
How to Create an Item Class in Oracle Fusion
This guide shows you how to create an item class in Oracle Fusion Cloud Product Data Management (PDH). You configure item number generation, description generation, and security for the class. Then you create an item in the new class and assign it to organizations.
Video: Oracle Fusion ERP Cloud | PDH | How to Create Item Class & Associate items by First Learner Home | Fusion Cloud ERP (2024). All credit for the demonstration goes to the creator; watch the original on YouTube. The written guide below was generated from this video by Docsie. Creator? Request a change or removal.
This guide shows you how to create an item class in Oracle Fusion Cloud Product Data Management (PDH). You configure item number generation, description generation, and security for the class. Then you create an item in the new class and assign it to organizations.
Prerequisites
- You need the Product Manager privilege or a job role that includes it.
About the item class hierarchy
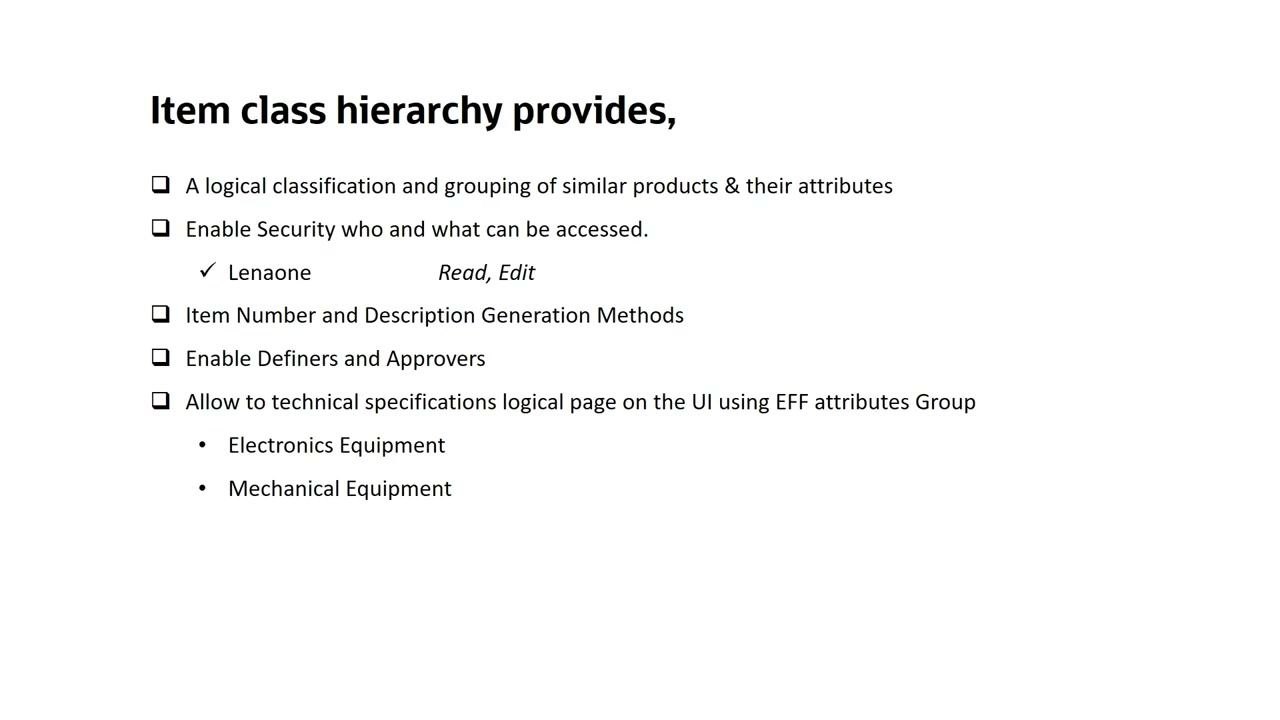
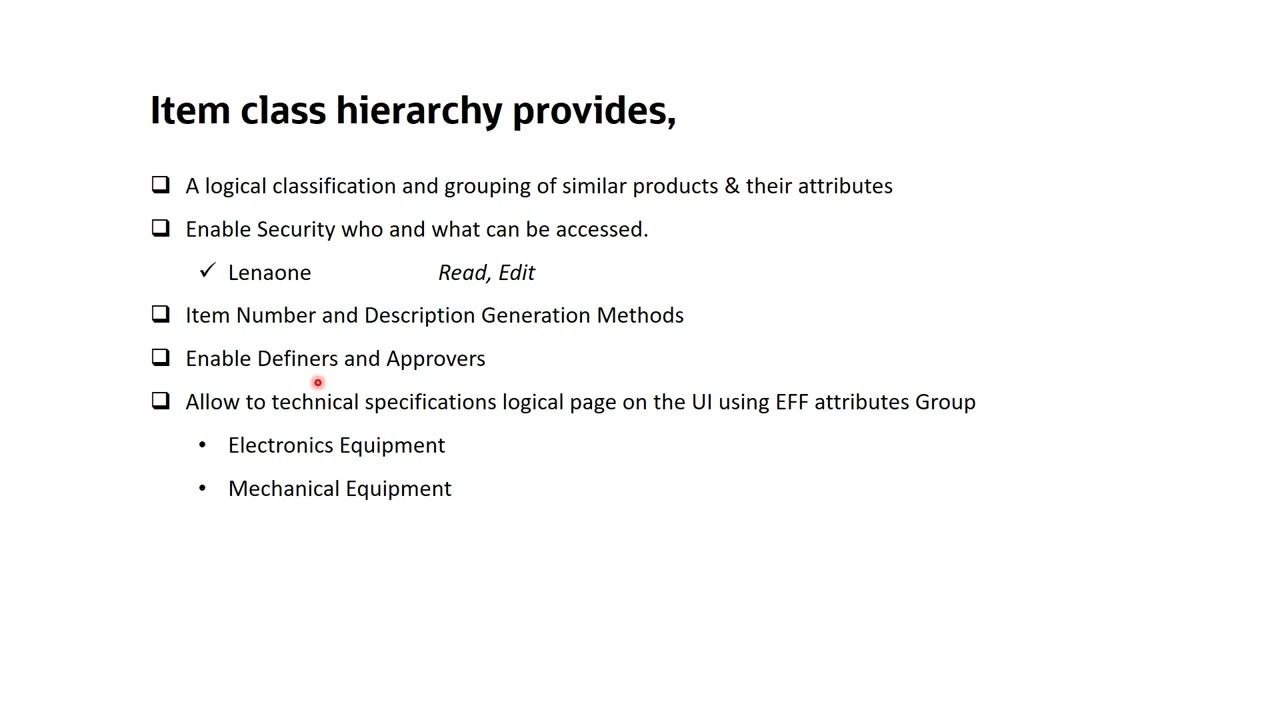
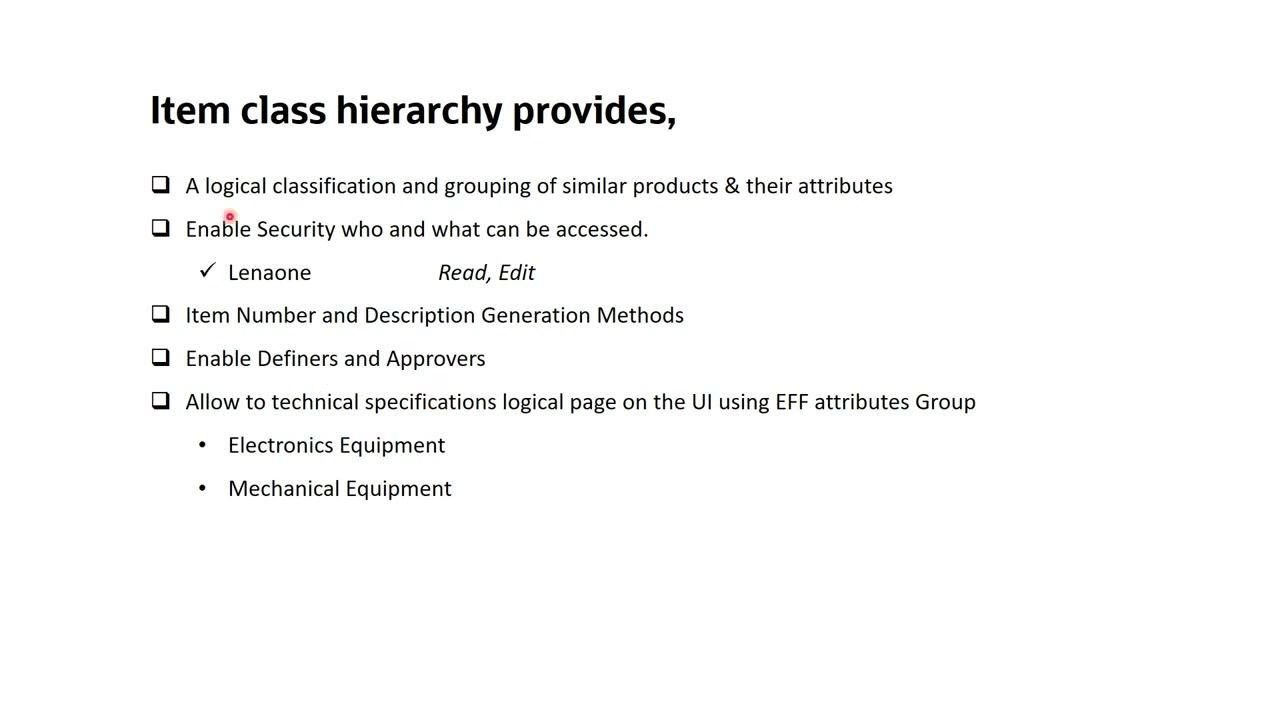
Before you create an item class in Oracle Fusion, it helps to know what the item class hierarchy provides:
- Logical classification and grouping of similar products and their attributes.
- Security controls that specify who can access what.
- Item number and description generation methods.
- Definers and approvers for item classes.
- Access to technical specification logical pages in the UI through Extensible Flexfield (EFF) attribute groups.
Example item classes include Electronics Equipment and Mechanical Equipment.
Open the item class setup
Step 1: Open Setup and Maintenance
Sign in to Oracle Fusion Cloud. On the home page, select the Setup and Maintenance app tile. You can also reach it from the My Enterprise menu.
Alternatively, click your user icon or the settings menu in the top right corner. In the dropdown, under the Personalization section, select Setup and Maintenance.
Step 2: Search for the Item Class task
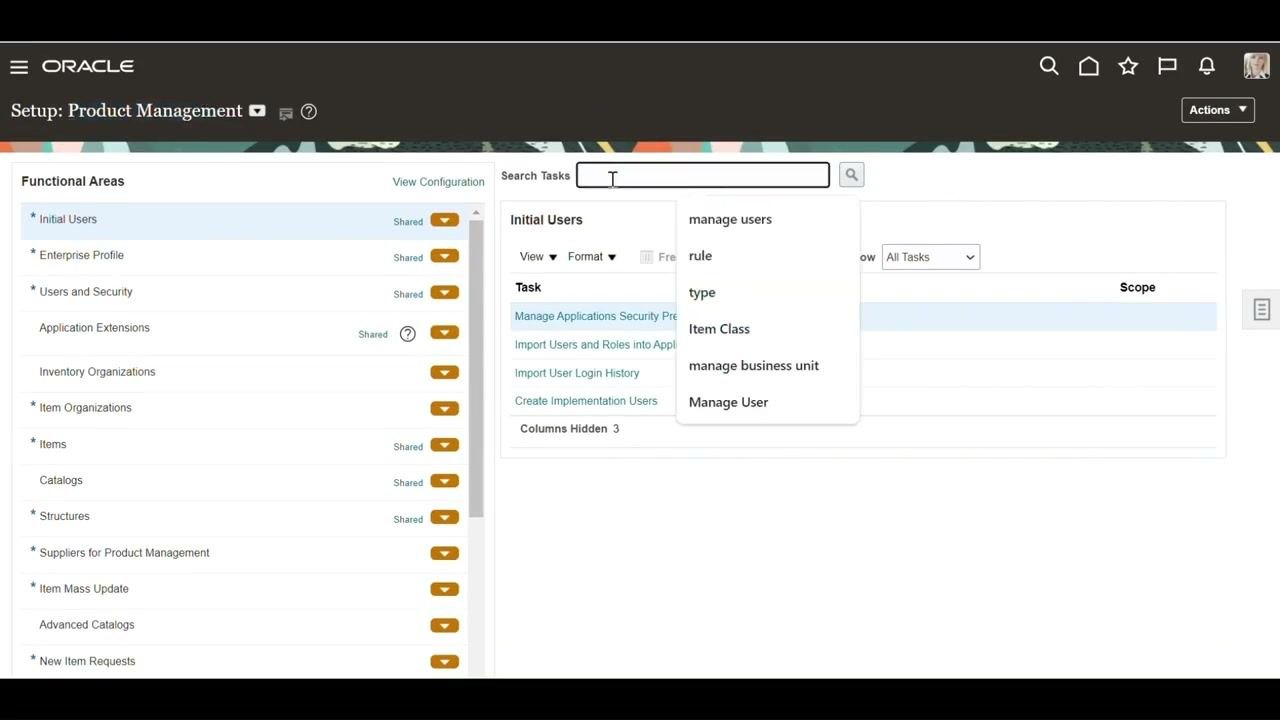
- On the Setup: Product Management screen, find the Search Tasks bar at the top.
- Type
Item Class. - Select Item Class from the dropdown suggestions to open item class management.
Create the item class
Step 3: Review the existing hierarchy
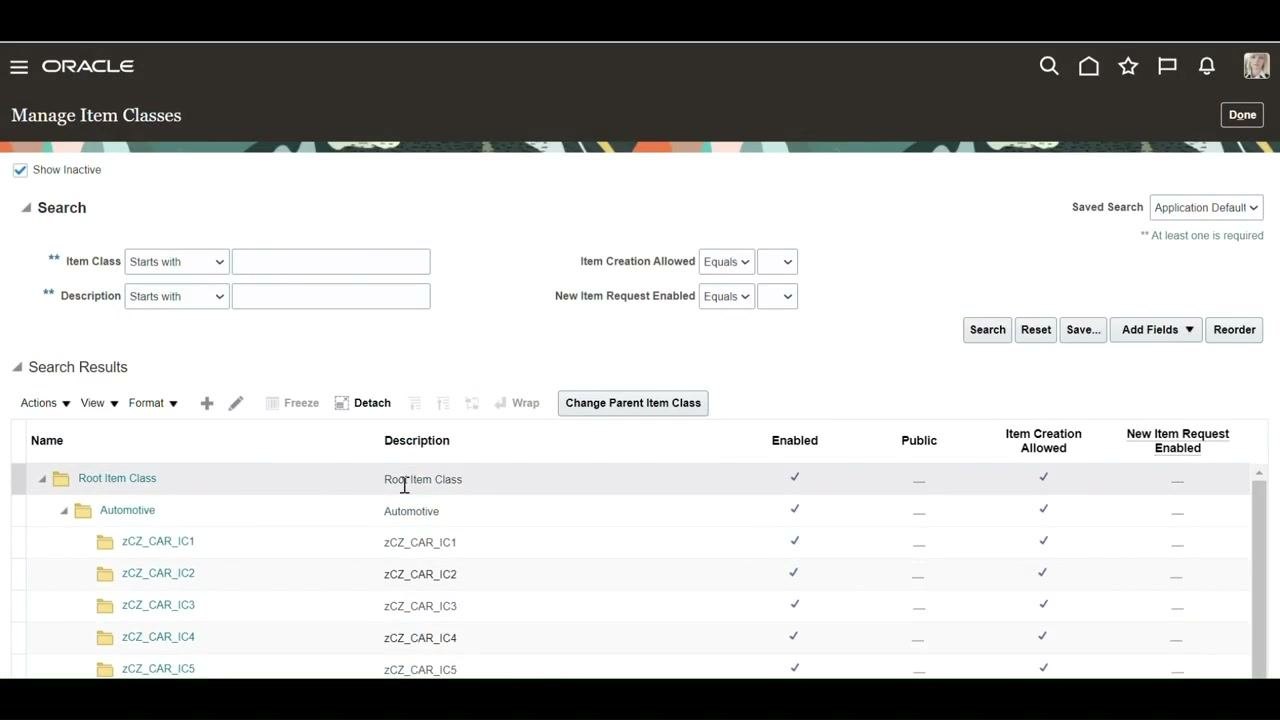
The Manage Item Classes page shows a hierarchical list of existing item classes. The hierarchy typically starts with a Root Item Class. Under it, you may see sub-classes such as Automotive and custom classes (for example, zCZ_CAR_IC1 and zCZ_CAR_IC2).
Each item class shows the Enabled, Public, Item Creation Allowed, and New Item Request Enabled columns.
Step 4: Select the parent class
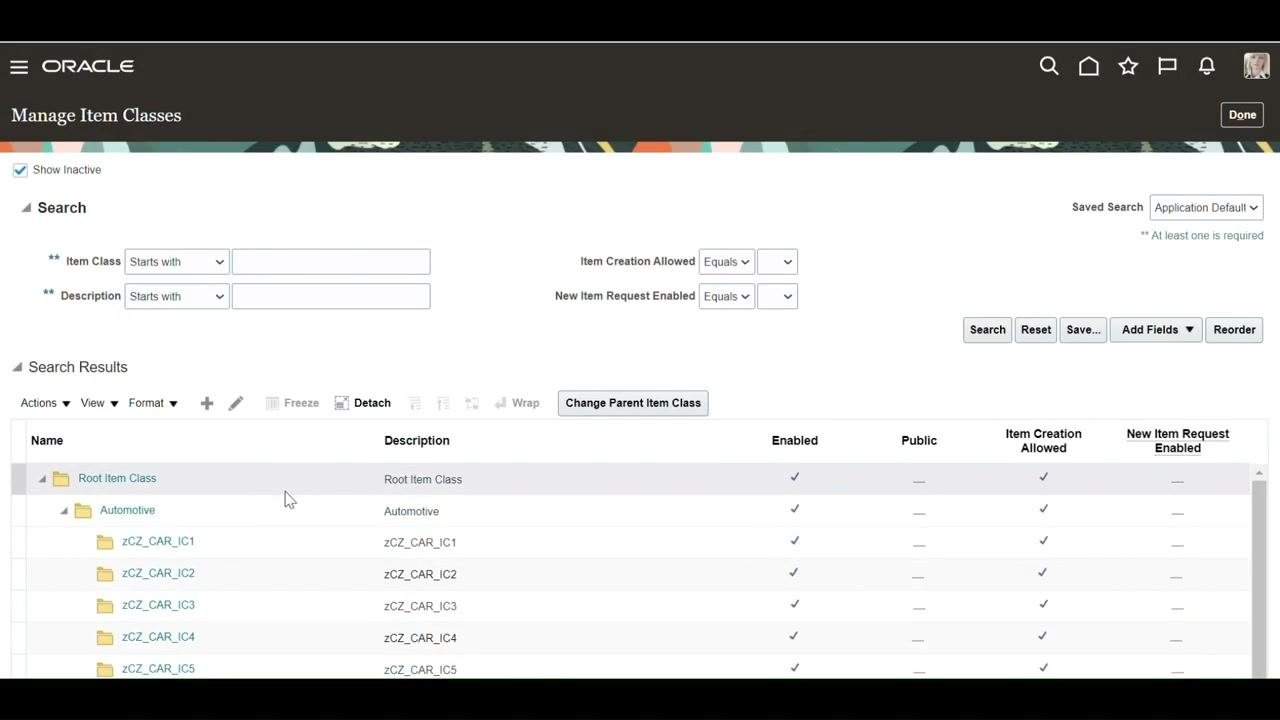
Click Root Item Class, or your preferred parent class, to highlight it. Your new item class is created as a child of the selected parent.
Step 5: Start creating the item class
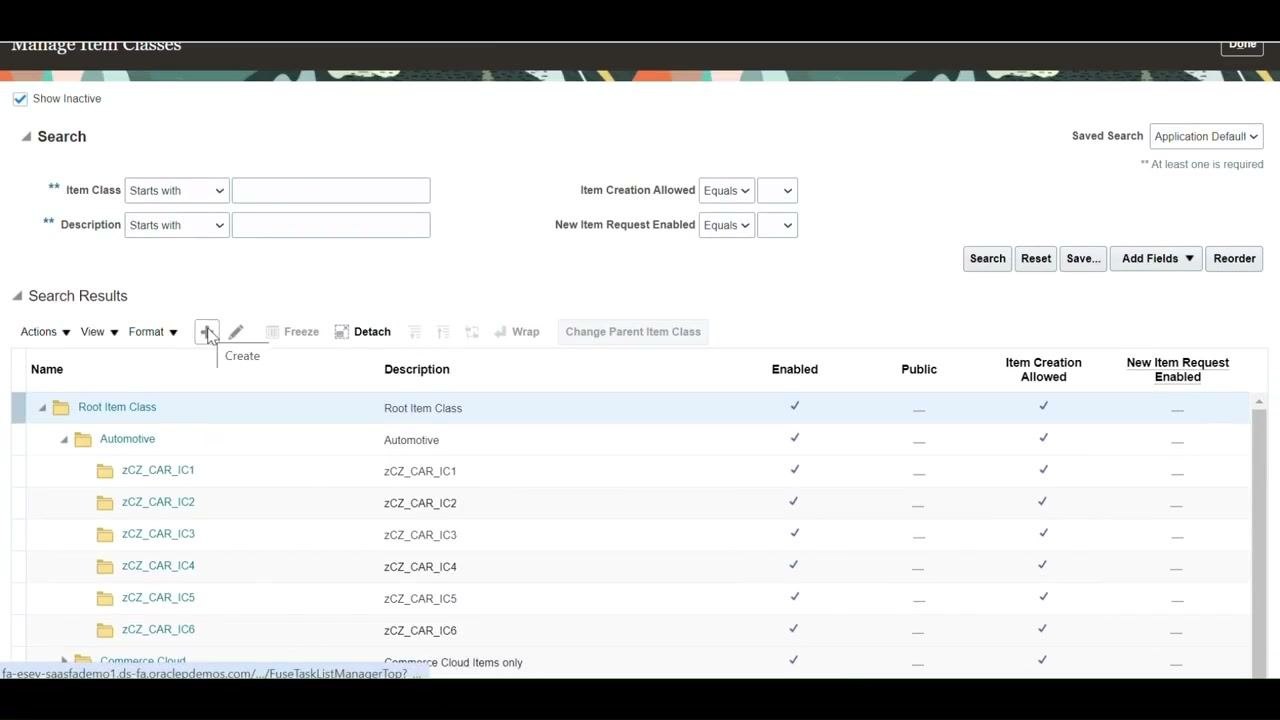
Click Create (the plus icon) above the search results table. The Create Item Class dialog opens.
Step 6: Enter the item class details
In the Create Item Class dialog, complete these fields:
- Parent Item Class: Filled in automatically (for example, Root Item Class).
- Item Class: Enter
My Demo2 Class. - Internal Name: Enter
My_Demo2_Class. The internal name must be unique. - Description: Enter
My Demo2 Class.
Optionally, choose whether to make the class public. Then click Save and Add Details to continue configuring the class, or Save and Close to finish the basic creation.
Step 7: Confirm the new item class
The Edit Item Class page opens for your new class. Confirm these values:
- Item Class: My Demo2 Class
- Internal Name: My_Demo2_Class
- Description: My Demo2 Class
- Enabled: Checked
- Item creation allowed: Checked
- Parent Item Class: Root Item Class
The page also has tabs for further configuration: Basic, Item Management, Security, Transactional Attributes, Pages and Attribute Groups, Lifecycle Phases, and Templates and Formats.
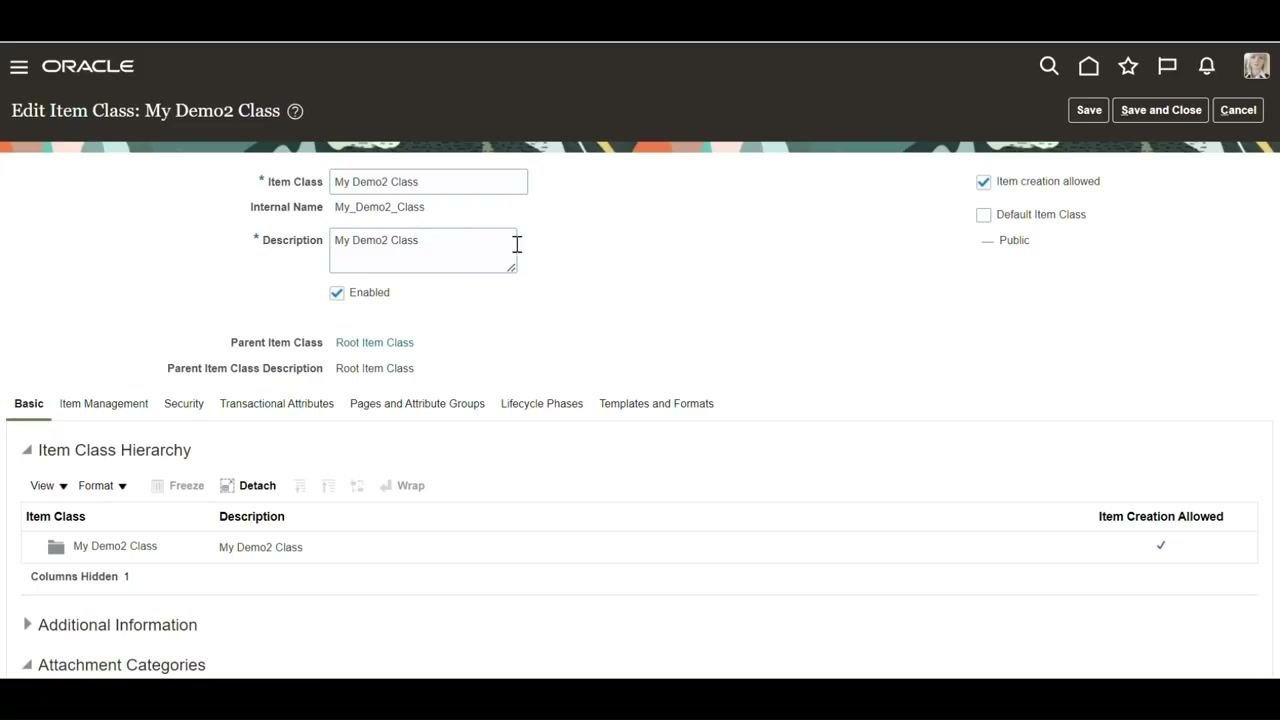
When Item creation allowed is checked, you can create items directly under the class. Parent classes such as Root Item Class typically don't allow item creation; only child classes do. In this example, My Demo2 Class is a child of Root Item Class and allows item creation.
Configure item management
Step 8: Set the item number generation method
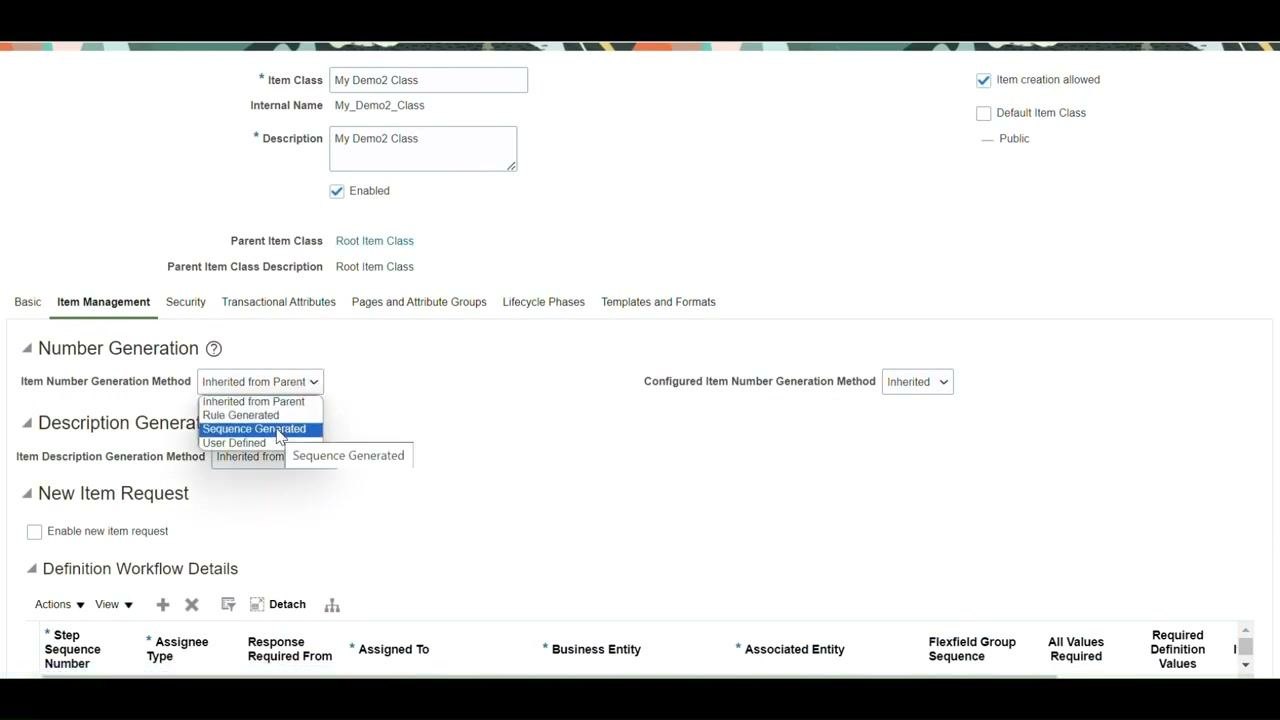
- Open the Item Management tab.
- Under Number Generation, open the Item Number Generation Method dropdown.
- Select Sequence Generated.
The available options are Inherited from Parent, Rule Generated, Sequence Generated, and User Defined. Sequence Generated numbers new items in this class automatically and sequentially.
Step 9: Configure the sequence details
Enter the following values, and confirm that Item Number Generation Method is still Sequence Generated:
- Starting Number:
100001 - Prefix:
DM - Increment by:
1 - Suffix: Leave blank unless you need a specific suffix.
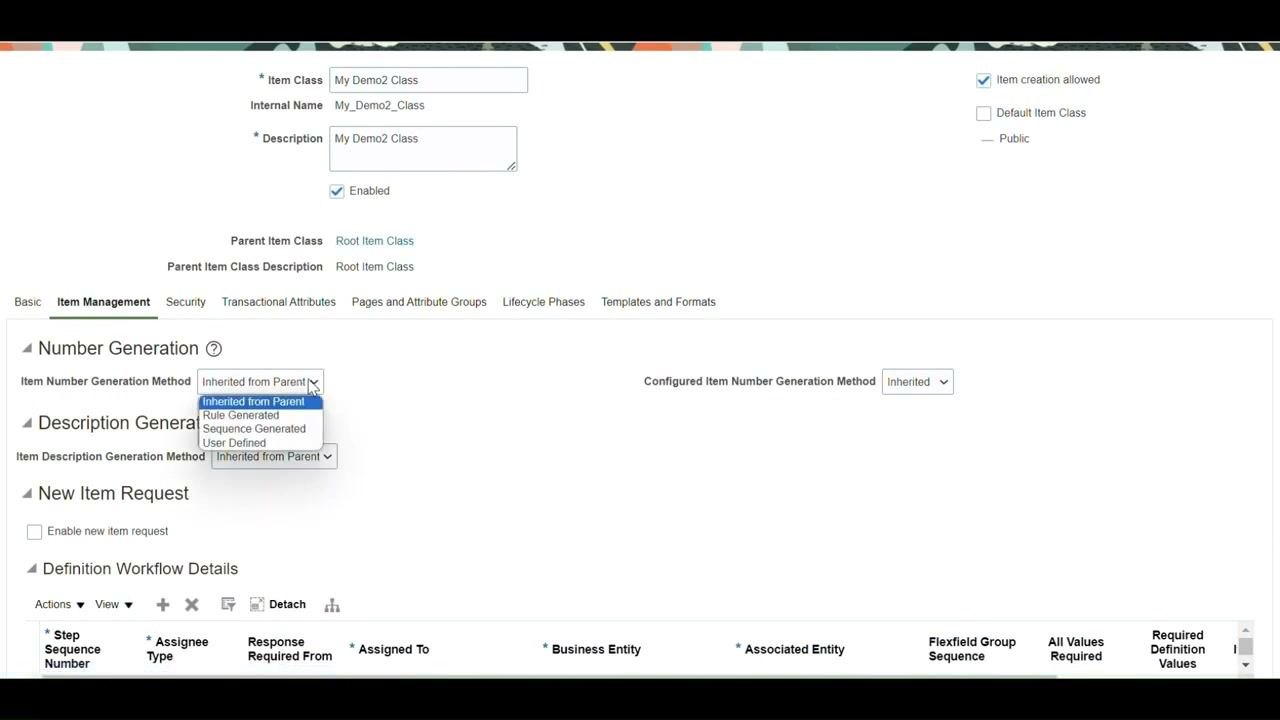
Step 10: Set the description generation method
Under Description Generation, open the Item Description Generation Method dropdown. Select User Defined so users can enter item descriptions manually.
Step 11: Enable new item requests (optional)
If you want to enable new item requests for this class, select the Enable new item request check box.
Set up security for the item class
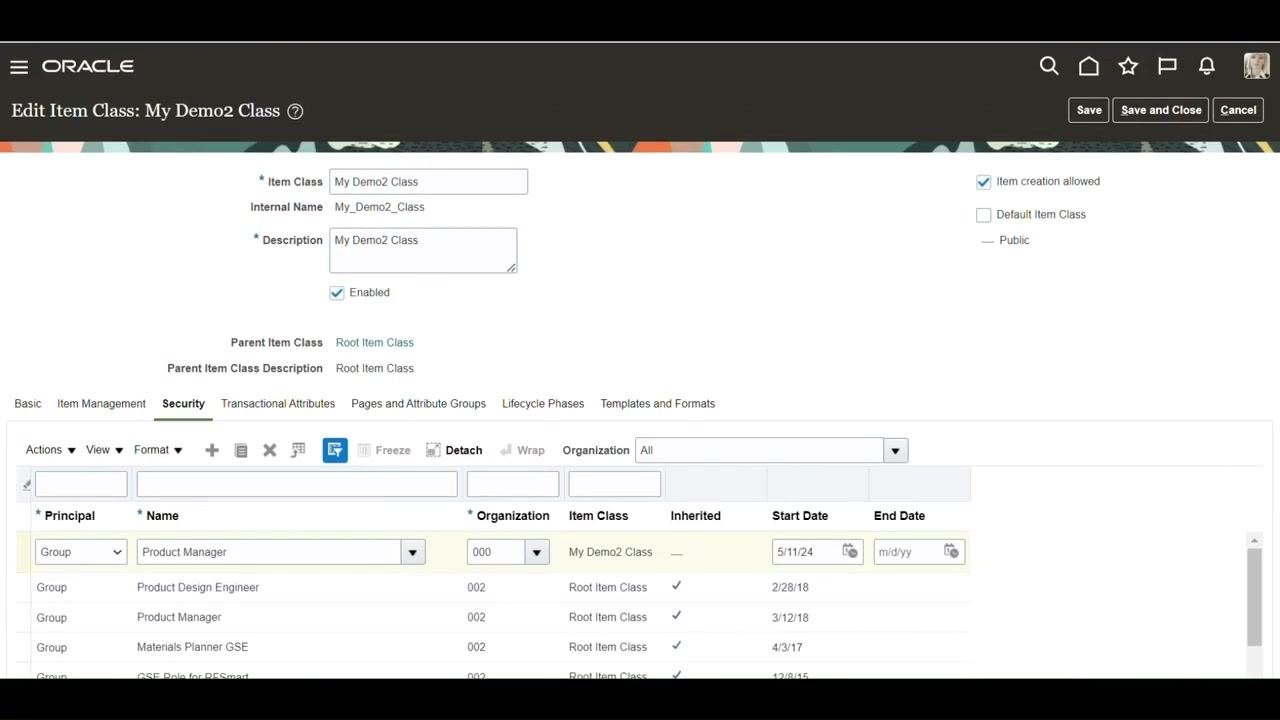
Step 12: Grant access to a group
- Open the Security tab to manage access permissions for the item class.
- In the Principal column, select Group.
- In the Name field, start typing the group name (for example, "Product Manager") and select the group from the list.
- Set the Organization as needed (for example,
002). - Set Item Class to
My Demo2 Class. - Enter the Start Date (for example,
5/11/24). - Leave End Date blank unless you want to limit access to a specific period.
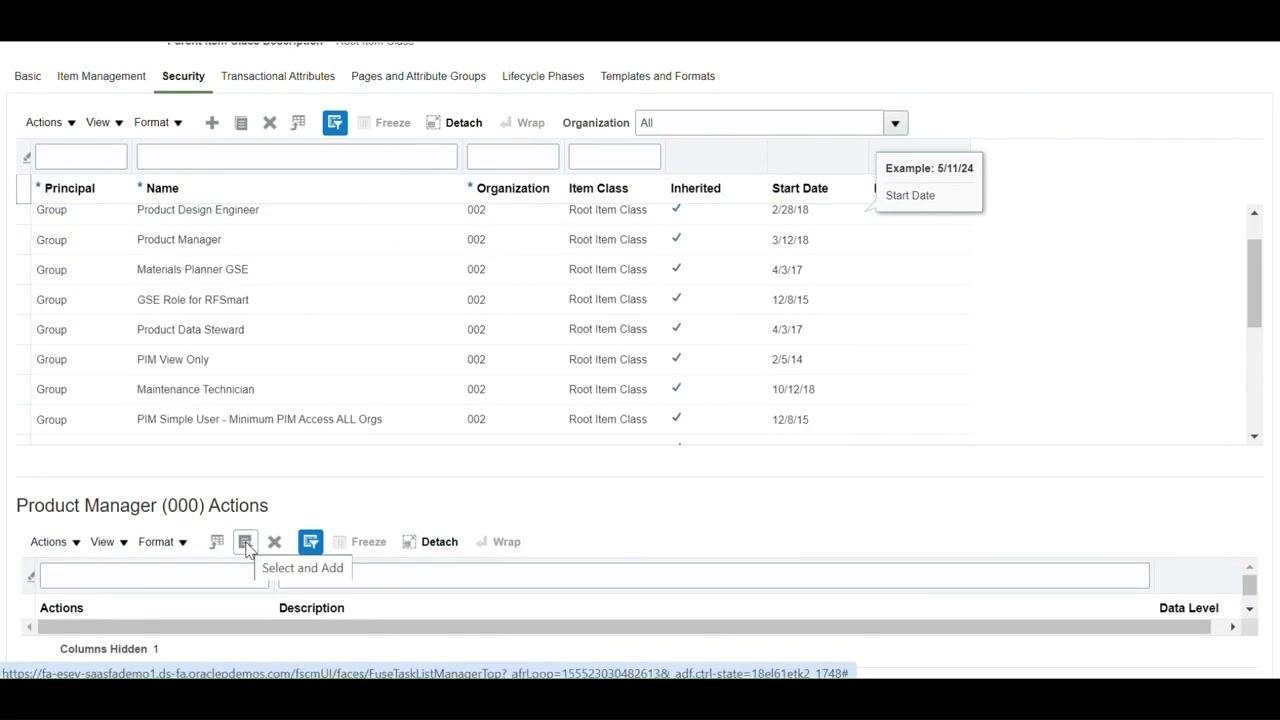
Step 13: Review the group actions
Use the Actions menu to add, edit, or remove group access. You can give a group all accesses or define particular permissions for each group.
The lower section, for example Product Manager (000) Actions, lets you specify detailed actions and descriptions for the selected group.
Step 14: Assign specific permissions to the group
In the Select and Add: Actions dialog, review the list of available actions. Scroll through the Actions column to find permissions such as:
- Maintain Item Lead Times Group
- Maintain Item MRP and MPS Group
- Maintain Item Revision
- Maintain Item Structure
- View Item Attribute
- View Item Basic
- View Item Structure
- Delete
- Read
- Update
Select the permissions the group needs, for example Read, Update, Delete, View Item Attribute, View Item Basic, and View Item Structure. Confirm that the Description and Data Level columns show the correct access (for example, "Allows access to" and "Item").
Click OK to confirm. The permissions now appear under the Product Manager (000) Actions section of the Security tab.
Step 15: Save the item class configuration
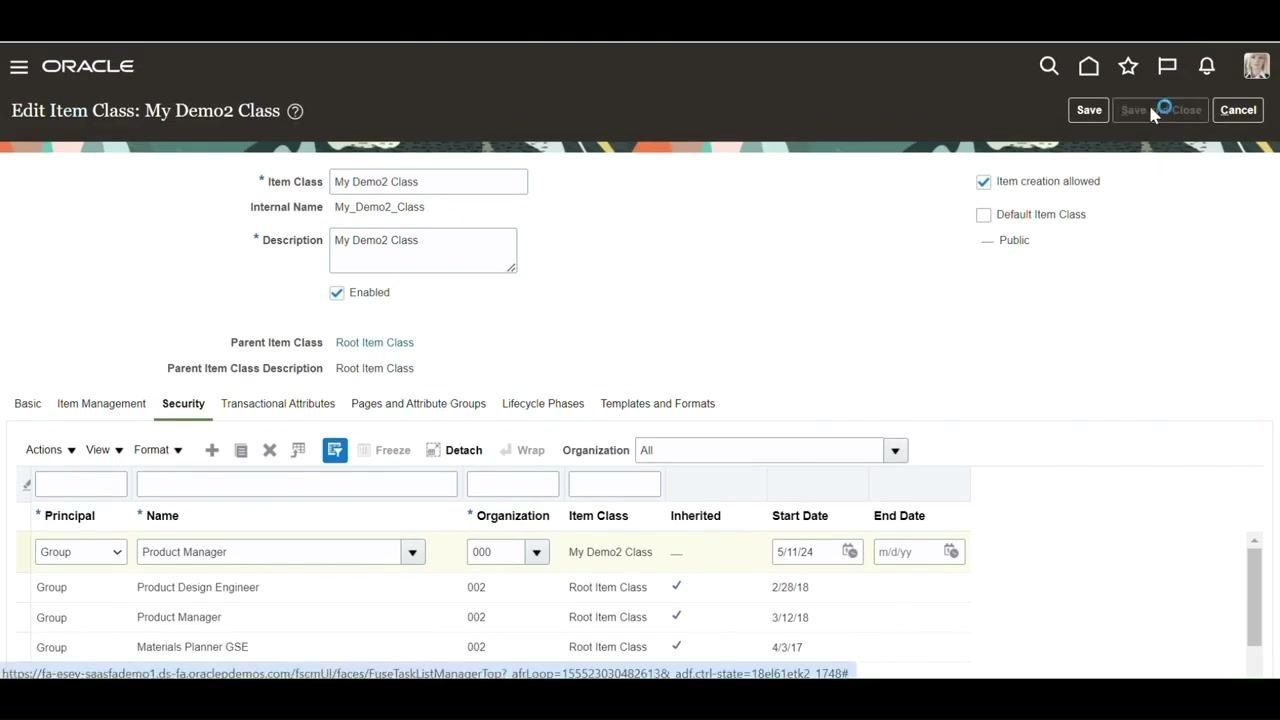
Click Save at the top right of the screen. Confirm that the Product Manager group has the correct permissions for My Demo2 Class.
Step 16: Verify the item class and permissions
After saving, you stay on the Edit Item Class: My Demo2 Class screen. Confirm that the Product Manager group is listed with the correct organization (000), item class (My Demo2 Class), and start date (5/11/24). The Security tab shows all assigned groups and their permissions.
Create an item in the new item class
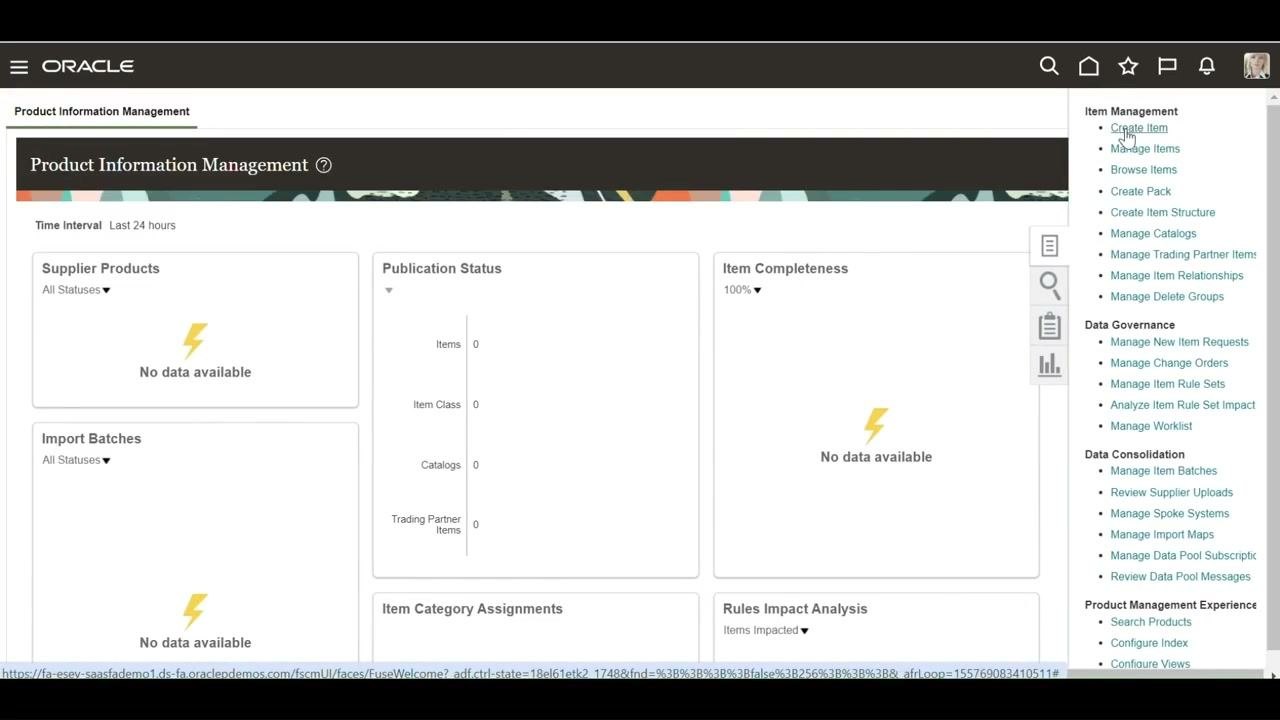
Step 17: Open Product Information Management
Return to the main menu or dashboard. Select the Product Management tab, then click Product Information Management.
Step 18: Start the Create Item task
In the Product Information Management workspace, find the Item Management panel on the right. Click Create Item.
Step 19: Select your item class
In the Create Item dialog, set these fields:
- Organization: Enter
000. - Create New: Make sure this option is selected.
- Number of Items: Enter
1. - Item Class: Open the dropdown, start typing
My Demo2 Class, and select My Demo2 Class My Demo2 Class.
Review the Templates section if needed, but leave it at the default unless you need a specific template.
Step 20: Confirm the system-generated item number
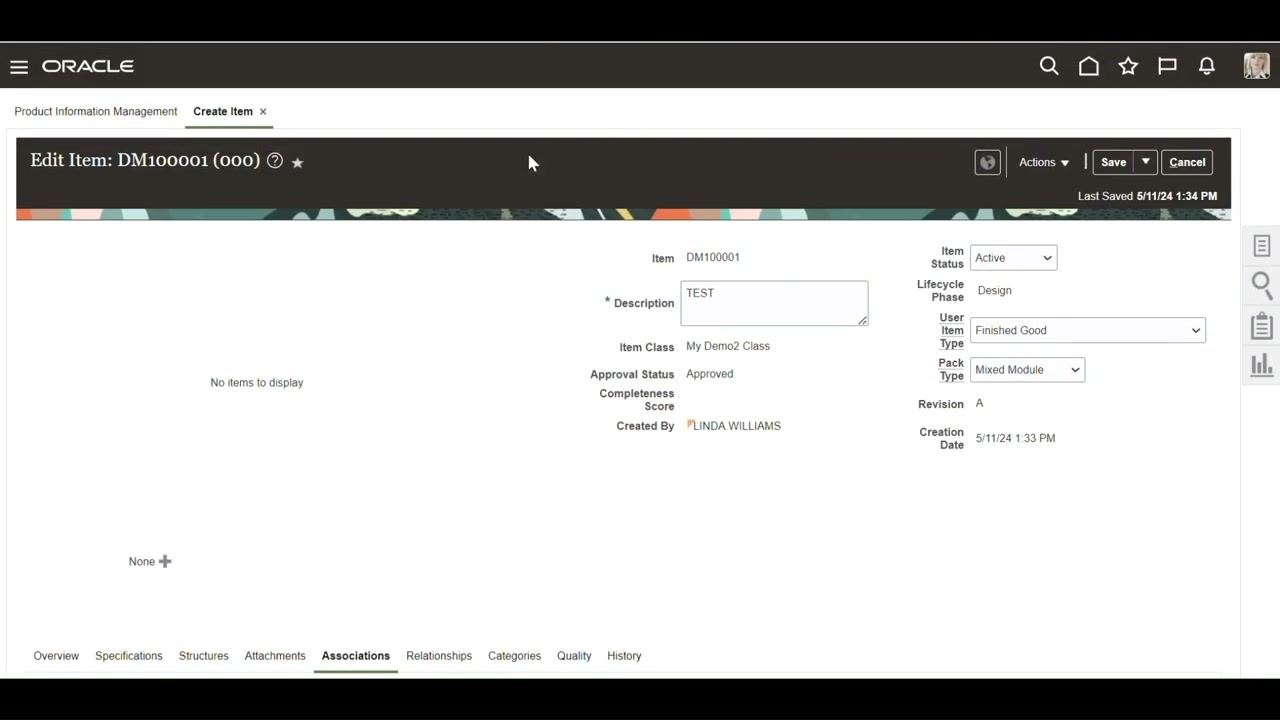
Click OK. The system generates a new item number from the sequence you configured (for example, DMXXXXXXX). The Create Item screen shows:
- Item: The system-generated number
- Description: Enter as needed
- Item Class: My Demo2 Class
- Approval Status: Approved
- Created By: For example, LINDA.WILLIAMS
- Item Status: Active
- Lifecycle Phase: Design
- User Item Type: Finished Good
- Pack Type: Mixed Module
- Revision: A
- Creation Date: For example, 5/11/24 1:33 PM
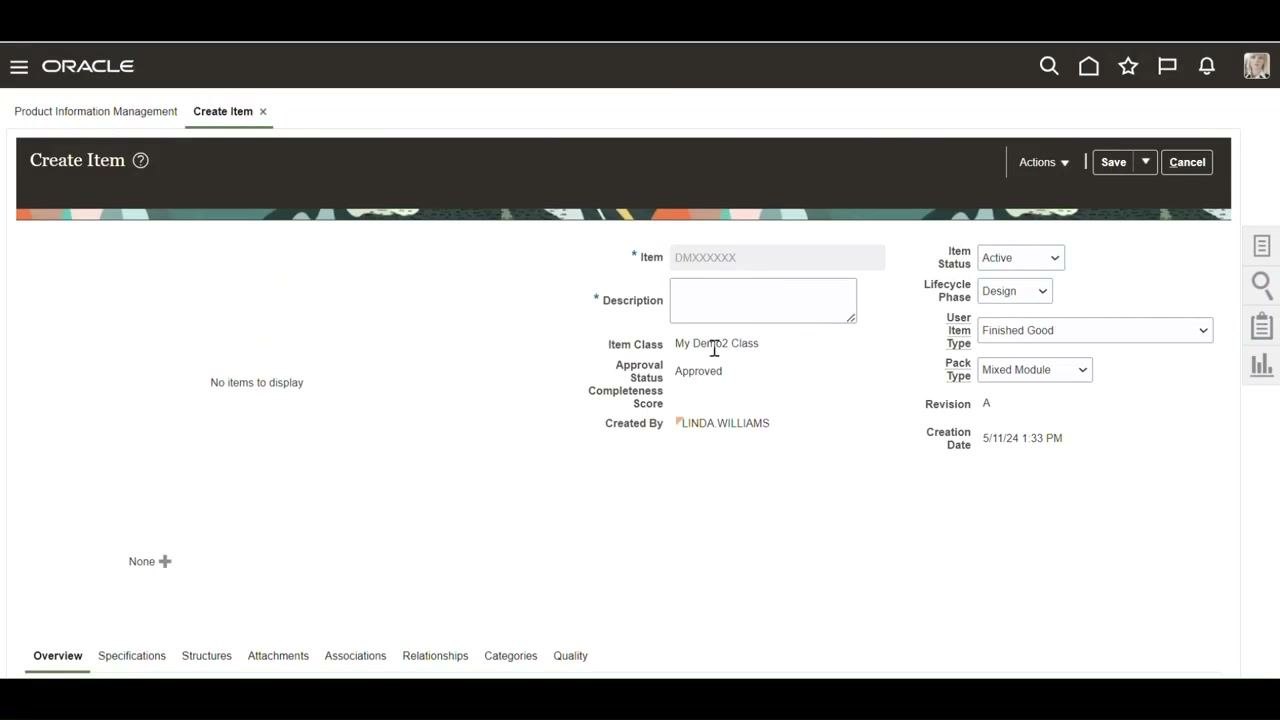
Step 21: Enter the item description
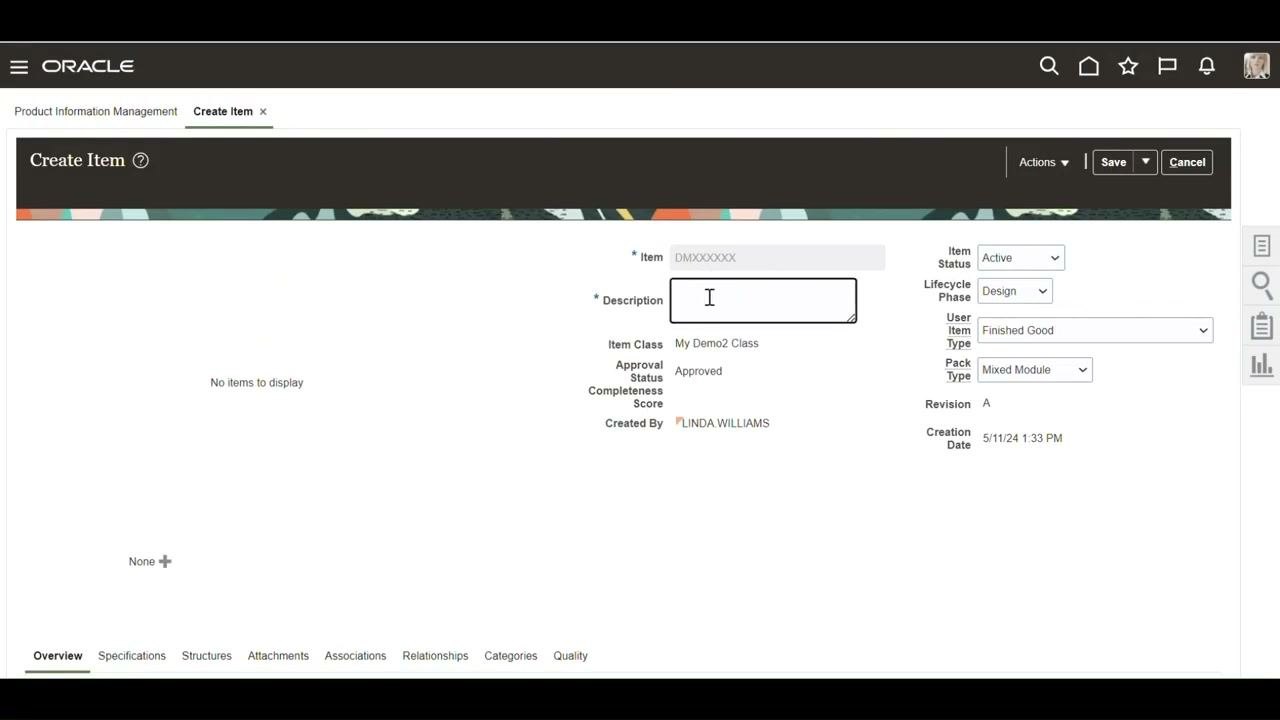
In the Description field, enter the description for the item (for example, TEST). Confirm that the Item field shows the system-generated number and that the other fields are populated as described in the previous step.
The item is automatically set to Approved status, so no additional approval is required at this stage. You can configure approval workflows if needed.
Assign the item to organizations
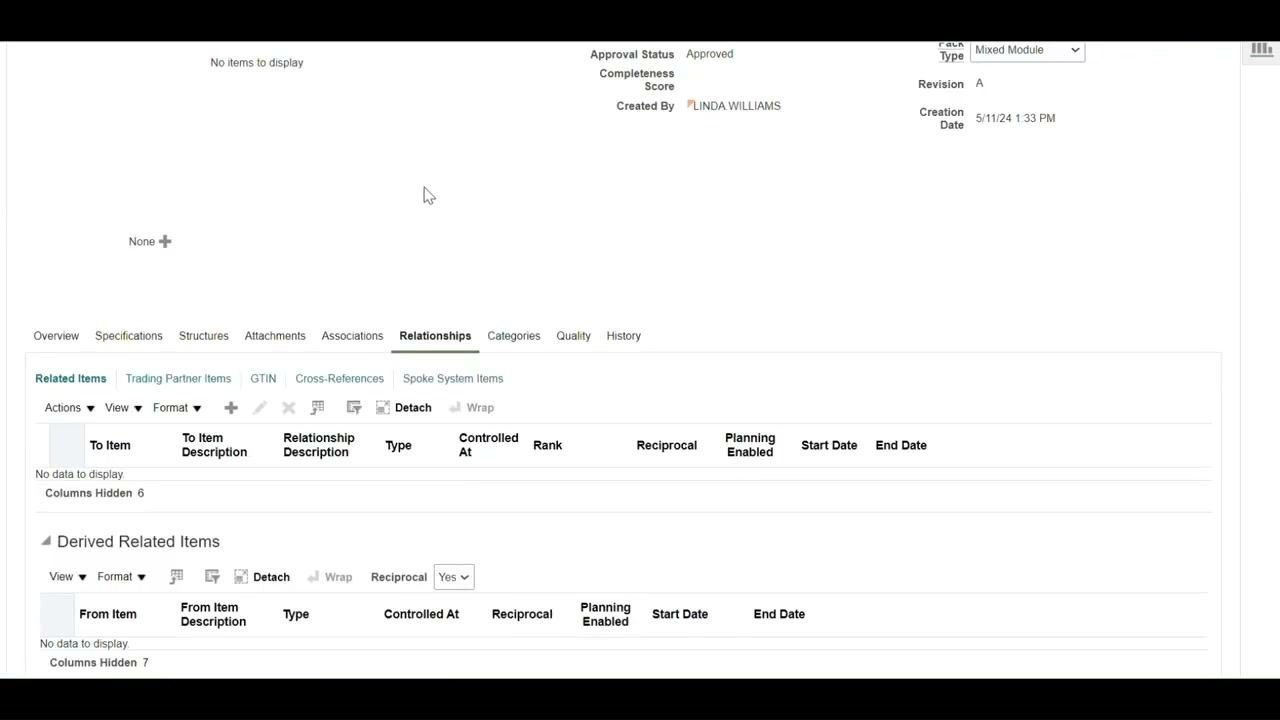
Step 22: Open the organization selection dialog
- Click the Associations tab.
- Review the current organization assignment (for example,
000 - Operations). - Click Select and Add to open the Select and Add: Organizations dialog.
The dialog lists the available organizations, such as Seattle, Atlanta, Chicago, Boise, and Dallas.
Step 23: Select the organizations
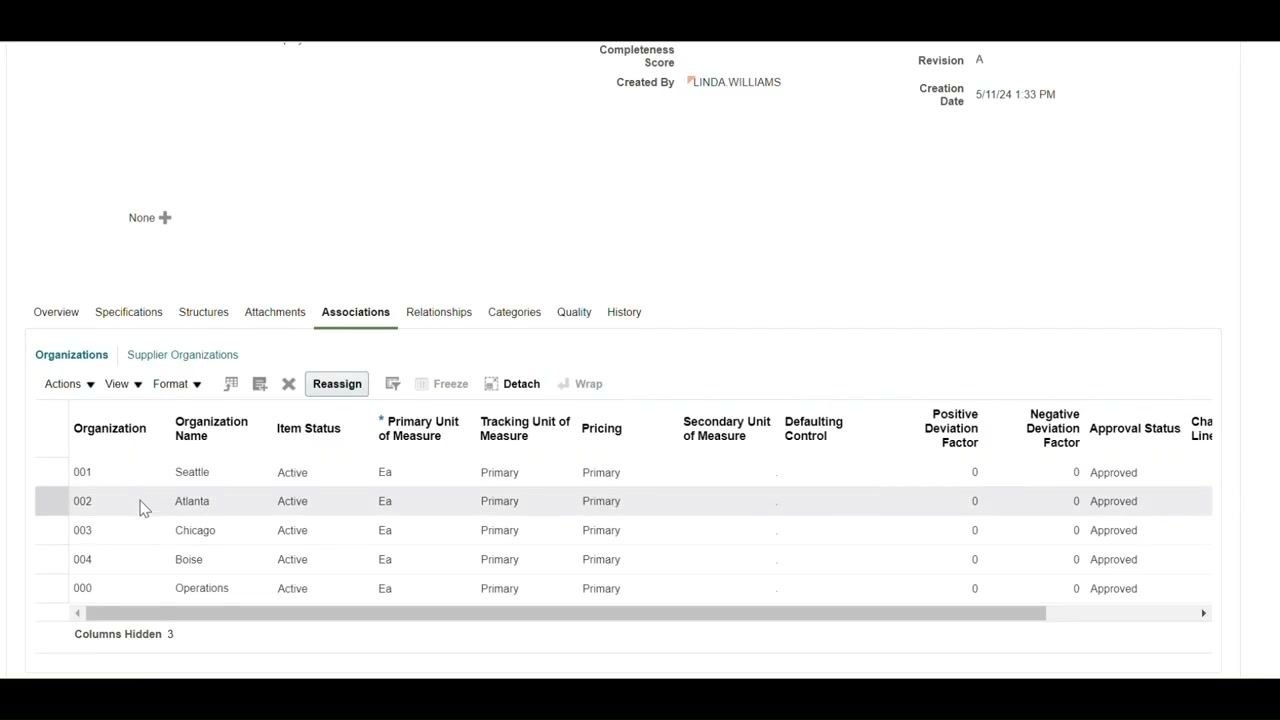
In the dialog, select one or more organizations. To select several, hold Ctrl and click each one (for example, 001 - Seattle, 002 - Atlanta, 003 - Chicago, and 004 - Boise). Click OK to confirm.
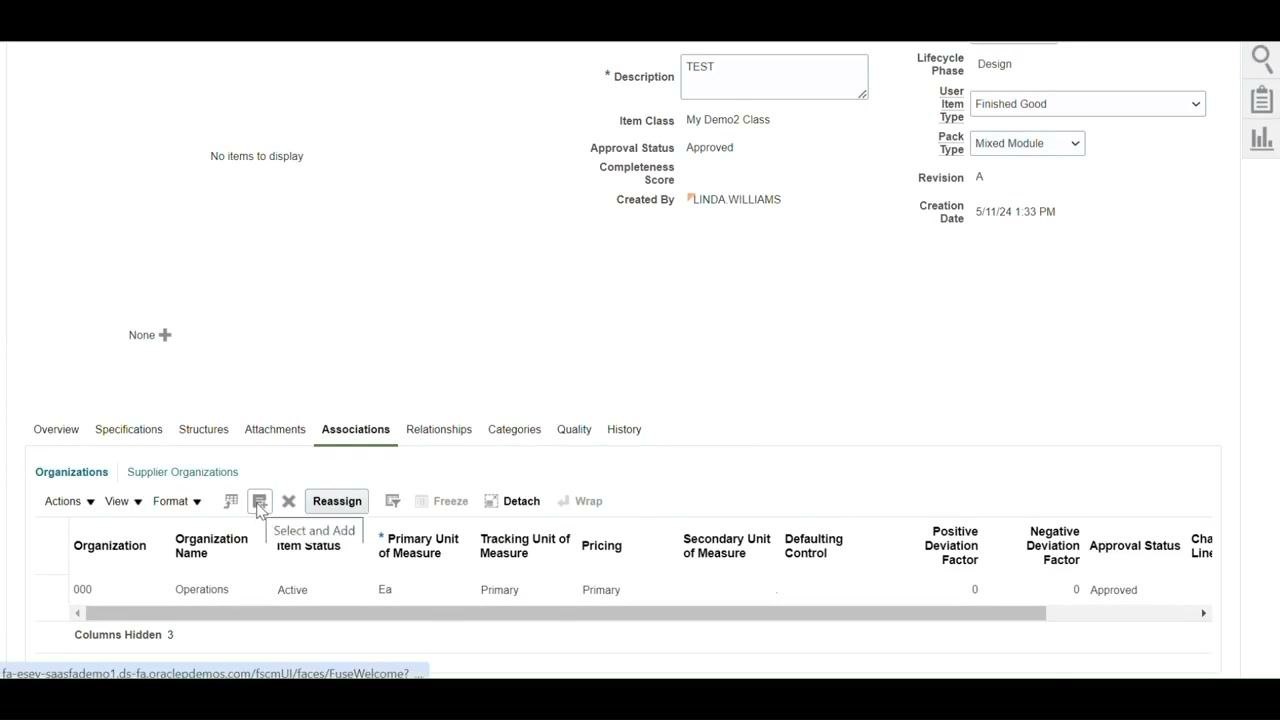
Step 24: Review the organization assignments
The Associations tab now lists every selected organization, including 000 - Operations. For each, confirm these details:
- Item Status: Active
- Primary Unit of Measure: Ea
- Tracking Unit of Measure: Primary
- Pricing: Primary
- Approval Status: Approved
Step 25: Save the item
Click Save at the top right of the screen. The Edit Item screen shows the updated information, including the item number, description, item class, approval status, and all assigned organizations.
Summary
You now know how to create an item class in Oracle Fusion and use it to create an item. You completed these tasks:
- Created the My Demo2 Class item class under Root Item Class.
- Configured sequence-based item number generation and user-defined descriptions.
- Granted the Product Manager group permissions on the class, then saved and verified the security configuration.
- Created an item in the class, with the system generating the item number from your sequence settings.
- Entered the item description, reviewed its approval status, and assigned it to multiple organizations.
Generation details: cost, quality tiers
Docsie billed 5,000 credits ($3.50) to analyze this 10-minute video at standard quality. The rewrite, template fill and Word/PDF exports were included. The same video at each quality tier:
| Quality | Frames sampled | Credits | Approx. cost |
|---|---|---|---|
| Draft | every 16-30 s | 2,500 | $1.75 |
| Standard (this guide) | every 8-15 s | 5,000 | $3.50 |
| Detailed | every 4-7 s | 10,000 | $7.00 |
| Ultra | every 1-3 s | 20,000 | $14.00 |
Credits priced at $0.70 per 1,000; plans include a monthly allowance. Enterprise customers on on-premise or bring-your-own-model deployments run this on their own inference and pay no per-video credits.
Generated by Docsie Video-to-Docs on 2026-11-15 from a 9-minute video. Screenshots are frames from the source video and belong to their creator, First Learner Home | Fusion Cloud ERP, whose original is embedded above. If you own this video and want the guide removed or credited differently, contact us and we will act within one business day.