
How to Assign Roles to a User in Oracle Fusion
This guide explains how to assign roles to a user in Oracle Fusion (Oracle Applications Cloud), starting from creating a new user account through to assigning the correct roles, synchronizing changes, and managing Security Console access. You will work primarily in the Security Console and the Setup and Maintenance area to complete these tasks.
Video: Oracle Fusion Creation of New User and assigning the Roles by Oracle Fusion Financial Hub. All credit for the demonstration goes to the creator; watch the original on YouTube. The written guide below was generated from this video by Docsie. Creator? Request a change or removal.
This guide explains how to assign roles to a user in Oracle Fusion (Oracle Applications Cloud), starting from creating a new user account through to assigning the correct roles, synchronizing changes, and managing Security Console access. You will work primarily in the Security Console and the Setup and Maintenance area to complete these tasks.
Prerequisites
- An Oracle Applications Cloud account with access to the Security Console.
- Administrative privileges to create user accounts and assign roles.
- Knowledge of the roles required for the user's job function (for example, Employee, Application Implementation roles, or IT Security Manager).
Sign in to Oracle Applications Cloud
Go to the Oracle Applications Cloud sign-in page and enter your username and password. Click the Sign In button to continue. Make sure you are signing in with an account that has access to the Security Console.
Open the Navigator menu
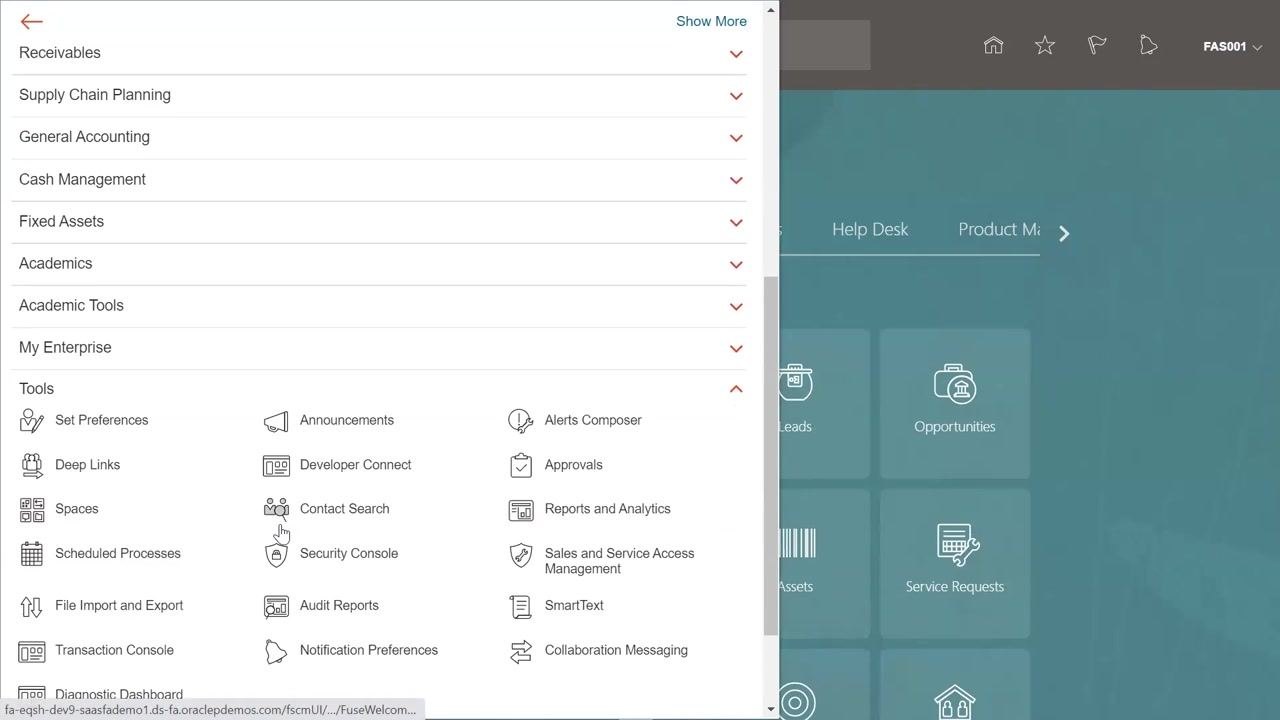
Once you are signed in, locate the Navigator icon at the top left of the dashboard. Click it to open the navigation menu, which gives you access to the application's tools and modules.
Access the Security Console
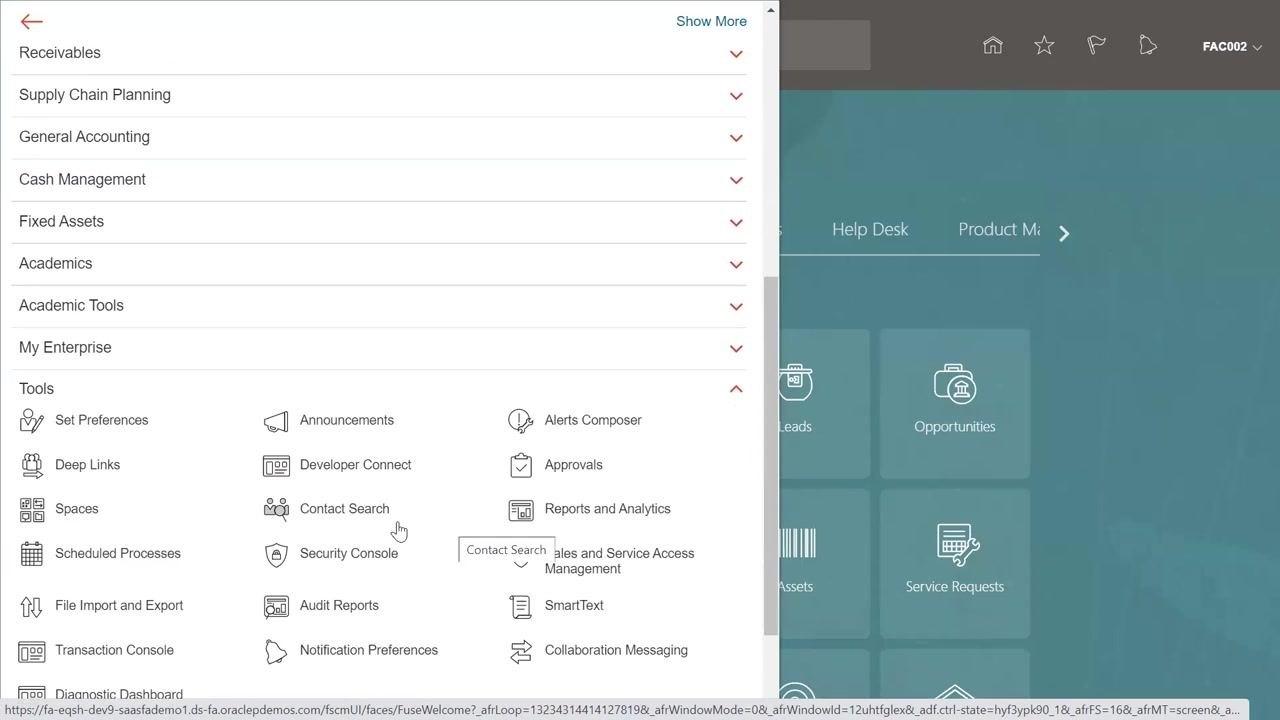
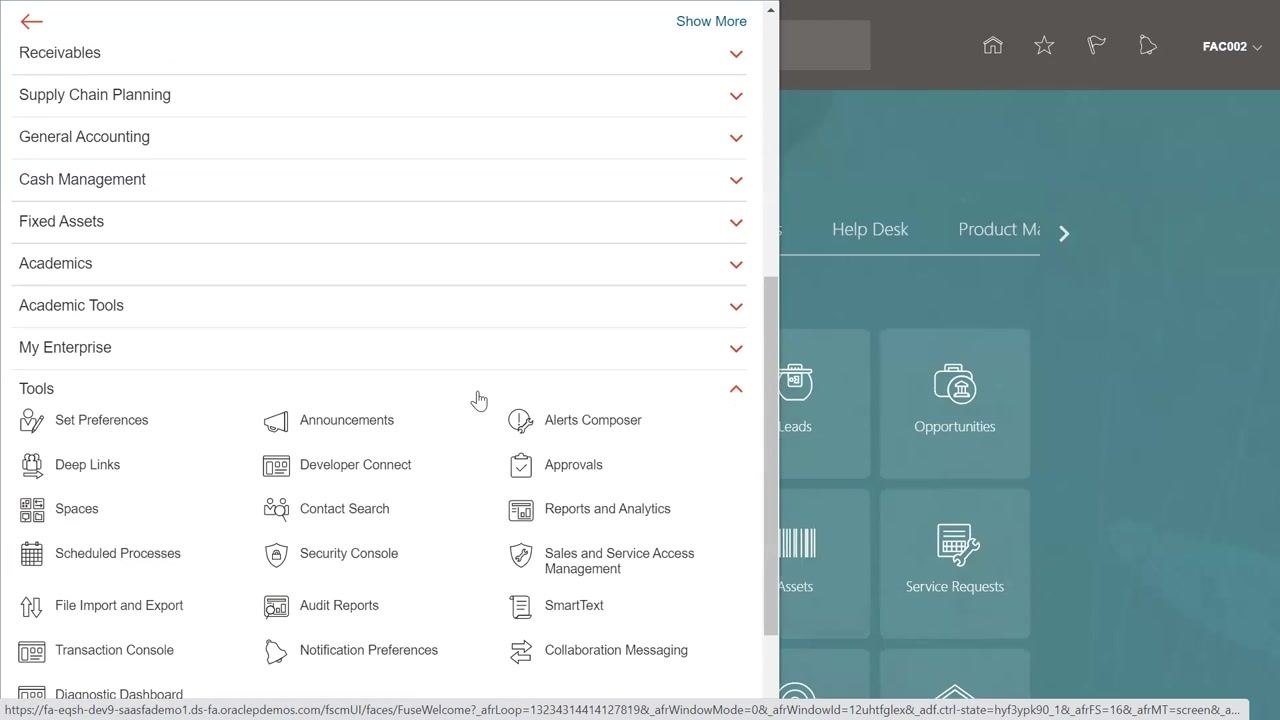
In the navigation menu, scroll down to the Tools section and click Security Console. This is where you create user accounts and manage role assignments.
Open the Add User Account form
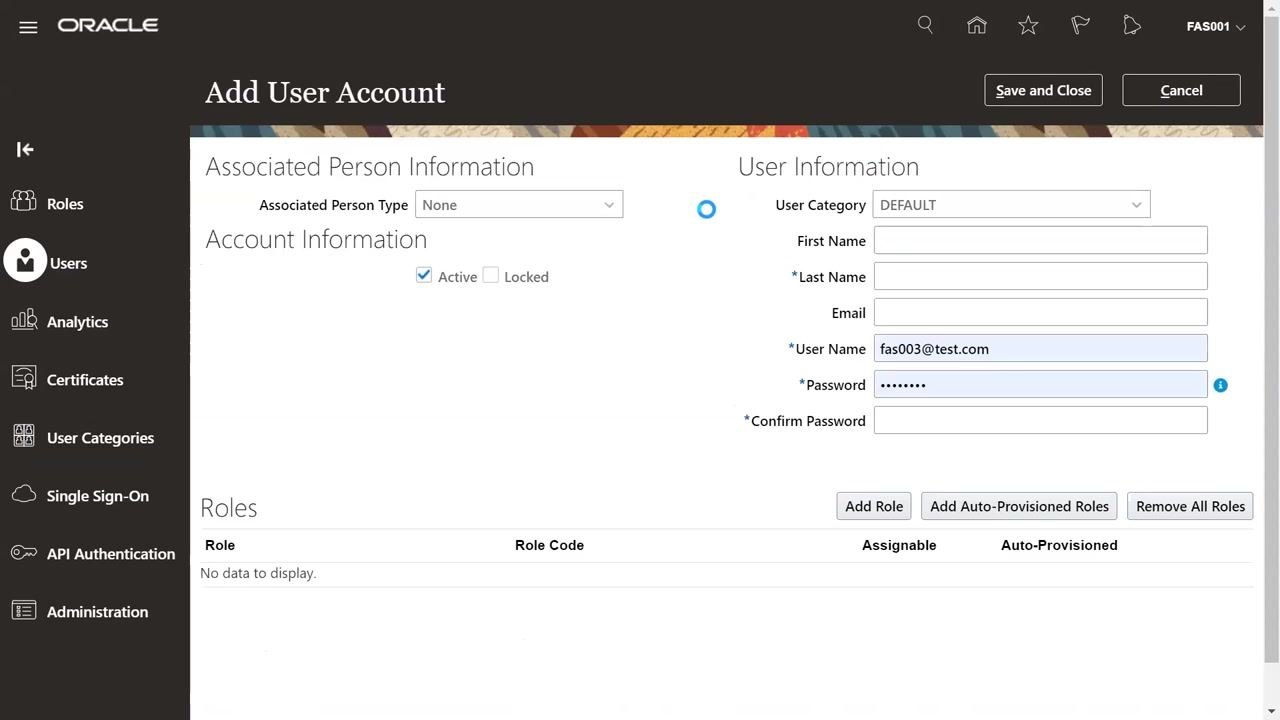
In the Security Console, click Users in the left sidebar, then click Add User Account at the top right of the User Accounts page.
Choose the Associated Person Type
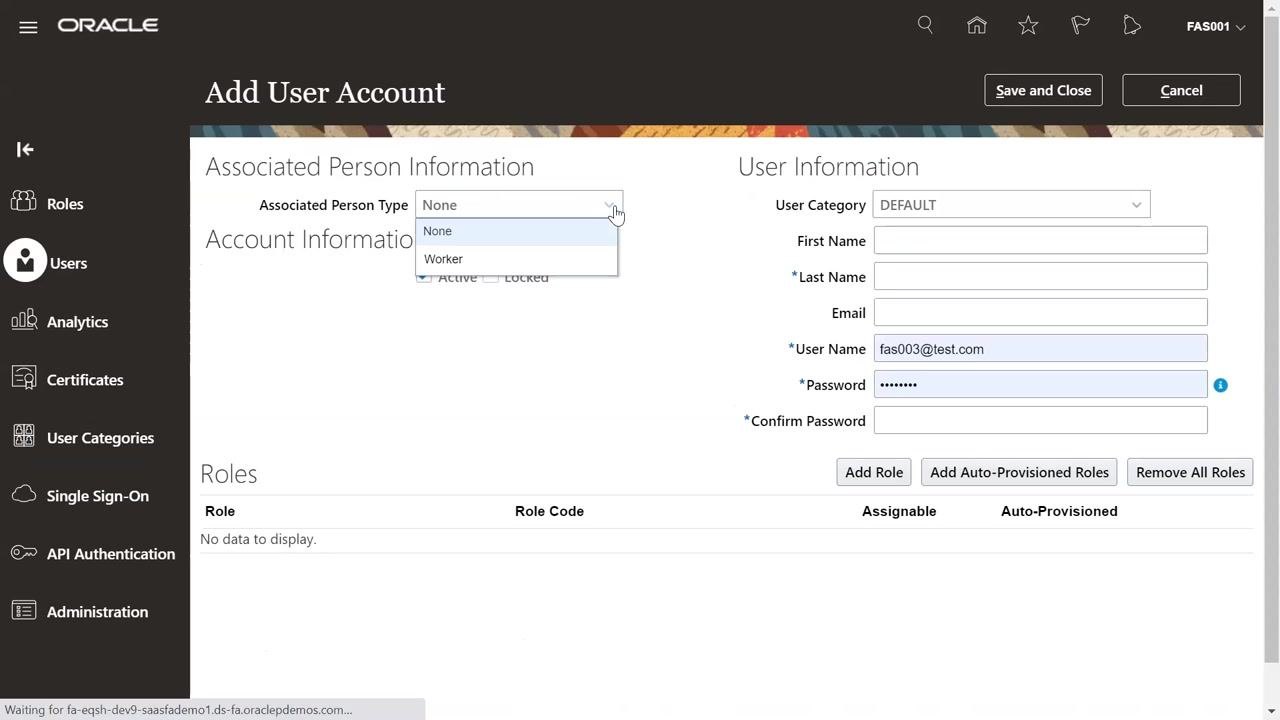
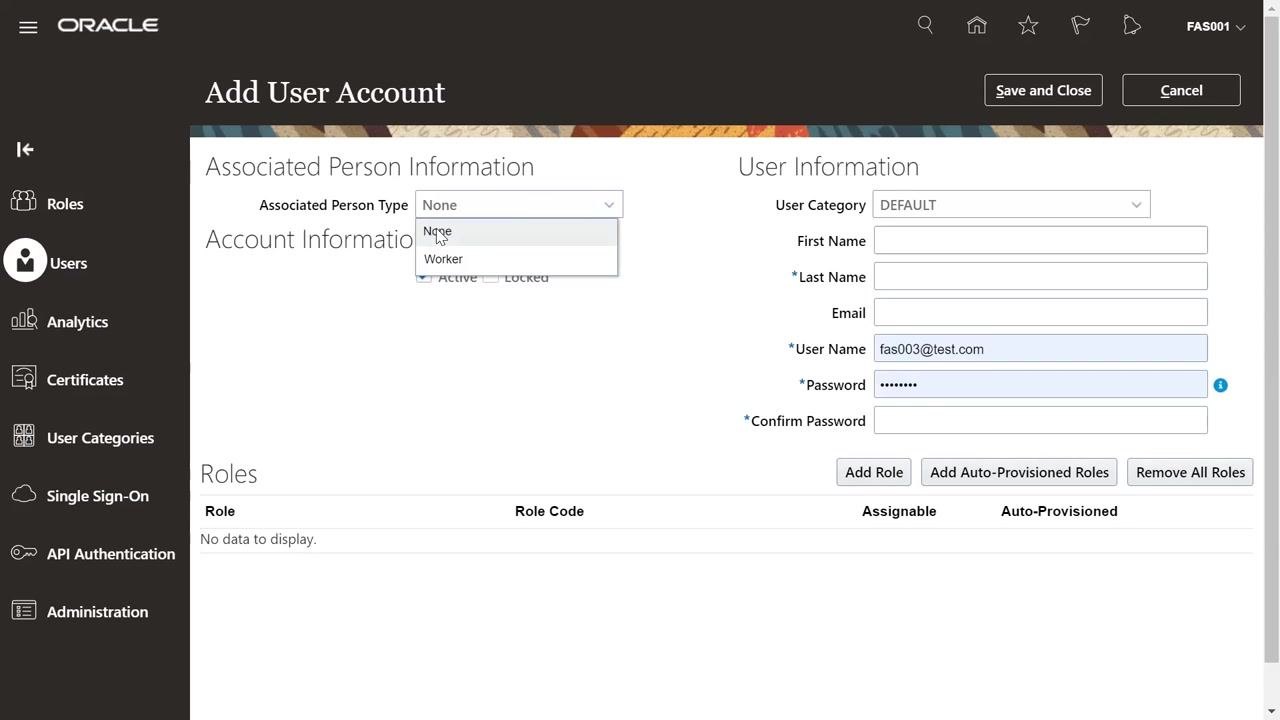
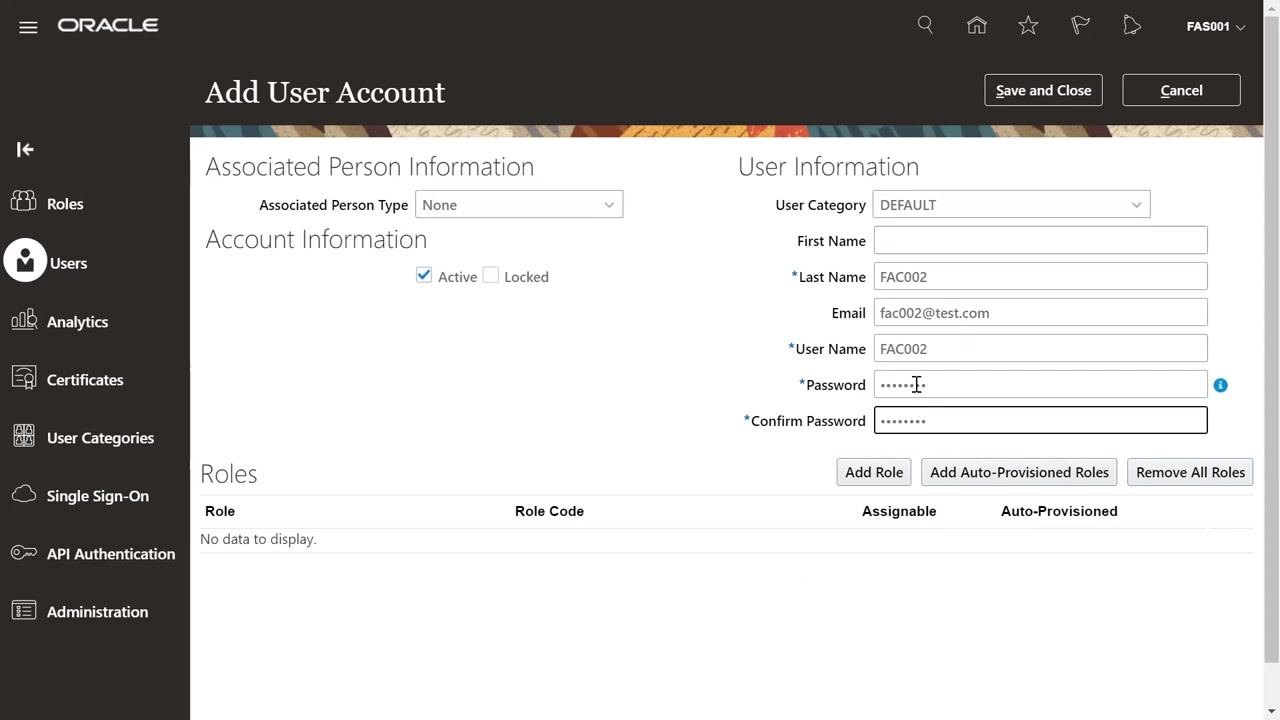
In the Add User Account form, locate the Associated Person Type dropdown under Associated Person Information. Select None for a non-employee user, or Worker for an employee user. This selection functions similarly to the equivalent option in Oracle E-Business Suite (EBS).
Enter the user's basic information
Fill in the mandatory fields for the new user, including User Category (DEFAULT is pre-selected), First Name, Last Name, Email, User Name, Password, and Confirm Password. Make sure the Active checkbox is selected before continuing.
Complete the remaining mandatory details
Enter any remaining required fields, such as Last Name, Email, User Name, Password, and Confirm Password. Confirm that the Active checkbox remains selected.
Save the new user account
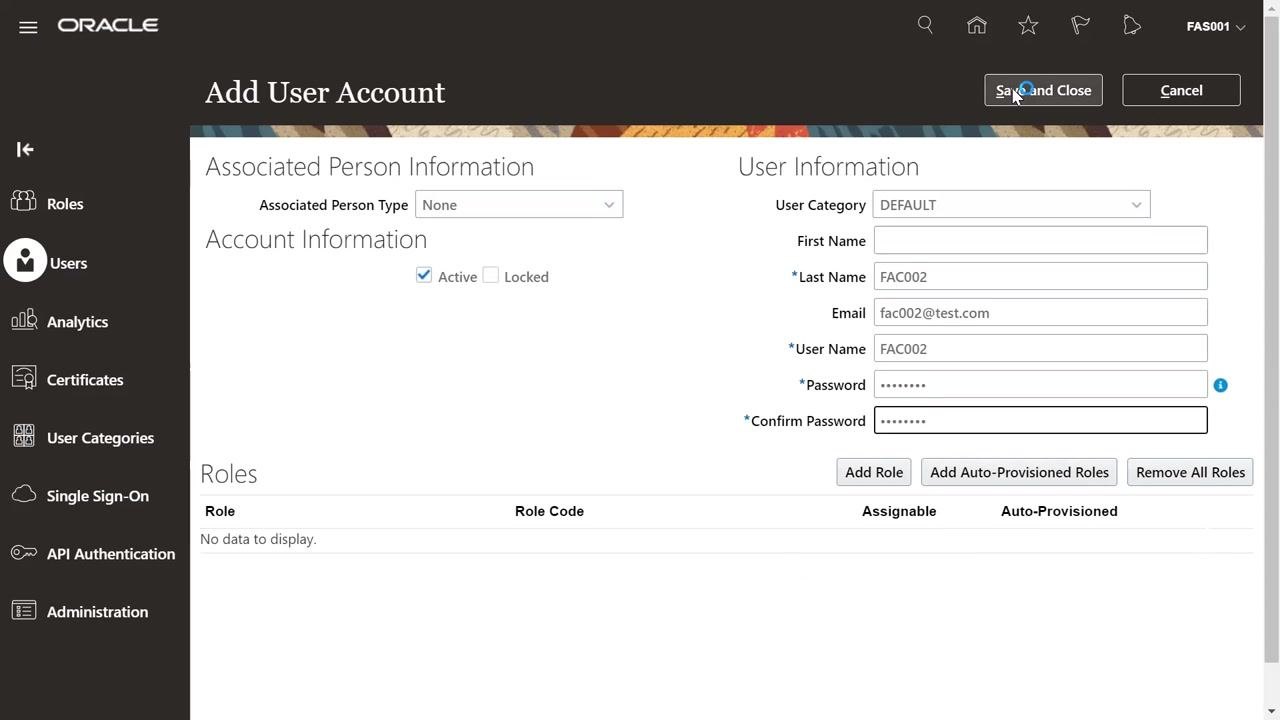
Click Save and Close at the top right of the Add User Account screen to create the account.
Search for the newly created user
On the User Accounts screen, enter the new user's name in the search bar and click the Search icon. The user should appear in the search results.
Open the user's account details
Click the display name of the newly created user in the search results. This opens the User Account Details page, showing the user's information and account details.
Open Add Role to start assigning roles
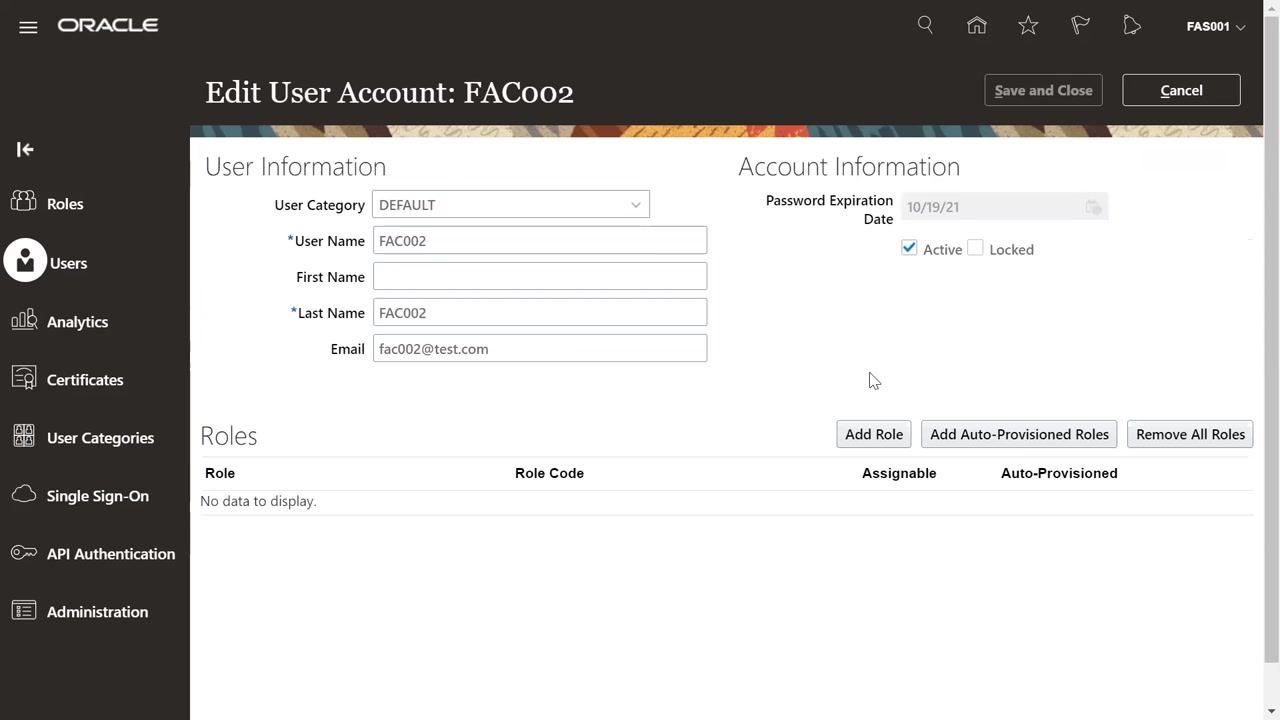
Click Edit at the top right of the User Account Details page. On the Edit User Account screen, click Add Role under the Roles section to begin assigning roles to the user.
Assign the Employee role
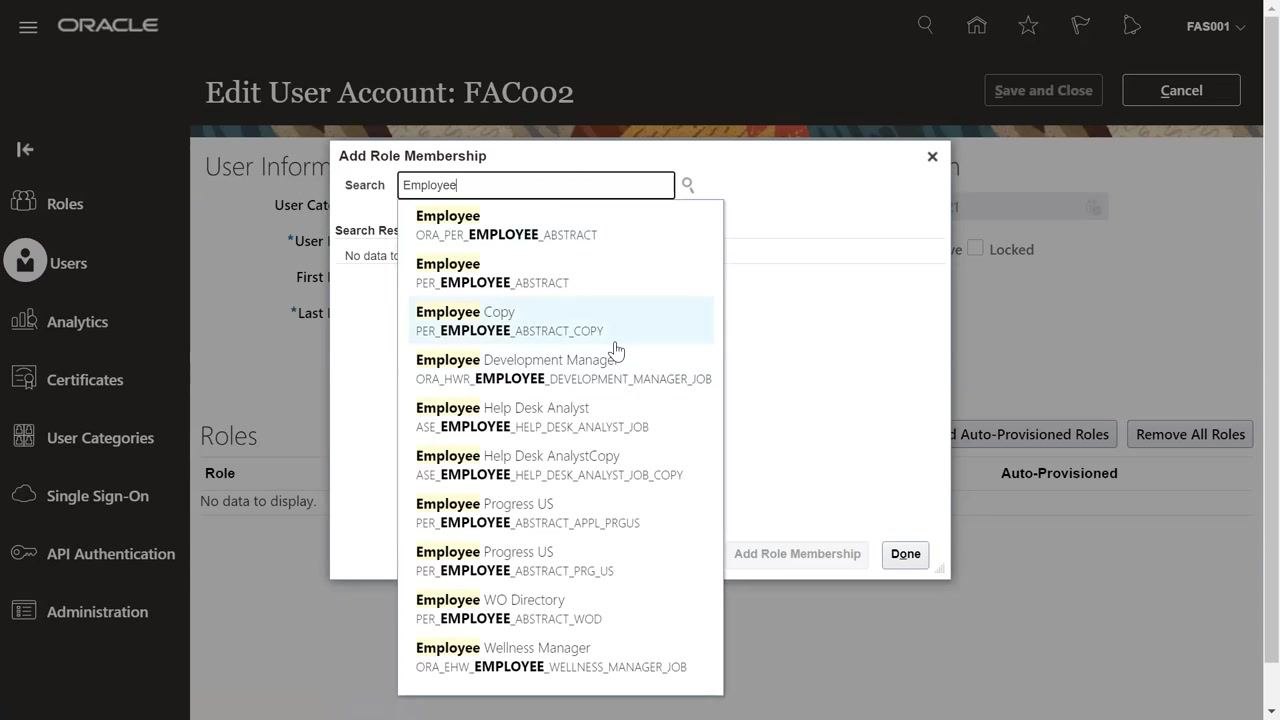
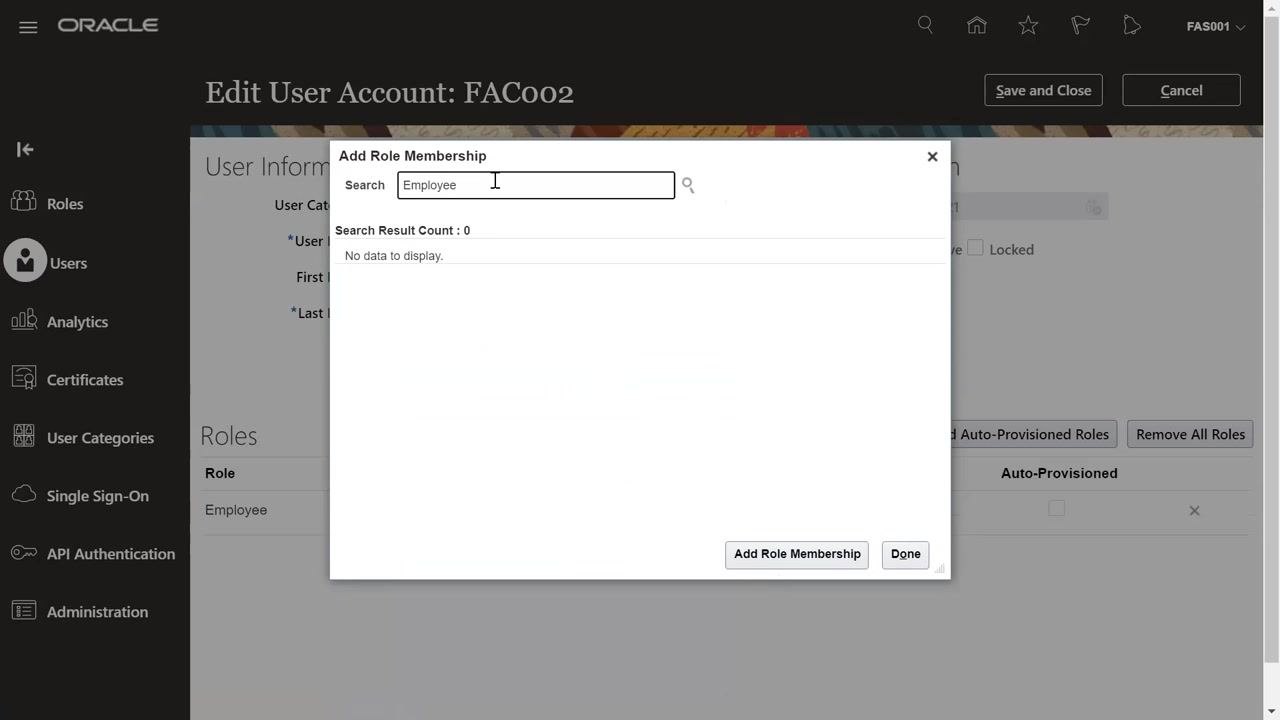
In the Add Role Membership dialog, type Employee in the search field and review the list of available Employee roles. Select the standard Employee role (for example, Employee ORA_PER_EMPLOYEE_ABSTRACT) and avoid any role labeled "Copy." Click Done to assign the role.
Understand role scope before continuing
A role in Oracle Fusion is similar to a responsibility in Oracle E-Business Suite: it controls access to menus, sub-menus, and functions. Assign roles to each user based on the access required for their job function.
Search again if no roles appear
If you search for a role and no results appear, verify the spelling and confirm the role exists in your environment. The search may return "No data to display" if the role is not found or has already been assigned.
Assign implementation project roles
For users involved in implementation projects, assign the Application Implementation Manager, Application Implementation Administrator, and Application Implementation Consultant roles. These roles provide access to configuration and setup tasks within Oracle Fusion.
Search for Application Implementation roles
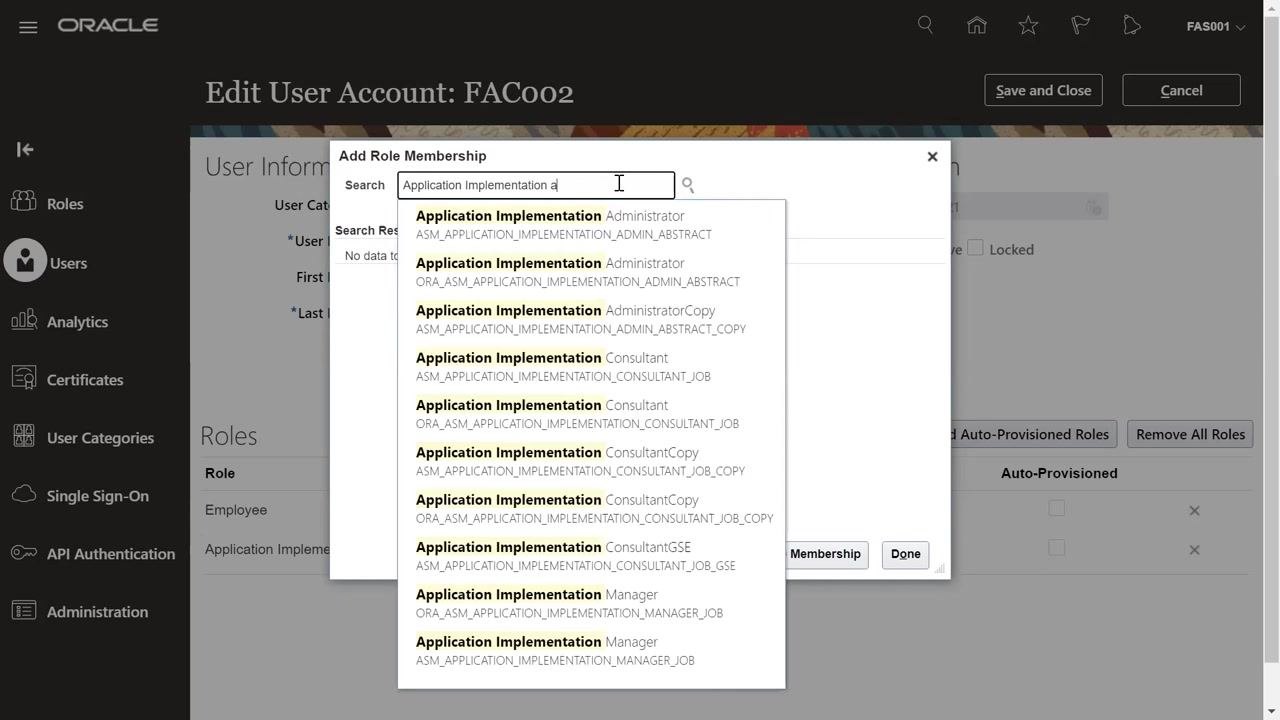
In the Search field, type Application Implementation. A dropdown list of matching roles appears. Review the list carefully and identify the Administrator, Consultant, and Manager roles, avoiding any entries labeled "Copy."
Select the Application Implementation Consultant role
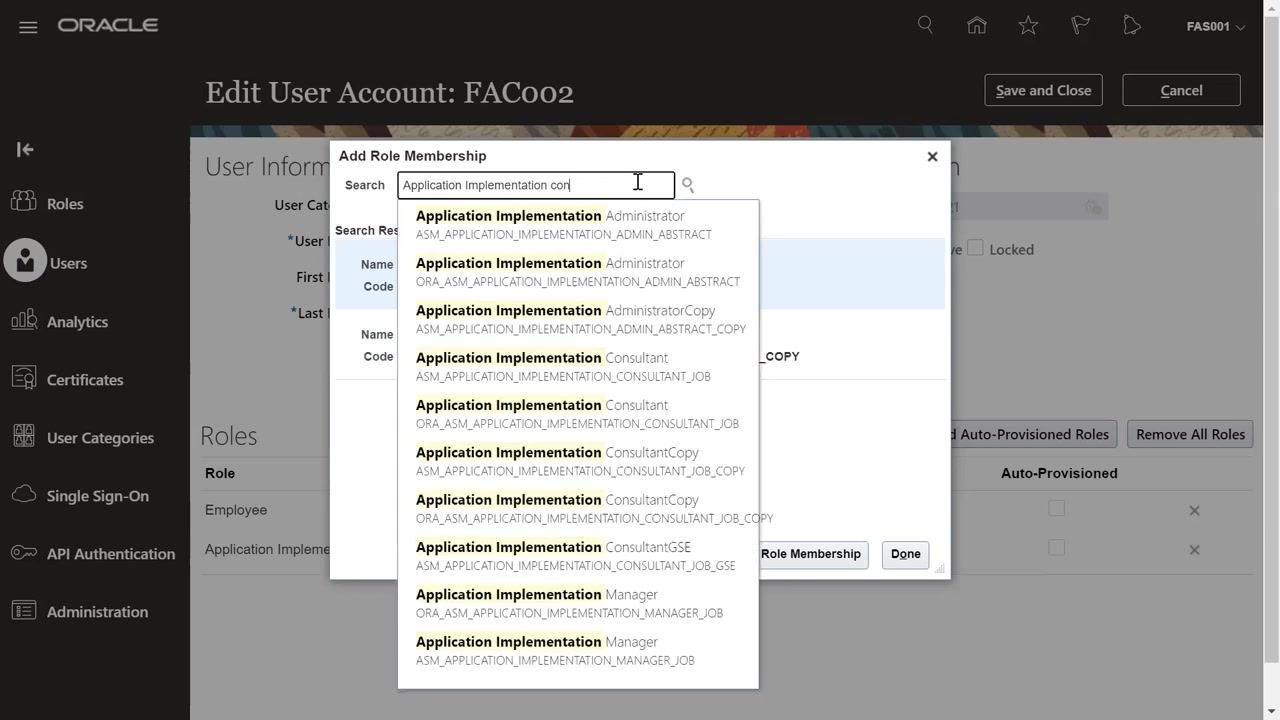
Narrow the search further by typing Application Implementation con to locate the Consultant role in the dropdown list, then select it.
Confirm the correct role variant
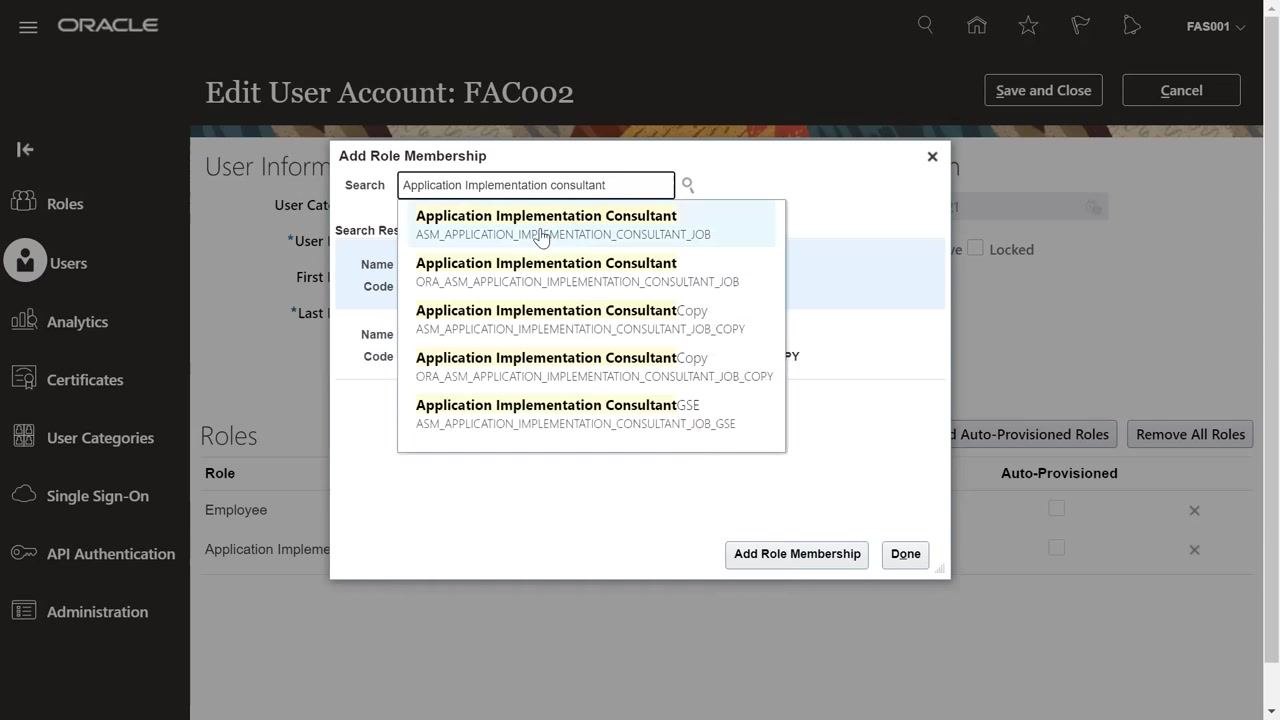
Several similar entries may appear when searching for a role, including standard versions and variants labeled "Copy" or "GSE." Select only the standard role unless your organization specifically requires a variant, click Add Role Membership, and repeat for any additional roles. Click Done once all required roles are added.
Search for additional roles as needed
To add further roles, use the Add Role button again and search for the role by name, such as "Application Implementation Consultant," reviewing the results list before making a selection.
Search for and assign the IT Security role
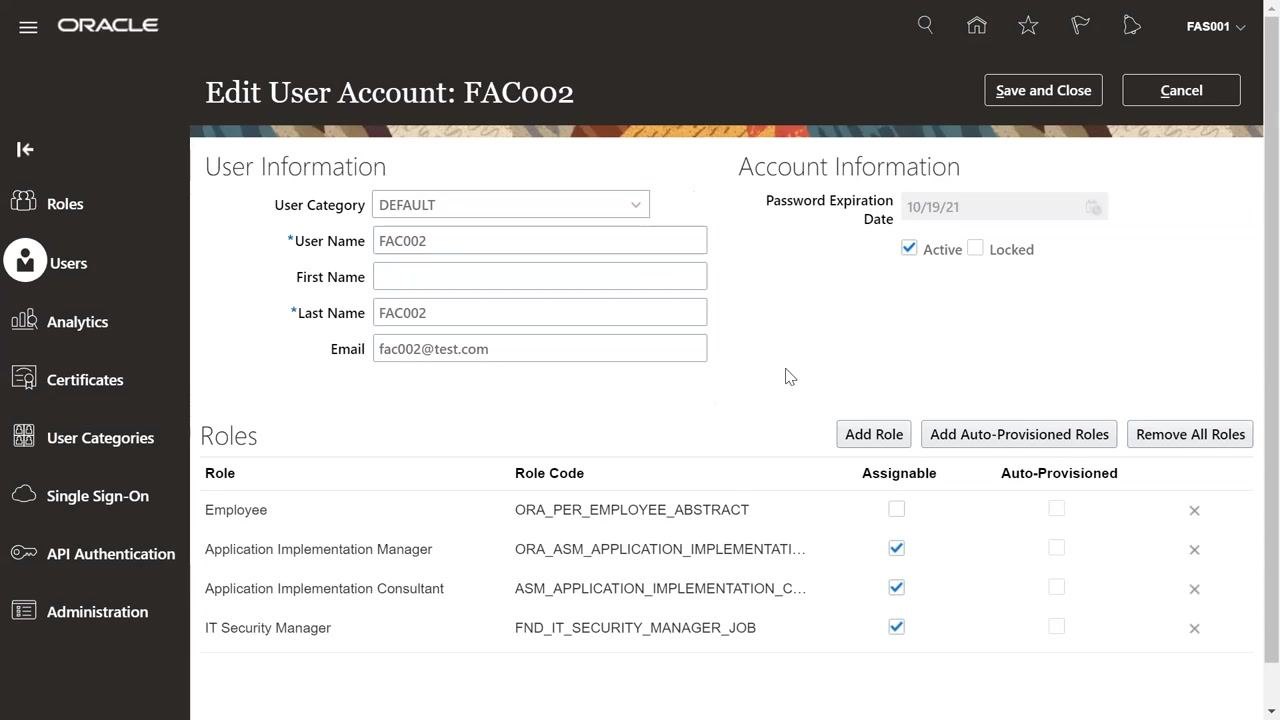
Type IT Security in the search bar to review available IT Security roles, such as IT Security Manager variants. Select the appropriate standard IT Security Manager role for your requirements, avoiding "Copy" or "GSE" variants unless required.
Confirm the role assignment
Click Add Role Membership to assign the selected role to the user. Verify that the new role now appears in the user's list of roles, along with previously assigned roles such as Employee and the Application Implementation roles. Confirm the Assignable checkbox is selected for each assignable role.
Save all role changes
Click Save and Close or Done to finalize the changes. The User Account Details page will display all roles now assigned to the user.
Remove a role from a user
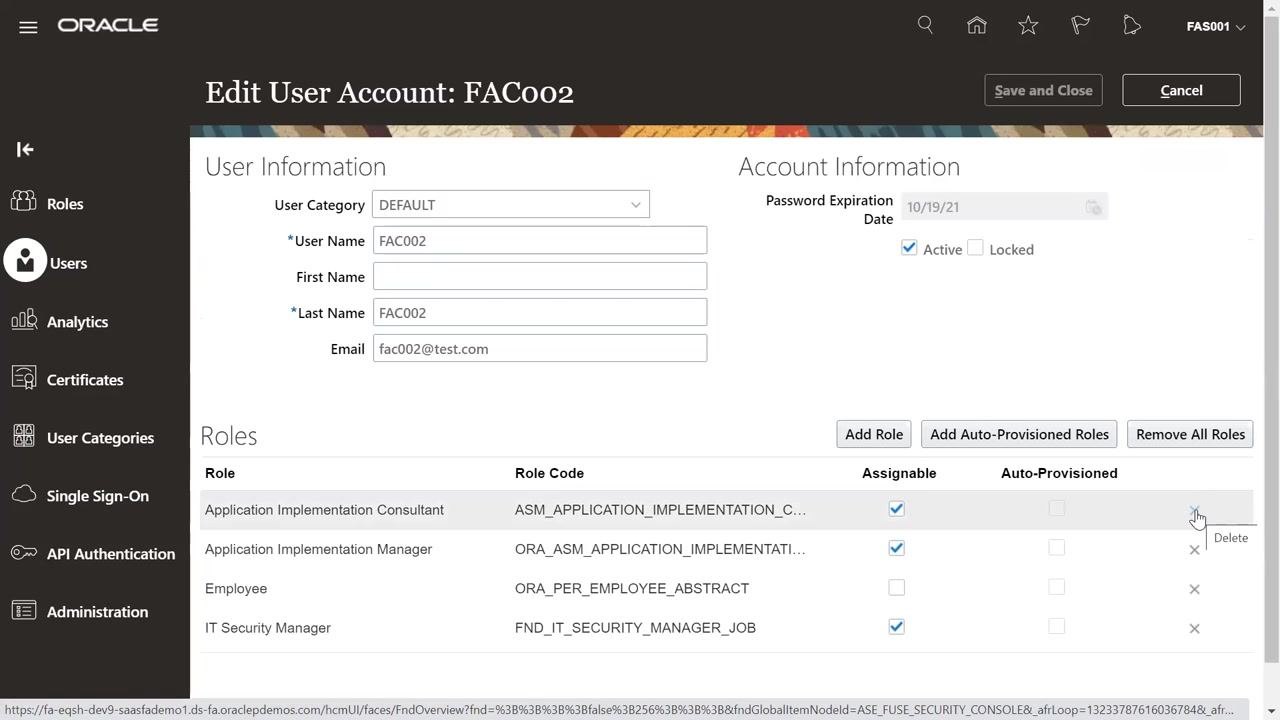
If you need to remove a role, locate it in the Roles section of the Edit User Account screen. On the far right of the role row, locate the delete icon (cross button).
Confirm role removal
Click the delete icon next to the role you want to remove. A warning dialog appears asking you to confirm the deletion. Click Yes to remove the role, or No to cancel.
Review the user account before synchronizing
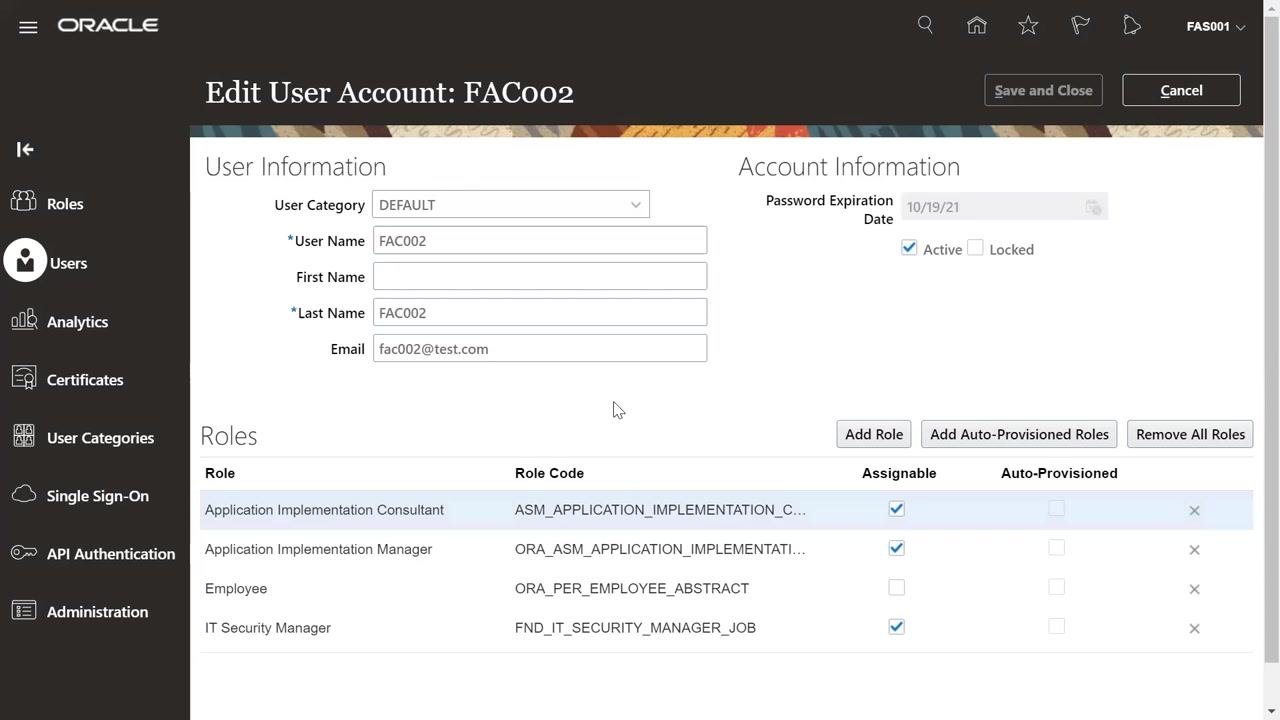
Before running synchronization, confirm you are on the Edit User Account screen for the user. Verify the User Category, User Name, Last Name, Email, and that the correct roles (including IT Security Manager) are assigned with the Assignable checkbox selected. Confirm the account is marked Active and not Locked.
Return to the main menu
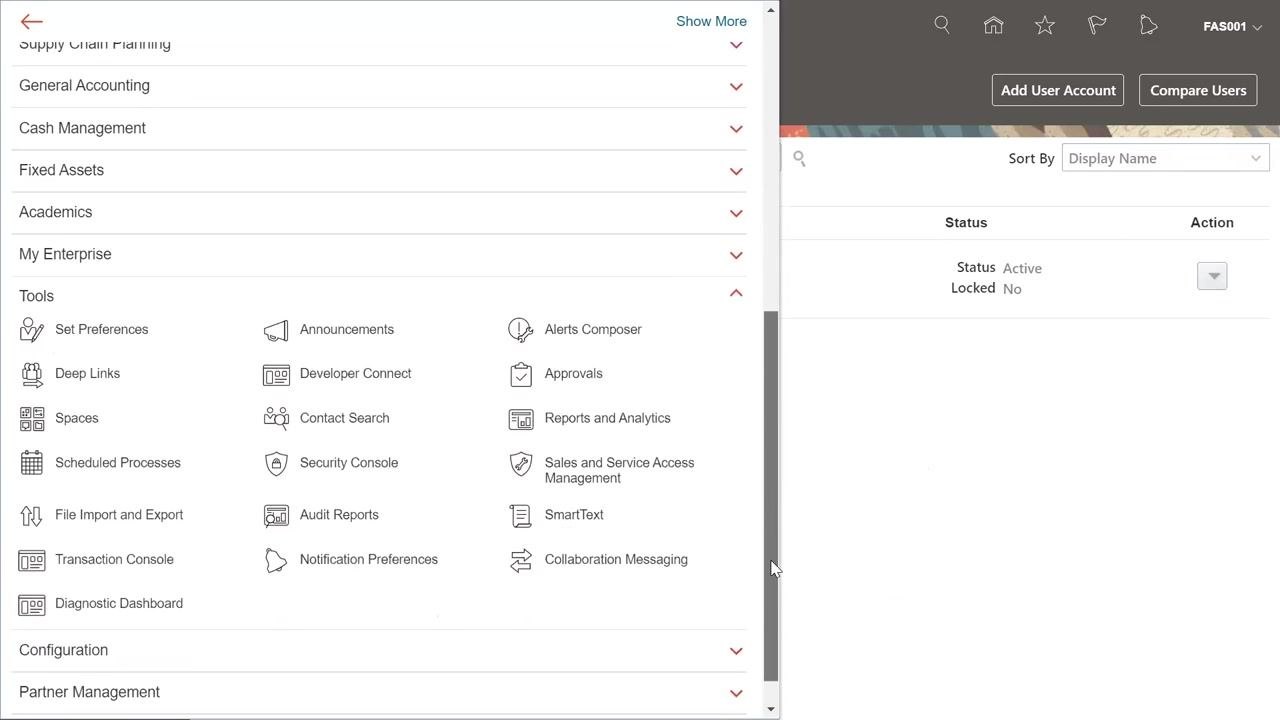
Click the home icon or navigation arrow to return to the main menu, which displays application modules such as Sales, Service, Procurement, and Product Management. On the right, you can see user status and options to add or compare user accounts.
Open the Tools section
Scroll down to the Tools section in the main menu to locate tools such as Scheduled Processes, Security Console, and Audit Reports.
Open Scheduled Processes
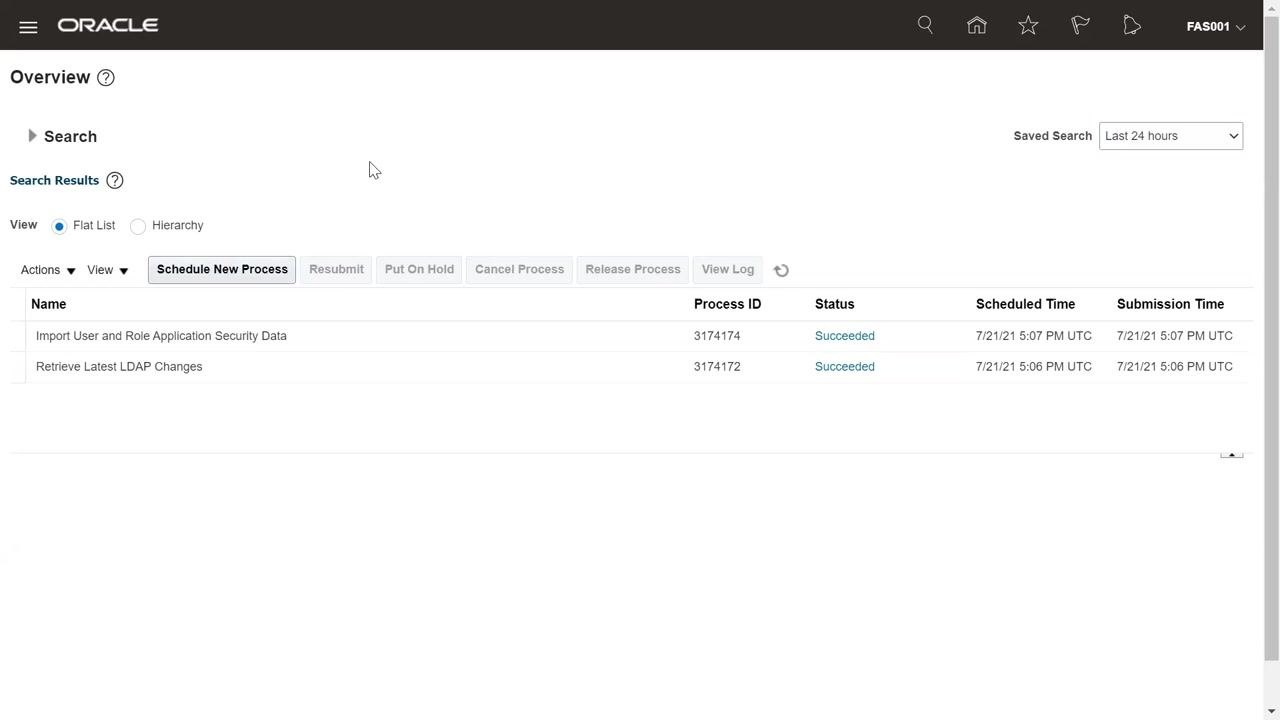
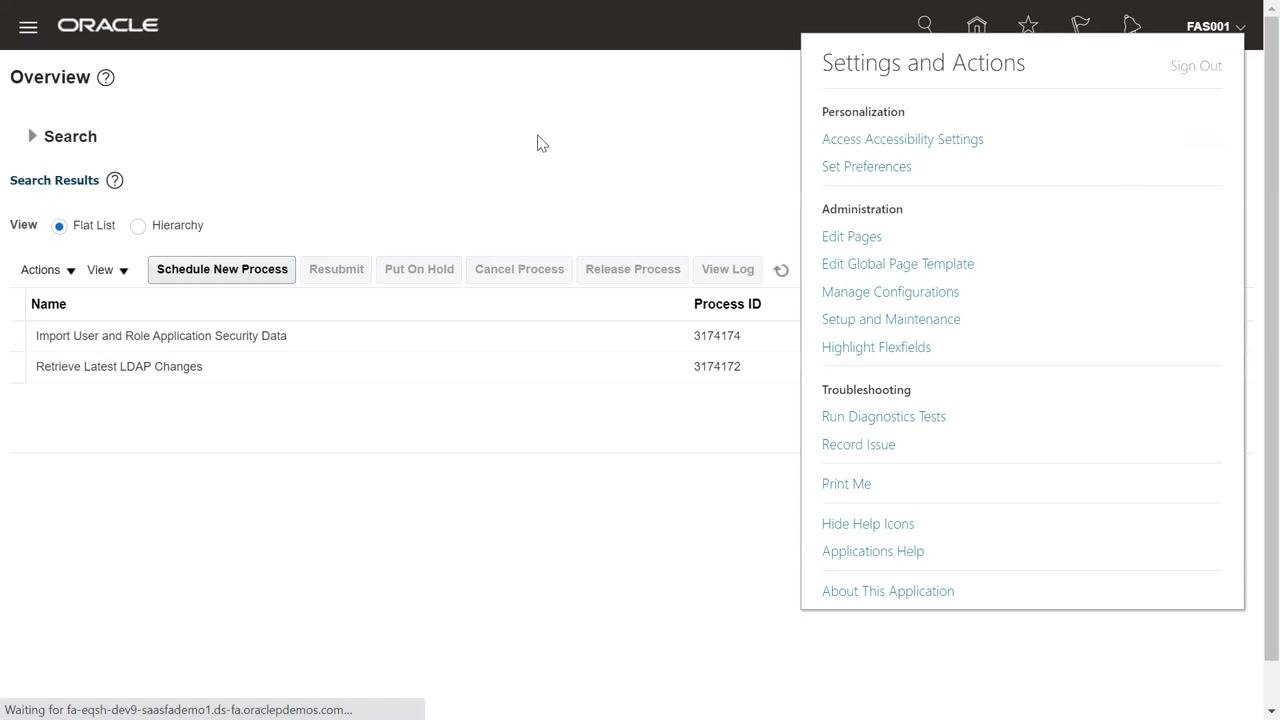
Click Scheduled Processes under the Tools section. The Overview screen lists previously run processes, such as "Import User and Role Application Security Data" and "Retrieve Latest LDAP Changes," along with their Process ID, Status, Scheduled Time, and Submission Time.
Schedule a new process
Click Schedule New Process. In the dialog, confirm Job is selected as the Type, then begin typing or searching for the process you want to run. Scroll to the bottom and click Search... to find the specific process.
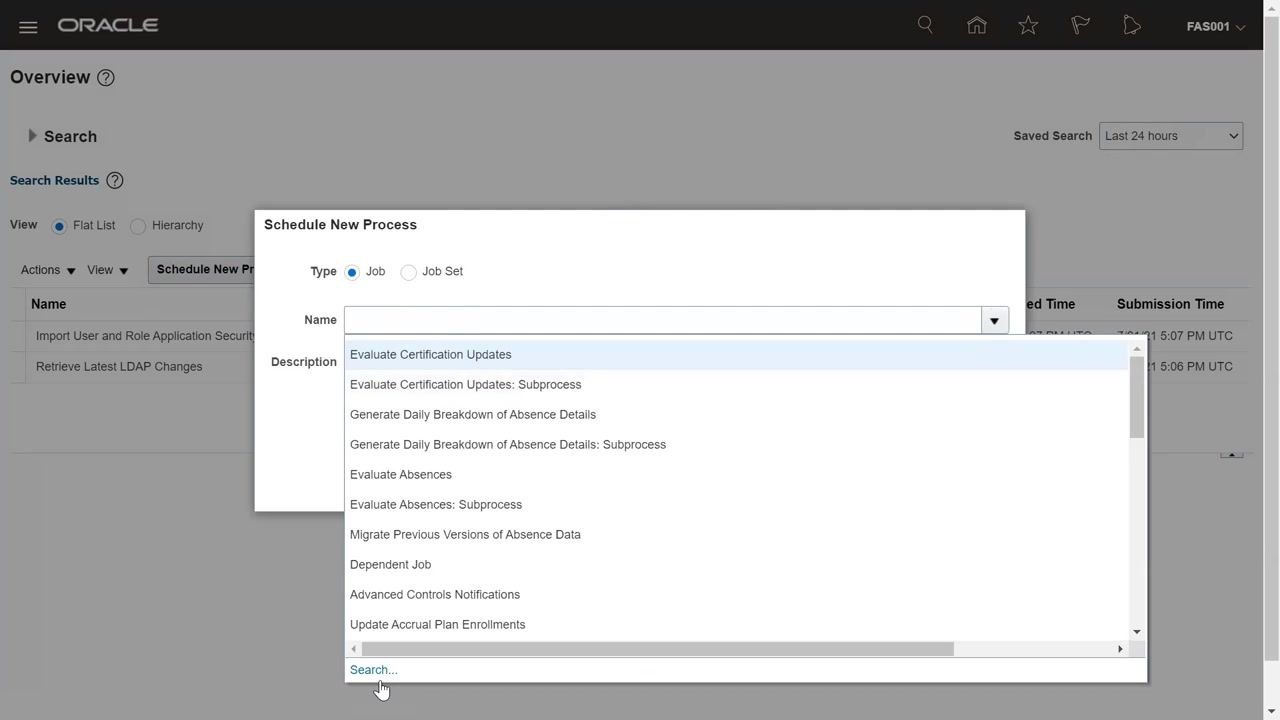
Search for the LDAP synchronization job
In the Search and Select: Name dialog, enter Retrieve% in the Name field and click Search. Review the list of matching jobs and select Retrieve Latest LDAP Changes, which synchronizes users, roles, and related data.
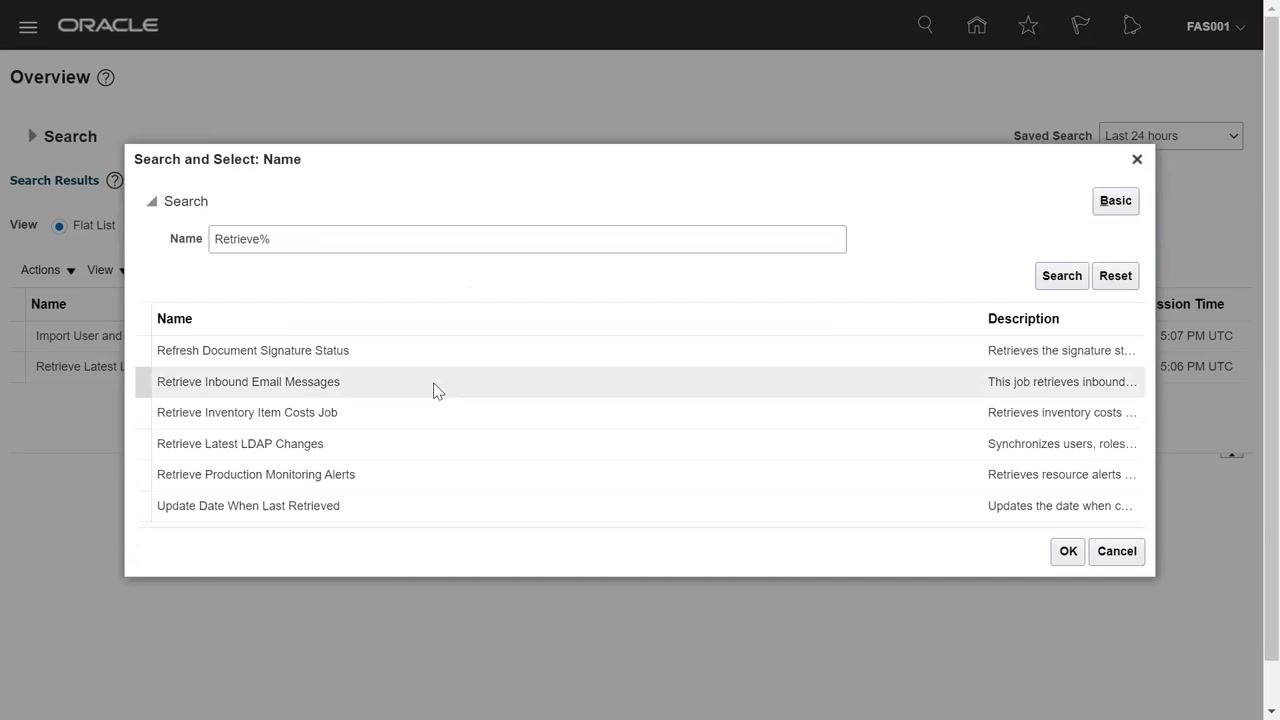
Run the LDAP synchronization
Click OK to confirm your selection. The process is scheduled and appears in the list of scheduled processes. Monitor its status to ensure it completes successfully.
Review completed synchronization jobs
Confirm you are on the Overview screen under Scheduled Processes. Verify that both the "Import User and Role Application Security Data" and "Retrieve Latest LDAP Changes" jobs show a Succeeded status, and note the Process IDs, Scheduled Time, and Submission Time for audit purposes.
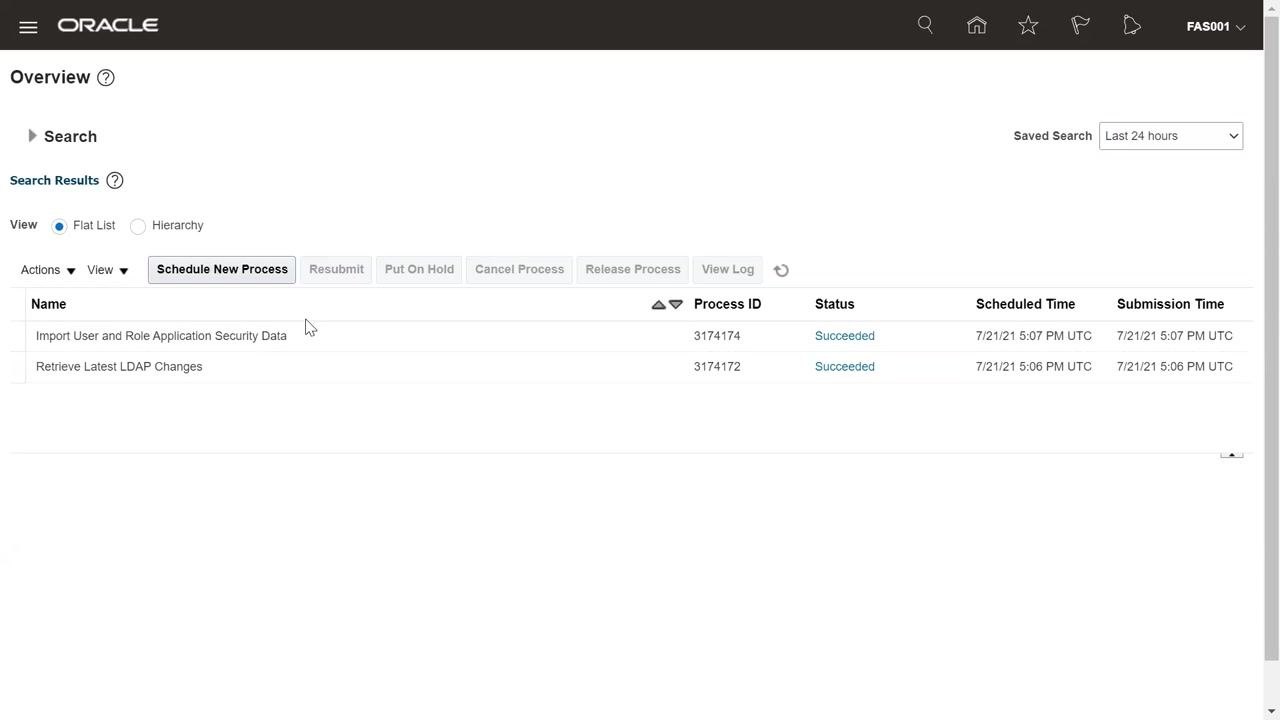
Plan future synchronization schedules
These processes can be run manually or scheduled according to your business requirements. Use Schedule New Process to set up recurring or future jobs as needed for your organization's data and role synchronization policies.
Access Setup and Maintenance
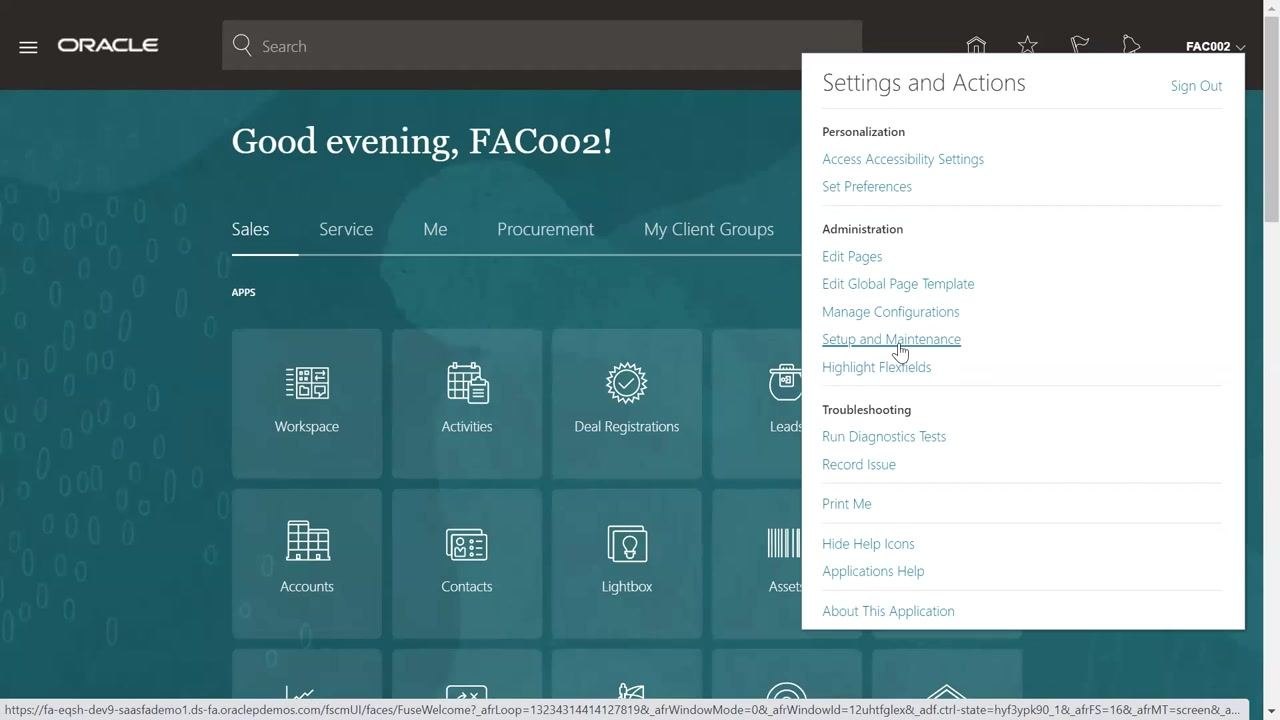
Open the user menu at the top right, then click Settings and Actions. Under Administration, locate options such as Edit Pages, Manage Configurations, and Setup and Maintenance. Select Setup and Maintenance to proceed with configuration.
Sign in as the relevant user if prompted
If prompted, sign in to Oracle Applications Cloud by entering the user ID and selecting the appropriate credentials, then proceed to log in.
Confirm access to the main dashboard
After signing in, confirm you see a welcome message and the main dashboard displaying modules such as Sales, Service, Me, Procurement, and My Client Groups. Open Settings and Actions again if further configuration is needed, and select Setup and Maintenance under Administration to define setup tasks.
Assign Security Console access
While signed in with administrative privileges, open Settings and Actions from the top right and select Setup and Maintenance under Administration. Assign the roles required to provide Security Console access, including roles that enable data entry and configuration of offerings as a Setup Function Manager. Click Save and Close, then Done to finish.
Return to the Security Console
From the main dashboard, open the Navigator, scroll to the Tools section, and click Security Console to manage users and roles further.
Create or modify users and roles as needed
In the Security Console, you can create a new user, assign roles to a user by modifying their profile, or update existing roles and access as required for your implementation project.
Sign out when finished
After completing user and role assignments, return to the main dashboard. Open Settings and Actions if further configuration is needed, then click Sign Out in the top right corner to securely log out of Oracle Applications Cloud.
What's next
With roles assigned, synchronized, and verified, your user accounts are ready to access the appropriate menus, sub-menus, and functions in Oracle Fusion. Review user access periodically, update roles as organizational needs change, and run LDAP synchronization whenever you modify role assignments to keep user access and security roles up to date.
Generation details: cost, quality tiers
Docsie billed 5,500 credits ($3.85) to analyze this 11-minute video at standard quality. The rewrite, template fill and Word/PDF exports were included. The same video at each quality tier:
| Quality | Frames sampled | Credits | Approx. cost |
|---|---|---|---|
| Draft | every 16-30 s | 2,750 | $1.92 |
| Standard (this guide) | every 8-15 s | 5,500 | $3.85 |
| Detailed | every 4-7 s | 11,000 | $7.70 |
| Ultra | every 1-3 s | 22,000 | $15.40 |
Credits priced at $0.70 per 1,000; plans include a monthly allowance. Enterprise customers on on-premise or bring-your-own-model deployments run this on their own inference and pay no per-video credits.
Generated by Docsie Video-to-Docs on 2026-10-01 from a 10-minute video. Screenshots are frames from the source video and belong to their creator, Oracle Fusion Financial Hub, whose original is embedded above. If you own this video and want the guide removed or credited differently, contact us and we will act within one business day.