
How to Create a Procurement Agent in Oracle Fusion
This guide shows you how to create a procurement agent in Oracle Fusion. You start by creating an employee record, then set up the user account in the Security Console, assign roles, grant business unit data access, and configure the procurement agent in your implementation project.
Video: How to Create Procurement Agent in Oracle Fusion Cloud by apps2fusion (2017). All credit for the demonstration goes to the creator; watch the original on YouTube. The written guide below was generated from this video by Docsie. Creator? Request a change or removal.
This guide shows you how to create a procurement agent in Oracle Fusion. You start by creating an employee record, then set up the user account in the Security Console, assign roles, grant business unit data access, and configure the procurement agent in your implementation project.
Prerequisites
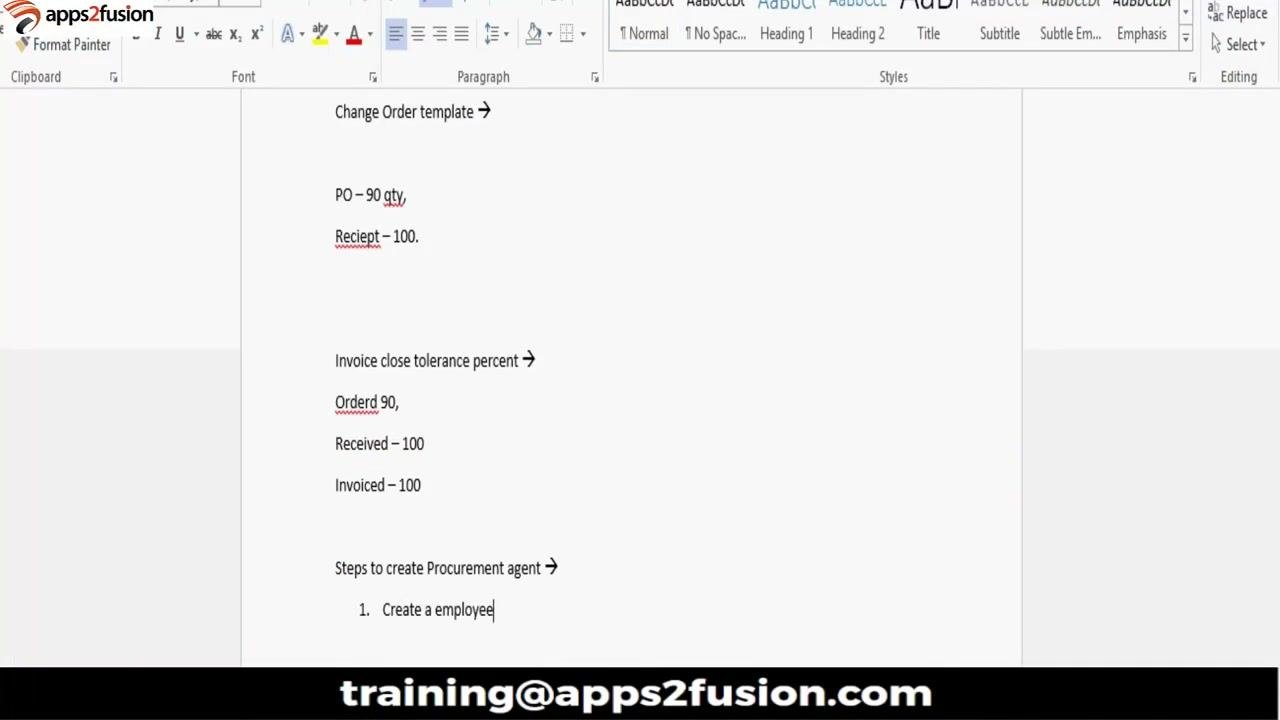
Only users with an employee record in the system can become procurement agents. Users created solely from the Security Console are not recognized as employees.
Before you set up the procurement agent, make sure of the following:
- An employee record exists for the user who will become a procurement agent.
- You know which business units need procurement agent access. You repeat the procurement agent setup for each one.
When you create an employee, the system automatically generates a corresponding user account. Creating the employee is mandatory before you start the procurement agent setup.
Part 1: Create the employee record
Step 1. Open your implementation project
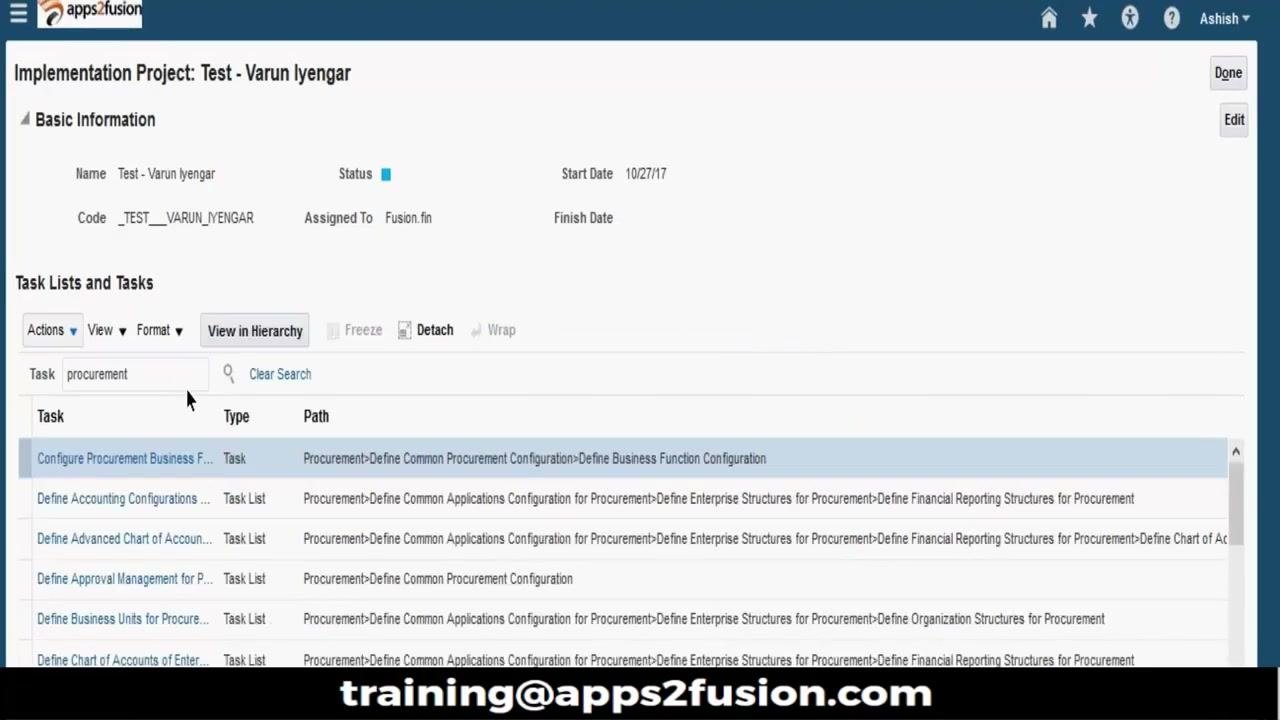
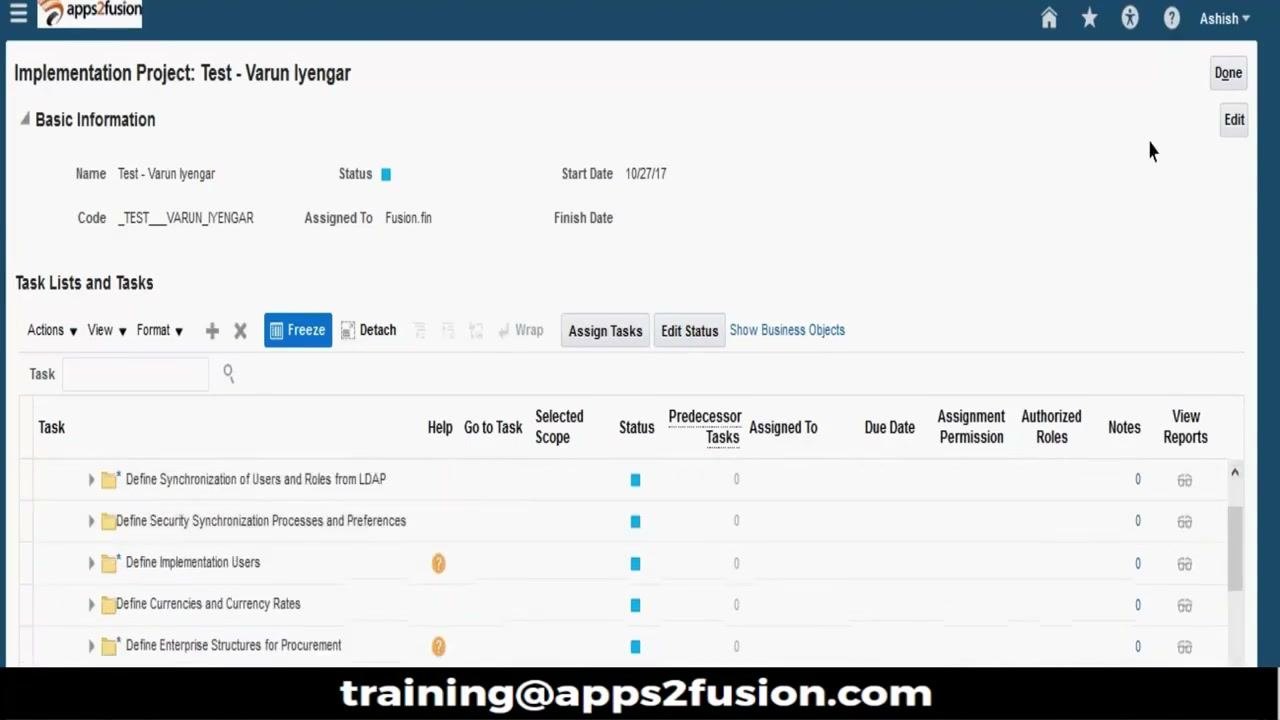
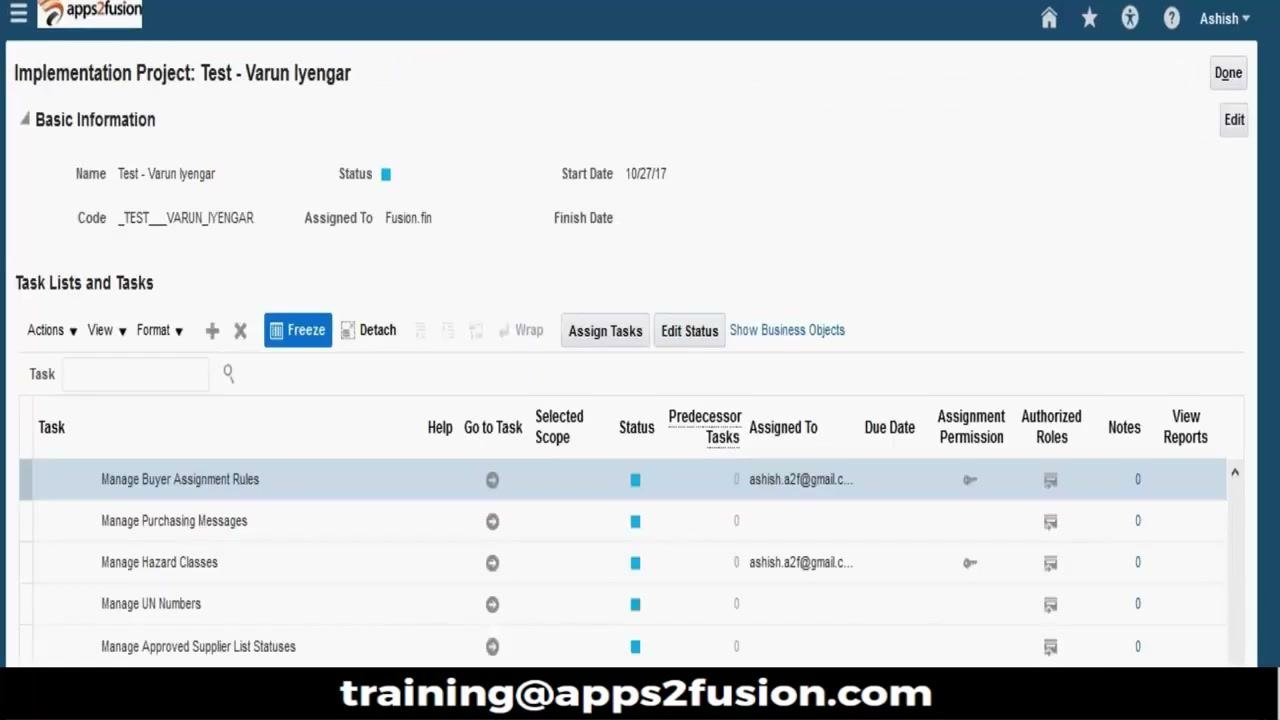
- Go to the Implementation Project screen for your project (for example, "Test - Varun Iyengar").
- Review the Task Lists and Tasks section to confirm you are in the correct project workspace.
Step 2. Start a new user
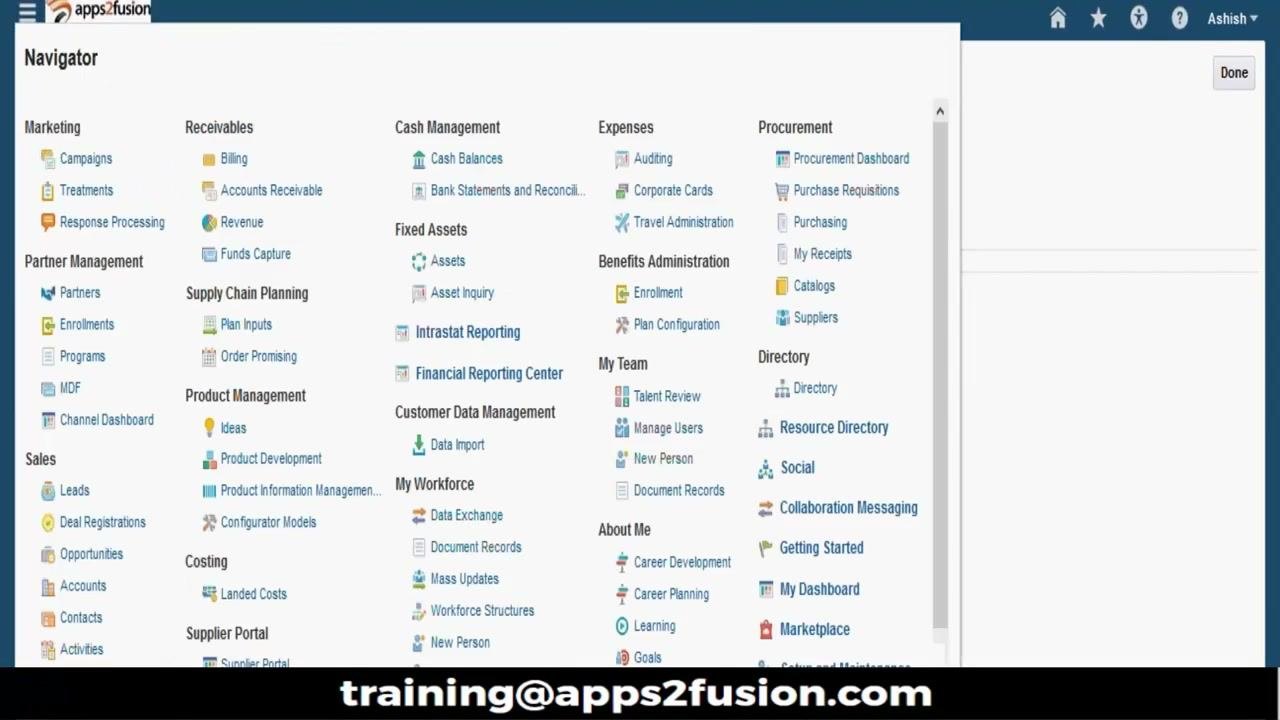
- Find and click Manage Users in the available tasks or navigation menu.
- Click the + (plus) button to create a new user.
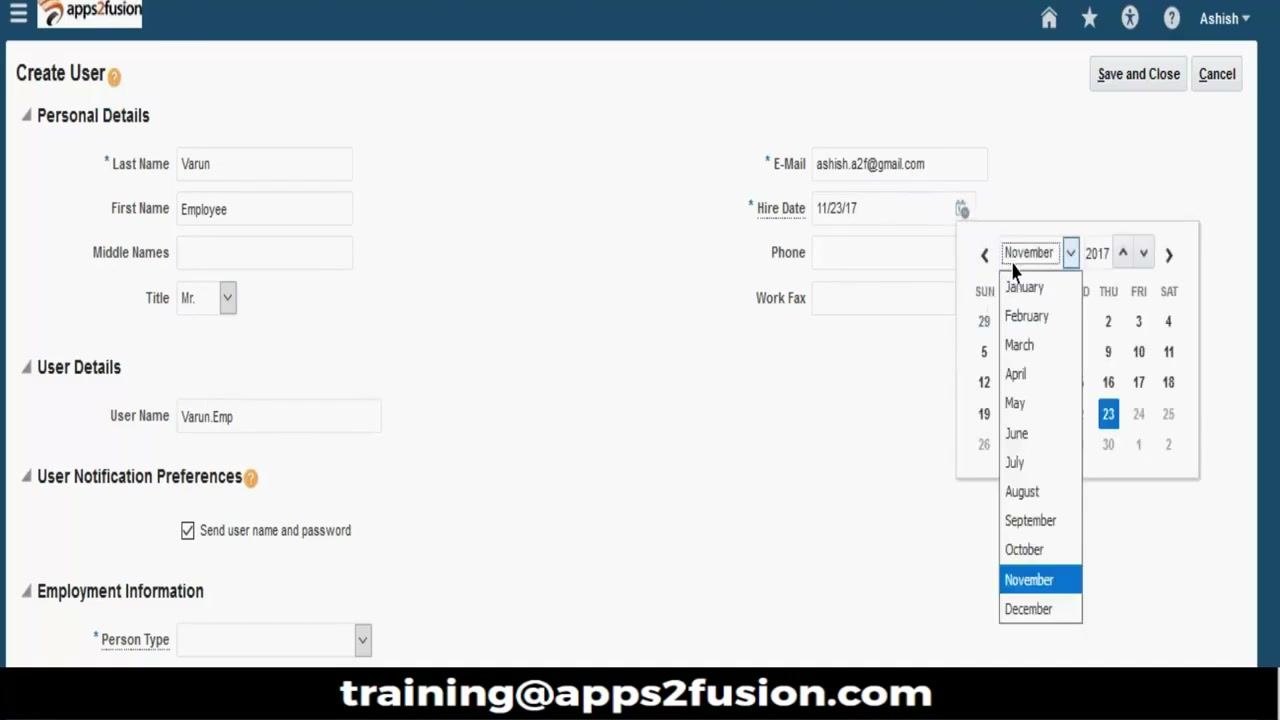
Step 3. Enter personal details
In the Create User form, complete the following fields:
- Last Name: Enter "Varun".
- First Name: Enter "Employee".
- Title: Select the appropriate title from the dropdown (for example, "Mr.").
Make sure you complete all required fields, which are marked with an asterisk (*).
Step 4. Enter user details
- In the User Details section, enter the username (for example, "Varun.Emp").
- Select the Send user name and password check box so the login credentials are sent to the email address you provide.
Step 5. Provide contact and employment information
Complete the following fields:
- E-Mail: Enter the user's email address (for example, "ashish.a2f@gmail.com").
- Hire Date: Select the date with the calendar picker (for example, "11/23/17").
- Person Type: Select "Employee" from the dropdown.
Step 6. Select the legal employer
In the Legal Employer dropdown, select the appropriate legal entity for the employee (for example, "AppsPro").
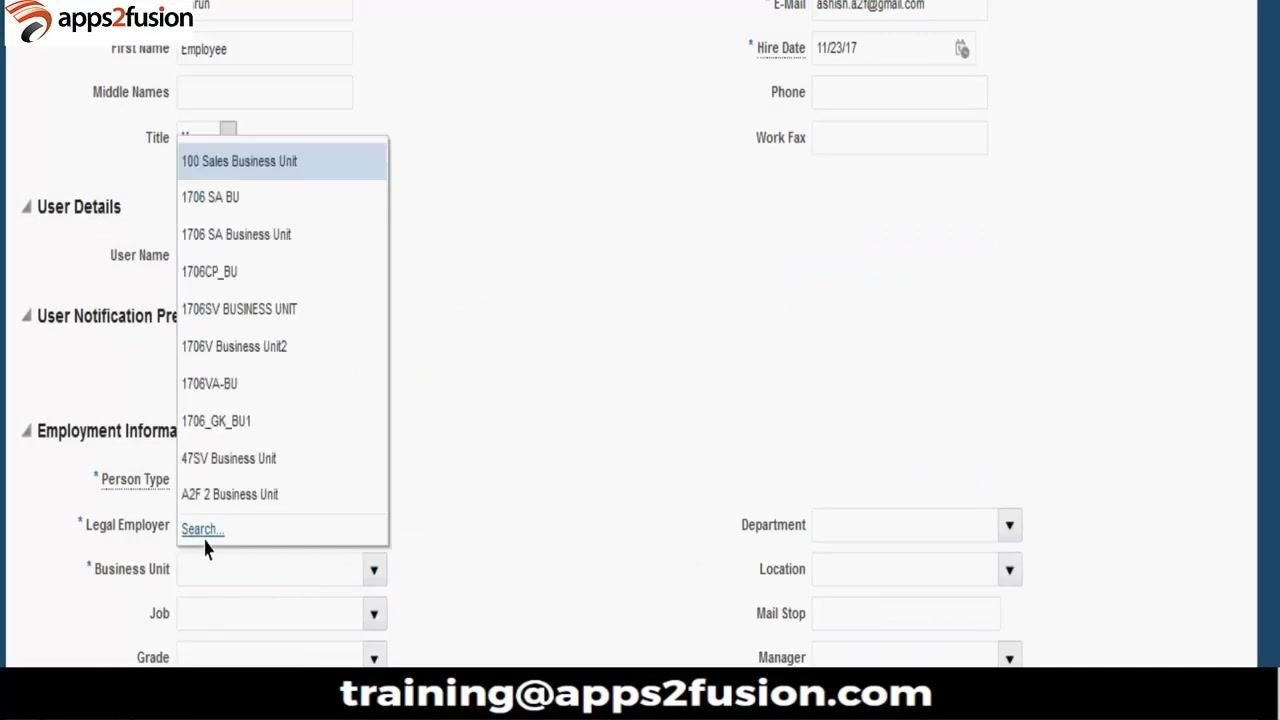
Step 7. Select the business unit
In the Business Unit dropdown, choose the relevant business unit for the employee (for example, "100 Sales Business Unit").
Step 8. Complete the remaining employment details
Fill in other required employment fields as applicable, such as Job, Grade, Department, Location, Mail Stop, and Manager. You can skip optional fields you don't need.
Step 9. Save the employee record
Click Save and Close to create the employee and the user account. The system automatically creates a corresponding user in the Security Console.
Step 10. Plan the procurement agent setup for each business unit
Perform the procurement agent setup for every business unit where you want to grant procurement agent access. You repeat the setup for each relevant business unit.
Part 2: Prepare the user account in the Security Console
Step 11. Open the Security Console
- Open the main application navigator.
- Click Security Console to access the user management features.
Step 12. Dismiss any warning
If a warning appears, such as one about the Import User and Role Application Security Data job, read the message. Click OK or the close (X) button to dismiss it and continue.
Step 13. Find the new user
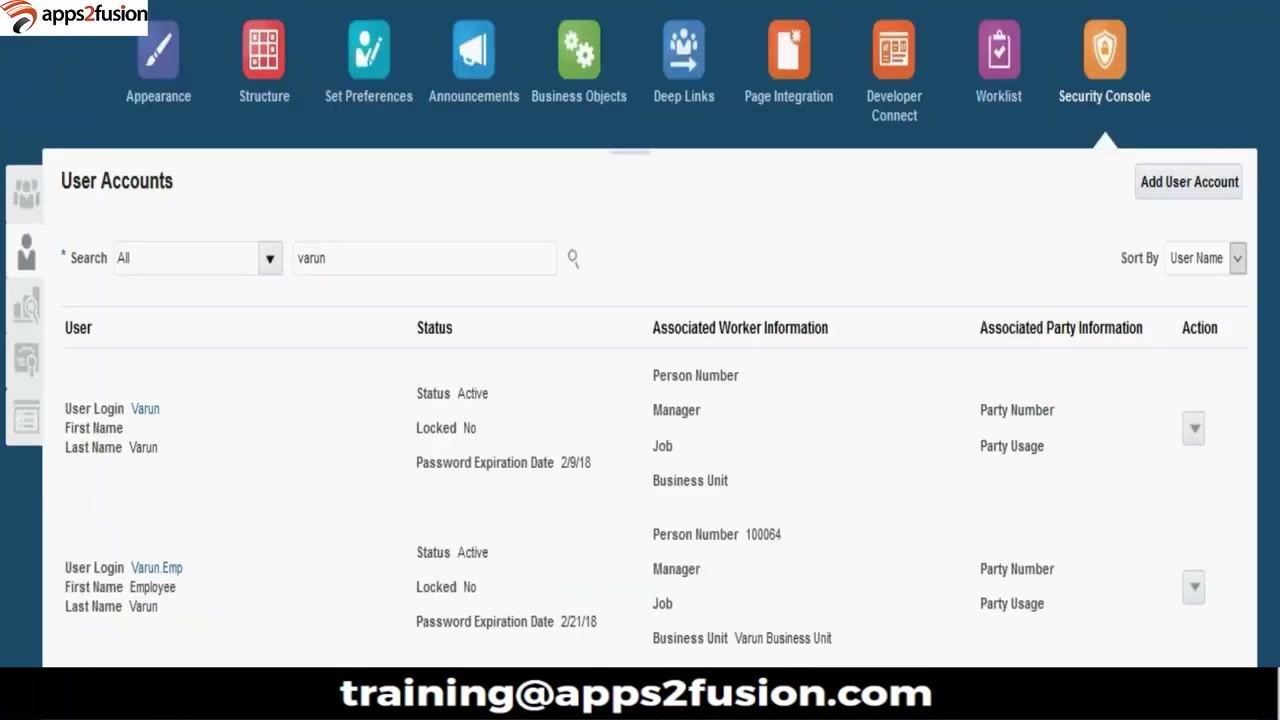
- In the User Accounts section, use the search bar to enter a search term (for example, "varun").
- Confirm that the following user logins are listed: Varun, Varun.Emp, and varun@gmail.com (a login in the form varun@[domain].com).
- Verify that each account has a status of Active and is not locked.
Step 14. Open the user account
Click the User Login (for example, "Varun.Emp") to open the user account details.
Step 15. Reset the password
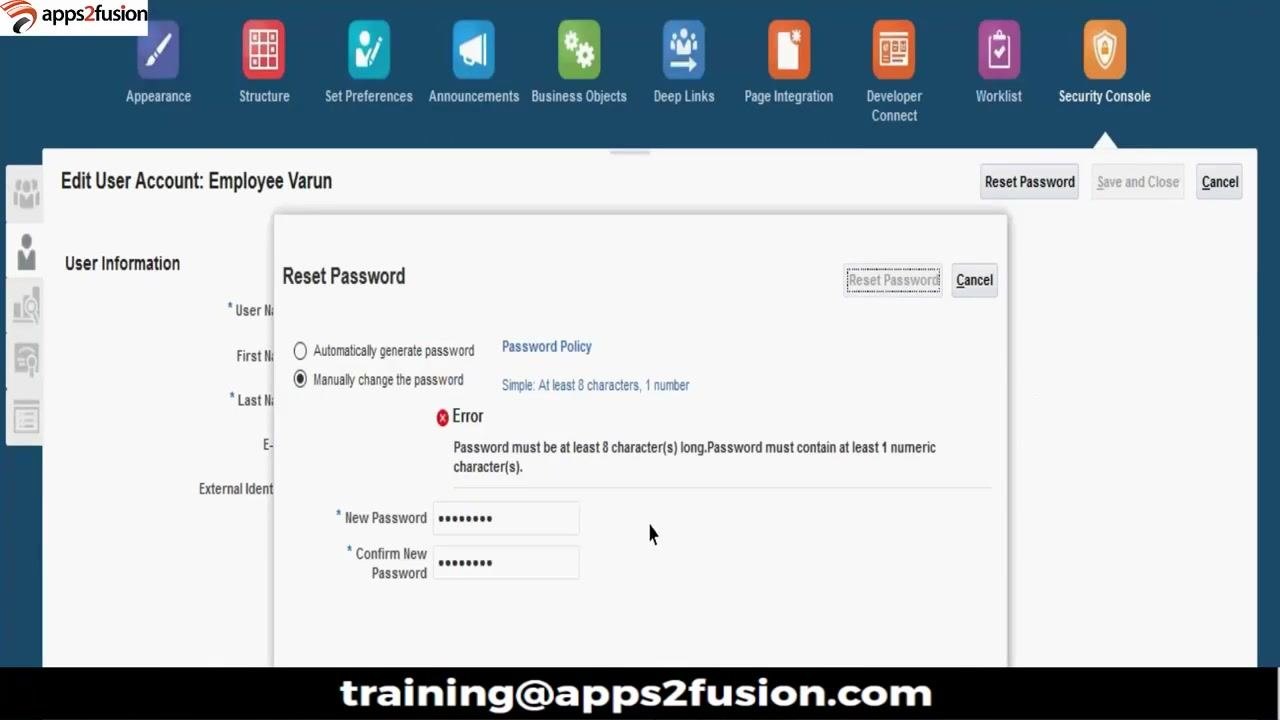
- On the Edit User Account screen, find the Reset Password section.
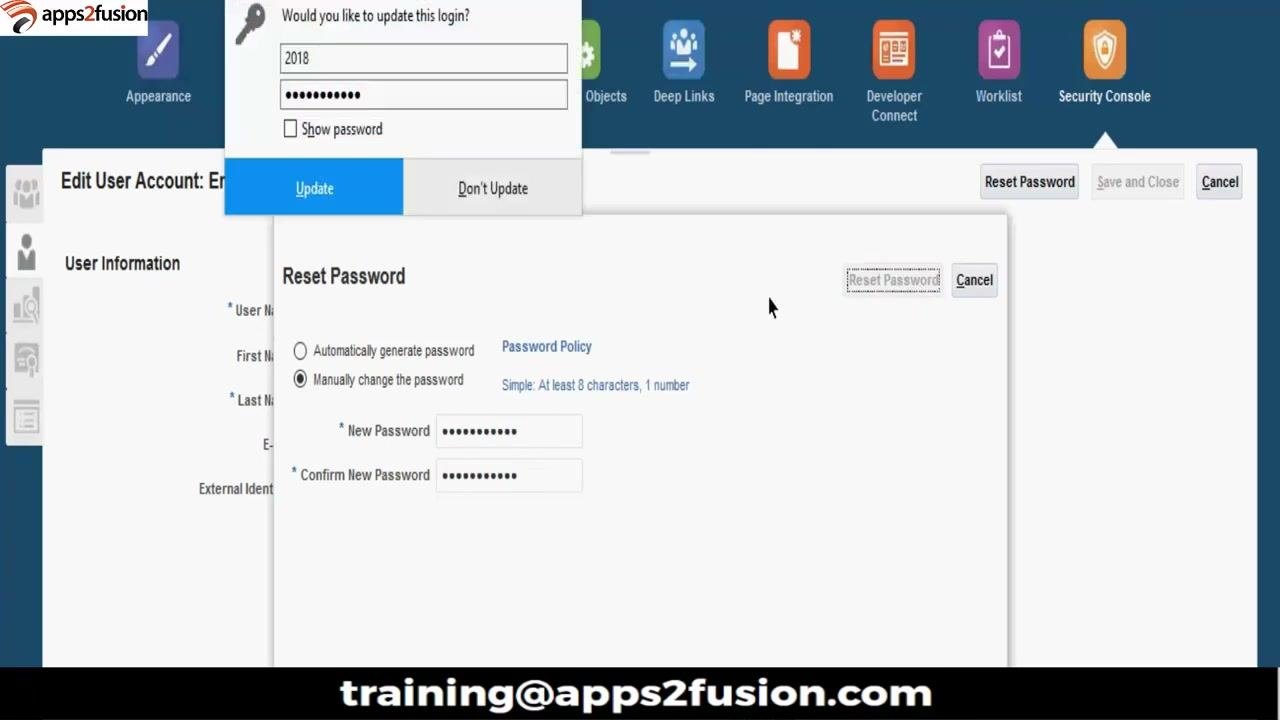
- Select Manually change the password.
- Enter a new password and confirm it.
The password must meet the policy:
- At least 8 characters long
- At least 1 numeric character
If an error appears, adjust the password to comply with these requirements.
Step 16. Review the account details
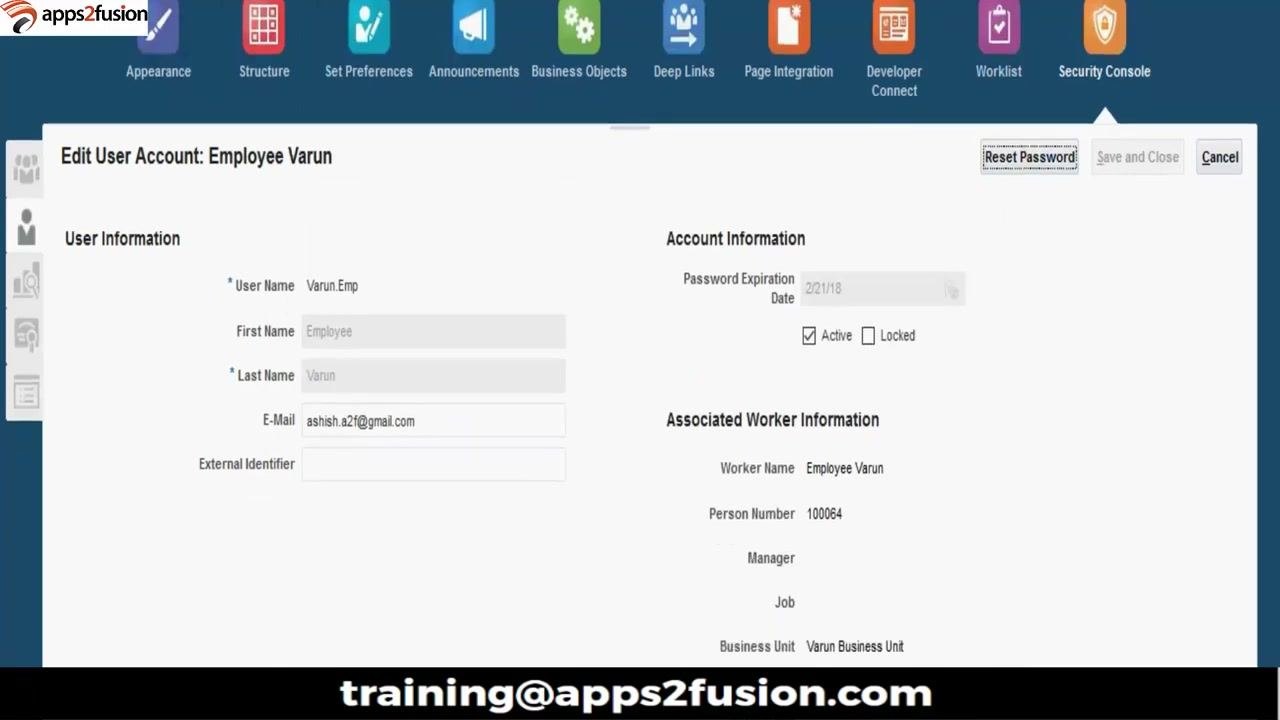
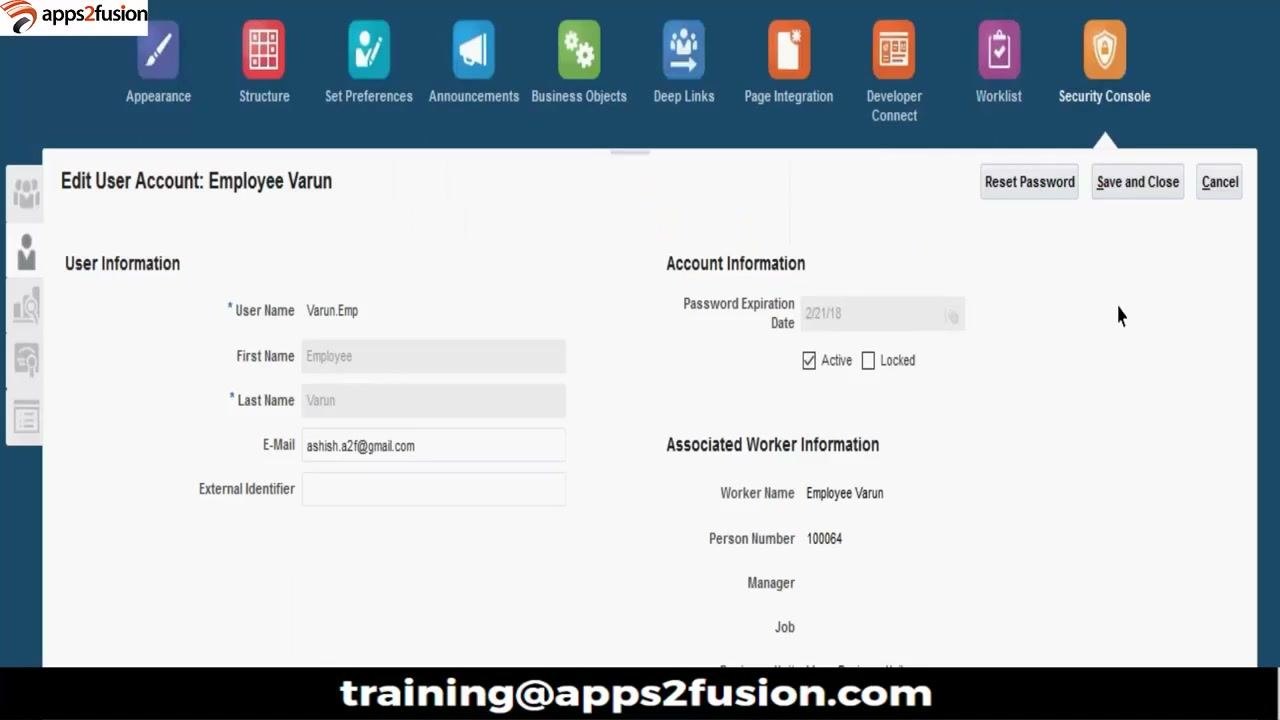
Verify the user information:
- User Name: Varun.Emp
- First Name: Employee
- Last Name: Varun
- E-Mail: ashish.a2f@gmail.com
Check the account status:
- Password Expiration Date: 2/21/18
- Active: checked
- Locked: unchecked
Review the associated worker information:
- Worker Name: Employee Varun
- Person Number: 100064
- Business Unit: Varun Business Unit
Part 3: Assign roles to the user account
Step 17. Open the Add Role Membership dialog
Click the option to add a new role membership for the user. In the Add Role Membership dialog, use the search box to find roles.
Step 18. Assign employee roles
Type "employee" in the search box, then select from the available roles, such as:
- Employee (ORA_PER_EMPLOYEE_ABSTRACT)
- Employee (PER_EMPLOYEE_ABSTRACT)
- Employee Help Desk Analyst (ASE_EMPLOYEE_HELP_DESK_ANALYST_JOB)
Step 19. Assign procurement roles
Type "procurement" in the search box, then select from the list of procurement roles, such as:
- Procurement Application Administrator
- Procurement Catalog Administrator
- Procurement Contract Administrator
- Procurement Integration Specialist
- Procurement Manager
- Procurement Preparer
- Procurement Requester
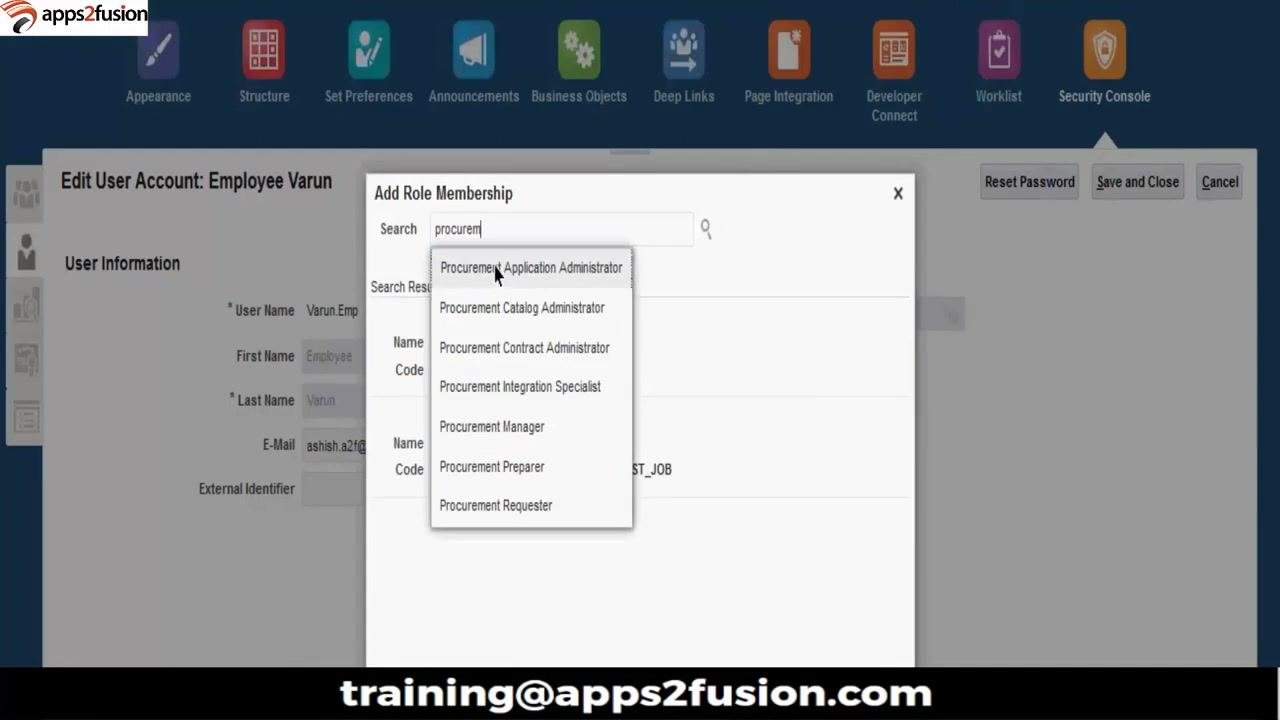
To assign the Procurement Preparer role, type "Procurement Preparer" in the search box. Select Procurement Preparer (ORA_POR_PROCUREMENT_PREPARER_ABSTRACT) from the results.
To assign the Procurement Requester role, type "Procurement Requester" in the search box. Select Procurement Requester (ORA_POR_PROCUREMENT_REQUESTER_ABSTRACT) from the results.
Step 20. Assign supplier roles
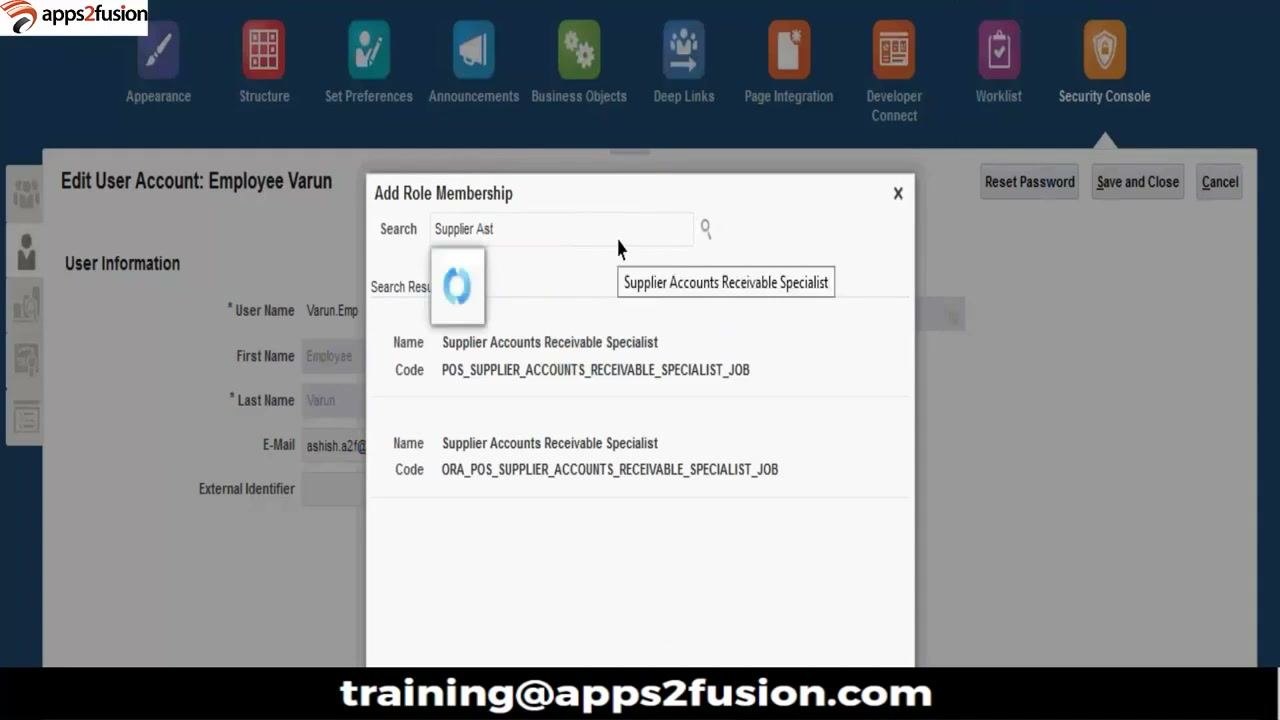
Type "supplier" in the search box, then select from the list of supplier roles, such as:
- Supplier Accounts Receivable Specialist
- Supplier Administrator
- Supplier Bidder
- Supplier Contract Administrator
- Supplier Contract Manager
- Supplier Contract Team Member
- Supplier Contract User
- Supplier Customer Service Representative
- Supplier Demand Planner
To assign the Supplier Accounts Receivable Specialist role, type "Supplier Ast" in the search box. Select Supplier Accounts Receivable Specialist (POS_SUPPLIER_ACCOUNTS_RECEIVABLE_SPECIALIST_JOB or ORA_POS_SUPPLIER_ACCOUNTS_RECEIVABLE_SPECIALIST_JOB) from the results.
Select the role codes exactly as shown in the search results.
Step 21. Assign the Supplier Qualification role
- In the Add Role Membership dialog, make sure the search box contains "Supplier".
- Review the dropdown list of supplier-related roles. It includes Supplier Accounts Receivable Specialist, Supplier Bidder, Supplier Contract Administrator, Supplier Contract Manager, Supplier Contract Team Member, Supplier Contract User, Supplier Customer Service Representative, Supplier Demand Planner, and Supplier Inventory Manager.
- Scroll through the list and select the Supplier Qualification role, if it is available.
Part 4: Grant business unit data access
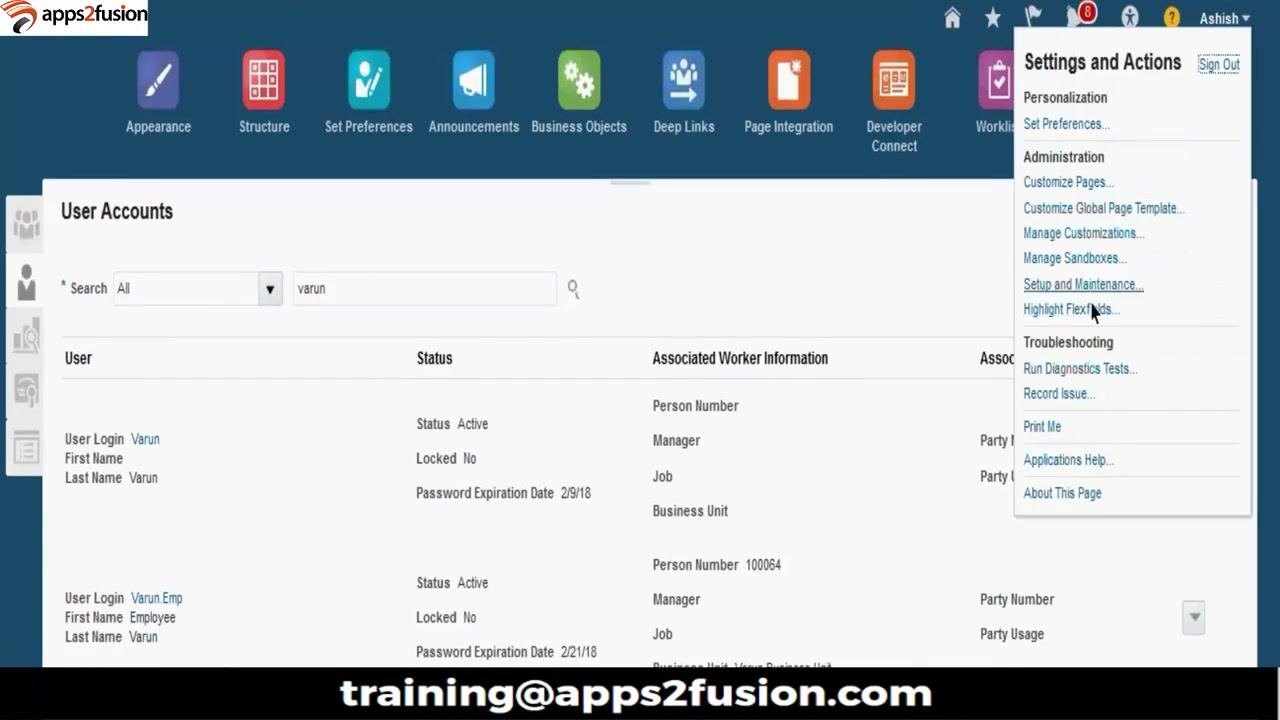
Step 22. Open Setup and Maintenance
- Click the user profile icon in the top right corner.
- In the Settings and Actions dropdown, select Setup and Maintenance.
Step 23. Search for the data access task
On the Setup and Maintenance screen, type "manage data" in the search bar at the top to find the relevant task.
Step 24. Open Manage Data Access for Users
- Select Manage Data Access for Users from the search results.
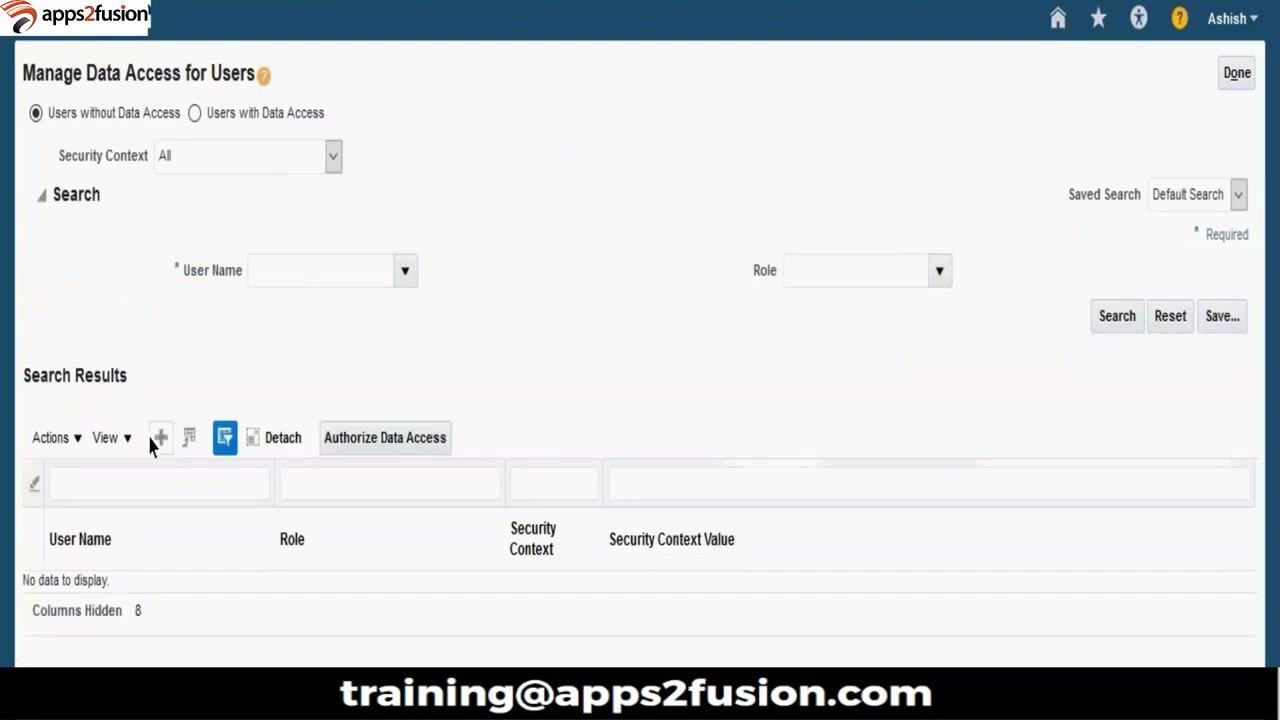
- Make sure Users without Data Access is selected.
The search section includes these fields:
- Security Context: All
- User Name: a dropdown to select the user
- Role: a dropdown to select the role
Step 25. Create data access for the user
Click the + (Add) button. In the Create Data Access for Users dialog, set the following values:
- User Name: Varun.Emp
- Role: Buyer
- Security Context: Business unit
- Security Context Value: Varun Business Unit
Repeat for other roles as needed, such as Category Manager, Employee, and the procurement roles.
Step 26. Fix a missing Security Context Value
If a row has no Security Context Value, the dialog shows the error "A value is required. You must enter a value." In the source example, this happens for the Procurement role. Every row must have a Security Context Value.
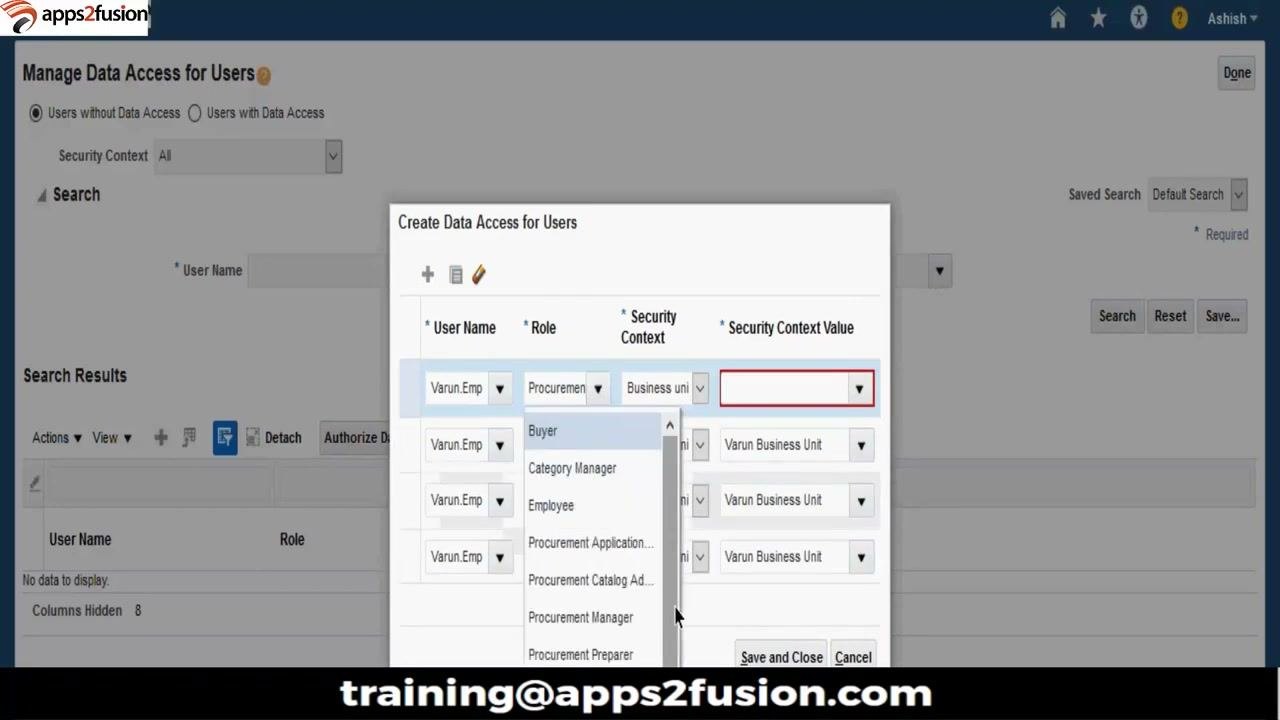
To resolve the error, click the dropdown under Security Context Value for the Procurement role. Select Varun Business Unit. Repeat this for any other roles that require a business unit context.
Step 27. Add more roles and save
- If needed, add more roles by selecting from the Role dropdown. Available roles include Buyer, Category Manager, Employee, Procurement Application Administrator, Procurement Catalog Administrator, Procurement Manager, Procurement Preparer, and Procurement Requester.
- For each role, set Security Context to "Business unit" and Security Context Value to "Varun Business Unit".
- Make sure every row is complete.
- Click Save and Close.
Part 5: Create the procurement agent
Step 28. Go to the Manage Procurement Agents task
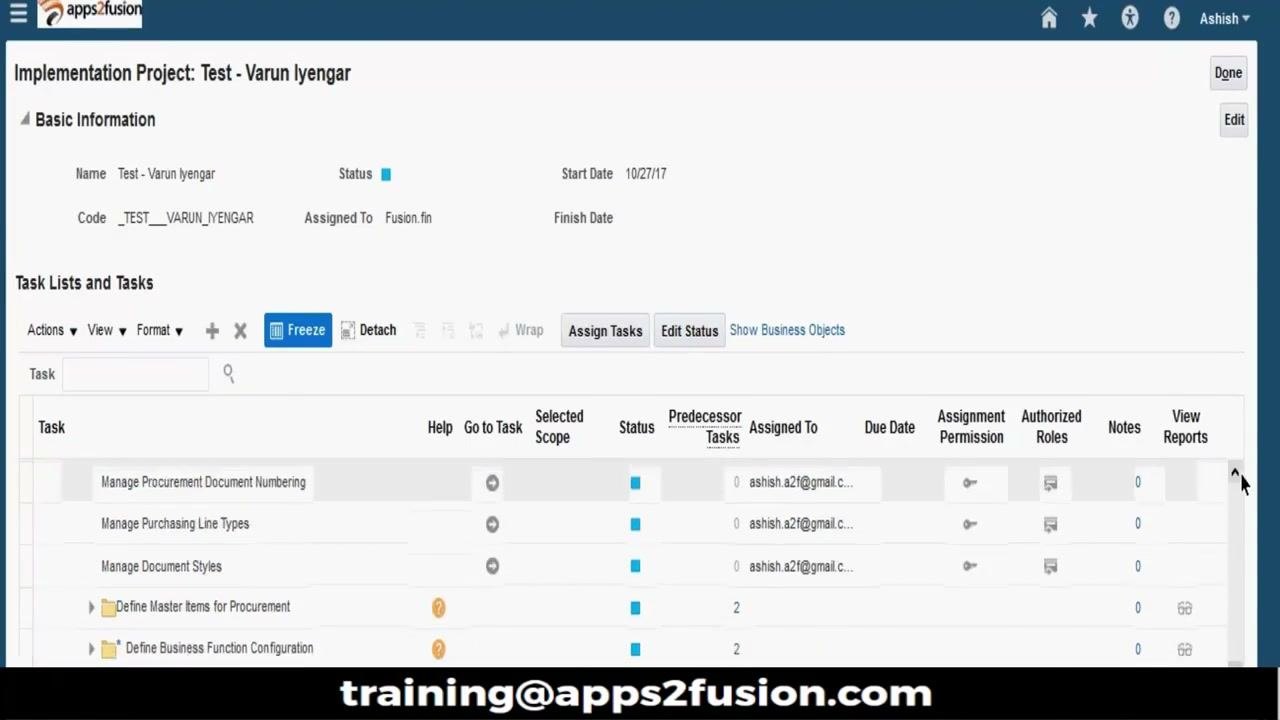
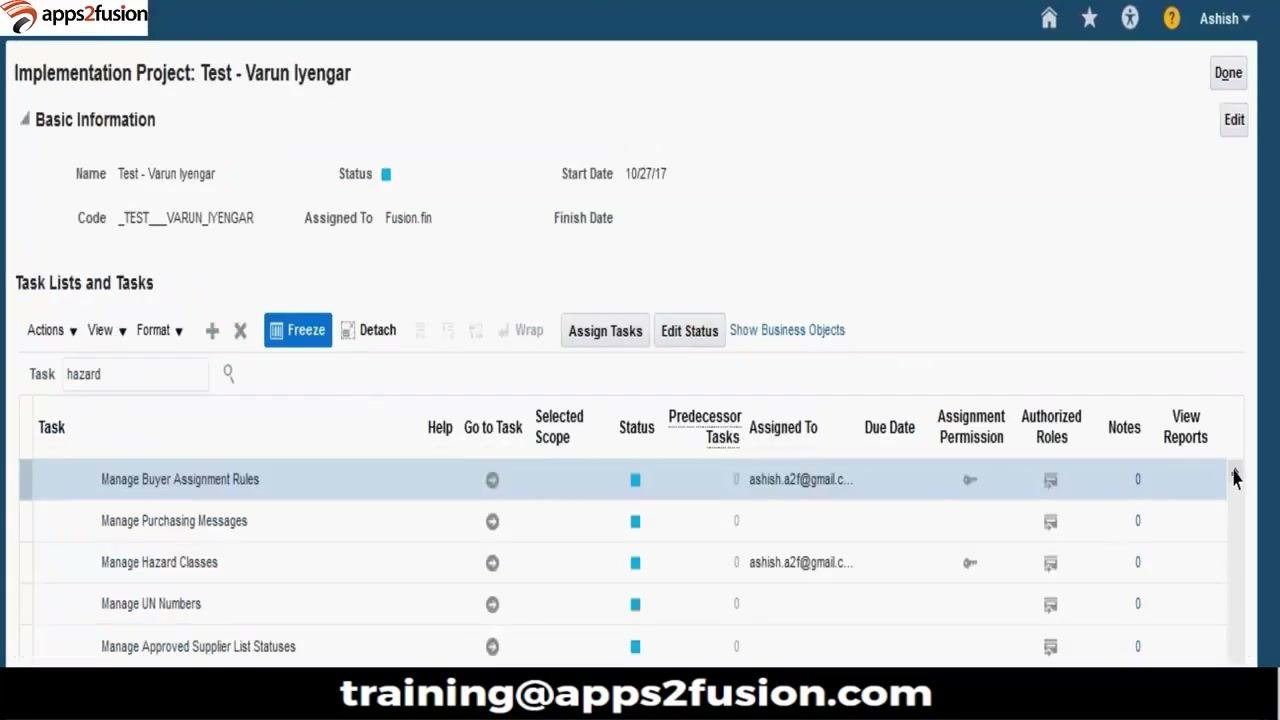
- Return to the main implementation project screen. It shows the project name ("Test - Varun Iyengar"), status, start date, assigned user, and a list of tasks.
- Use the search bar to filter tasks if needed (for example, by typing "hazard"), or scroll through the task list.
- Find the Manage Procurement Agents row.
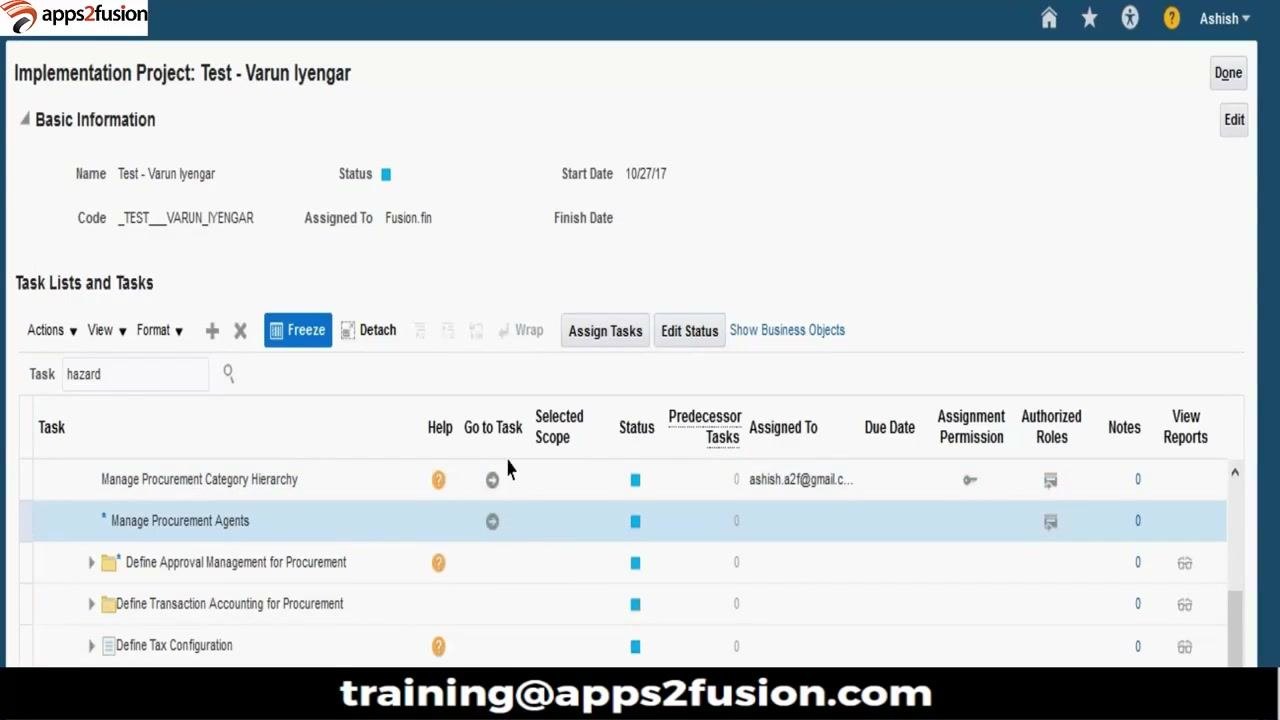
Nearby tasks include Manage Procurement Category Hierarchy and Define Approval Management for Procurement. Confirm you have the correct task, then click the Go to Task icon (a circle with an arrow) next to Manage Procurement Agents.
Step 29. Select the procurement business unit
On the Create Procurement Agent screen, click the dropdown next to Procurement BU. Choose the relevant business unit (for example, "A2F Business Unit" or "Varun Business Unit").
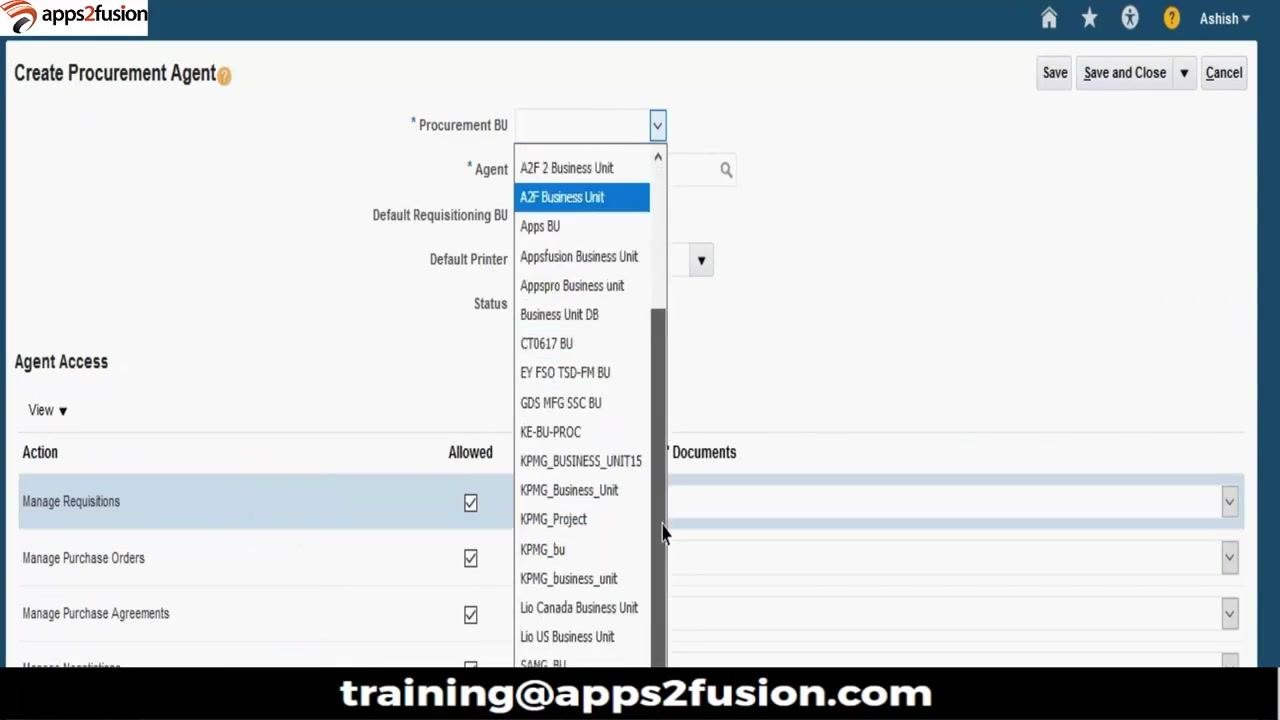
Step 30. Select the employee you created
In the Agent field, enter or search for the employee's name (for example, "Varun, Employee"). Use the search icon if you need help locating the user.
Step 31. Set the default requisitioning BU
Click the dropdown next to Default Requisitioning BU and select the appropriate business unit (for example, "Varun Business Unit").
Step 32. Set the status
Make sure the Status field is set to Active.
Step 33. Configure agent access
- Under Agent Access, review the list of actions and permissions.
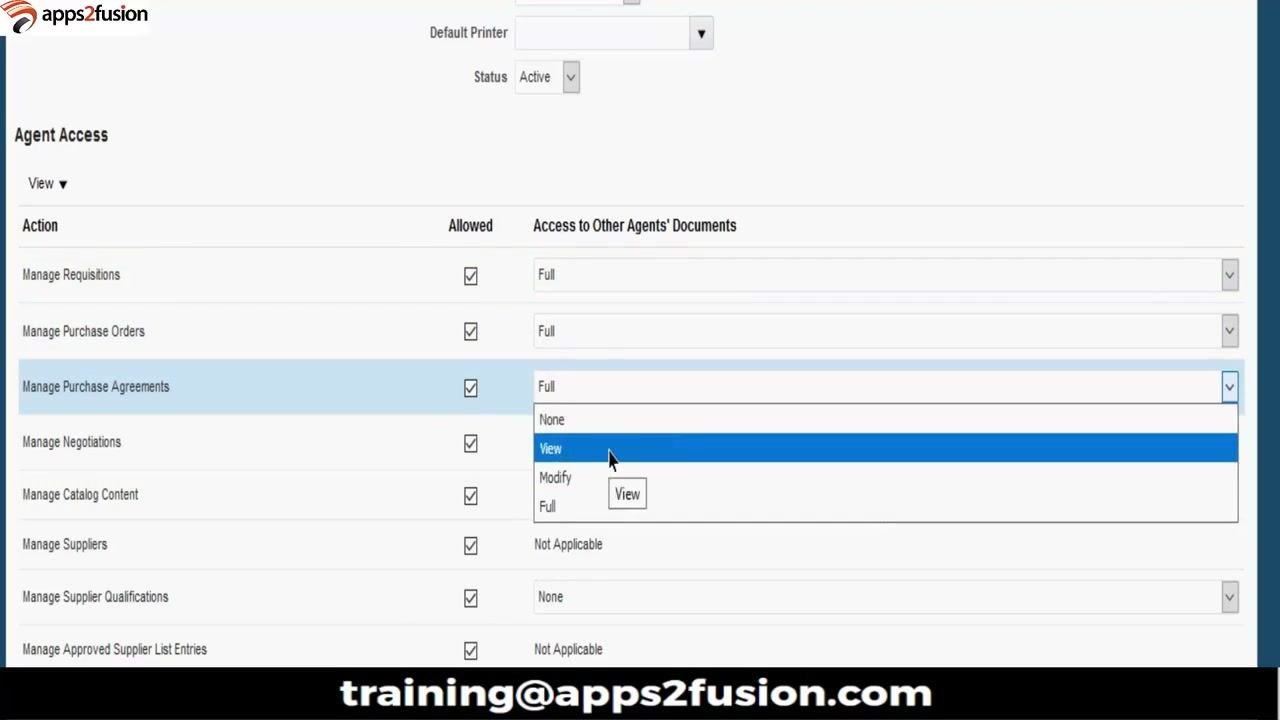
- For each action (such as Manage Requisitions, Manage Purchase Orders, and Manage Purchase Agreements), select the Allowed check box if the agent should have access.
- For each action, set Access to Other Agents' Documents as needed. For example, set Manage Requisitions and Manage Purchase Orders to "Full".
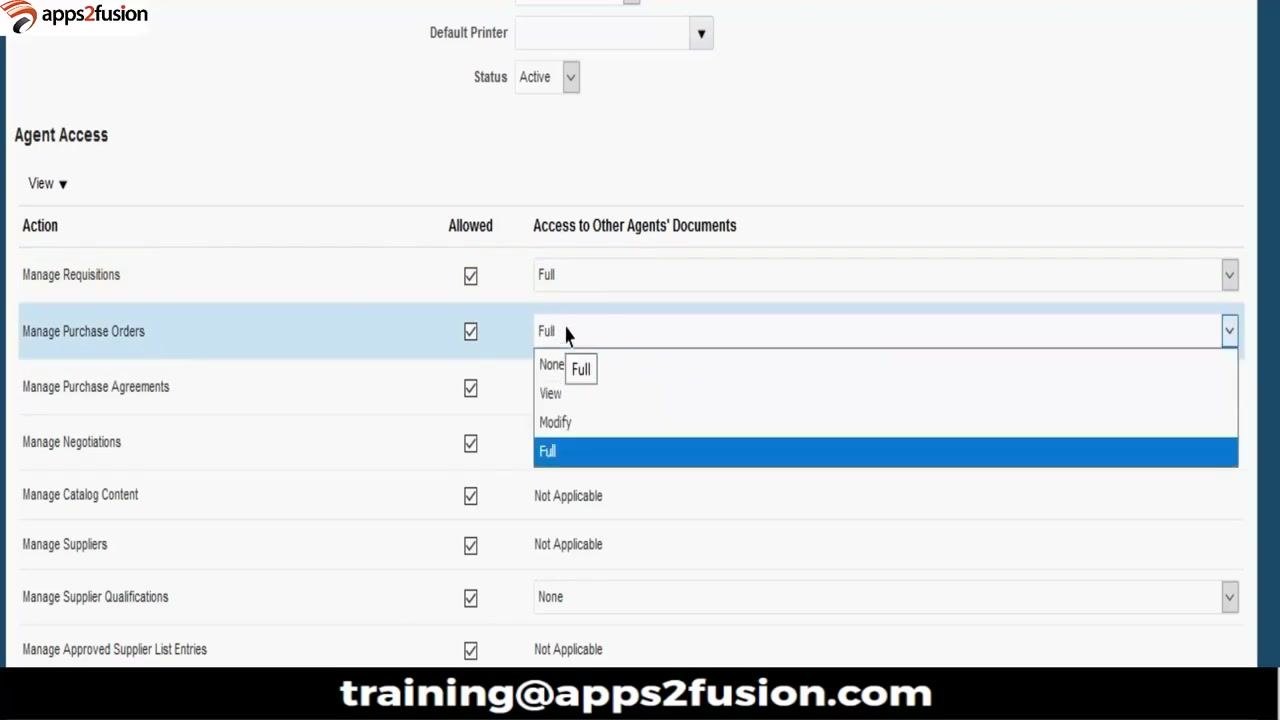
The access levels work as follows:
- None: The agent cannot access other agents' documents.
- View: The agent can only view other agents' documents.
- Modify: The agent can edit other agents' documents.
- Full: The agent can perform all actions, including approval and other management tasks.
The dropdown also offers Not Applicable.
Step 34. Check the permissions
Confirm that all required permissions and access levels match your organization's policy.
Step 35. Save the procurement agent
Click Save or Save and Close to finalize the procurement agent setup.
Summary
You now know how to create a procurement agent in Oracle Fusion. You created an employee record, which generated the user account, then reset the password and assigned employee, procurement, and supplier roles in the Security Console. You granted business unit data access and configured the agent's business unit assignments and document access levels. Repeat the procurement agent setup for each business unit where the agent needs access.
Generation details: cost, quality tiers
Docsie billed 6,000 credits ($4.20) to analyze this 12-minute video at standard quality. The rewrite, template fill and Word/PDF exports were included. The same video at each quality tier:
| Quality | Frames sampled | Credits | Approx. cost |
|---|---|---|---|
| Draft | every 16-30 s | 3,000 | $2.10 |
| Standard (this guide) | every 8-15 s | 6,000 | $4.20 |
| Detailed | every 4-7 s | 12,000 | $8.40 |
| Ultra | every 1-3 s | 24,000 | $16.80 |
Credits priced at $0.70 per 1,000; plans include a monthly allowance. Enterprise customers on on-premise or bring-your-own-model deployments run this on their own inference and pay no per-video credits.
Generated by Docsie Video-to-Docs on 2026-11-15 from a 11-minute video. Screenshots are frames from the source video and belong to their creator, apps2fusion, whose original is embedded above. If you own this video and want the guide removed or credited differently, contact us and we will act within one business day.