
How to Create a Payables Invoice in Oracle Fusion
This guide walks you through how to create a payables invoice in Oracle Fusion, from logging in to the application through entering invoice details, saving, and validating the invoice. Follow each step in order to ensure all required header, line, tax, and total information is captured correctly for your accounts payable workflow.
Video: Create AP Invoice in oracle fusion | How to create invoice in fusion | OIC tutorials by Fox Oracle Apps Solutions. All credit for the demonstration goes to the creator; watch the original on YouTube. The written guide below was generated from this video by Docsie. Creator? Request a change or removal.
This guide walks you through how to create a payables invoice in Oracle Fusion, from logging in to the application through entering invoice details, saving, and validating the invoice. Follow each step in order to ensure all required header, line, tax, and total information is captured correctly for your accounts payable workflow.
Prerequisites
- You must be logged into your Oracle Fusion instance.
- You need access to the Payables application and the Invoices work area.
- You should know the supplier, business unit, and distribution details required for your invoice before you begin.
Steps
Log in to Oracle Fusion Applications
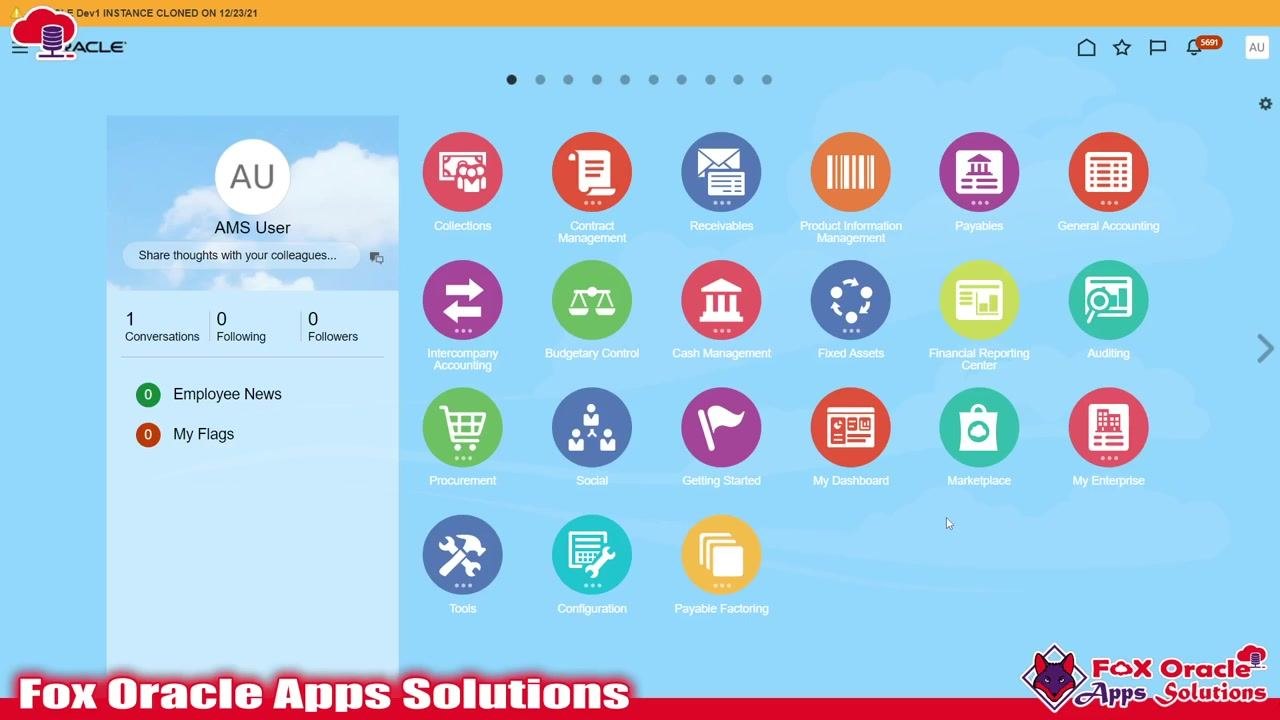
Make sure you are logged into your Oracle Fusion instance. The home screen displays application icons such as Collections, Contract Management, Receivables, Product Information Management, and Payables. Your user information and dashboard widgets appear on the left side of the screen.
Navigate to the Payables application
Locate the purple icon labeled Payables in the application menu and click it to open the Payables workspace.
Access the Invoices work area
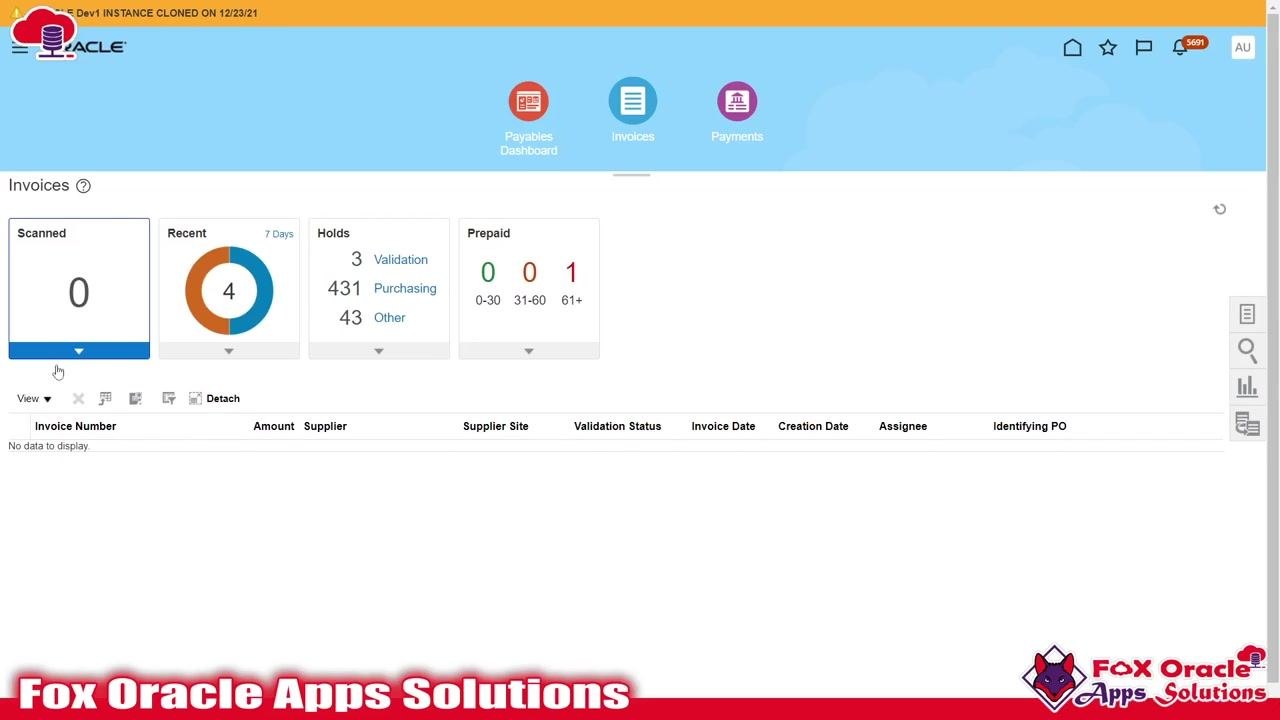
After clicking Payables, a submenu appears with options including Payables Dashboard, Invoices, and Payments. Click the Invoices icon to enter the Invoices work area.
Review the Invoices dashboard
The Invoices dashboard shows summary information, including scanned invoices, recent invoices from the last 7 days, holds (Validation, Purchasing, and Other), and prepaid amounts grouped by age. The lower section lists invoice details such as Invoice Number, Amount, Supplier, Supplier Site, Validation Status, Invoice Date, Creation Date, Assignee, and Identifying PO.
Open the Task menu and select Create Invoice
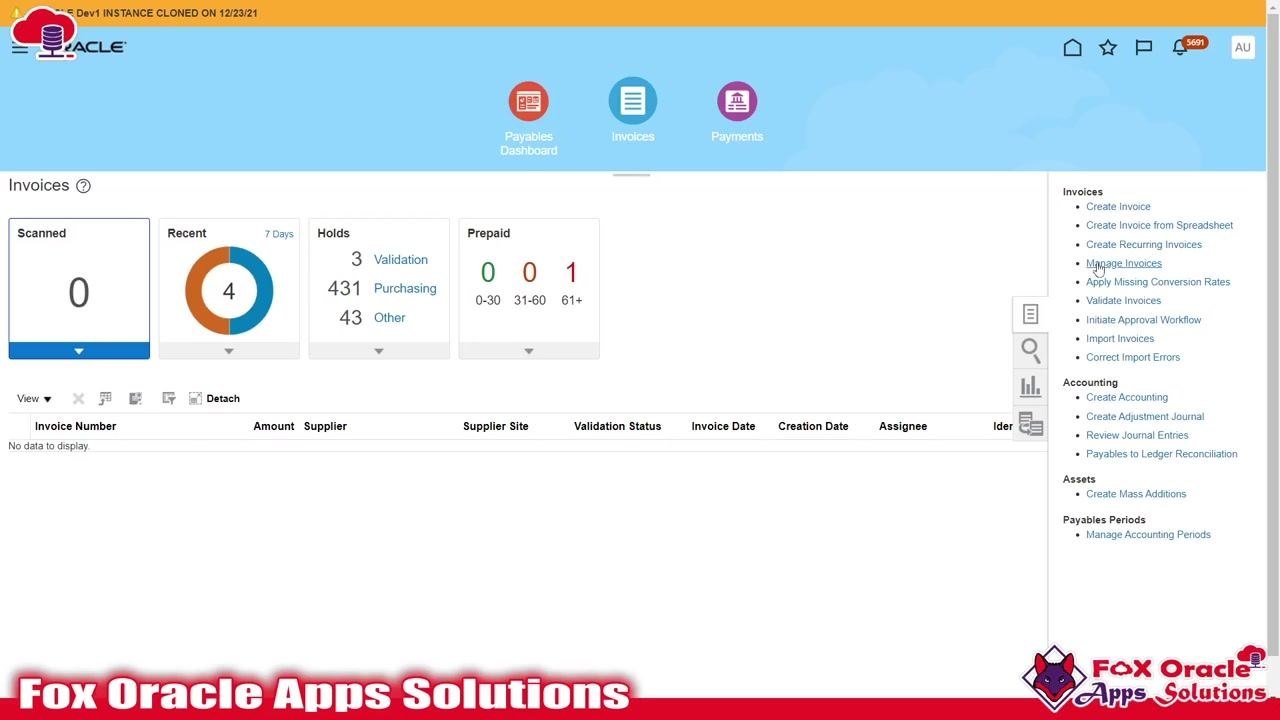
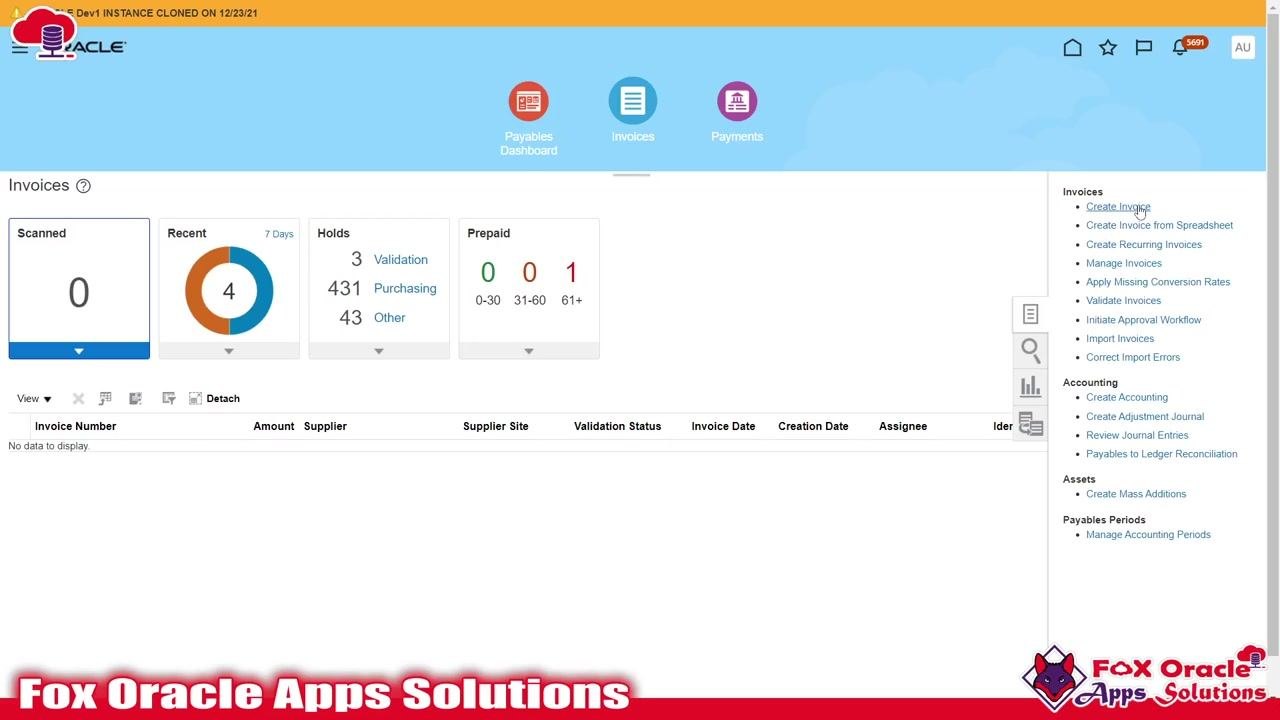
Click the Tasks icon, usually on the right side of the screen, to open the task pane. In the Invoices section, select Create Invoice to start a new invoice. Other available options include Create Invoice from Spreadsheet, Create Recurring Invoices, and Manage Invoices.
Enter invoice header details
The Create Invoice screen appears, divided into the Invoice Header, Lines, Taxes, and Totals sections. In the header, fill in required fields:
- Business Unit: Select from the dropdown, for example GlobalTranz Enterprises, LLC
- Supplier and Supplier Site: Enter or search for the correct values
- Legal Entity: Select the appropriate legal entity
- Number: Enter the invoice number
- Amount: Enter the invoice amount and select the currency, such as USD
- Type: Choose the invoice type, for example Standard
- Date: Enter the invoice date
- Payment Terms and Terms Date: Select and enter as required
- Requester, Attachments, Description: Optional fields you can complete if needed
Additional fields such as Identifying PO, Supplier Number, and Invoice Group can be filled in as needed.
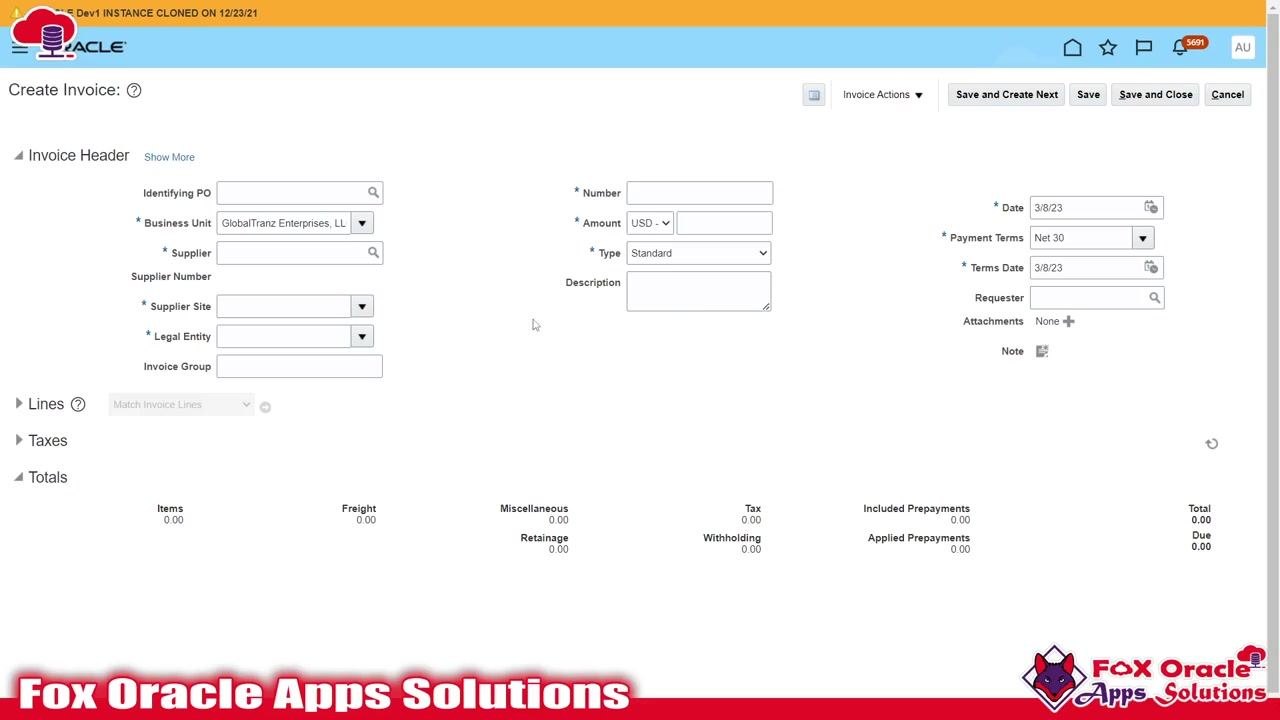
Review line, tax, and total sections
Expand the Lines section to add invoice line items, and expand the Taxes section to review or enter tax details. Expand the Totals section to review calculated totals, including Items, Freight, Miscellaneous, Tax, Included Prepayments, Applied Prepayments, Retainage, Withholding, and Total Due. These sections may already be pre-configured based on your business unit or user settings.
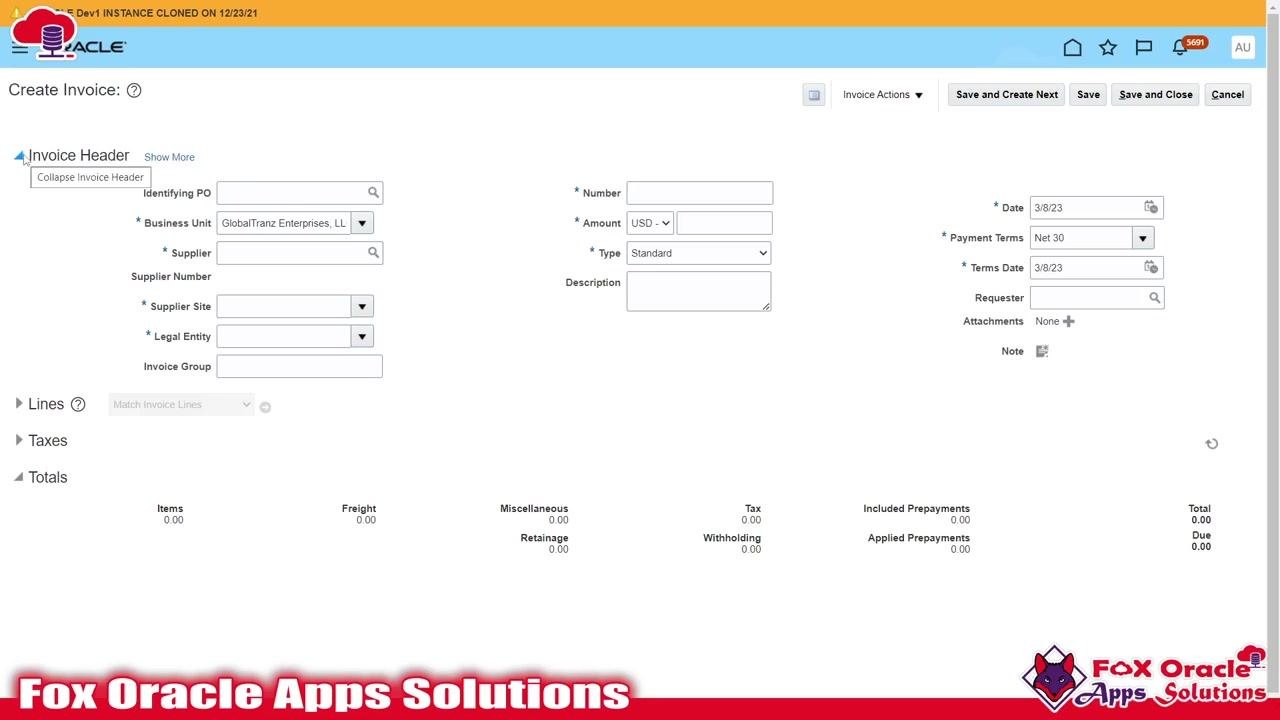
Enter invoice header information
In the Invoice Header section, enter the following details. If your invoice does not require taxation, you can skip the Taxes tab for now.
- Number: XX INV Test 001
- Amount: 5,000.00, with currency set to USD
- Type: Standard
- Business Unit: GlobalTranz Enterprises, LLC
- Supplier: 1A LLC
- Supplier Number: Auto-populates as BZ147
- Supplier Site: HUMBLE
- Legal Entity: GlobalTranz Enterprises, LLC
- Date: 3/8/23
- Payment Terms: Net 30
- Terms Date: 3/8/23
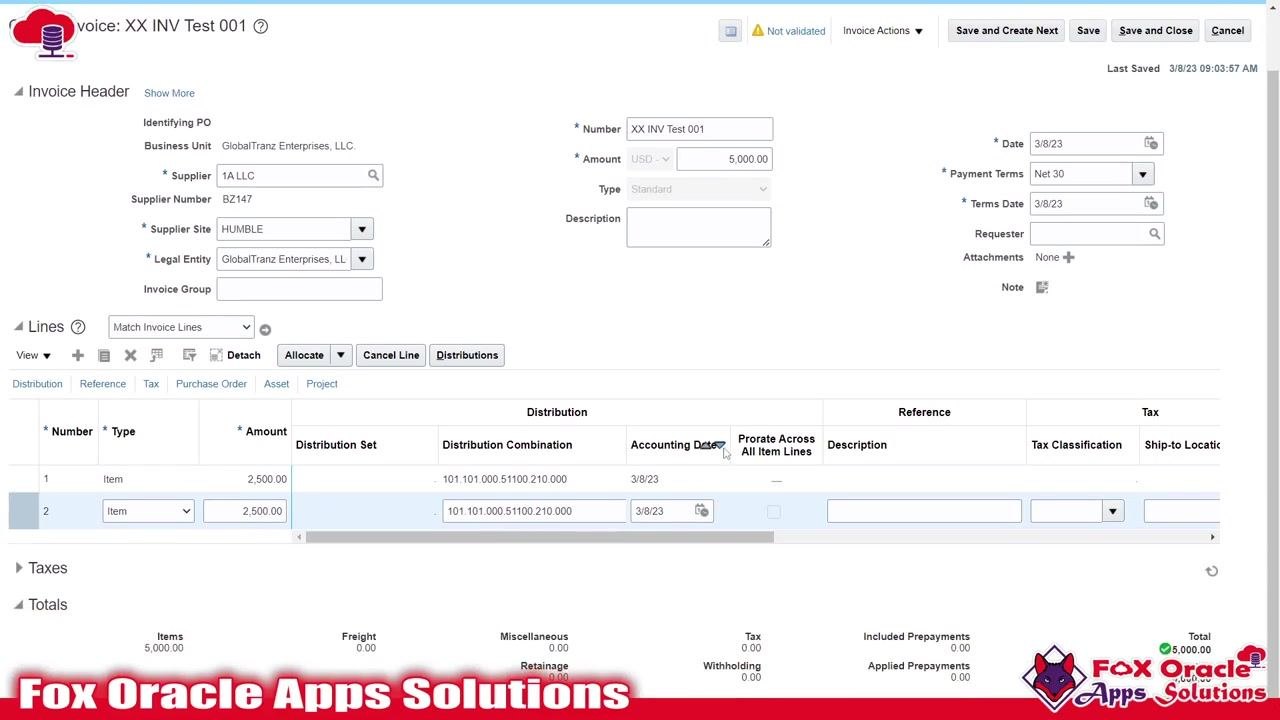
Leave optional fields such as Requester, Attachments, Description, and Invoice Group blank unless your organization requires them. The Total and Due fields at the bottom right update automatically as you enter the amount.
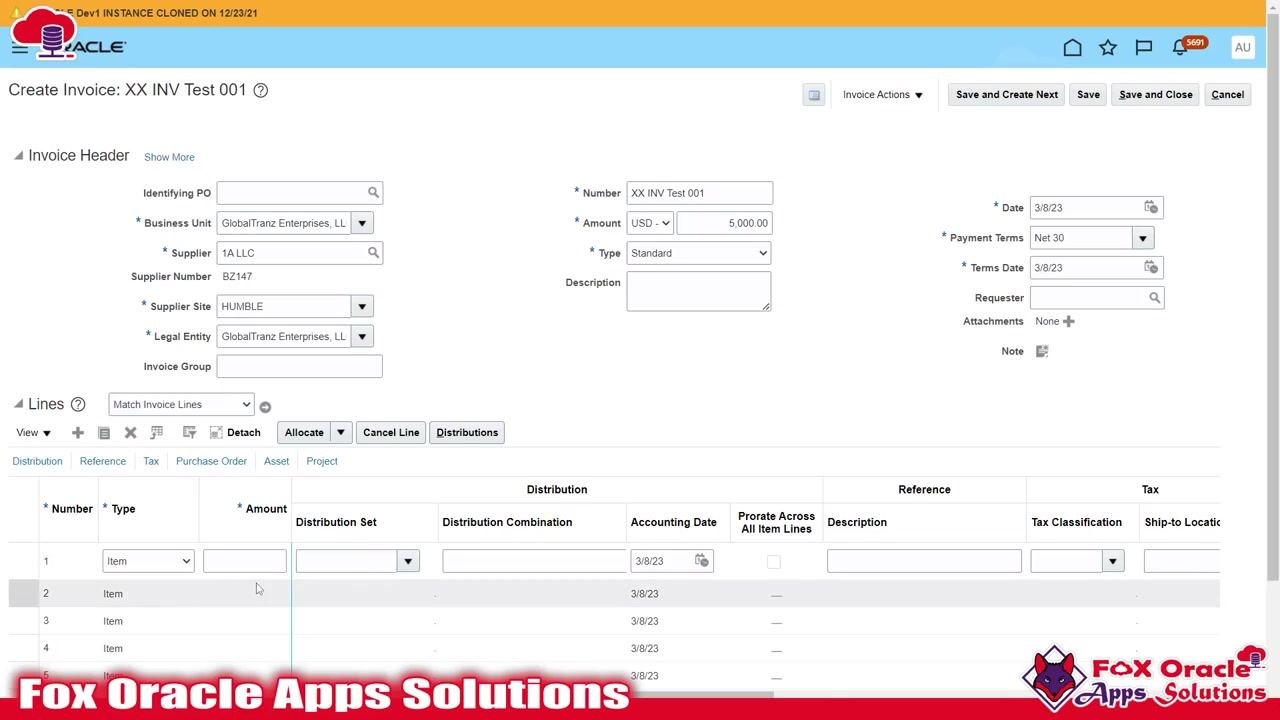
Expand the Lines section
Click the arrow next to the Lines section to expand it. This opens the invoice lines entry area, where you specify the details for each item or service being invoiced.
Enter the first invoice line
Create two invoice lines to match the total invoice amount of 5,000.00 USD. For the first line:
- Type: Item
- Amount: 2,500.00
- Distribution Set or Distribution Combination: Enter the value appropriate to your organization's configuration
- Accounting Date: 3/8/23
You can leave fields such as Reference, Description, Tax Classification, and Ship-to Location blank unless required.
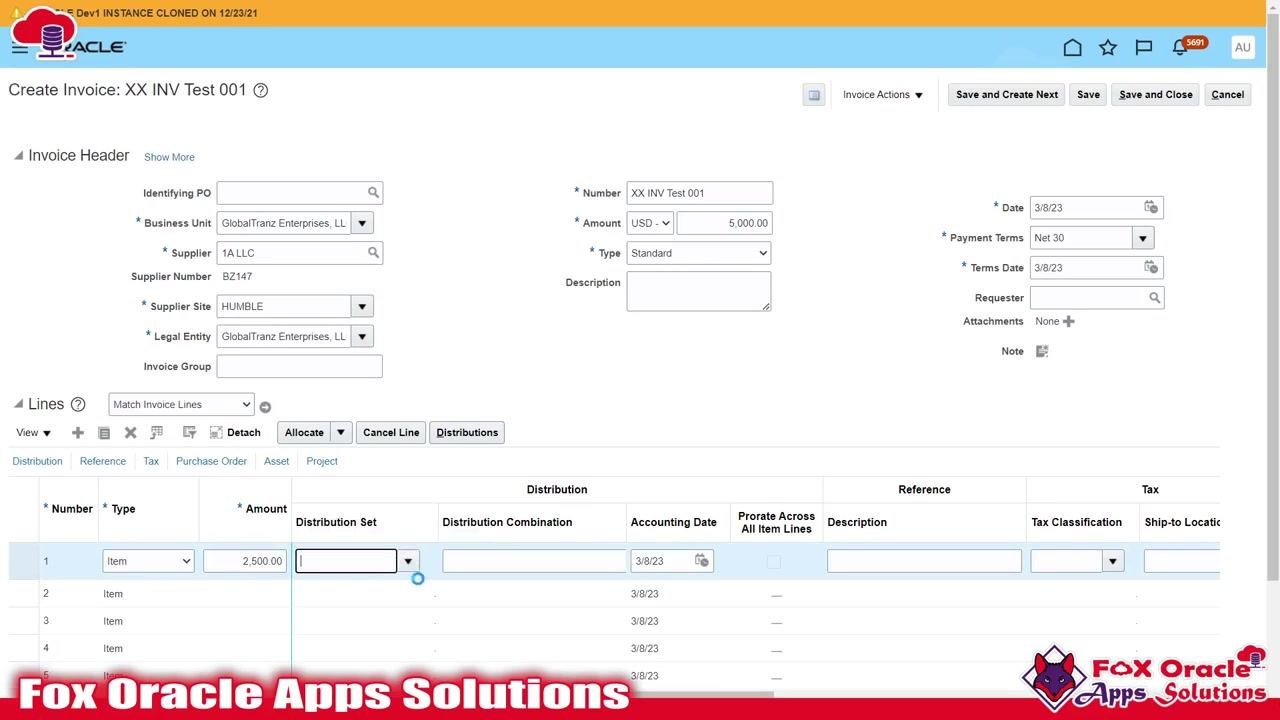
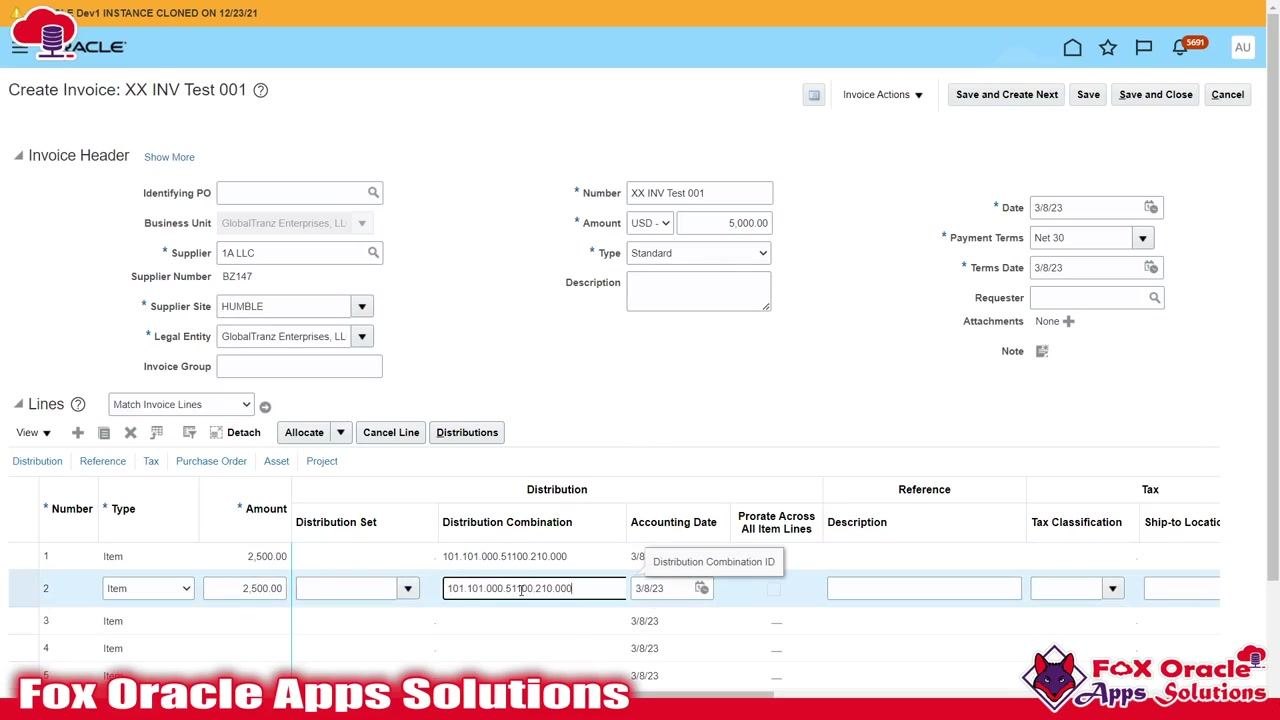
Complete the second invoice line
Leave the remaining default details unchanged, then enter the following for the second line:
- Type: Item
- Amount: 2,500.00
- Distribution Combination: 101.101.000.51100.210.000, matching the first line
- Accounting Date: 3/8/23
Confirm that both lines together total 5,000.00 USD.
Save the invoice
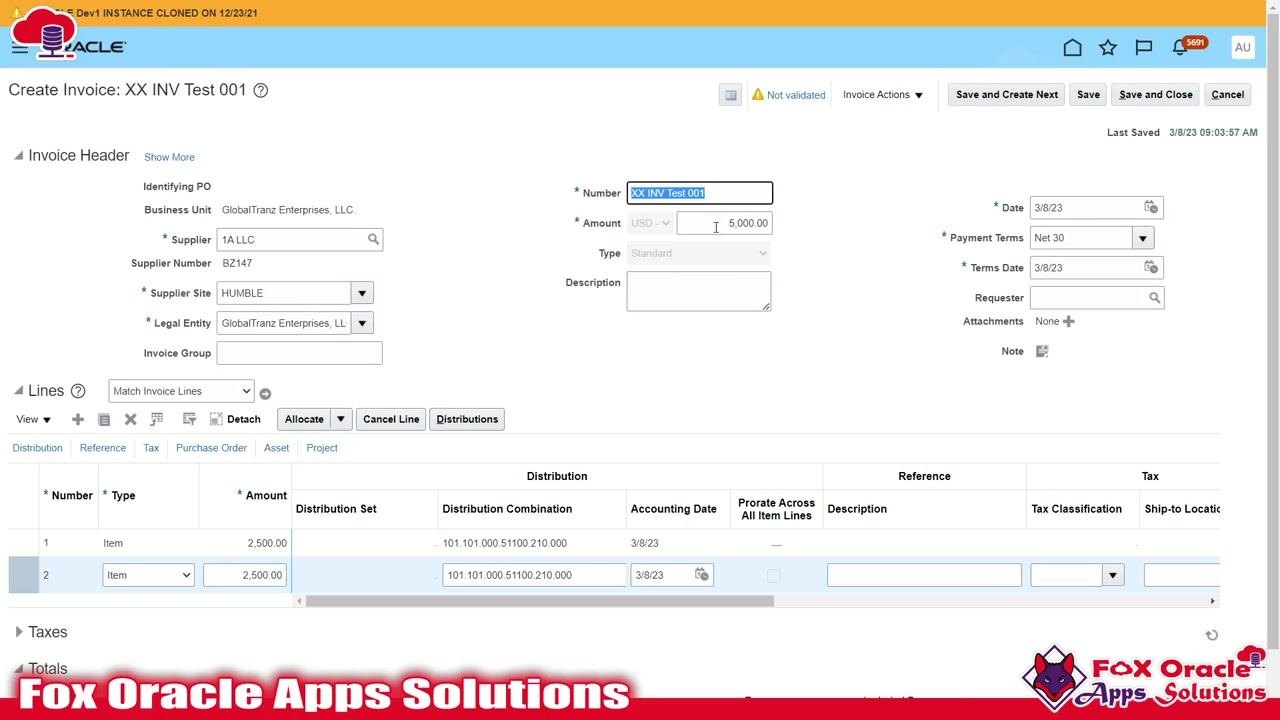
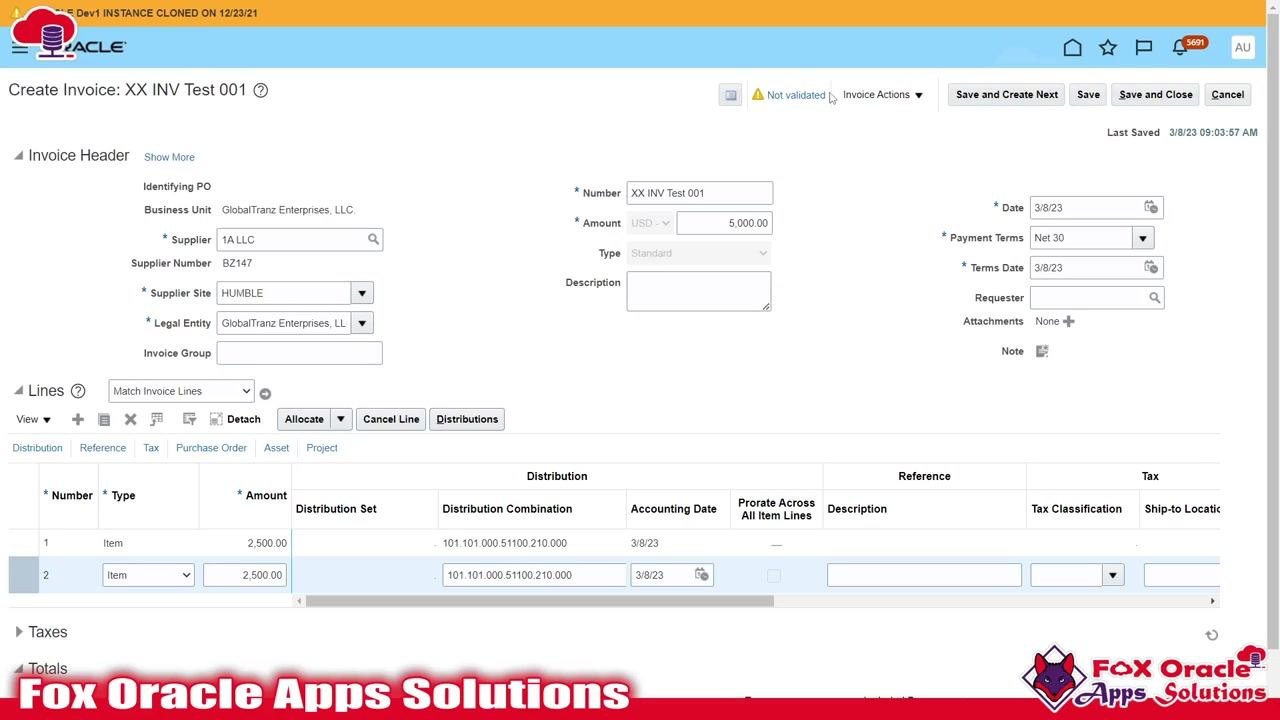
Click Save at the top right of the screen. The invoice is created with the number XX INV Test 001, but its status shows as Not validated.
Copy the invoice number and close
Copy the invoice number XX INV Test 001 for reference, then click Save and Close to exit the invoice creation screen.
Search for the created invoice
Navigate to the Manage Invoices screen, enter the invoice number XX INV Test 001 in the Invoice Number field, and click Search.
Review invoice search results
Confirm that the invoice appears in the search results and that its status shows as Not validated.
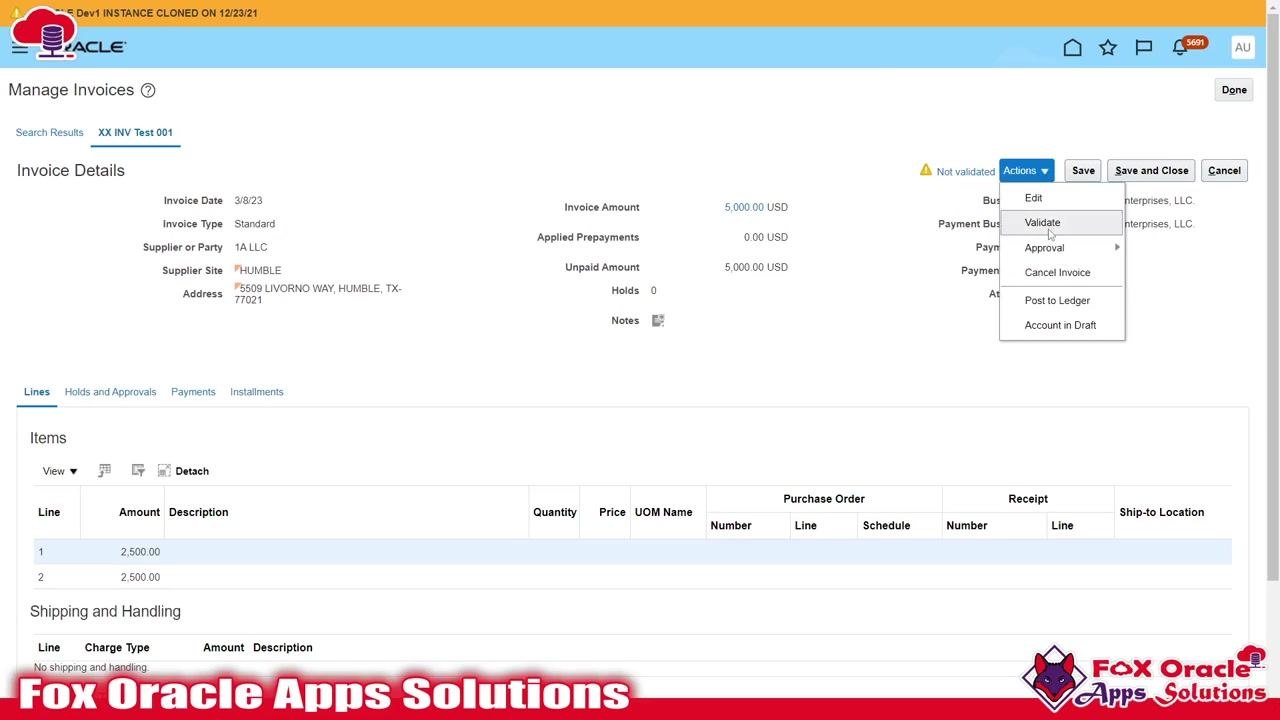
Open the invoice and validate
Click the invoice number XX INV Test 001 in the search results to open its details. In the invoice details screen, click the Actions dropdown, then select Validate.
Confirm invoice validation
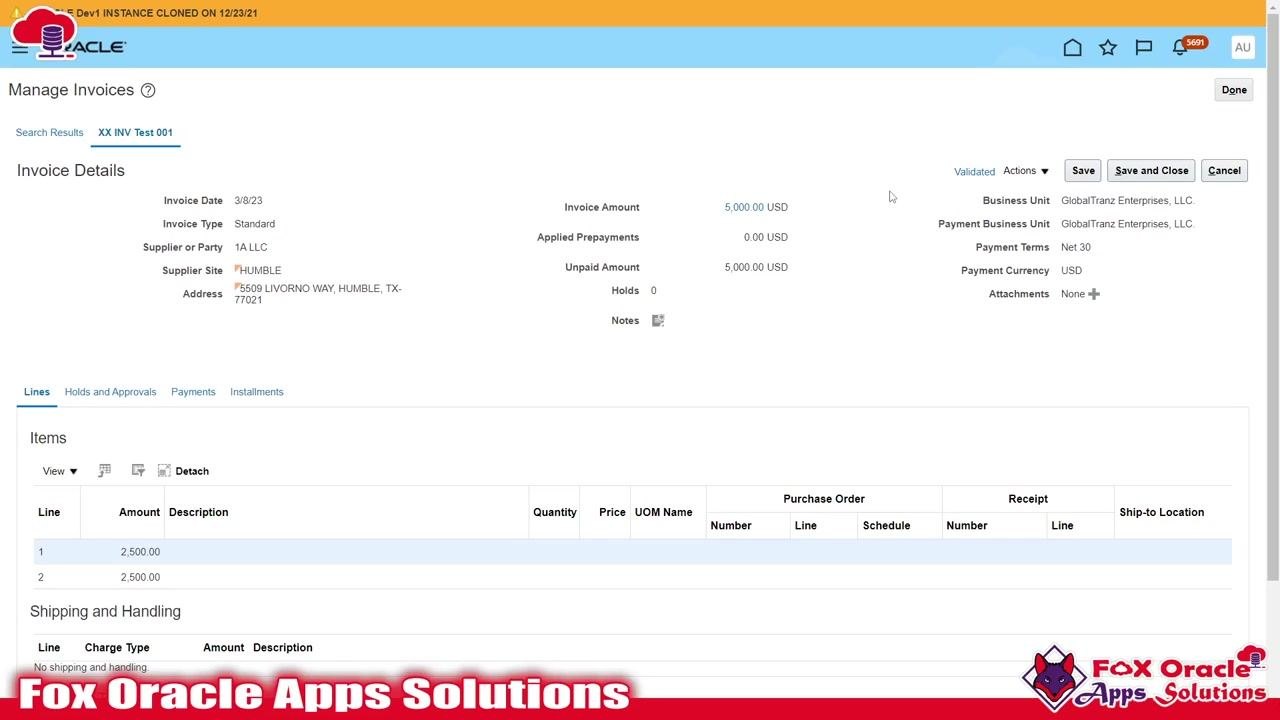
After validation, verify that the invoice status changes from Not validated to Validated. The invoice is now ready for further processing in Oracle Fusion.
Review the final invoice details
On the Invoice Details screen, confirm the following information:
- Invoice Number: XX INV Test 001
- Invoice Date: 3/8/23
- Invoice Amount: 5,000.00 USD
- Supplier or Party: 1A LLC
- Supplier Site: HUMBLE
- Address: 5509 LIVORNO WAY, HUMBLE, TX-77021
- Business Unit: GlobalTranz Enterprises, LLC
- Payment Terms: Net 30
- Payment Currency: USD
- Status: Validated
- Line Items: Two lines, each with an amount of 2,500.00 USD
Confirm there are no holds or applied prepayments on the invoice.
Return to the Manage Invoices screen
Click Done to exit the invoice details view. On the Manage Invoices screen, confirm the invoice appears in the search results with:
- Invoice Number: XX INV Test 001
- Invoice Date: 3/8/23
- Supplier or Party: 1A LLC
- Supplier Site: HUMBLE
- Unpaid Amount: 5,000.00 USD
- Invoice Amount: 5,000.00 USD
- Invoice Type: Standard
- Status: Validated
Summary
You have now completed the full process of how to create a payables invoice in Oracle Fusion: entering header, line, tax, and total details, saving the invoice, searching for it in Manage Invoices, and validating it so it is ready for the next step in your accounts payable workflow.
Generation details: cost, quality tiers
Docsie billed 3,000 credits ($2.10) to analyze this 6-minute video at standard quality. The rewrite, template fill and Word/PDF exports were included. The same video at each quality tier:
| Quality | Frames sampled | Credits | Approx. cost |
|---|---|---|---|
| Draft | every 16-30 s | 1,500 | $1.05 |
| Standard (this guide) | every 8-15 s | 3,000 | $2.10 |
| Detailed | every 4-7 s | 6,000 | $4.20 |
| Ultra | every 1-3 s | 12,000 | $8.40 |
Credits priced at $0.70 per 1,000; plans include a monthly allowance. Enterprise customers on on-premise or bring-your-own-model deployments run this on their own inference and pay no per-video credits.
Generated by Docsie Video-to-Docs on 2026-10-01 from a 5-minute video. Screenshots are frames from the source video and belong to their creator, Fox Oracle Apps Solutions, whose original is embedded above. If you own this video and want the guide removed or credited differently, contact us and we will act within one business day.