
How to Create a Business Unit in Oracle Fusion
This guide walks you through how to create a business unit in Oracle Fusion, from setting up a supporting location to assigning business functions. You will create a location, use it to configure a new business unit, assign a default reference data set, and enable the business functions that the unit will support.
Video: Fusion Cloud:- How to Create Business Unit by Oracle Ebiz and Fusion Videos (2021). All credit for the demonstration goes to the creator; watch the original on YouTube. The written guide below was generated from this video by Docsie. Creator? Request a change or removal.
This guide walks you through how to create a business unit in Oracle Fusion, from setting up a supporting location to assigning business functions. You will create a location, use it to configure a new business unit, assign a default reference data set, and enable the business functions that the unit will support.
Prerequisites
- Access to Oracle Fusion Applications with permissions to use Setup and Maintenance.
- An existing Implementation Project if you plan to assign business unit business functions (this task cannot be reached through global search alone).
- Knowledge of the address or ZIP code for the location you want to associate with the business unit.
Understanding business units in Oracle Fusion
A business unit in Oracle Fusion is the equivalent of an operating unit in Oracle E-Business Suite (EBS). It can represent a division, department, or any specific business area within your organization.
There are no strict rules for defining a business unit — you should configure it according to your organization's business requirements.
Part 1: Create a location
Before creating a business unit, you need a location to associate with it.
Step 1: Open Setup and Maintenance
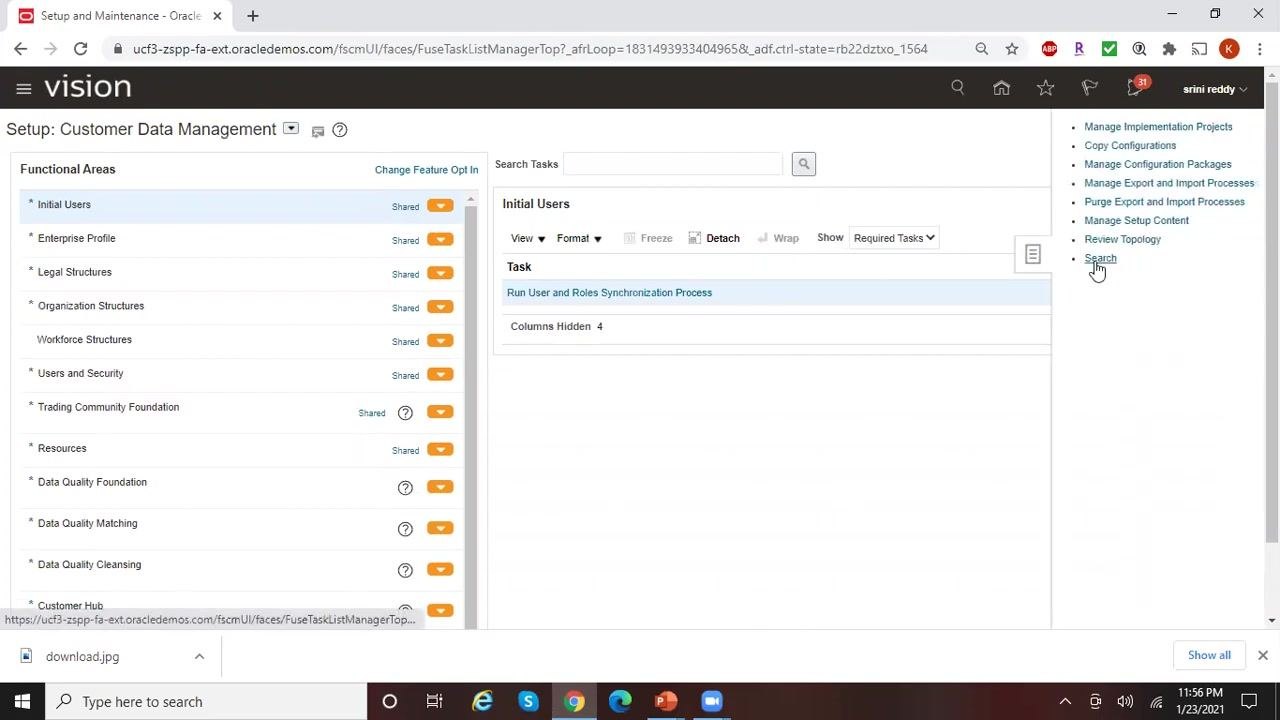
Log in to Oracle Fusion Applications. From the home screen, open the Settings and Actions menu in the top right, then select Setup and Maintenance under Administration.
Step 2: Search for the Manage Locations task
In the Setup and Maintenance area, locate the Search Tasks field and enter Manage Locations. Press Enter or click the search icon, then select Manage Locations from the list of results.
Step 3: Open the Manage Locations screen
On the Manage Locations screen, click Create to add a new location.
Step 4: Enter the location name and code
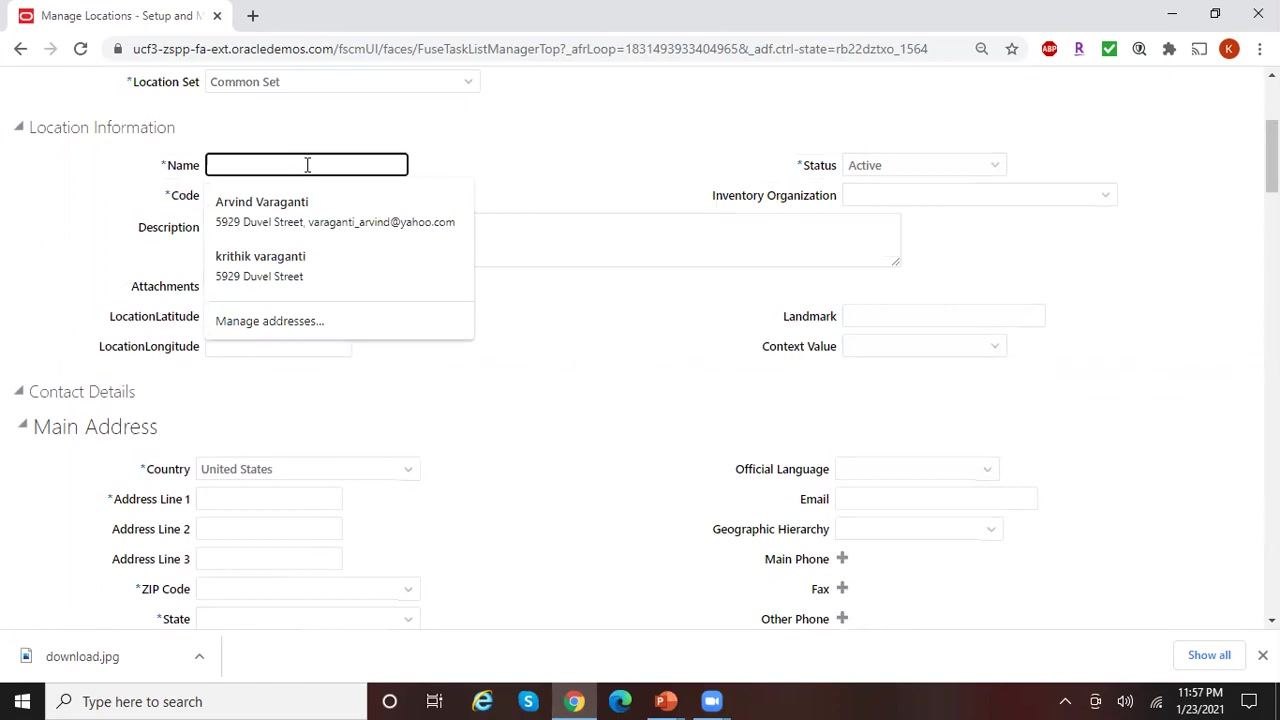
In the Manage Locations form, enter the following values:
- Name:
Irving_Texas - Code:
Irving_Texas - Leave Description blank unless additional details are required.
- Set Status to
Active. - Confirm Location Set is
Common Set. - Leave Inventory Organization, Attachments, LocationLatitude, and LocationLongitude blank unless needed.
- Under Main Address, confirm Country is set to
United States.
Step 5: Use the ZIP code to auto-populate address details
If you do not have the complete address, enter the ZIP code to automatically fill in the city, state, and county. Enter 75014 in the ZIP Code field — State (TX), City (Irving), and County (Dallas) populate automatically. Leave Tax District and Time Zone Code blank unless required.
Step 6: Enter the street address (optional)
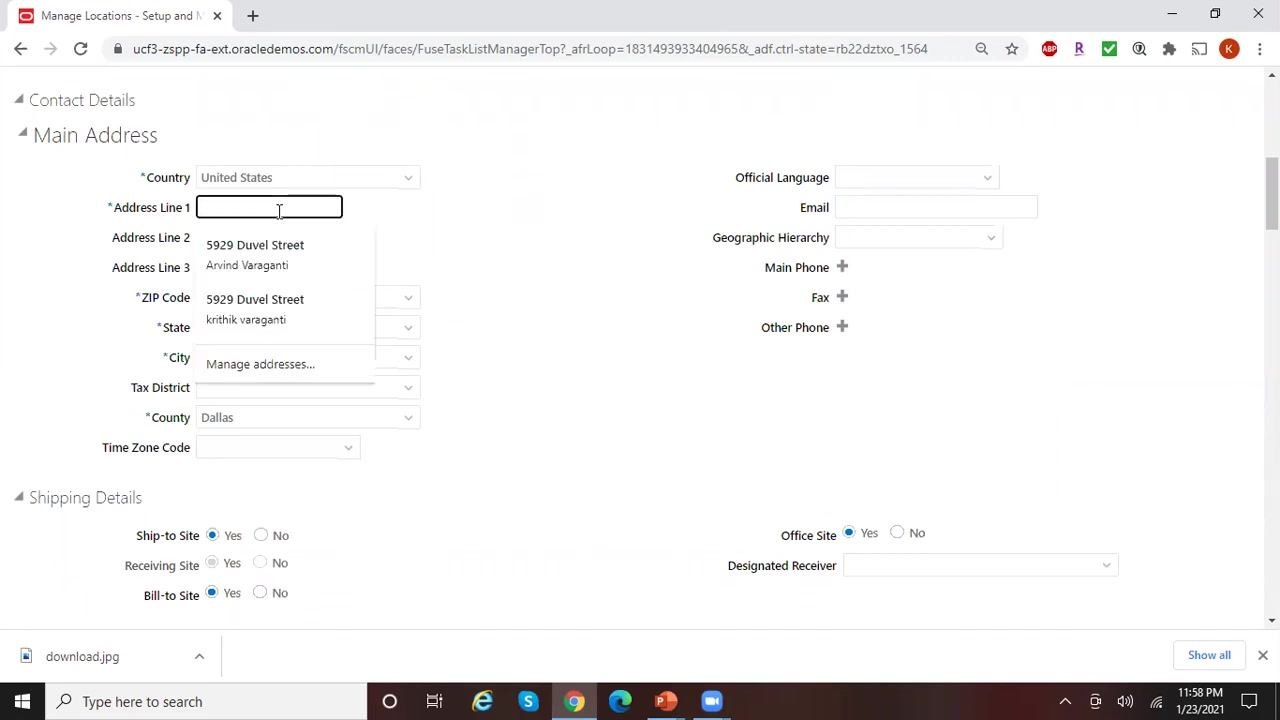
If you have the street address, enter it in Address Line 1. If not, leave it blank or select from the available suggestions if one matches your intended address.
Step 7: Review the shipping details
In the Shipping Details section, leave the default options as is unless your business requires changes:
- Ship-to Site: Yes
- Receiving Site: Yes
- Bill-to Site: Yes
- Office Site: Yes
Leave Designated Receiver blank unless specified.
Step 8: Save the location
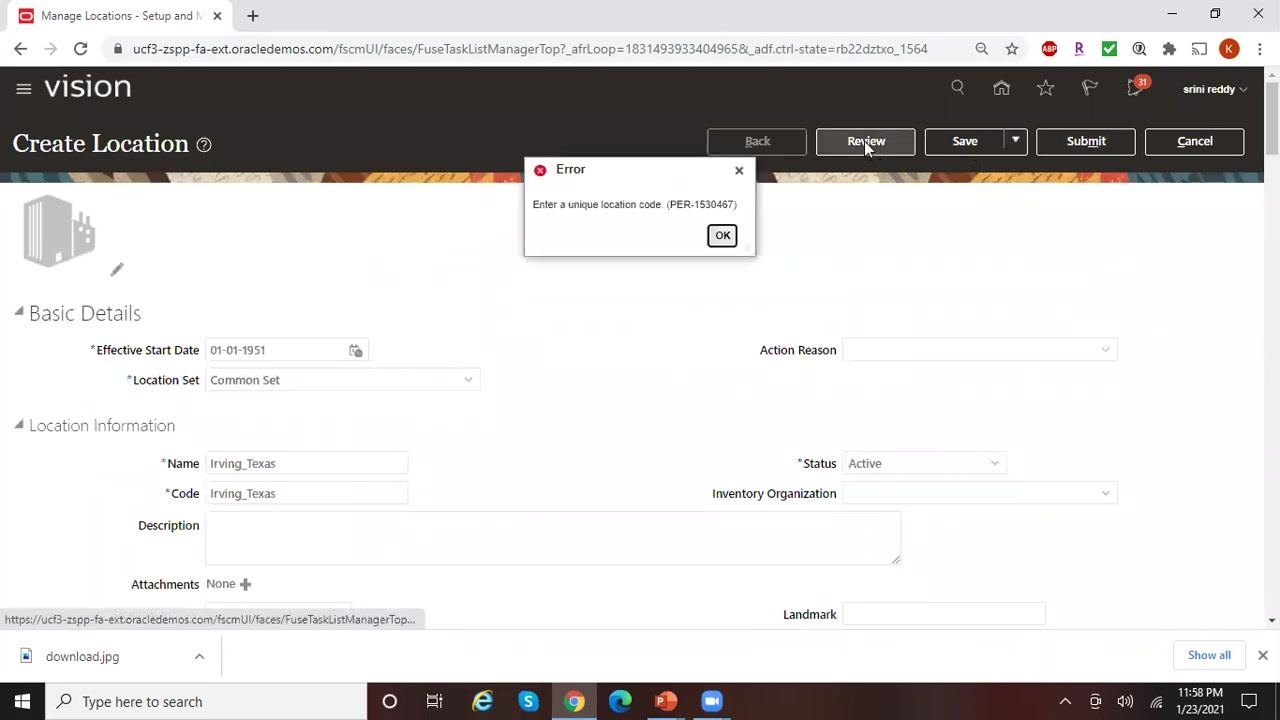
Click Save. If you see an error stating "Enter a unique location code (PER-1530467)," the code you entered is already in use.
Step 9: Correct the code and resave
Change the Name to Irving1_Texas and ensure the Code is also unique (for example, Irving1_Texas). Click Save again.
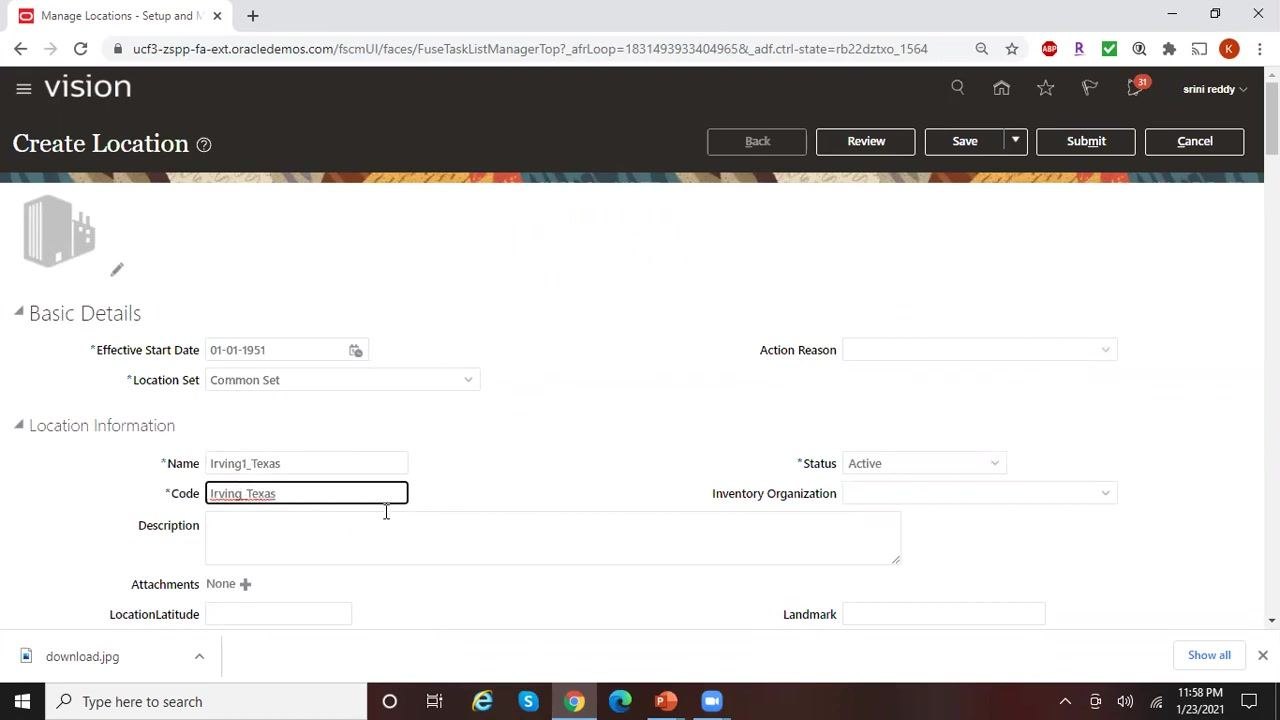
Step 10: Review and submit the location
Click Review to check your entered details on the Create Location: Review screen. Verify the Name, Code, Status (Active), Location Set (Common Set), and other fields. Click Submit to finalize the creation of the location — a background job runs to process the new entry.
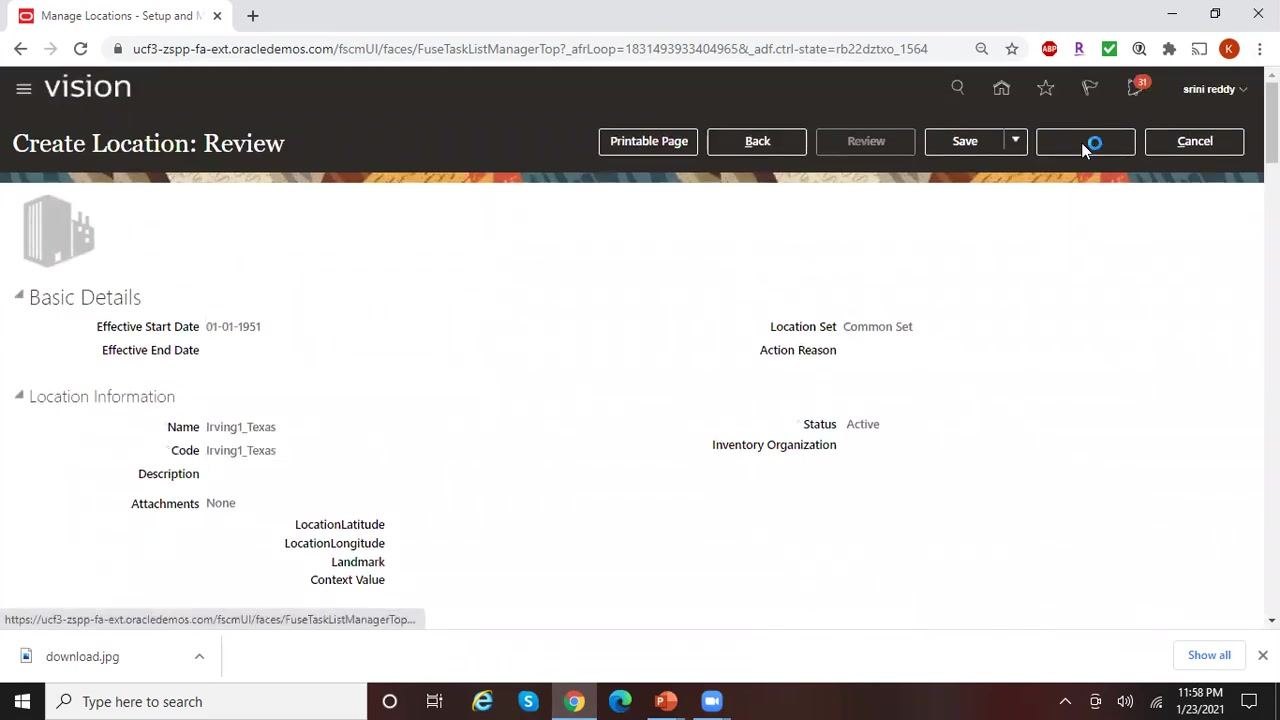
Step 11: Exit the location setup
Click Done to exit the location creation process and return to the Manage Locations screen.
Part 2: Create the business unit
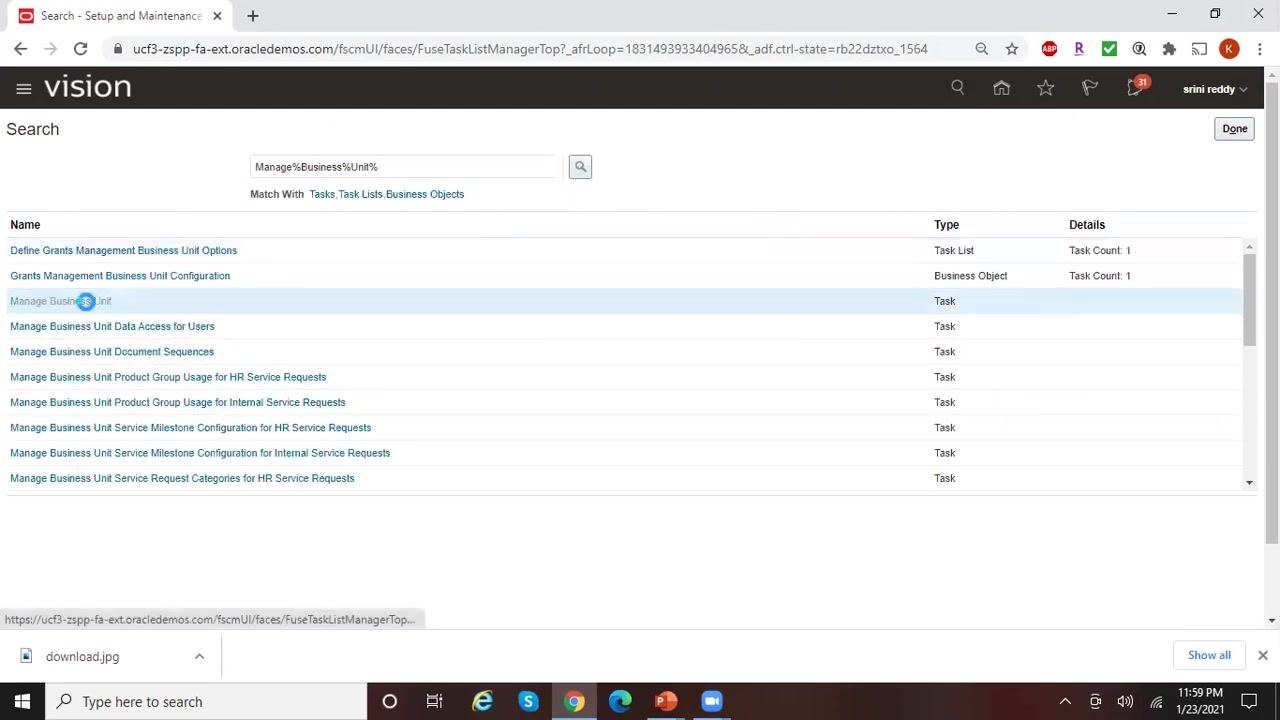
Step 12: Search for the Manage Business Unit task
In Setup and Maintenance, type Manage% in the search bar to display all tasks starting with "Manage." Select Manage Business Unit from the list to proceed.
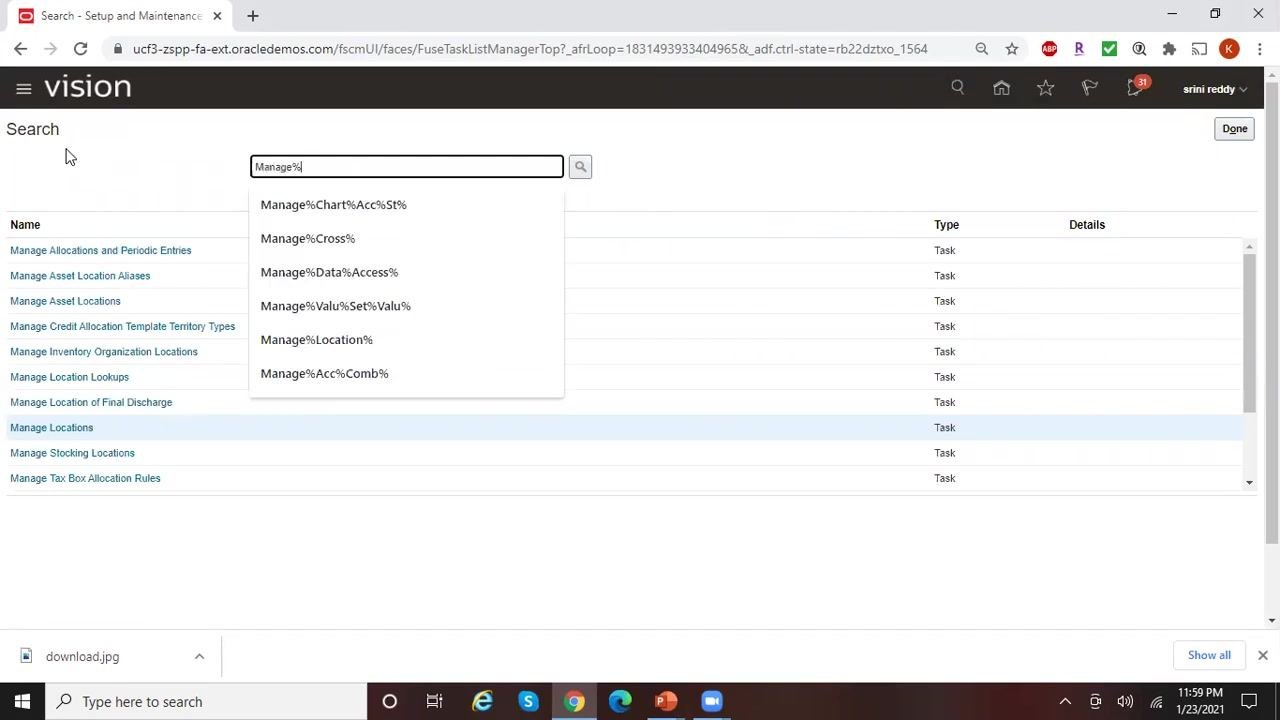
Step 13: Start a new business unit
Click the plus (+) button to open the Create Business Unit form.
Step 14: Enter the business unit name and manager
In the Create Business Unit form, enter Reliance Telecomm in the Name field. The Manager field is optional — select a manager from the dropdown suggestions (for example, "Arvind Varaganti" or "krithik varaganti") or leave it blank. Ensure the Active checkbox is selected.
Step 15: Assign a location to the business unit
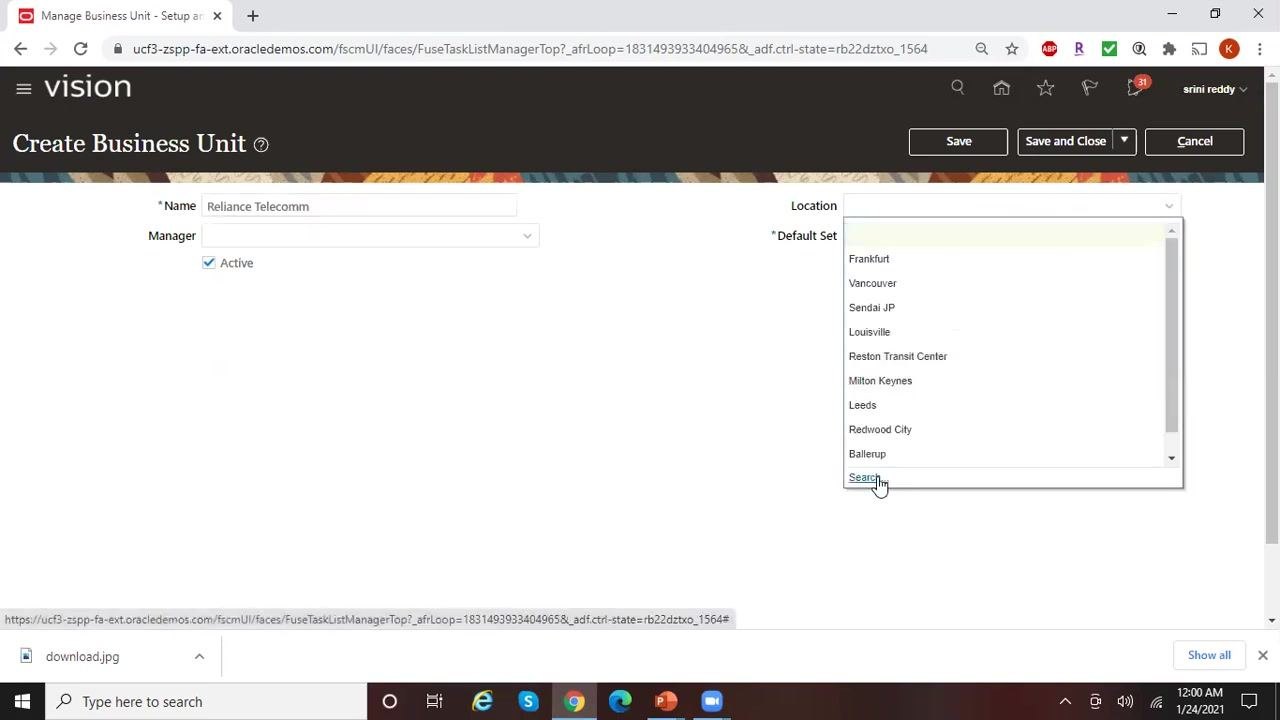
Click the Location dropdown. If the location is not immediately visible, click Search at the bottom of the dropdown. In the Search and Select: Location dialog, enter the location name you created earlier (for example, Irving1_Texas) in the Name field, set Status to Active, and click Search. Select the correct location from the results and click OK. Confirm the Location field now displays Irving1_Texas.
Step 16: Choose a Default Set
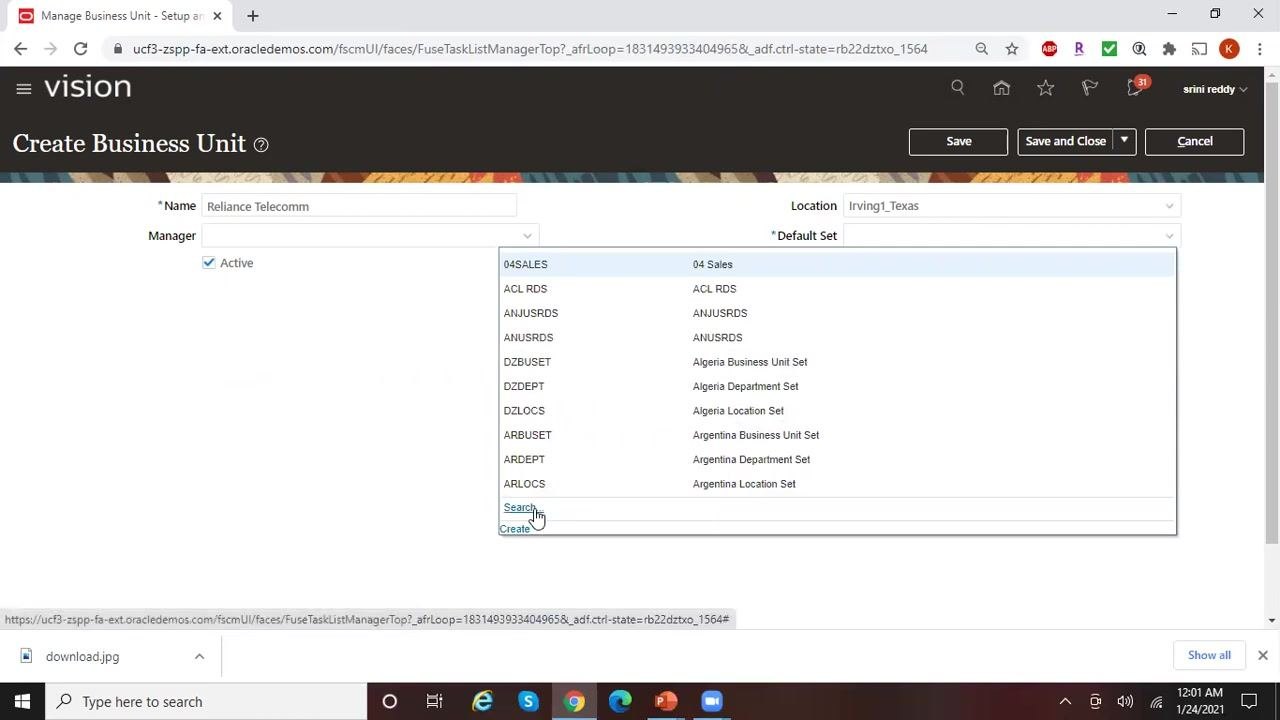
Click the dropdown for the Default Set field. A list of available reference data sets appears, including options such as:
- 04SALES (04 Sales)
- ACL RDS (ACL RDS)
- ANUSRDS (ANUSRDS)
- DZBUSET (Algeria Business Unit Set)
- ARBUSET (Argentina Business Unit Set)
At the bottom of the dropdown, you can select Search to find more sets or Create to define a new one.
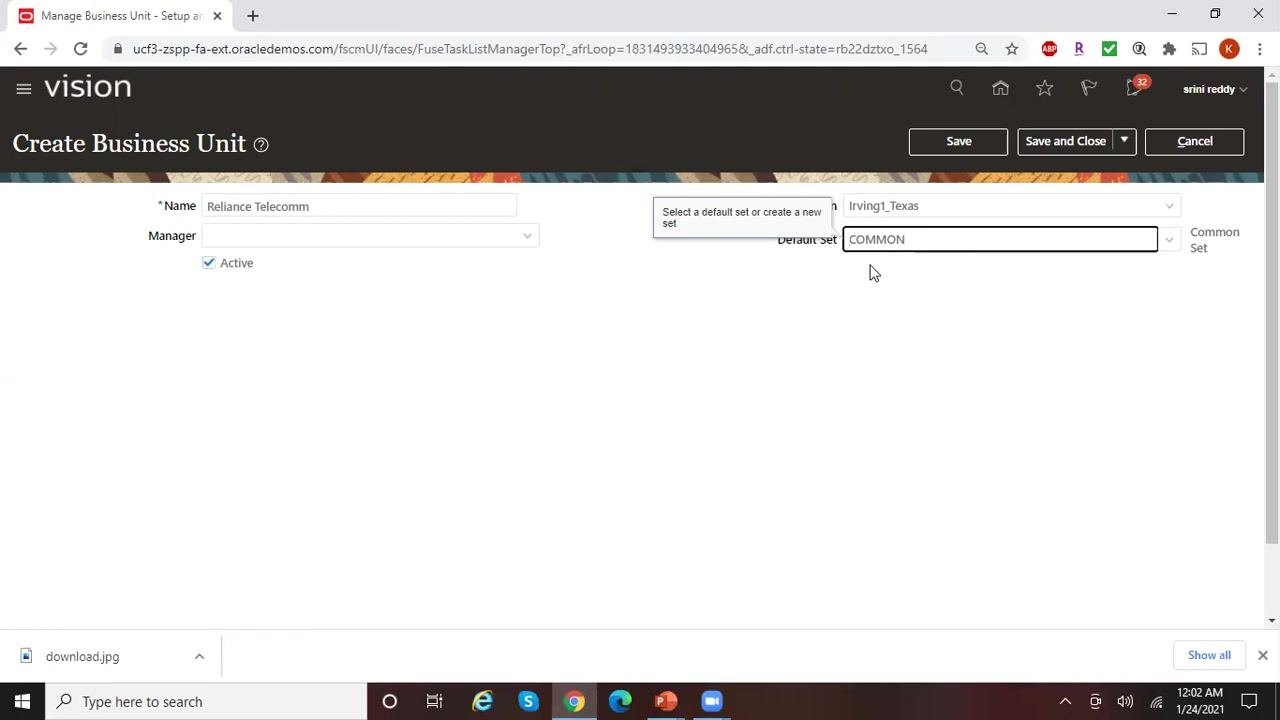
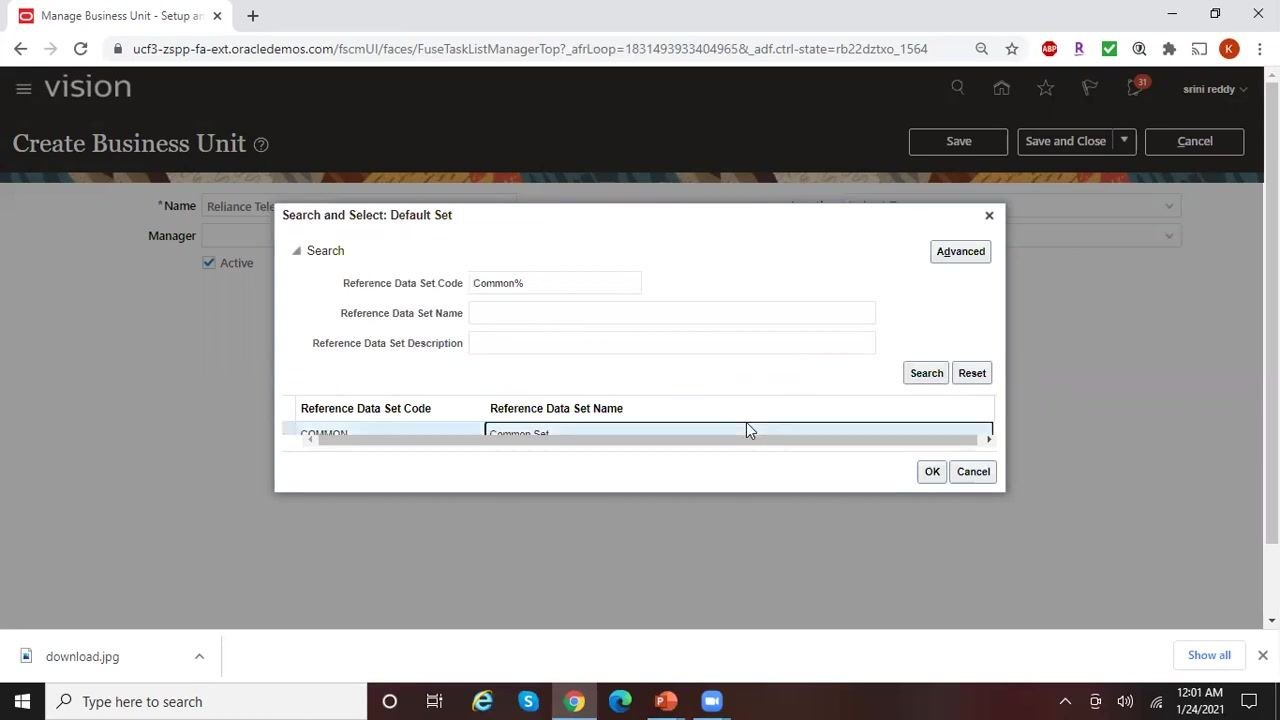
To find a specific set, click Search, then in the Search and Select: Default Set dialog enter a Reference Data Set Code such as Common% and click Search. Select the desired set (for example, Reference Data Set Code: COMMON, Reference Data Set Name: Common Set) and click OK. The Default Set field now displays COMMON.
Step 17: Understand the role of the Default Set
The Default Set determines which reference data — such as payment terms and locations — is available to this business unit. If a specific configuration (for example, a 30-day payment term) is not included in the assigned Default Set, it will not be available for use in this business unit. The same Default Set can be assigned to multiple business units, allowing shared reference data across them.
Step 18: Review your entries
Before saving, confirm all required fields are filled in:
- Name: Reliance Telecomm
- Location: Irving1_Texas
- Default Set: COMMON
- Active: Checked
Step 19: Resolve a duplicate name error
When you attempt to save, if the business unit name is already in use, an error dialog appears: "An object of type Business Unit with the name Reliance Telecomm already exists. Enter a unique name." Click OK to close the dialog.
Update the Name field to a unique value, such as Reliance Telecomm 1, and confirm that Location (Irving1_Texas), Default Set (COMMON), and Active remain correctly set.
Step 20: Save the business unit
Click Save to keep the form open for further edits, or Save and Close to save your changes and return to the previous screen.
Note: Certain reference data sets, such as the Default Set, are not specific to an Operating Unit and may be shared across multiple business units.
Part 3: Assign business unit business functions
Business functions must be assigned through an implementation project rather than through global search, since direct access to this task can result in scope or ID errors.
Step 21: Open your implementation project
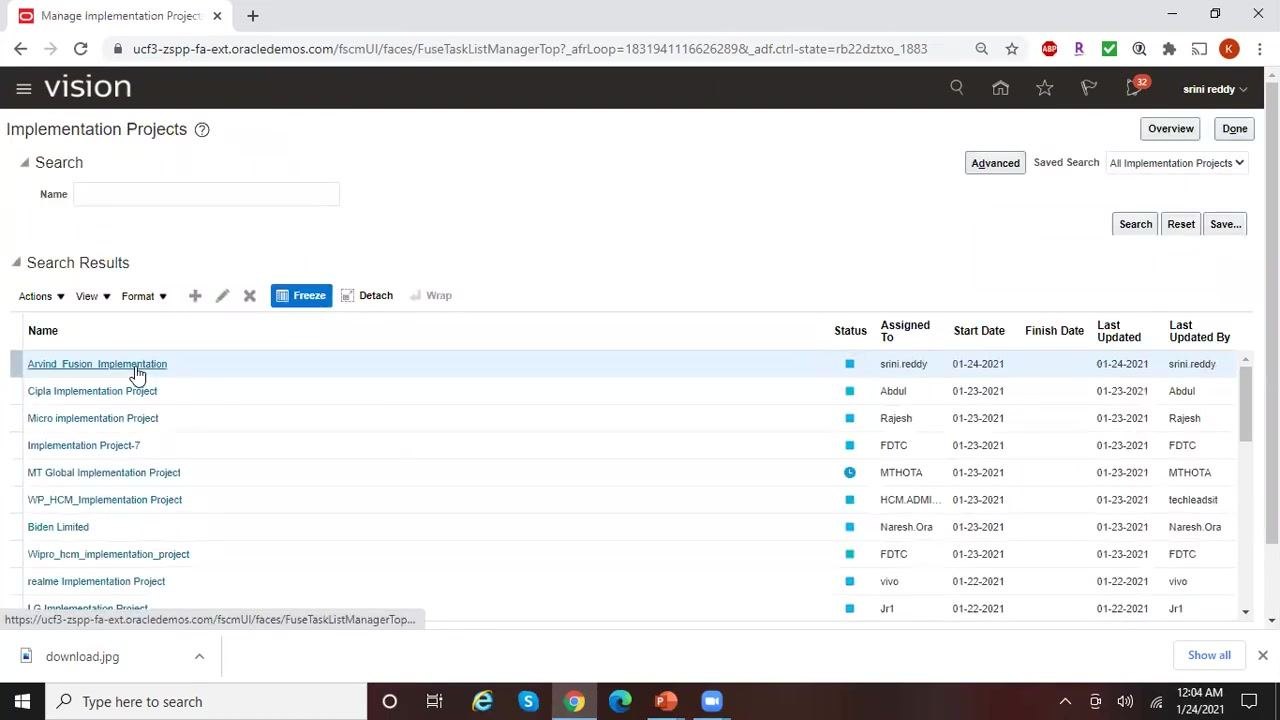
Navigate to the Manage Implementation Projects screen. In the Search Results section, find and select your implementation project (for example, "Arvind_Fusion_Implementation"). The project list shows columns for Name, Status, Assigned To, Start Date, Finish Date, Last Updated, and Last Updated By. Click on your project to open it.
Step 22: Wait for the project to load
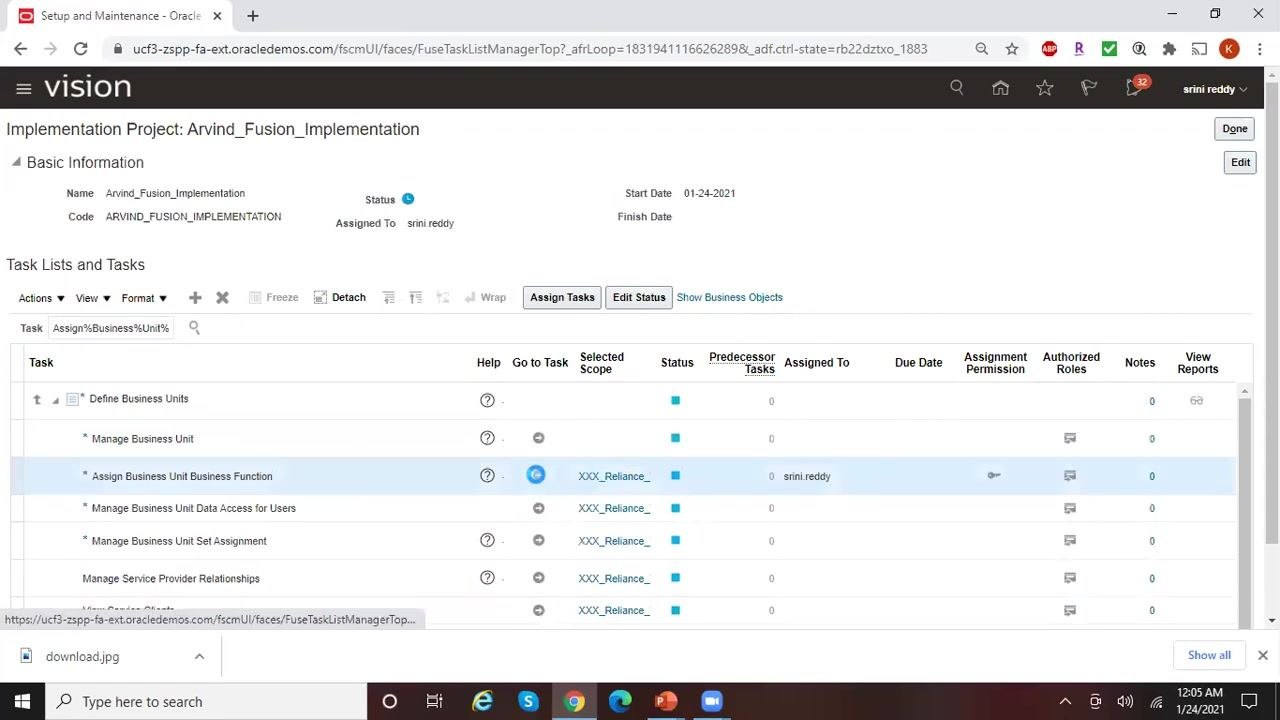
After clicking your project, wait for the project details to load. The system may display a loading indicator while it processes your selection.
Step 23: Search for the task
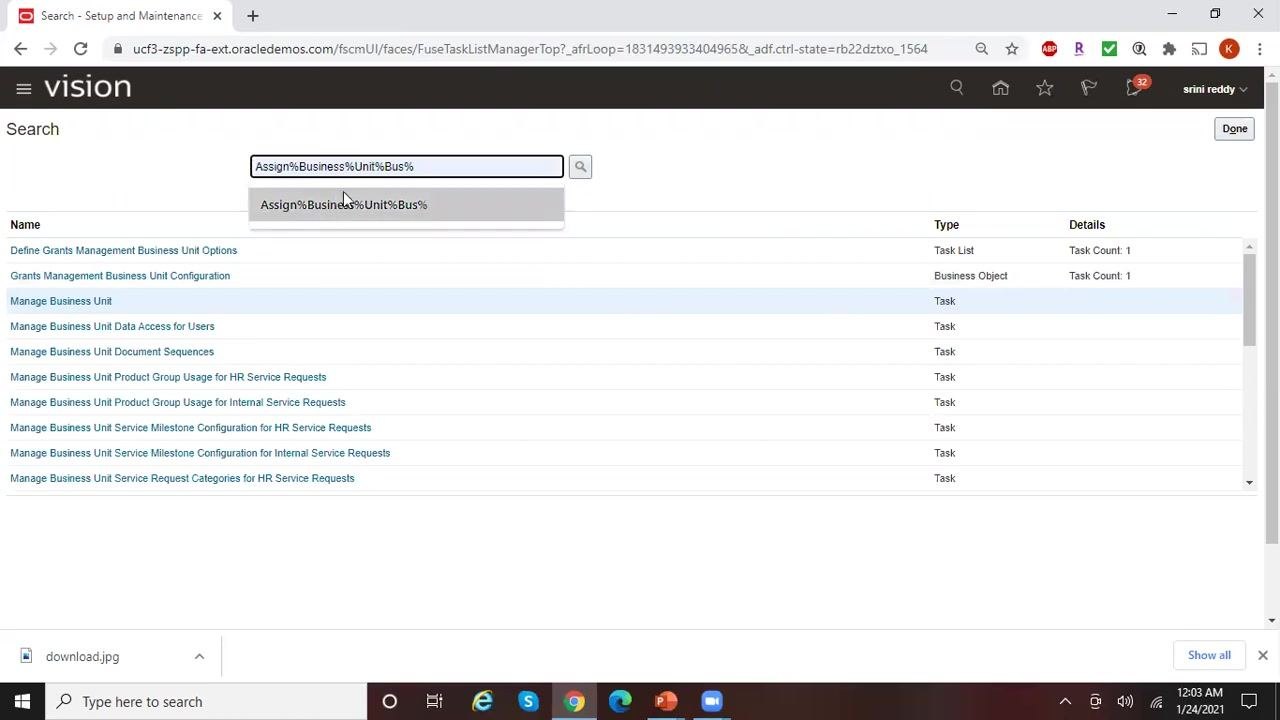
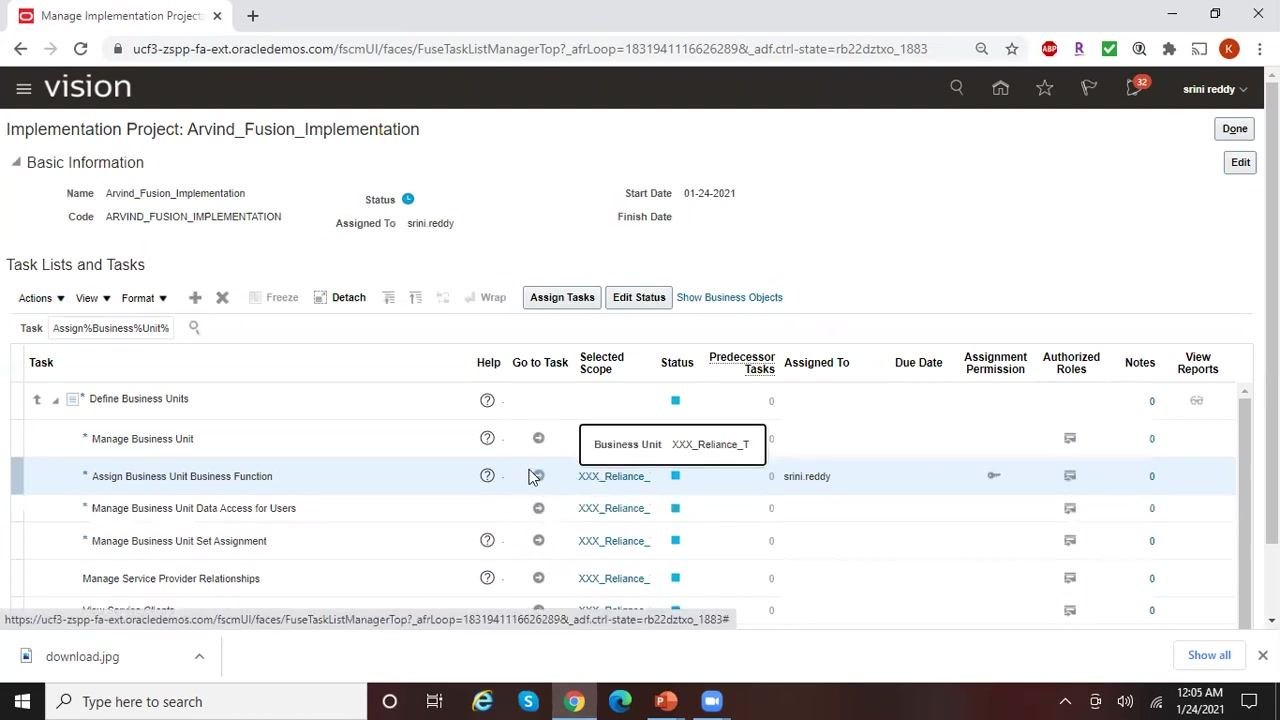
Within the opened project, locate the Task Lists and Tasks section. In the task search field, enter Assign%Business%Unit%Bus% and click the search icon to filter the tasks. The filtered list displays matching tasks, such as "Assign Business Unit Business Function."
Step 24: Select the task
In the filtered task list, select Assign Business Unit Business Function. The Selected Scope column may display a business unit code (for example, "XXX_Reliance_"). Click the scope link or icon to specify or change the business unit.
Step 25: Set the task scope
In the Select Scope dialog, confirm Assign Business Unit Business Function is selected. In the Business Unit dropdown, choose the appropriate business unit (for example, "XXX_Reliance_T"). Click Apply and Go to Task to proceed.
Step 26: Search for and confirm the business unit
If the Manage Business Units window appears, use the search fields to locate your business unit — enter the name (for example, Reliance%Tele%1) and optionally the location (for example, Irving1_Texas). Click Search and confirm that the correct business unit, such as "Reliance Telecomm1," appears with the right location and active status.
Step 27: Verify the scope selection
If the business unit shown is not the one you intend to use, return to the previous screen and repeat the search or selection process. Confirm that the Selected Scope in the task list matches your intended business unit before proceeding.
Step 28: Open the Assign Business Functions screen
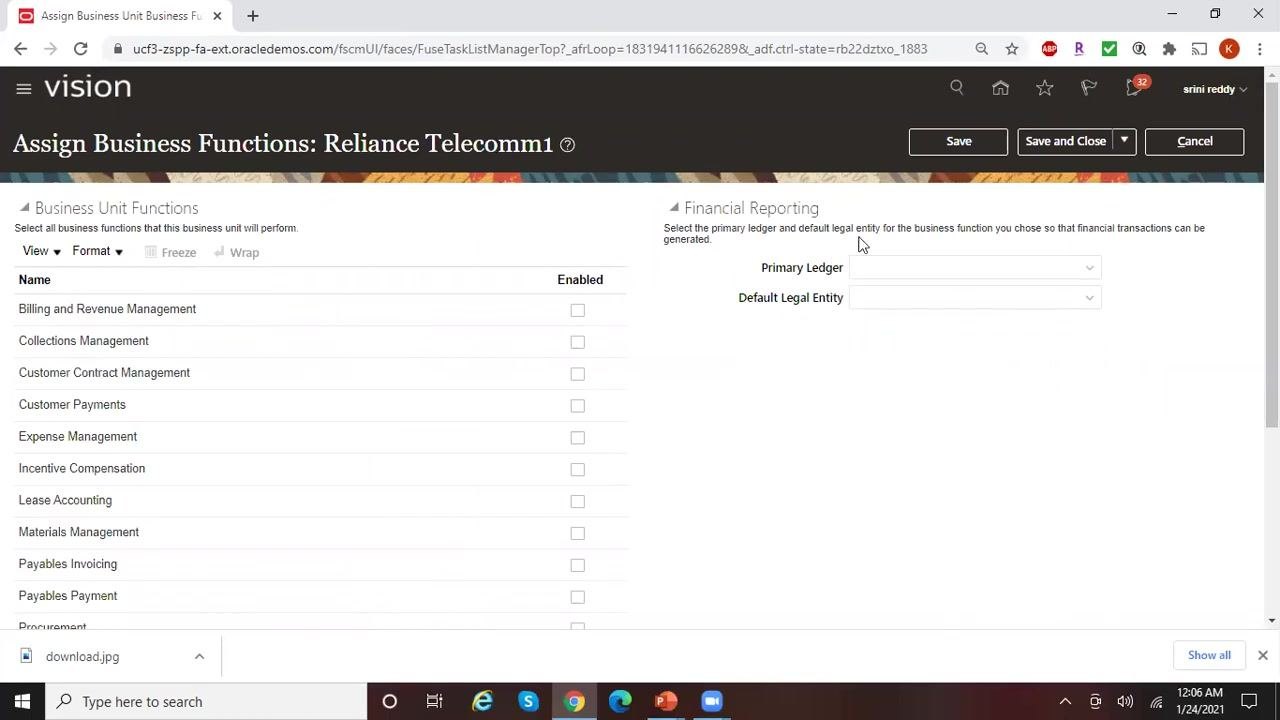
After selecting your business unit, the screen title changes to "Assign Business Functions: Reliance Telecomm1." You see a list of available business unit functions on the left and financial reporting options on the right. Available functions include Billing and Revenue Management, Collections Management, Customer Contract Management, Customer Payments, Expense Management, Incentive Compensation, Lease Accounting, Materials Management, Payables Invoicing, Payables Payment, and Procurement.
Step 29: Review financial reporting requirements
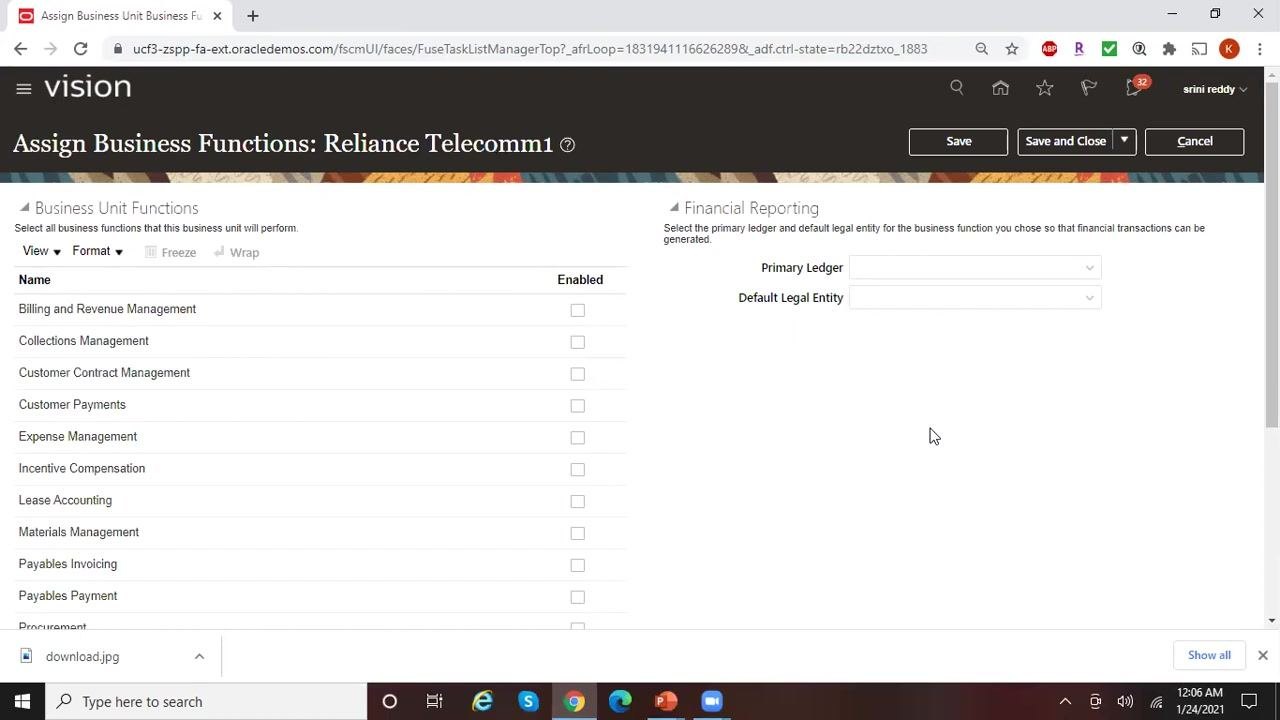
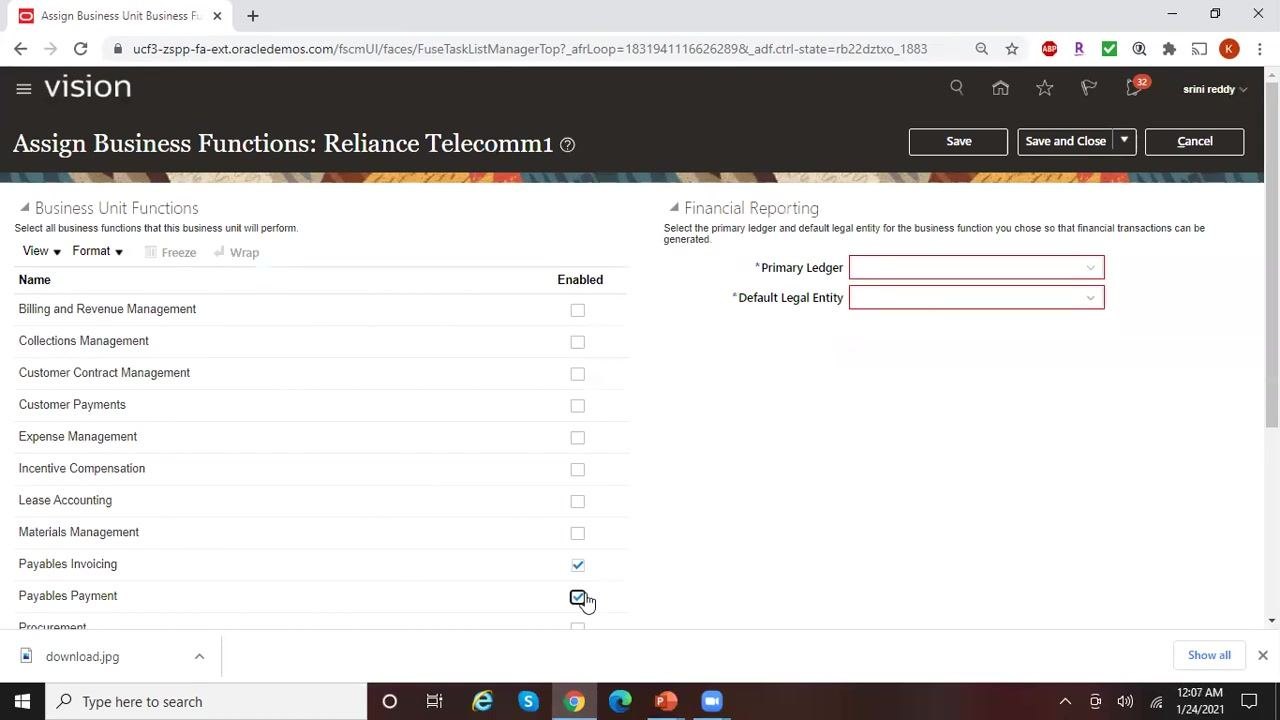
Under Financial Reporting on the right, note that you must select a Primary Ledger and Default Legal Entity for the business unit. These fields are mandatory, marked with an asterisk (*), and must be filled before saving. The system prompts: "Select the primary ledger and default legal entity for the business function you chose so that financial transactions can be generated."
Step 30: Enable the required business functions
Check the corresponding boxes in the Enabled column for the functions you want this business unit to support. For example, to use Reliance Telecomm1 only for Accounts Payable, check Payables Invoicing and Payables Payment, and leave other functions unchecked. As you check these boxes, the required financial reporting fields remain highlighted until filled in.
Step 31: Select the Primary Ledger
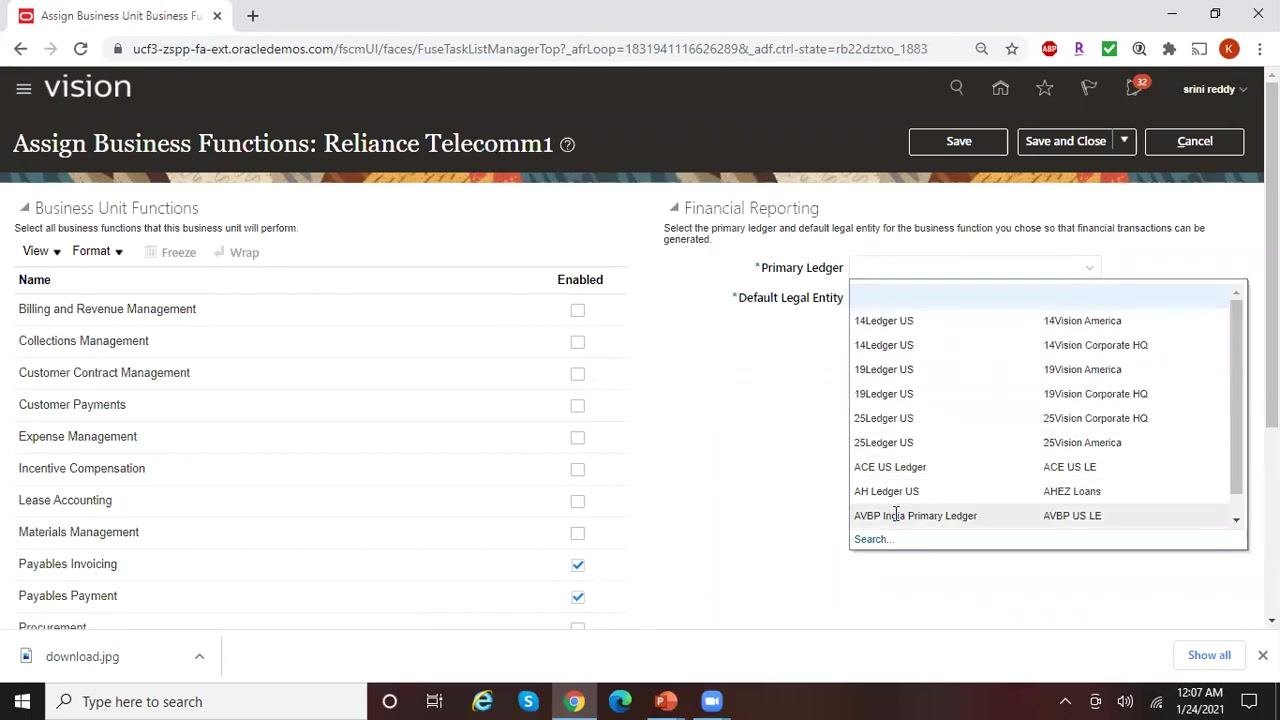
In the Financial Reporting section, click the dropdown for Primary Ledger. A list of available ledgers appears, including options such as "14Ledger US," "19Ledger US," "ACE US Ledger," "AH Ledger US," and "Reliance Ledger US." Select Reliance Ledger US as the primary ledger for this business unit.
Step 32: Confirm the Default Legal Entity
After selecting the primary ledger, the Default Legal Entity field auto-populates, or you can select the appropriate entity. For Reliance Telecomm1, ensure the default legal entity is set to Reliance Telecomm. Both required fields should now be filled, and the enabled business functions remain checked.
Step 33: Save the configuration
Click Save and Close at the top right of the screen to save your business unit function assignments and financial reporting configuration. This finalizes the setup for Reliance Telecomm1.
What's next
With the business unit created and its business functions assigned, you can continue configuring additional settings, such as additional reference data sets, legal entity associations, or further financial reporting options, as required by your business processes.
Generation details: cost, quality tiers
Docsie billed 7,000 credits ($4.90) to analyze this 14-minute video at standard quality. The rewrite, template fill and Word/PDF exports were included. The same video at each quality tier:
| Quality | Frames sampled | Credits | Approx. cost |
|---|---|---|---|
| Draft | every 16-30 s | 3,500 | $2.45 |
| Standard (this guide) | every 8-15 s | 7,000 | $4.90 |
| Detailed | every 4-7 s | 14,000 | $9.80 |
| Ultra | every 1-3 s | 28,000 | $19.60 |
Credits priced at $0.70 per 1,000; plans include a monthly allowance. Enterprise customers on on-premise or bring-your-own-model deployments run this on their own inference and pay no per-video credits.
Generated by Docsie Video-to-Docs on 2026-10-14 from a 13-minute video. Screenshots are frames from the source video and belong to their creator, Oracle Ebiz and Fusion Videos, whose original is embedded above. If you own this video and want the guide removed or credited differently, contact us and we will act within one business day.