
How to Open a Purchasing Period in Oracle EBS
This guide shows you how to open a purchasing period in Oracle EBS. You find the Control Purchasing Periods window in the Oracle Purchasing Navigator, search periods by fiscal year, and change a period's status to Open. You then save the change. The guide also shows how to open the matching period in Inventory Accounting Periods.
Video: Oracle - R12 - Purchasing Period and Inventory Accounting Period by Oracle EBIZ Application (2014). All credit for the demonstration goes to the creator; watch the original on YouTube. The written guide below was generated from this video by Docsie. Creator? Request a change or removal.
This guide shows you how to open a purchasing period in Oracle EBS. You find the Control Purchasing Periods window in the Oracle Purchasing Navigator, search periods by fiscal year, and change a period's status to Open. You then save the change. The guide also shows how to open the matching period in Inventory Accounting Periods.
Prerequisites
- You are logged in to Oracle with a responsibility that has the right permissions, for example "Order Management Super User, Vision Operations (USA)".
- You can access the Oracle Purchasing Navigator, which has the Functions, Documents, and Processes tabs.
Steps
Open the Oracle Purchasing Navigator
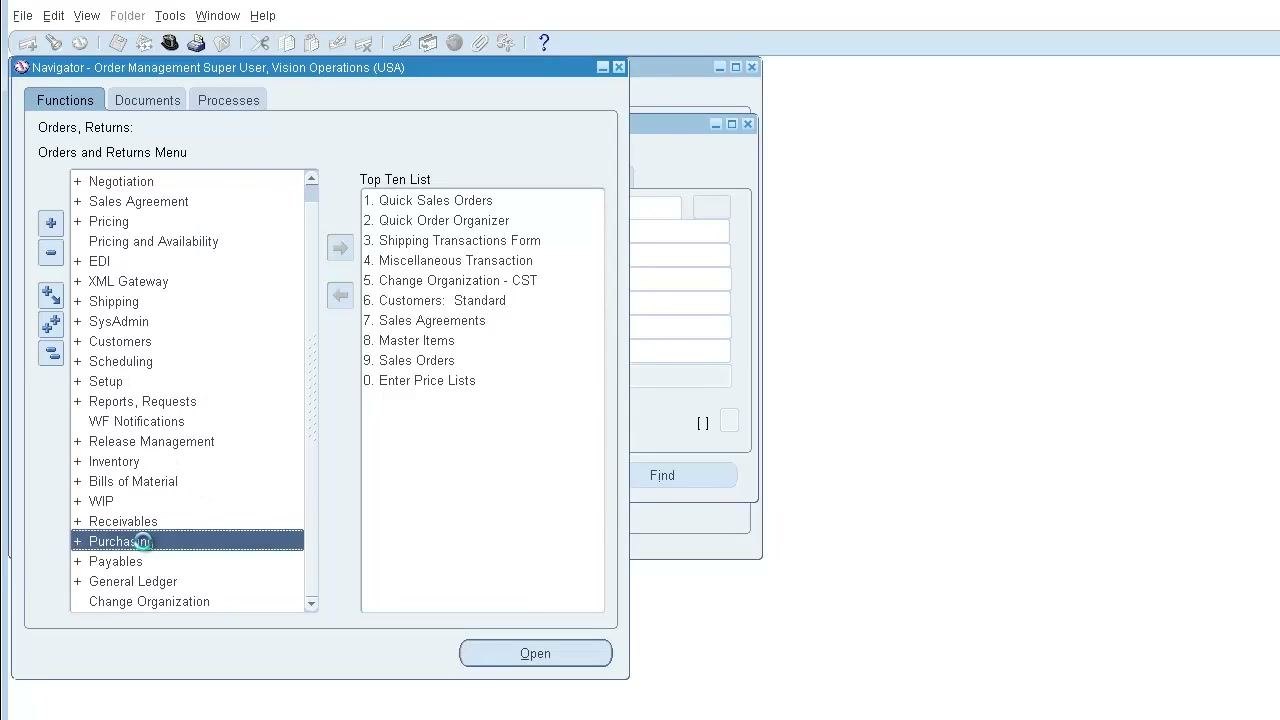
The main Navigator window appears with tabs for Functions, Documents, and Processes. The left pane shows a hierarchical menu with expandable categories such as Negotiation, Sales Agreement, Pricing, and Purchasing. The right pane shows a Top Ten List of frequently used functions.
Expand the Purchasing section
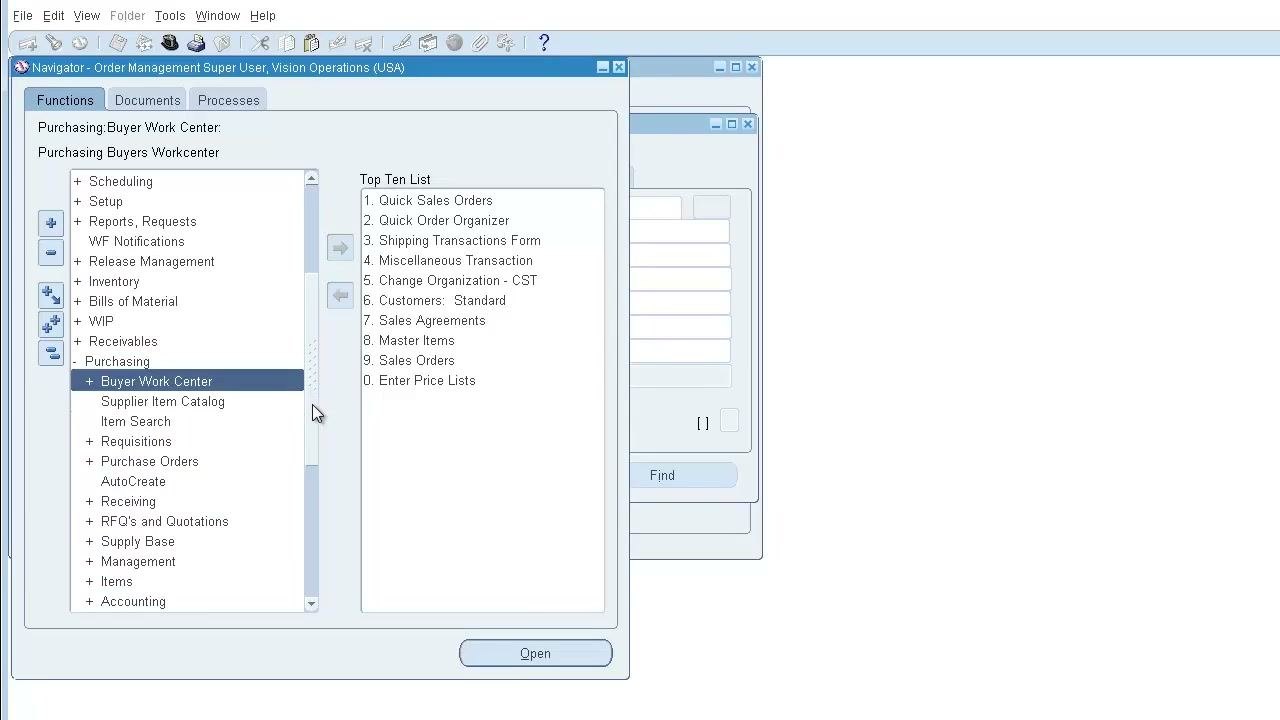
In the left pane, scroll down and click the "+" icon next to Purchasing. Click Buyer Work Center to highlight it. The right pane still shows the Top Ten List.
Expand the Accounting section
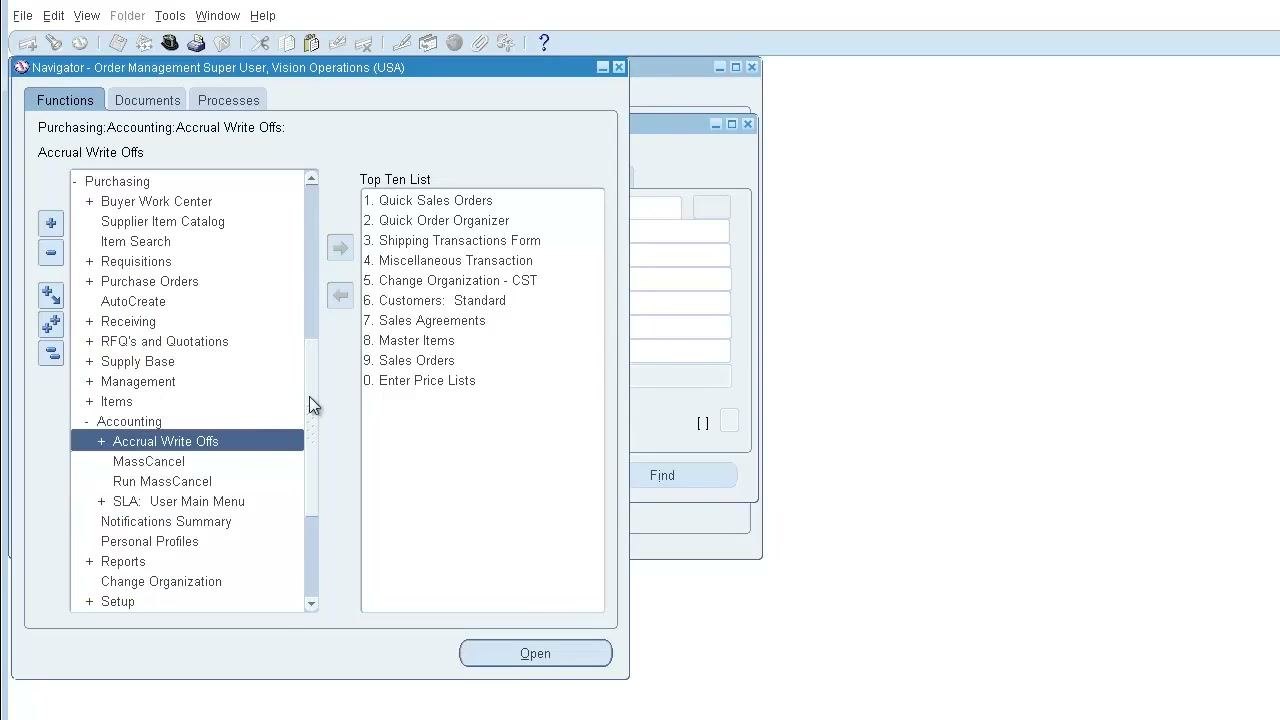
Keep scrolling in the left pane under Purchasing. Click the "+" icon next to Accounting, then click Accrual Write Offs to highlight it. Sub-options such as MassCancel, Run MassCancel, and SLA: User Main Menu appear.
Find and open Control Purchasing Periods
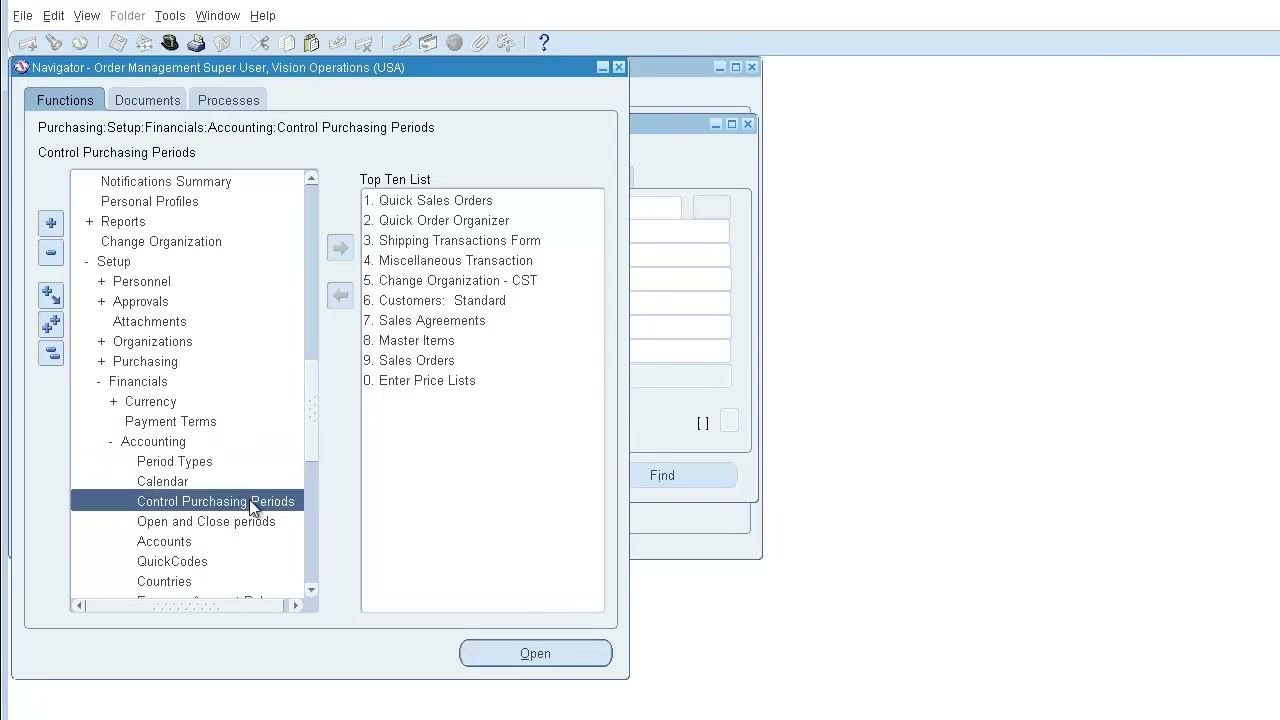
Scroll further in the left pane to the Setup section. Expand Setup > Financials > Accounting, then click Control Purchasing Periods to highlight it. The right pane continues to show the Top Ten List.
Click Open at the bottom of the Navigator window. A new browser window or tab opens with the Control Purchasing Periods screen.
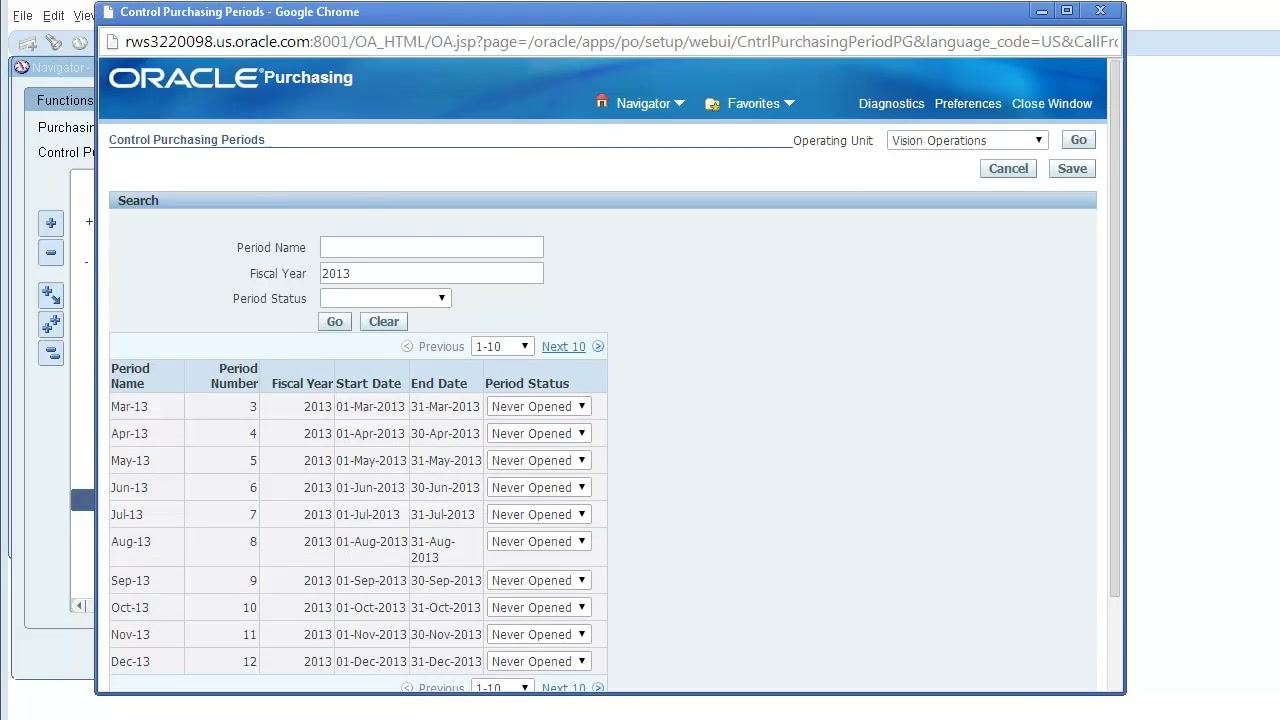
The screen has:
- A search section with the fields Period Name, Fiscal Year, and Period Status.
- A table with the columns Period Name, Period Number, Fiscal Year, Start Date, End Date, and Period Status.
By default, the table shows periods from previous years (for example, 1995 and 1996), all with the status Closed.
Search for a fiscal year
In the Fiscal Year field, enter the year you want (for example, "2013"). Click Go. The table updates to show the periods for that year. In this example, every 2013 period has the status Never Opened.
Use this step to check the status of the periods before you open any of them.
Search for another fiscal year
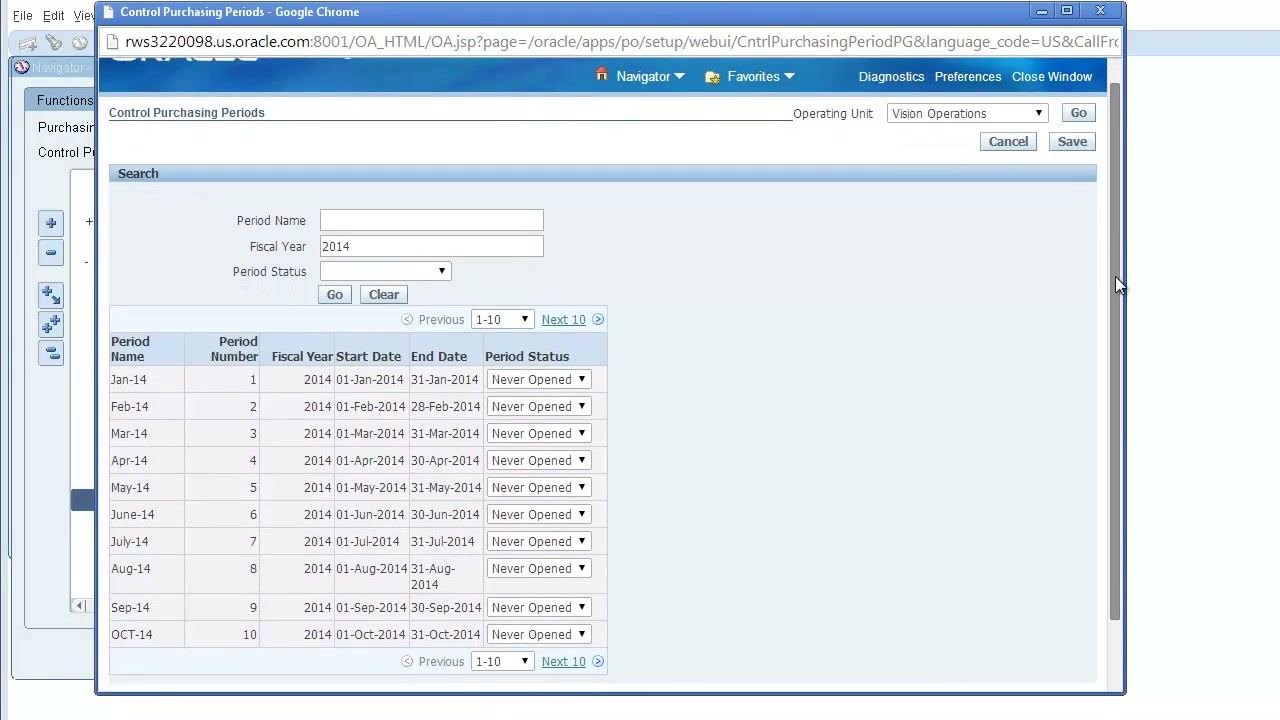
To look at a different year, change the Fiscal Year field (for example, to "2014") and click Go again. The table refreshes to show the periods for the new year. In this example, every 2014 period shows Never Opened.
Review the period status for fiscal year 2014
With Fiscal Year set to 2014 and Period Name and Period Status blank, review the table. Before you make changes:
- Jan-14 and Feb-14 have the status Open.
- Mar-14 and all later months have the status Never Opened.
Open the March and April 2014 purchasing periods
To open a purchasing period in Oracle EBS, use the dropdown menu in the Period Status column for each period. Set the status for Mar-14 and Apr-14 to Open, which replaces Never Opened. Then move the cursor to Save.
Save your changes
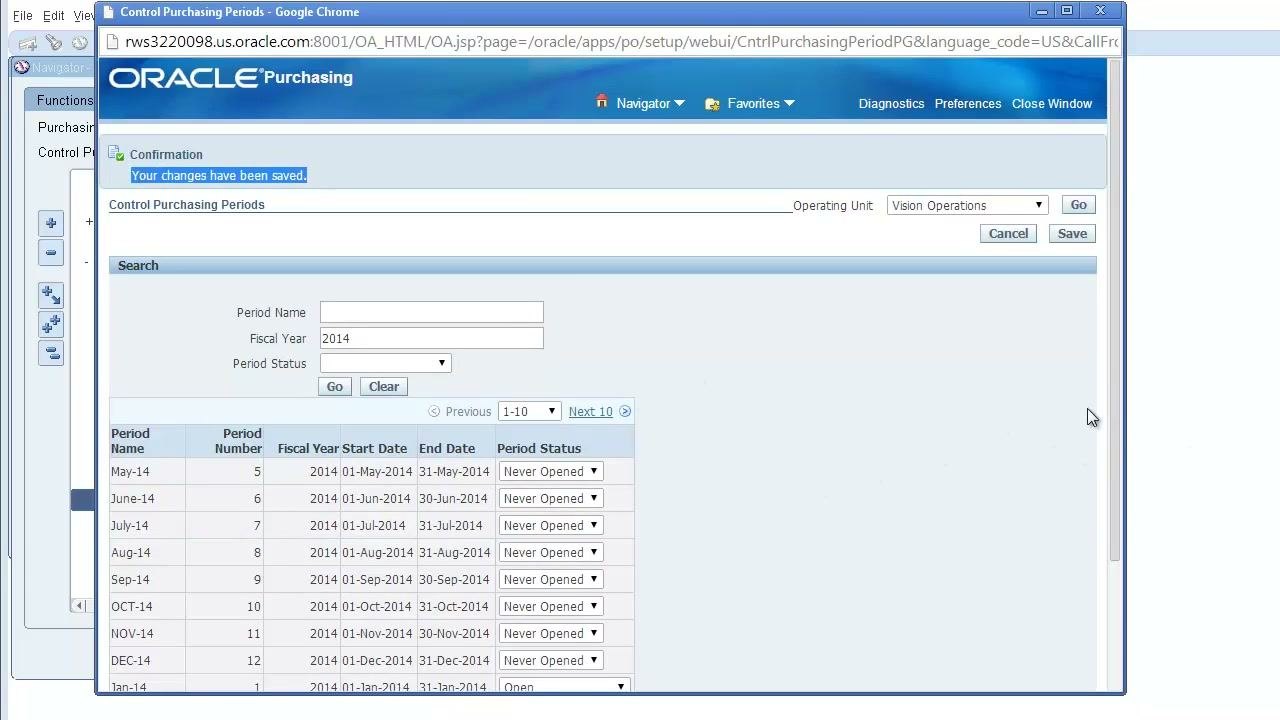
Click Save. The message "Your changes have been saved." appears at the top of the screen. The table now shows Mar-14 and Apr-14 as Open, and the other periods are unchanged.
Page through the remaining periods
Review all the periods after you save. The table lists May-14 through Dec-14, all with the status Never Opened. Jan-14, Feb-14, Mar-14, and Apr-14 are Open.
Use the Previous and Next buttons to move through the table. Click Previous to see the earlier periods in the fiscal year. The table then shows only Mar-14 and Apr-14, both Open.
Go to Inventory Accounting Periods
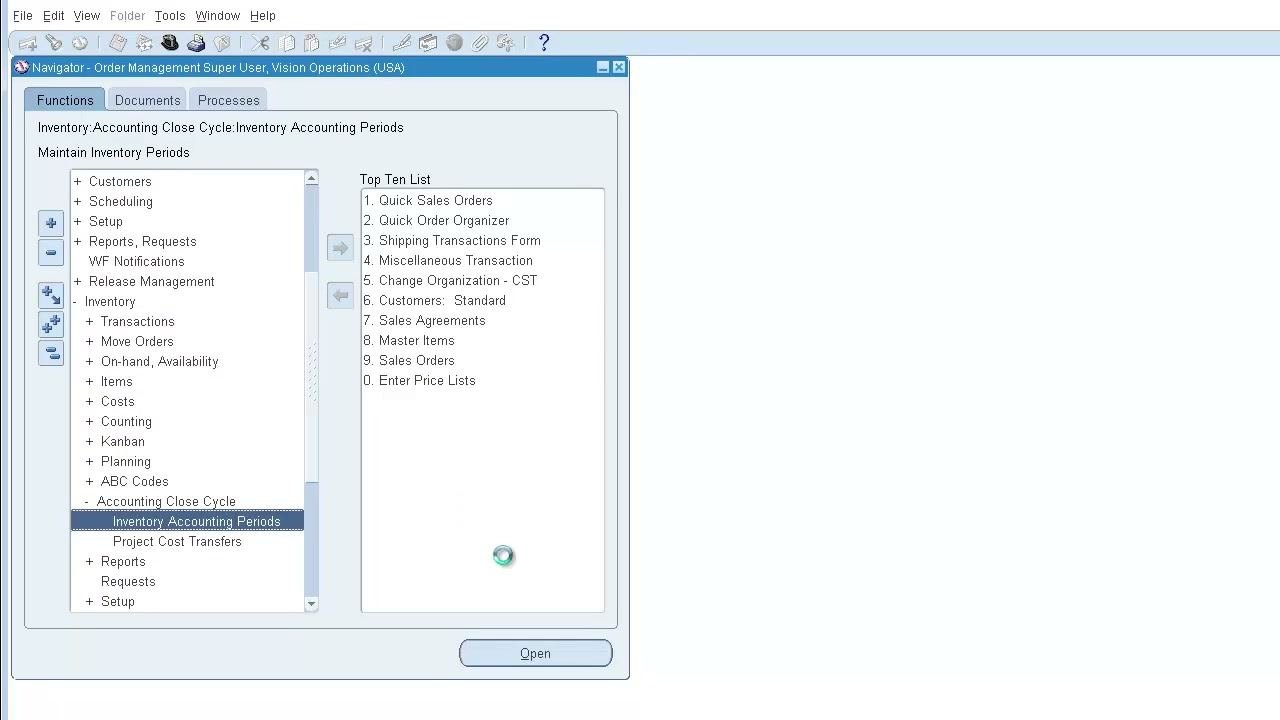
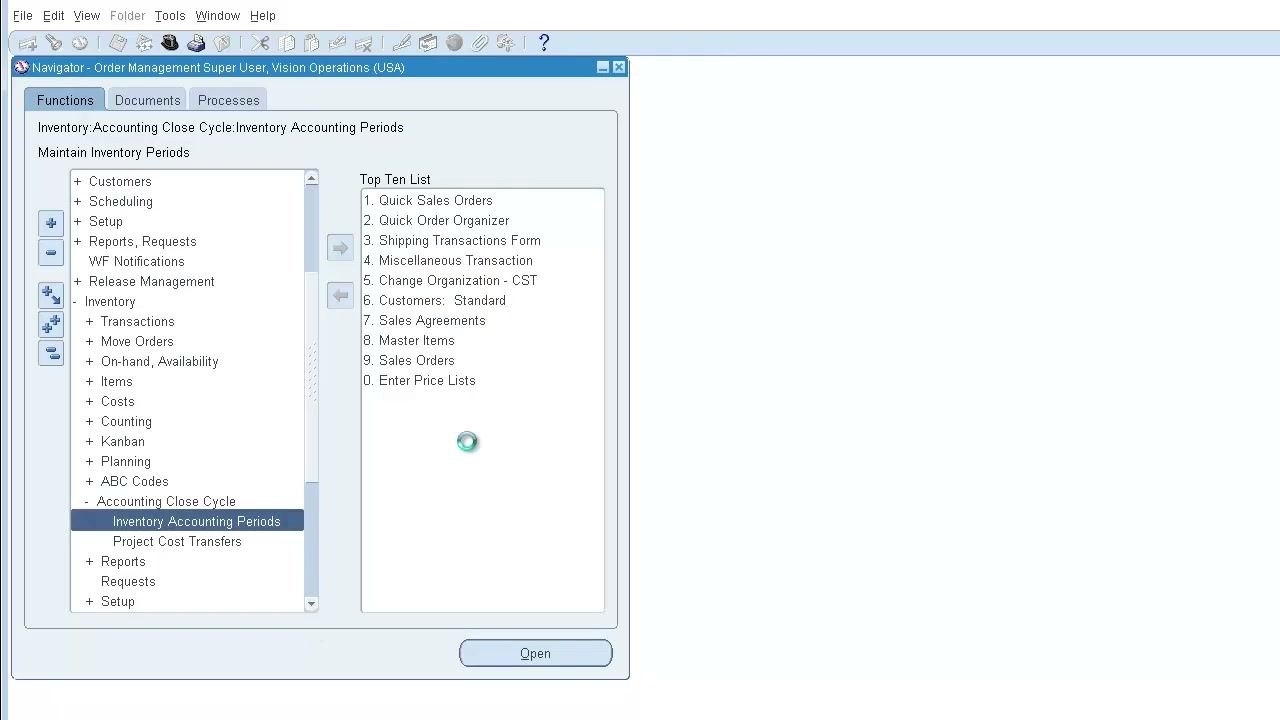
In the Navigator, expand Inventory > Accounting Close Cycle and highlight Inventory Accounting Periods. The Top Ten List stays visible. A spinning loading icon appears in the center of the window while the next screen loads.
Select the inventory period to open
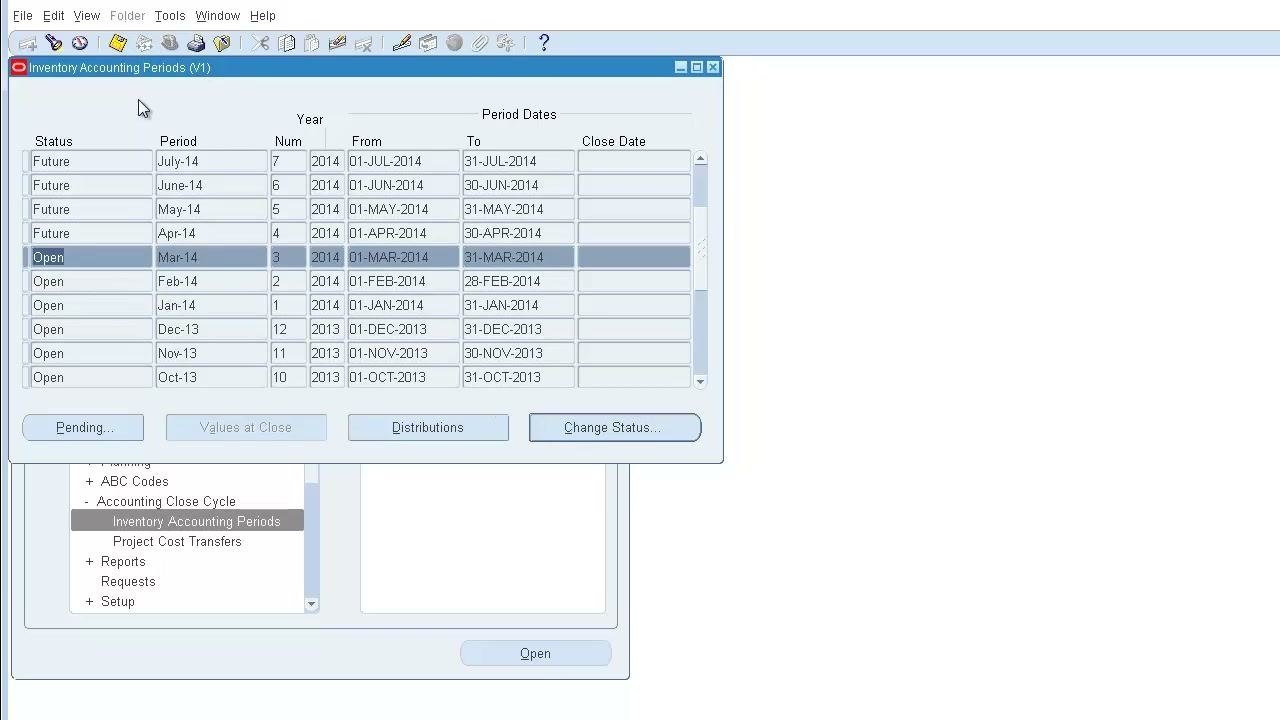
The Inventory Accounting Periods window opens. Its table has the columns Status, Period, Num, Year, From, To, and Close Date.
Select the row for Mar-14 (Period 3, Year 2014, From 01-MAR-2014, To 31-MAR-2014). Its status is Future.
Start the status change
Click Change Status.... A Caution dialog box appears with the message "Open this period?" and the options OK and Cancel.
Confirm that you want to open the period
Click OK in the Caution dialog box.
Check that the period is open
The dialog box closes and the Status for Mar-14 changes from Future to Open. No further confirmation message appears. The other periods keep their statuses:
- Jan-14, Feb-14, Dec-13, Nov-13, and Oct-13 remain Open.
- Apr-14, May-14, and later periods remain Future.
Scroll and verify the change
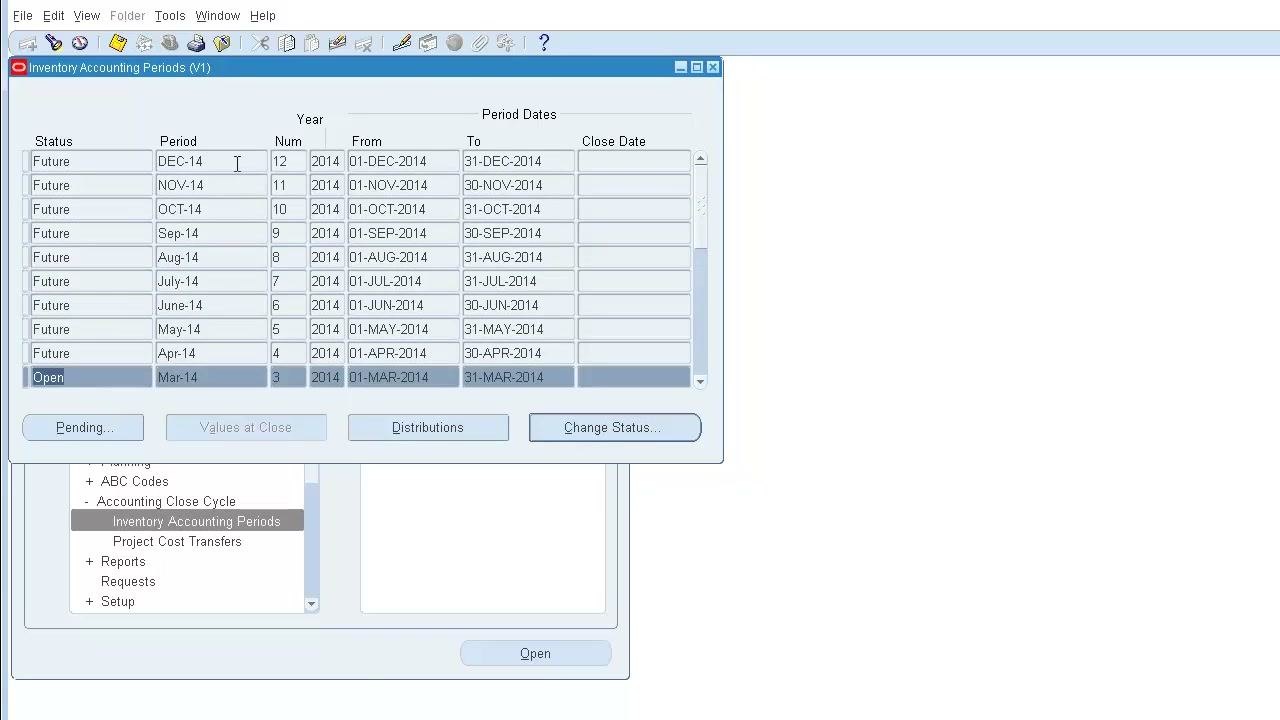
Scroll the table to see more periods. Mar-14 stays Open, and every period from Apr-14 through Dec-14 is still Future. This confirms the change and shows that nothing else was affected.
Summary
- Expand the menu sections in the Navigator to find Control Purchasing Periods, then click Open.
- Search by Fiscal Year and click Go to review period statuses.
- Set the Period Status to Open for the periods you need, then click Save.
- Look for the message "Your changes have been saved."
- In Inventory Accounting Periods, select the period, click Change Status..., and click OK in the Caution dialog.
- Scroll the table to verify that only the period you chose changed to Open.
The Control Purchasing Periods window also has Cancel and Save options. You only need them when you intend to make changes.
What's next
- Repeat the steps for other fiscal years by changing the Fiscal Year field and clicking Go.
- Use Previous and Next to check that the periods you opened show the status you expect.
Generation details: cost, quality tiers
Docsie billed 2,500 credits ($1.75) to analyze this 5-minute video at standard quality. The rewrite, template fill and Word/PDF exports were included. The same video at each quality tier:
| Quality | Frames sampled | Credits | Approx. cost |
|---|---|---|---|
| Draft | every 16-30 s | 1,250 | $0.88 |
| Standard (this guide) | every 8-15 s | 2,500 | $1.75 |
| Detailed | every 4-7 s | 5,000 | $3.50 |
| Ultra | every 1-3 s | 10,000 | $7.00 |
Credits priced at $0.70 per 1,000; plans include a monthly allowance. Enterprise customers on on-premise or bring-your-own-model deployments run this on their own inference and pay no per-video credits.
Generated by Docsie Video-to-Docs on 2026-11-15 from a 4-minute video. Screenshots are frames from the source video and belong to their creator, Oracle EBIZ Application, whose original is embedded above. If you own this video and want the guide removed or credited differently, contact us and we will act within one business day.