
How to Create an Organization in Oracle EBS
This guide shows you how to create an organization in Oracle EBS (E-Business Suite) by copying an existing model organization. You create an interface record, launch the Organization Copy concurrent request, track it to completion, and then verify the new organization. The example copies organization 809 (RSR3) to create organization 810 (RSR4).
Video: Creating an Organisation using Organisation Copy - Oracle E-business Suite #4 by Benavalan Sulaphalan (2019). All credit for the demonstration goes to the creator; watch the original on YouTube. The written guide below was generated from this video by Docsie. Creator? Request a change or removal.
This guide shows you how to create an organization in Oracle EBS (E-Business Suite) by copying an existing model organization. You create an interface record, launch the Organization Copy concurrent request, track it to completion, and then verify the new organization. The example copies organization 809 (RSR_3) to create organization 810 (RSR_4).
Prerequisites
Before you begin, make sure you have the following:
- Access to Oracle E-Business Suite, with the Navigator - Inventory, Vision Operations (USA) window open.
- An existing model organization to copy from. This example uses organization code
809(RSR_3). - A location that already exists for the new organization. This example uses
Cmalur. You can check available locations in the list of values. - An unused organization code for the new organization. This example uses
810, the next code after 809.
Create the interface record
Open the Maintain Interface form
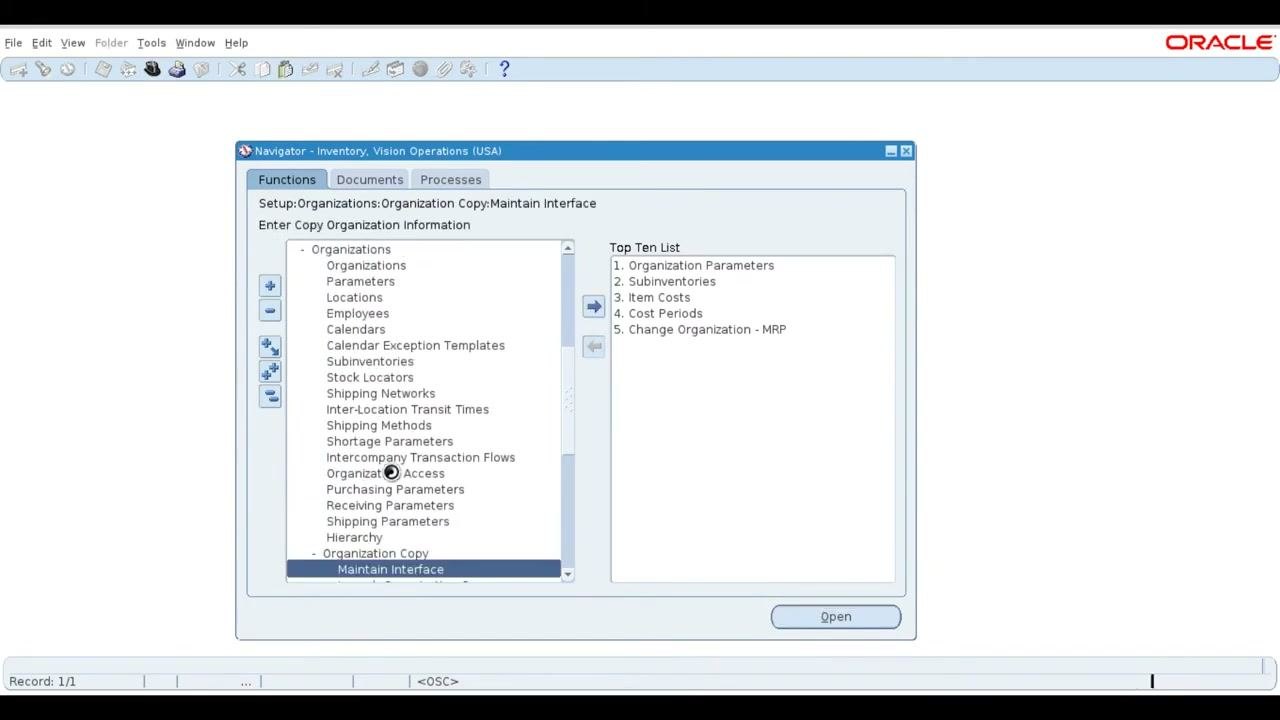
In the left pane of the Navigator, find the Transaction Menu and scroll down to expand Setup. Expand Organizations, then Organization Copy. Select Maintain Interface and click Open.
Start a new interface record
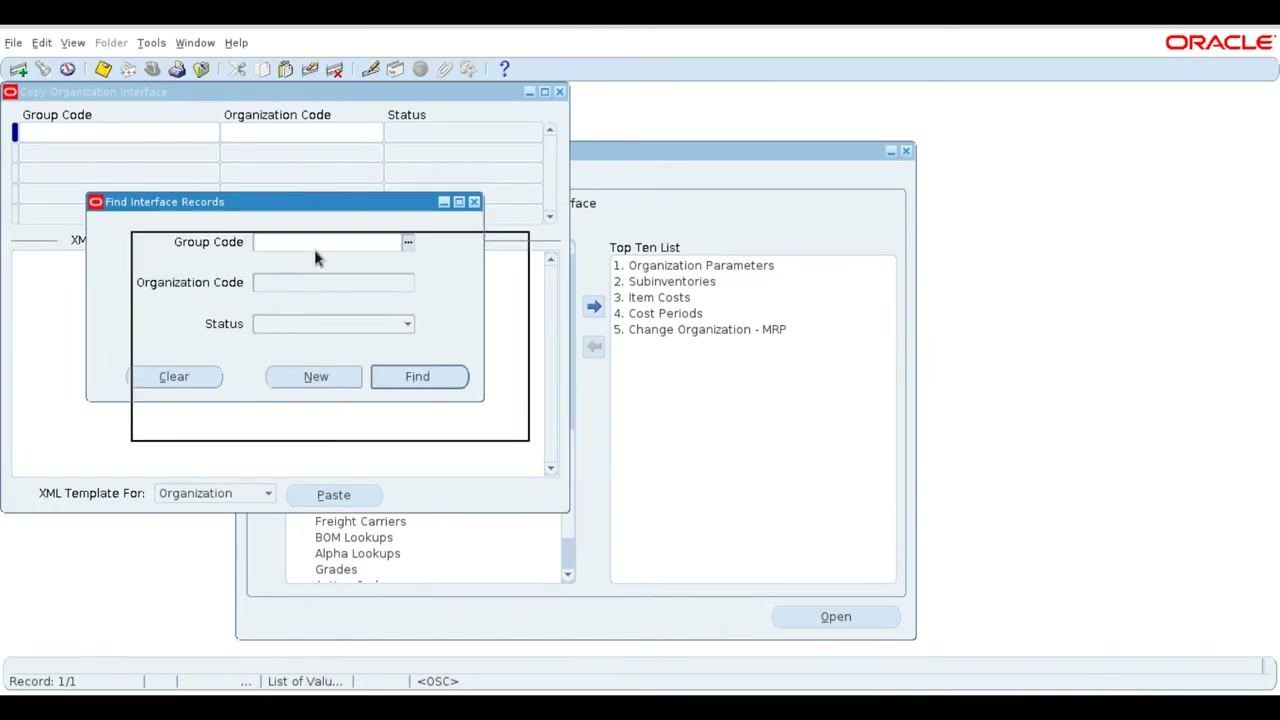
The Find Interface Records dialog appears. Click New, or press Alt + N, to create a new interface record. All fields in this form are mandatory.
Enter the group code and organization name
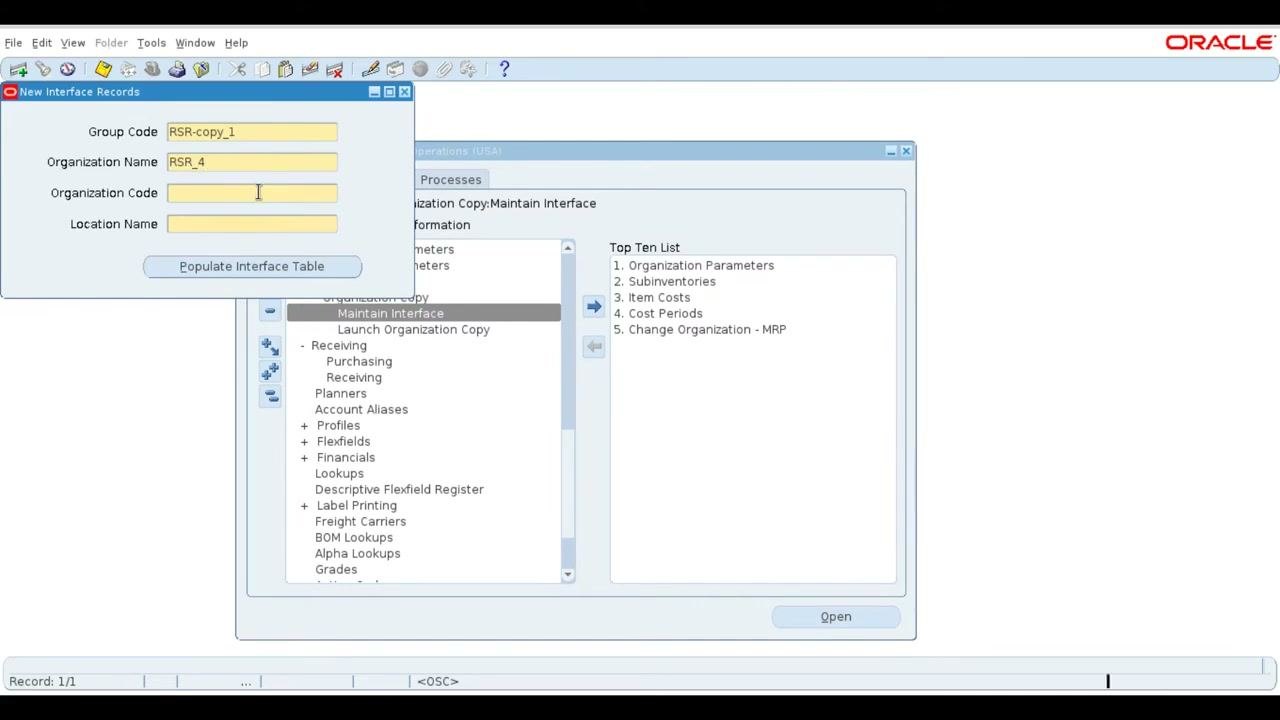
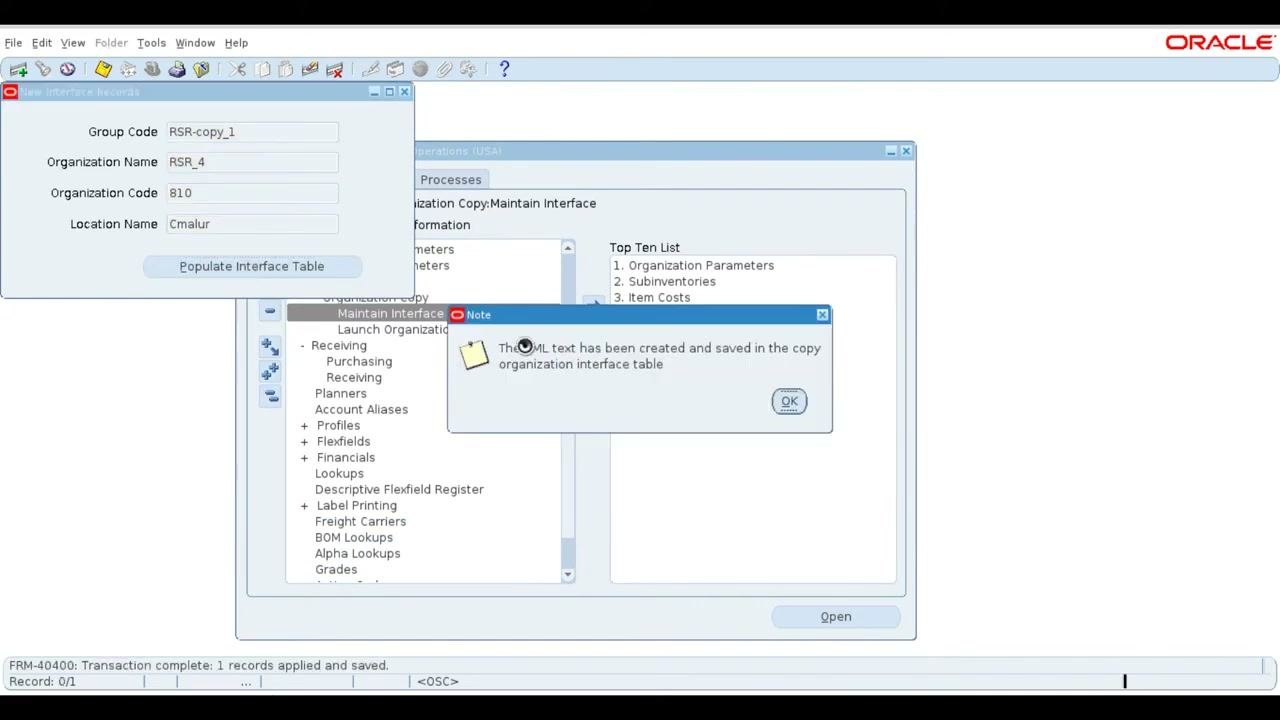
In the New Interface Records window, fill in the first two fields. Leave Organization Code and Location Name blank for now.
- Group Code:
RSR-copy_1 - Organization Name:
RSR_4
Enter the organization code and location name
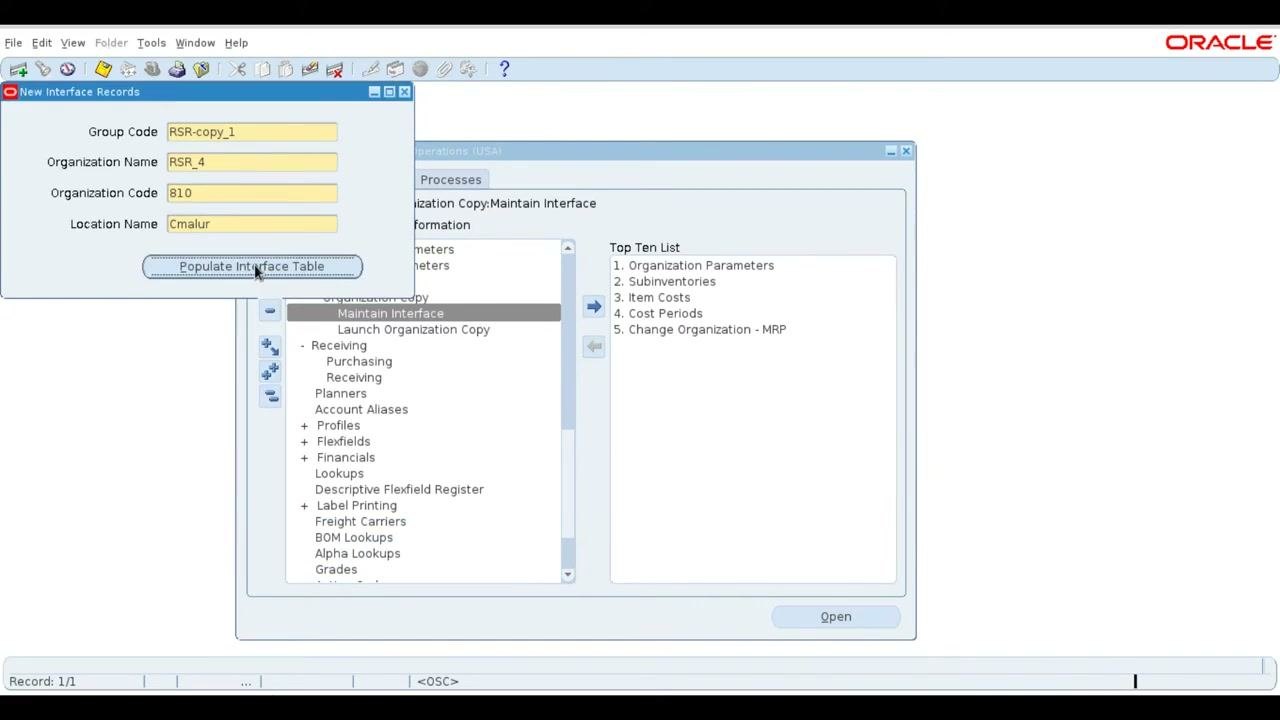
Complete the remaining fields in the New Interface Records window:
- Organization Code:
810(the next available code after 809) - Location Name:
Cmalur(check the list of values to confirm this location exists)
Populate the interface table
Click Populate Interface Table. A note appears stating "The XML text has been created and saved in the copy organization interface table." Click OK to acknowledge the message.
Close the New Interface Records form
After you confirm the note, close the New Interface Records form to continue.
Launch Organization Copy
Open Launch Organization Copy
In the main Navigator window, go to Setup > Organizations > Organization Copy > Launch Organization Copy. Select Launch Organization Copy and click Open.
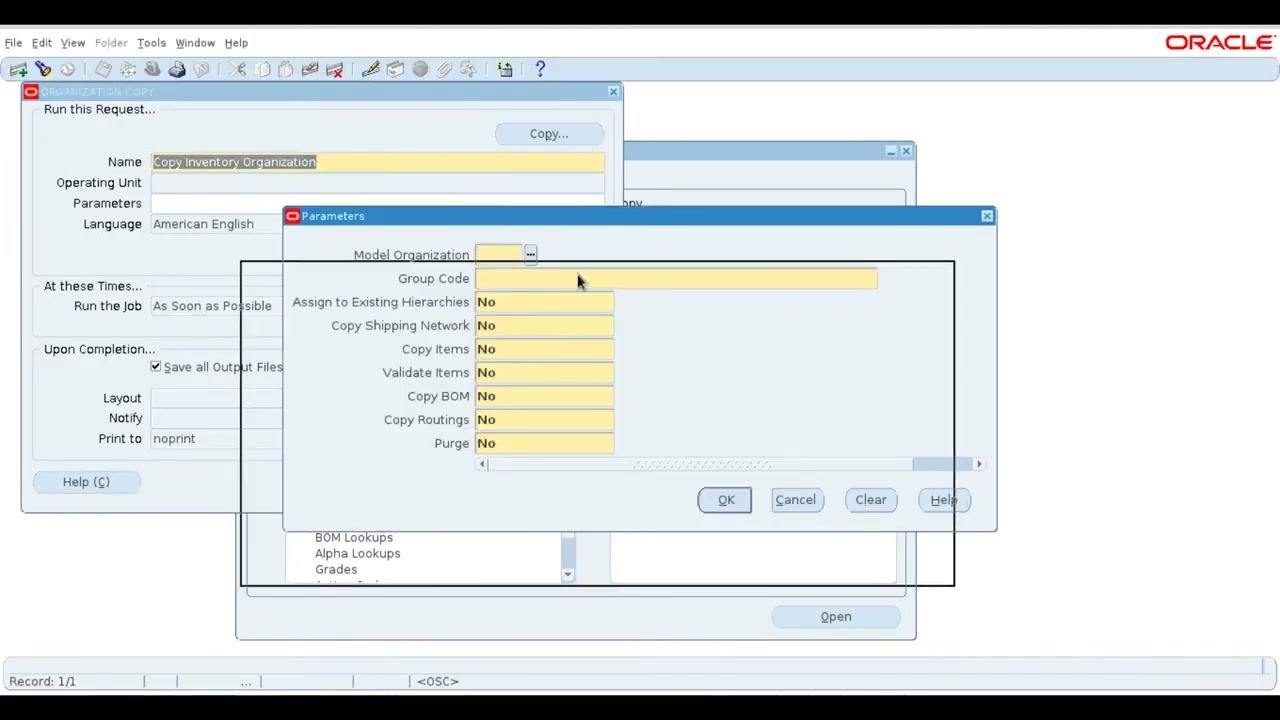
The Organization Copy Request form opens. This form does not ask for the new (destination) organization name or code. It only requires the model organization and the group code.
Open the Parameters dialog
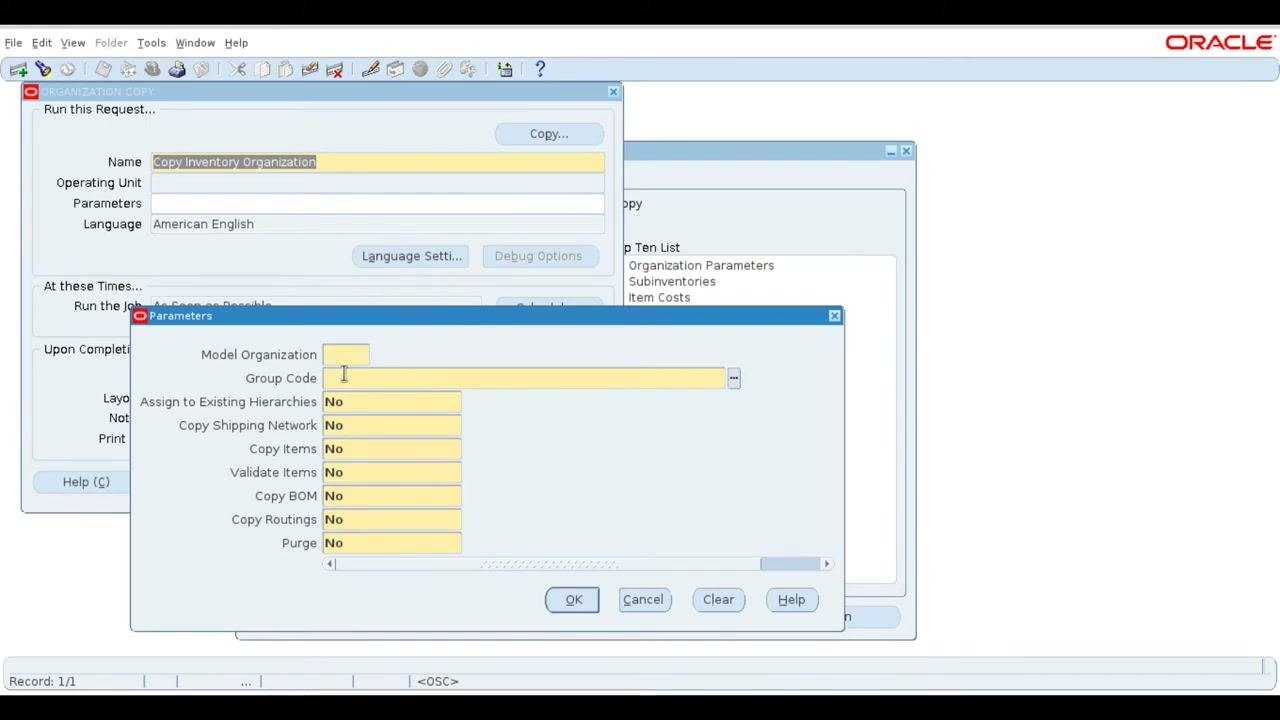
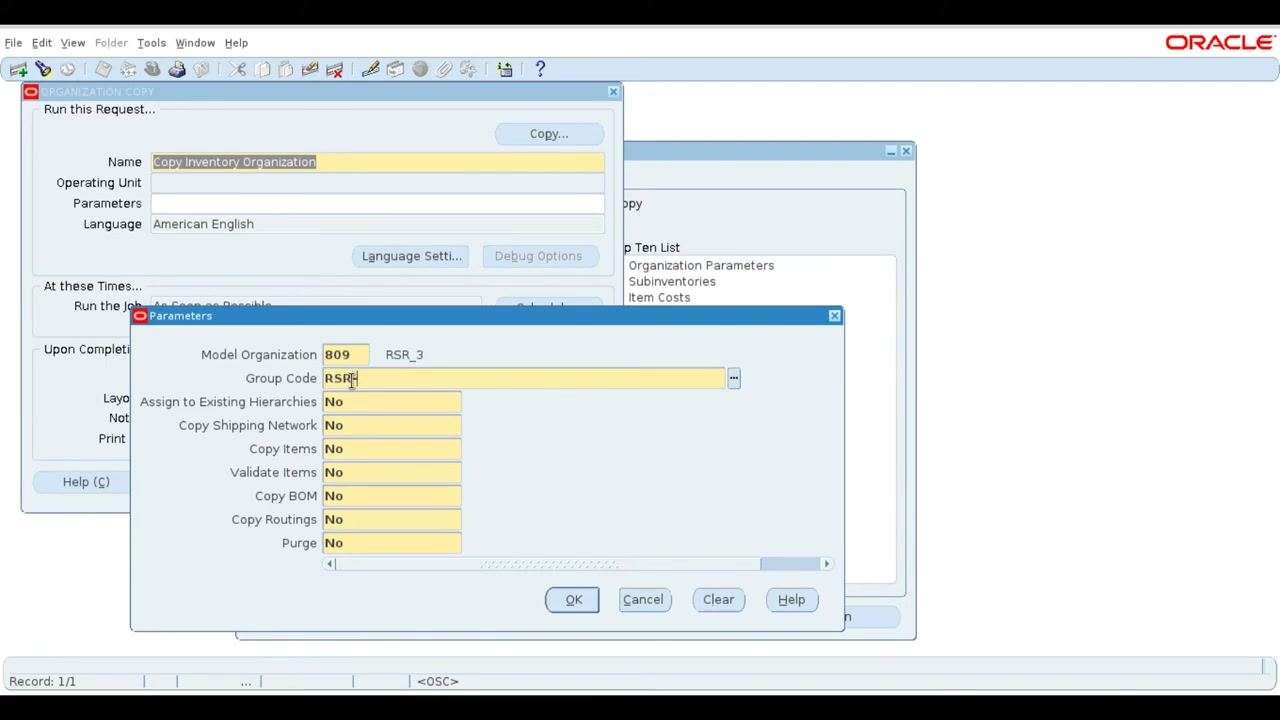
In the Organization Copy Request form, click to open the Parameters dialog. The dialog displays these fields:
- Model Organization
- Group Code
- Assign to Existing Hierarchies
- Copy Shipping Network
- Copy Items
- Validate Items
- Copy BOM
- Copy Routings
- Purge
All options default to No.
Enter the model organization
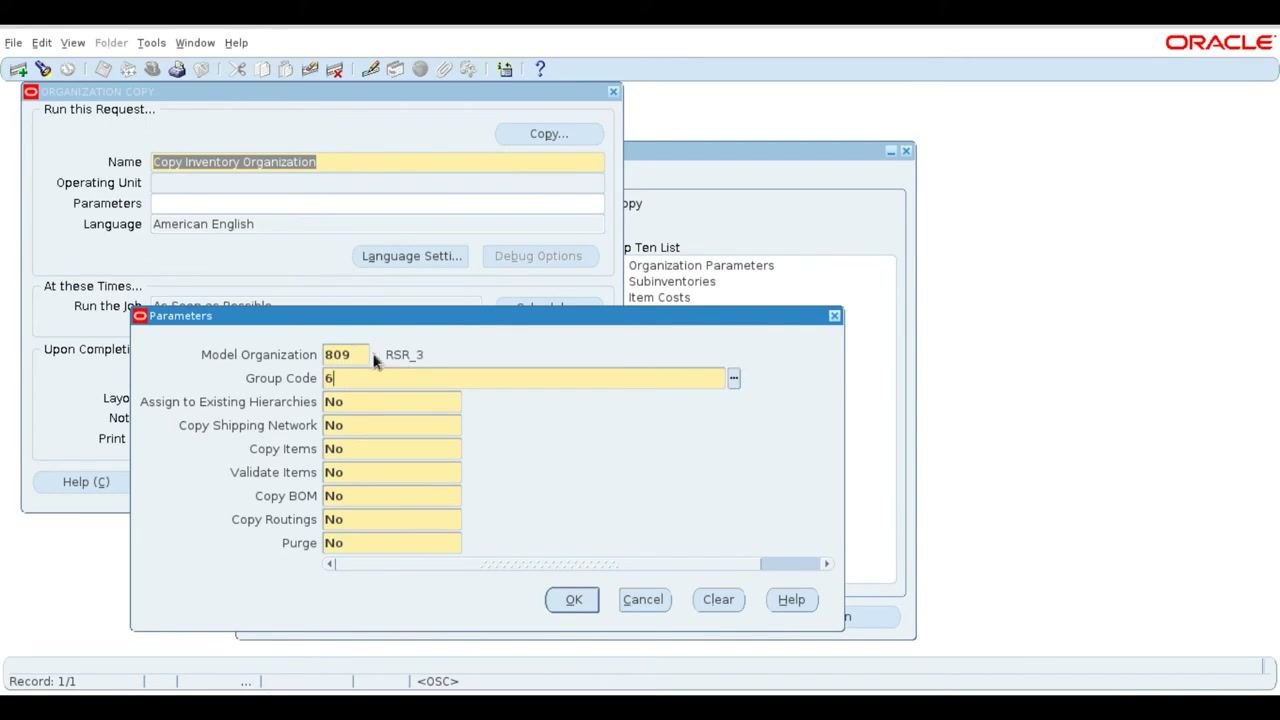
In the Model Organization field, enter 809, which corresponds to RSR_3. The system automatically populates the organization name as RSR_3.
Enter the group code
In the Group Code field, enter RSR-copy_1. Press Tab to auto-fill the remaining details.
Verify the copy options
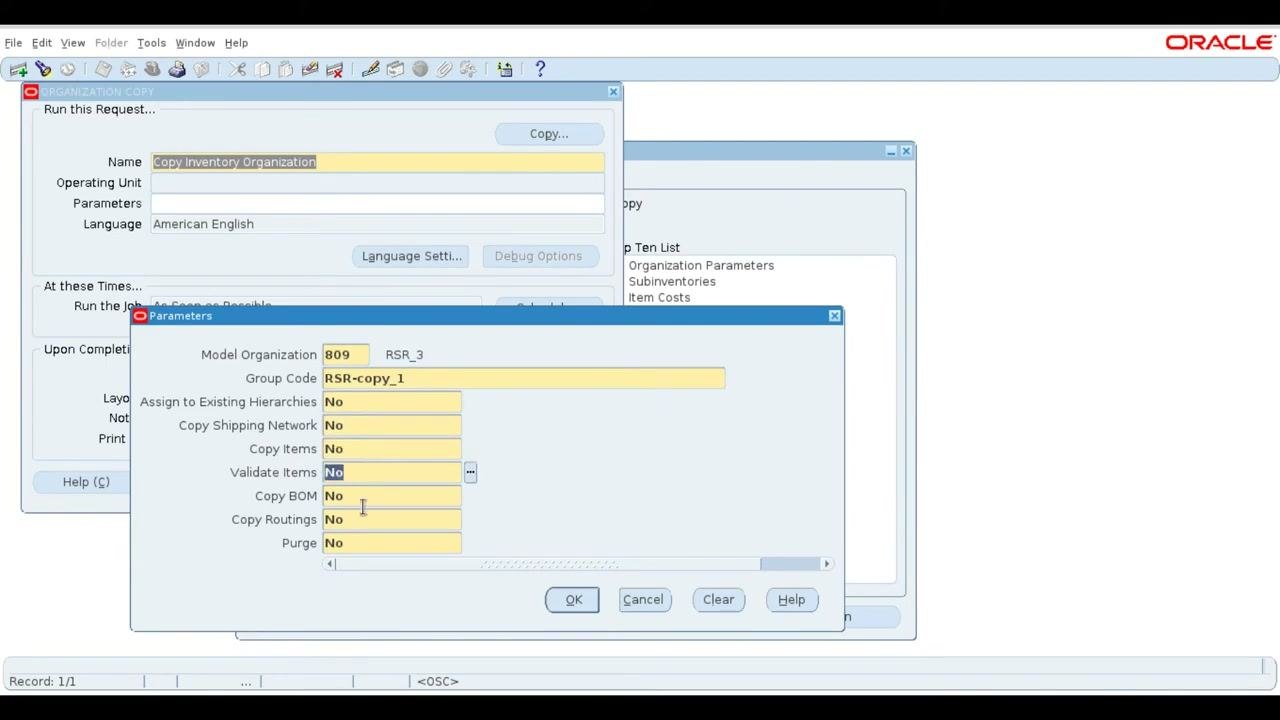
For this example, keep all copy options set to No. You can change these options later as needed.
- Assign to Existing Hierarchies:
No - Copy Shipping Network:
No - Copy Items:
No - Validate Items:
No - Copy BOM:
No - Copy Routings:
No - Purge:
No
Confirm the parameters
Click OK to confirm your entries and close the Parameters dialog.
Submit the Organization Copy request
Review the request window
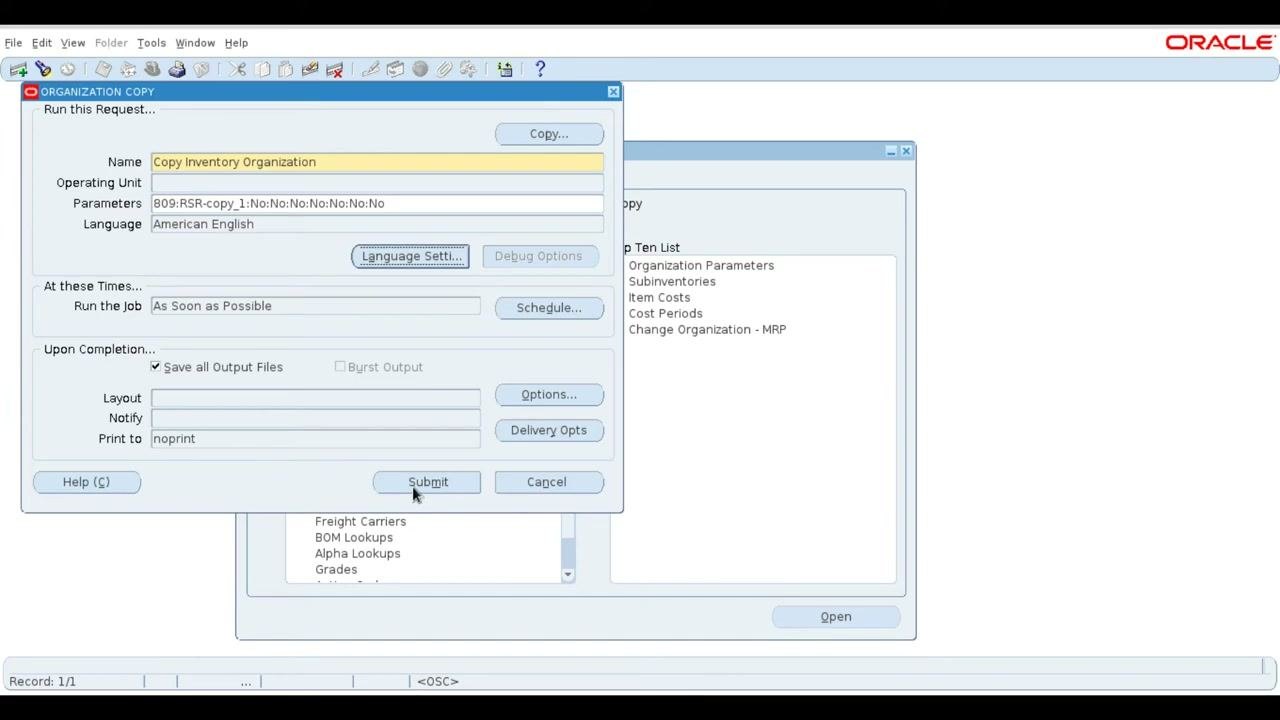
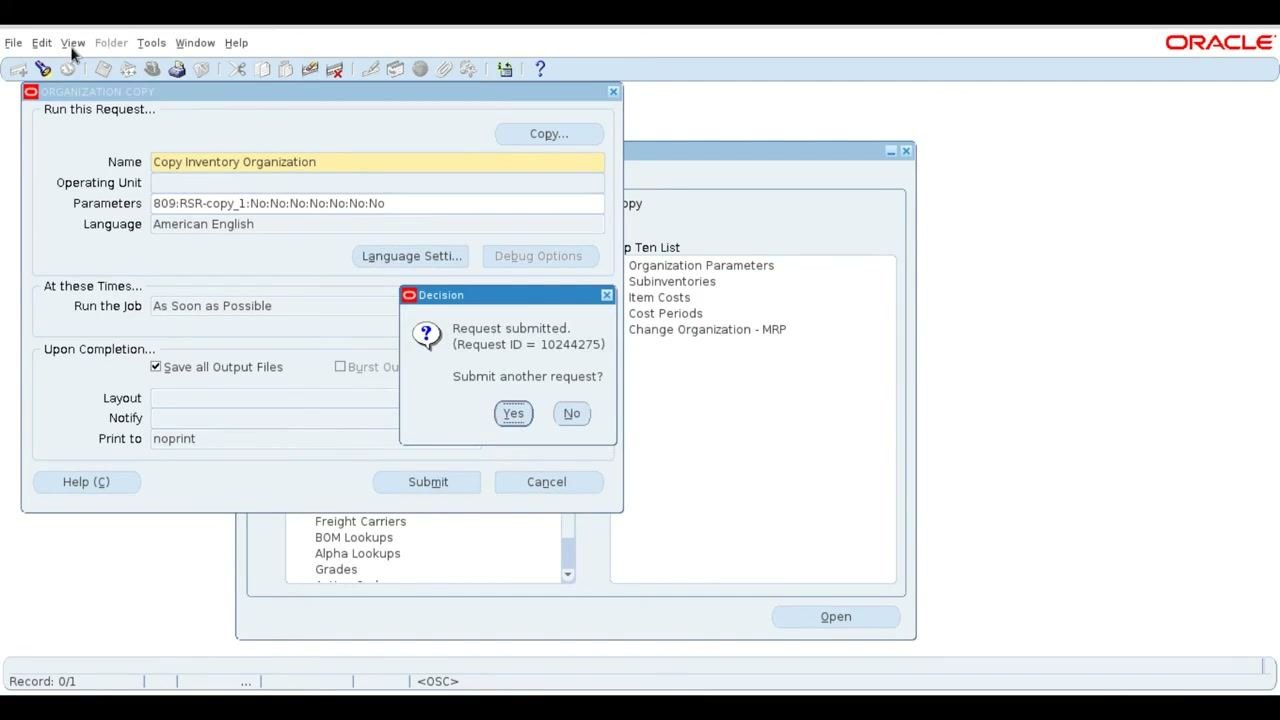
After you close the Parameters dialog, check the ORGANIZATION COPY window. It should show these values:
- Name:
Copy Inventory Organization - Parameters:
809:RSR-copy_1:No:No:No:No:No:No:No - Language:
American English - Run the Job:
As Soon as Possible - Save all Output Files: checked
- Print to:
noprint
Position the cursor over the Submit button.
Submit the concurrent request
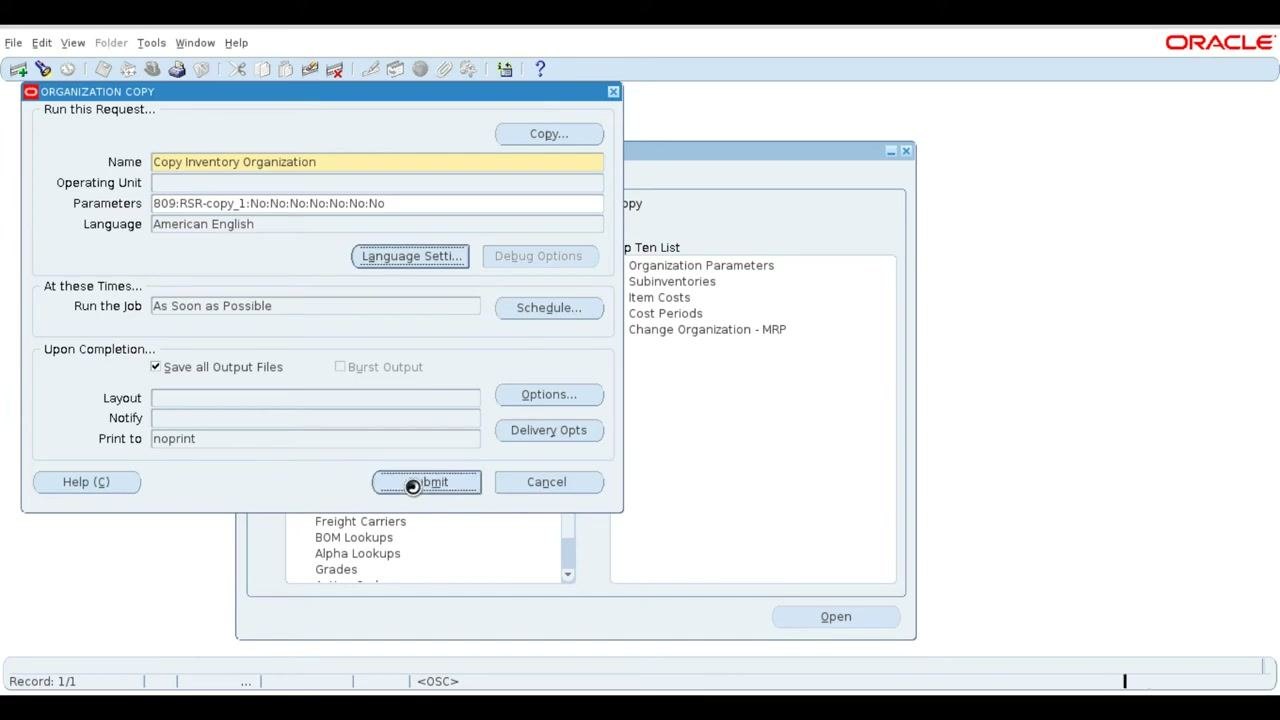
Click Submit to submit the Organization Copy as a concurrent request.
Read the confirmation dialog
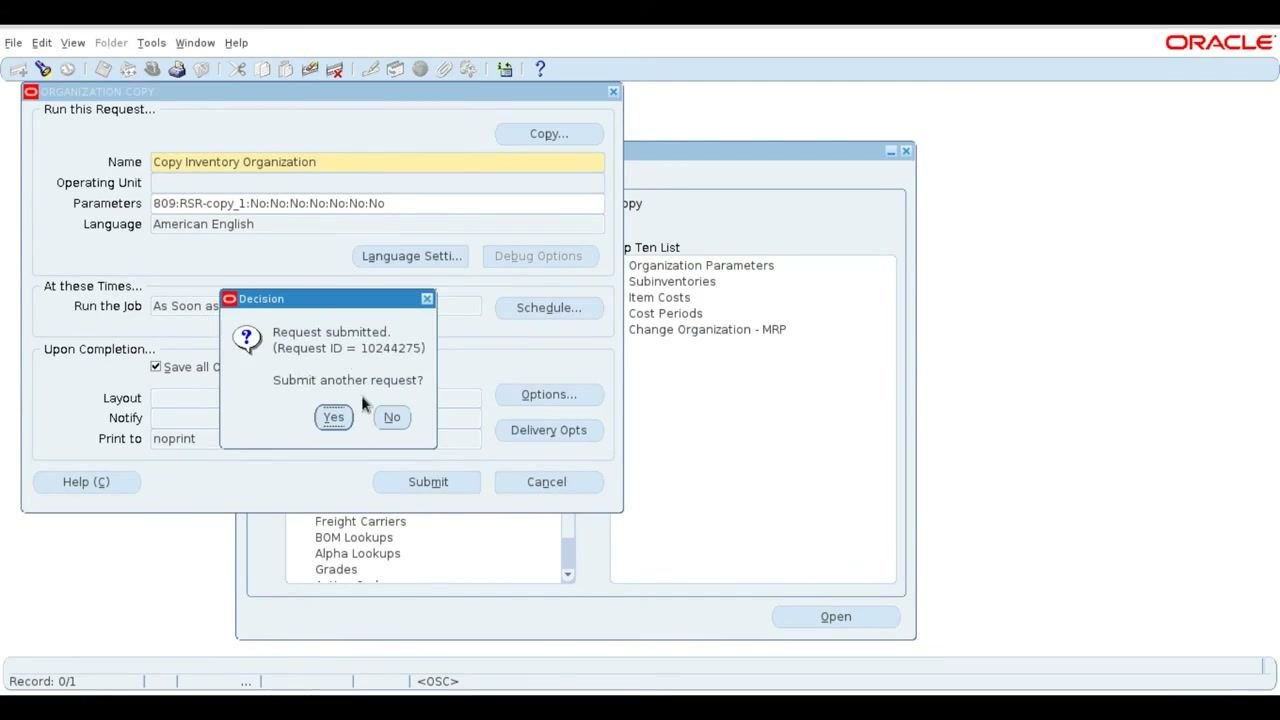
A Decision dialog appears with the message Request submitted. (Request ID = 10244275). It asks "Submit another request?" and offers Yes and No options.
Close the dialog
Click No. This closes the dialog and returns you to the Organization Copy window.
Track the concurrent request
Open the Requests window
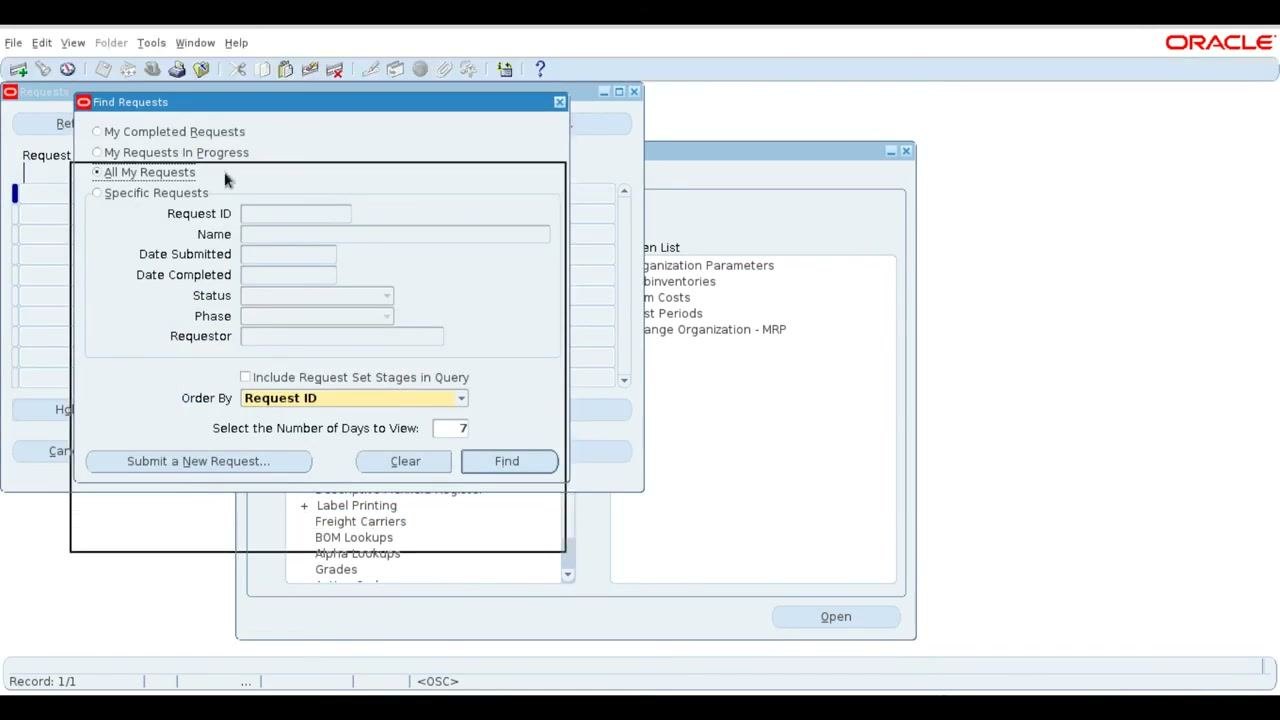
In the menu bar, click View and select Requests. You can also press Alt+V, then R.
Select All My Requests
In the Find Requests dialog, select All My Requests to view every request you have submitted. You can also search by a specific Request ID.
Find your requests
Click Find. The system lists all requests that match your criteria, and you can review the status of your Organization Copy request, such as completed or running.
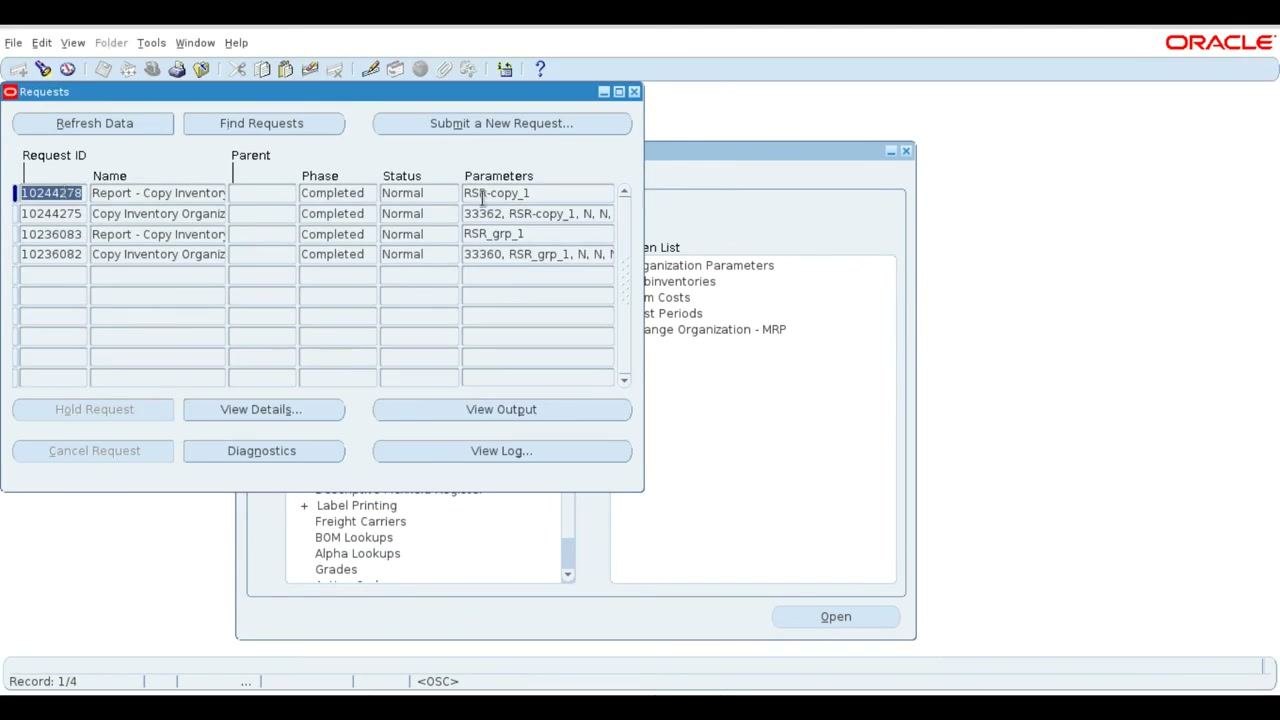
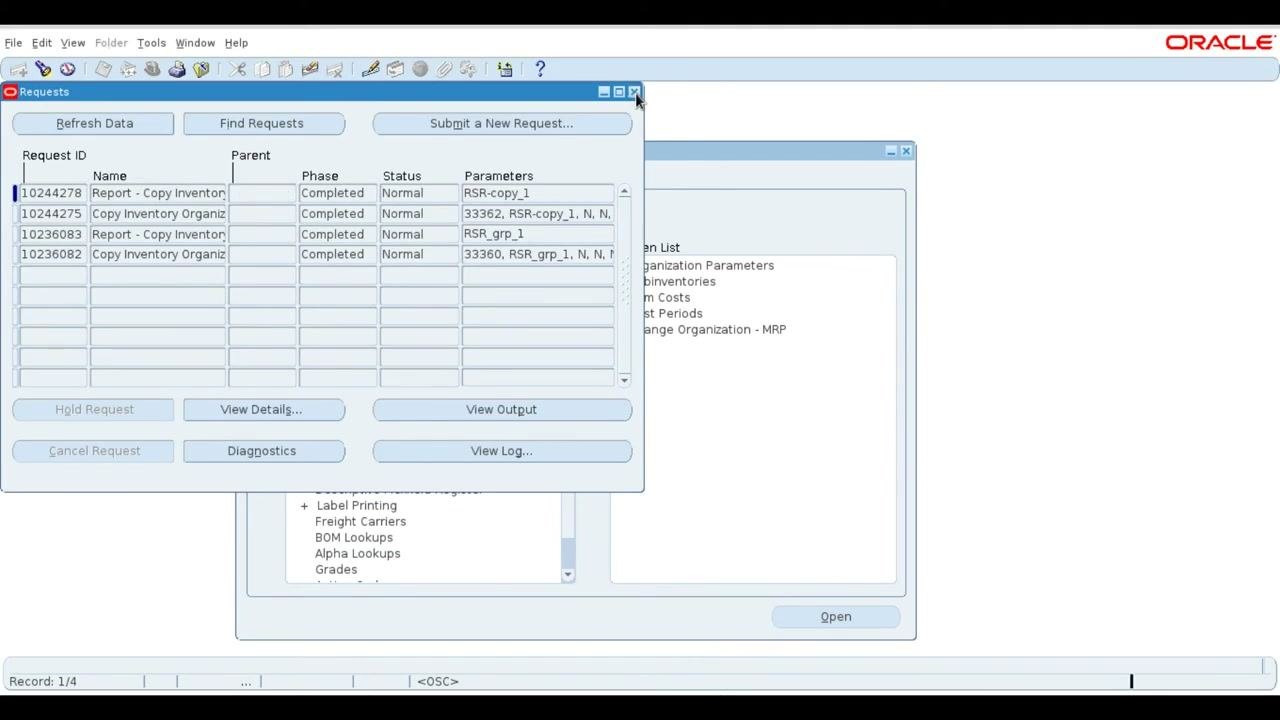
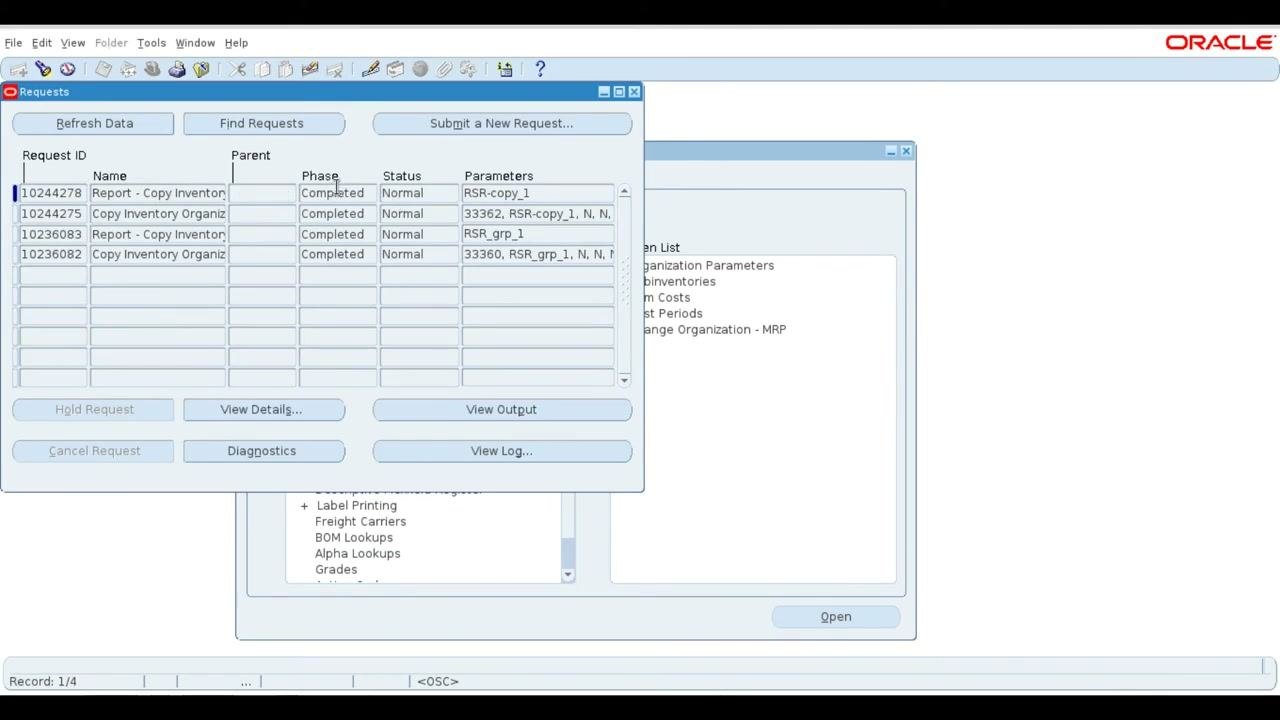
Review the request status
In the Requests window, locate your request by Request ID (for example, 10244278). Confirm these details:
- Phase is
Completed. - Status is
Normal. - The Parameters column shows the group code (for example,
RSR-copy_1).
This confirms that the Organization Copy process finished successfully.
Close the Requests window
Click the close button (X) in the upper right corner, or press Ctrl+F4. You return to the main Oracle Applications Navigator.
Find the new organization with Change Organization
Open Change Organization
In the Navigator, under the Setup section, select Change Organization - MRP. Click Open.
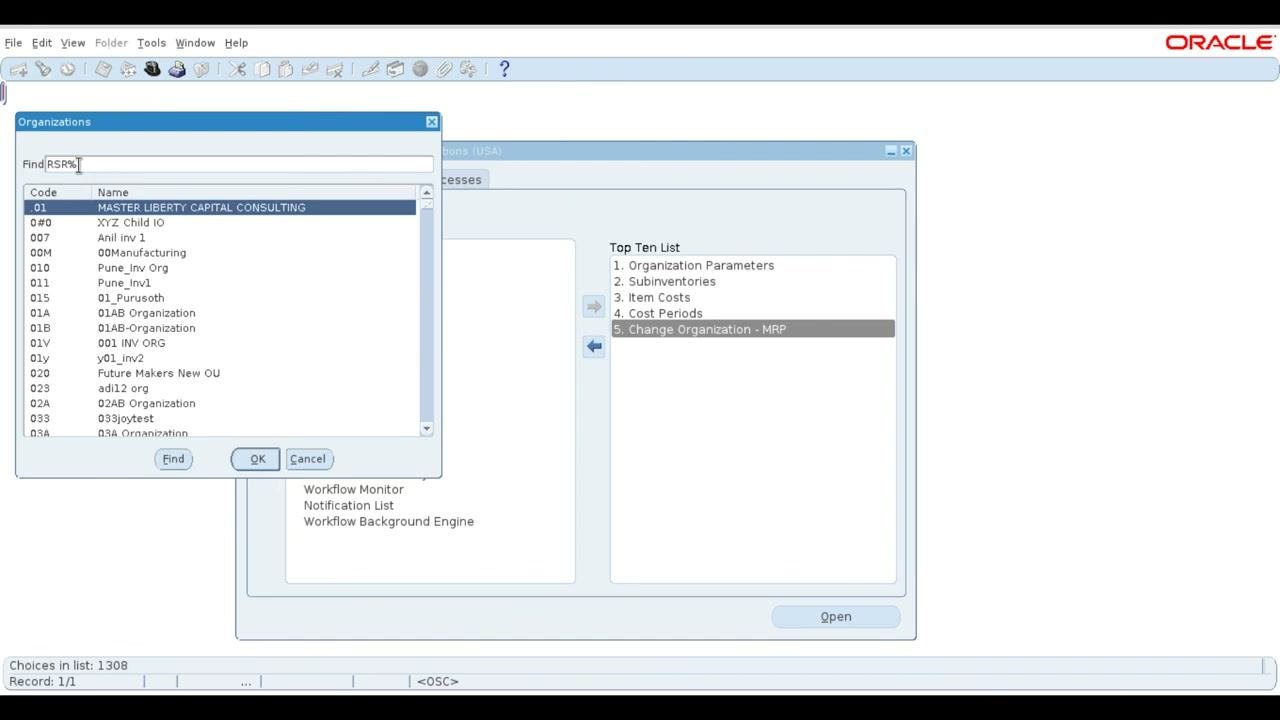
Filter by code prefix
In the Organizations search dialog, enter RSR% in the Find field to filter organizations by code prefix. Click Find to display the matching organizations.
Select the new organization
In the search results, find the organization with Code 810 and Name RSR_4. Select it and click OK.
Verify the new organization
Open the Organizations form
In the Navigator, go to Setup > Organizations and select Organizations. Click Open to access the organization details form.
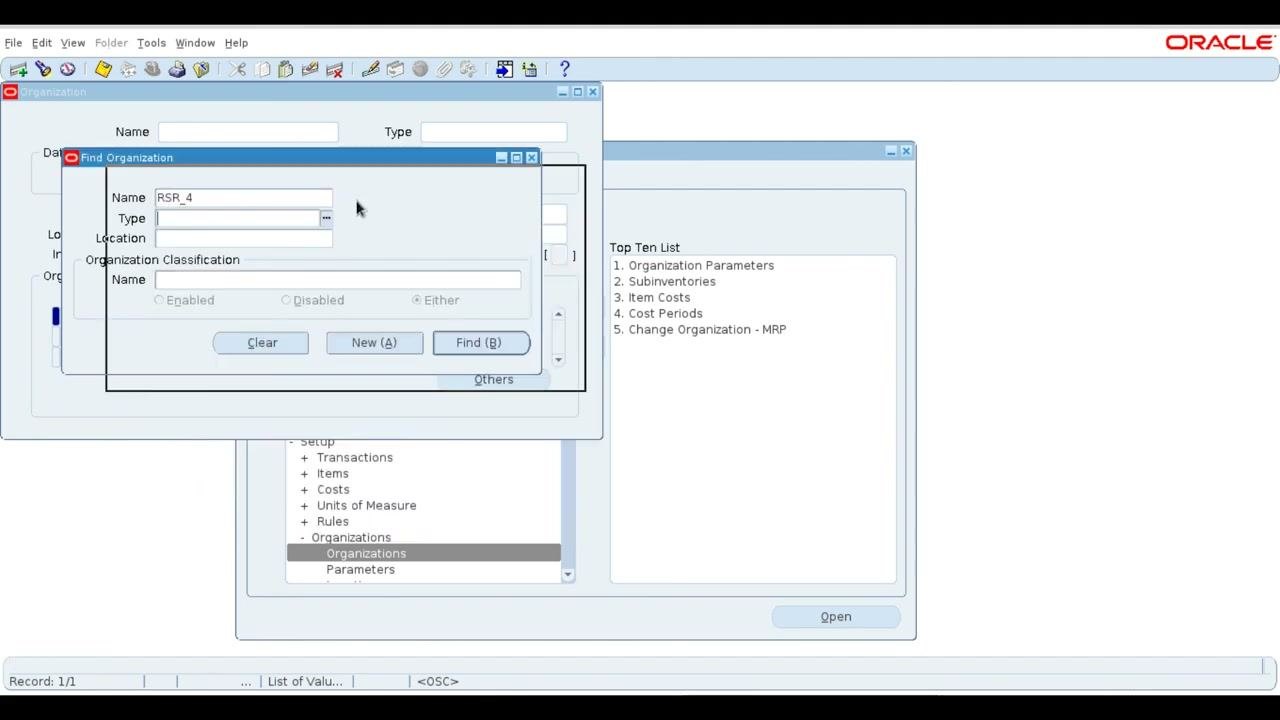
Search for the organization by name
In the Find Organization dialog, enter RSR_4 in the Name field. Leave the other fields blank unless you want to filter the search further. Click Find to display the organization details.
Review the main organization details
In the Organization window, confirm the following:
- Name is
RSR_4and Type isPlant. - The From date is
21-NOV-2019. - Location is
Cmalur. - Location Address is
Block No:632, Atlantic city, Atlants, Cmalur, Kolkota, Kerala, 606060, India. - Internal or External is
Internal. - Inventory Organization is listed under Organization Classifications and is enabled.
Open additional organization information
Click Others in the Organization window. The Additional Organization Information dialog lists these sections:
- Additional Information
- Accounting Information
- Customer/Supplier Association
- Inventory Information
- Receiving Information
Select Accounting Information to continue the verification.
Verify the inventory parameters
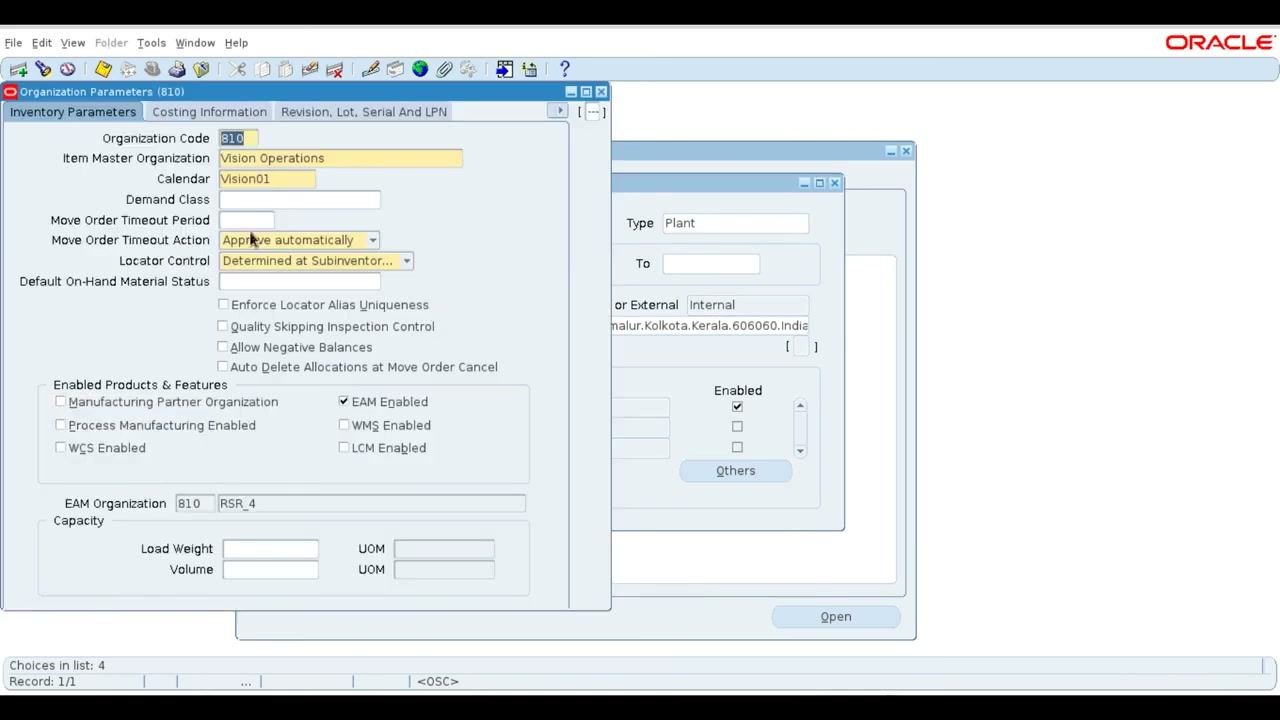
In the Organization Parameters window, confirm these details:
- Organization Code:
810 - Item Master Organization:
Vision Operations - Calendar:
Vision01 - Move Order Timeout Action:
Approve automatically - Locator Control:
Determined at Subinventor... - EAM Organization:
810,RSR_4 - EAM Enabled: checked under Enabled Products & Features
Confirm that these parameters match those of the source organization (for example, organization 809).
Review costing information and valuation accounts
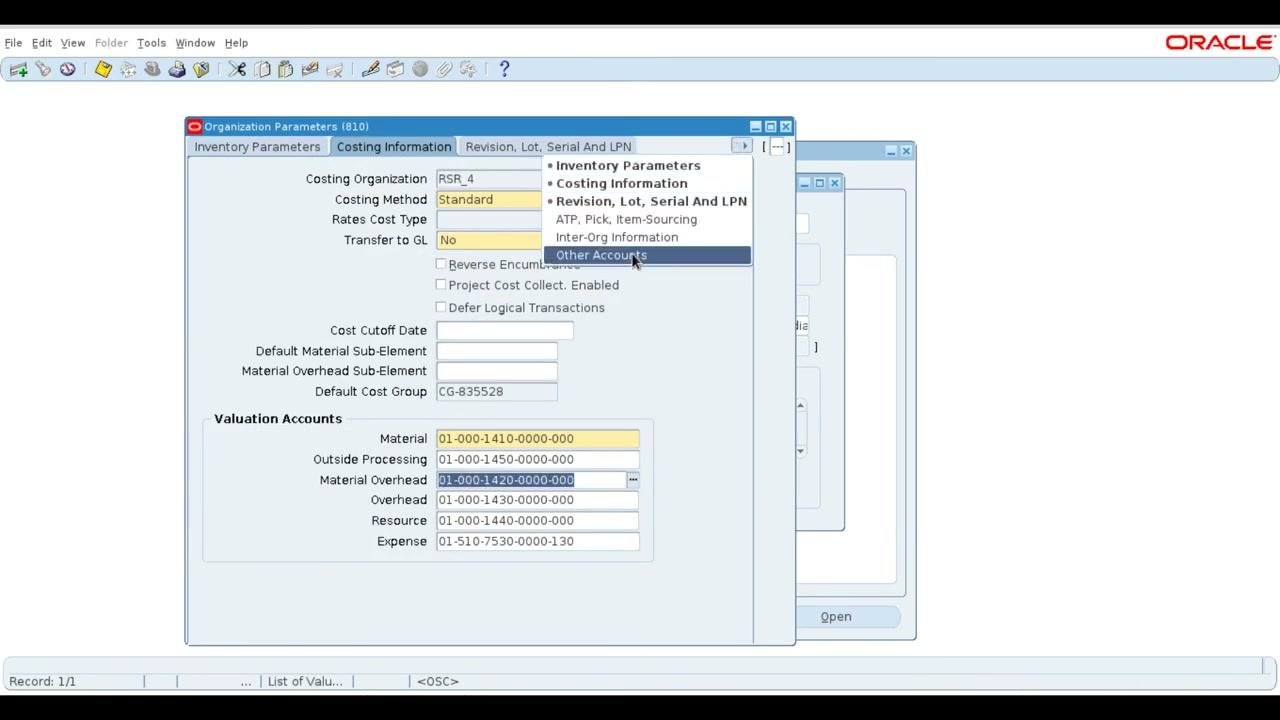
Switch to the Costing Information tab in the Organization Parameters window and confirm these values:
- Costing Organization:
RSR_4 - Costing Method:
Standard - Rates Cost Type: blank
- Transfer to GL:
No - Default Cost Group:
CG-835528
Under Valuation Accounts, verify these account codes:
- Material:
01-000-1410-0000-000 - Outside Processing:
01-000-1450-0000-000 - Material Overhead:
01-000-1420-0000-000 - Overhead:
01-000-1430-0000-000 - Resource:
01-000-1440-0000-000 - Expense:
01-510-7530-0000-130
You can use the navigation menu to review other account sections if needed.
Close the organization details window
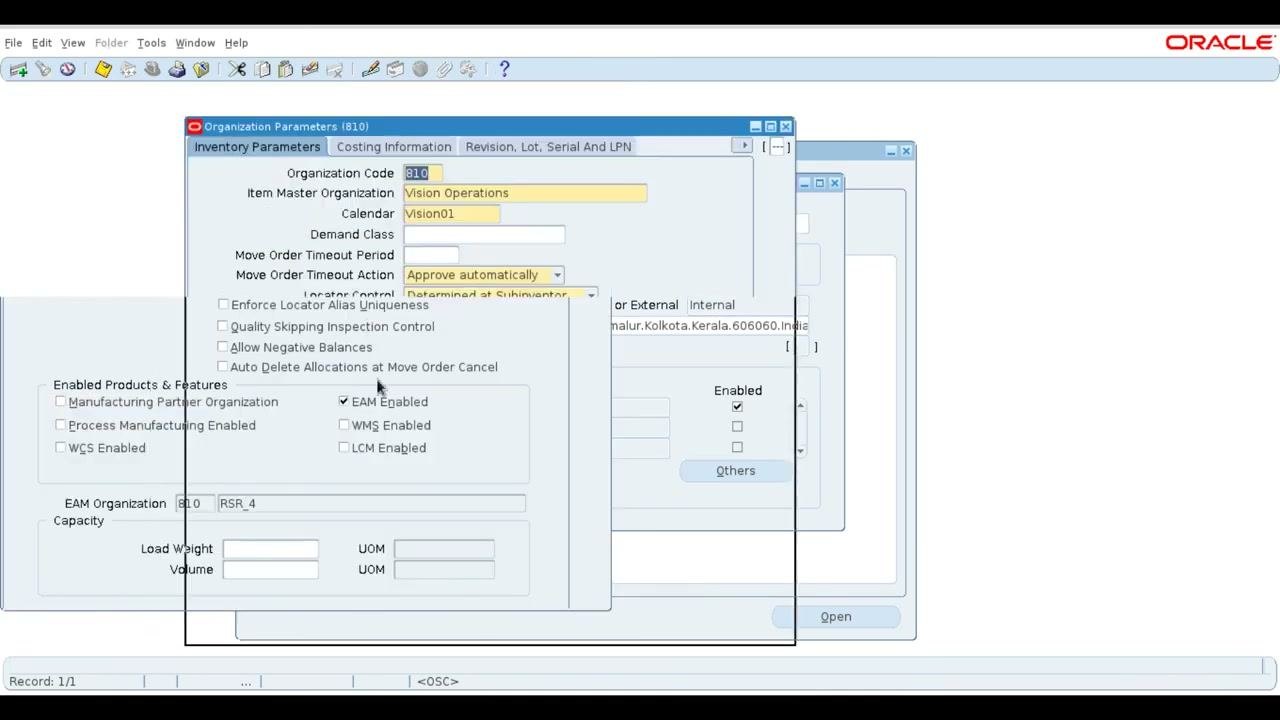
When you finish verifying the details, click the close (X) button in the upper right corner of the Organization window. This completes the verification of the new organization.
Summary
You now know how to create an organization in Oracle EBS by copying an existing one. You created an interface record, launched the Organization Copy request with model organization 809 (RSR_3), and tracked the request to a Completed phase with Normal status. You then confirmed that the details, parameters, and accounts were copied to the new organization, 810 (RSR_4).
Generation details: cost, quality tiers
Docsie billed 5,000 credits ($3.50) to analyze this 10-minute video at standard quality. The rewrite, template fill and Word/PDF exports were included. The same video at each quality tier:
| Quality | Frames sampled | Credits | Approx. cost |
|---|---|---|---|
| Draft | every 16-30 s | 2,500 | $1.75 |
| Standard (this guide) | every 8-15 s | 5,000 | $3.50 |
| Detailed | every 4-7 s | 10,000 | $7.00 |
| Ultra | every 1-3 s | 20,000 | $14.00 |
Credits priced at $0.70 per 1,000; plans include a monthly allowance. Enterprise customers on on-premise or bring-your-own-model deployments run this on their own inference and pay no per-video credits.
Generated by Docsie Video-to-Docs on 2026-11-15 from a 9-minute video. Screenshots are frames from the source video and belong to their creator, Benavalan Sulaphalan, whose original is embedded above. If you own this video and want the guide removed or credited differently, contact us and we will act within one business day.