
How to Create an Asset in Oracle EBS
This guide shows you how to create an asset in Oracle EBS (Oracle Fixed Assets). You enter the asset details, the book and depreciation information, and the accounting and location assignments, and then verify the saved asset. The example is a computer software purchase that you add two ways: through the detailed Additions workflow and through Quick Additions.
Video: How to Add Assets in Oracle FA by Oracle Ebiz and Fusion Videos (2018). All credit for the demonstration goes to the creator; watch the original on YouTube. The written guide below was generated from this video by Docsie. Creator? Request a change or removal.
This guide shows you how to create an asset in Oracle EBS (Oracle Fixed Assets). You enter the asset details, the book and depreciation information, and the accounting and location assignments, and then verify the saved asset. The example is a computer software purchase that you add two ways: through the detailed Additions workflow and through Quick Additions.
You can add an asset in three ways: - Through Assets Workbench using the Additions button. - Using the Quick Additions button. - From the Accounts Payable (AP) module. This guide does not cover this method.
Prerequisites
Before you begin, make sure you have: - Valid credentials to log in to Oracle Applications. - Access to the Assets module under the Vision Operations responsibility.
Add an asset with Assets Workbench
Step 1: Log in and open Assets Workbench
- Open Oracle Applications and log in with your credentials.
- Under the Vision Operations responsibility, go to the Assets module.
- Select Assets Workbench to access the asset management features.
Step 2: Start a new asset addition
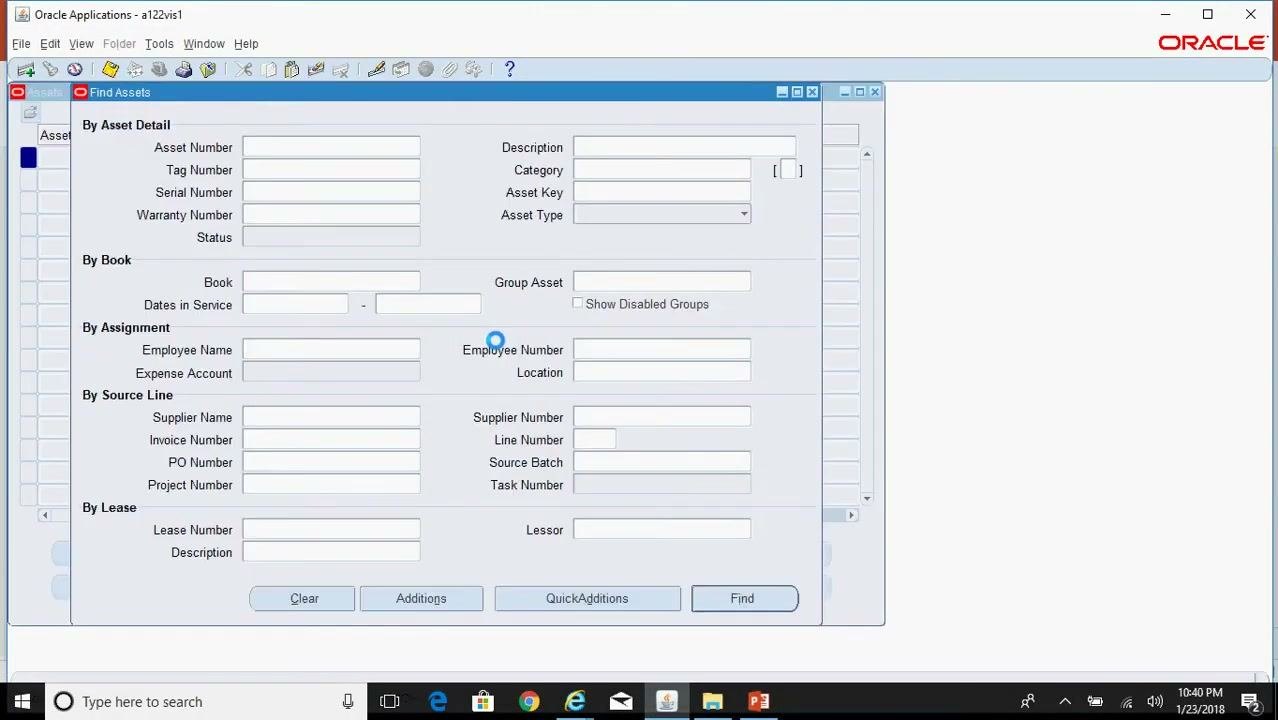
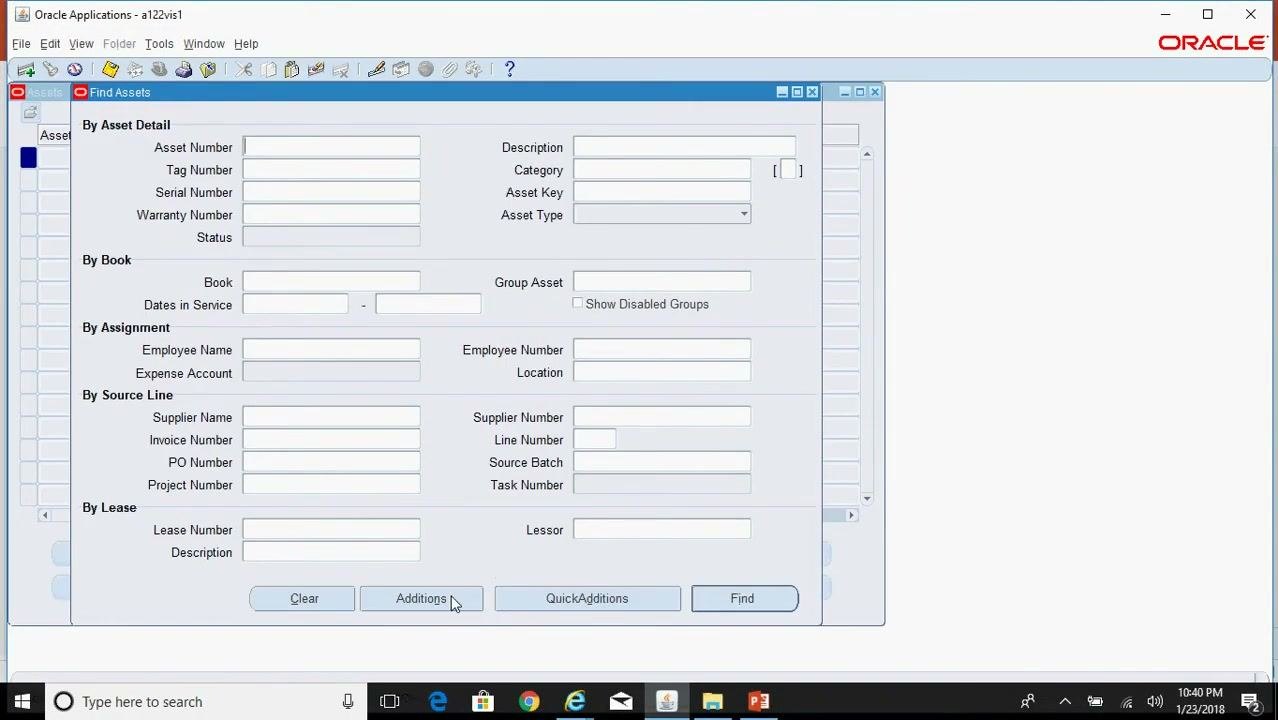
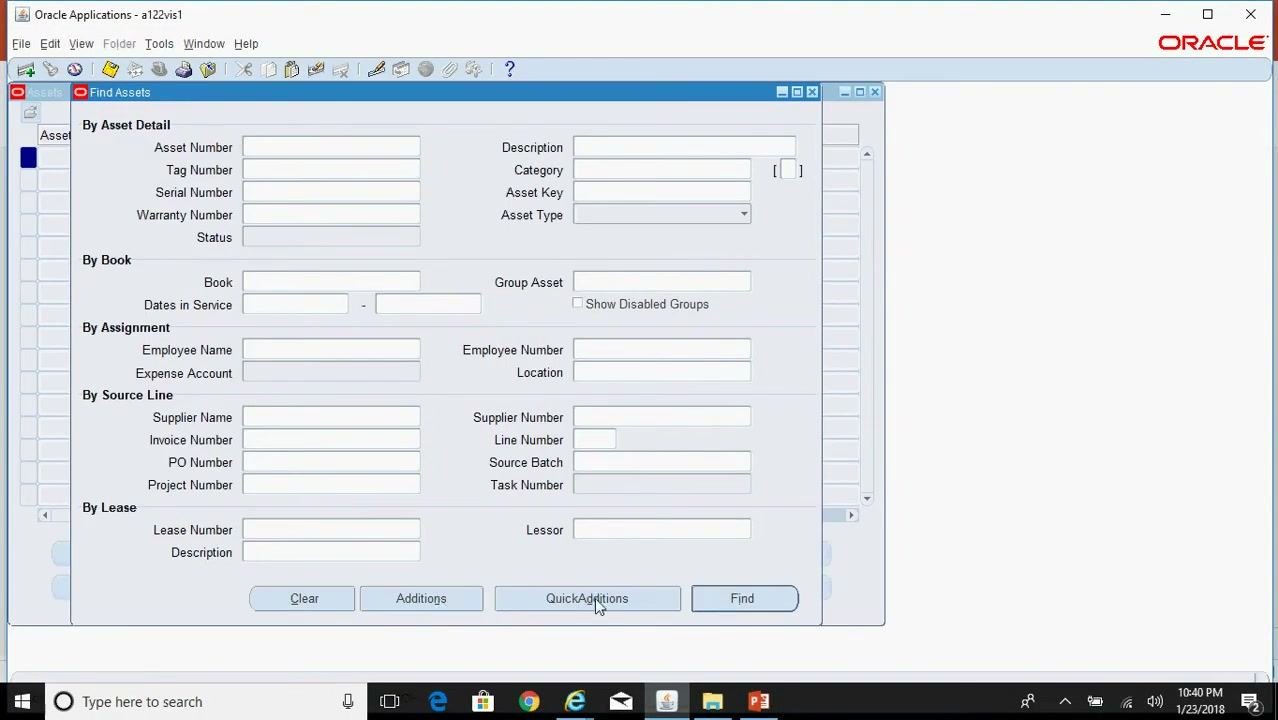
In the Find Assets window, look at the row of buttons at the bottom. Click Additions to begin adding a new asset.
Step 3: Enter the asset details
In the Asset Details window, enter the following information:
- Description: Enter a free-text description. In this example, enter Purchase of Computer Software.
- Category: You assign this in the next step.
- Units: Enter the number of units. In this example, enter 1.
- Asset Number: The system generates this value, so you leave it blank.
Other fields, such as Tag Number, Serial Number, Manufacturer, Warranty Number, and Model, are optional. They are typically used for physical assets.
Step 4: Assign the asset category
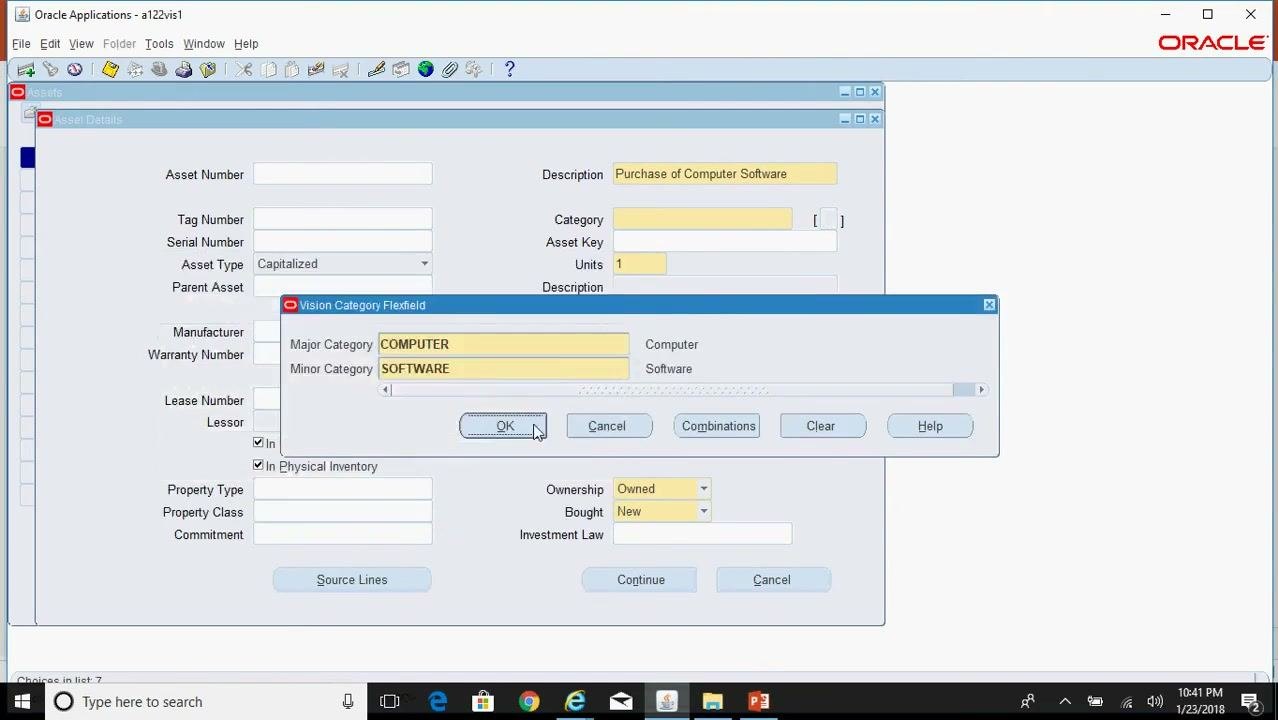
- Click the Category field to open the Vision Category Flexfield dialog.
- Enter
COMPUTERas the Major Category. - Enter
SOFTWAREas the Minor Category. - Click OK to confirm.
Step 5: Continue to the Books window
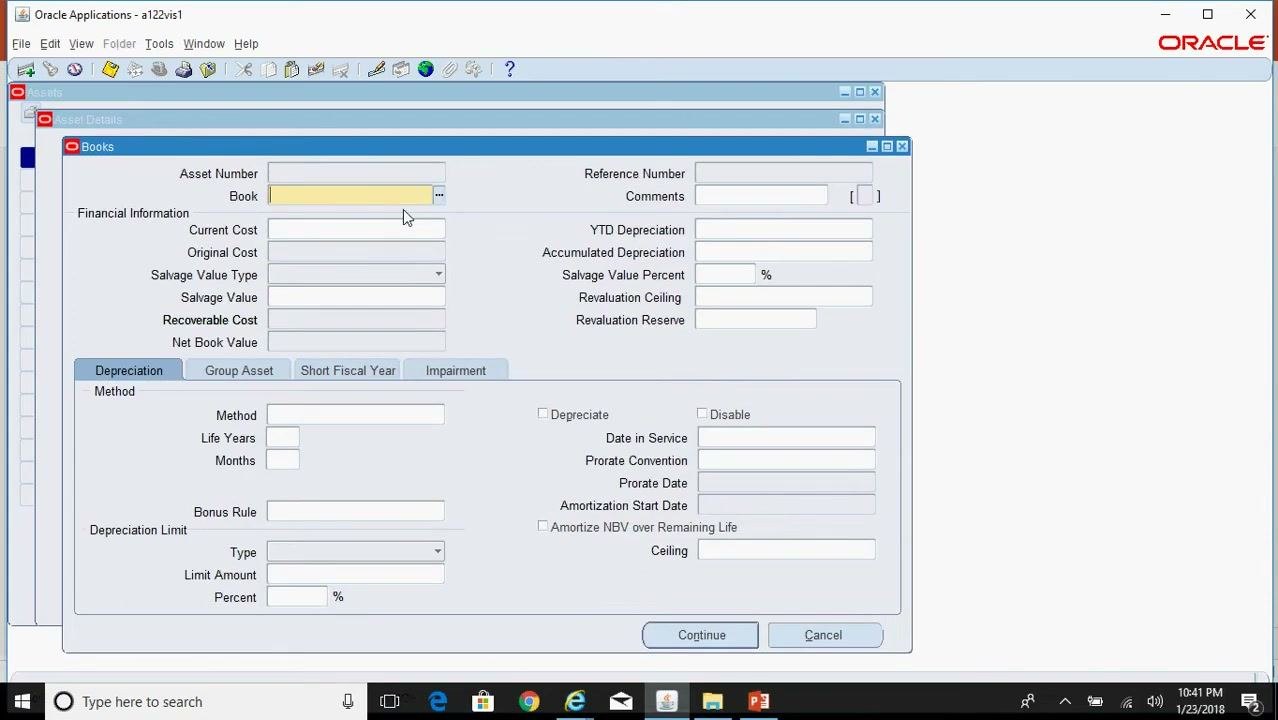
Click Continue in the Asset Details window. The Books window opens, where you enter financial and depreciation information for the asset.
Step 6: Select the asset book
In the Books window, select the asset book you want to create the asset under. In this example, select OPS CORP (Operations Corporate Asset Book).
Step 7: Enter the financial information
Enter the following values:
- Current Cost: 35,000, the purchase cost of the asset.
- YTD Depreciation: 0.00, because this is a new asset.
- Accumulated Depreciation: 0.00, because there is no depreciation yet.
- Salvage Value Type: Select Percent and enter 20%.
- Salvage Value: 7,000, calculated from the percentage.
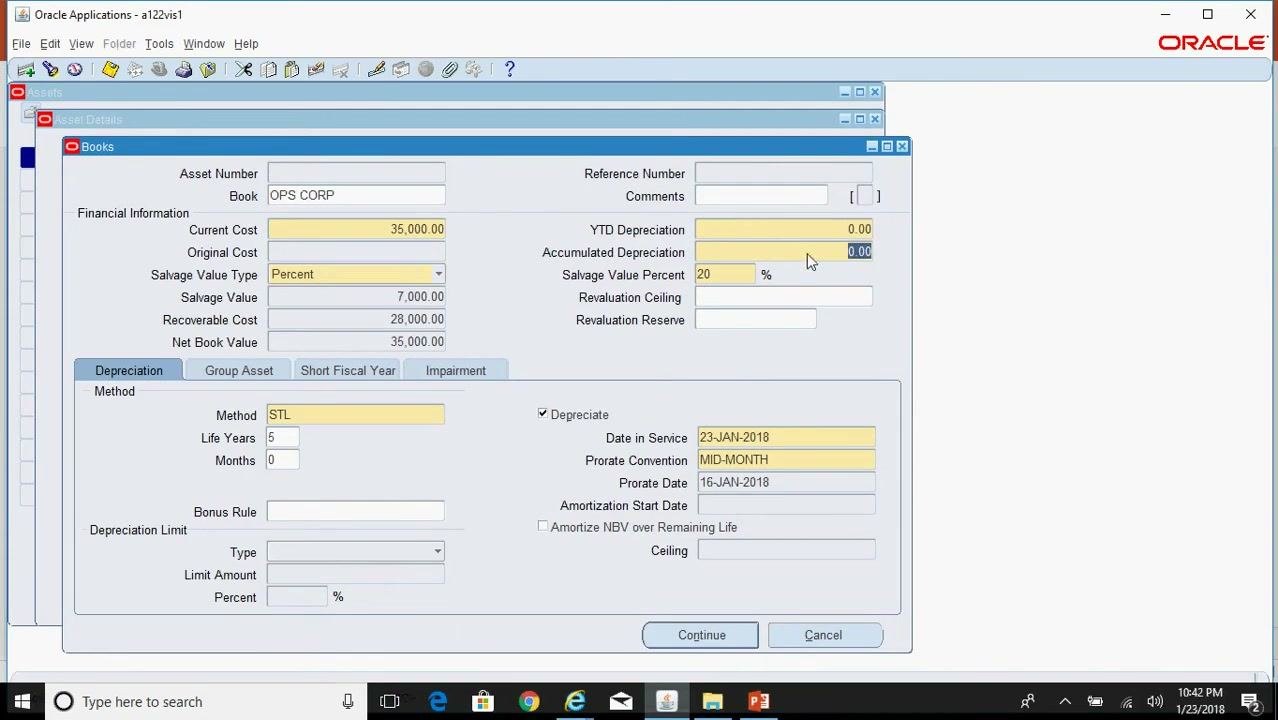
Net Book Value fills in automatically as 35,000.
Step 8: Use a fixed salvage amount (optional)
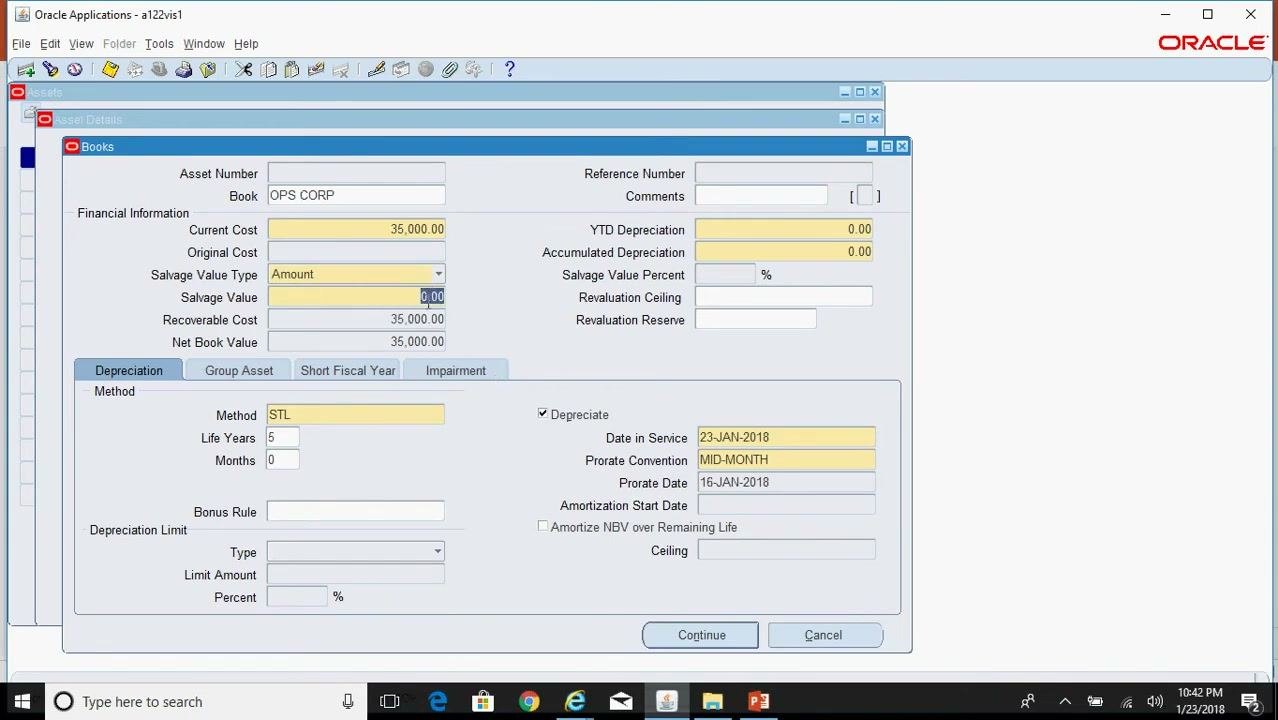
If you want to specify the salvage value as a fixed amount instead of a percentage:
1. Change Salvage Value Type to Amount.
2. Enter 0.00 as the Salvage Value if you expect no salvage value at the end of the asset's life.
Step 9: Confirm the depreciation settings
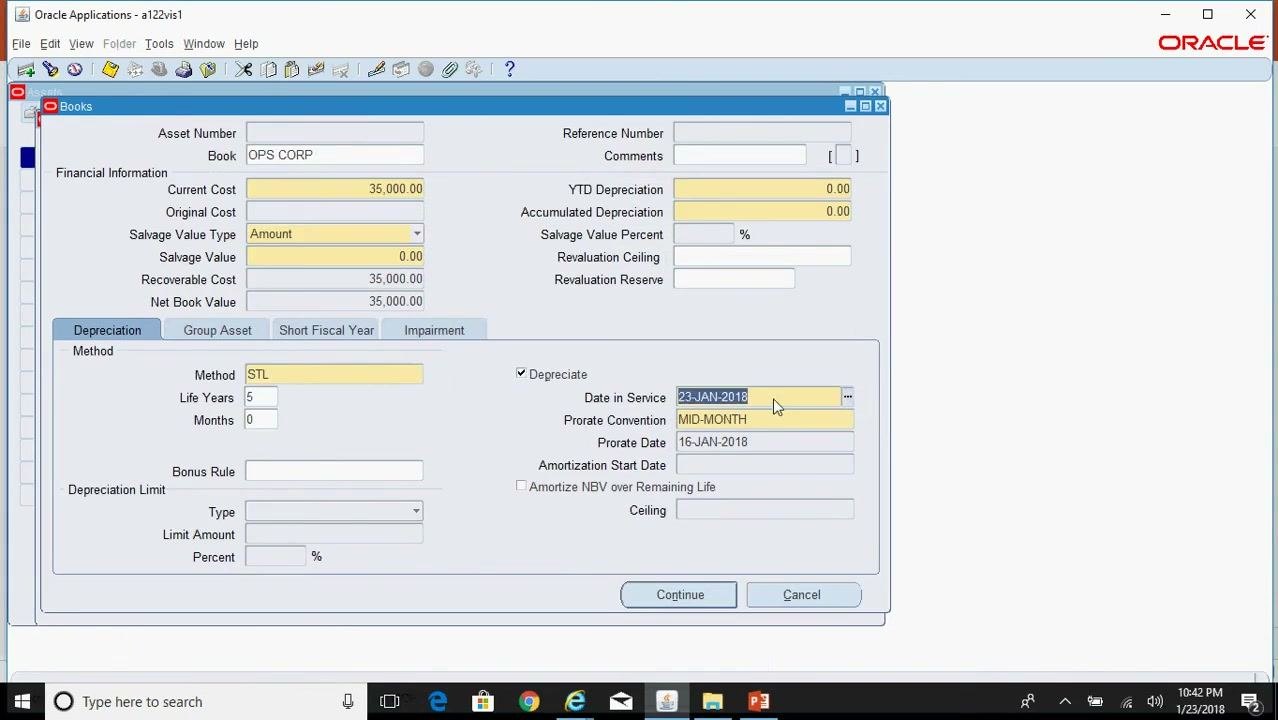
Review the depreciation method and related fields:
- Method: STL (Straight Line).
- Life Years: 5.
- Depreciate: Make sure the box is checked.
- Date in Service: 23-JAN-2018, the date the asset is placed in service.
- Prorate Convention: MID-MONTH.
- Prorate Date: 16-JAN-2018.
Step 10: Assign the expense (depreciation) account
In the Assignments window, enter these values in the Operations Accounting Flex popup:
- Company: 01 (Operations)
- Department: 000 (No Department)
- Account: 7360 (Depreciation Computers & Software)
- Sub-Account: 0000 (No Sub Account)
- Product: 000 (No Product)
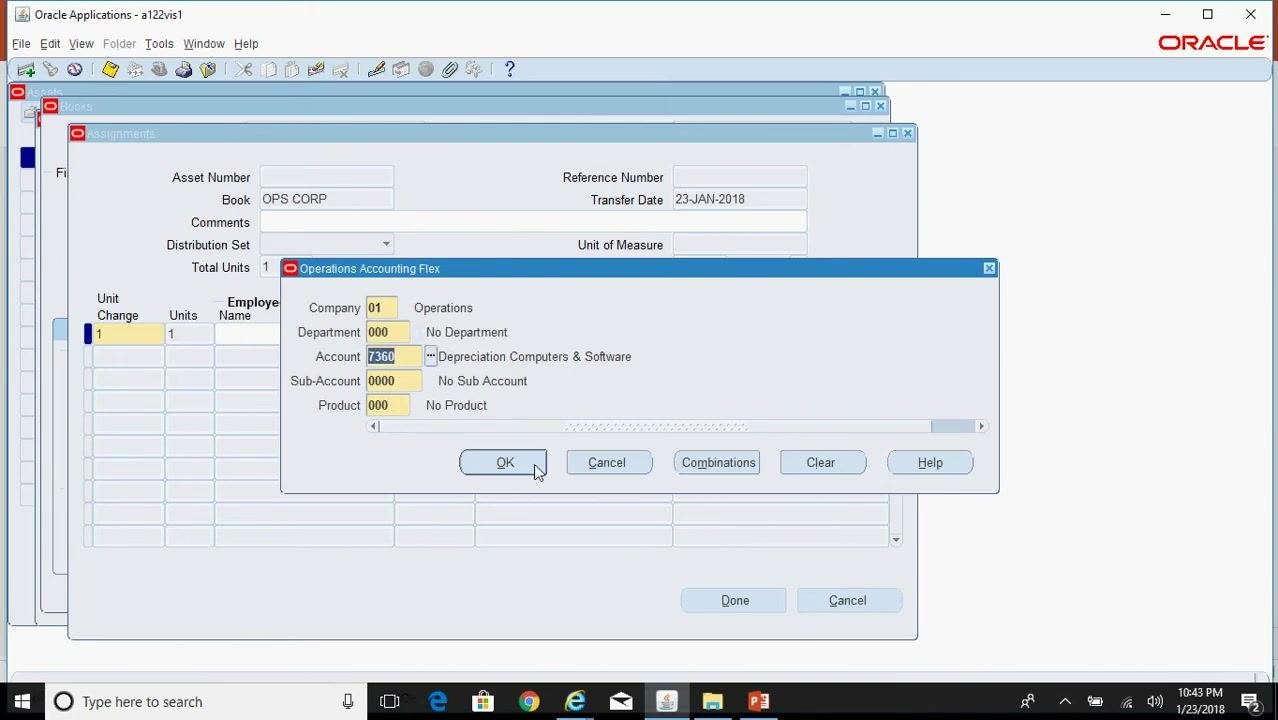
Click OK to confirm the accounting combination.
Step 11: Specify the physical location
- In the Location field, click the search icon to open the location selection window.
- Select
Californiafrom the predefined locations in the asset location master, or choose another relevant location.
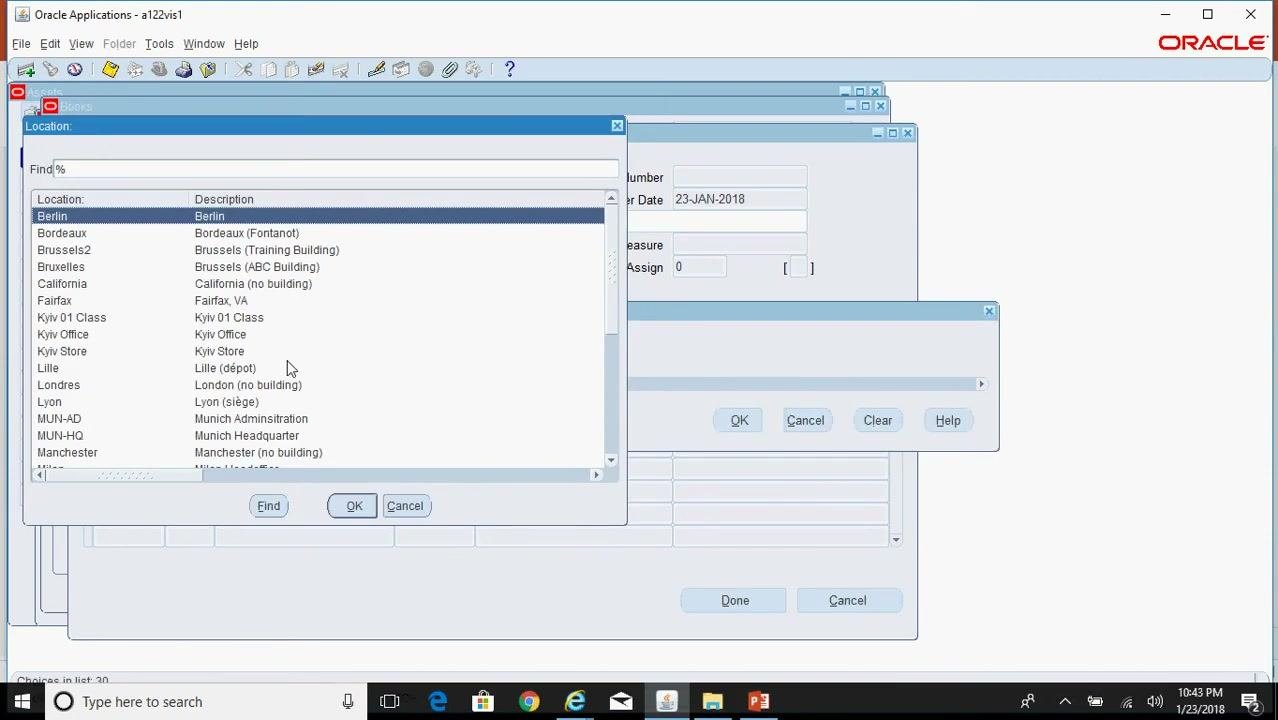
For software assets, the physical location may not have special significance.
Step 12: Finish and save the asset
- In the Assignments window, check that the Expense Account and Location fields are correct. For example,
01-000-7360-0000-000andUSA.CA.SAN FRANCISCO-NONE. - Click Done to complete the asset addition.
A message confirms the save: "Transaction saved for the asset number 189577." The system generates the asset number.
Step 13: Query the new asset
- Return to Assets Workbench.
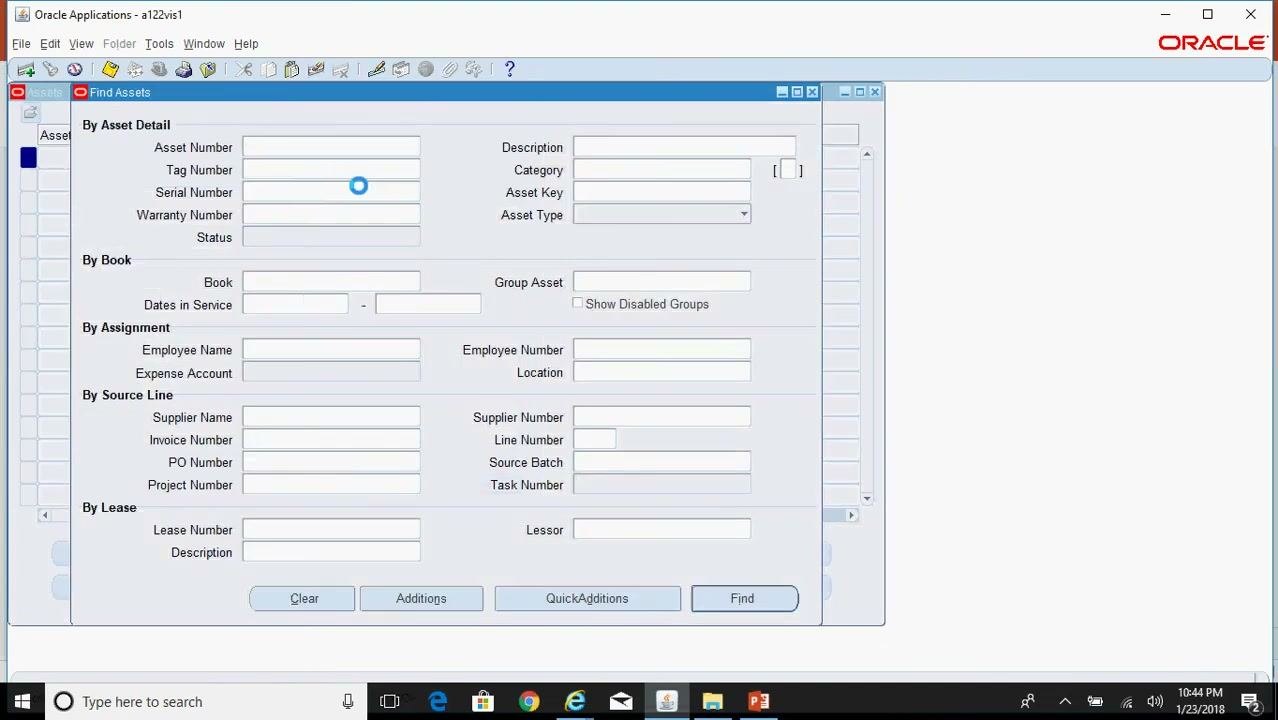
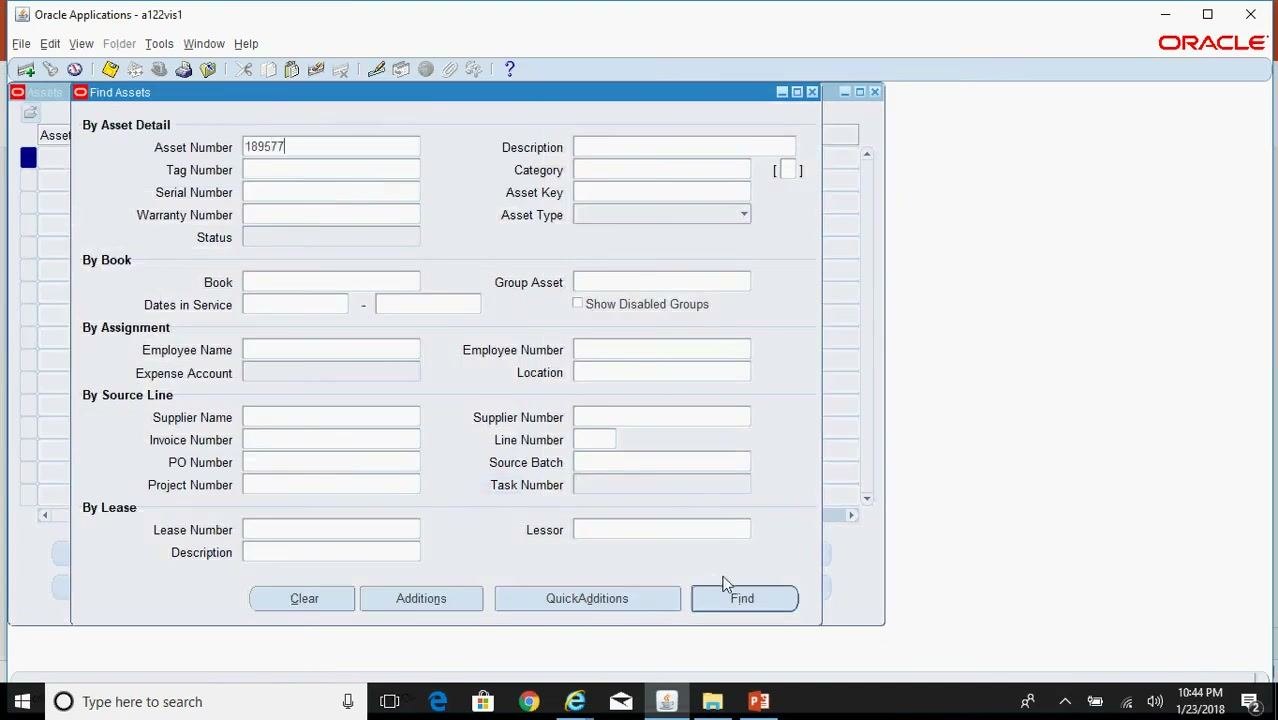
- In the Find Assets window, enter the generated number
189577in the Asset Number field. - Click Find to retrieve the asset and review the details you entered.
Create an asset with Quick Additions
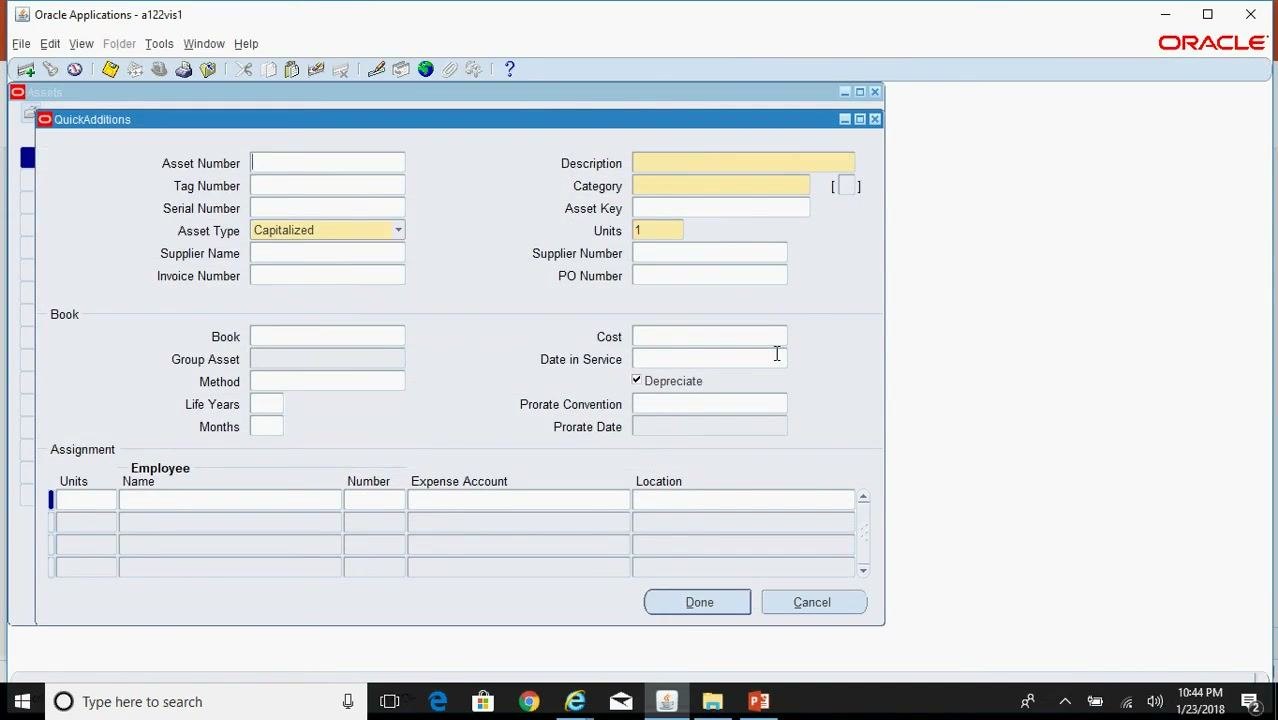
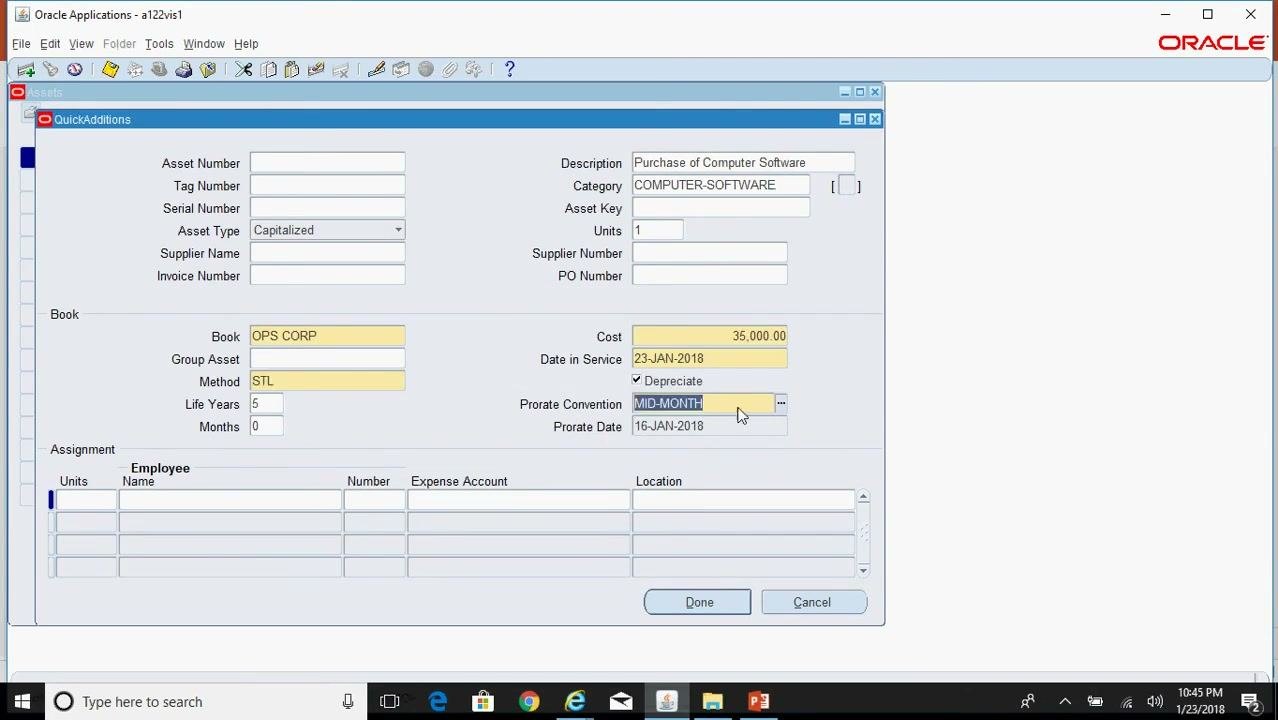
Quick Additions lets you enter all required asset details on a single screen for faster entry. Some fields from the detailed process, such as YTD Depreciation and Accumulated Depreciation, are not available in Quick Additions.
Step 14: Open Quick Additions
In the Find Assets window, click Quick Additions to open the Quick Additions form.
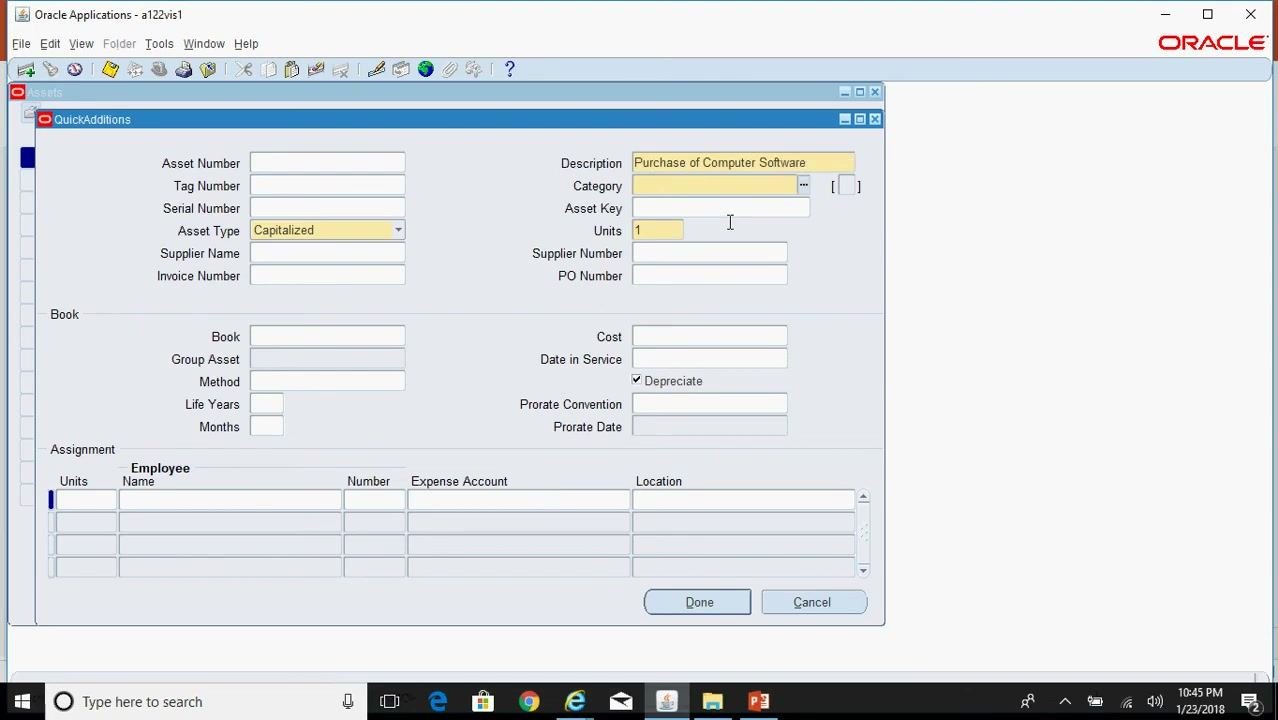
Step 15: Enter the description, asset type, and units
- In the Description field, enter
Purchase of Computer Software. - Set Asset Type to
Capitalized. - Enter
1in the Units field.
Step 16: Select the category
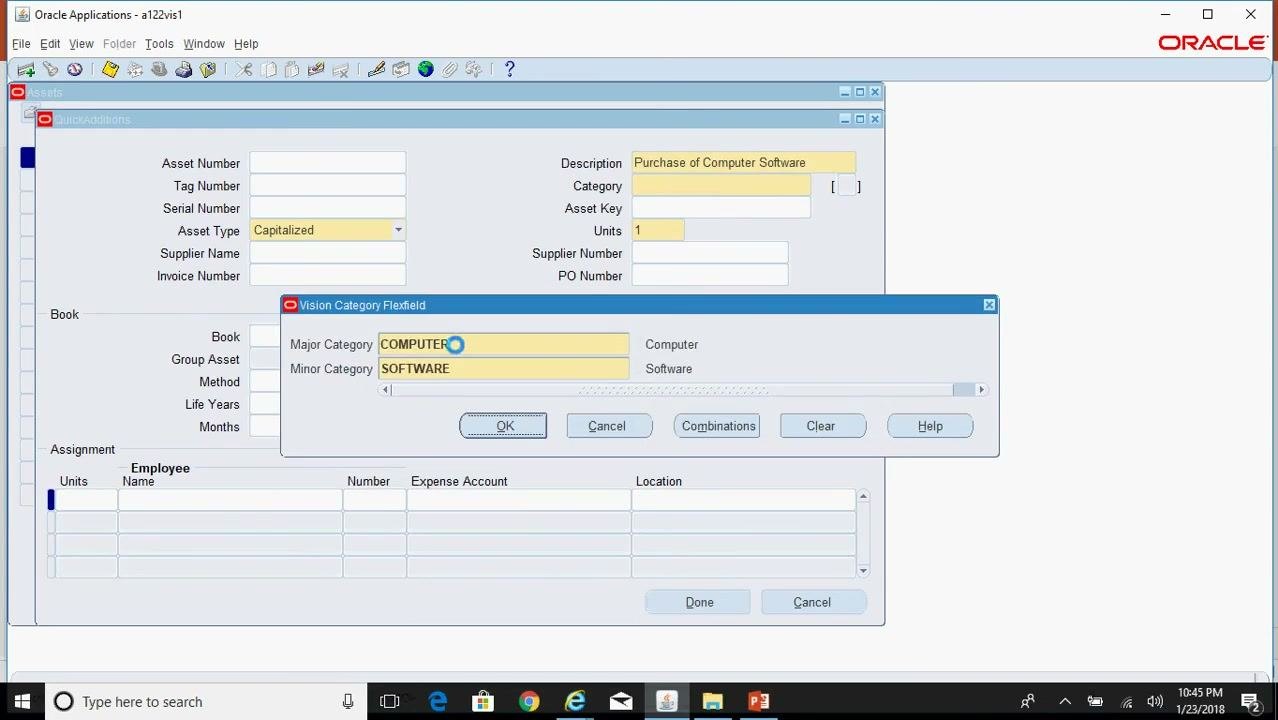
- Click the ellipsis button next to the Category field to open the Vision Category Flexfield dialog.
- Select
COMPUTERas the Major Category. - Select
SOFTWAREas the Minor Category. - Click OK.
Step 17: Add optional details
If you need them, enter additional details such as Tag Number and Serial Number. These fields are not mandatory.
Step 18: Complete the Book section
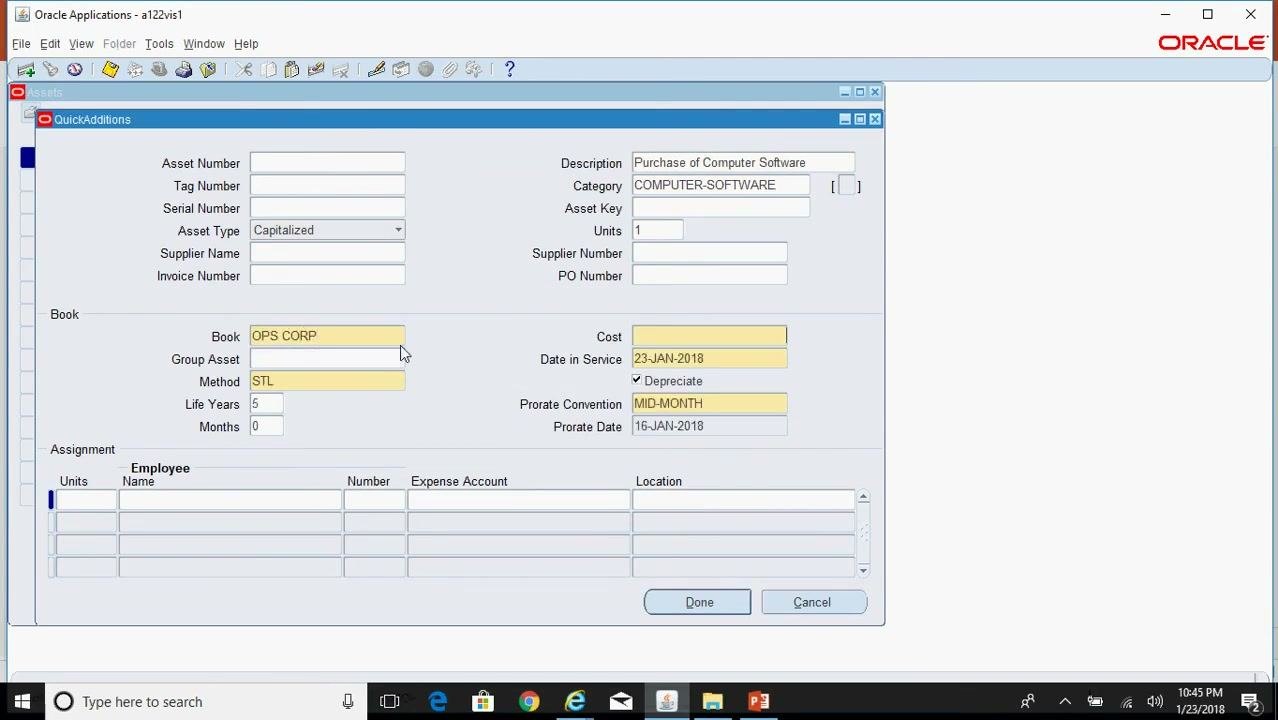
Enter the following values:
- Book: OPS CORP
- Method: STL
- Life Years: 5, and Months: 0
- Depreciate: Make sure the checkbox is checked.
- Date in Service: 23-JAN-2018
- Prorate Convention: MID-MONTH
- Prorate Date: 16-JAN-2018
Step 19: Enter the cost
Enter the asset cost in the Cost field. In this example, enter 35,000.00. Confirm that the defaulted values for method, life, and proration convention are correct.
Step 20: Complete the Assignment section
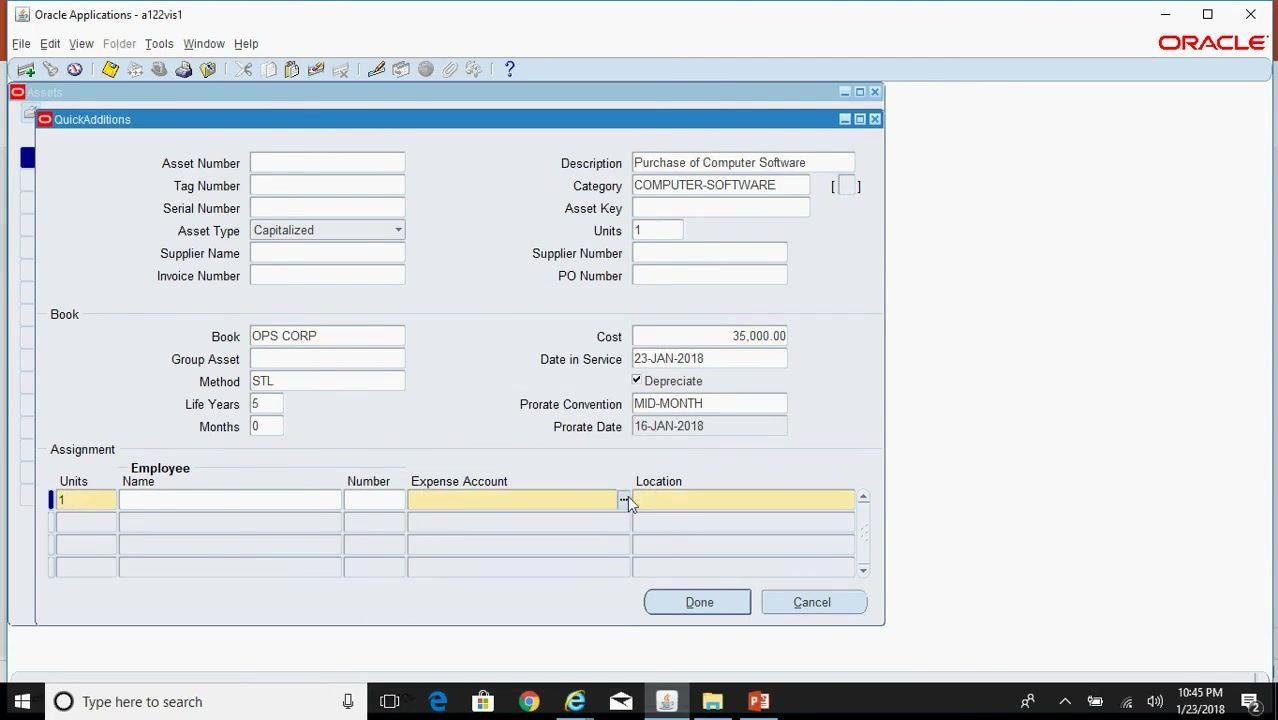
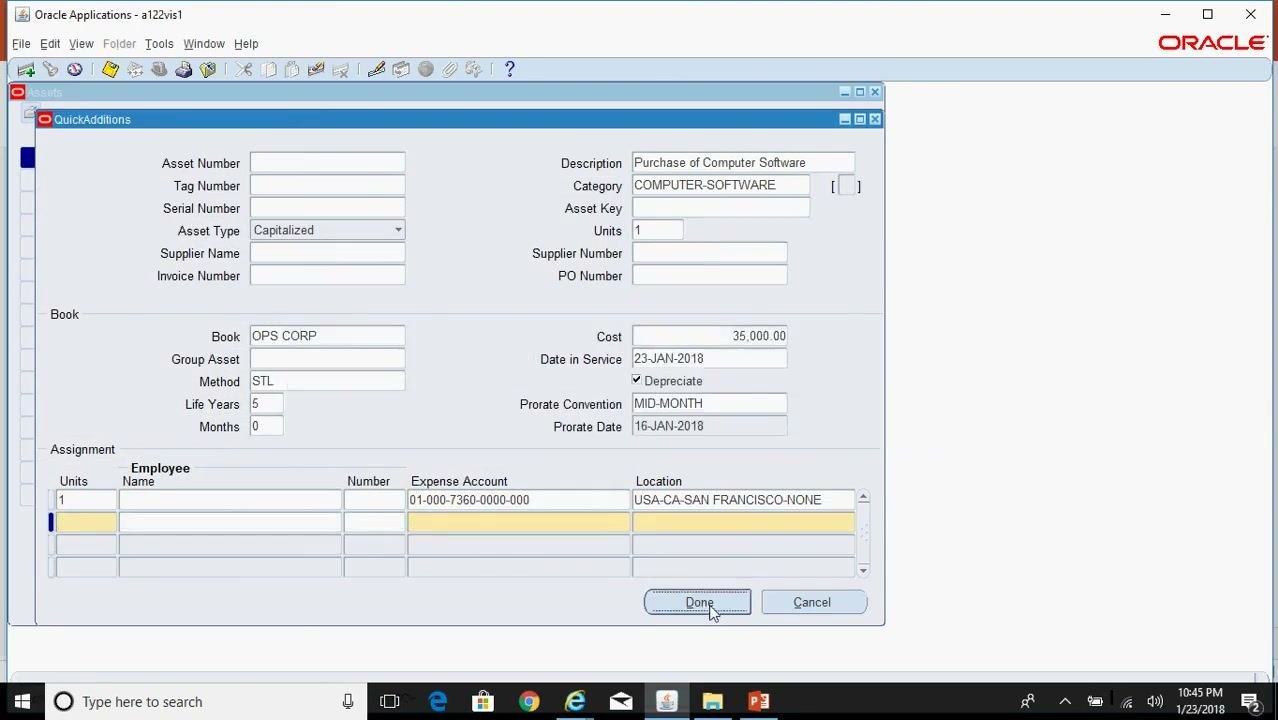
In the Assignment section, enter:
- Units: 1
- Expense Account: 01-000-7360-0000-000
- Location: USA-CA-SAN FRANCISCO-NONE
Step 21: Save the asset
Click Done to save the asset entry. A message confirms that the transaction is saved for asset number 189578.
Step 22: Find the asset
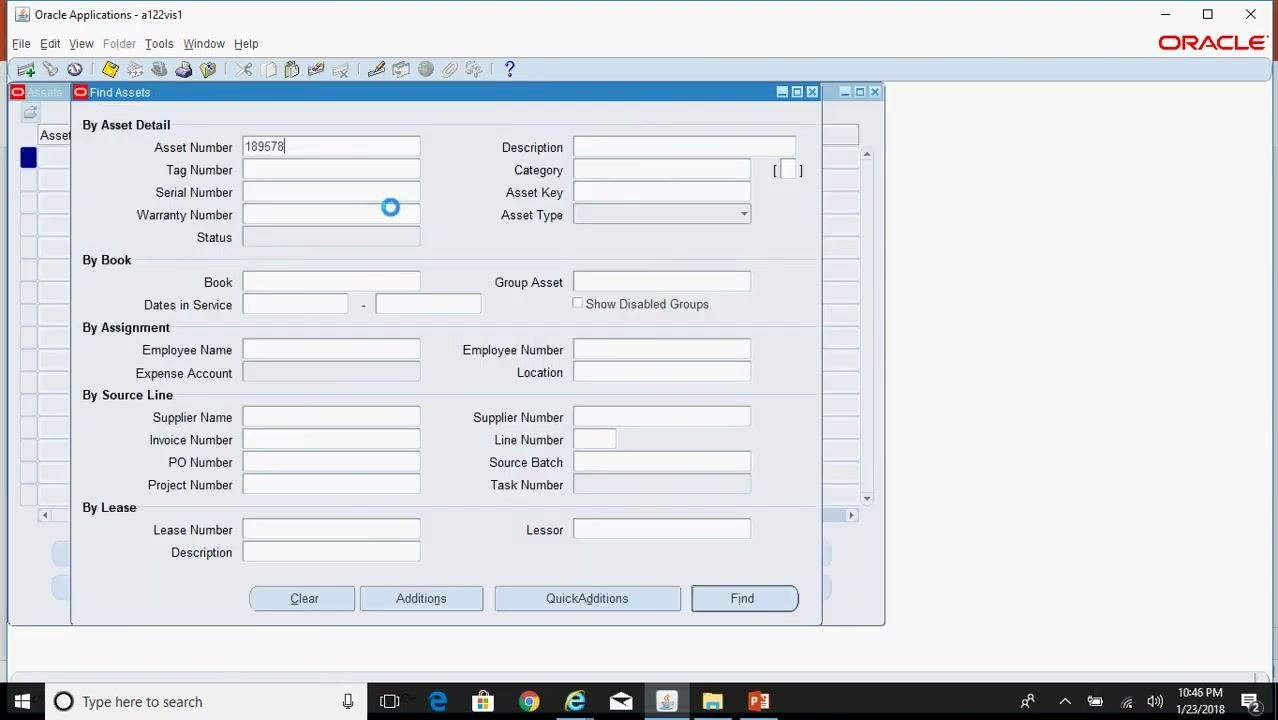
- Open the Find Assets window.
- Enter
189578in the Asset Number field. - Click Find.
Step 23: Review the results
In the results grid, confirm that asset 189578 appears with the description Purchase of Computer Software. The category displays as COMPUTER-SOFTWARE.
Summary
You now know how to create an asset in Oracle EBS in two ways. The detailed Additions workflow takes you through Asset Details, Books, and Assignments, and includes fields such as YTD Depreciation and Accumulated Depreciation. Quick Additions collects the required details on one screen and omits those fields. In both methods, the system generates the asset number when you click Done, and you can look up the asset in the Find Assets window to verify it.
Generation details: cost, quality tiers
Docsie billed 3,500 credits ($2.45) to analyze this 7-minute video at standard quality. The rewrite, template fill and Word/PDF exports were included. The same video at each quality tier:
| Quality | Frames sampled | Credits | Approx. cost |
|---|---|---|---|
| Draft | every 16-30 s | 1,750 | $1.22 |
| Standard (this guide) | every 8-15 s | 3,500 | $2.45 |
| Detailed | every 4-7 s | 7,000 | $4.90 |
| Ultra | every 1-3 s | 14,000 | $9.80 |
Credits priced at $0.70 per 1,000; plans include a monthly allowance. Enterprise customers on on-premise or bring-your-own-model deployments run this on their own inference and pay no per-video credits.
Generated by Docsie Video-to-Docs on 2026-11-15 from a 6-minute video. Screenshots are frames from the source video and belong to their creator, Oracle Ebiz and Fusion Videos, whose original is embedded above. If you own this video and want the guide removed or credited differently, contact us and we will act within one business day.