
How to Create a User in Oracle EBS
This guide shows you how to create a user in Oracle EBS (E-Business Suite) with the System Administrator responsibility. You define the user name, password, description, and password expiration, then assign responsibilities. You then log in as the new user to confirm that everything works.
Video: HOW TO CREATE USER IN ORACLE APPS R12 2 by EBS STUDIO ORACLE (2018). All credit for the demonstration goes to the creator; watch the original on YouTube. The written guide below was generated from this video by Docsie. Creator? Request a change or removal.
This guide shows you how to create a user in Oracle EBS (E-Business Suite) with the System Administrator responsibility. You define the user name, password, description, and password expiration, then assign responsibilities. You then log in as the new user to confirm that everything works.
Prerequisites
Before you begin, make sure you have the following:
- The Oracle EBS login URL for your environment.
- A user name and password with the System Administrator responsibility, such as
sysadmin. - The approval or reason for creating the user, if your organization's process requires one.
- The responsibilities you plan to assign, such as System Administrator or Application Developer.
Open the Oracle EBS login page
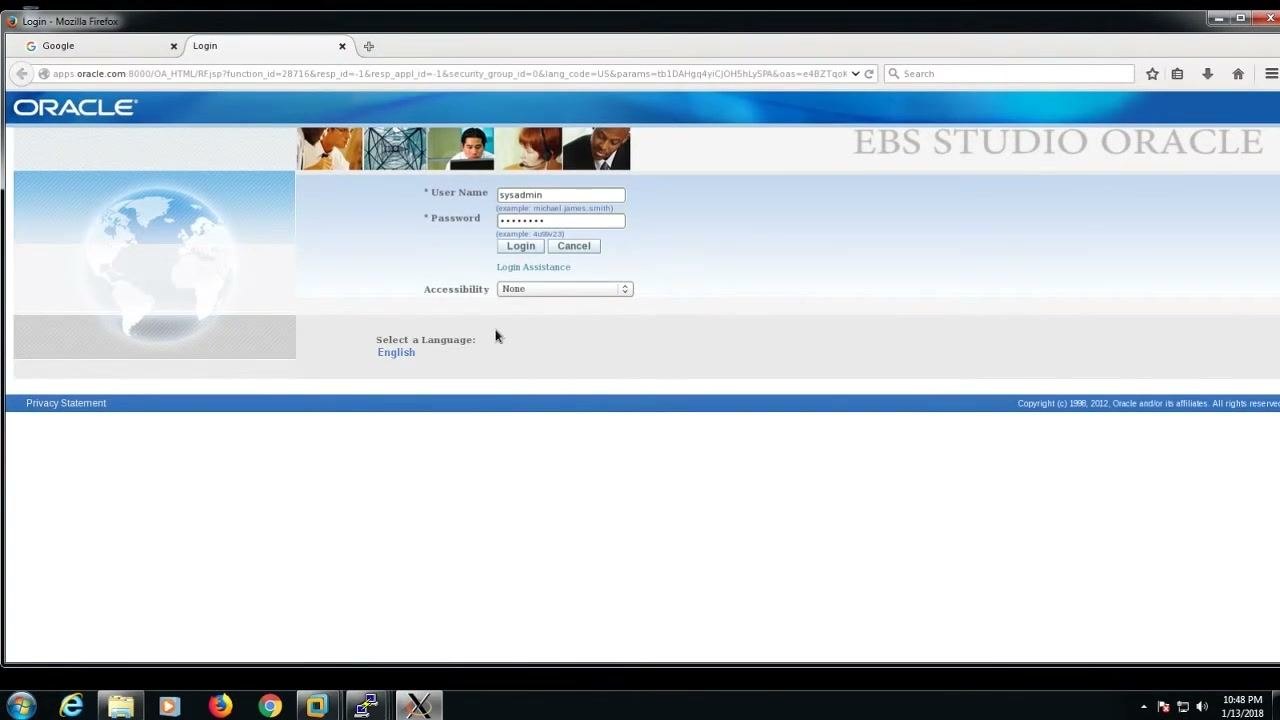
Launch your web browser and go to the Oracle EBS login URL. The login screen shows fields for User Name and Password, plus options for Accessibility and Language.
Log in as a system administrator
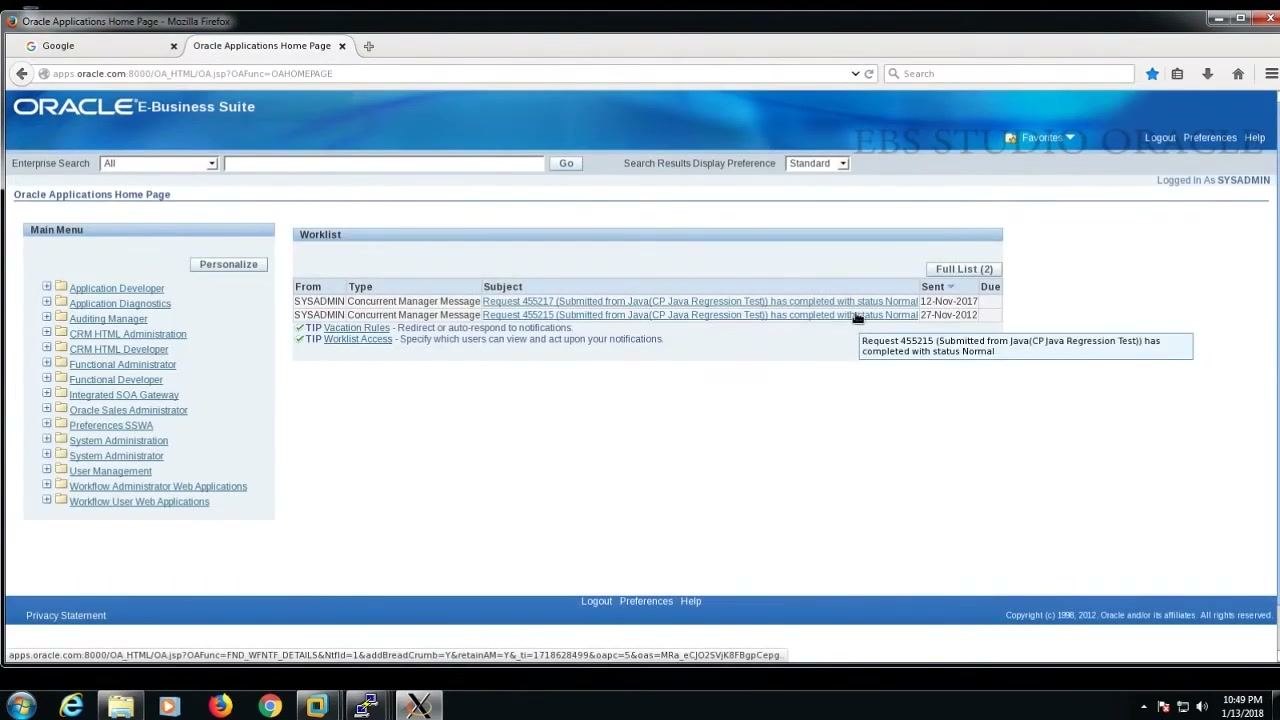
Enter the user name of an account with the System Administrator responsibility, for example sysadmin. Enter its password, then click Login. The system authenticates you and opens the Oracle Applications Home Page.
Open the System Administrator responsibility
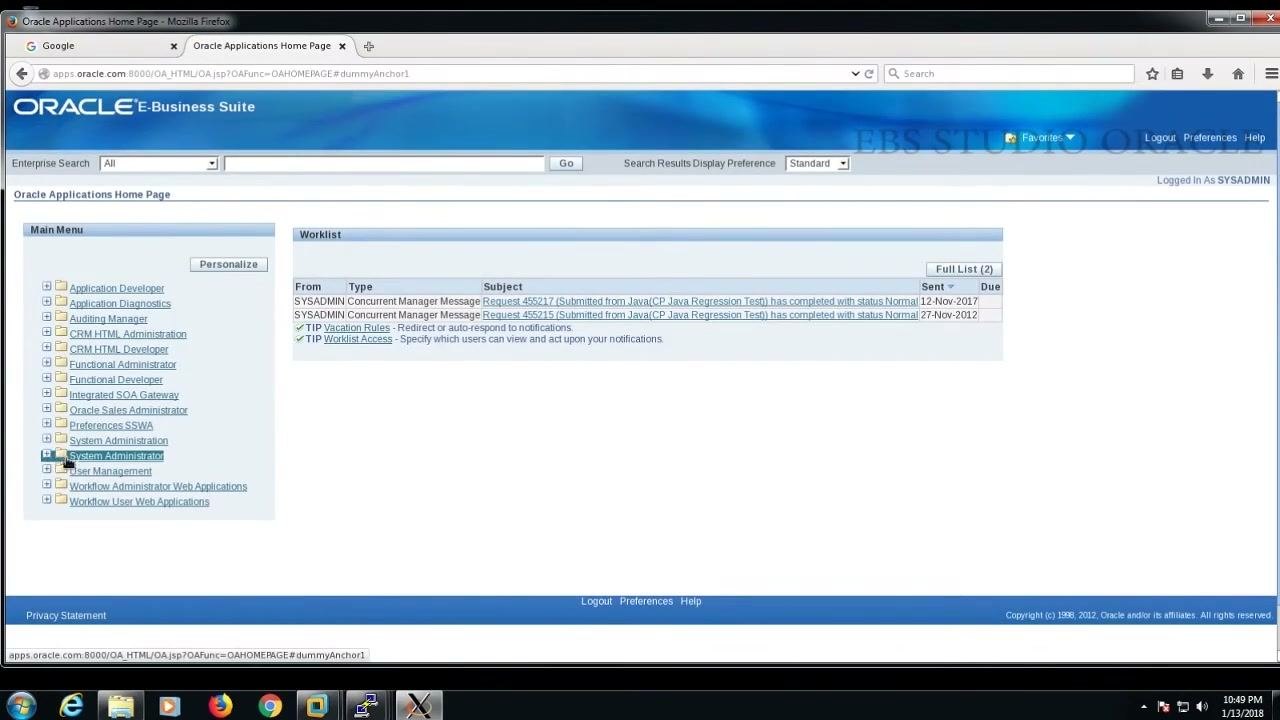
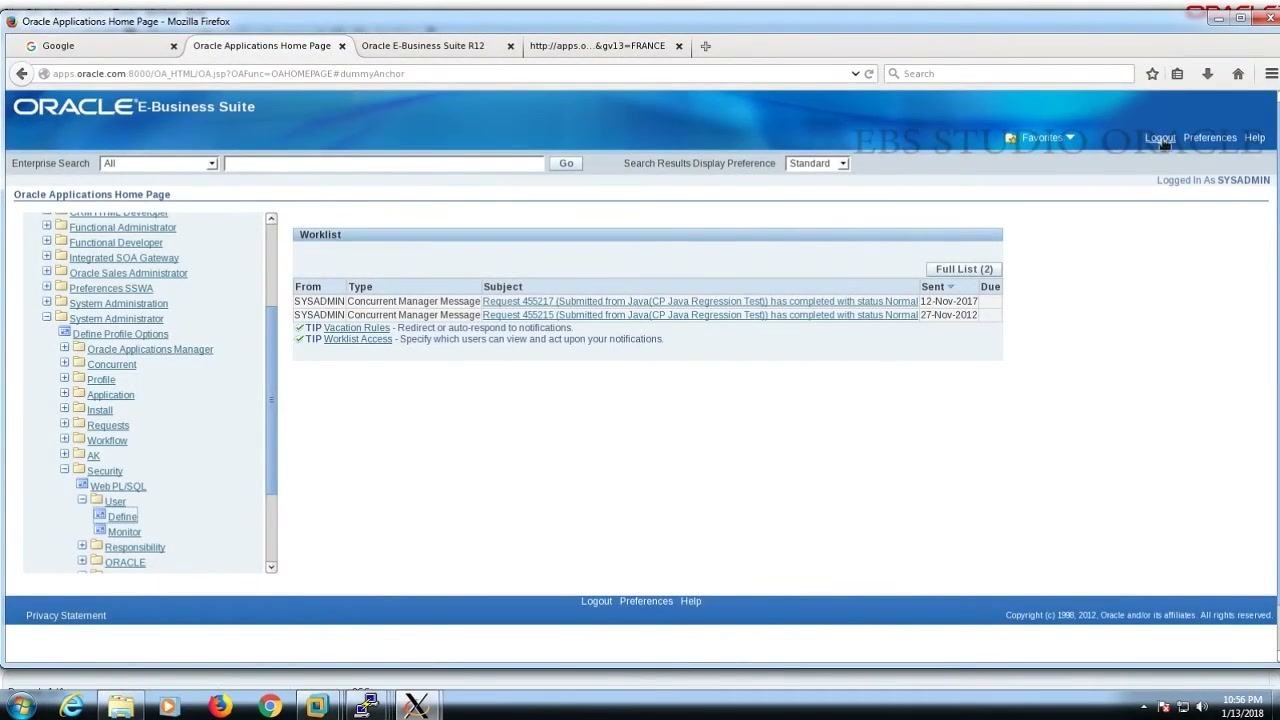
On the Oracle Applications Home Page, find the Main Menu on the left. Click System Administrator.
Navigate to the user definition form
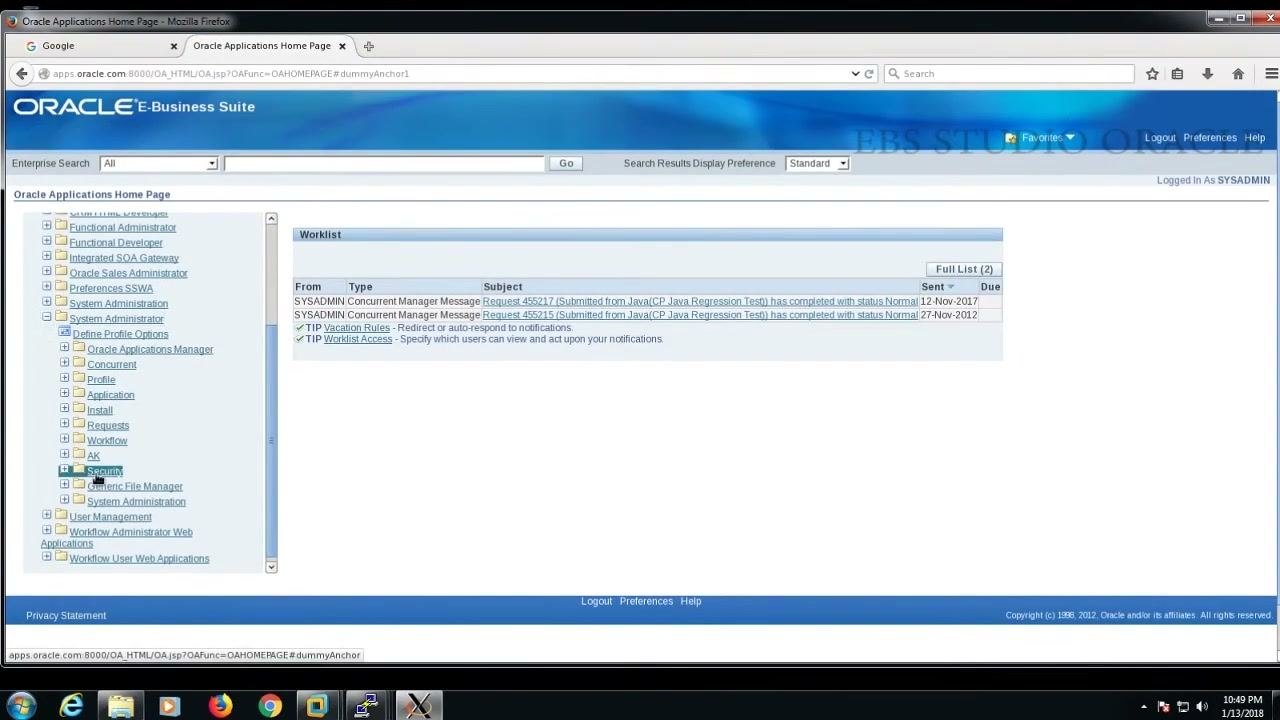
Expand the System Administrator menu tree to reach the form where you create a user in Oracle EBS:
- Click Security.
- Under Security, click User.
- Under User, click Define.
The full path is System Administrator > Security > User > Define.
Review the Users form
The Users form opens. It contains the following fields and areas:
- User Name, Password, Description, and Status
- Password Expiration options: Days, Accesses, and None
- Person, Customer, Supplier, E-Mail, and Fax
- Effective Dates (From and To)
- Tabs for Direct Responsibilities, Indirect Responsibilities, and Securing Attributes
- A table for assigning responsibilities, with Application, Description, Security Group, and Effective Dates
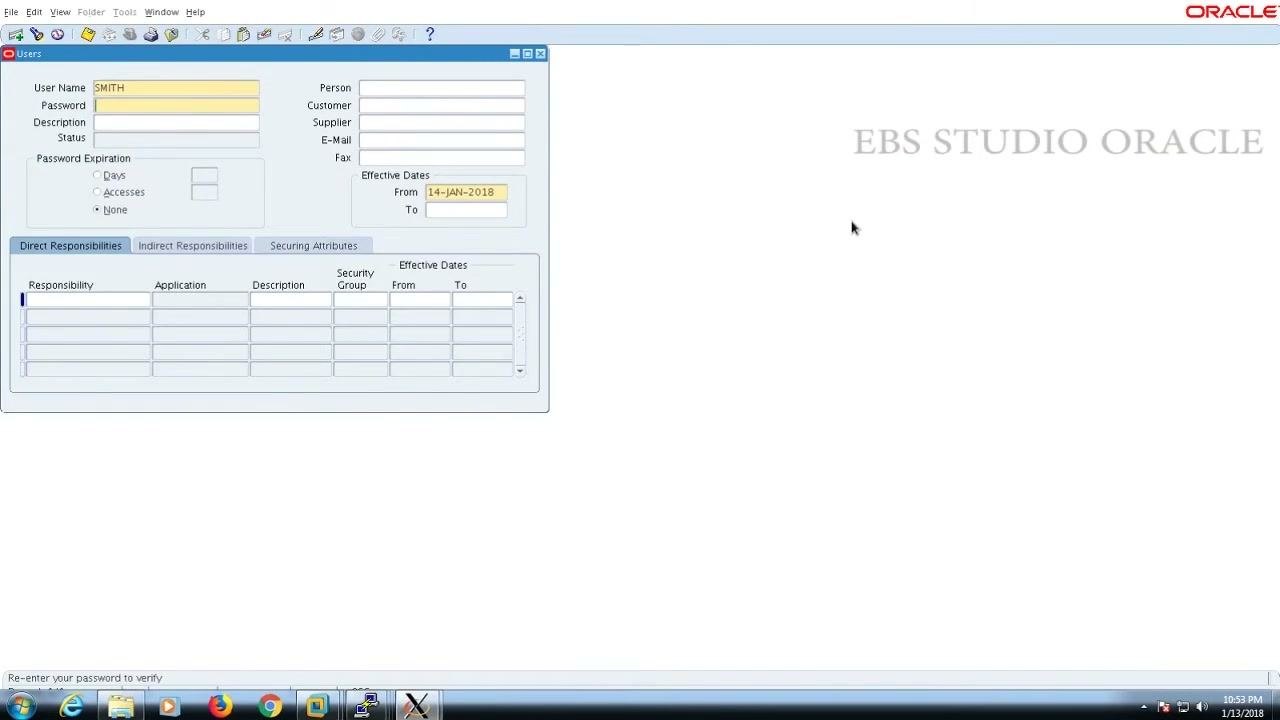
Enter the user name and password
In the User Name field, enter the user name you want, for example SMITH. In the Password field, enter a secure password. The password is hidden after you enter it. Fill in other fields as required, such as Description and Status.
Re-enter the password to confirm it
After you enter the password, the field is masked. This is expected. The system prompts you to re-enter the password to verify it.
Enter the same password again in the prompt, then press Tab. The cursor moves to the Description field.
Enter a description for the user
In the Description field, enter a note or reason for creating the user, according to your organization's process or approval. For example: as per approval the user smith is created.
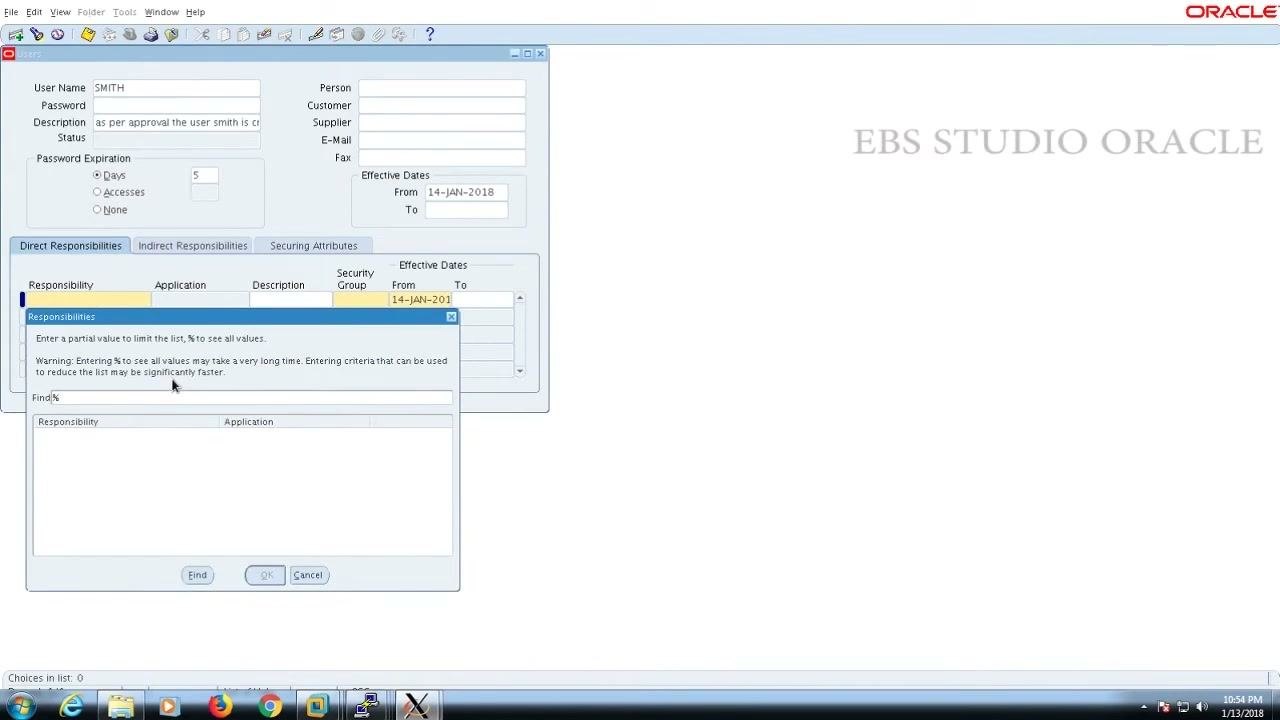
Set password expiration (optional)
If you need a password expiration policy, go to the Password Expiration section. Select Days and enter the number of days the password stays valid. For example, enter 5. The password then expires 5 days from the effective start date, such as 14-JAN-2018.
If the password should not expire, select None.
Assign a responsibility to the user
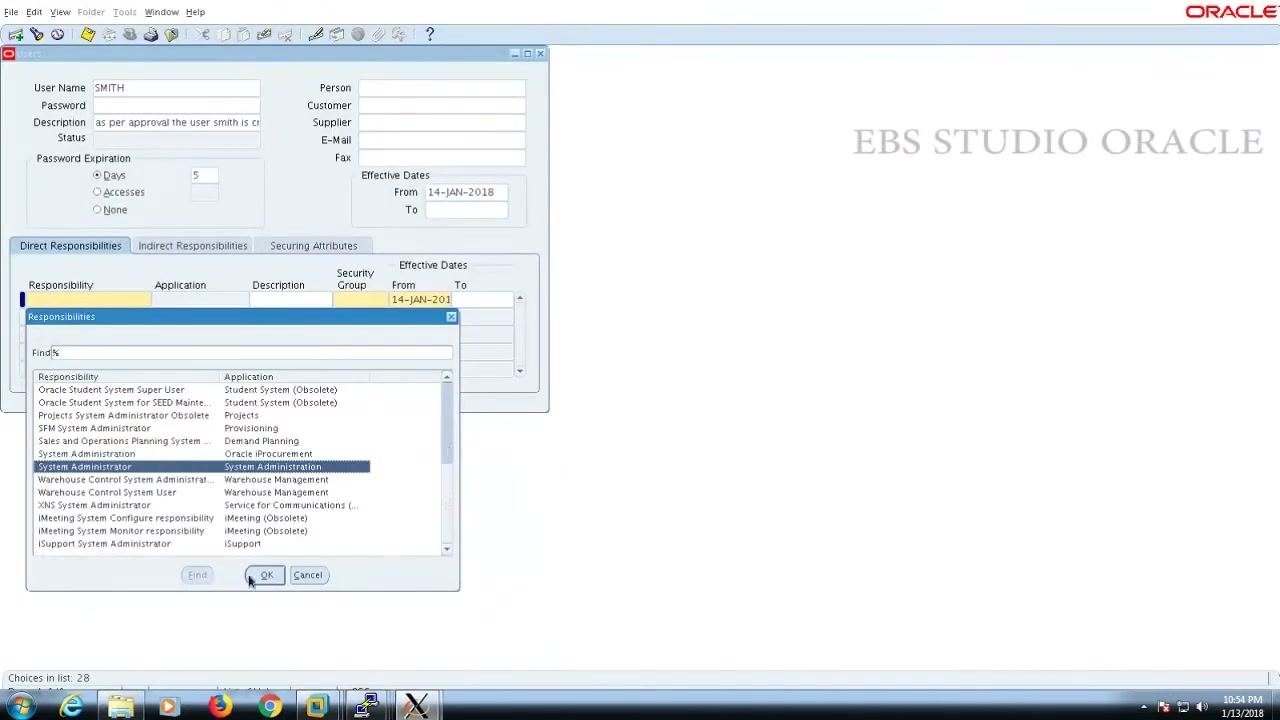
Open the Direct Responsibilities tab, which is the default tab. Then assign a responsibility:
- Click in the Responsibility field to open the Responsibilities selection window.
- Search for the responsibility. Enter a partial value, or enter
%to list all responsibilities. Listing all of them may take time. - Select the responsibility you need, for example
System Administrator. - Click OK.
The Effective Dates field defaults to the current date. You can change it if needed.
Assign the Application Developer responsibility
Add another responsibility the same way. In the Responsibilities selection window, search for and select Application Developer, then click OK. The responsibility now appears in the user's list of assigned responsibilities.
Assign all the responsibilities the user's role needs, and review all entries before you save the user record.
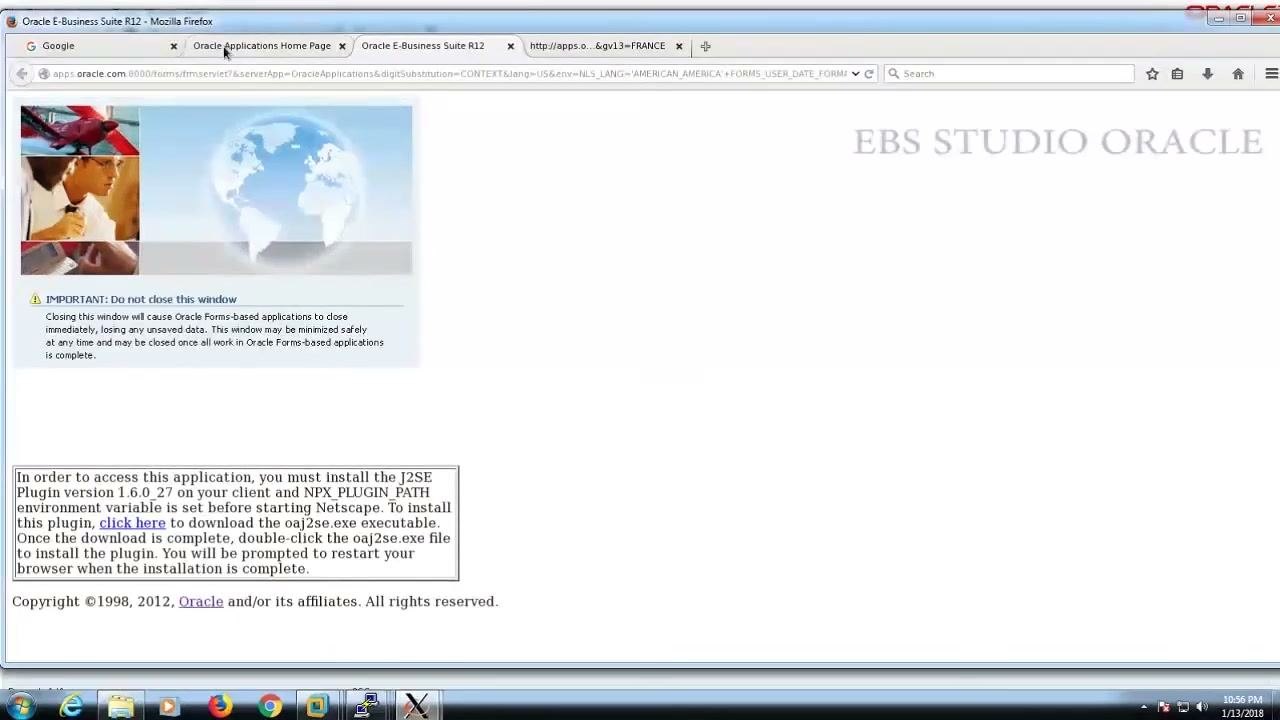
Close the user creation window
After you assign all required responsibilities, close the user creation form to complete the process.
Log out of the sysadmin account
Before you test the new user, log out of the sysadmin account. On the Oracle E-Business Suite Home Page, click Logout, usually at the top right. Wait for the login screen to appear.
Log in as the new user
On the login screen, enter the new credentials:
- User Name:
smith - Password: the password you set during user creation
Click Login. If your browser prompts you to save the password, you can choose to do so.
Change the password on first login
On first login, the system may prompt the user to change the password. Enter the following:
- Current Password: the password the administrator provided
- New Password: a new password of at least 6 characters
- Re-enter New Password: the same new password, to confirm it
Click Submit to save. If you see an error, check that you entered the current password correctly.
Verify the user and assigned responsibilities
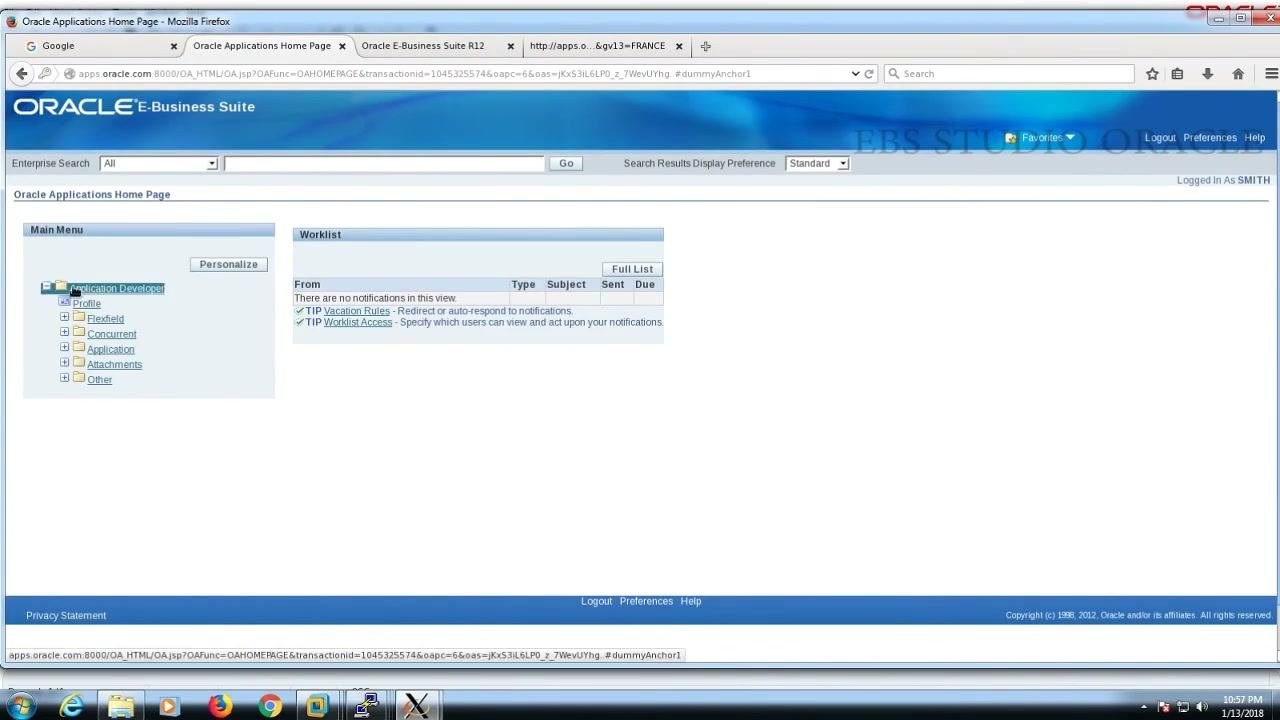
After a successful login and password change, the Oracle Applications Home Page opens. Check the following:
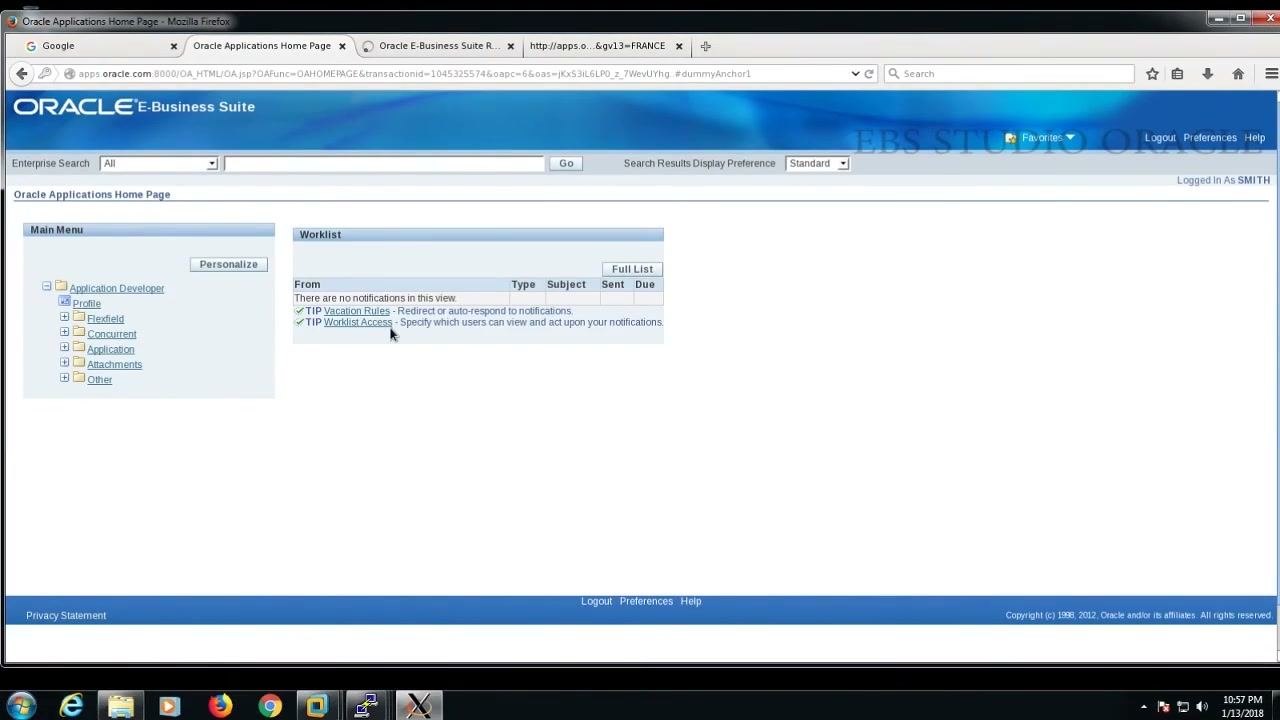
- The Application Developer responsibility appears in the Main Menu.
- The Worklist shows any notifications or tips relevant to the user.
- The top right shows "Logged In As SMITH", which confirms the correct user.
Test access to the assigned responsibility
Expand the Application Developer menu to check access to its sub-functions: Profile, Flexfield, Concurrent, Application, Attachments, and Other. Make sure the user can reach the features as intended.
Summary
You now know how to create a user in Oracle EBS. The new user has secure credentials, a description, a password policy, and the correct responsibilities. You also confirmed that the user can log in, change the password, and open the assigned responsibilities.
Keep these points in mind:
- Provide the initial password to the user securely, so they can log in and set their own password.
- The sysadmin can monitor and manage user access as needed.
- If the user cannot log in or does not see the assigned responsibility, review the user setup and the assigned responsibilities.
Generation details: cost, quality tiers
Docsie billed 2,500 credits ($1.75) to analyze this 5-minute video at standard quality. The rewrite, template fill and Word/PDF exports were included. The same video at each quality tier:
| Quality | Frames sampled | Credits | Approx. cost |
|---|---|---|---|
| Draft | every 16-30 s | 1,250 | $0.88 |
| Standard (this guide) | every 8-15 s | 2,500 | $1.75 |
| Detailed | every 4-7 s | 5,000 | $3.50 |
| Ultra | every 1-3 s | 10,000 | $7.00 |
Credits priced at $0.70 per 1,000; plans include a monthly allowance. Enterprise customers on on-premise or bring-your-own-model deployments run this on their own inference and pay no per-video credits.
Generated by Docsie Video-to-Docs on 2026-11-15 from a 4-minute video. Screenshots are frames from the source video and belong to their creator, EBS STUDIO ORACLE, whose original is embedded above. If you own this video and want the guide removed or credited differently, contact us and we will act within one business day.