
How to Create a PO Receipt in Oracle EBS
This guide shows you how to create a PO receipt in Oracle EBS from start to finish. You set up an item (a laptop in this example), create and approve a standard purchase order, receive the goods against that order, and confirm the on-hand quantity in Inventory.
Video: How to Create Item Purchase Order and Receipt to check On-hand Qty Oracle apps R12 by Manu Online IT (2019). All credit for the demonstration goes to the creator; watch the original on YouTube. The written guide below was generated from this video by Docsie. Creator? Request a change or removal.
This guide shows you how to create a PO receipt in Oracle EBS from start to finish. You set up an item (a laptop in this example), create and approve a standard purchase order, receive the goods against that order, and confirm the on-hand quantity in Inventory.
Prerequisites
Before you begin, make sure you have the following:
- Access to the
Inventory, Vision Operations (USA)responsibility. - Access to the
Purchasing, Vision Operations (USA)responsibility. - An organization where you can create or check the item, such as
B1 Northwest Electronic SupplyorV1 Vision Operations. - A supplier for the order. This example uses
3M Health Care.
Set up the item in Inventory
You need an item that is enabled for inventory, purchasing, and receiving before you can receive it against a purchase order.
Select the Inventory responsibility
- Open Oracle Applications.
- In the main Navigator window, locate your available functions and responsibilities and make sure you can access inventory-related responsibilities.
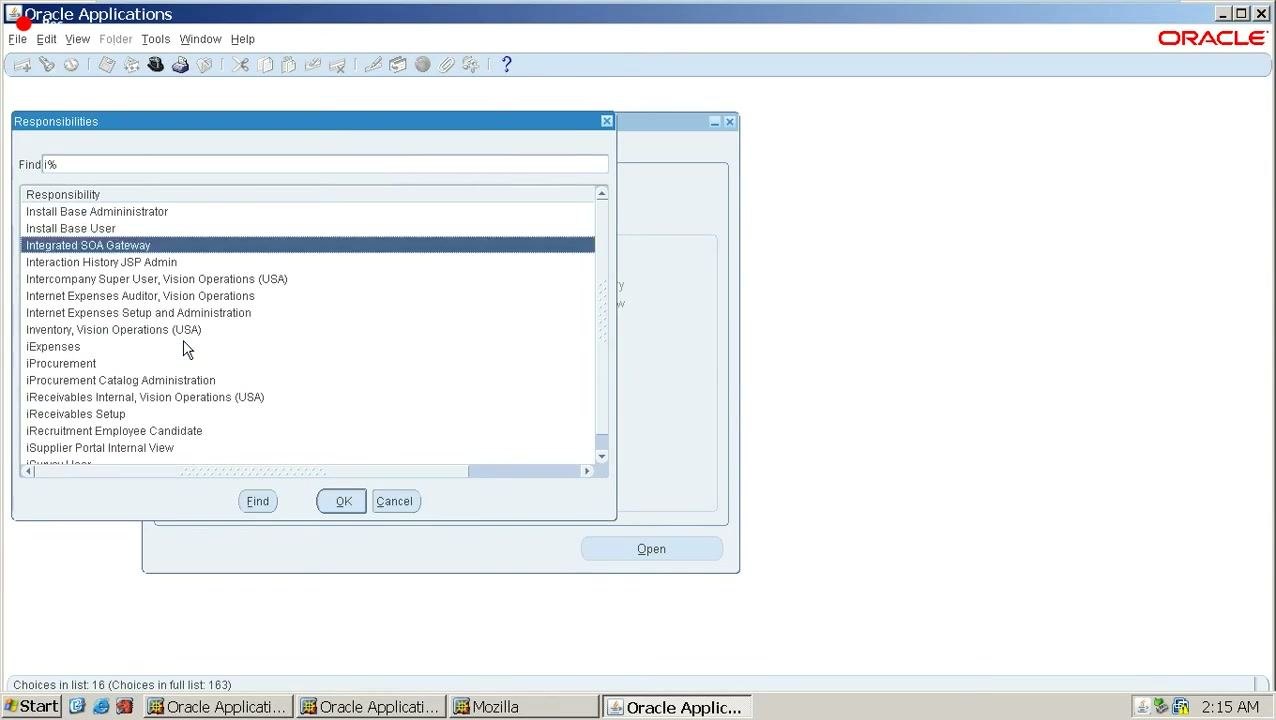
- In the Responsibilities dialog, scroll through the list and select
Inventory, Vision Operations (USA). - Click OK.
Choose the organization
- In the Organizations dialog, select the organization where you want to create or check the item. For example, select
B1 Northwest Electronic Supplyor another relevant organization. - Click OK.
Open the Item Master and enter item details
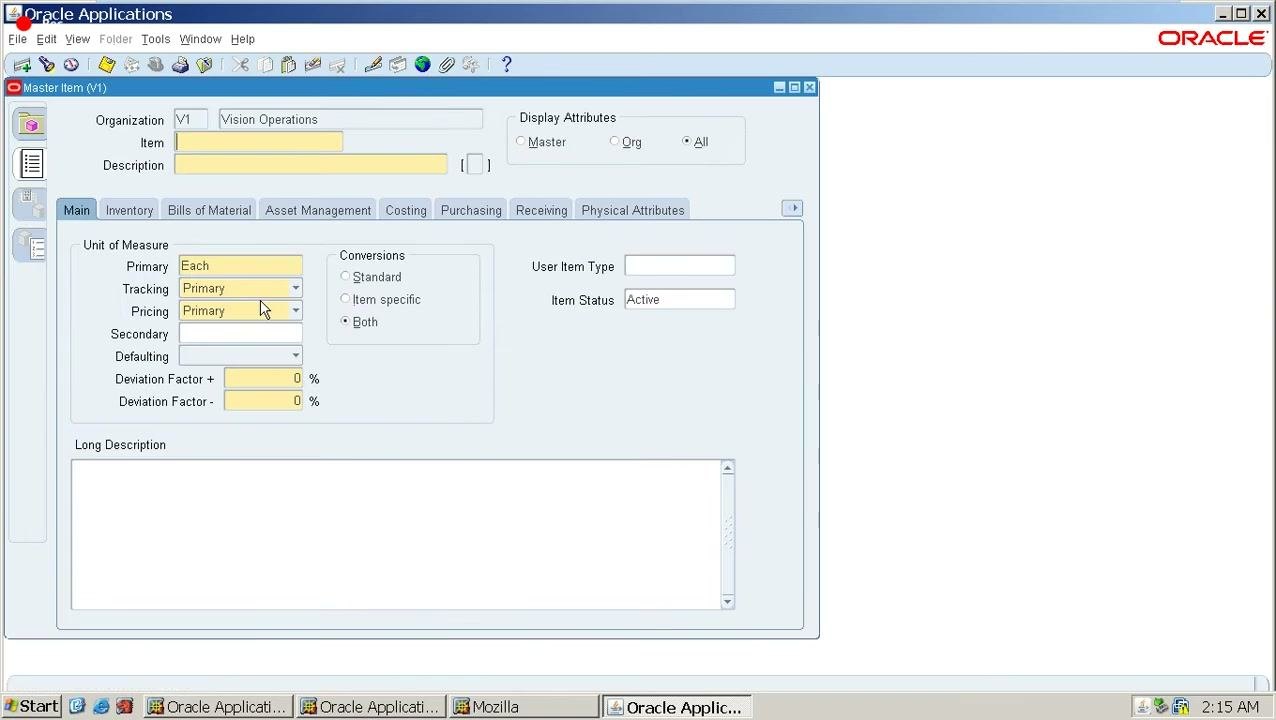
- Open the Item Master form.
- In the Organization field, confirm your selected organization is displayed (for example,
V1 Vision Operations). - In the Item field, enter
Laptop. - Optionally, enter a description such as
Laptop. - Set the Unit of Measure fields as needed. In this example, Primary is
Each, Tracking isPrimary, and Pricing isPrimary. - Make sure Item Status is
Active.
Configure the Inventory tab
- Open the Inventory tab.
- Select the Inventory Item checkbox to enable the item for inventory transactions.
This setting automatically enables the item as Stockable and Transactable.
Check costing information
- Open the Costing tab.
- Verify that the code combination for Cost of Goods Sold is available and correct.
Enable purchasing options
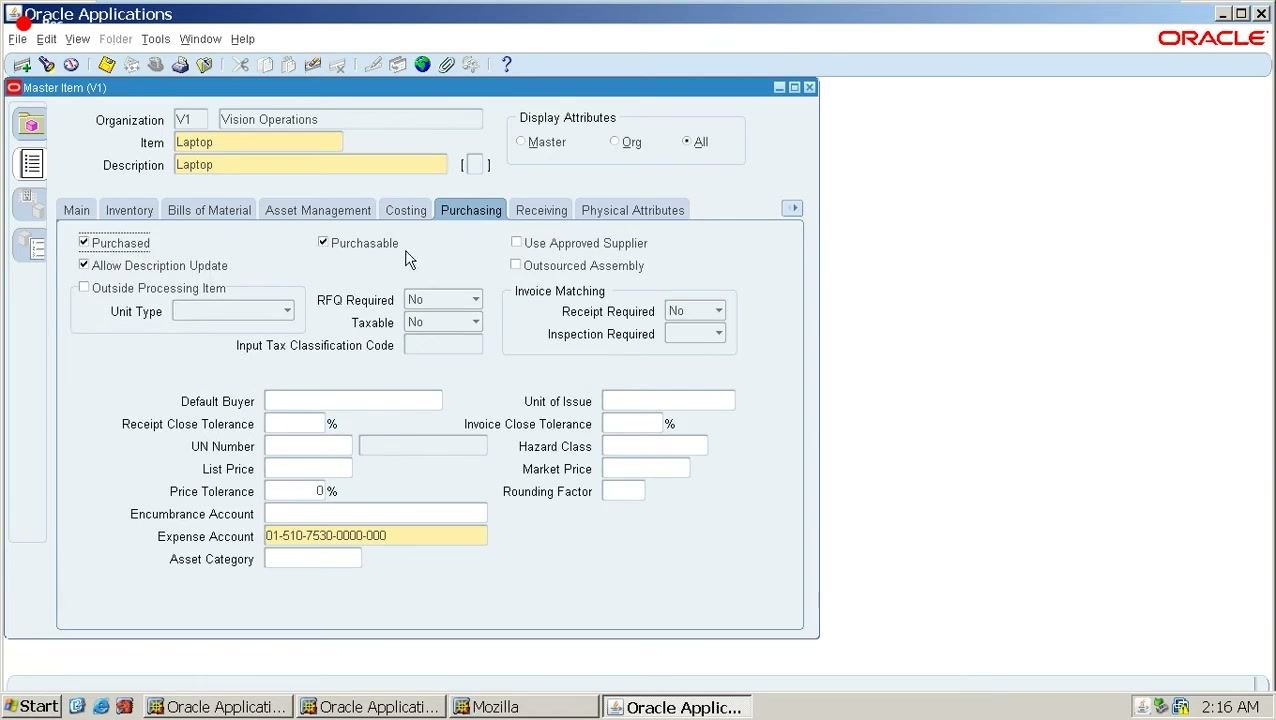
- Open the Purchasing tab.
- Select the Purchased and Purchasable checkboxes so the item can be purchased.
- Optionally, fill in other purchasing fields, such as Default Buyer and Expense Account.
Configure receiving options
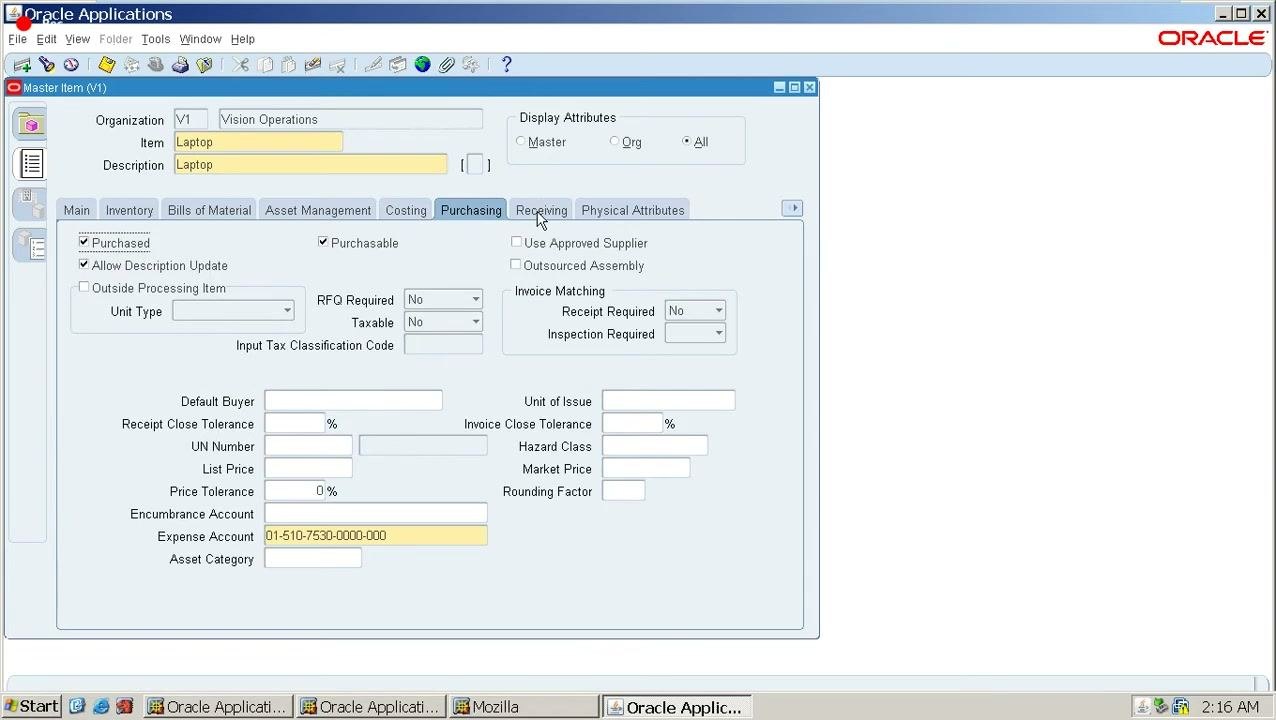
- Open the Receiving tab.
- Set options such as Allow Substitute Receipts (set it to
Yesif substitutes are allowed). - Set other fields, such as Allow Unordered Receipts, Allow Express Transactions, and receipt routing, as needed.
These settings are optional. You can also configure them in the global Receiving Options or Purchasing Options.
Enable Order Management and Invoicing
- Click the right arrow, or use the dropdown menu, to move to the next set of tabs.
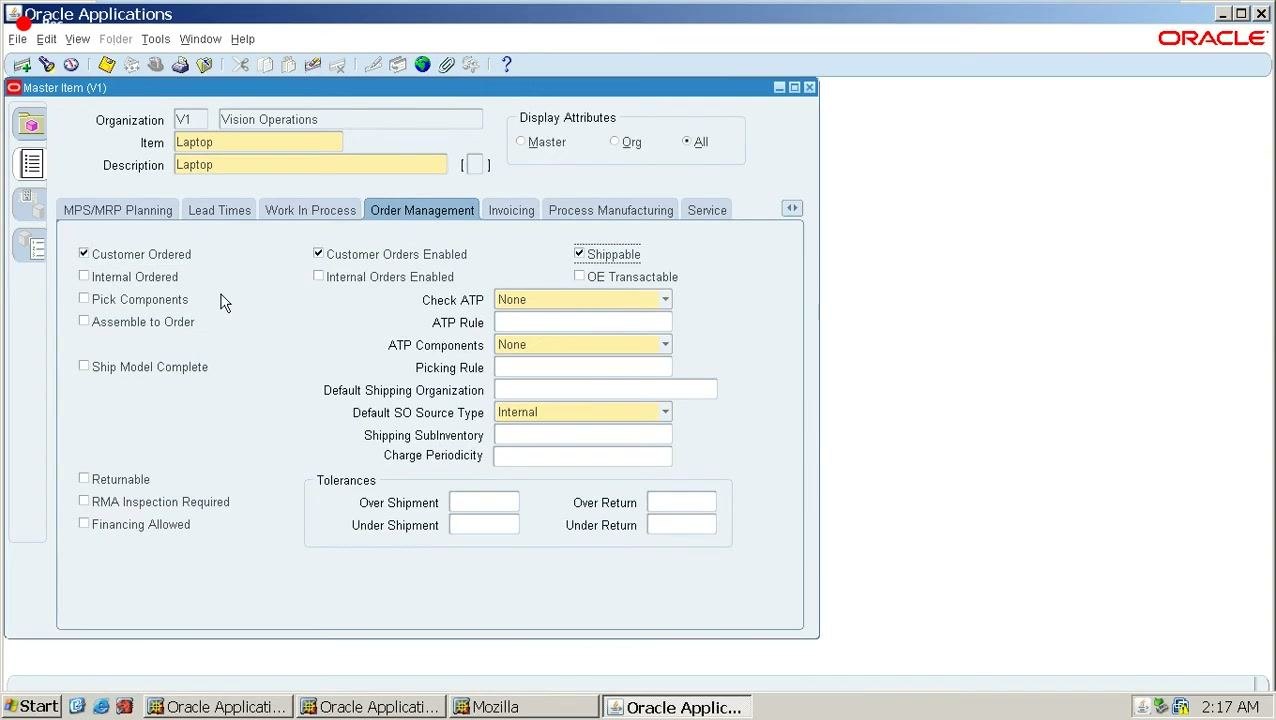
- Open the Order Management tab.
- Select Customer Ordered and Customer Orders Enabled so the item can be included in customer sales orders.
- Select Shippable to make the item available for shipping.
- Open the Invoicing tab.
- Make sure the item is set as
Invoicableand that Invoice Enabled is selected.
Save the item attributes
- Click the Save icon (diskette) to save your changes.
- Make sure all required fields are filled and the item status is
Active.
Assign the item to an organization
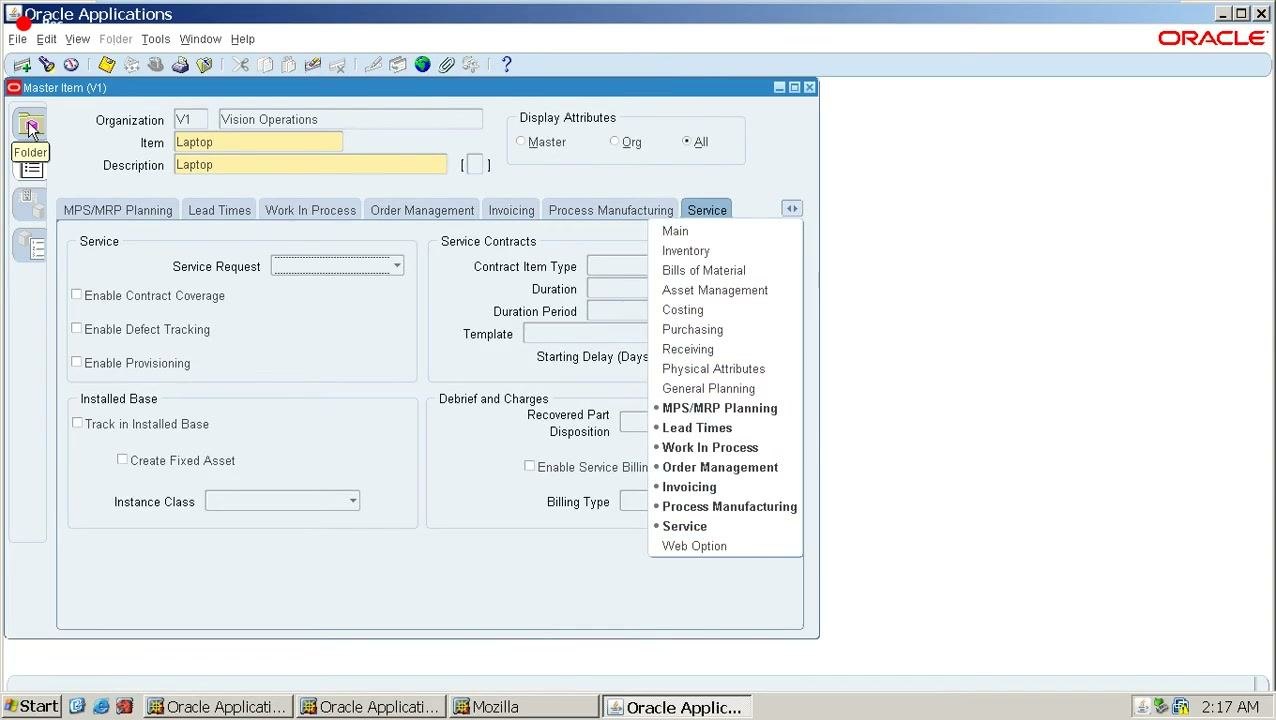
- After saving, click Assign to Organization.
- In the assignment window, confirm your item (for example,
Laptop) is listed. - Select the organization or organizations where the item should be available, such as
V1 Vision Operations. - Click Assign To Org....
Close the Item Master forms
Close the Item Master and Organization Item forms. You return to the main Oracle Applications Navigator.
Create and approve the purchase order
A PO receipt requires an approved purchase order, so create one for the new item first.
Switch to the Purchasing responsibility
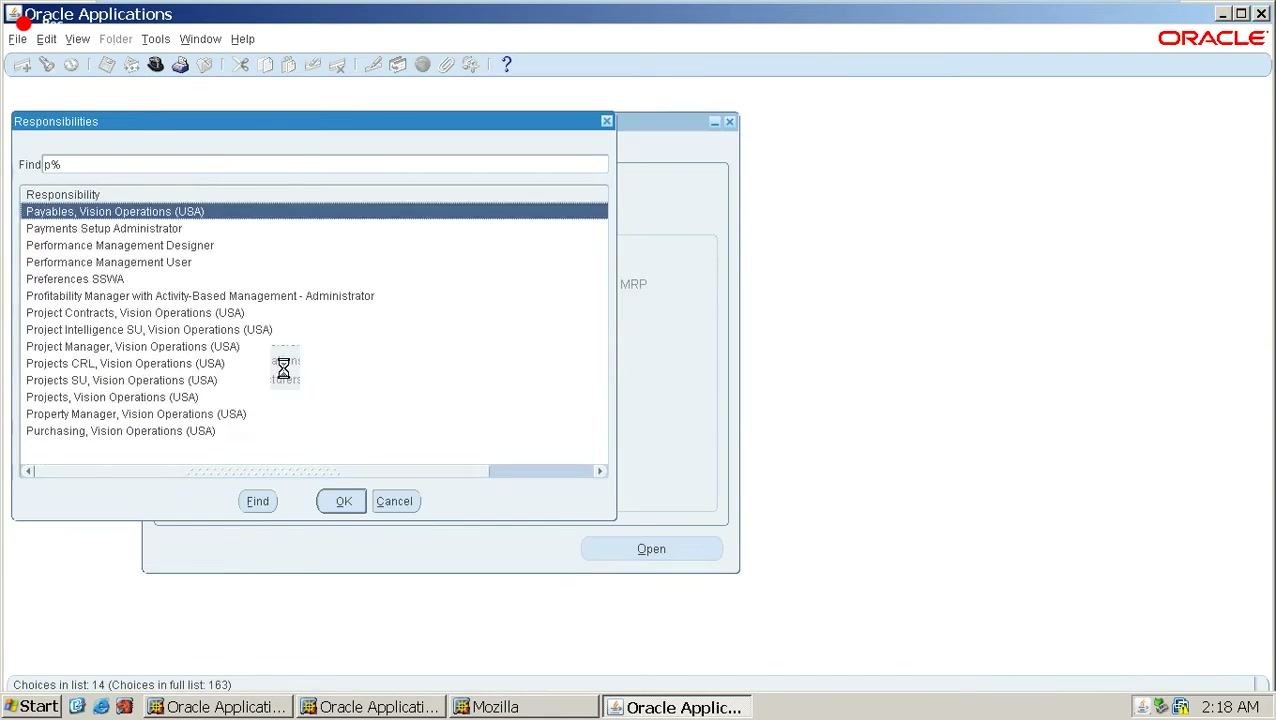
- In the Responsibilities dialog, scroll to
Purchasing, Vision Operations (USA)and select it. - Click OK.
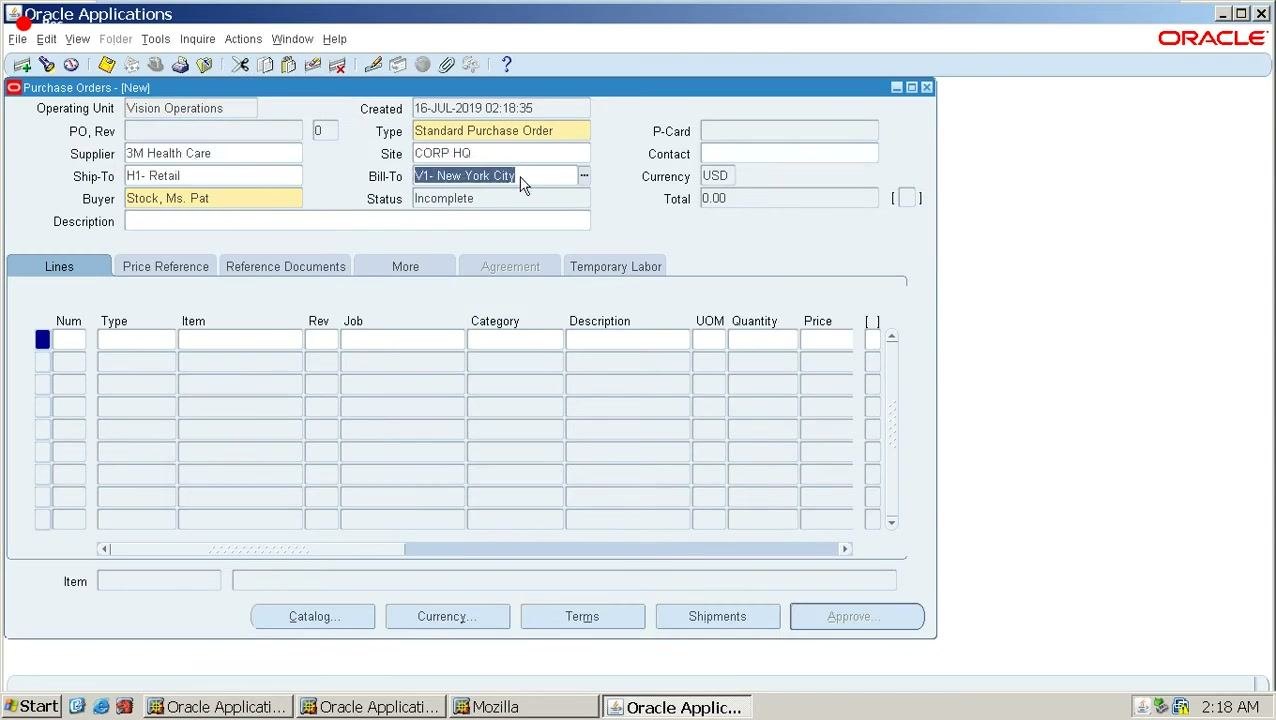
Open a new purchase order
- Open the Purchase Orders form.
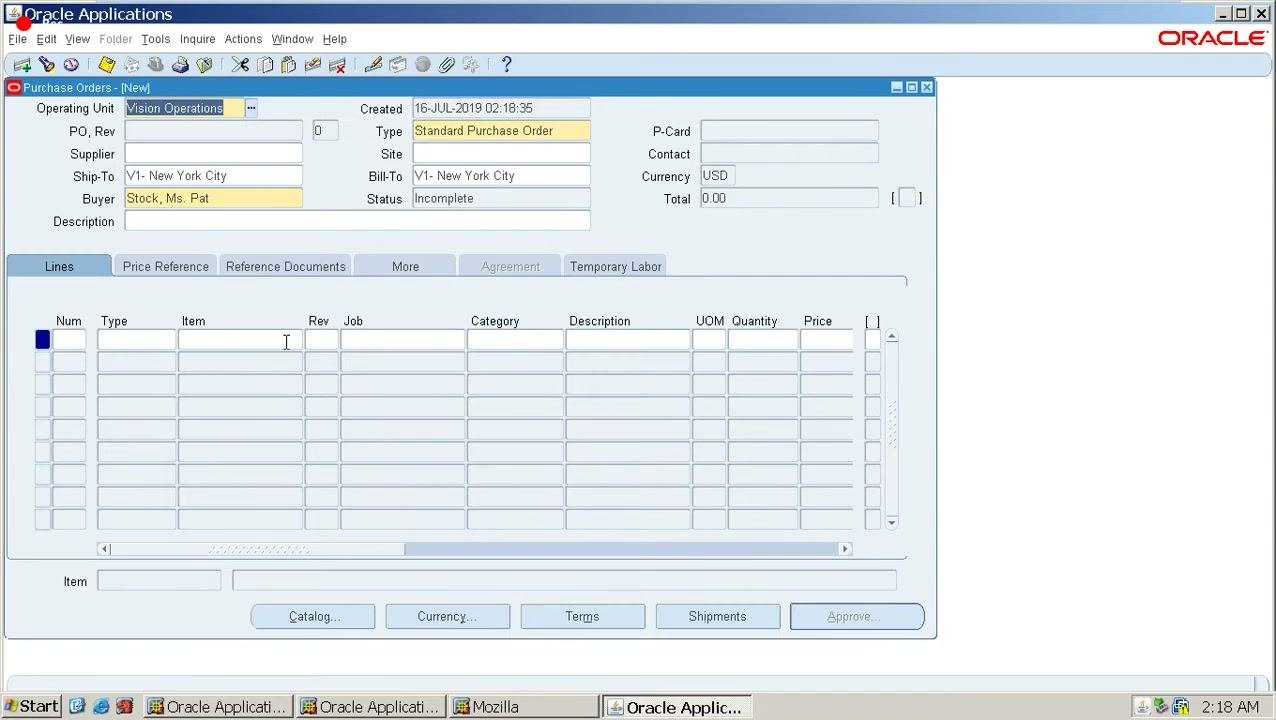
- Set Operating Unit to
Vision Operations. - Set Type to
Standard Purchase Order. - Enter the Buyer (for example,
Stock, Ms. Pat). - Set the Ship-To and Bill-To locations (for example,
V1 - New York City).
The Status remains Incomplete until you enter all details.
Select the supplier, ship-to, and bill-to locations
In the Purchase Orders form, make sure these fields are filled:
- Supplier:
3M Health Care - Ship-To:
V1 - New York City - Bill-To:
V1 - New York City. Ship-To and Bill-To don't have to match, but they are the same in this example. - Buyer:
Stock, Ms. Pat - Type:
Standard Purchase Order - Status:
Incompleteuntil all required fields are entered
Enter the purchase order line details
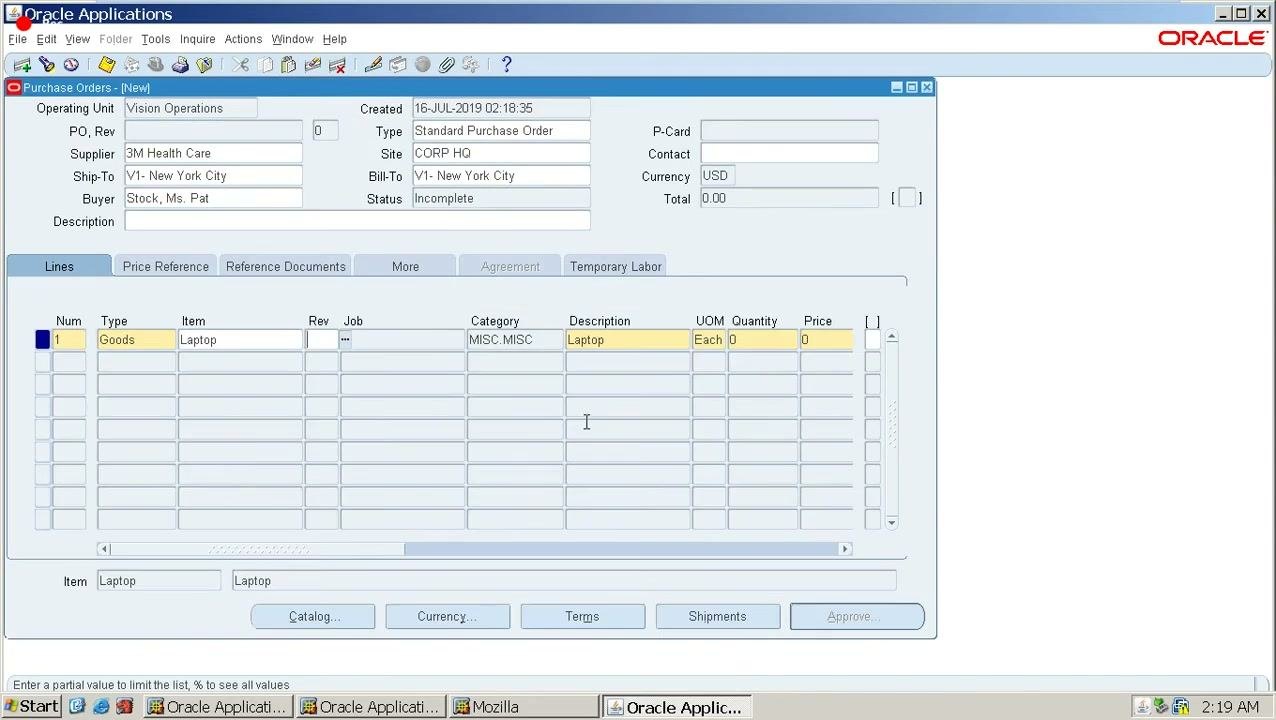
In the Lines section, enter the following:
- Type:
Goods - Item:
Laptop(you can select it from the list) - Category:
MISC.MISC - Description:
Laptop - UOM:
Each - Quantity:
1 - Price:
10000
Set the need-by date
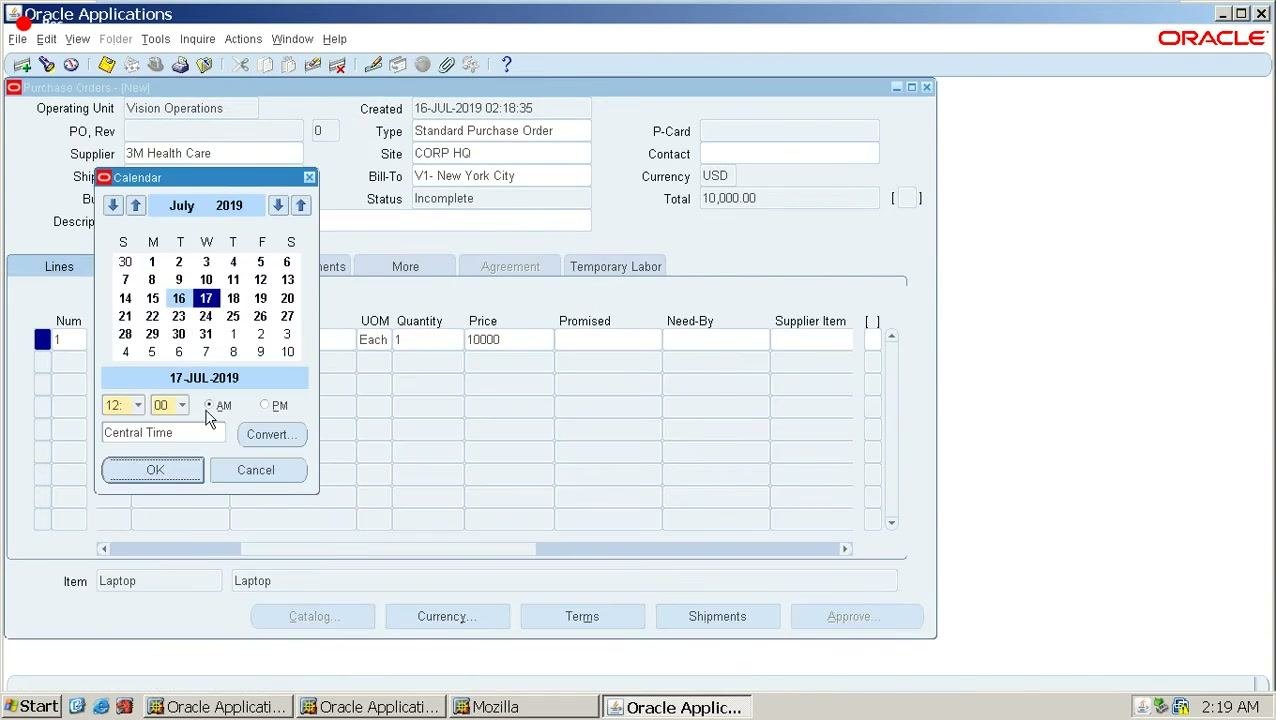
- In the Need-By field, click the calendar icon to open the date picker.
- Choose the delivery date, for example
17-JUL-2019. - Set the time if required, for example
12:00 AM. - Click OK.
Set the match approval level and receipt routing
You must set the receipt routing correctly, or you can't create a receipt for this PO line.
- Click the Shipments button at the bottom of the Purchase Orders form.
- Review or enter any shipment-specific details you need.
- Click the More button to access additional shipment options.
- Change Match Approval Level to
3-Way, which requires matching of the PO, receipt, and invoice. - Set Receipt Routing to
Standard, which enables receipt creation for this PO line.
Review the distribution details
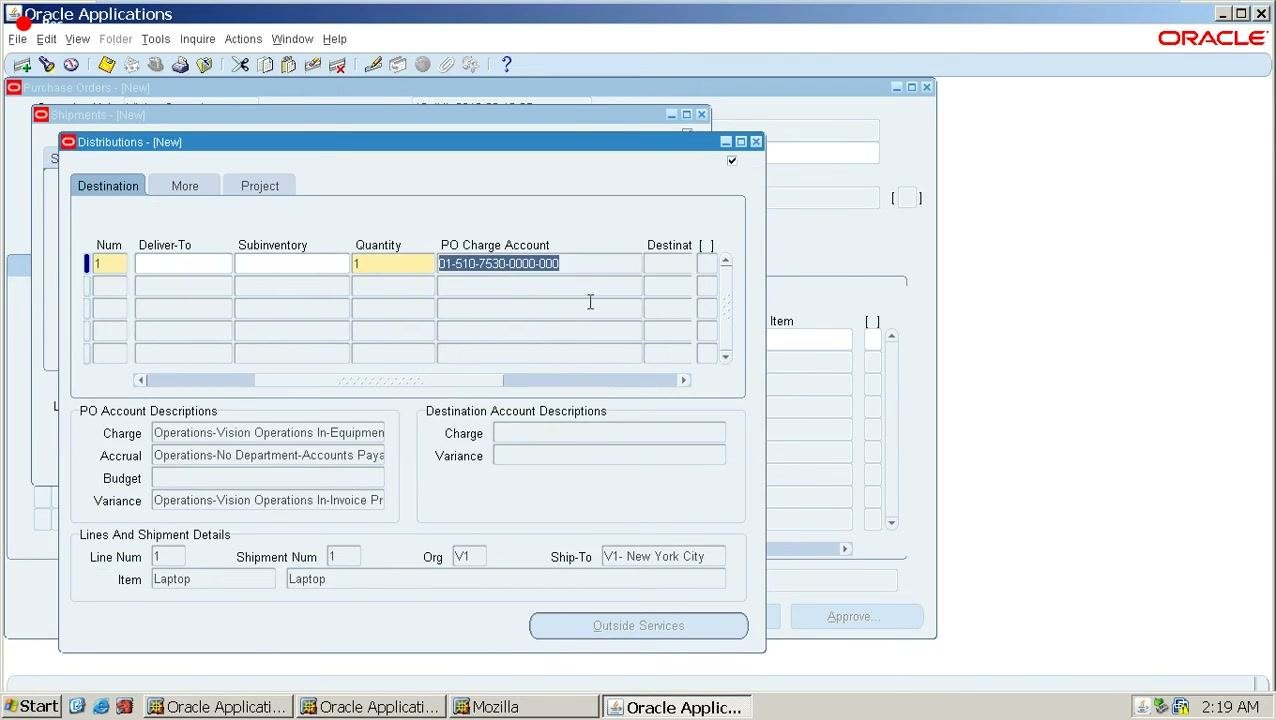
- Click the Distributions button.
- Confirm the Requesting Org (for example,
V1). - Make sure Ship-To is
V1 - New York City. - Review or enter the PO account descriptions and destination account descriptions as required.
- Confirm the Line Num and Item match the PO line (Line Num
1, ItemLaptop).
Set the PO charge account
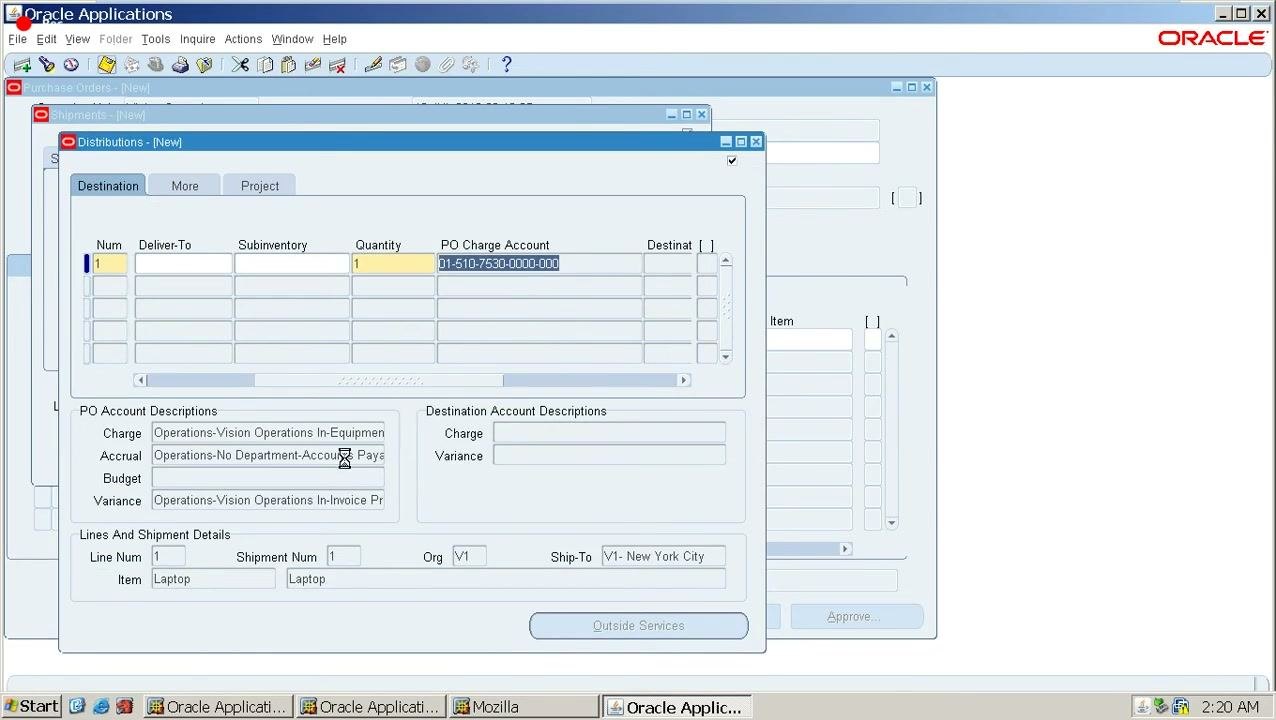
- In the Distributions window, review the fields: Num, Deliver-To, Subinventory, Quantity, PO Charge Account, and Destination.
- Click the PO Charge Account field and enter
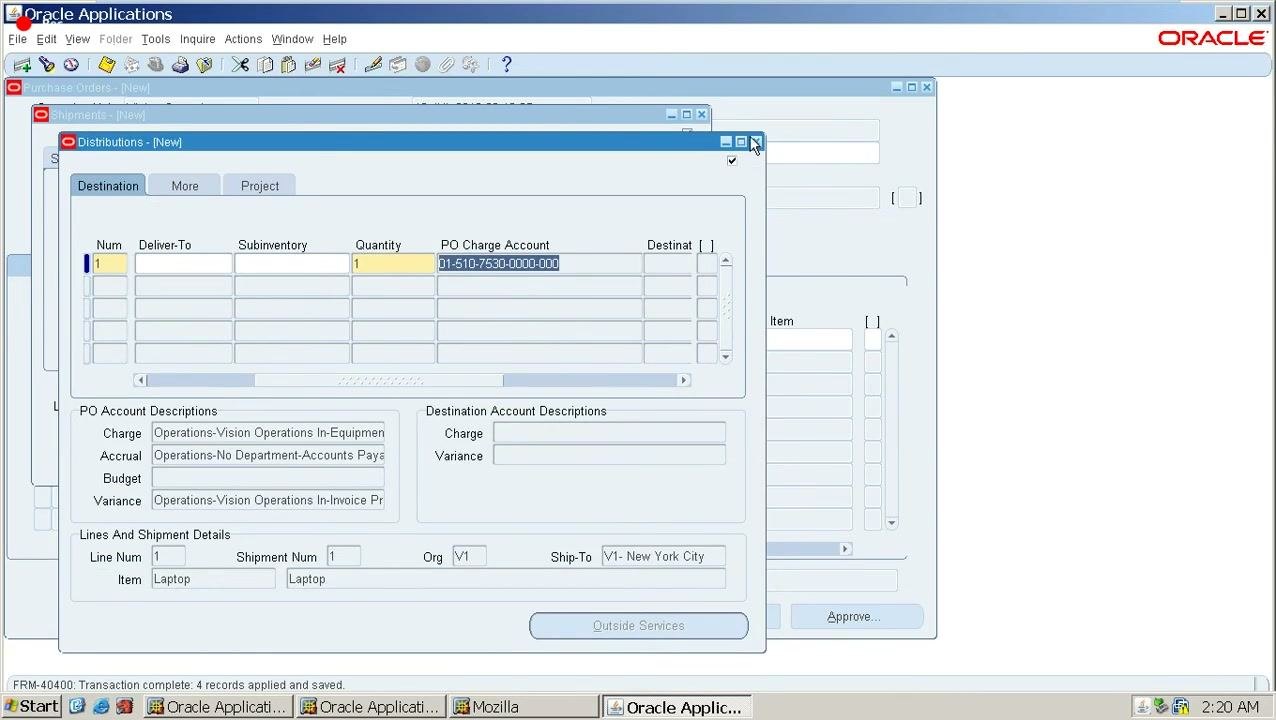
01-510-7530-0000-000. - Save your changes.
The PO Account Descriptions section then shows:
- Charge: Operations-Vision Operations In-Equipment
- Accrual: Operations-No Department-Accounts Payable
- Budget: blank
- Variance: Operations-Vision Operations In-Invoice Price
The Lines and Shipment Details section shows Line Num 1, Shipment Num 1, Org V1, Ship-To V1 - New York City, and Item Laptop.
The system populates the Accrual, Budget, and Variance accounts automatically based on the purchasing options selected. You don't need to enter them manually.
Approve the purchase order
- After you save, note the purchase order number the system generates (in this example,
6041). - Click Approve to start the approval process.
The status changes to Approved. In this example, purchase order 6041 is approved for a quantity of 1.
Create the PO receipt
With the purchase order approved, you can receive the goods against it.
Open the Receipts window
In the Navigator window, select Receiving > Receipts.
Find the expected receipts
- In the Find Expected Receipts window, set Operating Unit to
Vision Operations. - Set Source Type to
Supplier. - Enter
6041in Purchase Order. - Run the search.
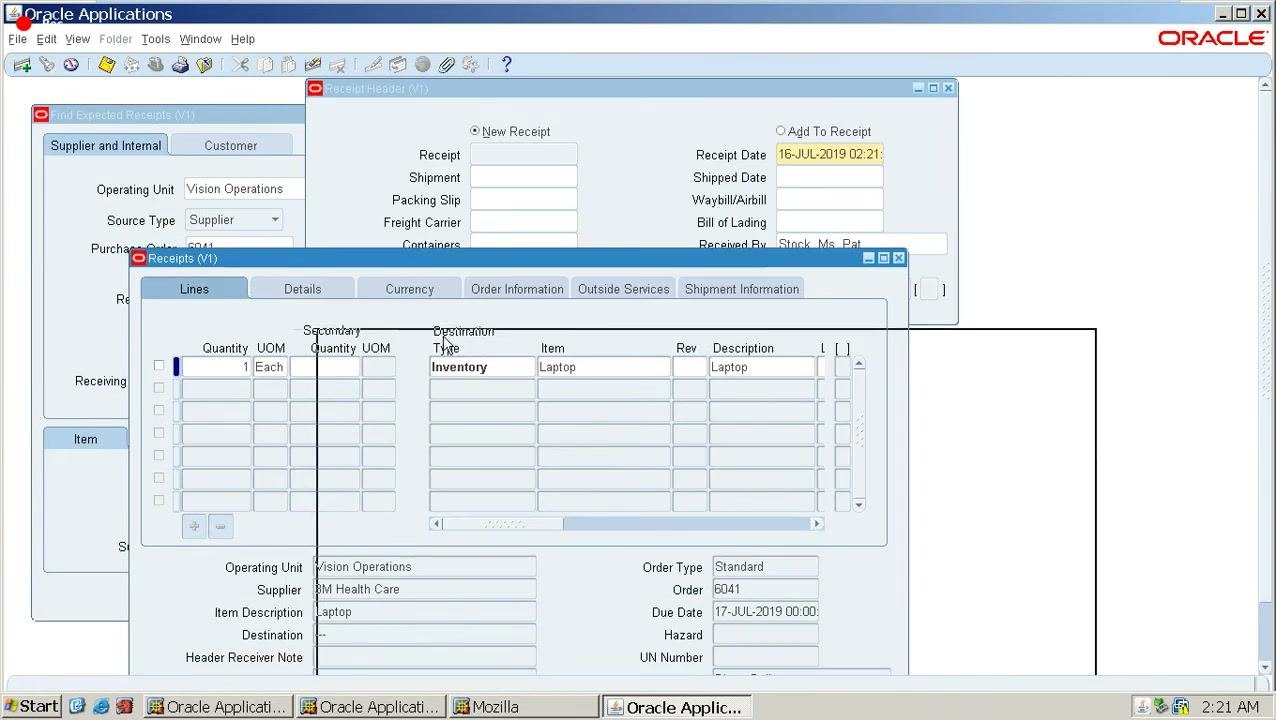
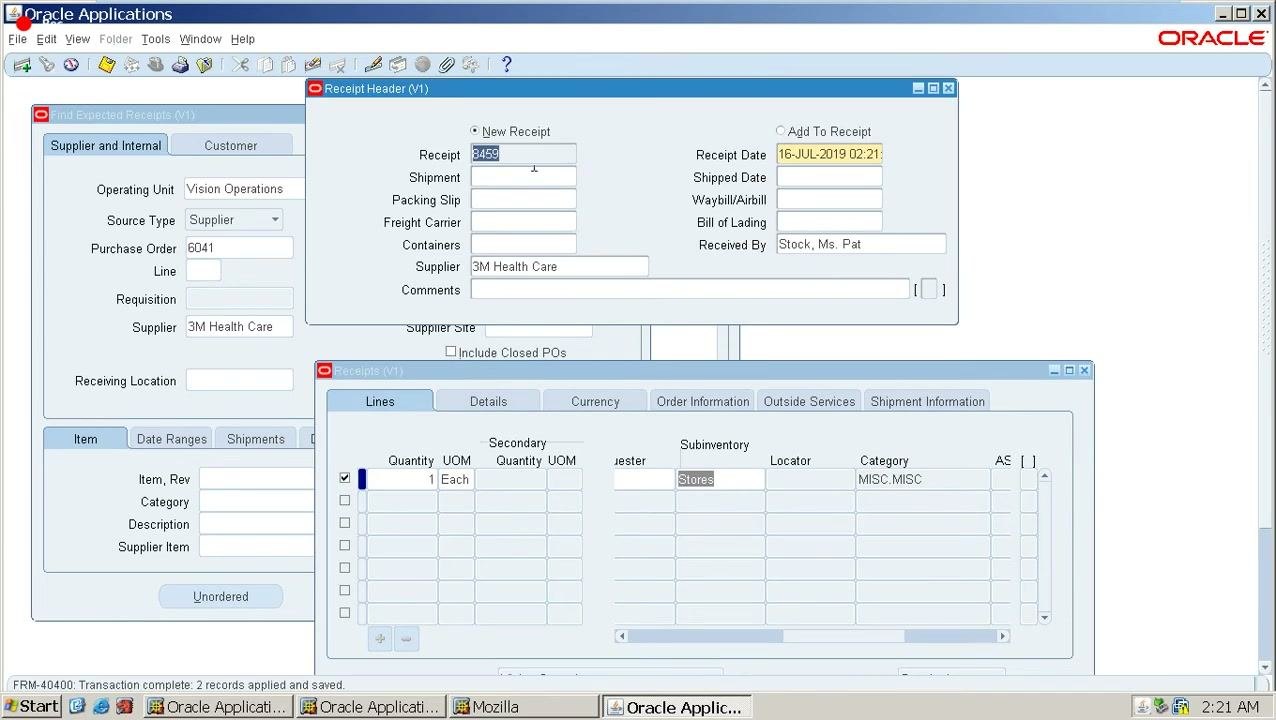
The Receipts window opens with the Receipt Header and Lines tabs. The header shows these values:
- Receipt Date: 16-JUL-2019 02:21
- Supplier: 3M Health Care
- Received By: Stock, Ms. Pat
- Item Description: Laptop
In the Receipts window, verify the receipt line details:
- Destination Type: Inventory
- Item: Laptop
- Quantity: 1 Each
- Order Type: Standard
- Order Number: 6041
- Due Date: 17-JUL-2019
Review the receipt details
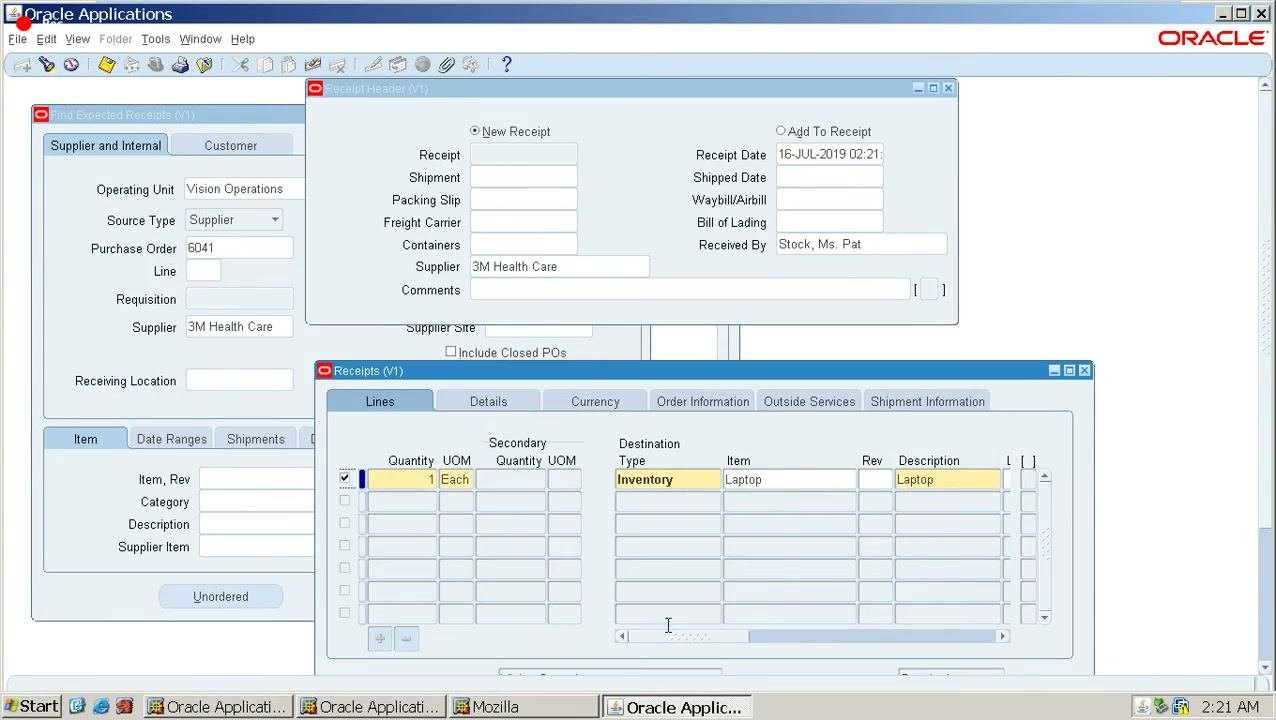
Before you save, confirm the following in the Receipts window:
- Quantity: 1 Each
- Destination Type: Inventory
- Item: Laptop
- Subinventory: Stores
- Category: MISC.MISC
The Receipt Header window shows Receipt Date 16-JUL-2019 02:21, Supplier 3M Health Care, and Received By Stock, Ms. Pat. You don't enter shipment or packing slip details at this stage.
Save the receipt
- Click the Save icon, or select File > Save.
- Note the receipt number the system generates (in this example,
8459).
A confirmation message appears at the bottom of the window: FRM-40400: Transaction complete: 2 records applied and saved.
Close the receipt windows
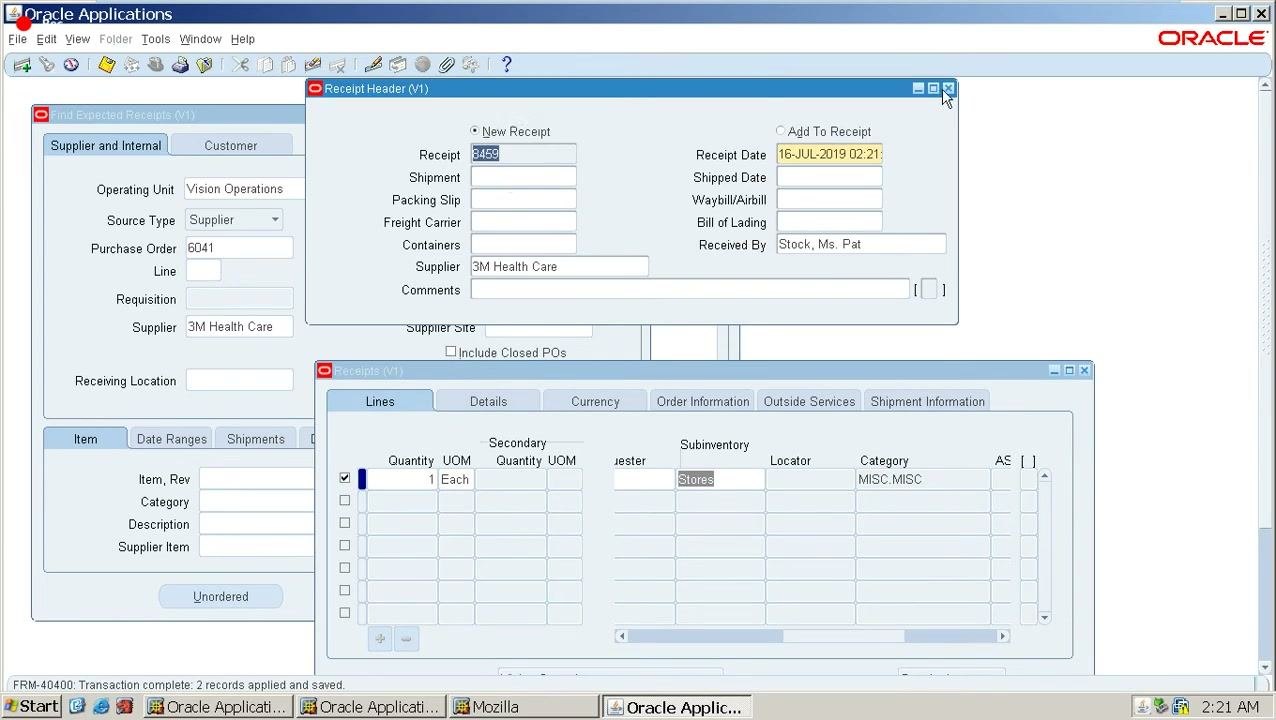
Click the close (X) button on the Receipt Header window and on the Receipts window to exit the receipt entry screens.
Verify the on-hand quantity
After you create the PO receipt, check Inventory to confirm the item is available.
Open On-hand Quantity
- From the Navigator, select the
Inventoryresponsibility. - Under On-hand, Availability, select On-hand Quantity.
- Click Open.
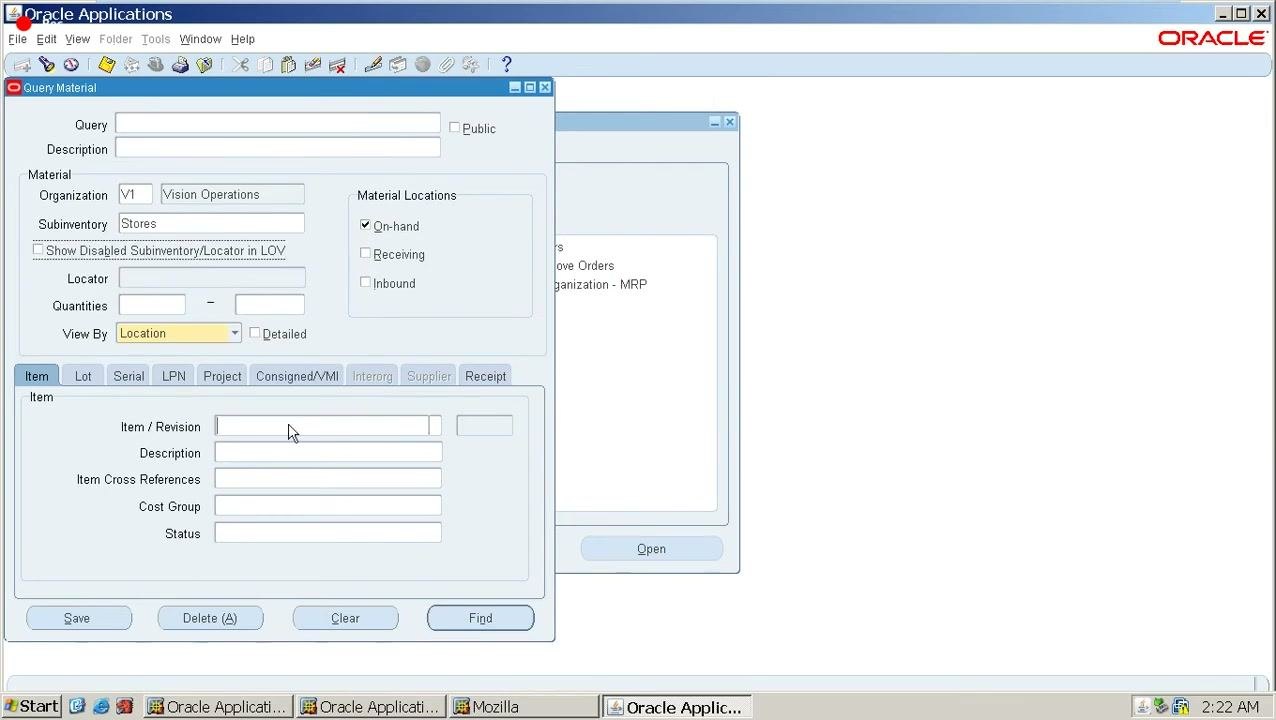
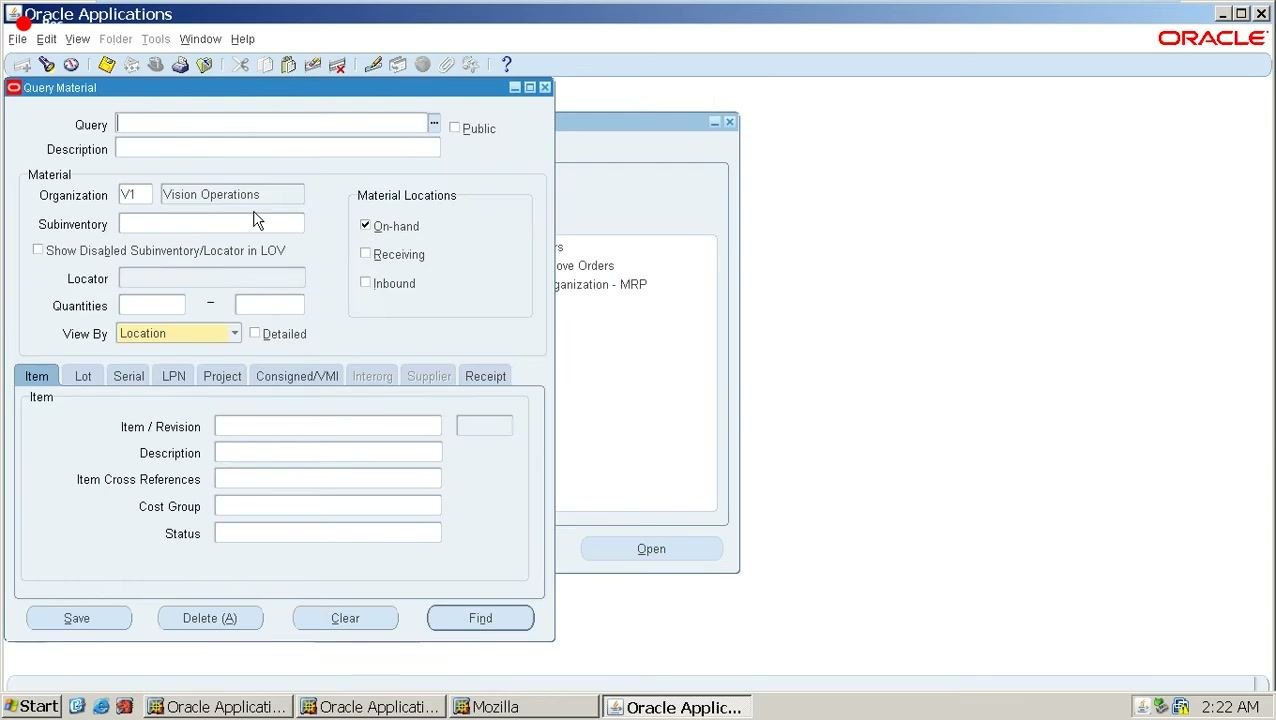
Search for the item in the Query Material window
- Set Organization to
V1(Vision Operations). - Set Subinventory to
Stores. - Make sure On-hand is selected under Material Locations.
- Leave Locator and Quantities blank for a broad search.
- Click Find.
Review the Material Workbench results
- In the Material Workbench, expand the Organizations tree to V1 > On-hand > Stores.
- Confirm that
Laptopappears as an item under Stores. - Check that the right pane lists Org
V1, SubStores, and ItemLaptop. - Click the
Laptopentry to view more details.
Check availability
- Click the Availability button.
- In the Availability window, verify these values:
- Material Location: On-hand
- Organization: V1
- Item/Revision: Laptop
- Subinventory: Stores
- Total Quantity (Primary): 1 Ea
- Available to Reserve: 1 Ea
- Available to Transact: 1 Ea
These values confirm that the received laptop is now available in inventory.
Summary
To create a PO receipt in Oracle EBS, you:
- Set up the item with inventory, purchasing, receiving, order management, and invoicing options, then assign it to an organization.
- Create a standard purchase order with the supplier, ship-to and bill-to locations, line details, and need-by date.
- Set the match approval level to
3-Wayand the receipt routing toStandard, then set the PO charge account. - Approve the purchase order, then receive it through Receiving > Receipts.
- Save the receipt and verify the on-hand quantity in Inventory.
What's next
After the item is received, you can continue with further item setup or transaction processing as needed. Because the match approval level is 3-Way, the purchase order, receipt, and invoice must all match.
Generation details: cost, quality tiers
Docsie billed 4,500 credits ($3.15) to analyze this 9-minute video at standard quality. The rewrite, template fill and Word/PDF exports were included. The same video at each quality tier:
| Quality | Frames sampled | Credits | Approx. cost |
|---|---|---|---|
| Draft | every 16-30 s | 2,250 | $1.57 |
| Standard (this guide) | every 8-15 s | 4,500 | $3.15 |
| Detailed | every 4-7 s | 9,000 | $6.30 |
| Ultra | every 1-3 s | 18,000 | $12.60 |
Credits priced at $0.70 per 1,000; plans include a monthly allowance. Enterprise customers on on-premise or bring-your-own-model deployments run this on their own inference and pay no per-video credits.
Generated by Docsie Video-to-Docs on 2026-11-15 from a 8-minute video. Screenshots are frames from the source video and belong to their creator, Manu Online IT, whose original is embedded above. If you own this video and want the guide removed or credited differently, contact us and we will act within one business day.