
How to Do a Bank Reconciliation in NetSuite
Reconciling your bank accounts in NetSuite ensures your accounting records match your actual bank activity. This guide walks you through how to do a bank reconciliation in NetSuite, from importing an online bank statement to matching transactions and saving a completed reconciliation.
Video: NetSuite Bank Reconciliation - How to by TrueCloud. All credit for the demonstration goes to the creator; watch the original on YouTube. The written guide below was generated from this video by Docsie. Creator? Request a change or removal.
Reconciling your bank accounts in NetSuite ensures your accounting records match your actual bank activity. This guide walks you through how to do a bank reconciliation in NetSuite, from importing an online bank statement to matching transactions and saving a completed reconciliation.
Prerequisites
- Access to your NetSuite account with permissions to view and manage banking transactions.
- Access to your online banking portal to download a bank statement.
- A bank statement file saved in the Quicken (
.QFX) format.
Log in to NetSuite
Enter your credentials to access your NetSuite account. Once logged in, you land on your personalized dashboard.
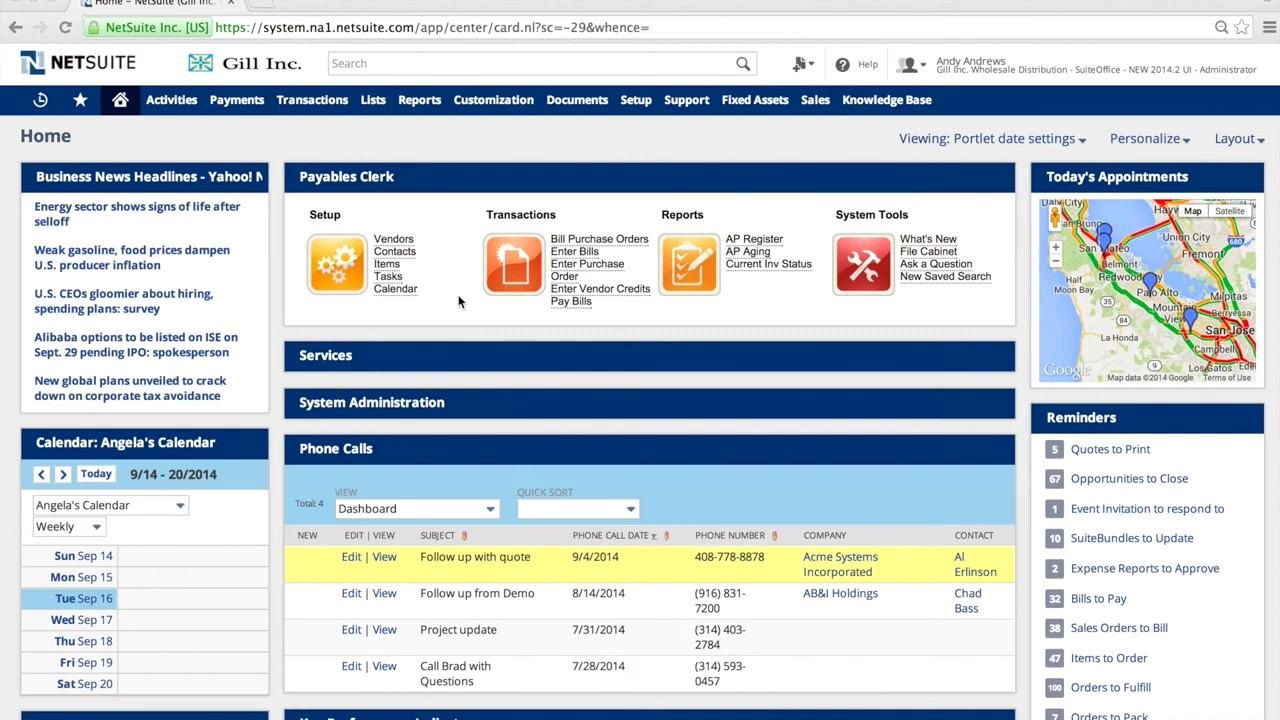
Navigate to the Transactions menu
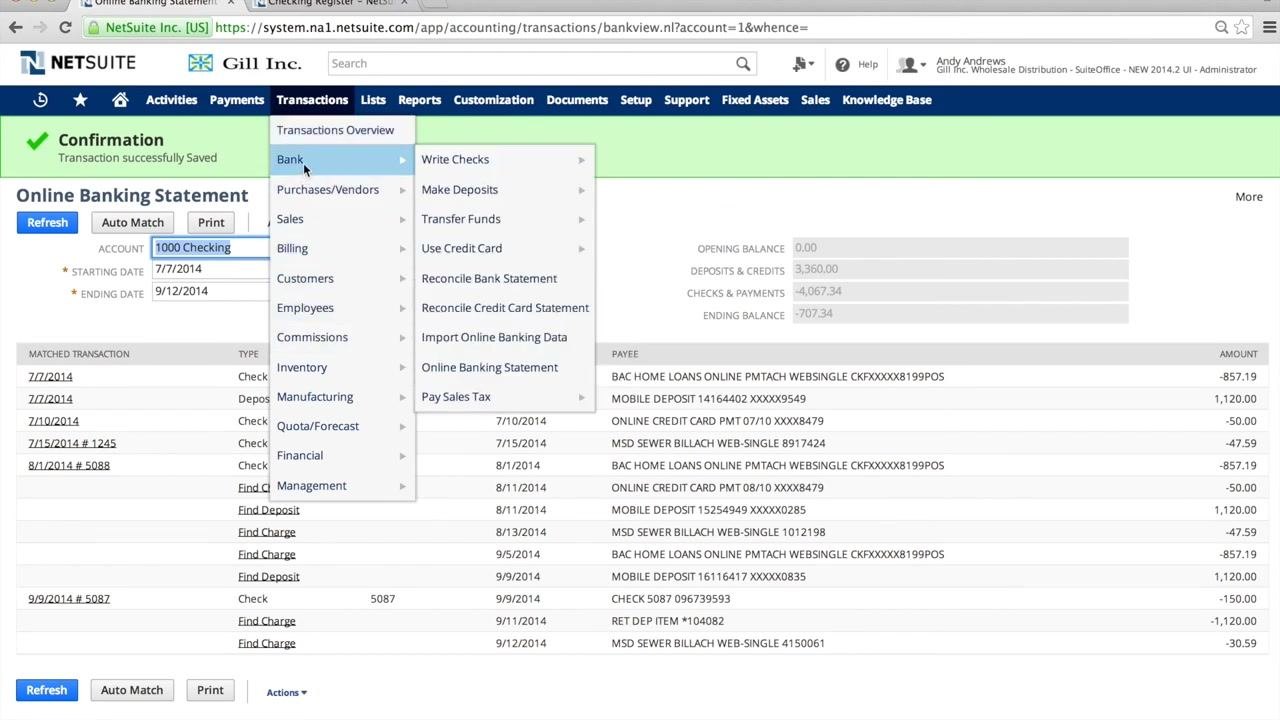
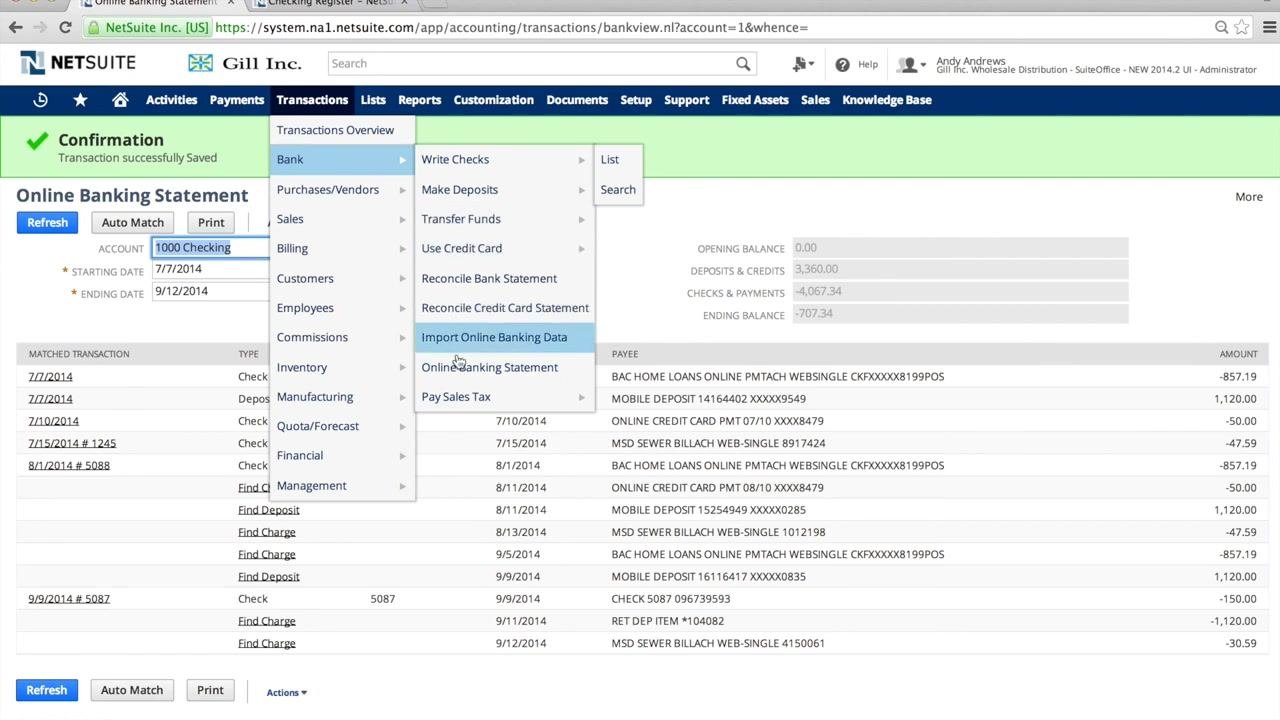
From the dashboard, locate the top navigation bar and click or hover over the Transactions menu. This menu gives you access to banking functions such as writing checks, making deposits, transferring funds, using credit cards, and reconciling statements.
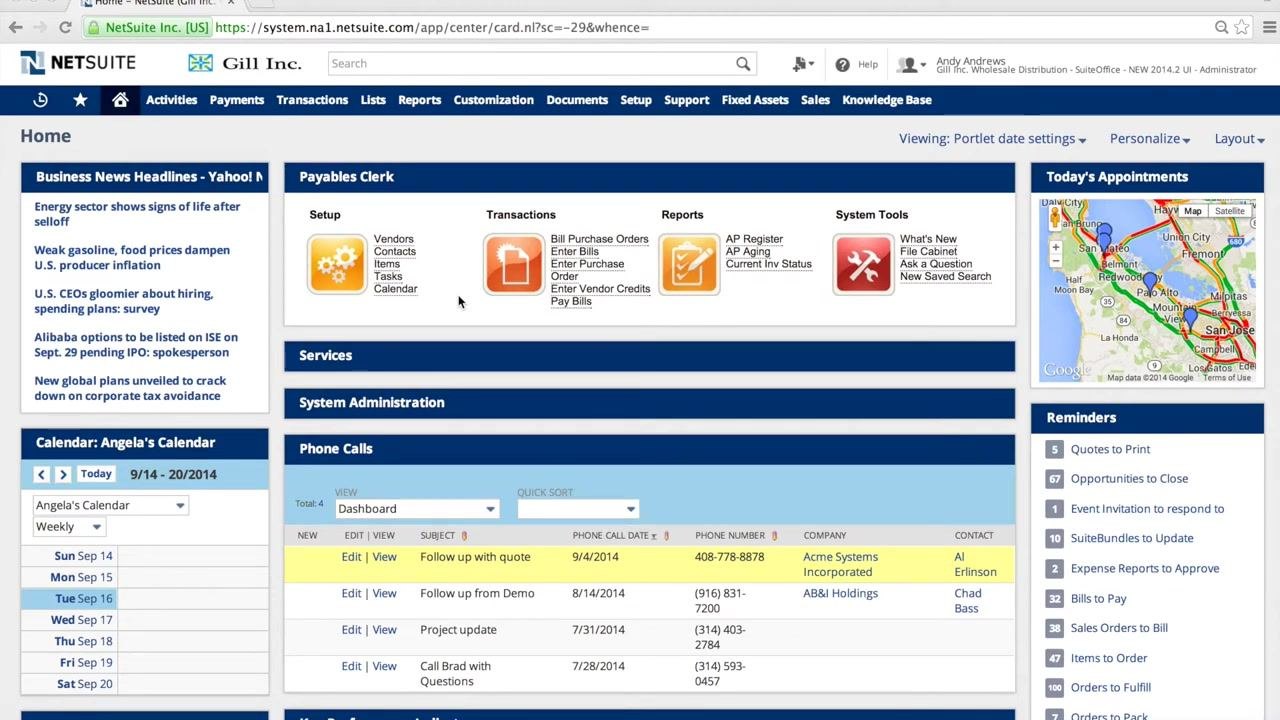
Open the Bank submenu
Under Transactions, go to Bank. From here you can choose from several options, including:
- Write Checks
- Make Deposits
- Transfer Funds
- Use Credit Card
- Reconcile Bank Statement
- Reconcile Credit Card Statement
- Import Online Banking Data
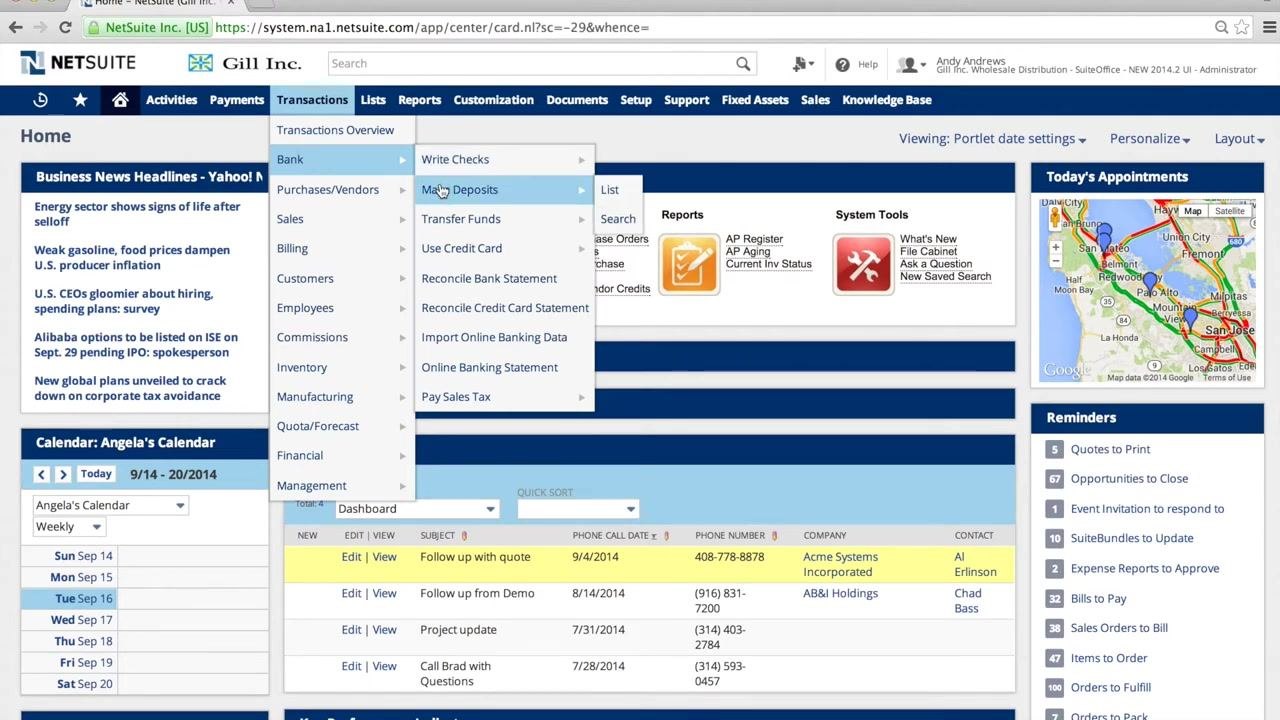
Select Import Online Banking Data
Click Import Online Banking Data from the Bank submenu. This opens the Online Banking Data Upload page.
Download your bank statement
Log in to your online banking portal and download your bank statement in Quicken file format (.QFX). Save the file somewhere easy to find, such as your Desktop or Downloads folder.
Upload the bank statement file
On the Online Banking Data Upload page in NetSuite, click Choose File. In the file browser dialog, navigate to where you saved your .QFX file, select it (for example, quickenExport.QFX), and click Open.
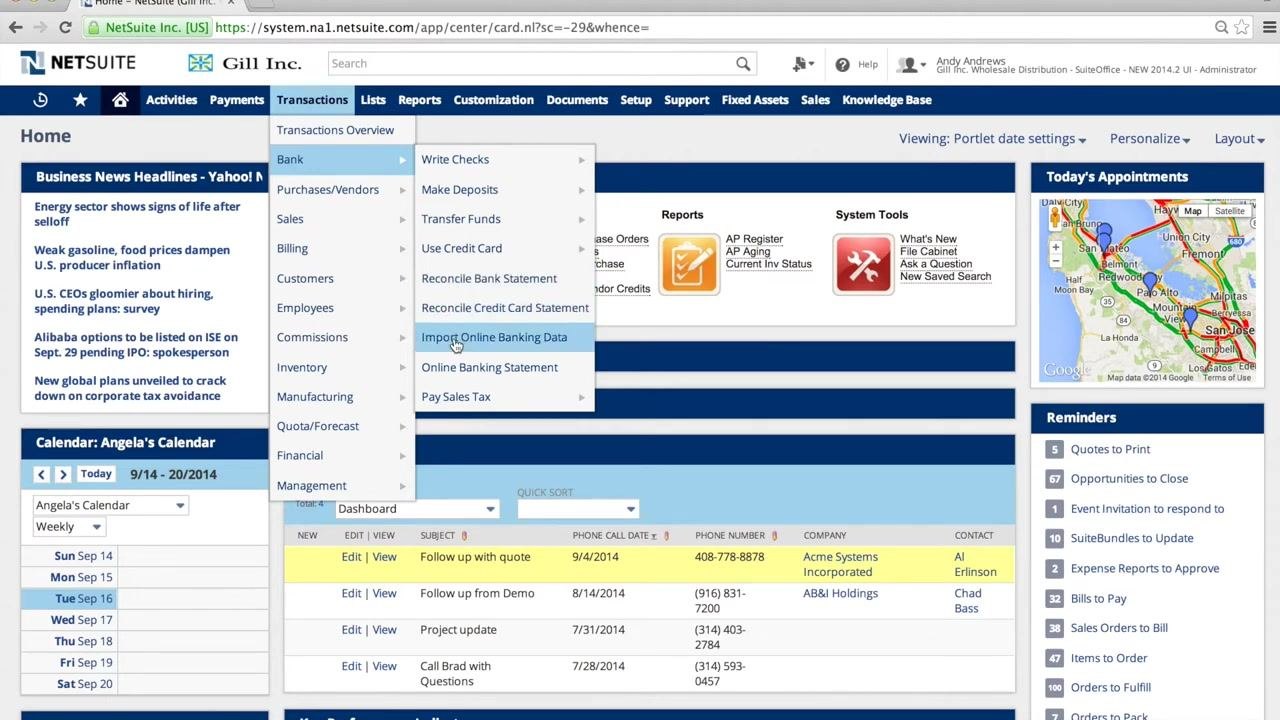
Select the account and confirm settings
In the Account dropdown, select the account you want to import the transactions into (for example, 1000 Checking). Make sure Character Encoding is set to Unicode (UTF-8), and confirm the date format if required.
Submit the import
Click Submit to begin the import process.
Review the import confirmation
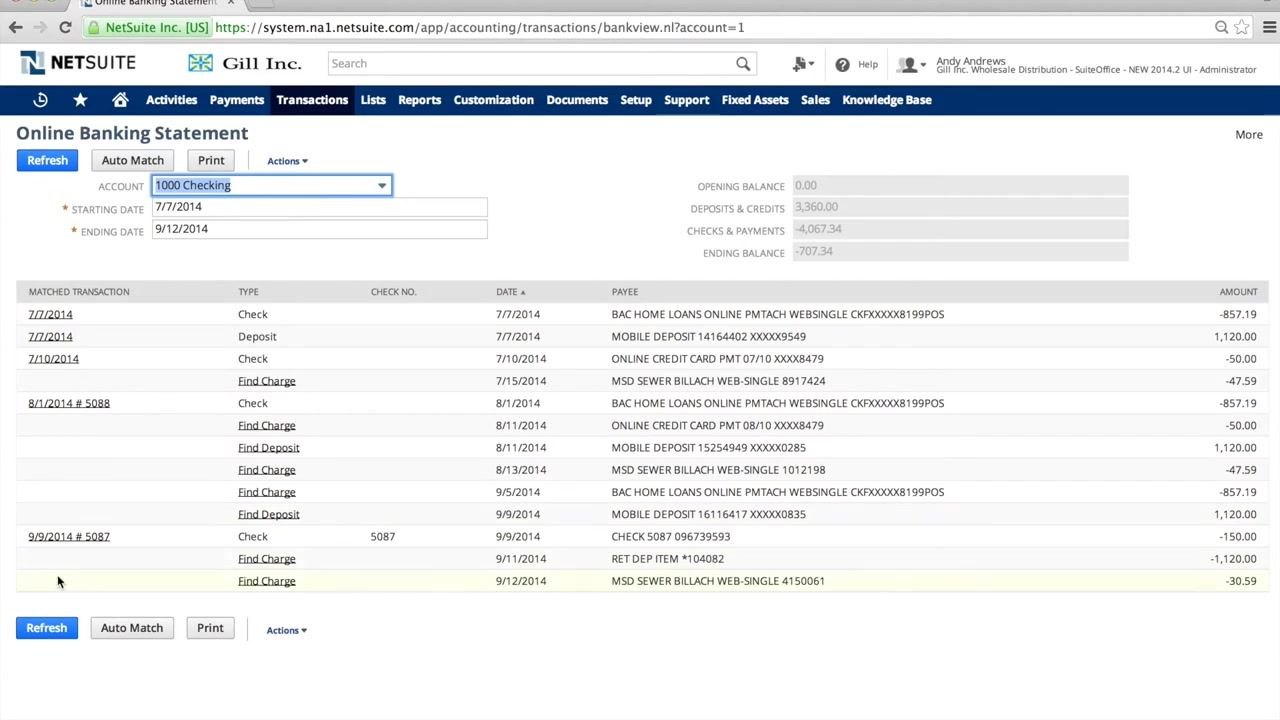
After submitting, a confirmation screen displays the results, for example: "13 have been successfully imported. There are 5 matched transactions." Click OK to continue.
View imported transactions on the Online Banking Statement page
You're taken to the Online Banking Statement page, where you can review all imported transactions. The left-hand side shows matched transactions, including match date, transaction type, check number, date, payee, and amount. Use the Auto Match feature, or review and reconcile each transaction manually.
Drill into a specific transaction
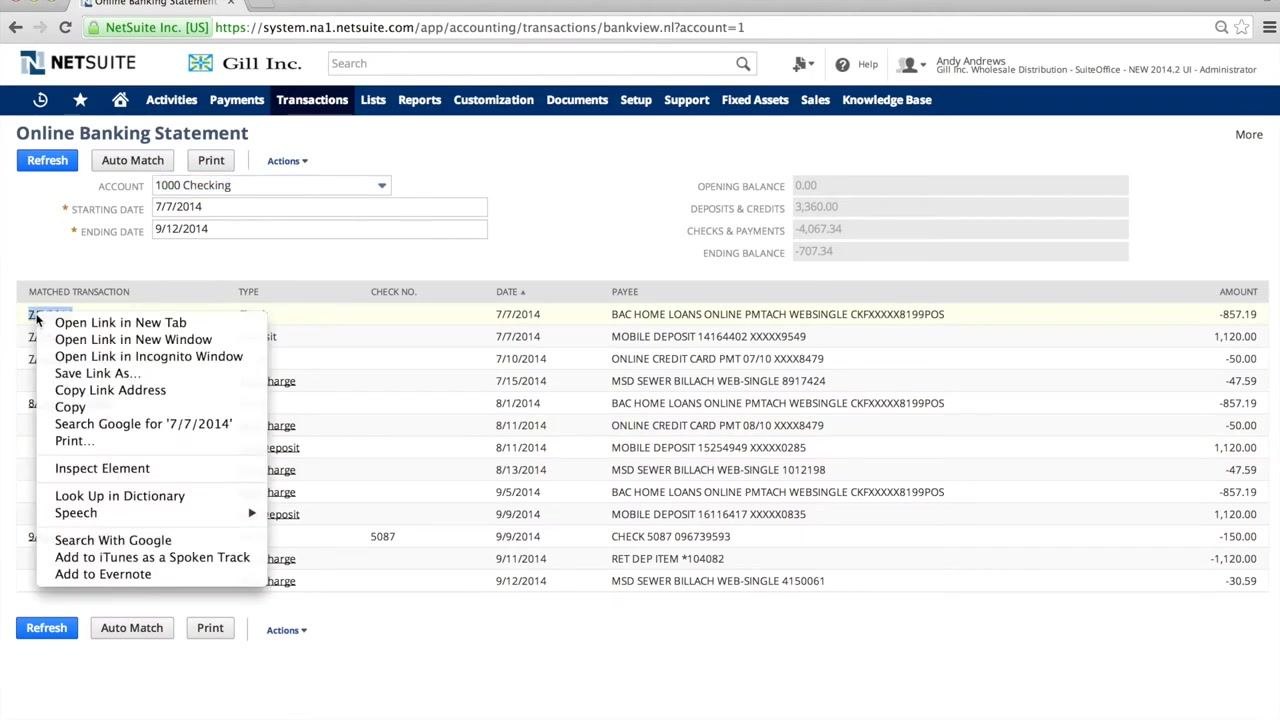
To see more detail about a transaction, right-click the transaction date link (for example, 7/7/2014 under Matched Transaction) and select Open Link in New Tab or Open Link in New Window. This lets you view the details without losing your place on the statement page.
Review transaction details
The transaction detail page shows all information for the selected transaction. For example, a check might show the account (1000 Checking), payee (AB&I Holdings), amount (857.19), date (7/7/2014), memo (Building loan), and expense account (1450 Building). Use Edit, Back, or Void as needed.
Return to the Online Banking Statement
Switch back to the Online Banking Statement tab to continue matching or reviewing transactions. Confirm that the amount and details match those in your uploaded file.
Find a match for an unmatched charge
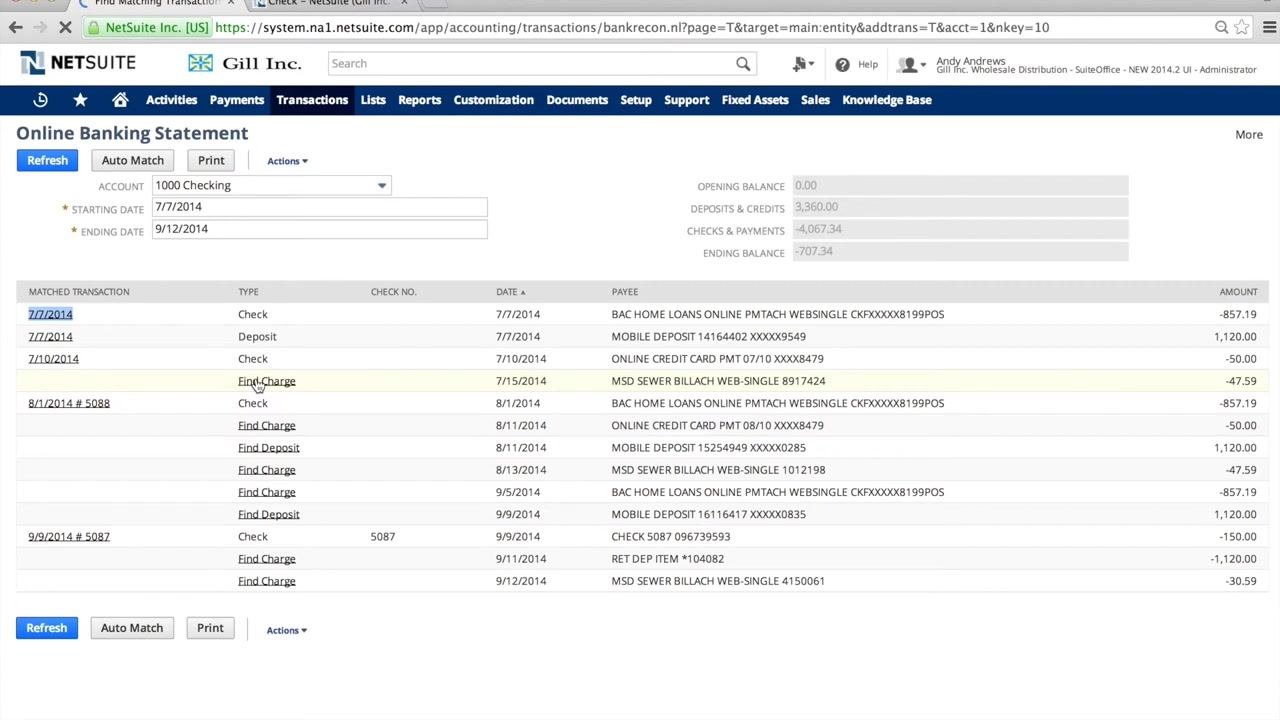
If a charge from your bank statement isn't automatically matched, click Find Charge next to the unmatched transaction. A list of possible transactions appears so you can review and select the correct match.
Manually add a new charge
If the charge doesn't already exist in NetSuite, add it directly from the matching screen. In the Find Matching Transactions window, select the payee from the dropdown (for example, Acera), then enter the date (7/15/2014), number (1245), memo (for example, MSD SEWER BILLACH WEB-SINGLE 8917424), and amount (47.59).
Assign the correct account
In the Account dropdown, select the appropriate account for the charge (for example, 1300 Prepaid Expenses). Confirm all required fields are filled in, then click Add to include the new charge.
Save the new charge and confirm the match
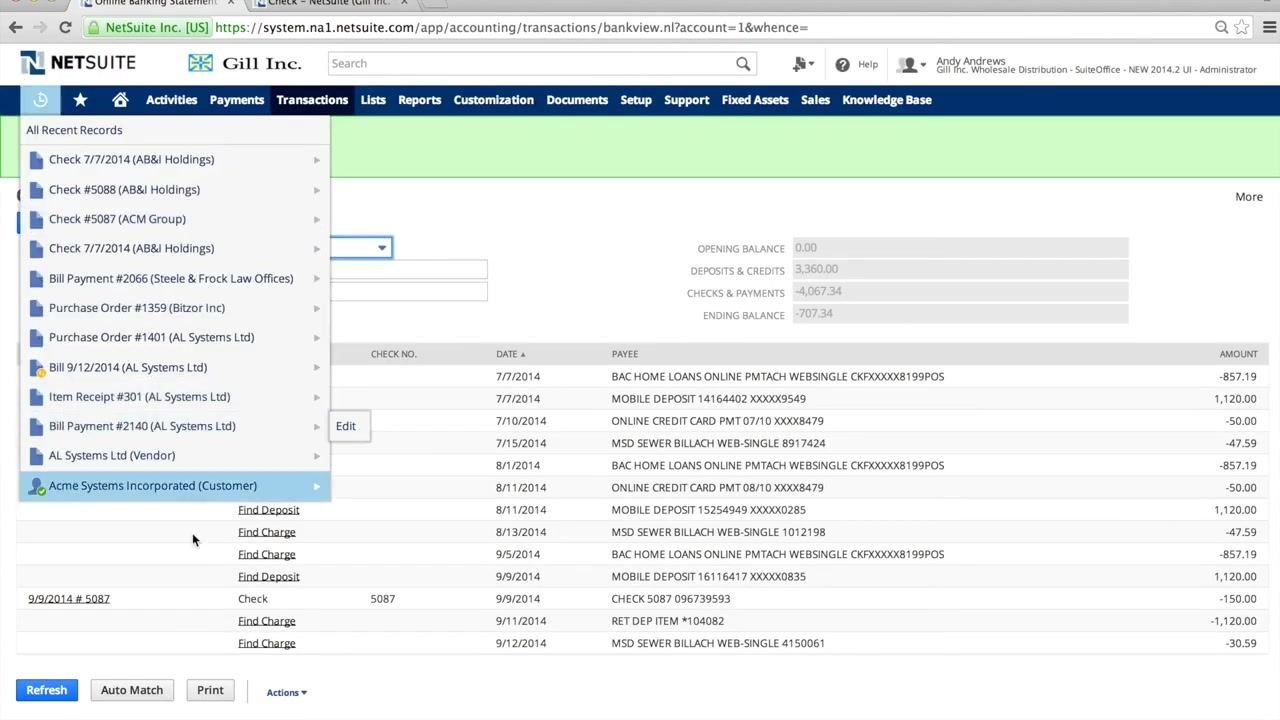
Click Save to record the new charge and match it to the imported bank transaction. A confirmation message appears, and the Online Banking Statement updates to reflect the newly matched charge.
Access additional details via the Transactions menu
To investigate or audit further, use the navigation menus to access the General Ledger (GL) registry or other transaction records. Use the Transactions menu and select the relevant overview or processing option.
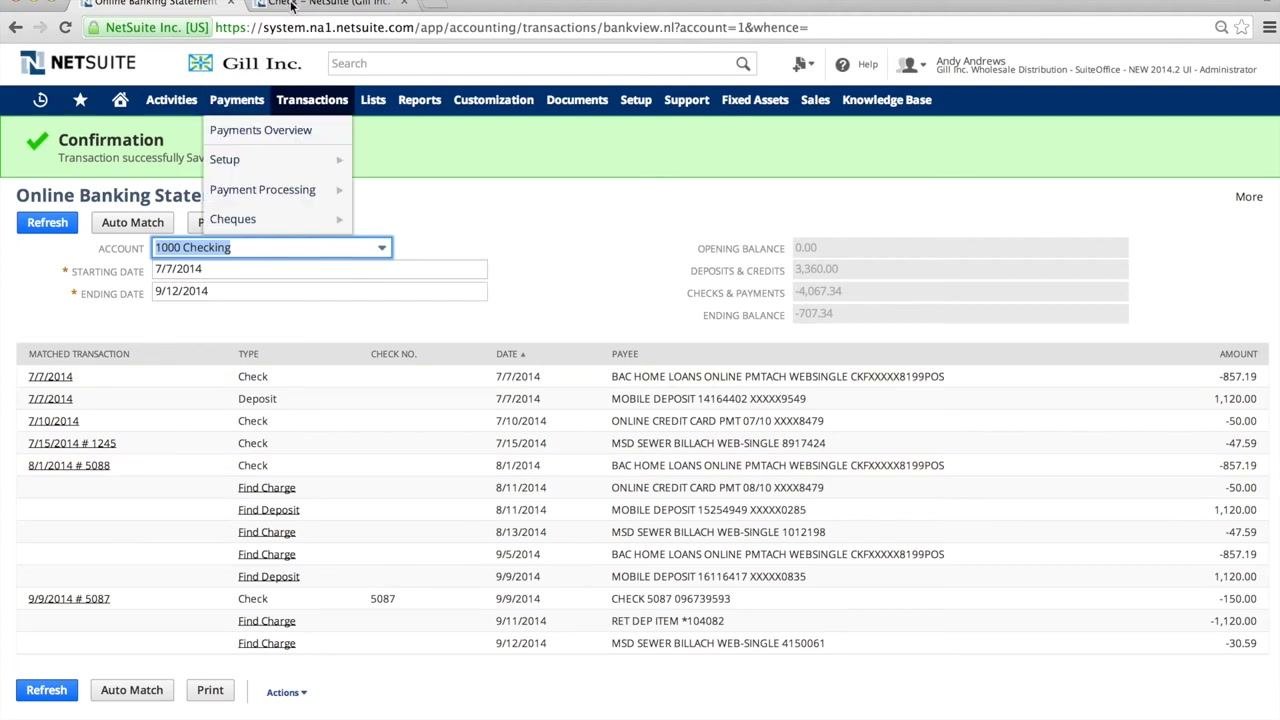
View the GL impact of a transaction
Open the transaction detail page (for example, a check) and review the GL Impact section to see which accounts are affected (for example, 1000 Checking and 1450 Building). Confirm the payee, amount, date, memo, and expense account.
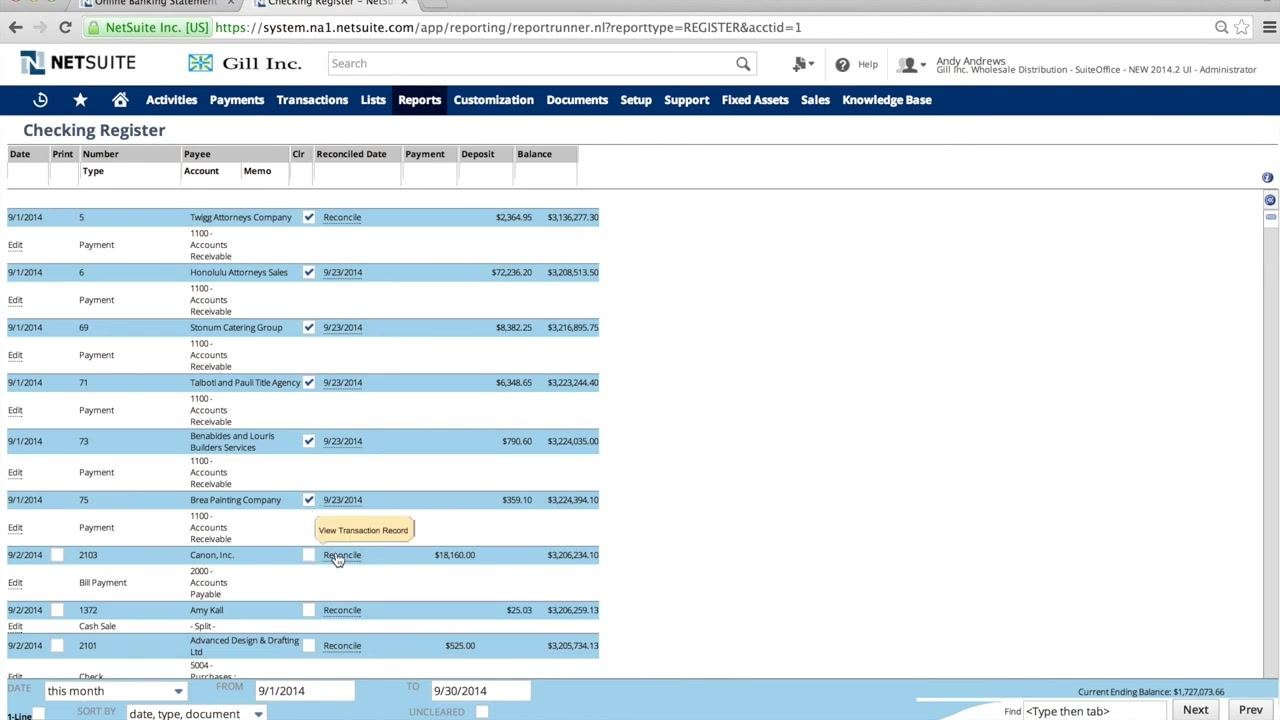
Access the GL registry
Click the Actions dropdown on the transaction detail page and select GL Impact or Go To Register to view all related transactions in the GL registry. Use this view to check which transactions have already been reconciled and saved to your statement.
Navigate to the Checking Register
From the GL registry or transaction detail page, go directly to the Checking Register. Review all transactions for the account, including payment and deposit details, reconciliation status, and running balances. Click Reconcile to view or update reconciliation status for specific transactions.
Open the Reconcile Bank Statement page
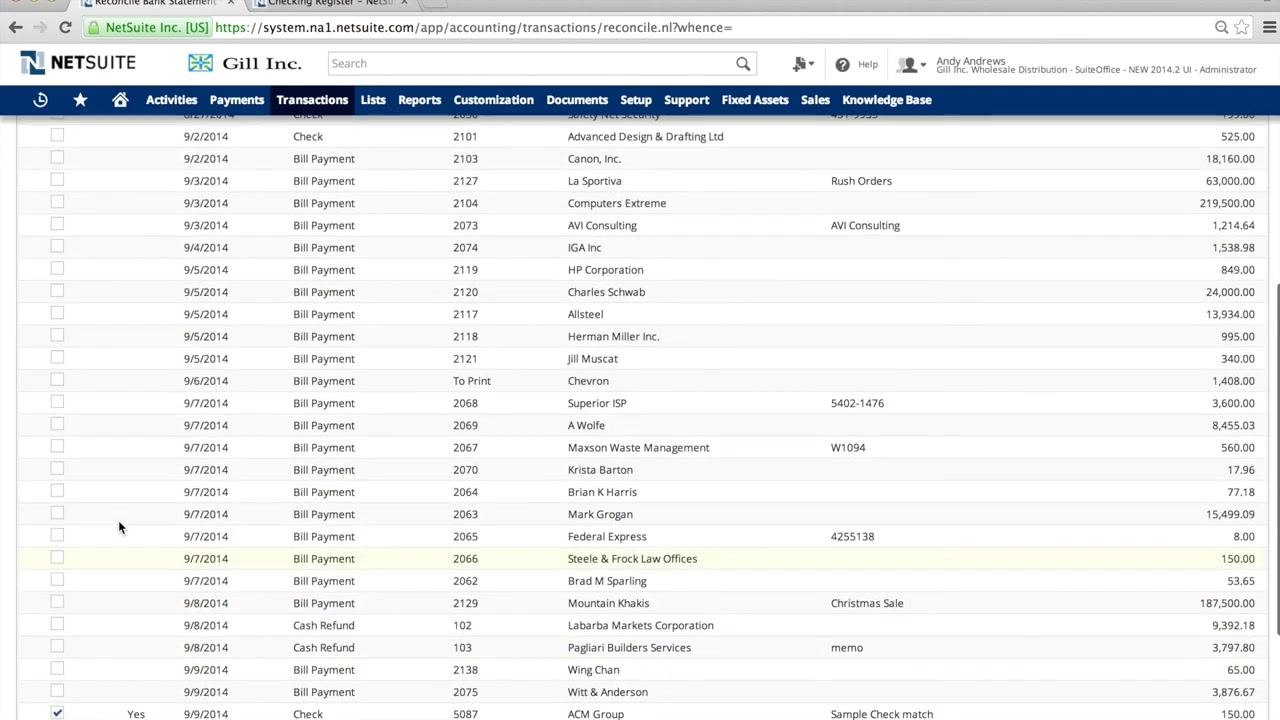
Go to Transactions > Bank > Reconcile Bank Statement. This page displays all uploaded bank statement data and shows which transactions have cleared with your bank, including check numbers (for example, 5088, 5087), payees, memos, and amounts.
Review and mark transactions as cleared
On the Reconcile Bank Statement page, verify that all transactions from your bank statement are listed. In most cases, matched transactions show "Yes" in the Cleared column automatically. If needed, manually select or deselect transactions to mark them as cleared.
Mark all cleared transactions at once
Use the Mark All Cleared to Reconcile button to quickly select all transactions that your bank has cleared. This ensures all uploaded and matched transactions are ready for reconciliation.
Save and complete the reconciliation
Click Save at the top of the page. NetSuite reconciles the selected transactions and updates your records to reflect the cleared bank statement. Once saved, your reconciliation is complete, and the transactions are marked as reconciled.
Summary
By following these steps, you can import your bank statement, review and match transactions, check the GL impact, and complete a bank reconciliation in NetSuite — keeping your accounting records accurate and in sync with your bank activity.
Generation details: cost, quality tiers
Docsie billed 2,500 credits ($1.75) to analyze this 5-minute video at standard quality. The rewrite, template fill and Word/PDF exports were included. The same video at each quality tier:
| Quality | Frames sampled | Credits | Approx. cost |
|---|---|---|---|
| Draft | every 16-30 s | 1,250 | $0.88 |
| Standard (this guide) | every 8-15 s | 2,500 | $1.75 |
| Detailed | every 4-7 s | 5,000 | $3.50 |
| Ultra | every 1-3 s | 10,000 | $7.00 |
Credits priced at $0.70 per 1,000; plans include a monthly allowance. Enterprise customers on on-premise or bring-your-own-model deployments run this on their own inference and pay no per-video credits.
Generated by Docsie Video-to-Docs on 2026-10-01 from a 4-minute video. Screenshots are frames from the source video and belong to their creator, TrueCloud, whose original is embedded above. If you own this video and want the guide removed or credited differently, contact us and we will act within one business day.