
How to Create a Sales Order in NetSuite
This guide shows you how to create a sales order in NetSuite, from opening the entry screen to saving the completed order. It also covers the action buttons available once the order is saved, so you can manage fulfillment, invoicing, and approvals.
Video: How to Create a Sales Order in NetSuite (Step-by-Step Guide) | ScaleNorth by ScaleNorth | NetSuite Consulting & BPO Accounting. All credit for the demonstration goes to the creator; watch the original on YouTube. The written guide below was generated from this video by Docsie. Creator? Request a change or removal.
This guide shows you how to create a sales order in NetSuite, from opening the entry screen to saving the completed order. It also covers the action buttons available once the order is saved, so you can manage fulfillment, invoicing, and approvals.
Prerequisites
- You must be logged into your NetSuite account before starting.
- Have the customer, item, and pricing details ready for the order you want to create.
Access the NetSuite home page
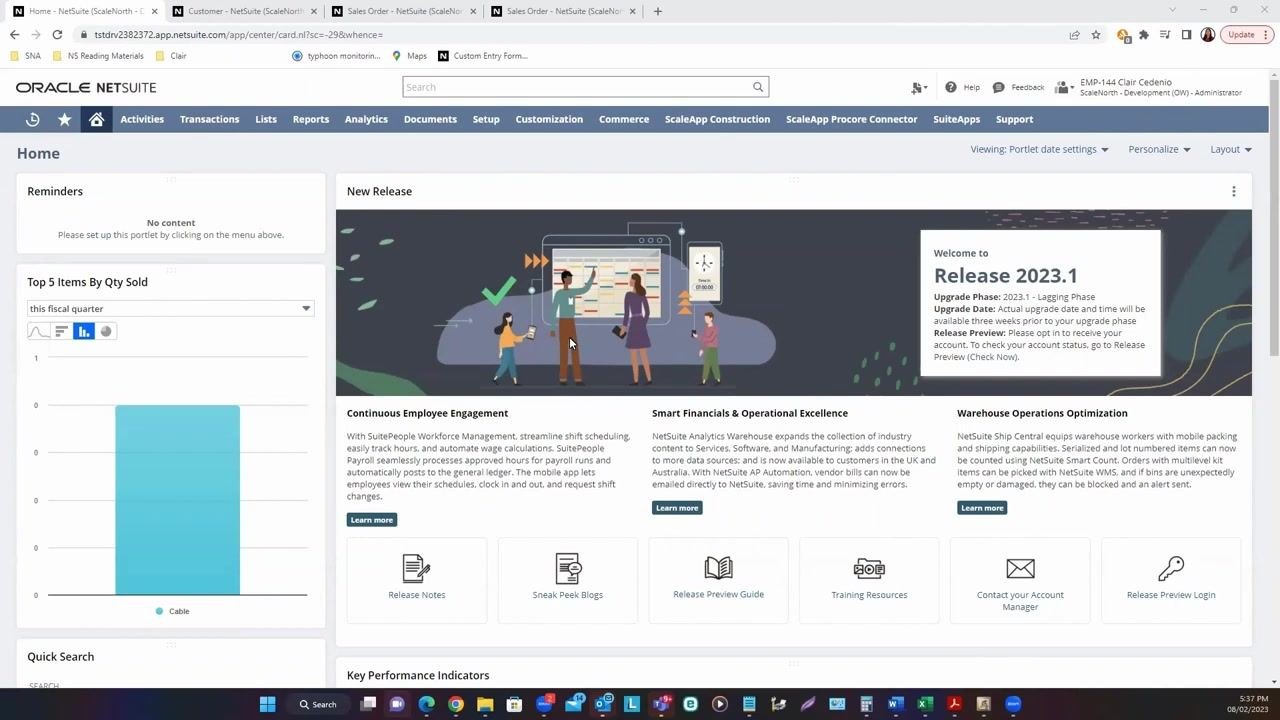
Log into your NetSuite account to reach the home page. The home page displays widgets such as Reminders, Top 5 Items By Qty Sold, and new release information, along with navigation menus at the top of the screen.
Navigate to the sales order page
NetSuite offers three ways to open the sales order entry screen.
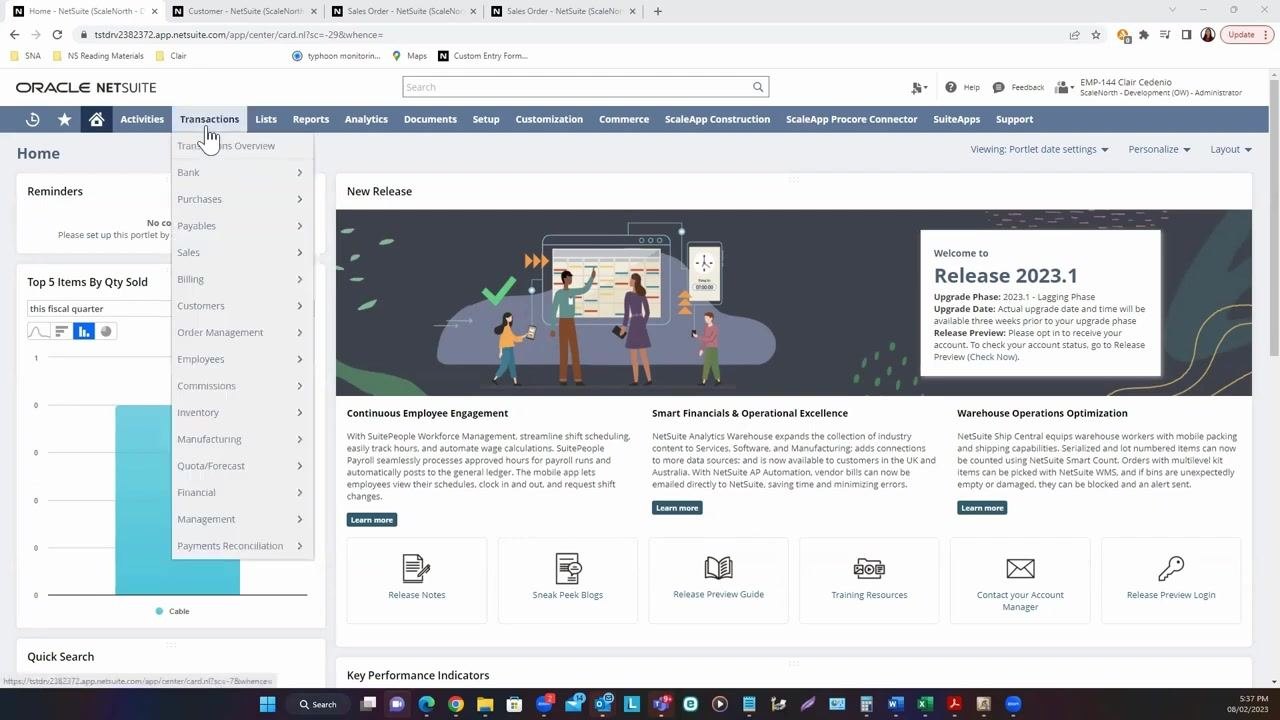
Option 1: Using the center tabs. Hover over the top navigation bar and go to Transactions > Sales > Enter Sales Orders.
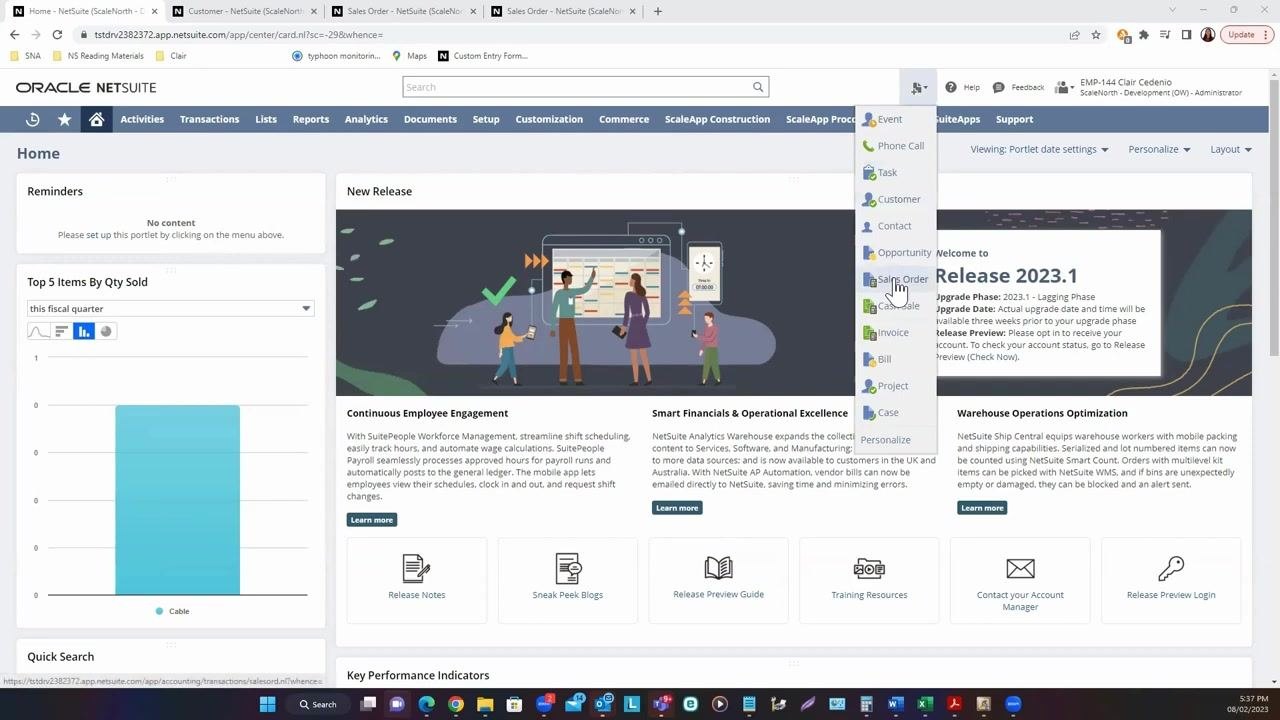
Option 2: Using the Create New icon. Click the Create New icon (plus sign) in the top navigation, then select Sales Order from the dropdown list.
Option 3: From a customer record. If you are viewing a customer record, click the Actions or Create New dropdown and select Sales Order. The customer field is automatically populated with that customer's information.
Enter sales order header information
On the Sales Order entry screen, fill in the header fields:
- Customer: This field may already be filled in if you accessed the form from a customer record (for example, CUS-47 A Test Customer).
- Date: Enter the order date (for example, 8/2/2023).
- Status: Confirm it is set to "Pending Fulfillment".
- Complete any other required fields, such as Sales Rep, Department, Class, and Location.
Add items to the sales order
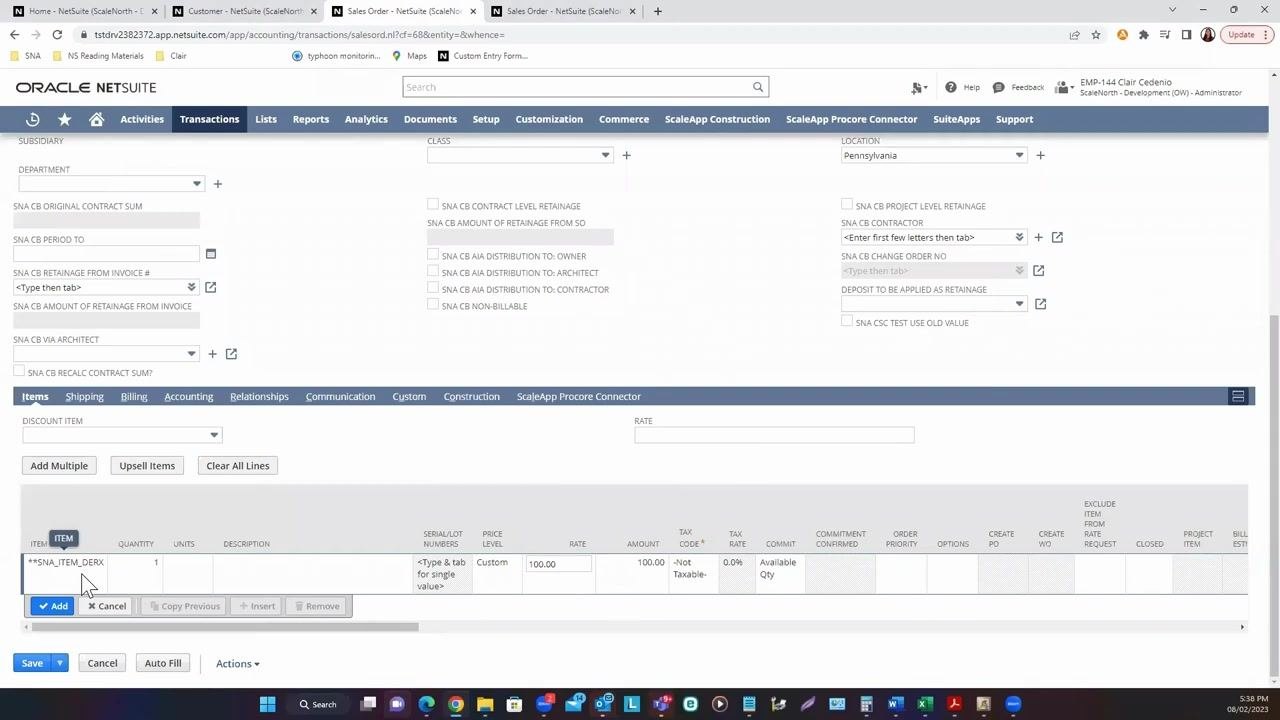
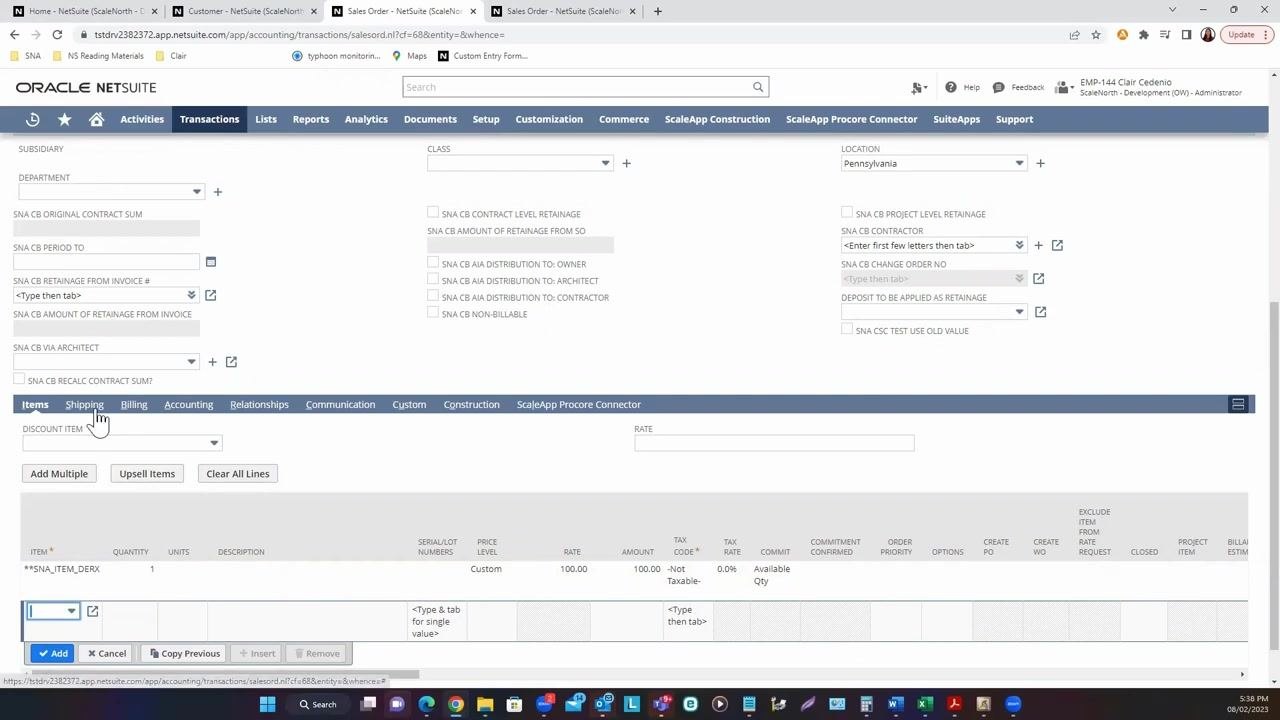
Scroll down to the Items subtab to add the products or services for this order.
- Select the item (for example, SNA_ITEM_DERX).
- Enter the Quantity (for example, 1).
- If the item has no base price, enter the Rate (for example, 100.00).
- Click Add to include the item in the order.
- Repeat these steps to add additional items as needed.
Enter additional information (optional)
Use the available subtabs to add further details to the order:
- Shipping: Enter shipping terms and address if required.
- Billing: Enter billing terms and address.
- Other subtabs: Fill in accounting, relationship, communication, or custom fields as needed.
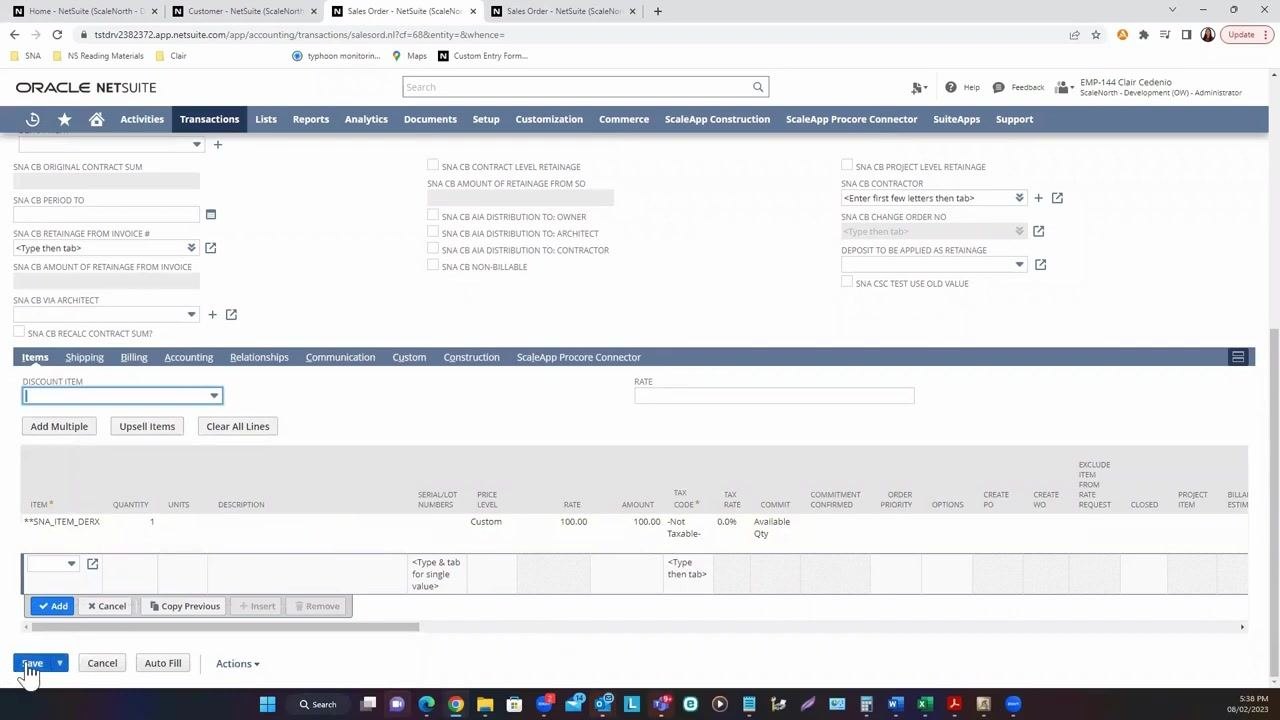
Review and save the sales order
Review all entered information for accuracy, then scroll to the bottom of the screen and click Save. The sales order is created with a status of "Pending Fulfillment."
By completing these steps, you create a sales order in NetSuite with all required fields and items properly entered, ready for the next stage in your fulfillment process.
Understanding sales order actions in NetSuite
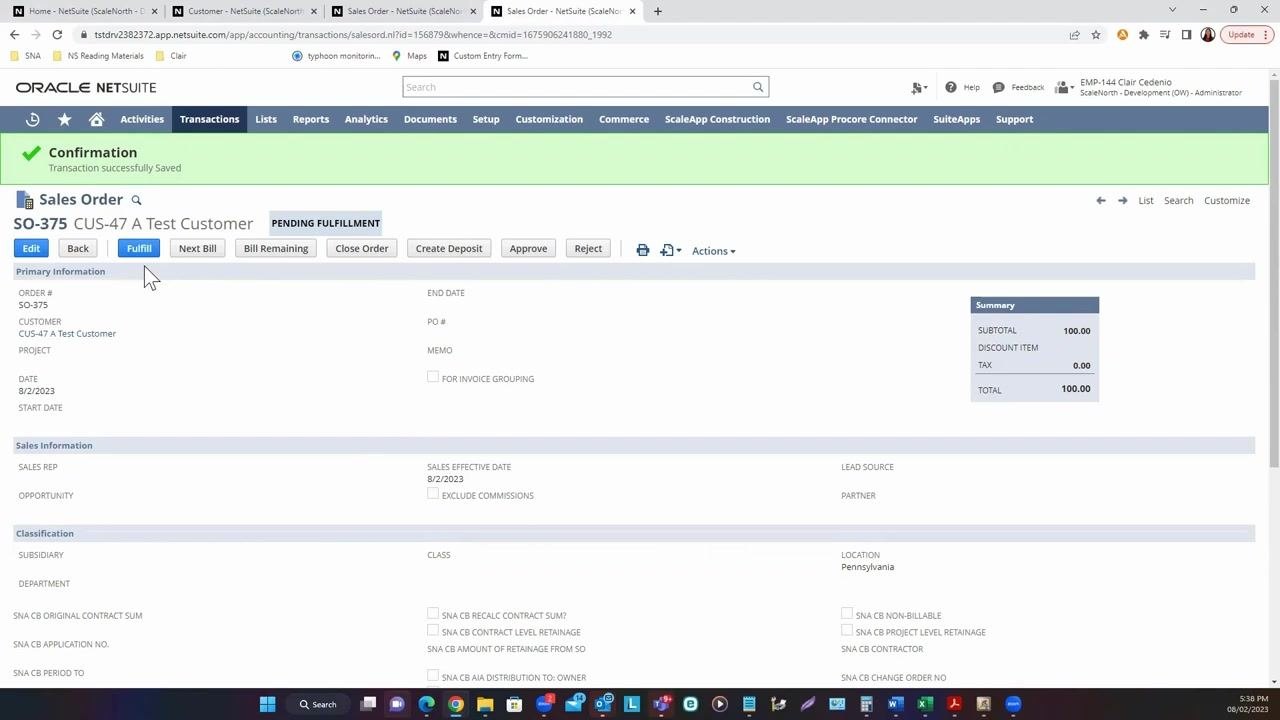
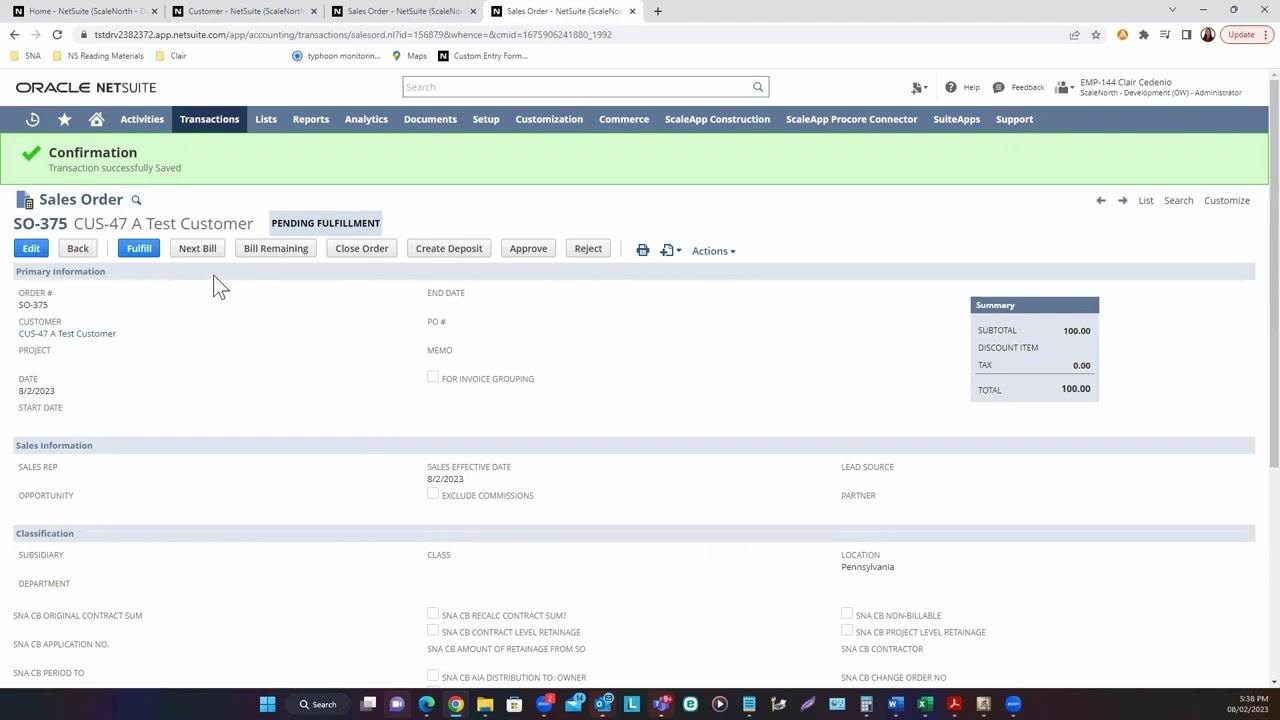
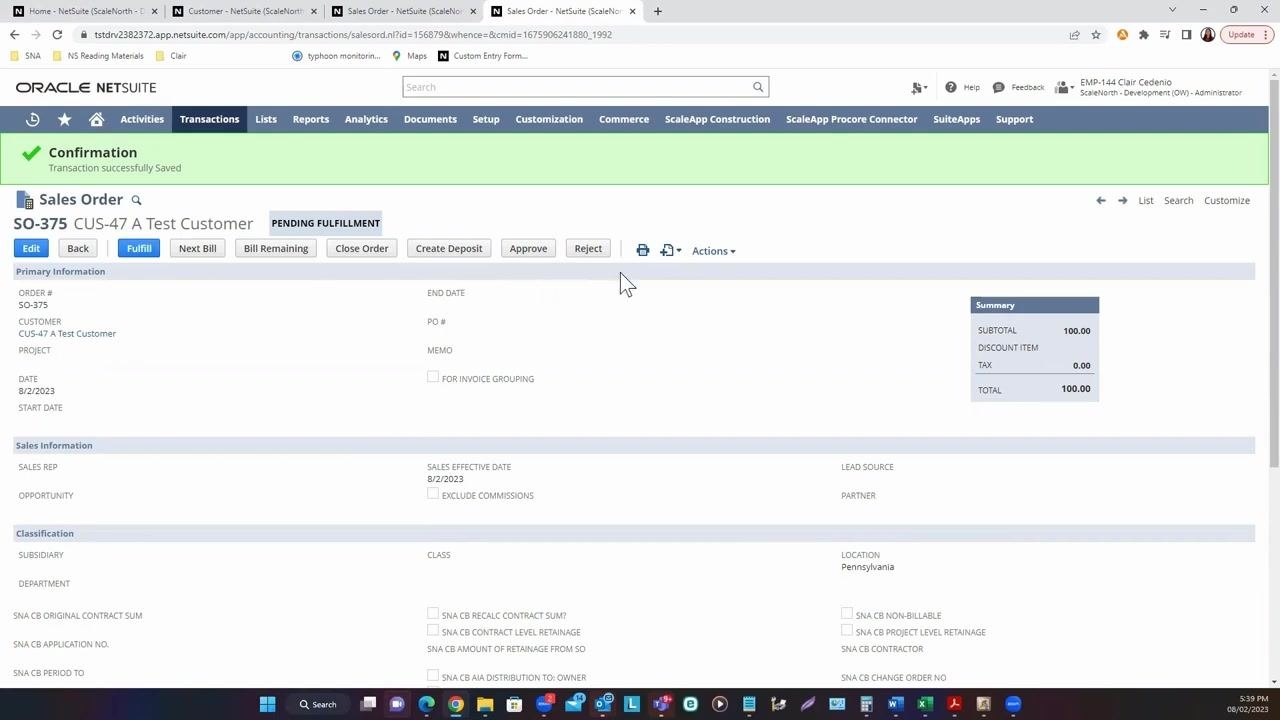
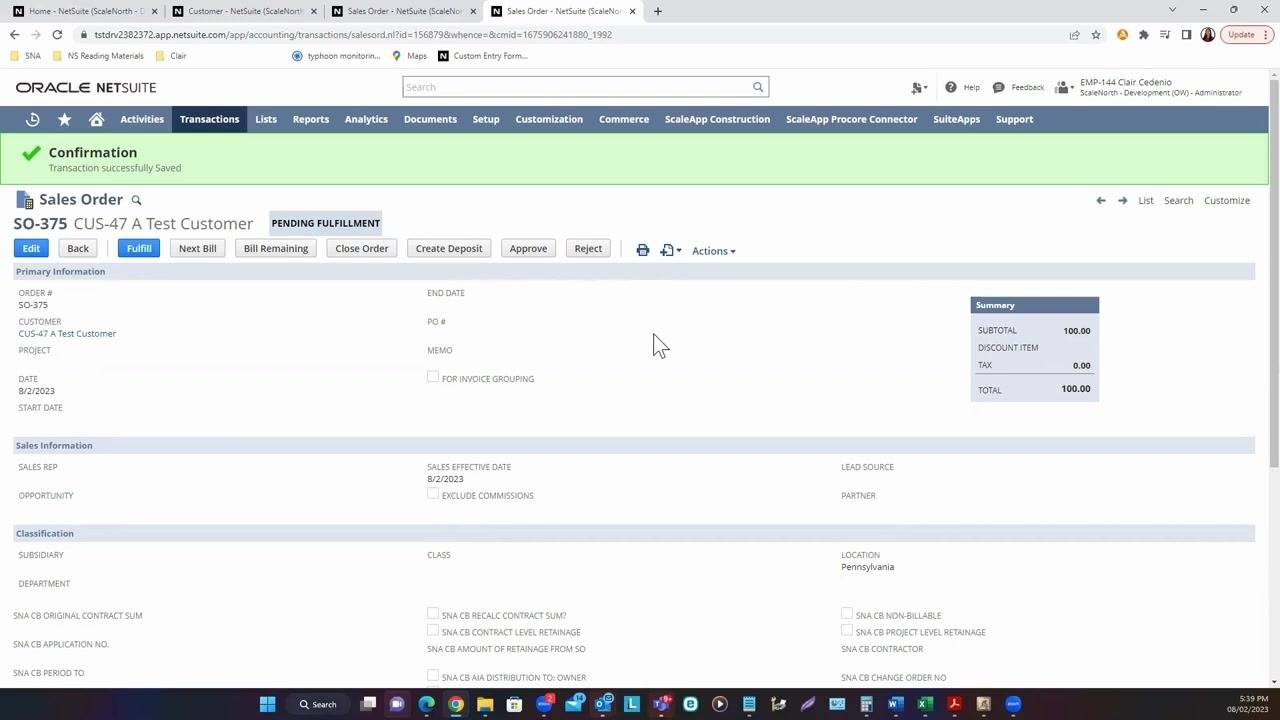
After you save a sales order, several action buttons appear at the top of the screen. Each button supports a specific step in the order management workflow.
Fulfill the sales order
Click the Fulfill button to begin the item fulfillment process. Use this option when you are ready to ship or deliver the items to the customer. The order status must be "Pending Fulfillment" before you can proceed.
Invoice the sales order
Use the Next Bill and Bill Remaining buttons to generate invoices:
- Next Bill: Creates the next scheduled invoice if the order is set up for multiple billings.
- Bill Remaining: Invoices the remaining balance of the sales order in a single step.
Use these options to bill the customer after fulfillment or according to your billing schedule.
Close the sales order
Click Close Order to close a sales order that is already cancelled or should not proceed further. This action prevents any further fulfillment or billing on the order.
Create a customer deposit
Select Create Deposit to record an advance payment received from the customer against the sales order. Use this option when customers pay a portion or all of the order amount upfront.
Approve or reject the sales order
If your organization uses an approval workflow, the Approve and Reject buttons appear on the order:
- Approve: Confirms and authorizes the sales order for further processing.
- Reject: Denies the sales order, preventing fulfillment and billing.
These options are only visible if an approval process is configured for sales orders.
Review order summary and details
The order summary panel on the right side of the screen displays the Subtotal, Discount Item, Tax, and Total for the sales order. Review this information for accuracy before taking further action.
What's next
Once your sales order is saved and reviewed, you can move forward with fulfillment, invoicing, recording deposits, or routing the order through approval, depending on your organization's workflow. Understanding these action buttons helps you manage each sales order efficiently from creation through completion.
Generation details: cost, quality tiers
Docsie billed 1,500 credits ($1.05) to analyze this 3-minute video at standard quality. The rewrite, template fill and Word/PDF exports were included. The same video at each quality tier:
| Quality | Frames sampled | Credits | Approx. cost |
|---|---|---|---|
| Draft | every 16-30 s | 750 | $0.52 |
| Standard (this guide) | every 8-15 s | 1,500 | $1.05 |
| Detailed | every 4-7 s | 3,000 | $2.10 |
| Ultra | every 1-3 s | 6,000 | $4.20 |
Credits priced at $0.70 per 1,000; plans include a monthly allowance. Enterprise customers on on-premise or bring-your-own-model deployments run this on their own inference and pay no per-video credits.
Generated by Docsie Video-to-Docs on 2026-10-01 from a 2-minute video. Screenshots are frames from the source video and belong to their creator, ScaleNorth | NetSuite Consulting & BPO Accounting, whose original is embedded above. If you own this video and want the guide removed or credited differently, contact us and we will act within one business day.