
How to Create an Email Group in Outlook in Microsoft 365
This guide walks you through how to create an email group in Outlook 2010, also known as a contact group or distribution list, and shows you several ways to send messages to that group once it's set up. You'll also learn how to manage group members and customize your recipient list for individual emails.
Video: How to create contact groups in Outlook by Excel, Word and PowerPoint Tutorials from Howtech (2012). All credit for the demonstration goes to the creator; watch the original on YouTube. The written guide below was generated from this video by Docsie. Creator? Request a change or removal.
This guide walks you through how to create an email group in Outlook 2010, also known as a contact group or distribution list, and shows you several ways to send messages to that group once it's set up. You'll also learn how to manage group members and customize your recipient list for individual emails.
Prerequisites
- Microsoft Outlook 2010 installed and open
- At least a few existing contacts saved in your Outlook Contacts list
Open the Contacts view
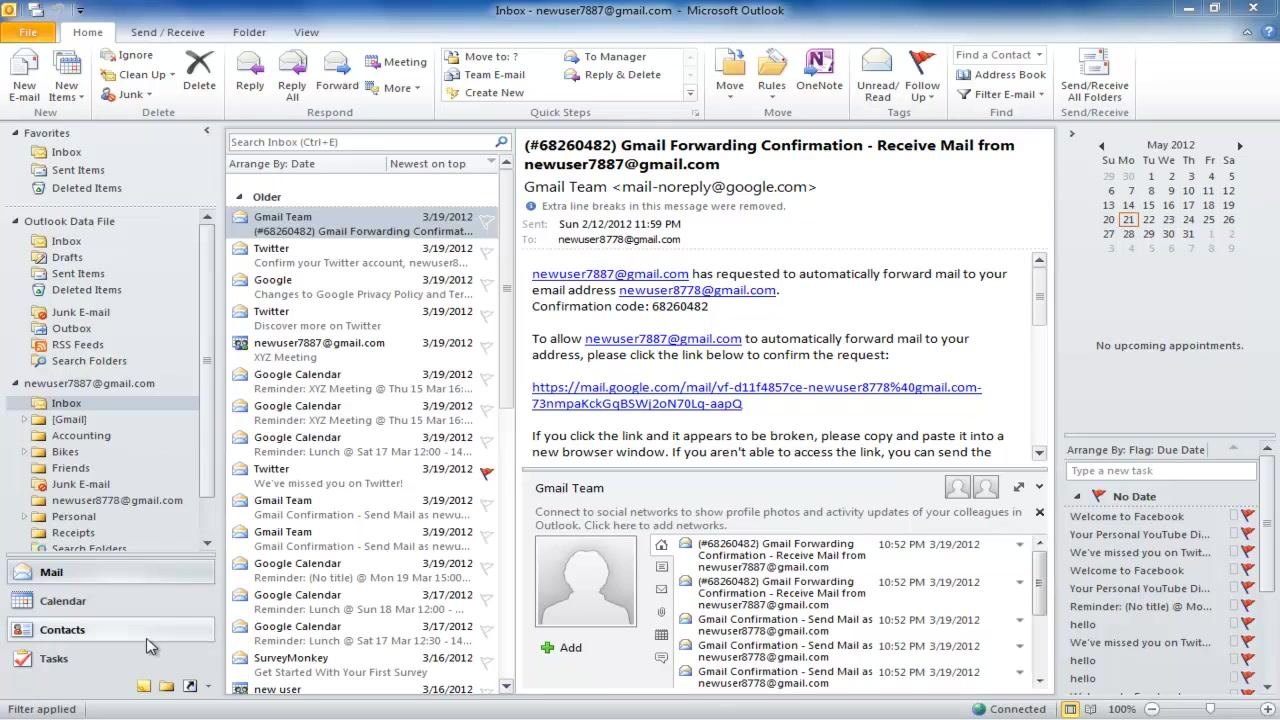
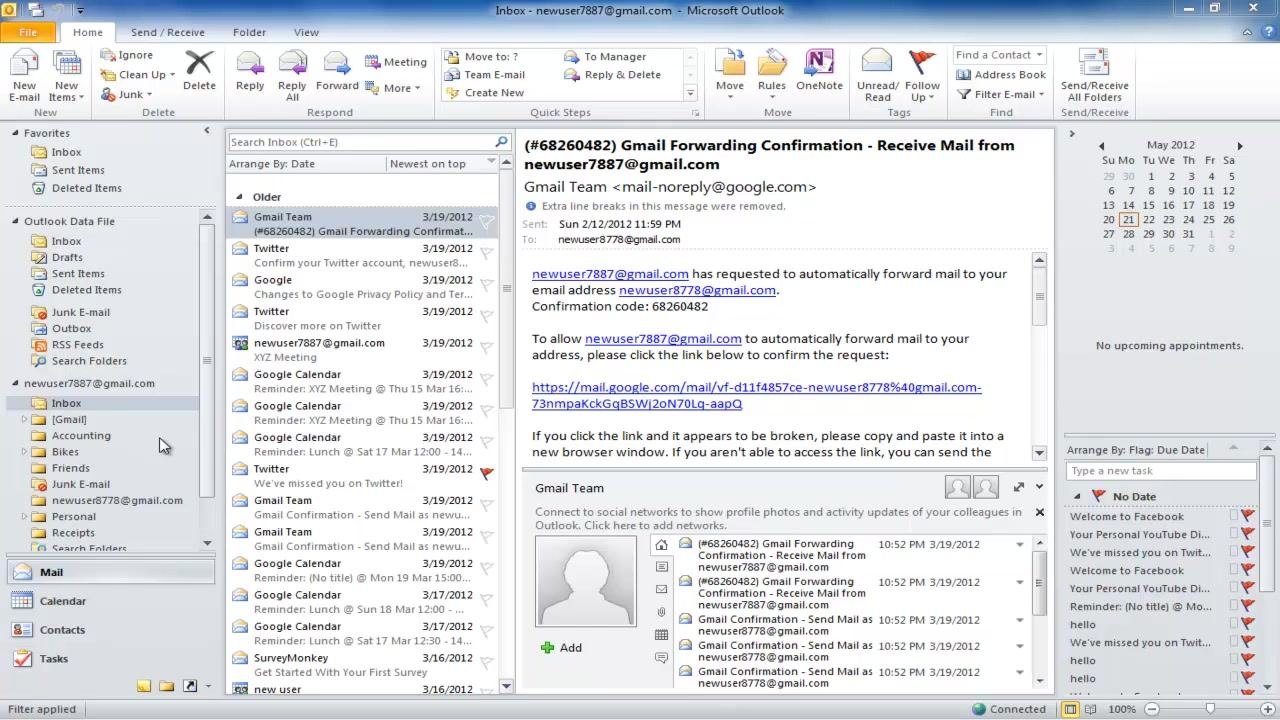
Launch Outlook and look at the navigation pane on the left side of the window. Click the Contacts icon at the bottom of this pane to switch from your inbox to the Contacts view.
Create a new contact group
From the Contacts view, go to the Home tab in the ribbon. Click New Contact Group in the New section to open a group creation window.
Name the contact group
In the group window that opens, type a name for your group in the Name field—for example, Office Staff. Click Save & Close to save it. The new group now appears in your Contacts list.
Move the group to the top of the list (optional)
To make your group easier to find, double-click it to reopen the group window. Add an underscore (_) before the name in the Name field (for example, _office staff), then click Save & Close. Groups named this way sort above regular contacts alphabetically.
Add members to the group
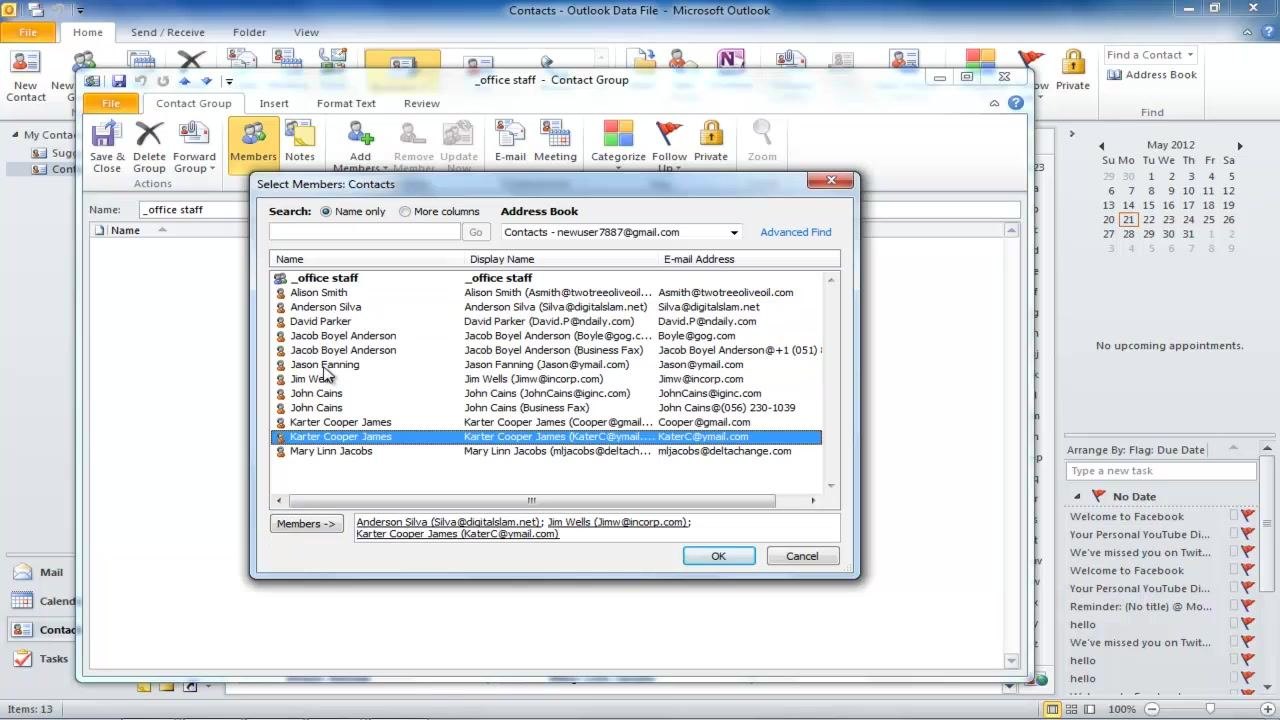
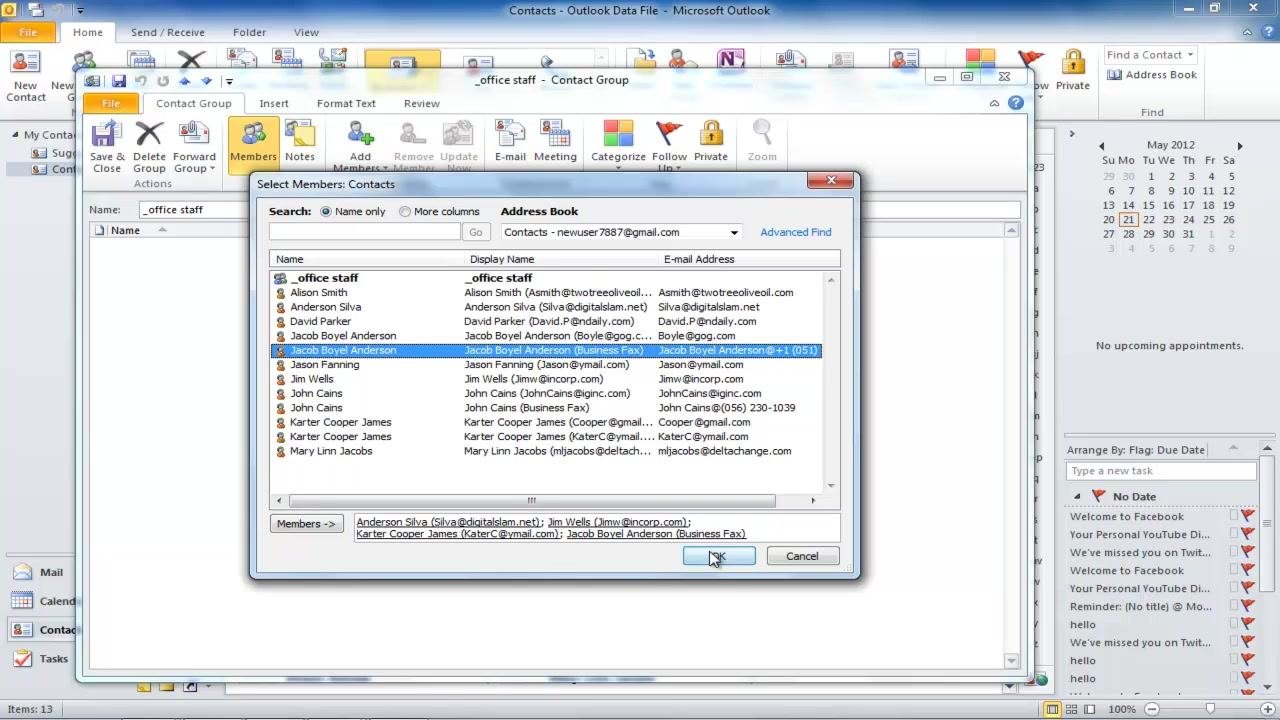
Select your contact group in the Contacts list, then click Add Members in the Members section of the ribbon and choose From Outlook Contacts. In the Select Members window, double-click each contact you want to add—each one will appear in the Members field at the bottom.
Save the group with its members
Once you've selected everyone you want in the group, click OK. The group window will now display your full list of added members. Click Save & Close to finalize the group.
Edit group members later
To add someone to the group after it's created, reopen the group and click Add Members. To remove someone, select their name in the list and click Remove Member. Click Save & Close after making any changes.
Send an email by right-clicking the group
Once your group is created, right-click it in the Contacts view, hover over Create, and select E-mail from the submenu. A new email window opens with the group name already filled in the To field.
Send an email from the group window
Alternatively, double-click the contact group to open it, then click the E-mail icon in the Communicate section of the ribbon. This also opens a new email with the group populated in the To field.
Send an email from the folder list
You can also go to the folder list, locate your contact group, and use the available options to compose a new email to the group.
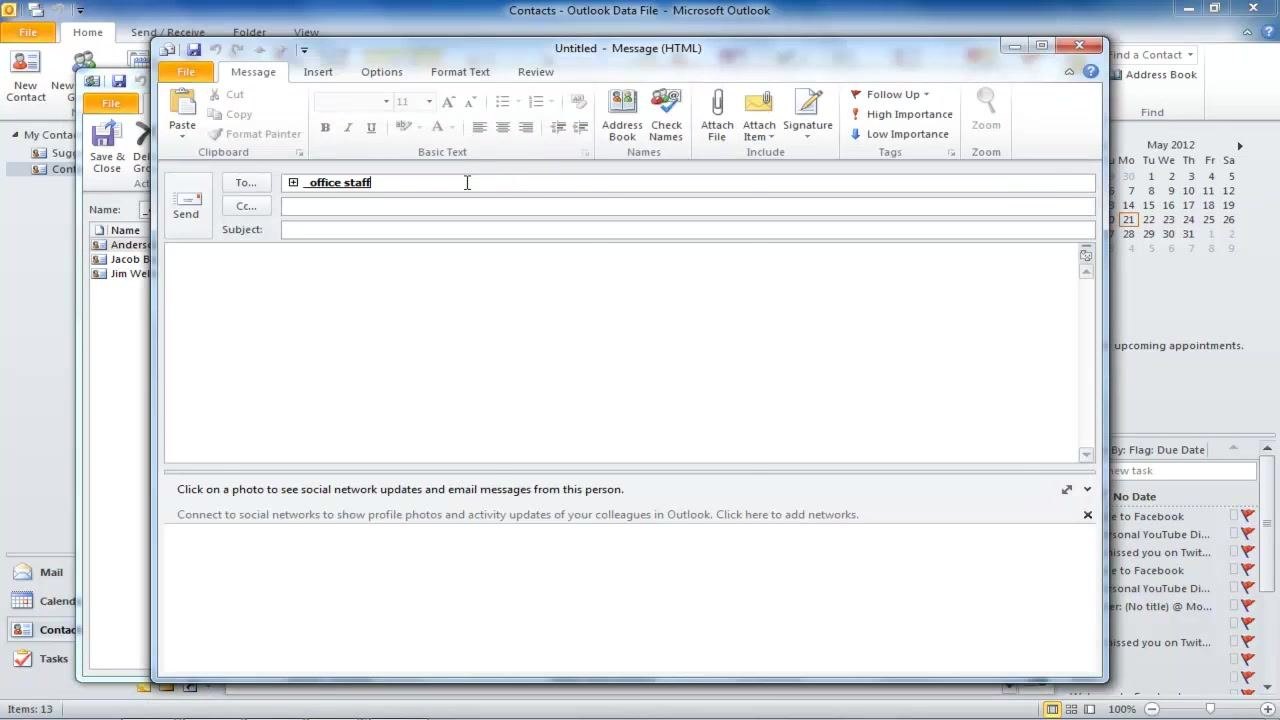
Compose an email using the New E-mail button
You can also view your contacts and mailbox at the same time by switching to the Folder List view—this lets you drag a contact group directly into your Inbox to start a new email.
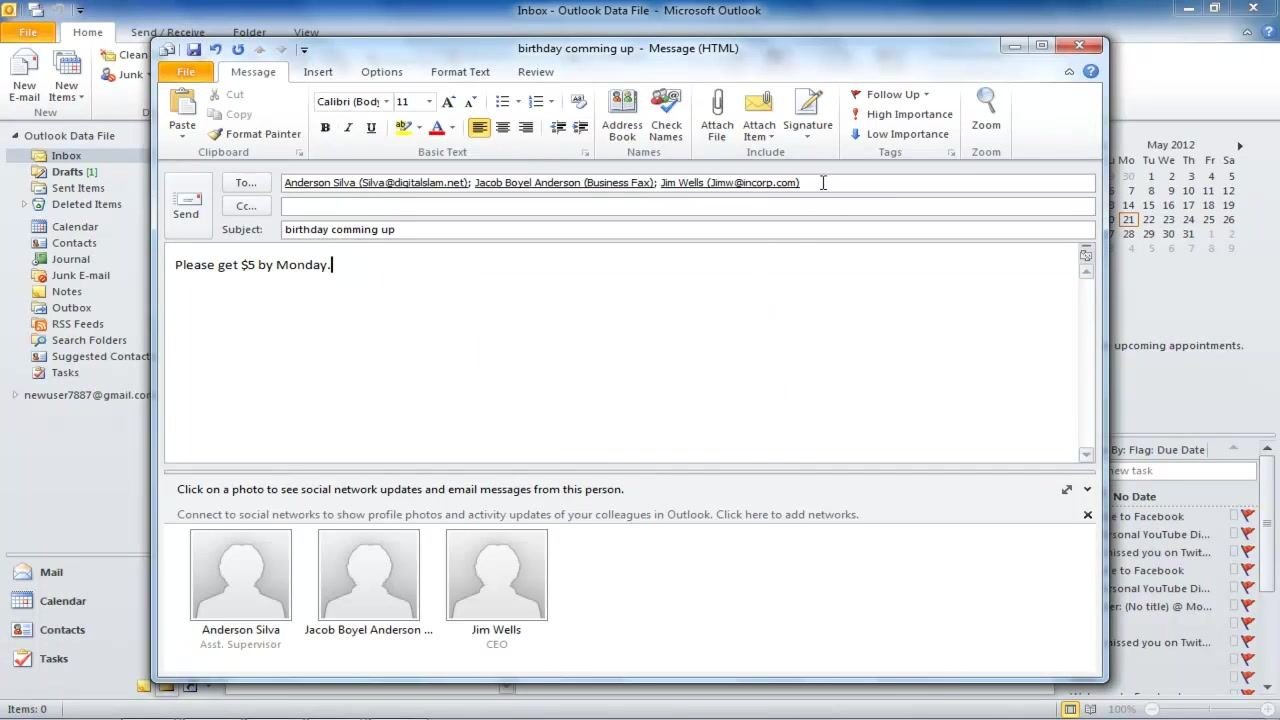
To compose from scratch, click New E-mail on the Home tab to open a blank message. In the To field, start typing the first few characters of your group's name—for example, an underscore (_) if your group is _office staff—and select it when it appears in the suggestions. Fill in the Subject line (for example, birthday comming up) and write your message in the body (for example, Please get $5 by Monday.).
Remove a member from the recipient list
If you don't want to send the email to every member of the group, click the plus sign (+) next to the group name in the To field. This expands the group and lists each member individually. Click OK to confirm the expansion, then select and delete the names of any members you want to exclude.
Send the email
Once your recipient list, subject, and message body are finalized, click Send to deliver your email.
What's next
With these steps, you now know how to create an email group in Outlook 2010, add and edit its members, and send messages using several different methods. You can also customize the recipient list for any individual email by expanding the group and removing members as needed, giving you flexibility every time you communicate with your contacts.
Generation details: cost, quality tiers
Docsie billed 1,500 credits ($1.05) to analyze this 3-minute video at standard quality. The rewrite, template fill and Word/PDF exports were included. The same video at each quality tier:
| Quality | Frames sampled | Credits | Approx. cost |
|---|---|---|---|
| Draft | every 16-30 s | 750 | $0.52 |
| Standard (this guide) | every 8-15 s | 1,500 | $1.05 |
| Detailed | every 4-7 s | 3,000 | $2.10 |
| Ultra | every 1-3 s | 6,000 | $4.20 |
Credits priced at $0.70 per 1,000; plans include a monthly allowance. Enterprise customers on on-premise or bring-your-own-model deployments run this on their own inference and pay no per-video credits.
Generated by Docsie Video-to-Docs on 2026-09-28 from a 2-minute video. Screenshots are frames from the source video and belong to their creator, Excel, Word and PowerPoint Tutorials from Howtech, whose original is embedded above. If you own this video and want the guide removed or credited differently, contact us and we will act within one business day.