
How to Add a Shared Mailbox in Outlook in Microsoft 365
If a shared mailbox does not appear automatically in your Outlook folder pane after your administrator has granted you access, you can add it manually. This guide walks you through how to add a shared mailbox in Outlook using the Account Settings dialog, so you can access mailboxes such as "IT Team Support" or "Payroll Support" directly from your main account.
Video: Boost Efficiency: Learn How to Add Shared Mailbox in Outlook by TechByTosh (2023). All credit for the demonstration goes to the creator; watch the original on YouTube. The written guide below was generated from this video by Docsie. Creator? Request a change or removal.
If a shared mailbox does not appear automatically in your Outlook folder pane after your administrator has granted you access, you can add it manually. This guide walks you through how to add a shared mailbox in Outlook using the Account Settings dialog, so you can access mailboxes such as "IT Team Support" or "Payroll Support" directly from your main account.
Prerequisites
- You must have been granted access to the shared mailbox by your administrator before proceeding.
- Shared mailboxes typically appear automatically in your Outlook folder pane once access has been granted. If yours does not, follow the steps below to add it manually.
Check for automatically added mailboxes
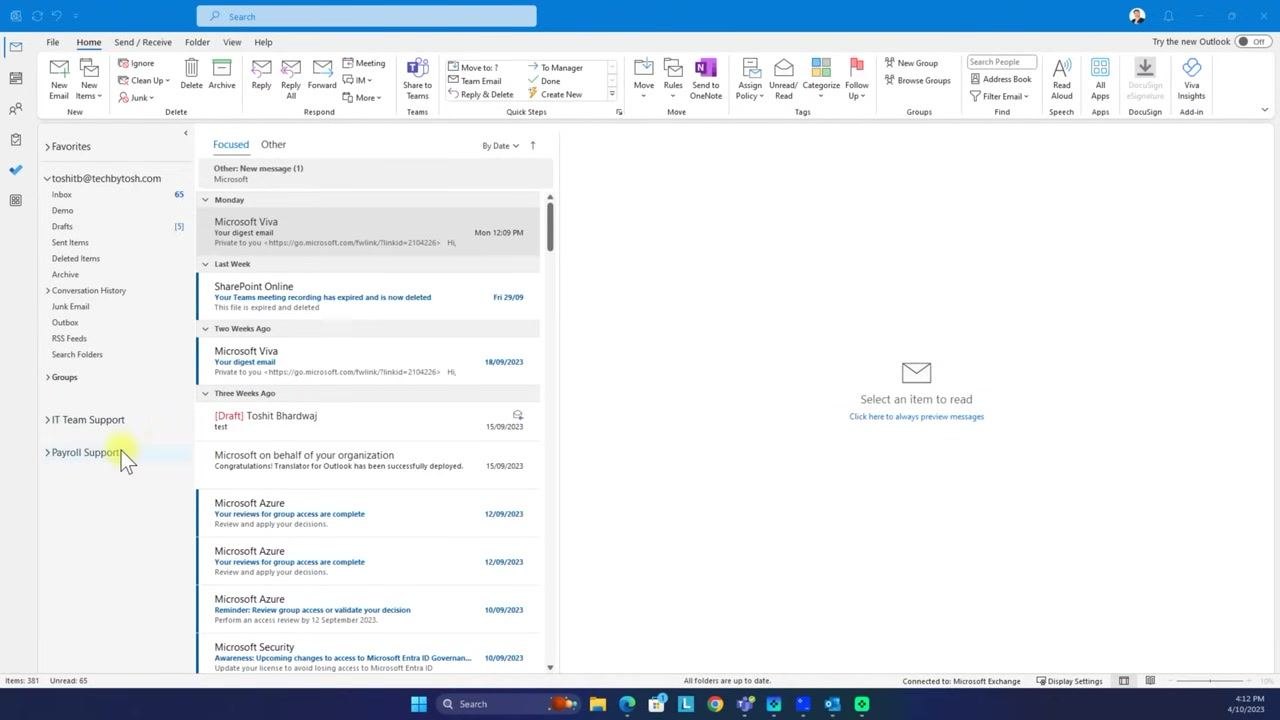
Look in the Outlook folder pane, under your main account, to see if the shared mailbox already appears there. If a mailbox such as "Payroll Support" is not visible, proceed with the manual steps below.
Open account settings
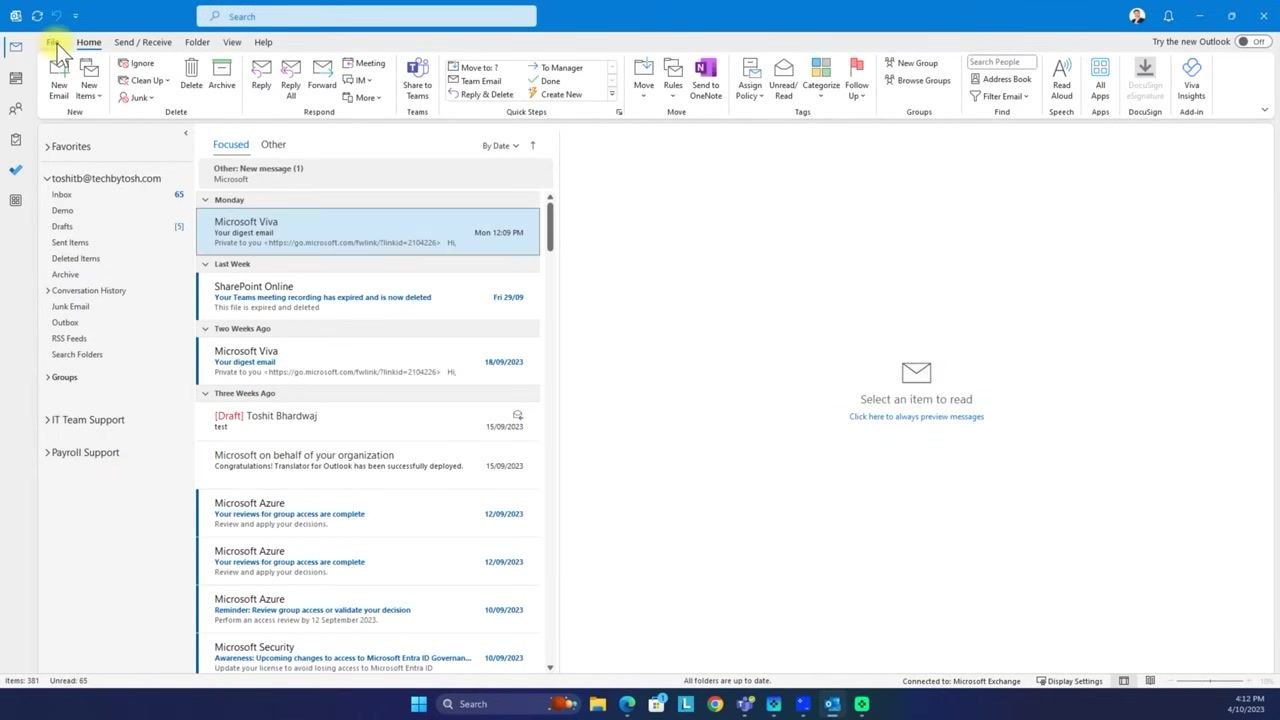
Click the File tab in the top left corner of the Outlook window.
Access the Account Settings dialog
In the File menu, click Account Settings, then select Account Settings again from the dropdown to open the Account Settings dialog.
Select your main email account
In the Account Settings window, locate and highlight your main email account (for example, toshitb@techbytosh.com).
Change account settings
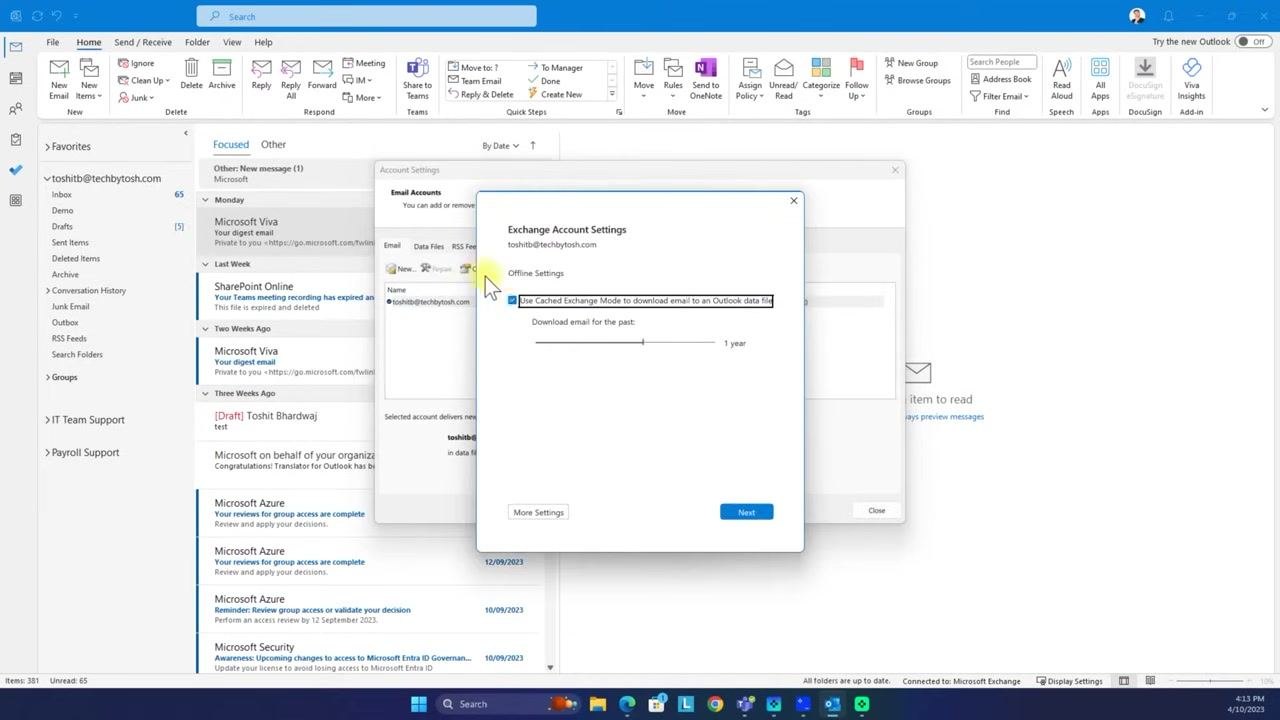
With your account highlighted, click the Change button above the account list.
Open more settings
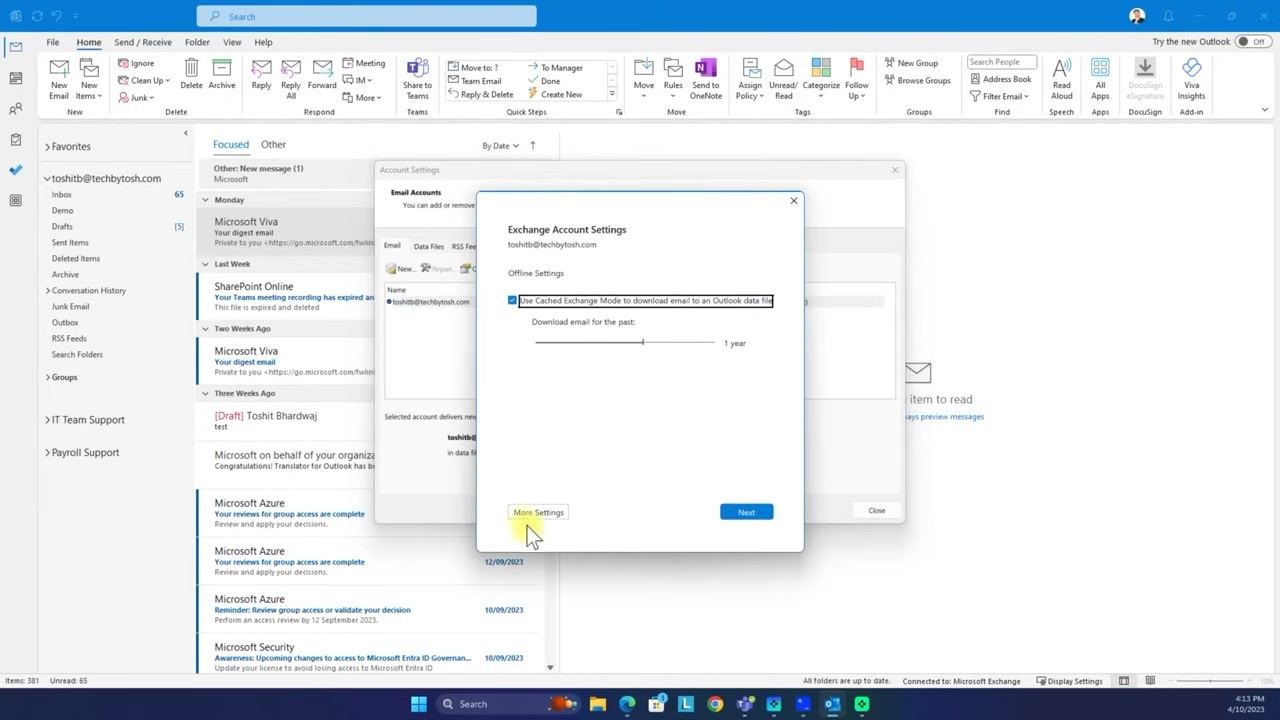
In the Exchange Account Settings window, confirm that "Use Cached Exchange Mode to download email to an Outlook data file" is checked. Then click More Settings at the bottom left of the window.
Add the shared mailbox
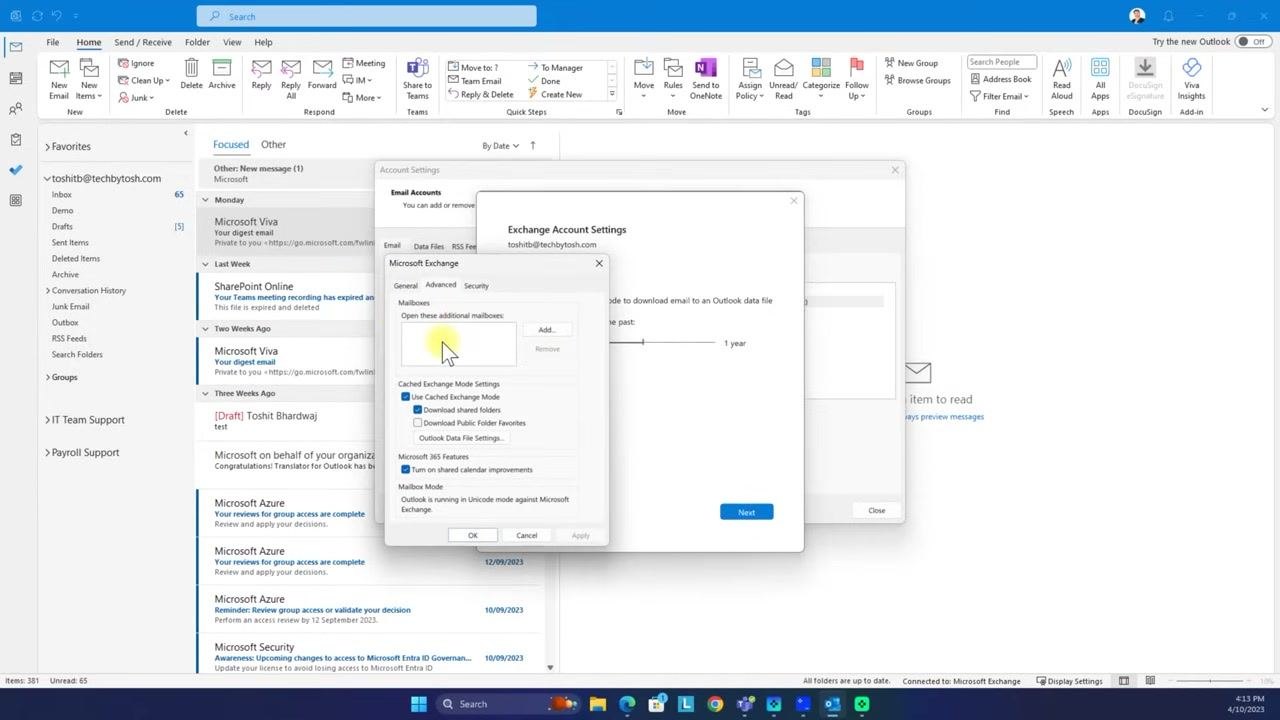
In the Microsoft Exchange window, go to the Advanced tab and locate the Open these additional mailboxes section. Click Add....
Enter the shared mailbox email address
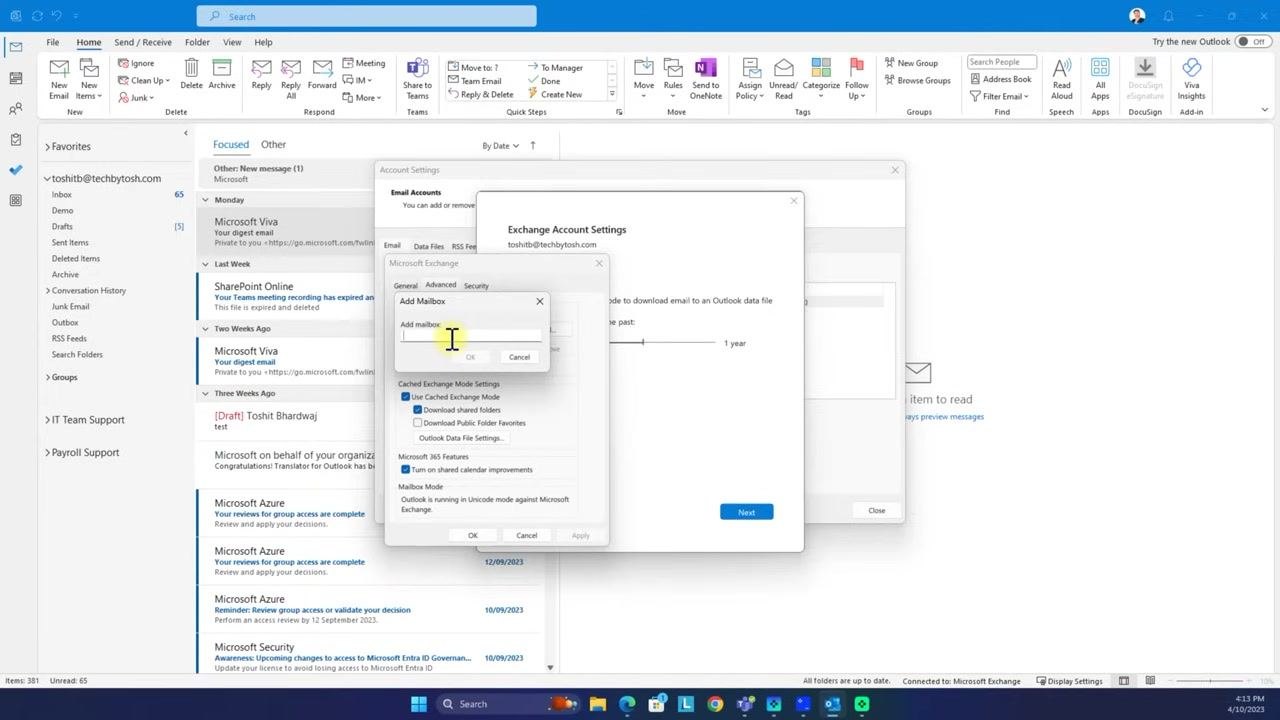
In the Add Mailbox dialog, type the email address of the shared mailbox you want to add. For example, enter payroll@techbytosh.com.
Confirm and apply changes
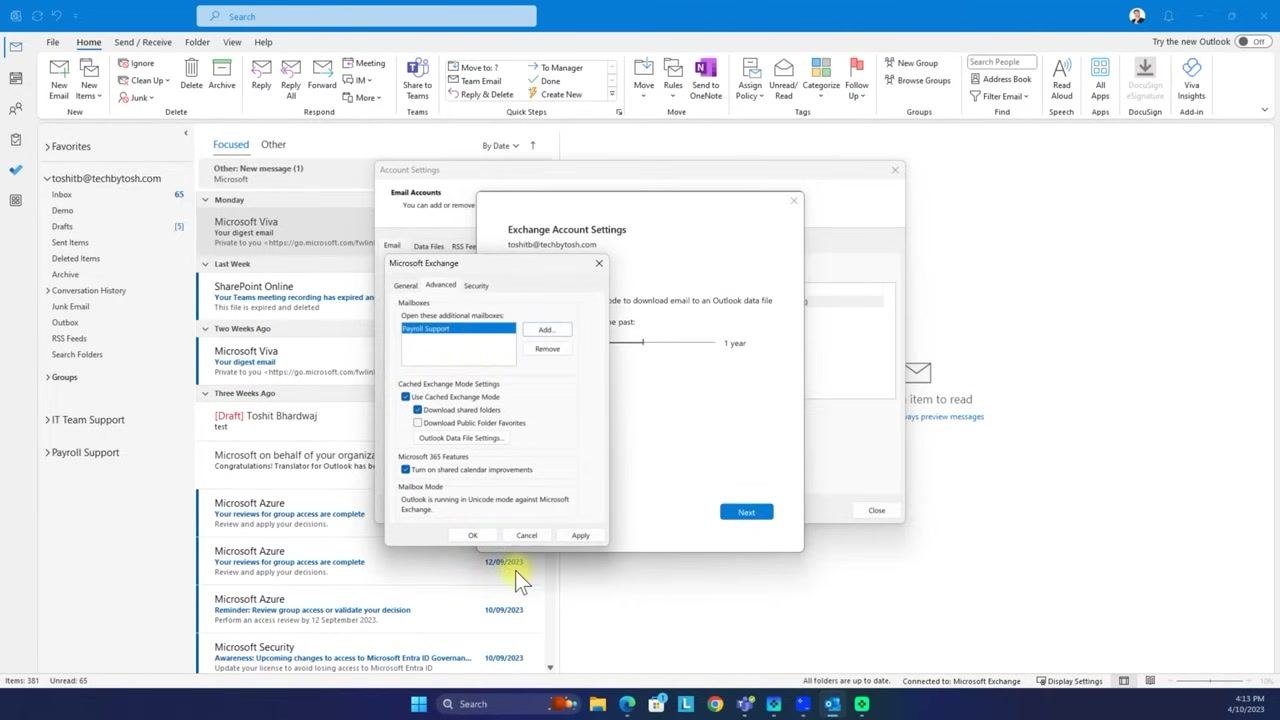
Click OK in the Add Mailbox dialog after entering the email address. The shared mailbox (for example, "Payroll Support") should now appear in the list under Open these additional mailboxes. Click OK again in the Microsoft Exchange window to confirm your changes.
Complete the account settings update
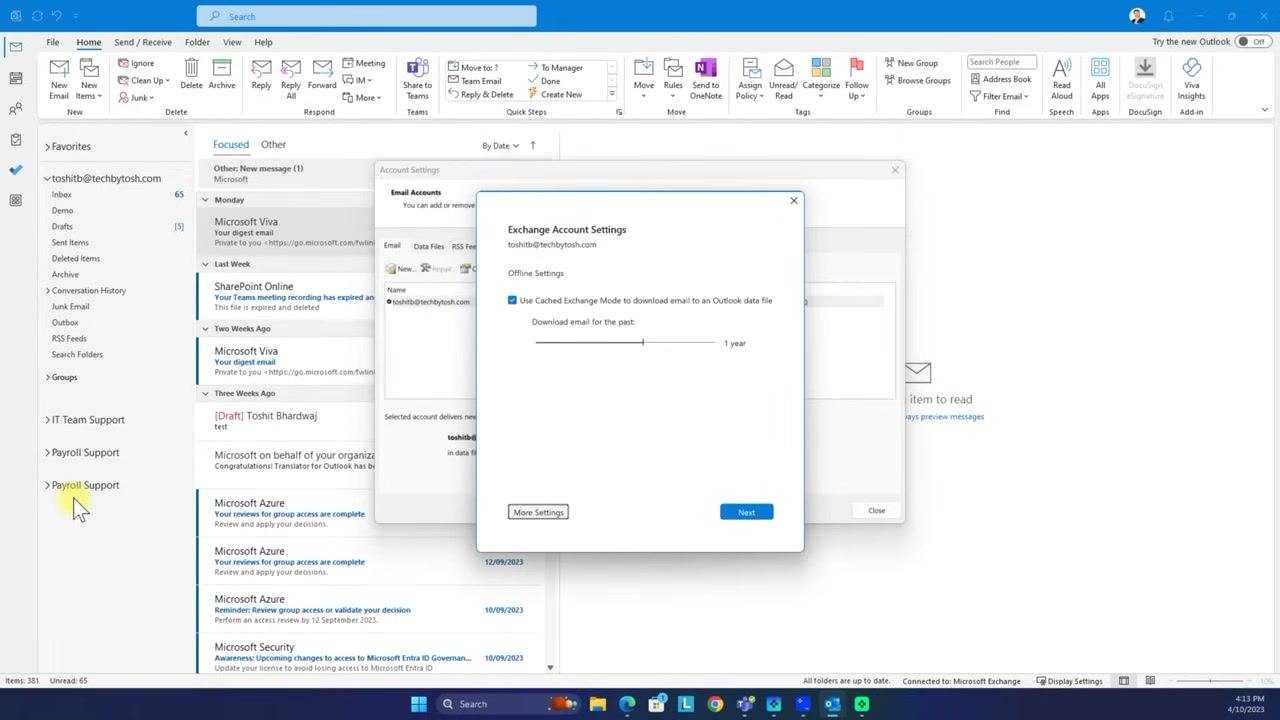
In the Exchange Account Settings window, click Next to proceed. If the shared mailbox was already added automatically, it may appear twice in the folder pane—once automatically and once manually.
Restart Outlook to apply changes
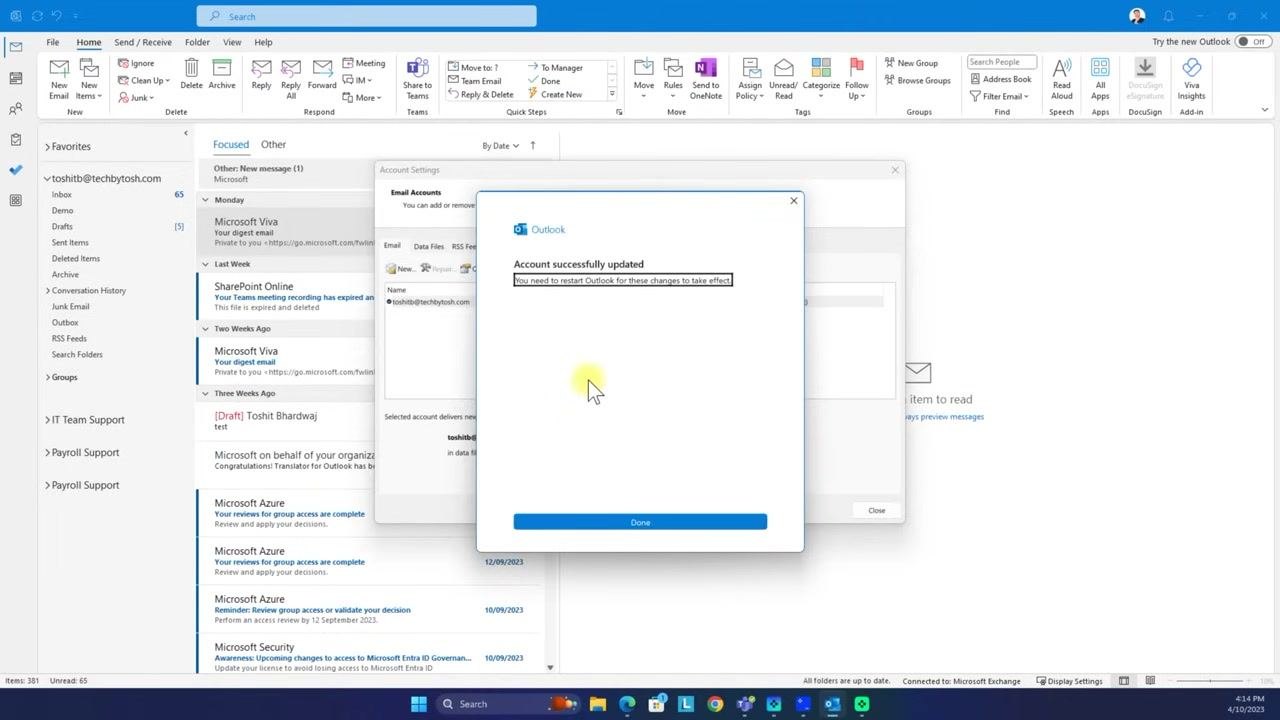
After clicking Next, a dialog confirms that your account was successfully updated and states: "You need to restart Outlook for these changes to take effect." Click Done to close the dialog.
Close account settings
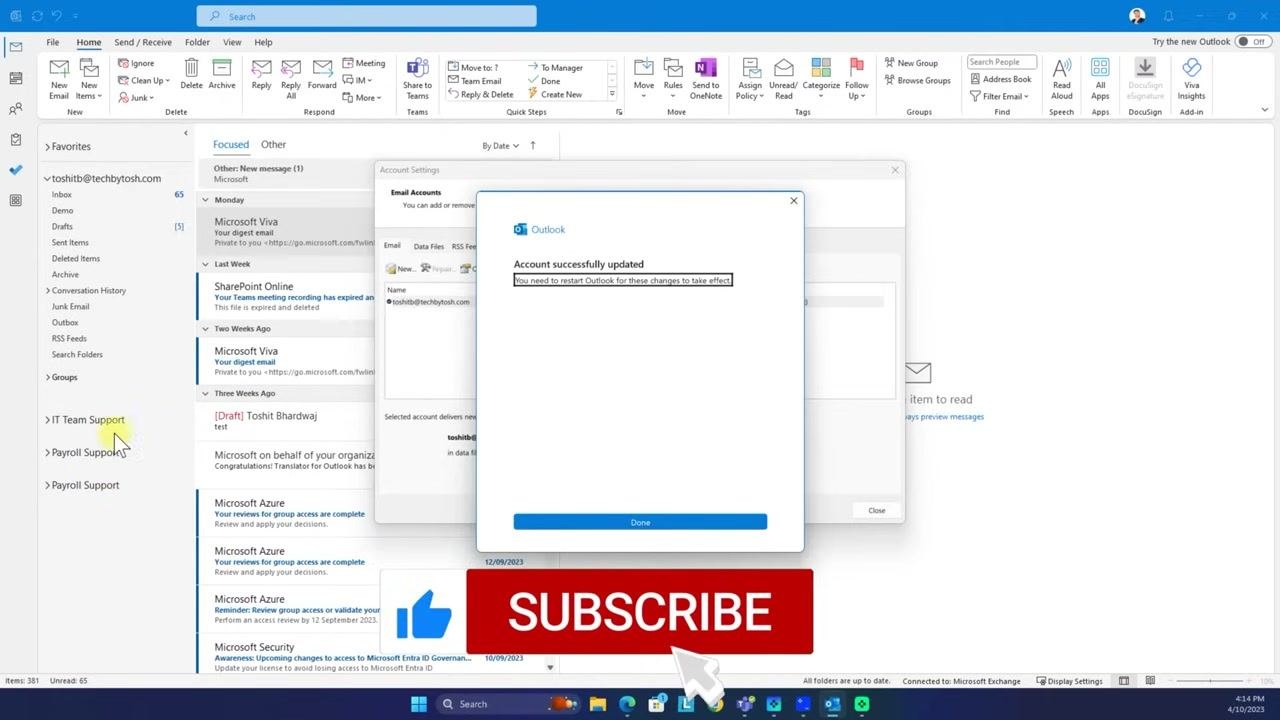
In the Account Settings window, click Close to exit and return to the main Outlook interface.
Restart Outlook and verify the mailbox
Close and reopen Outlook to apply the changes. Once Outlook restarts, check the folder pane to confirm the shared mailbox (for example, "Payroll Support") is now visible and accessible.
Troubleshooting tips
- If the shared mailbox does not appear after completing these steps, double-check that you entered the correct email address and that your administrator has granted you access.
- Restarting Outlook is often required for the changes to take effect.
Summary
You have now learned how to add a shared mailbox in Outlook manually through the Account Settings dialog. By adding the mailbox under Open these additional mailboxes and restarting Outlook, the shared mailbox should appear in your folder pane and be ready for use.
Generation details: cost, quality tiers
Docsie billed 2,000 credits ($1.40) to analyze this 4-minute video at standard quality. The rewrite, template fill and Word/PDF exports were included. The same video at each quality tier:
| Quality | Frames sampled | Credits | Approx. cost |
|---|---|---|---|
| Draft | every 16-30 s | 1,000 | $0.70 |
| Standard (this guide) | every 8-15 s | 2,000 | $1.40 |
| Detailed | every 4-7 s | 4,000 | $2.80 |
| Ultra | every 1-3 s | 8,000 | $5.60 |
Credits priced at $0.70 per 1,000; plans include a monthly allowance. Enterprise customers on on-premise or bring-your-own-model deployments run this on their own inference and pay no per-video credits.
Generated by Docsie Video-to-Docs on 2026-09-28 from a 3-minute video. Screenshots are frames from the source video and belong to their creator, TechByTosh, whose original is embedded above. If you own this video and want the guide removed or credited differently, contact us and we will act within one business day.