
How to Create a Rule in Outlook in Microsoft 365
If you receive frequent notification emails from Facebook, you can keep your inbox organized by learning how to create a rule in Outlook that automatically moves these messages to a dedicated folder. This guide walks you through setting up the rule from start to finish, including creating a new folder, configuring conditions and actions, and confirming that the rule runs correctly on both existing and future messages.
Video: How to Create a Rule in Outlook to Always Move Emails from Inbox to Specific Folders | Outlook Tips by The Technology (2021). All credit for the demonstration goes to the creator; watch the original on YouTube. The written guide below was generated from this video by Docsie. Creator? Request a change or removal.
If you receive frequent notification emails from Facebook, you can keep your inbox organized by learning how to create a rule in Outlook that automatically moves these messages to a dedicated folder. This guide walks you through setting up the rule from start to finish, including creating a new folder, configuring conditions and actions, and confirming that the rule runs correctly on both existing and future messages.
Prerequisites
- Microsoft Outlook installed and open on your computer, with access to your inbox.
- At least one email from Facebook already in your inbox to use as the basis for the rule.
- Note that rules created in the Outlook desktop application only apply there. If you check your mail through Outlook Web Access or another client such as Gmail's web interface, this rule will not run, and you would need to set up a separate filter in that service.
Open Outlook and locate a Facebook email
Launch Microsoft Outlook and confirm you are viewing the inbox of the correct email account. Locate an email sent from Facebook in your message list—you will use this email as the starting point for your rule.
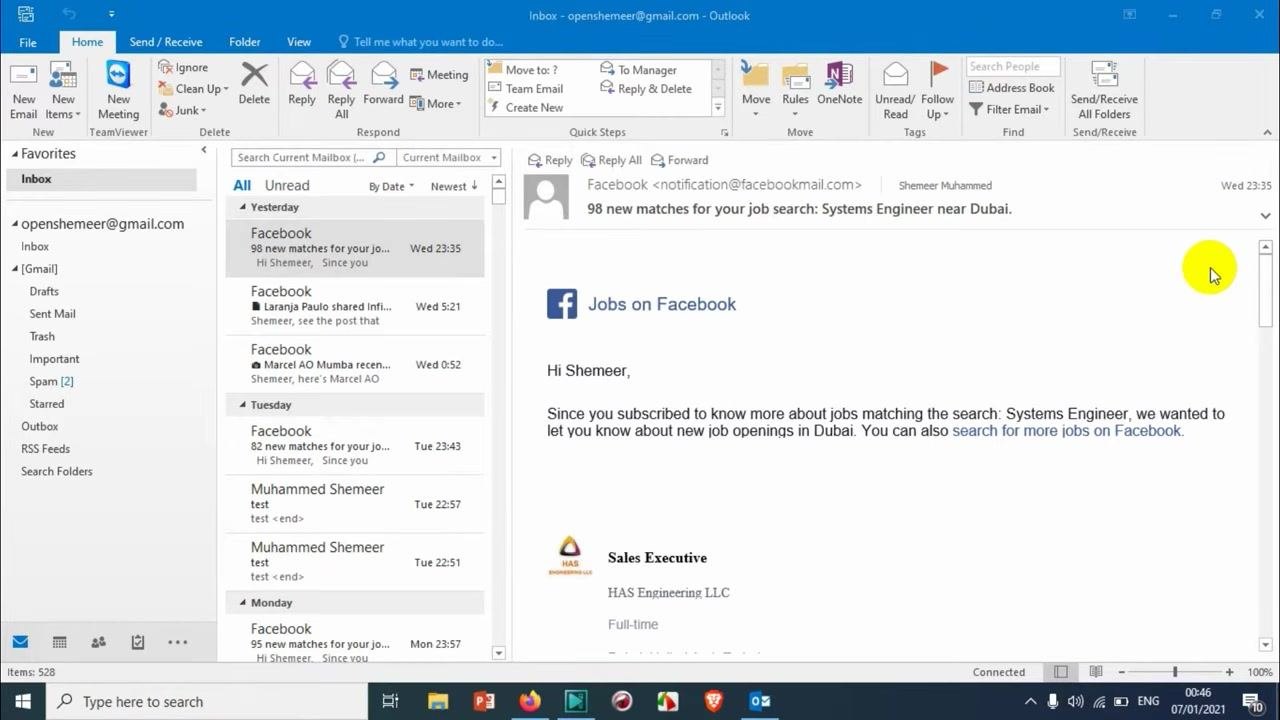
Select the Facebook email
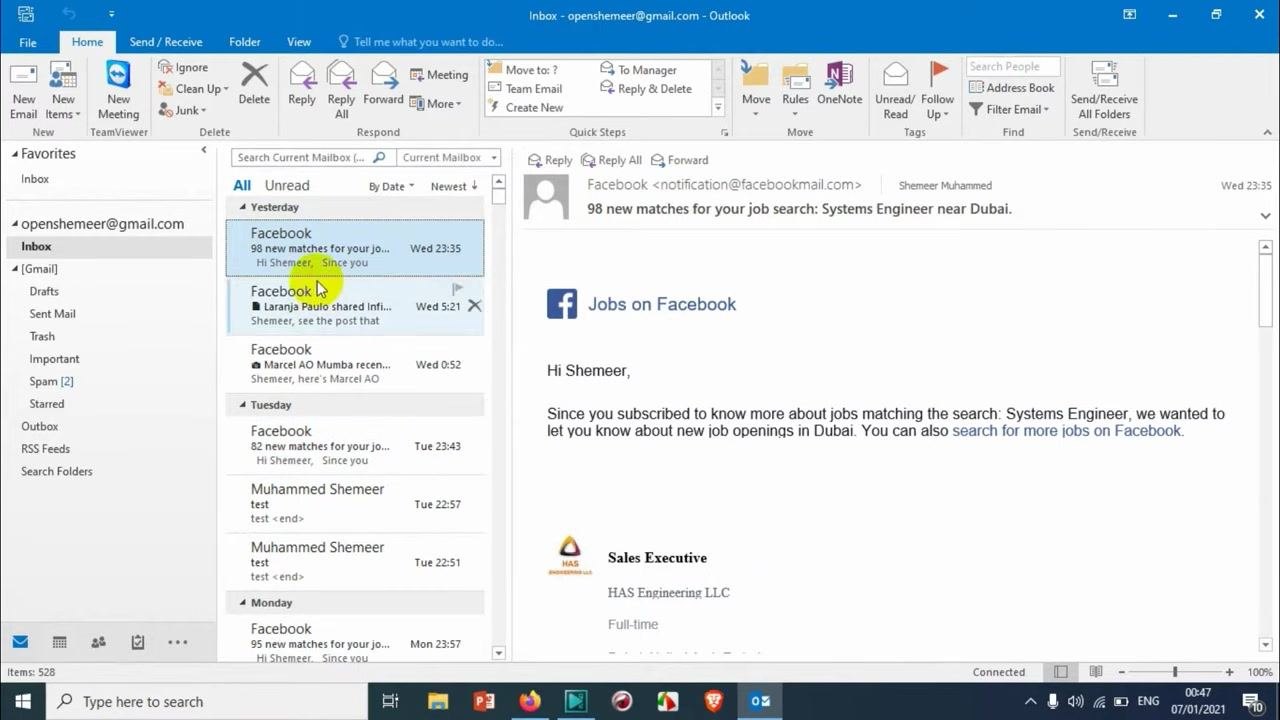
Click the Facebook email you want to use as the basis for your rule so it is highlighted in the message list.
Open the context menu
Right-click the selected Facebook email. A context menu appears with several options, including Rules, Move, and Quick Steps.
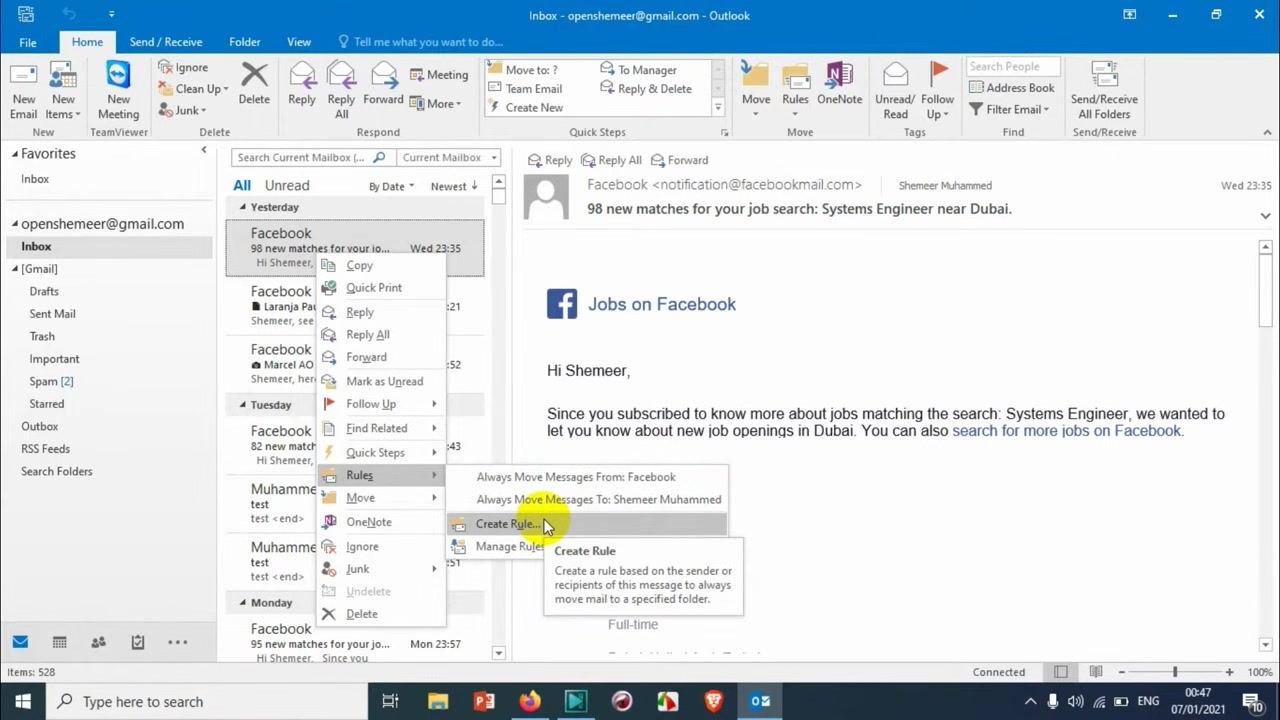
Start the rule creation wizard
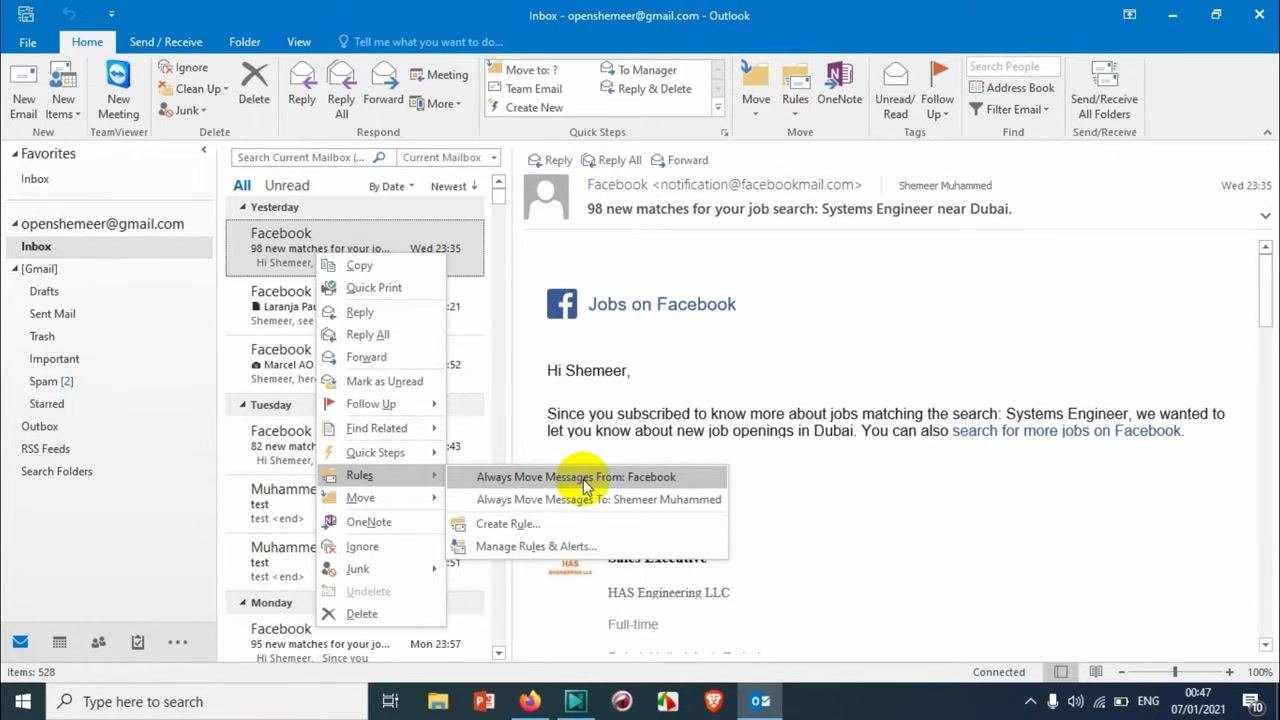
Hover over Rules in the context menu to open the submenu, then click Create Rule... to begin building a custom rule.
Configure the rule conditions
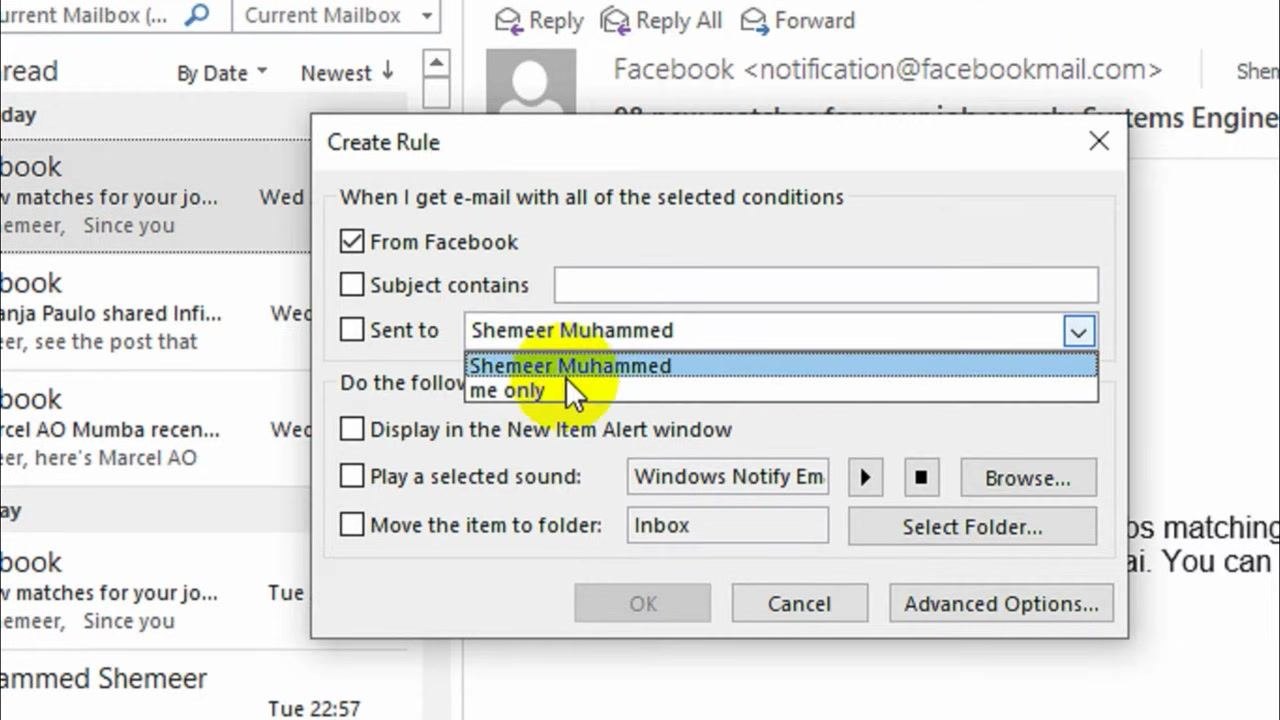
The Create Rule dialog box opens. Check the box labeled From Facebook so the rule applies to all emails from that sender. If you want the rule to match every Facebook email regardless of subject or recipient, leave Subject contains and Sent to unchecked. Under Do the following, check Move the item to folder to prepare for selecting or creating a destination folder.
Confirm the condition settings
Make sure only From Facebook is checked if your goal is to move all Facebook emails without additional filtering. Leave Subject contains and Sent to unchecked unless you need to narrow the rule further.
Review the recipient setting (optional)
Check the Sent to field in the dialog. If you manage multiple accounts, you can choose your name or me only; if you use a single account, you can leave this setting as it is. This determines whether the rule applies to emails sent specifically to you or to any recipient.
Choose alert and notification options
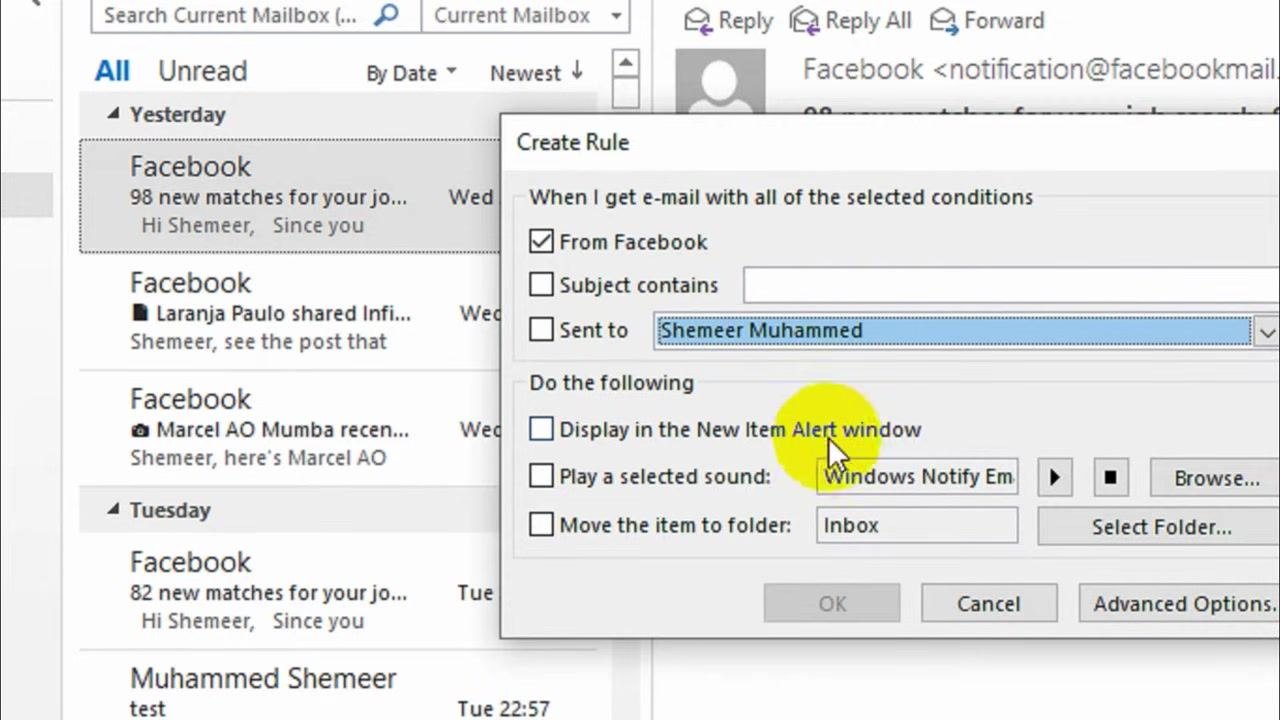
Decide whether you want a notification when a new Facebook email arrives. Check Display in the New Item Alert window for a pop-up alert, and optionally check Play a selected sound to add an audio notification and choose a sound.
Set the destination folder
Under Do the following, confirm Move the item to folder is checked, then click Select Folder... to choose or create the folder where Facebook emails will be sent. Select a folder other than Inbox if you don't want these emails to remain there.
Create a new folder for Facebook emails
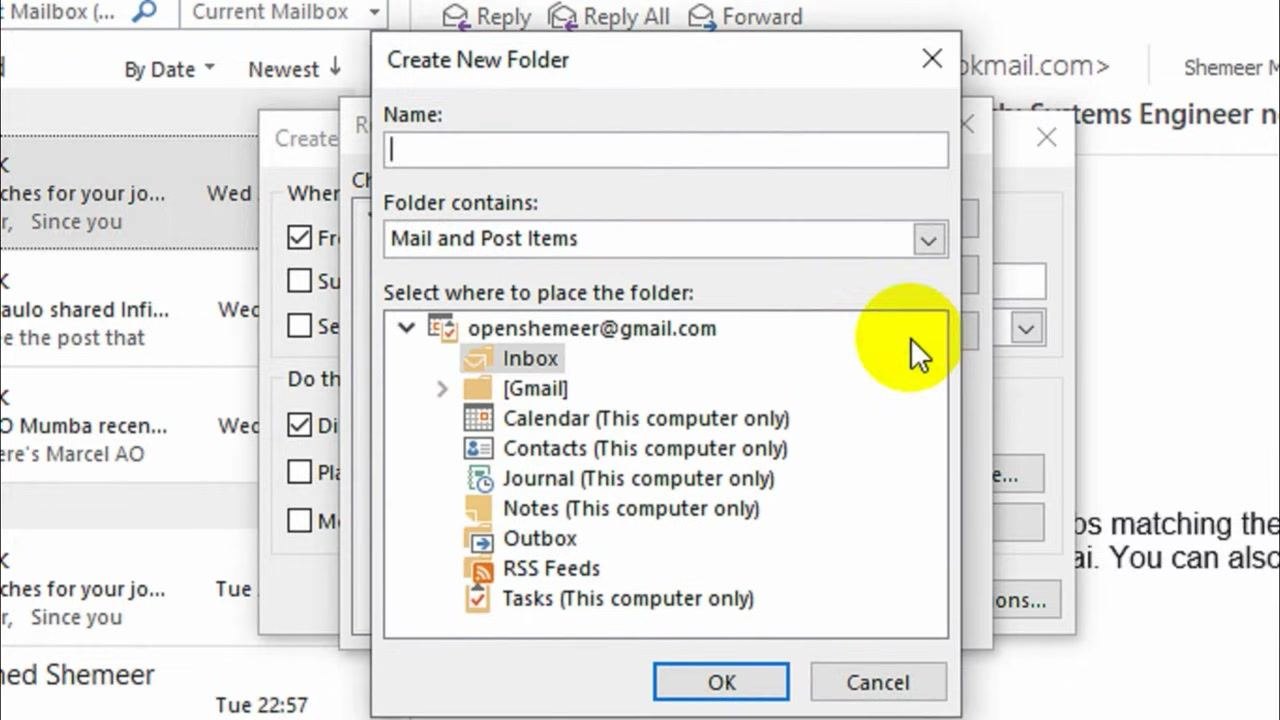
In the Create New Folder dialog, enter the folder name Facebook. Confirm Mail and Post Items is selected under Folder contains, and choose Inbox under Select where to place the folder so the new folder is created inside your inbox. Click OK to create it.
Select the new Facebook folder
In the Rules and Alerts dialog, locate and select the Facebook folder under your inbox, then click OK to confirm.
Confirm the folder selection
Check that the Move the item to folder field now displays Facebook, then click OK or Next to move on to the advanced rule options.
Review the rule conditions
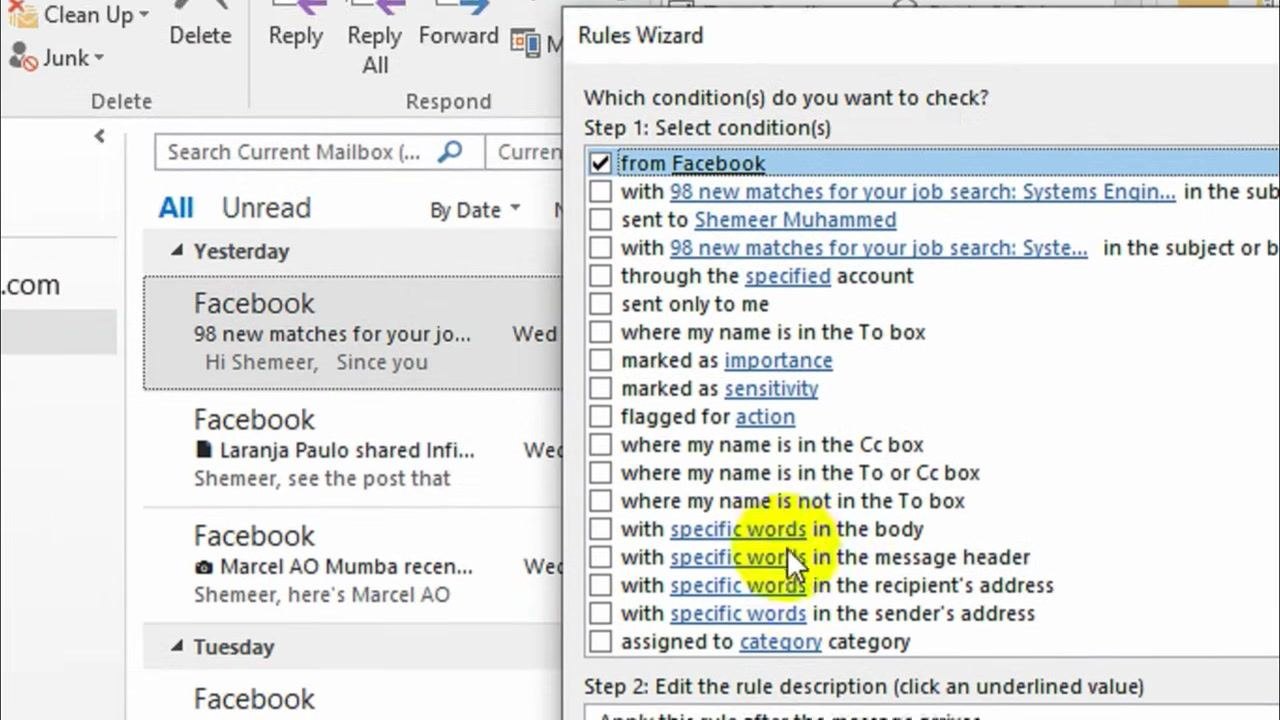
In the Rules Wizard, confirm that from Facebook is checked as the condition. You can select additional conditions if needed, though for this rule only from Facebook is required.
Set the rule actions
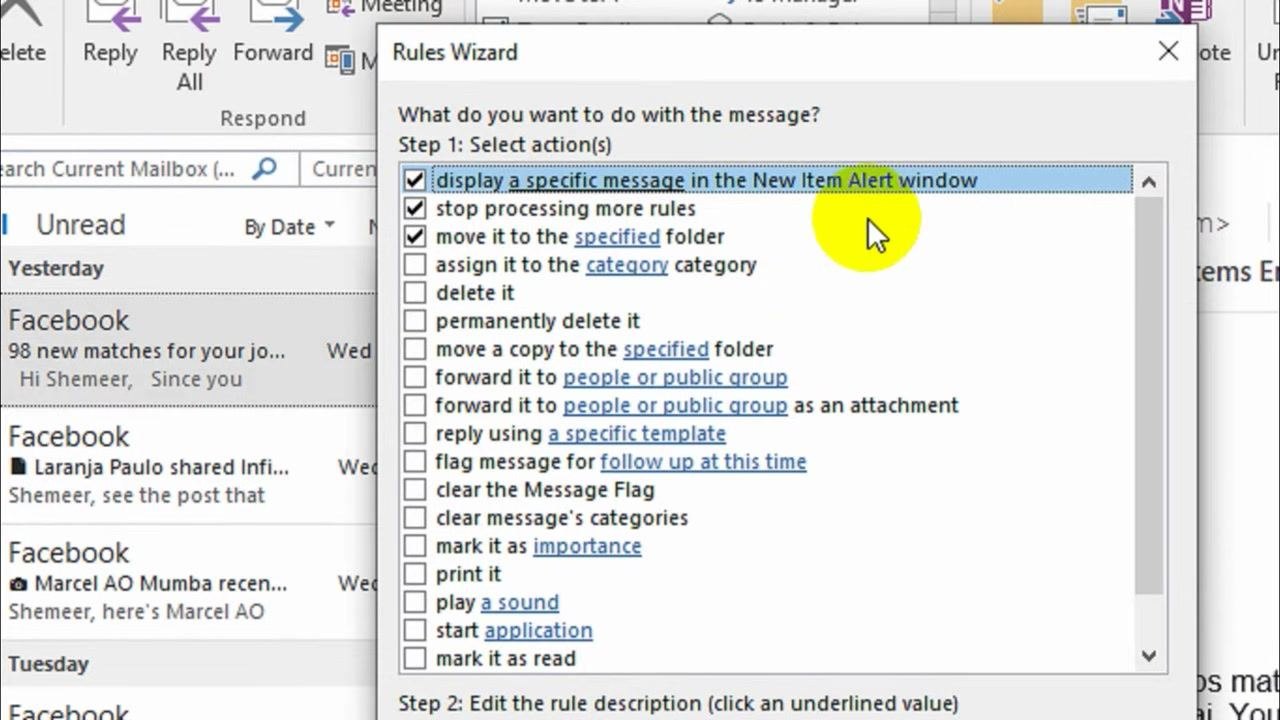
In the next step of the Rules Wizard, select the actions for the rule. Check display a specific message in the New Item Alert window for a pop-up notification, stop processing more rules to prevent other rules from affecting these emails, and move it to the specified folder to send Facebook emails to the Facebook folder. Click Next to continue.
Skip advanced exceptions (optional)
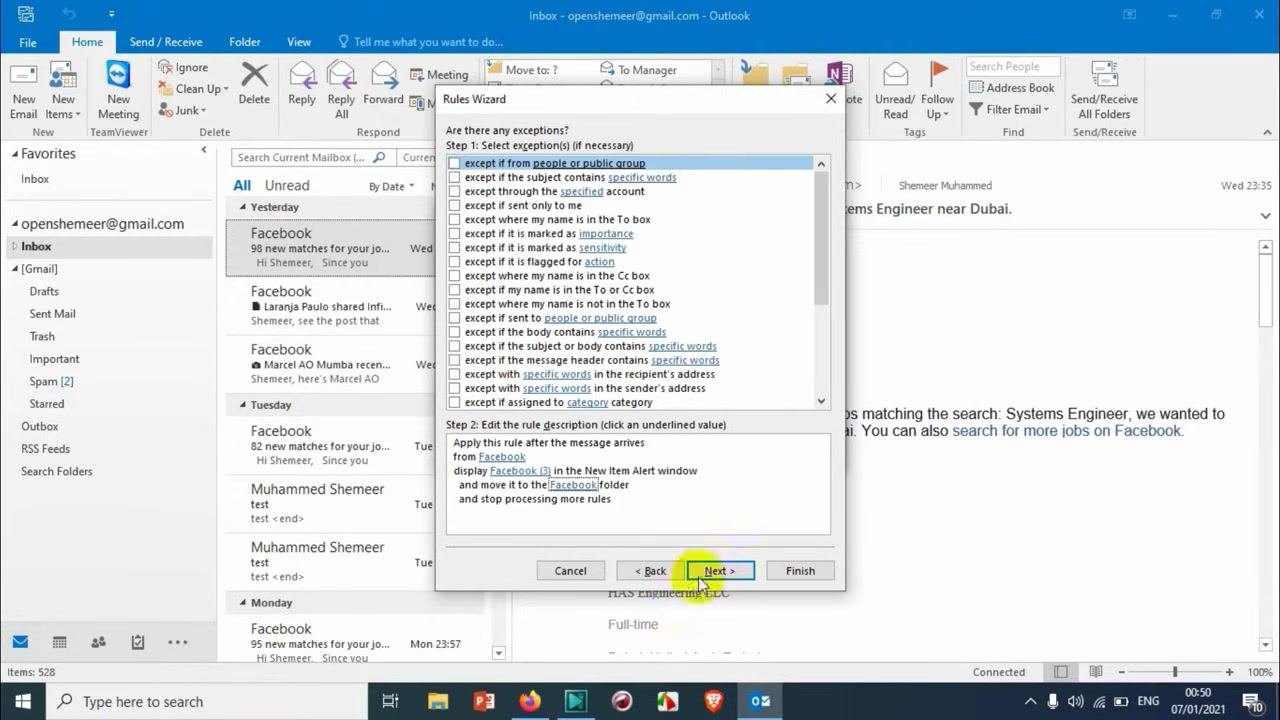
Review the list of possible exceptions, such as except if from people or public group or except if the subject contains specific words. Leave all exception boxes unchecked to apply the rule to all Facebook emails, then click Next.
Finalize the rule setup
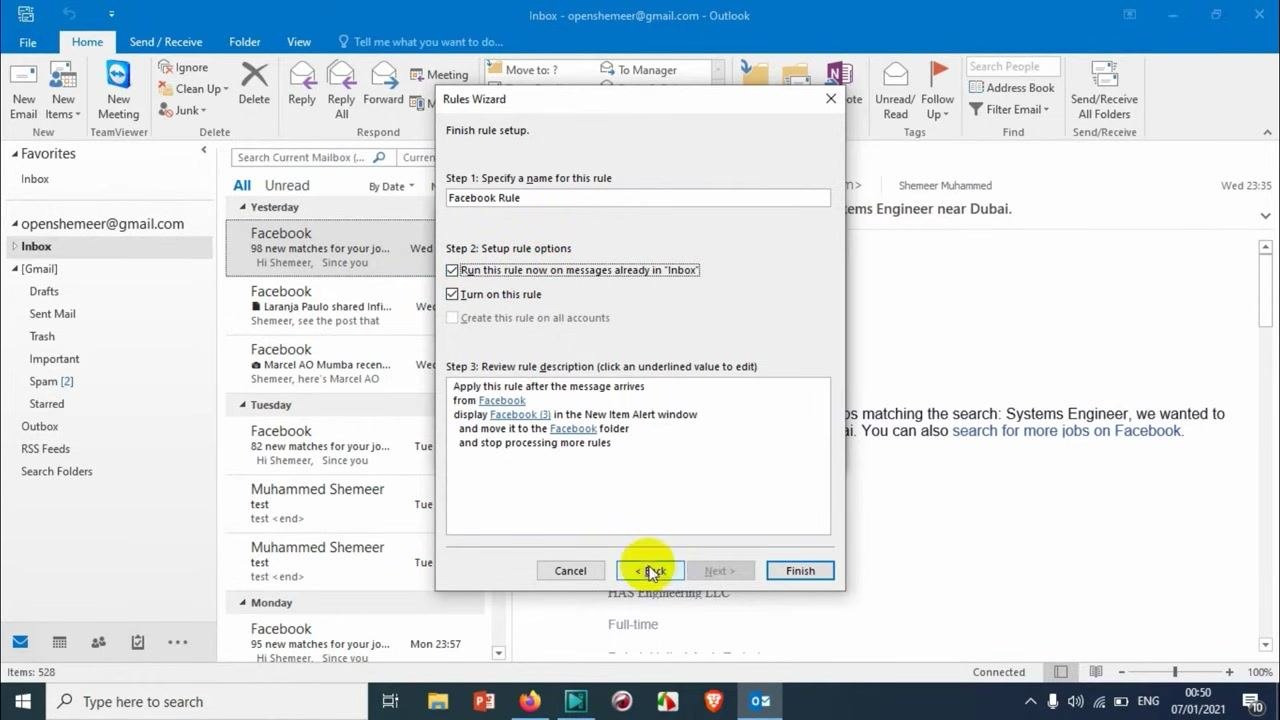
On the Finish rule setup screen, enter a name for the rule, such as Facebook Rule. Check Run this rule now on messages already in 'Inbox' if you want to move existing Facebook emails immediately, and make sure Turn on this rule is checked so it applies to future emails. Review the rule description before proceeding.
Apply and run the rule
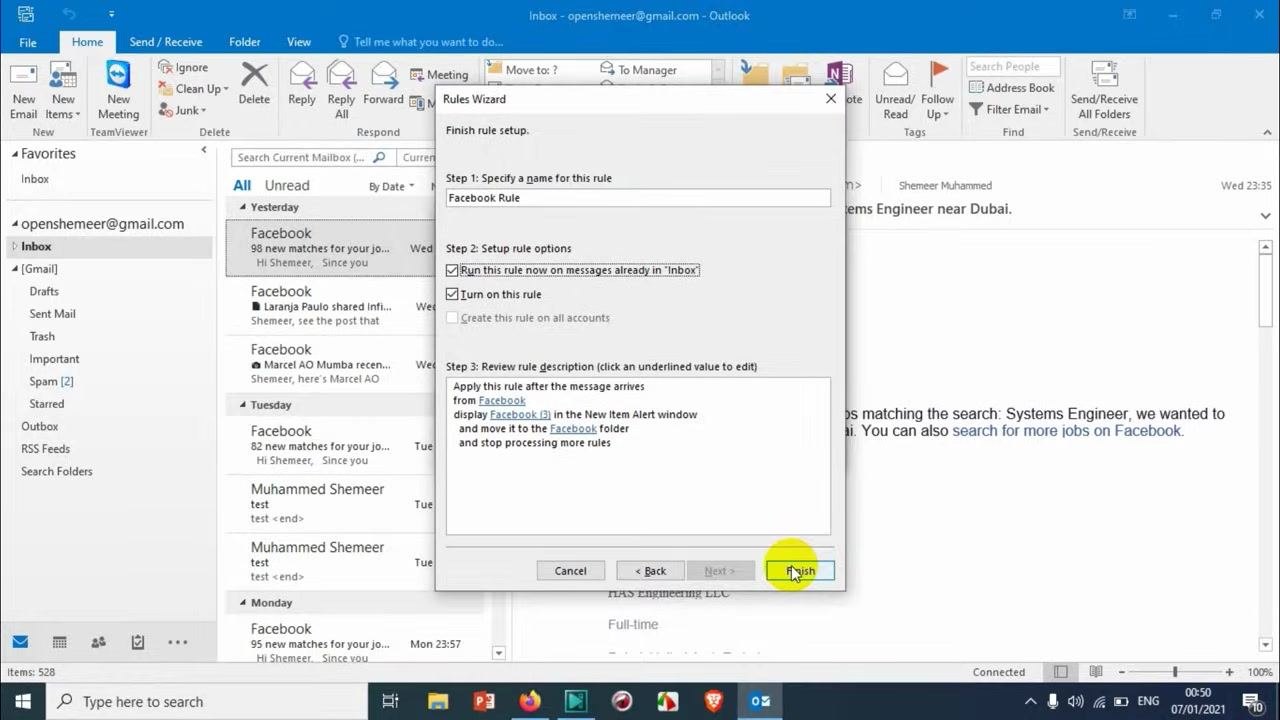
Click Finish to save and activate the rule. Outlook begins processing it immediately, moving existing Facebook emails from your inbox to the Facebook folder while showing a progress dialog with a status bar.
Verify the emails have moved
Once the rule finishes running, open the Facebook folder under your inbox and confirm that all Facebook emails have been moved there, including both old and new messages.
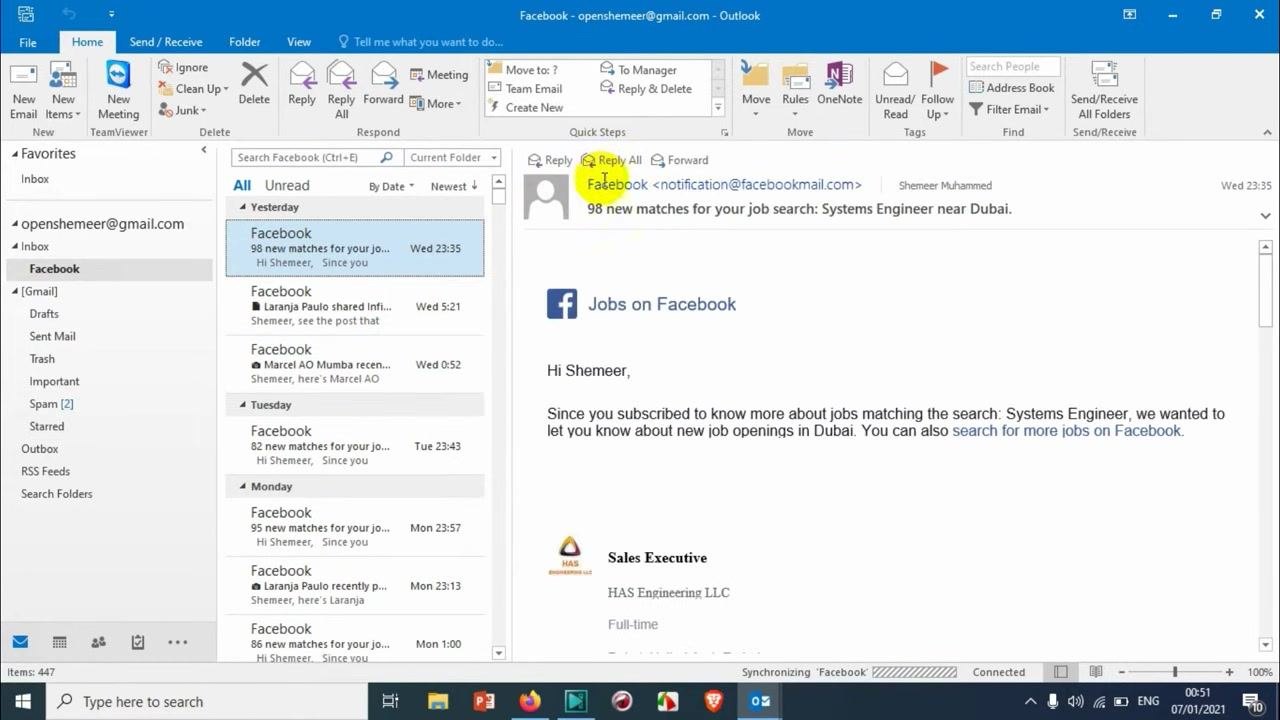
Confirm the rule will process future emails
Any new emails from Facebook will now be moved automatically to the Facebook folder as they arrive—no further action is needed. Keep in mind that this rule only applies when you use the Outlook desktop application; it will not run if you access your mail through Outlook Web Access or another client such as Gmail's web interface.
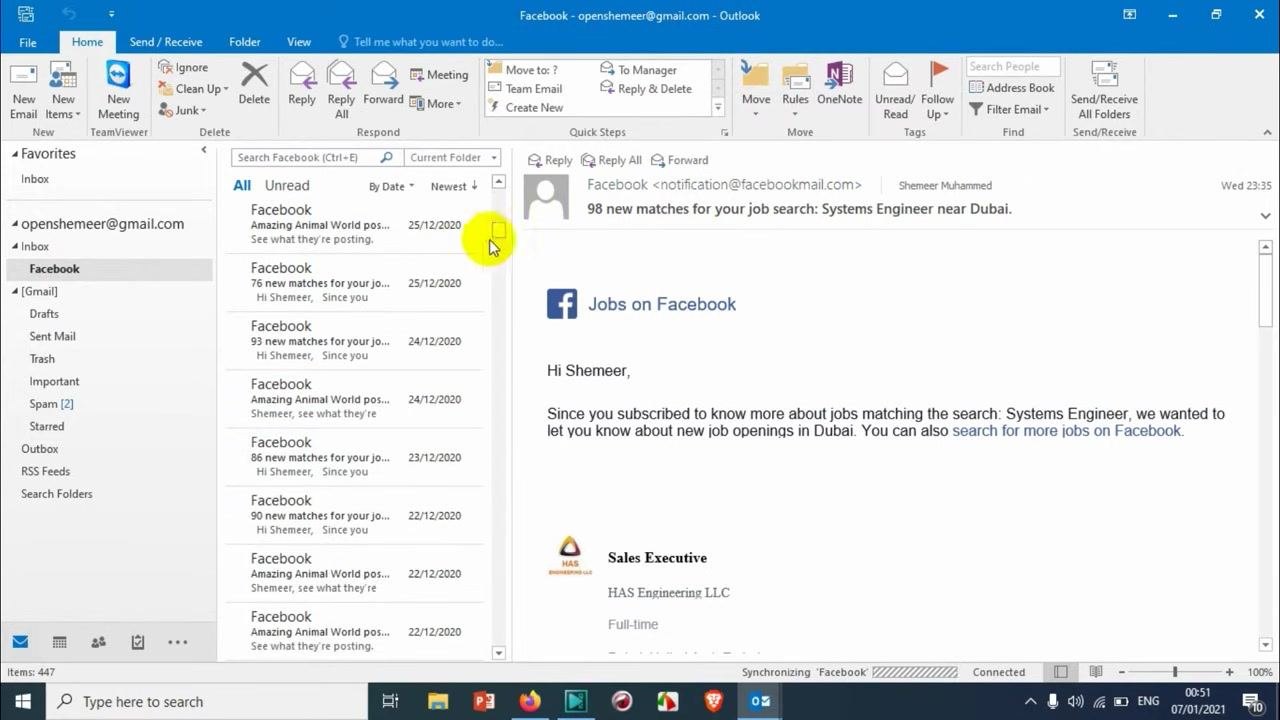
Check the inbox for remaining emails
Your inbox should now display only emails that don't match the Facebook rule. Verify that non-Facebook messages remain in place, confirming that the rule is filtering correctly.
Wait for synchronization to complete
After the rule runs, Outlook synchronizes your folders to move emails as specified. Watch the status bar at the bottom of the window for messages such as "Synchronizing 'Facebook'" or "Synchronizing 'Inbox'" along with a progress bar. Depending on the size of your inbox, this may take a few moments—avoid closing Outlook or interrupting the process until it finishes.
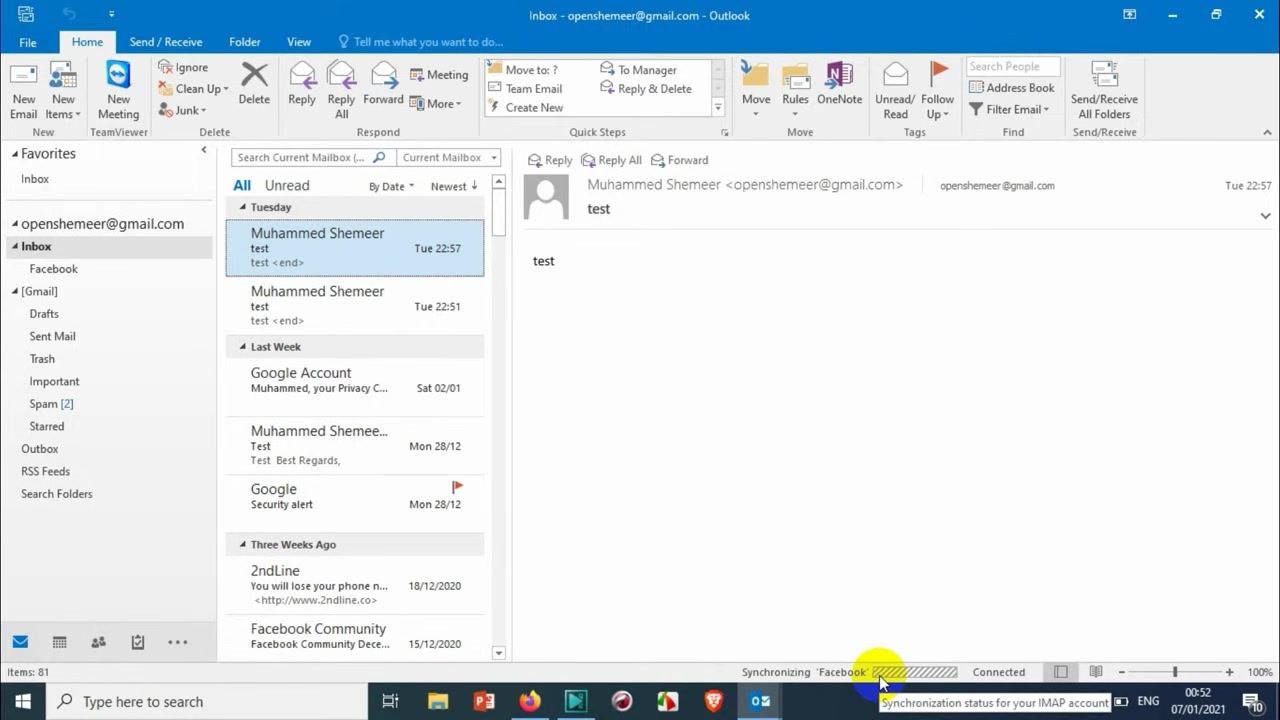
Monitoring progress and confirming completion
If you have a large number of emails or a slow connection, synchronization may take several minutes, and the status bar may alternate between folders such as "Synchronizing 'Inbox'" and "Synchronizing 'Facebook'". Once the progress bar disappears and synchronization messages stop, check the Facebook folder again to confirm that all relevant emails have moved successfully.
Important note about other email clients
The rule you created only applies within the Outlook desktop application. If you check your email through the Gmail web interface or another client, this rule will not run there. To achieve similar automatic organization in Gmail, you need to create a separate filter directly in your Gmail account settings.
What's next
- If you need to move additional emails later, you can re-run the rule from the Outlook Rules menu.
- Periodically check that the rule is still active and functioning as expected.
- If synchronization issues occur, confirm that your internet connection is stable and that Outlook is properly connected to your email server.
By completing these steps, you have successfully created and activated a rule in Outlook that automatically moves Facebook emails—both existing and future—into a dedicated folder, keeping your inbox organized and important notifications easy to find.
Generation details: cost, quality tiers
Docsie billed 3,000 credits ($2.10) to analyze this 6-minute video at standard quality. The rewrite, template fill and Word/PDF exports were included. The same video at each quality tier:
| Quality | Frames sampled | Credits | Approx. cost |
|---|---|---|---|
| Draft | every 16-30 s | 1,500 | $1.05 |
| Standard (this guide) | every 8-15 s | 3,000 | $2.10 |
| Detailed | every 4-7 s | 6,000 | $4.20 |
| Ultra | every 1-3 s | 12,000 | $8.40 |
Credits priced at $0.70 per 1,000; plans include a monthly allowance. Enterprise customers on on-premise or bring-your-own-model deployments run this on their own inference and pay no per-video credits.
Generated by Docsie Video-to-Docs on 2026-09-28 from a 5-minute video. Screenshots are frames from the source video and belong to their creator, The Technology, whose original is embedded above. If you own this video and want the guide removed or credited differently, contact us and we will act within one business day.