
How to Create a Flow in Power Automate
This guide walks you through automating updates to an Excel table stored in OneDrive using Microsoft Power Automate. You'll build an instant flow that collects user input and adds it as a new row to your Excel table, then verify the results directly in the spreadsheet.
Video: Microsoft Power Automate | How to create a flow and update an Excel Table | Tutorial by Anders Jensen (2020). All credit for the demonstration goes to the creator; watch the original on YouTube. The written guide below was generated from this video by Docsie. Creator? Request a change or removal.
This guide walks you through automating updates to an Excel table stored in OneDrive using Microsoft Power Automate. You'll build an instant flow that collects user input and adds it as a new row to your Excel table, then verify the results directly in the spreadsheet.
Prerequisites
- Access to Microsoft Power Automate with an organizational account.
- An Excel file stored in OneDrive containing a formatted table.
- Basic familiarity with the Power Automate interface.
Access Microsoft Power Automate
Open your web browser and navigate to Microsoft Power Automate. Make sure you are logged in with your organizational account.
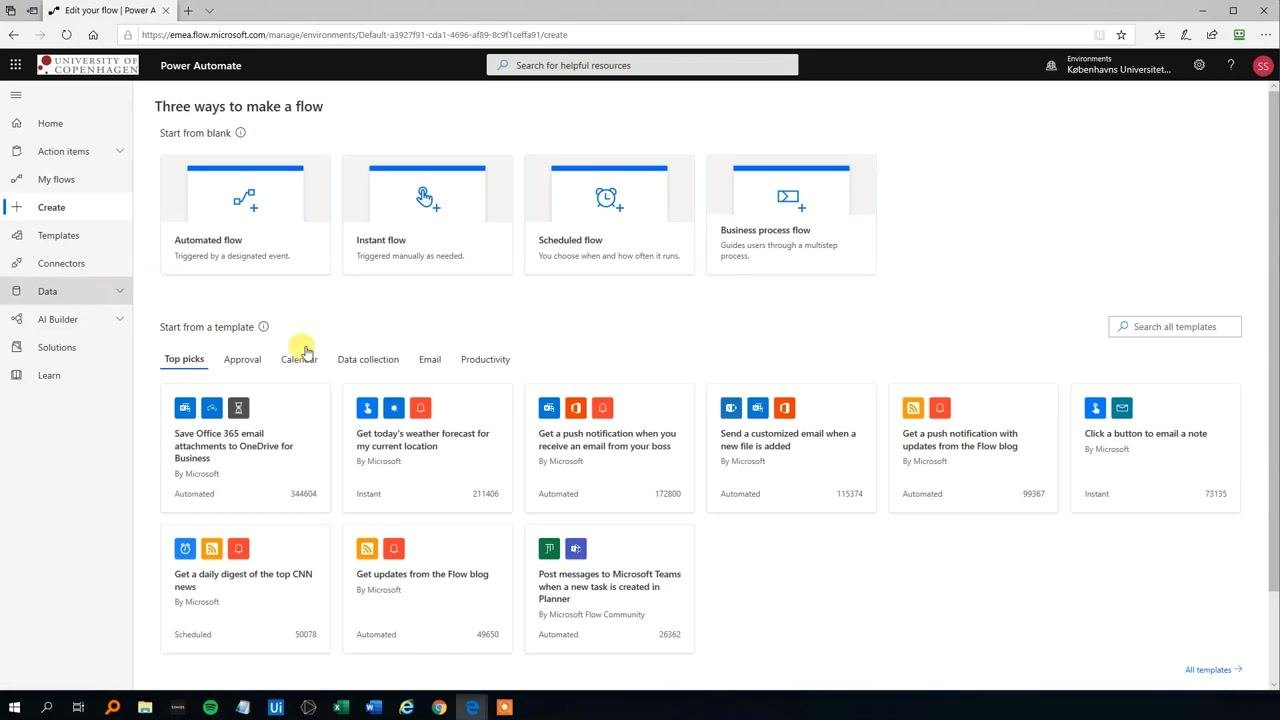
The home screen displays navigation options such as Home, Action items, My flows, Create, Templates, Connectors, Data, AI Builder, Solutions, and Learn in the left sidebar. The main area includes a search bar, template collections, and popular services like SharePoint, Office 365 Outlook, OneDrive, Twitter, Dropbox, Outlook.com, Dynamics 365, Yammer, Excel Online (Business), and Wunderlist.

Prepare your Excel sheet in OneDrive
Create a simple Excel sheet in OneDrive with the following columns: ID, Name, and Sale.
Enter sample data to start the table: - ID: 1 - Name: Angela - Sale: 7000
Save the Excel file in OneDrive once your table is set up.
Start creating a new flow
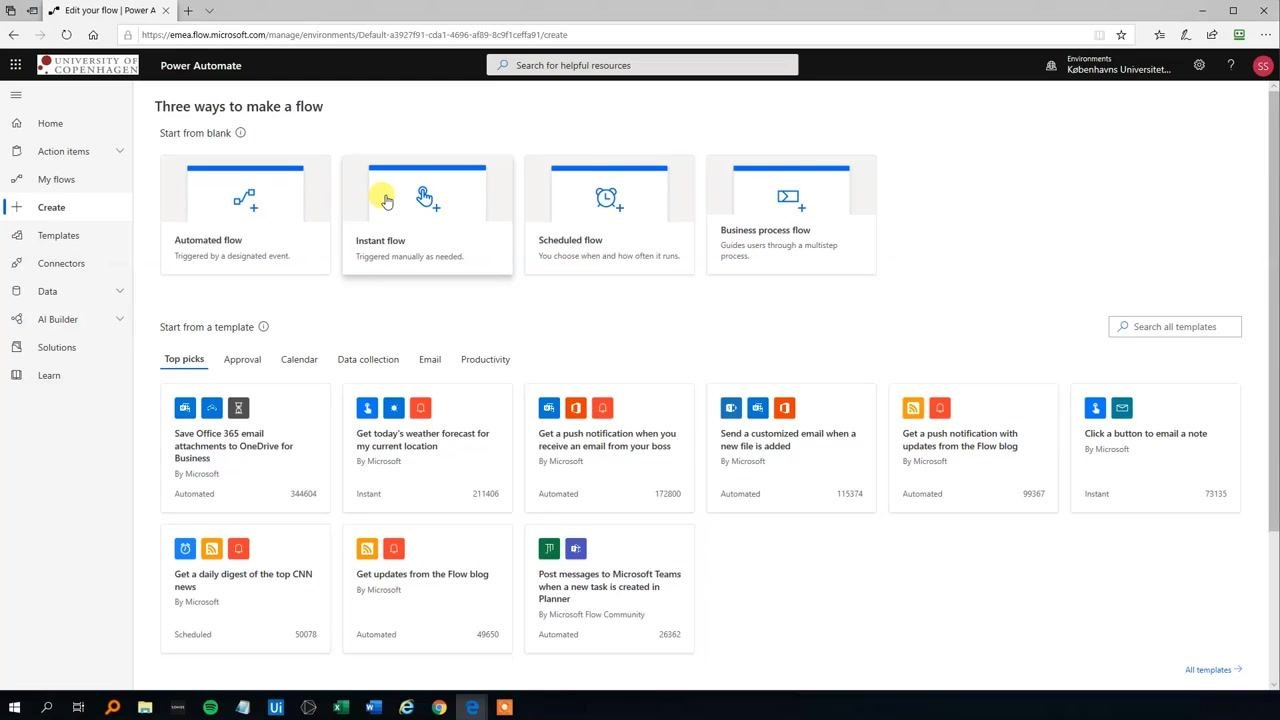
Return to Microsoft Power Automate and click Create in the left sidebar. Under "Three ways to make a flow," select Instant flow, which is triggered manually as needed.
Configure the flow trigger
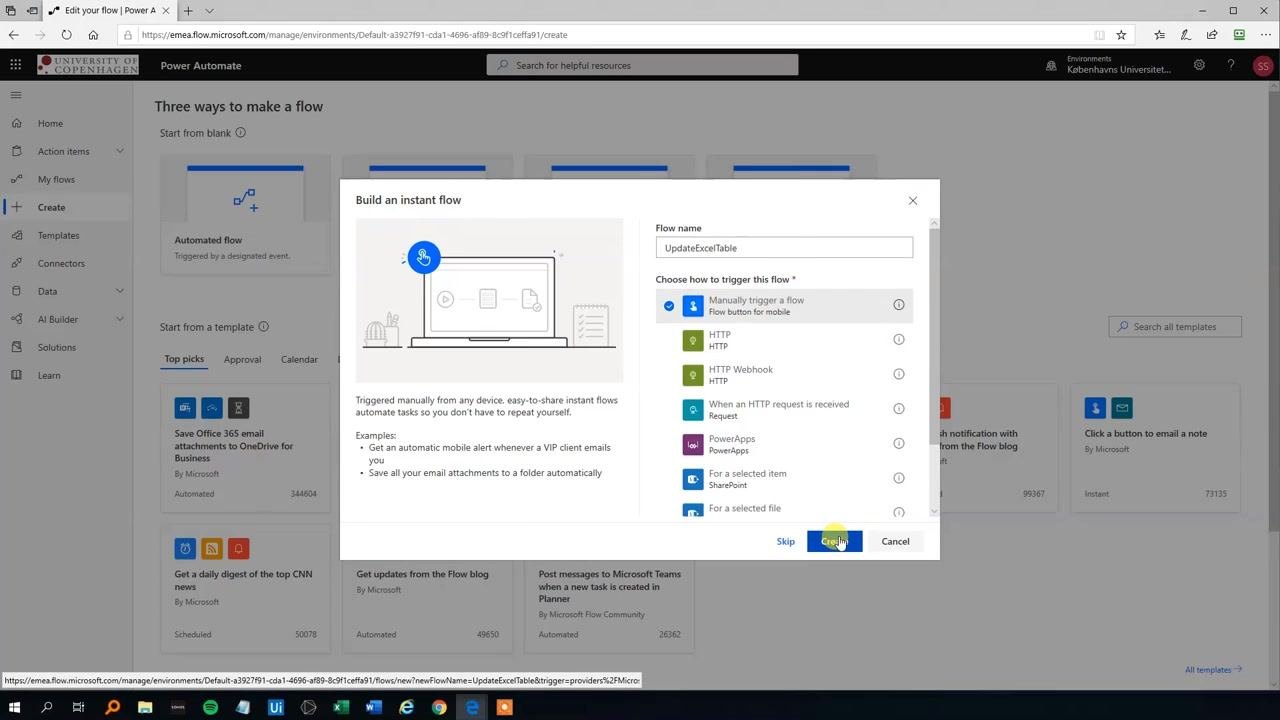
In the "Build an instant flow" dialog, enter the flow name UpdateExcelTable and choose Manually trigger a flow as the trigger. Click Create to proceed.
Add user input fields
In the flow editor, under Manually trigger a flow, add input fields to capture user data. Click Text to add the first input field and name it ID to serve as the unique identifier.
Add the remaining input fields as needed: - Name (Text) - Sale (Number)
Configure input field details
For each input field, specify the label and data type: - ID: Text - Name: Text - Sale: Number
Ensure each field is clearly labeled so users know exactly what data to enter.
Add the "Add a row into a table" action
Once your input fields are configured, users will be prompted to enter ID, Name, and Sale data when running the flow. Click + New step to add the next action.
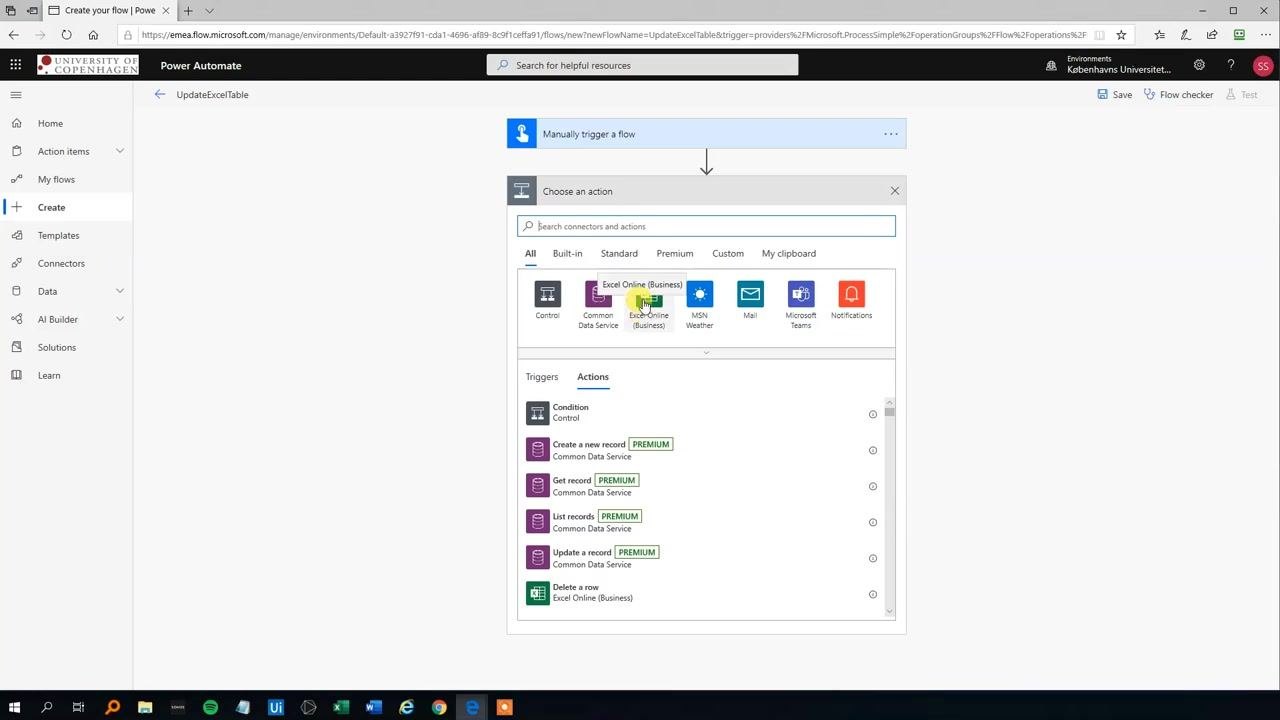
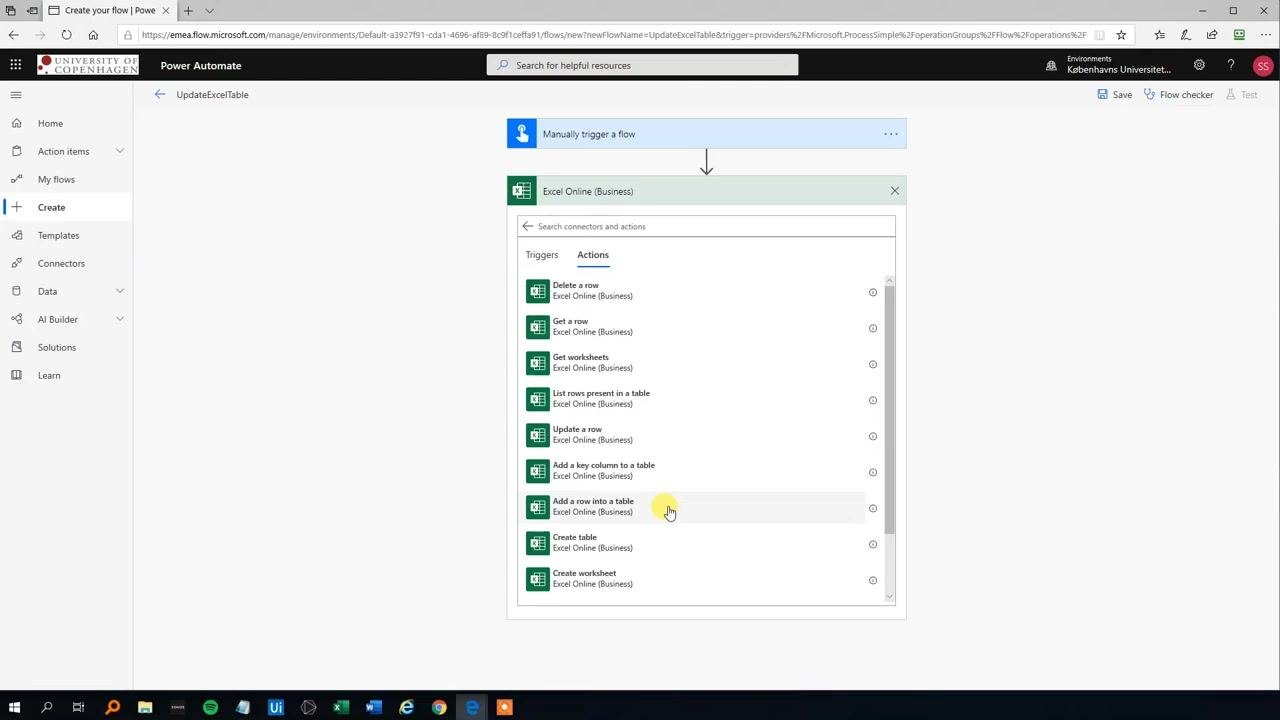
In the "Choose an action" screen, search for Excel Online (Business) and select it from the list of connectors.
Under the Actions tab, scroll down and select Add a row into a table.
Configure the Excel table details
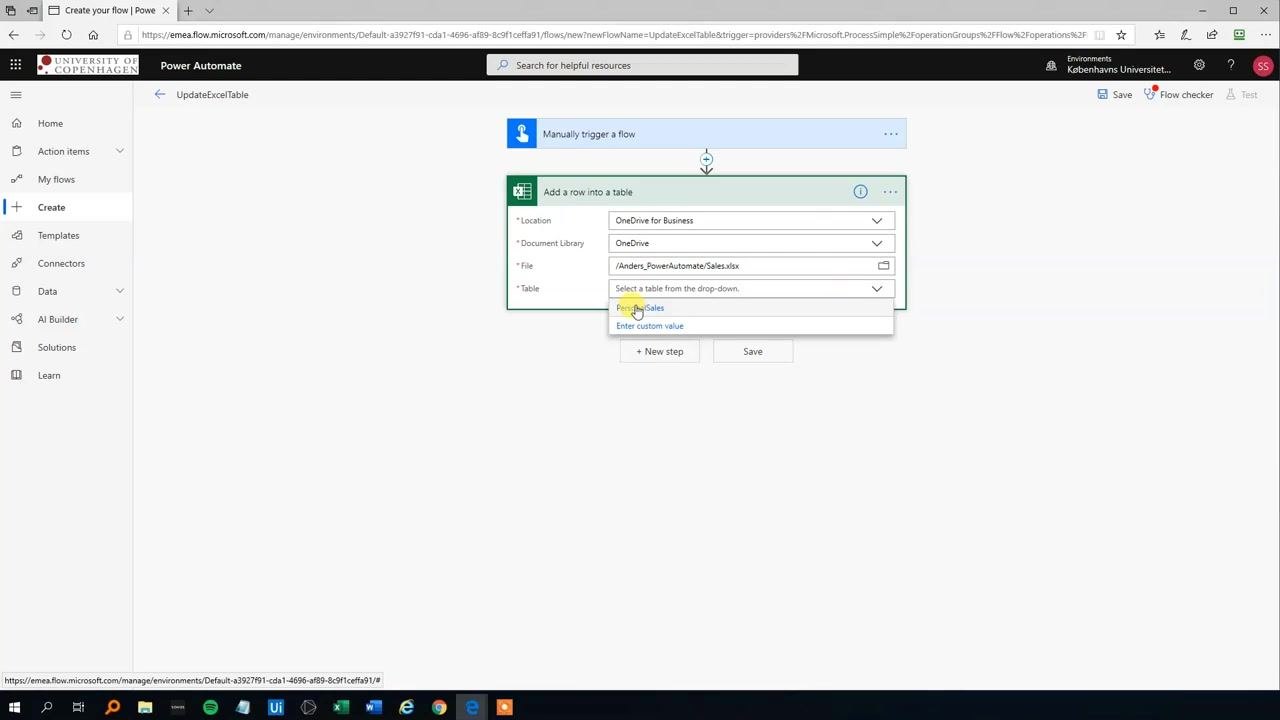
In the "Add a row into a table" action, configure the following fields:
- Location: Select OneDrive for Business from the dropdown.
- Document Library: Choose OneDrive.
- File: Browse to and select your Excel file. In this example, the file path is /Anders_PowerAutomate/Sales.xlsx.
- Table: Select the table where data will be added. In this example, choose PersonalSales from the dropdown.
Map user input fields to Excel table columns
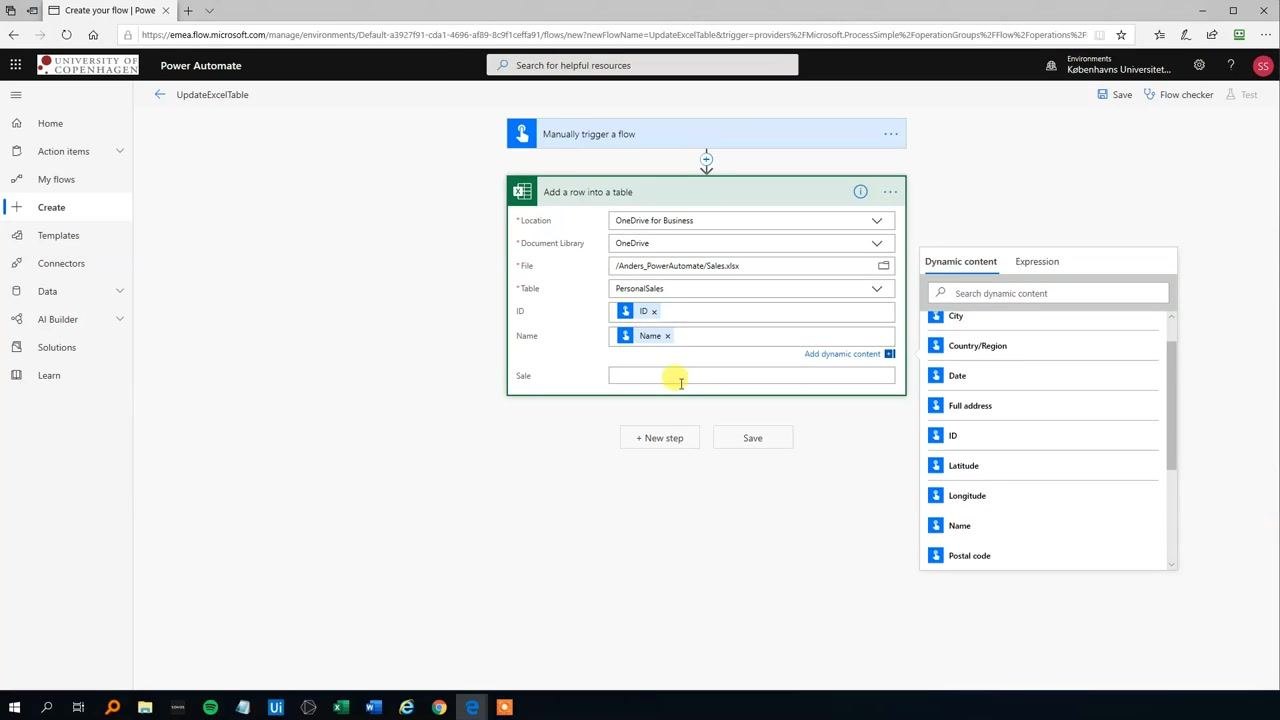
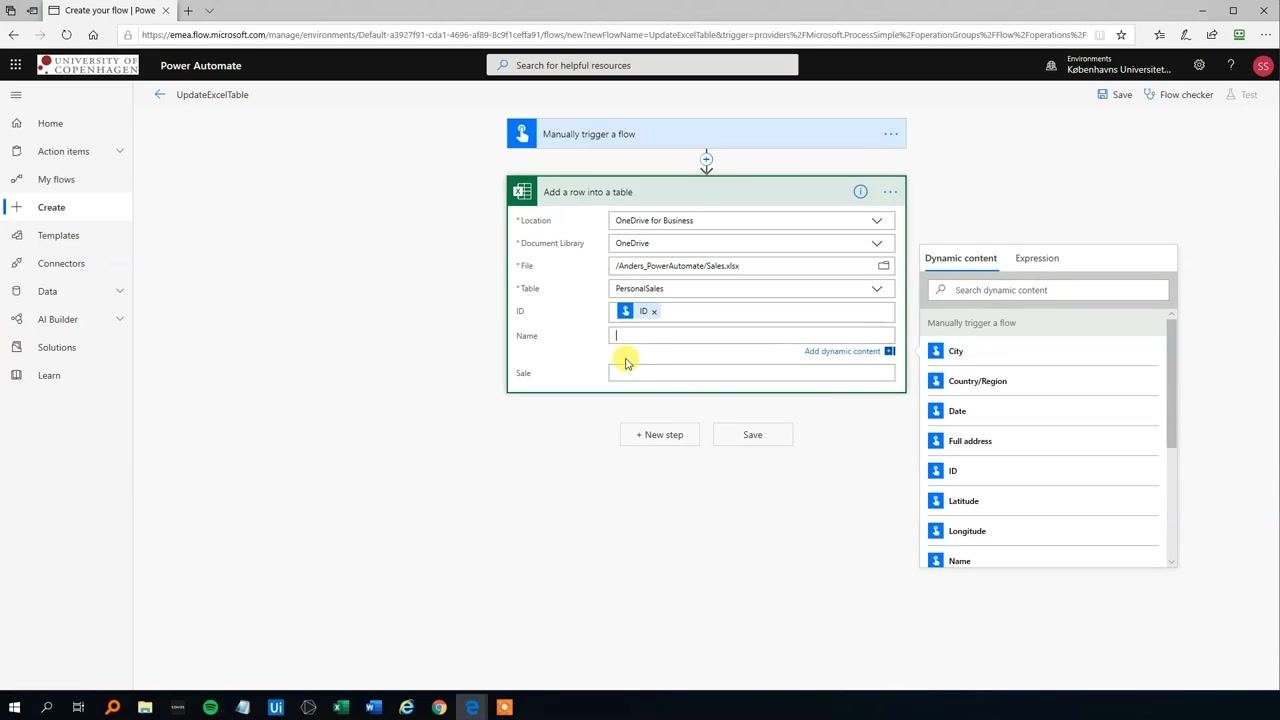
Map each user input field to the corresponding Excel table column: - Set ID to the dynamic content ID. - Set Name to the dynamic content Name. - Set Sale to the dynamic content Sale.
Double-check that all fields are correctly mapped before proceeding.
Save and test the flow
Click Save to store your flow configuration, then click Test to run the flow manually. If prompted, confirm that you are signed in to Excel Online (Business); a green checkmark indicates you're ready to proceed.
Click Continue to proceed to the input form.
Enter test data and run the flow
Enter the following test data in the input form: - ID: 2 - Name: Anders - Sale: 1000
Click Run flow to execute the flow with the provided data.
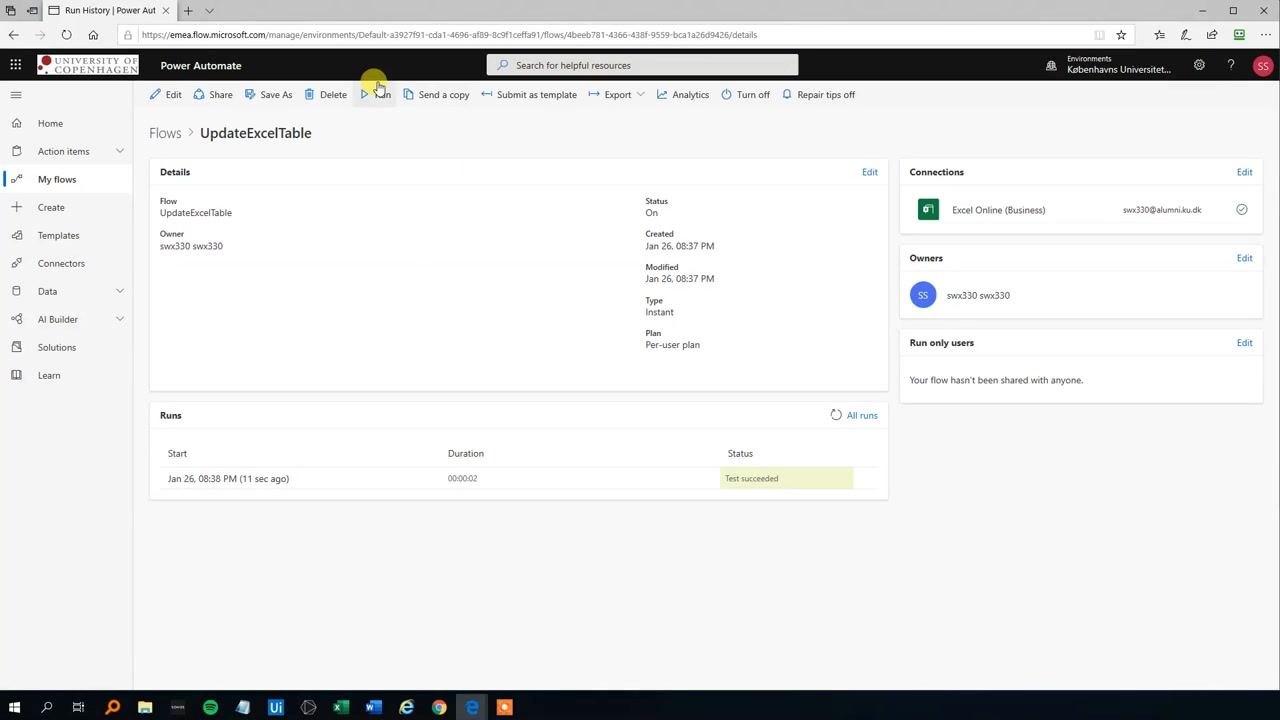
Wait for the confirmation message indicating the flow ran successfully.
Run the flow multiple times with different data
Repeat the process to add more rows to your Excel table using different sample values:
- Example 1: ID 3, Name John, Sale 11000
- Example 2: ID 4, Name Hillary, Sale 6000
- Example 3: ID 5, Name Meta, Sale (enter the appropriate sale value)
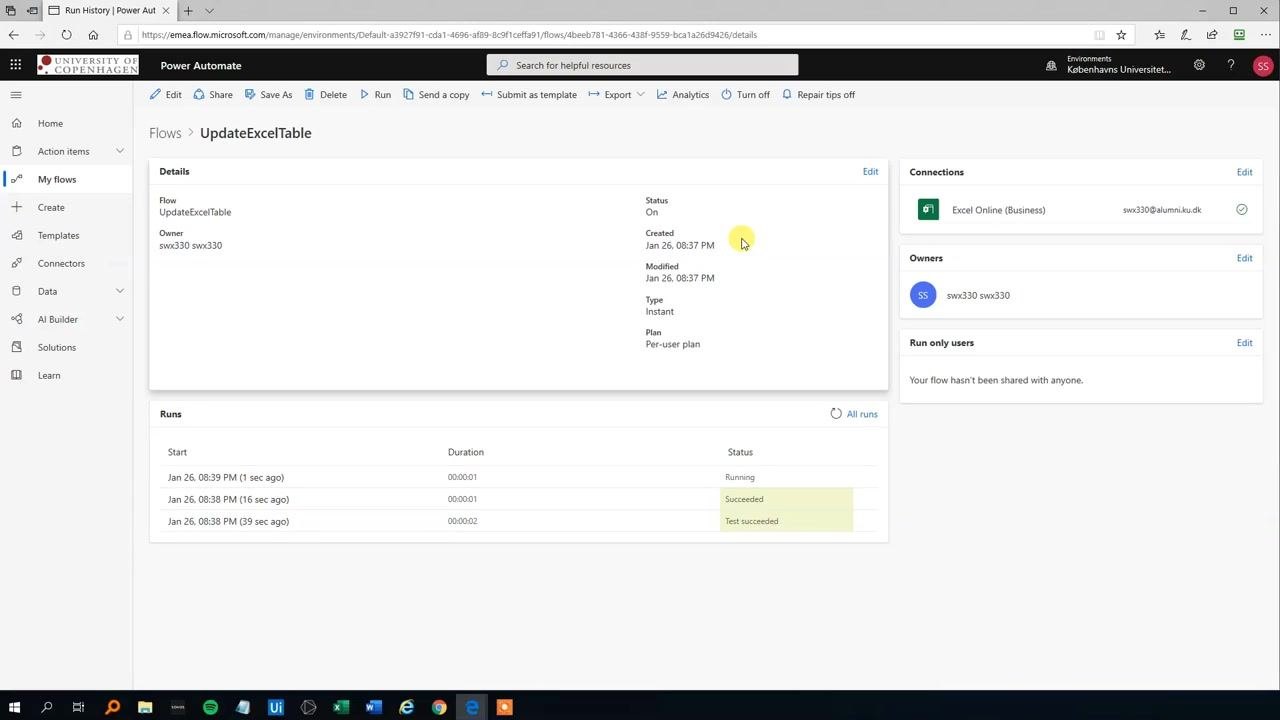
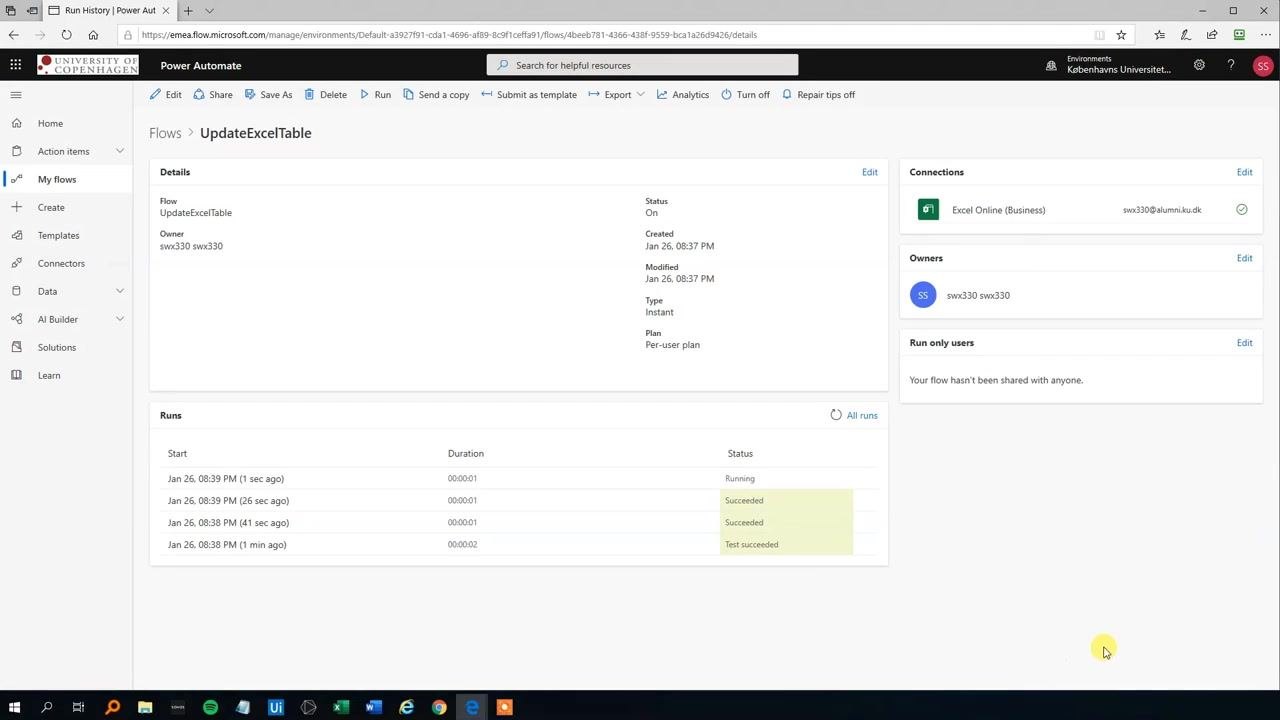
For each run, enter the new data and click Run flow. Check the status of each run in the "Runs" section — successful runs will show "Succeeded" or "Test succeeded".
Verify data in the Excel file
After running the flow multiple times, switch to your Excel file to confirm that all submitted data has been added correctly. Open the Sales.xlsx file in Excel Online and review the table to ensure each row matches the data entered via the flow:
- ID: 1, Name: Angela, Sale: 7,000.00
- ID: 2, Name: Anders, Sale: 1,000.00
- ID: 3, Name: Bill, Sale: 11,000.00
- ID: 4, Name: Hillary, Sale: 6,000.00
- ID: 5, Name: Mette, Sale: 4,500.00
Confirm that the Excel table reflects all data provided through the Power Automate flow.
Summary
You have successfully automated the process of adding rows to an Excel table using Power Automate. The Excel sheet reflects all entries made through the flow, confirming that the integration between Power Automate and Excel Online works as expected.
This concludes the demonstration of updating an Excel table with Power Automate.
Generation details: cost, quality tiers
Docsie billed 3,000 credits ($2.10) to analyze this 6-minute video at standard quality. The rewrite, template fill and Word/PDF exports were included. The same video at each quality tier:
| Quality | Frames sampled | Credits | Approx. cost |
|---|---|---|---|
| Draft | every 16-30 s | 1,500 | $1.05 |
| Standard (this guide) | every 8-15 s | 3,000 | $2.10 |
| Detailed | every 4-7 s | 6,000 | $4.20 |
| Ultra | every 1-3 s | 12,000 | $8.40 |
Credits priced at $0.70 per 1,000; plans include a monthly allowance. Enterprise customers on on-premise or bring-your-own-model deployments run this on their own inference and pay no per-video credits.
Generated by Docsie Video-to-Docs on 2026-09-08 from a 5-minute video. Screenshots are frames from the source video and belong to their creator, Anders Jensen, whose original is embedded above. If you own this video and want the guide removed or credited differently, contact us and we will act within one business day.