
How to Weld Plastic
This standard operating procedure explains how to weld plastic using TECHSPAN hot air thermoplastic welding equipment. Most thermoplastics can be joined using this process, and following each step in order will help you produce strong, professional-quality welds every time.
Video: Plastic Welding: How To Instructional Video by Techspan by TECHSPANONLINE (2010). All credit for the demonstration goes to the creator; watch the original on YouTube. The written guide below was generated from this video by Docsie. Creator? Request a change or removal.
This standard operating procedure explains how to weld plastic using TECHSPAN hot air thermoplastic welding equipment. Most thermoplastics can be joined using this process, and following each step in order will help you produce strong, professional-quality welds every time.
Purpose
This SOP provides a repeatable procedure for performing hot air thermoplastic welding, from selecting the correct equipment through to inspecting the finished weld. It covers surface preparation, tool setup, rod selection, and the tacking, main welding, pendulum welding, and speed welding techniques.
Scope
This procedure applies to anyone performing hot air plastic welding repairs or fabrication with TECHSPAN tools, including flooring welders, tarpaulin welders, extruder welders, wedge welders, and ultrasonic welders. It covers both repair welding of cracked plastic parts and joint welding of new plastic pieces.
Required equipment
Select the appropriate equipment for your application from the following TECHSPAN product range:
- Hot Air Plastic Welders
- Flooring Welders
- Tarpaulin Welders
- Extruder Welders
- Wedge Welders
- Ultrasonic Welders
- Industrial Hot Air Tools & Systems
- Nozzle Heater Bands
- Cartridge Elements
- Ceramic Infrared Heaters
You will also need surface preparation tools (emery paper, a sharp blade, or a clean wire brush), a rotary burr for repair welding, welding rod matching your parent material, and the accessory nozzles required for tacking, main welding, pendulum welding, and speed welding.

Step-by-step instructions
Select the appropriate welding equipment
Review the full range of TECHSPAN welders and heaters to identify the tool that matches your application. Refer to the product list to confirm your choice before starting work.
Prepare the surface
Clean and roughen the plastic surface using emery paper, a sharp blade, or a clean wire brush. Good surface preparation is essential for a successful weld, so make sure the area is free from contaminants and properly roughened for adhesion.
Familiarize yourself with the welding tool
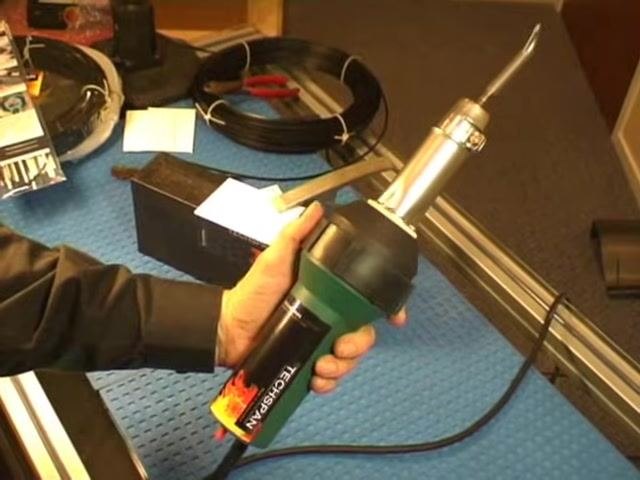
The TECHSPAN plastic welder is fully self-contained, with a built-in blower and electronic temperature control. All necessary attachments are available in kit form or can be purchased individually, so confirm you have everything you need before proceeding.
Cut a V-groove for repair welding
If you are repairing a crack, use a rotary burr to cut a V-shaped groove along the crack or joint. Drill a small hole at the end of the crack to prevent it from spreading further, and use adequate jigging and support to stabilize the workpiece while using the rotary burr.
Attach the accessory nozzle
Choose the accessory nozzle that matches your welding application. TECHSPAN nozzles are designed for easy push-fit installation onto the welding tool.
Set the correct welding temperature
Use the guide provided with your equipment to select the correct welding temperature, then adjust the electronic temperature control to match the requirements of the thermoplastic material you are welding.
Fit the tacking nozzle and tack the weld area
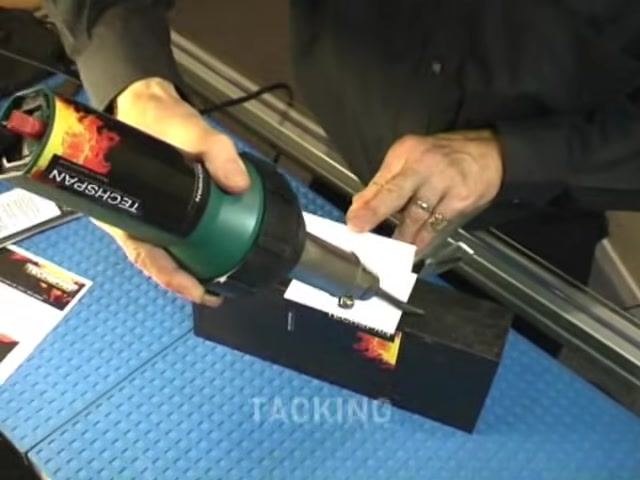
Fit the tacking nozzle to the welding tool and allow it to reach the correct operating temperature. Run the nozzle along the entire length of the area to be welded, tacking wherever you intend to place the welding rod. Tacking slightly presses the two materials together, holding them in place for the main weld. Make sure the tacking pass is continuous and covers the full weld length.
Select the correct welding rod
Only weld plastics with matching, like-for-like materials. Selecting the correct welding rod for your parent material is critical for a strong, reliable weld. If you are unsure of the plastic type, use the TECHSPAN rod test kit to identify it.
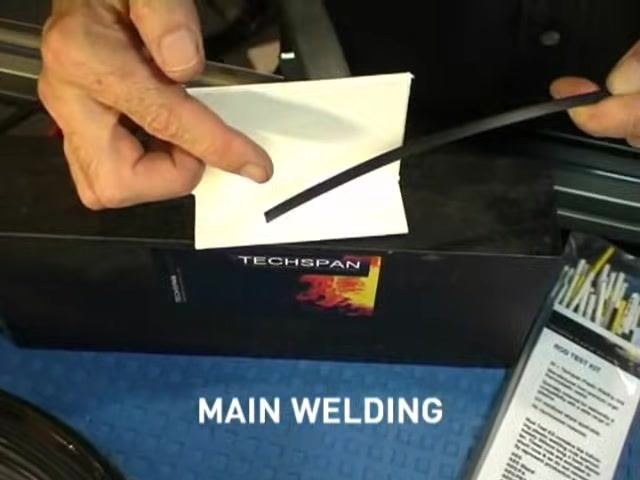
Set the welding temperature for the rod and material
Adjust the electronic temperature control on the welding tool to the recommended setting for your chosen plastic and welding rod. Refer to the TECHSPAN guide for the correct temperature values.
Begin main welding
Position the welding rod at the start of the prepared joint and heat the area until the rod softens enough to feed smoothly into the joint. Continue feeding new rod into the weld area as it softens, ensuring good contact and fusion with the parent material. Complete the weld in one continuous run along the length of the joint.
Use the pendulum welding technique for short welds or difficult access
Fit the standard pendulum welding nozzle to the tool. For short welds, repairs, or areas with limited access, use a pendulum action to evenly heat both the welding rod and the parent material, moving the nozzle back and forth while feeding the rod into the joint.
Complete the weld and allow it to cool
Continue the pendulum or speed welding technique until the entire joint is welded. Ensure the weld bead is smooth and fully fused to both the rod and the parent material, then allow the weld to cool naturally before handling or finishing.
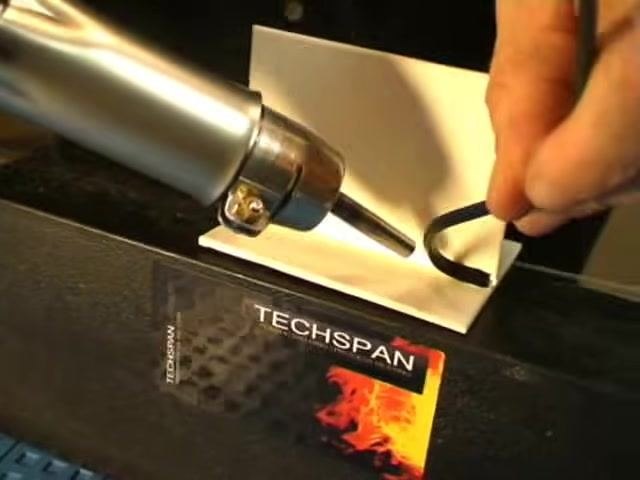
Apply downward pressure during speed welding
Hold the welding tool with the appropriate speed welding nozzle fitted, and position the welding rod in the nozzle aligned with the prepared joint. Apply approximately 2–3 kilograms of downward pressure so the softening rod is forced into the weld area, promoting proper fusion with the parent material. Maintain a steady, controlled movement along the joint for a consistent weld bead.
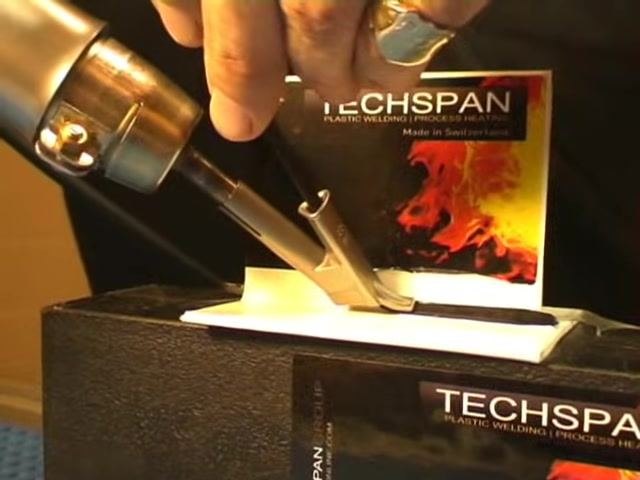
Confirm proper fusion of the welding rod
Watch the welding rod as it softens and is pressed into the joint, confirming that it is fully embedded into the weld area with no gaps or incomplete fusion. Adjust pressure and speed as needed to maintain a smooth, continuous weld.
Inspect and finish the weld
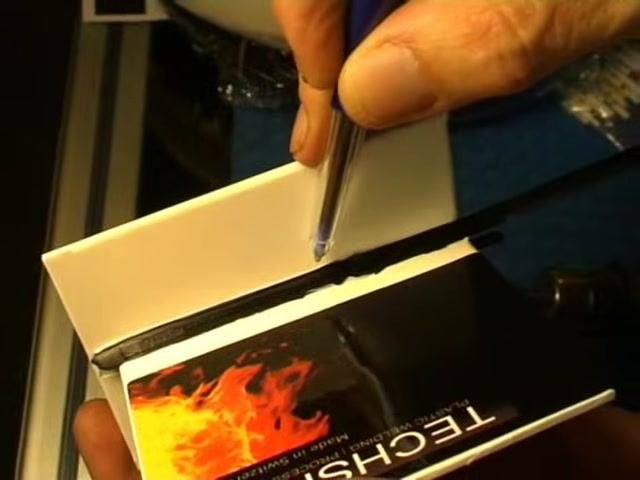
After completing the weld, inspect the bead for uniformity and full fusion. If necessary, use a tool such as a pen or spatula to press down or smooth the bead so it is properly seated and finished. Allow the weld to cool naturally before handling.
Repeat the process for additional joints
For multiple joints or longer welds, repeat the speed welding process described above, always maintaining the correct downward pressure and steady movement for each weld.
Monitor the weld up close
Observe the weld area closely to confirm the rod is melting and fusing correctly, checking for proper flow and bonding between the rod and the parent material.
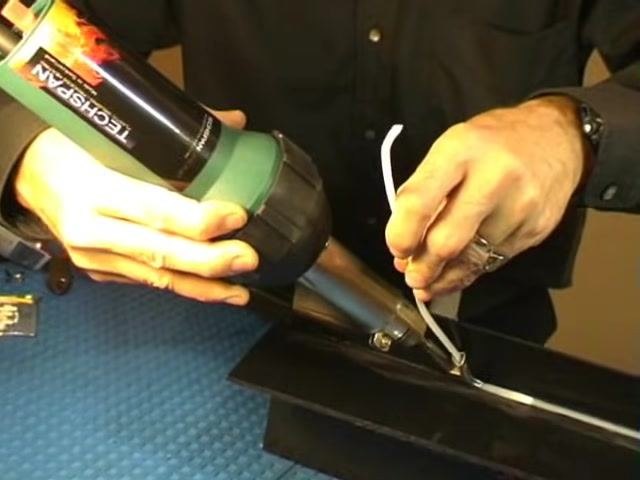
Continue welding along the entire joint
Move the tool and rod steadily along the full length of the joint, maintaining consistent pressure and speed for a uniform weld bead.

Perform a final quality check
Complete the weld, ensuring the entire joint is covered and the bead is smooth. Inspect the finished weld for any defects or areas that need touch-up.
Read the tool's operating instructions
Before using the TECHSPAN welding tool, thoroughly read the operating instructions provided by the manufacturer, and follow all safety guidelines and recommended procedures for optimal results.
Verification and summary
Before signing off on a completed weld, confirm the following:
- The surface was properly prepared before welding began.
- The correct nozzle, rod, and temperature setting were used for the specific plastic material.
- Rotary tools and welding equipment were used with proper safety precautions, including adequate jigging and support.
- The weld bead is smooth, continuous, and fully fused along the entire joint, with no gaps.
- The weld was allowed to cool naturally before handling or finishing.
TECHSPAN supplies a full range of plastic welding equipment and thermoplastic welding rods for various applications, along with service and backup support for all major brands of plastic welding equipment.
What's next
Consult the TECHSPAN guide for detailed temperature recommendations, accessory selection, and troubleshooting for advanced welding techniques. Always follow the manufacturer's operating instructions for your specific welding tool before starting a new job.
Generation details: cost, quality tiers
Docsie billed 2,500 credits ($1.75) to analyze this 5-minute video at standard quality. The rewrite, template fill and Word/PDF exports were included. The same video at each quality tier:
| Quality | Frames sampled | Credits | Approx. cost |
|---|---|---|---|
| Draft | every 16-30 s | 1,250 | $0.88 |
| Standard (this guide) | every 8-15 s | 2,500 | $1.75 |
| Detailed | every 4-7 s | 5,000 | $3.50 |
| Ultra | every 1-3 s | 10,000 | $7.00 |
Credits priced at $0.70 per 1,000; plans include a monthly allowance. Enterprise customers on on-premise or bring-your-own-model deployments run this on their own inference and pay no per-video credits.
Generated by Docsie Video-to-Docs on 2026-09-20 from a 4-minute video. Screenshots are frames from the source video and belong to their creator, TECHSPANONLINE, whose original is embedded above. If you own this video and want the guide removed or credited differently, contact us and we will act within one business day.