
How to Use a Height Gauge
This standard operating procedure explains how to use a height gauge to take accurate measurements. It covers two methods: reading measurements directly from the dial and counters, and using the height gauge as a transfer stand for the tightest possible tolerances. Following these steps will help you combine coarse and fine readings for precise, repeatable results.
Video: Take a Reading with a Dial Height Gauge - HaasTooling.com by Haas Automation, Inc. (2024). All credit for the demonstration goes to the creator; watch the original on YouTube. The written guide below was generated from this video by Docsie. Creator? Request a change or removal.
This standard operating procedure explains how to use a height gauge to take accurate measurements. It covers two methods: reading measurements directly from the dial and counters, and using the height gauge as a transfer stand for the tightest possible tolerances. Following these steps will help you combine coarse and fine readings for precise, repeatable results.
Purpose
This procedure describes how to correctly read a dial height gauge and, when required, how to use the height gauge as a transfer stand to achieve maximum measurement accuracy.
Scope
This procedure applies to any measurement task performed with a dial height gauge on a surface plate, including standard readings and high-precision transfer measurements using gauge blocks.
Required equipment
- Dial height gauge
- Granite surface plate
- Gauge blocks or other highly accurate dimensional reference standards
- Machined part(s) to be inspected
Procedure part 1: Reading a dial height gauge
Step 1: Understand the dial and counters
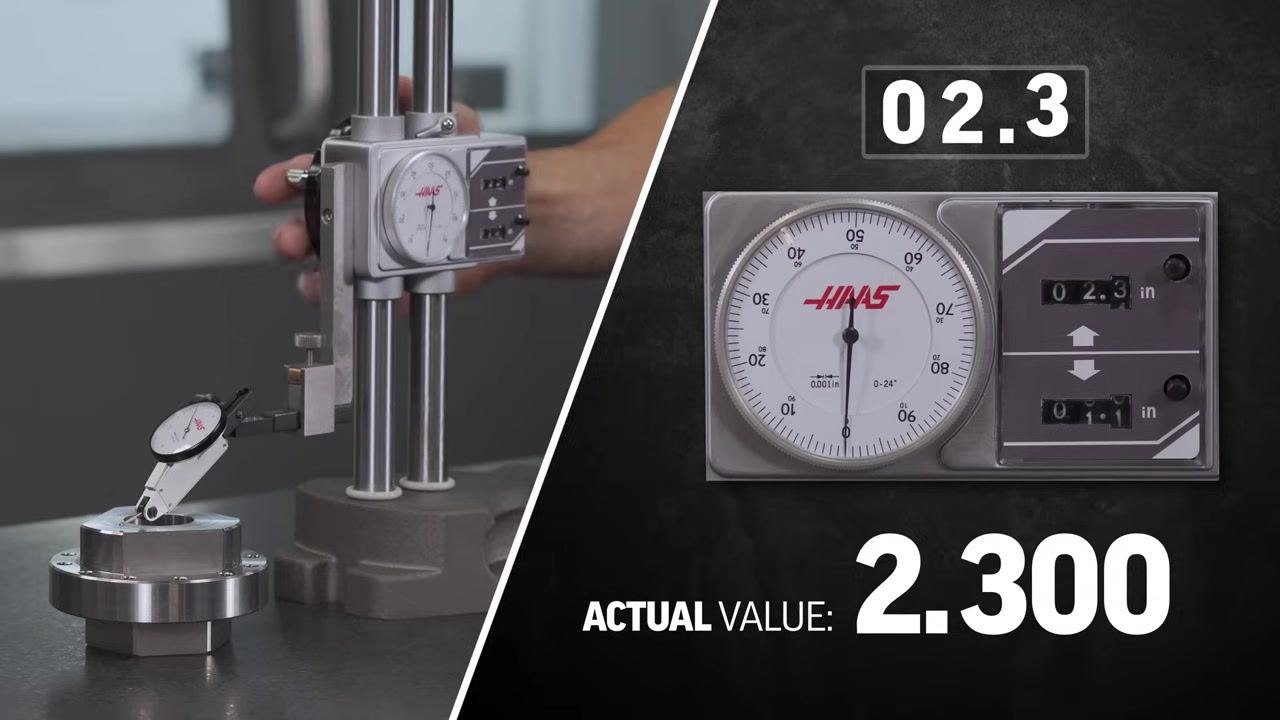
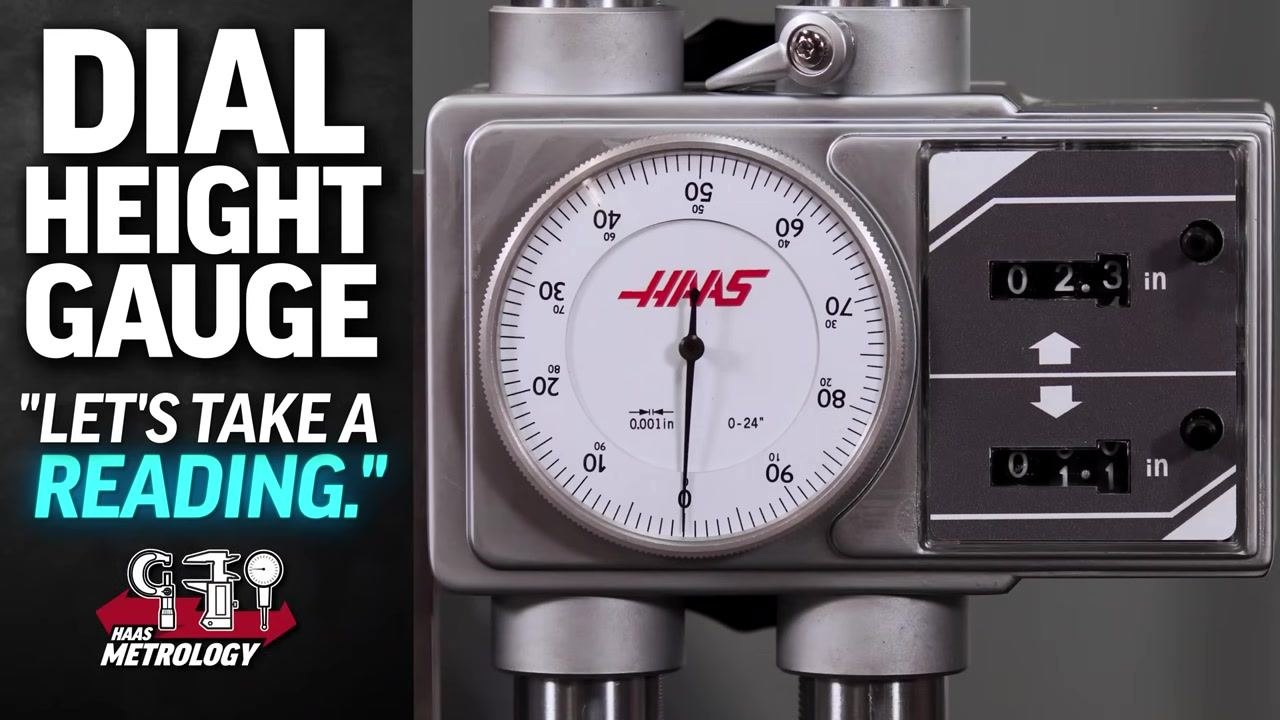
The dial face displays increments of 0.001 inches (thousandths of an inch). The left counter shows whole inches, and the right counter shows tenths of an inch (0.1 increments). The dial needle rotates as you move the gauge up or down, indicating fine measurements, and the counters increment or decrement as you pass each full inch or tenth of an inch.
Step 2: Identify the measurement columns
Observe the left column for whole-inch increments (for example, "2") and the right column for tenths of an inch (for example, "0.3"). As you descend the gauge from above the part, watch these counters to track your position.
Step 3: Take a preliminary reading
Lower the gauge toward the part. When the needle is on zero and the counter reads 2.3 inches, you are 2.3 inches above the table and have not yet touched the part.
Step 4: Continue lowering until contact
Keep moving the gauge down until the probe touches the part. As you pass zero on the dial, you move below the previous tenth or inch mark. At this stage, the actual value is 2.300 inches, as shown on the counters and dial.
Step 5: Read the final measurement
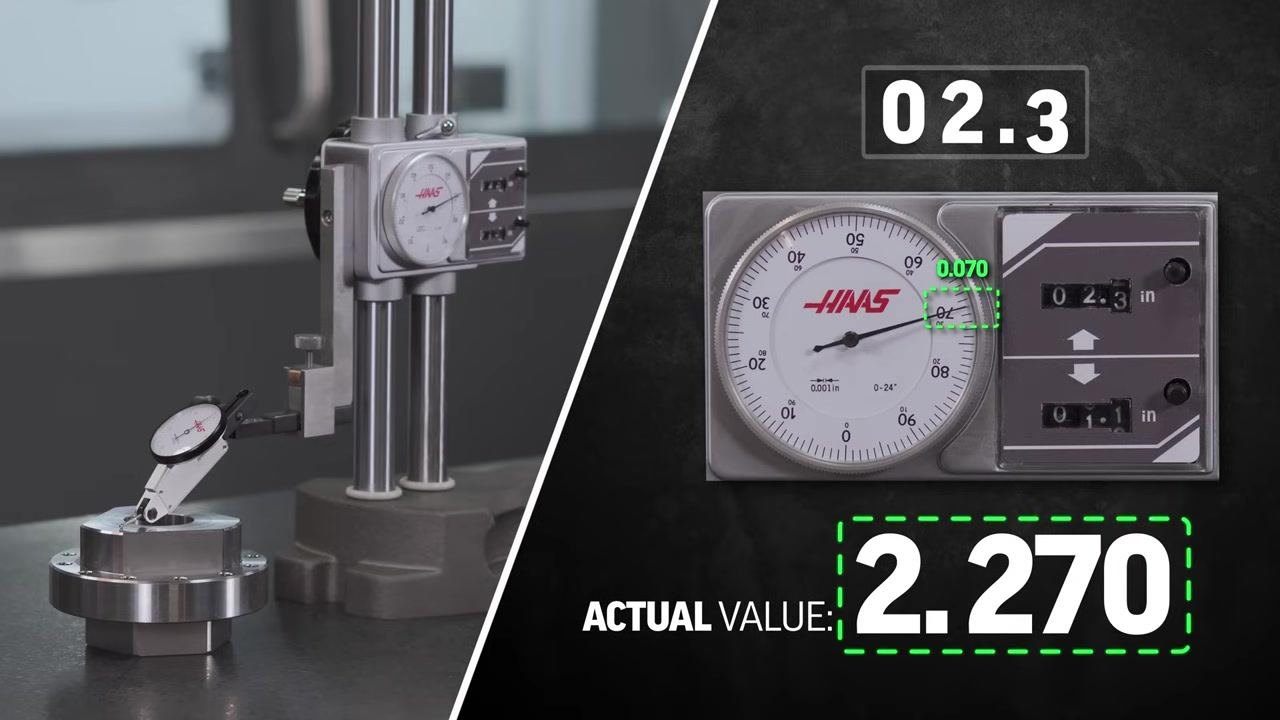
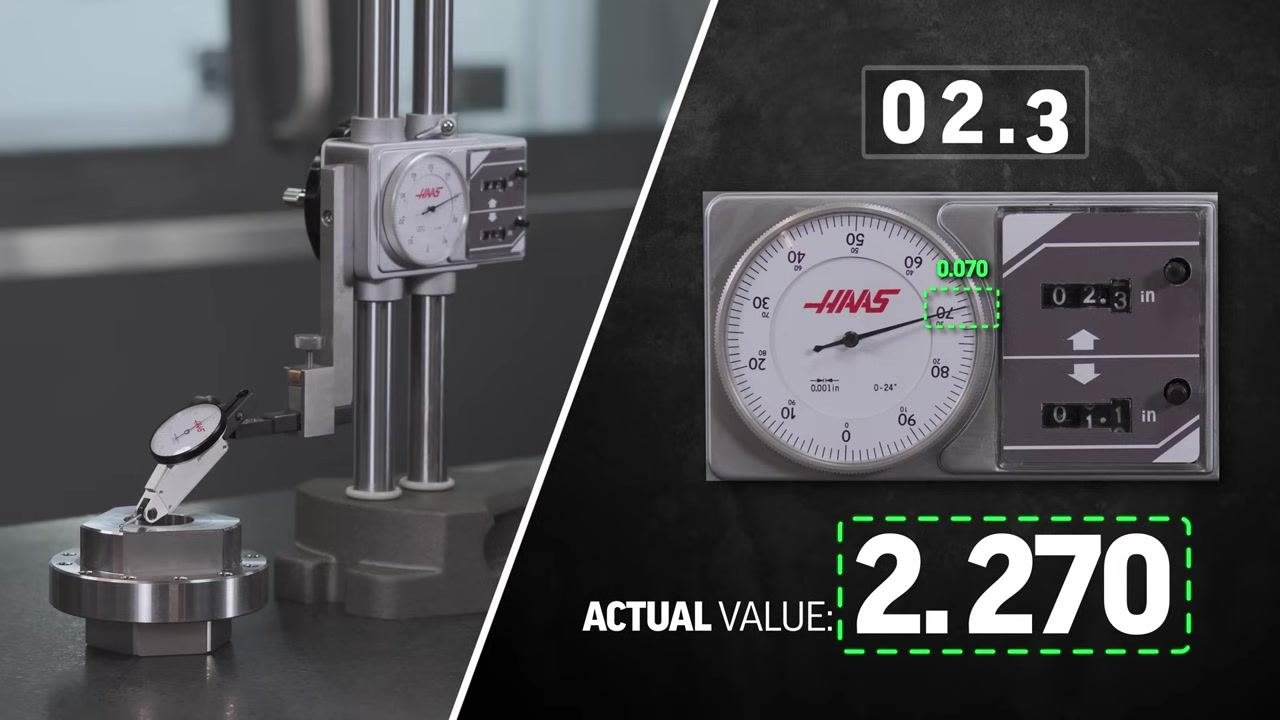
When the probe contacts the part, read the dial for the fine increment. For example, if the dial reads 0.070 and the counters show 2.3, the actual value is 2.270 inches. Combine the whole inch, tenth, and dial reading for the final measurement.
Step 6: Practice for familiarity
It may take several measurements to become comfortable reading the counters and dial together. As you approach the surface, mentally note which tenth of an inch you are on as the needle passes zero.
Step 7: Check for tight measurements
For very precise measurements, always use the dial for the thousandths place. For example, if the counters read 2.4 and the dial reads 0.088, the actual value is 2.388 inches.
Step 8: Verify and record the measurement
Double-check the counters and dial reading before recording your measurement. For example, if the counters read 2.3 and the dial reads 0.080, the actual value is 2.280 inches.
By following Steps 1 through 8, you will be able to accurately read and interpret measurements from a dial height gauge, combining the coarse (counters) and fine (dial) readings for precise results.
Procedure part 2: Using the height gauge as a transfer stand for maximum accuracy
For extremely precise measurements, use the height gauge as a transfer stand rather than relying solely on its readouts. This method involves setting the gauge to a known reference height and transferring that exact height to the part being inspected.

Step 1: Understand when to use the transfer stand method
Use this method when you require the tightest possible measurement tolerances. Do not rely exclusively on the dial and counter readouts for critical measurements.
Step 2: Prepare your reference standards
Obtain gauge blocks or other highly accurate dimensional references. Ensure the reference blocks are clean and free of debris.
Step 3: Set the height gauge to the reference standard
Place the gauge block(s) on the surface plate. Lower the height gauge's probe until it just contacts the top of the gauge block, then zero the dial or note the position as your reference height.
Step 4: Transfer the reference height to the part
Move the height gauge to the part you wish to inspect, keeping the probe at the same height setting. Carefully slide the gauge so the probe is above the feature to be measured, then lower the probe until it just contacts the part's surface. Observe whether the probe contacts at the same dial position as it did on the reference block; any deviation indicates a difference in height between the reference and the part.
Safety note: Avoid excessive force when lowering the probe to prevent damaging the part or the gauge.
Step 5: Interpret the results
If the dial reads zero (or the same as the reference), the part matches the reference height. If the dial shows a positive or negative value, note the difference to determine whether the part is over or under the reference height.
Step 6: Record and verify
Record the measured difference, if any, between the reference and the part. Repeat the process as needed to confirm accuracy.
Step 7: Best practices
- Always use clean, undamaged gauge blocks for reference.
- Avoid excessive force when lowering the probe to prevent damaging the part or the gauge.
- Use this transfer method for critical features where maximum accuracy is required.
Verification and summary
By following these steps, you can achieve the highest measurement accuracy with a dial height gauge, whether by reading the dial and counters directly or by using the gauge as a transfer stand referenced against known standards. Always double-check readings before recording final measurements, and use the transfer stand method whenever tighter tolerances are required.
Generation details: cost, quality tiers
Docsie billed 1,500 credits ($1.05) to analyze this 3-minute video at standard quality. The rewrite, template fill and Word/PDF exports were included. The same video at each quality tier:
| Quality | Frames sampled | Credits | Approx. cost |
|---|---|---|---|
| Draft | every 16-30 s | 750 | $0.52 |
| Standard (this guide) | every 8-15 s | 1,500 | $1.05 |
| Detailed | every 4-7 s | 3,000 | $2.10 |
| Ultra | every 1-3 s | 6,000 | $4.20 |
Credits priced at $0.70 per 1,000; plans include a monthly allowance. Enterprise customers on on-premise or bring-your-own-model deployments run this on their own inference and pay no per-video credits.
Generated by Docsie Video-to-Docs on 2026-09-20 from a 2-minute video. Screenshots are frames from the source video and belong to their creator, Haas Automation, Inc., whose original is embedded above. If you own this video and want the guide removed or credited differently, contact us and we will act within one business day.