
How to Read Digital Calipers
If you searched for how to read digital calipers, this guide covers the analog vernier caliper instead. It walks you through reading the main scale and vernier scale together so you can measure to a precision of 0.05 mm using the physical markings on the tool, rather than a digital display.
Video: How to read the caliper Vernier scale easily by Woodworking with DIY tools (2017). All credit for the demonstration goes to the creator; watch the original on YouTube. The written guide below was generated from this video by Docsie. Creator? Request a change or removal.
If you searched for how to read digital calipers, this guide covers the analog vernier caliper instead. It walks you through reading the main scale and vernier scale together so you can measure to a precision of 0.05 mm using the physical markings on the tool, rather than a digital display.
Purpose
This procedure explains how to accurately read a measurement from a vernier caliper by combining the main scale reading with the vernier scale reading. Following these steps consistently will help you achieve precise measurements down to 0.05 mm.
Scope
This SOP applies to anyone using a manual vernier caliper for measurement tasks, including students, technicians, and hobbyists who need to read dimensions accurately without a digital display.
Required equipment
- A vernier caliper with clearly visible main scale and vernier scale markings
- A pen or pointer (optional, to help visually track scale alignment)
- A clean, flat work surface
Procedure
Step 1: Verify the caliper's zero position
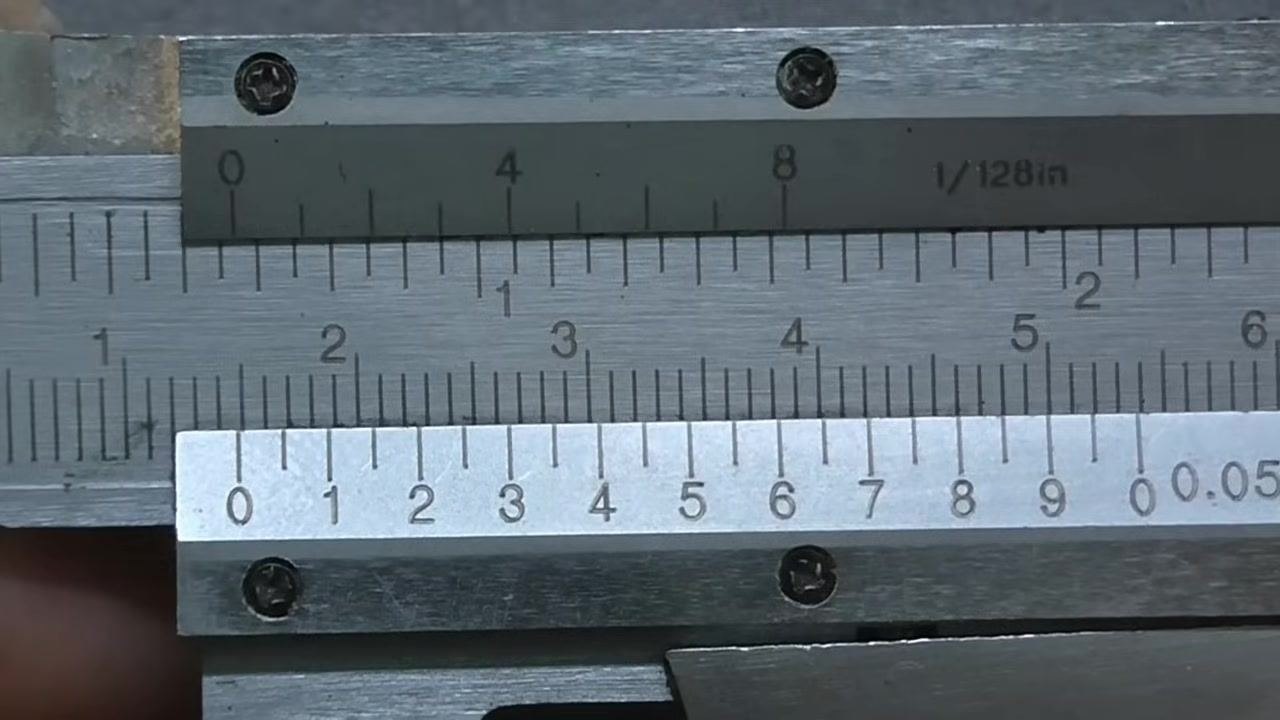
Before taking any measurement, check that the zero on the vernier scale aligns exactly with the zero on the main scale. When both zeros are aligned, the caliper should read 0 mm.
Step 2: Open the caliper and read whole millimeters
Gradually open the caliper and watch the zero on the vernier scale move past the markings on the main scale. As it aligns with each whole millimeter mark (1 mm, 2 mm, 3 mm, and so on), that value represents the whole-millimeter reading.
Step 3: Identify when the zero falls between two markings
Continue opening the caliper until the zero on the vernier scale sits between two main scale markings, for example between 15 mm and 16 mm. This indicates the measurement is greater than 15 mm but less than 16 mm.
Step 4: Understand the vernier scale divisions
When the zero doesn't land exactly on a main scale marking, use the vernier scale to find the extra fraction of a millimeter. The vernier scale spans 1 mm in total, and each individual line on it represents 0.05 mm.
Step 5: Determine the main scale reading
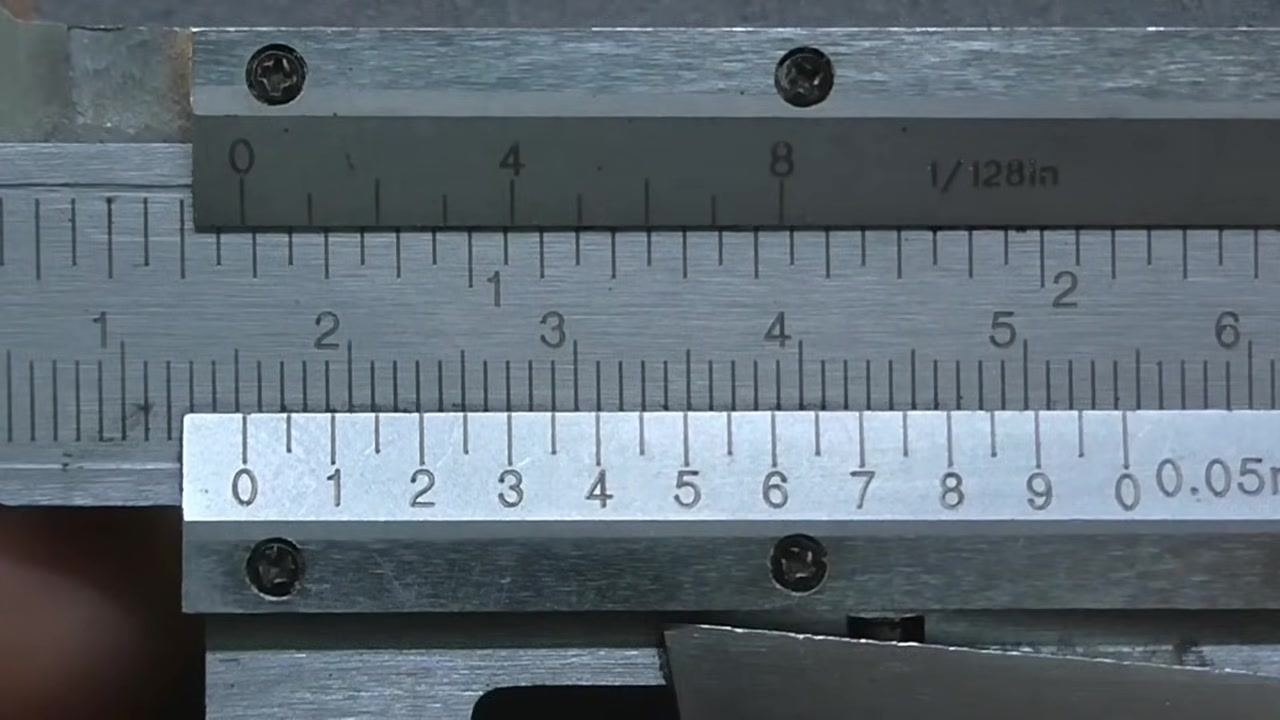
Locate the last main scale marking to the left of the vernier scale's zero. For example, if the zero has just passed the 15 mm mark, the main scale reading is 15 mm.
Step 6: Locate the coinciding lines
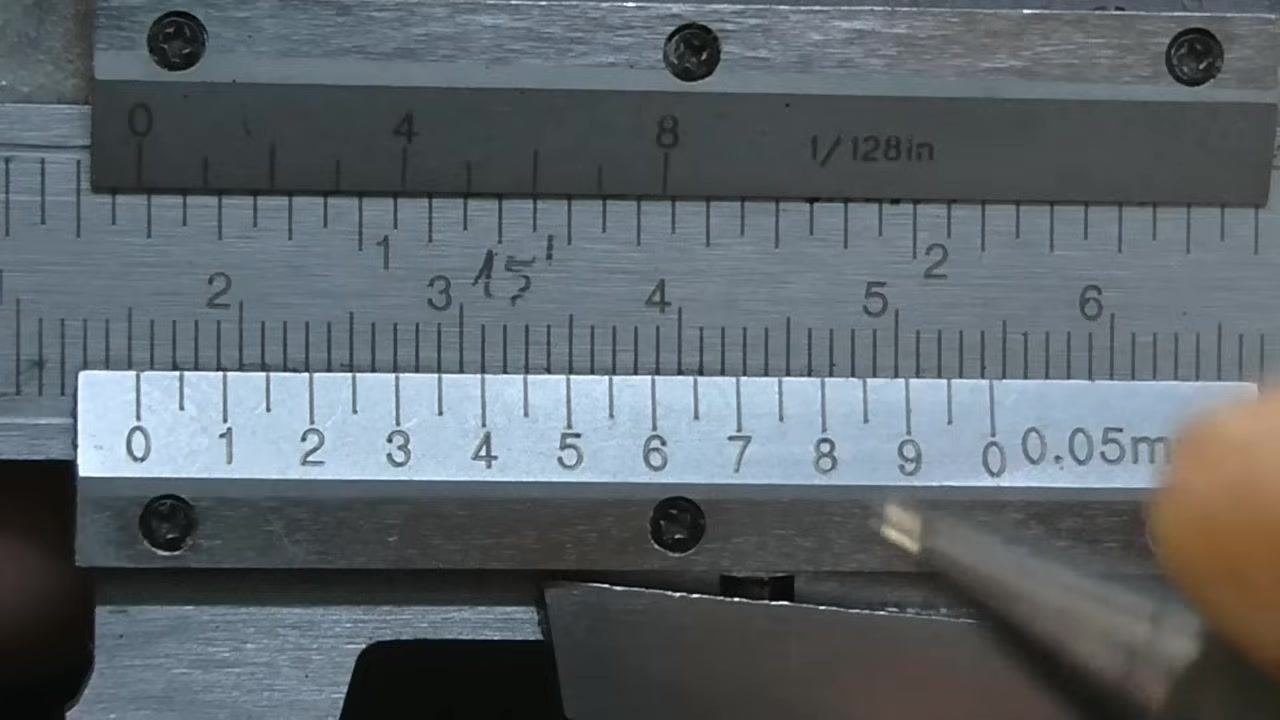
Look along the vernier scale for three consecutive lines that closely align with three lines on the main scale. Scan from left to right to find the point where the lines match up most precisely.
Step 7: Identify the best coincidence and calculate the vernier reading
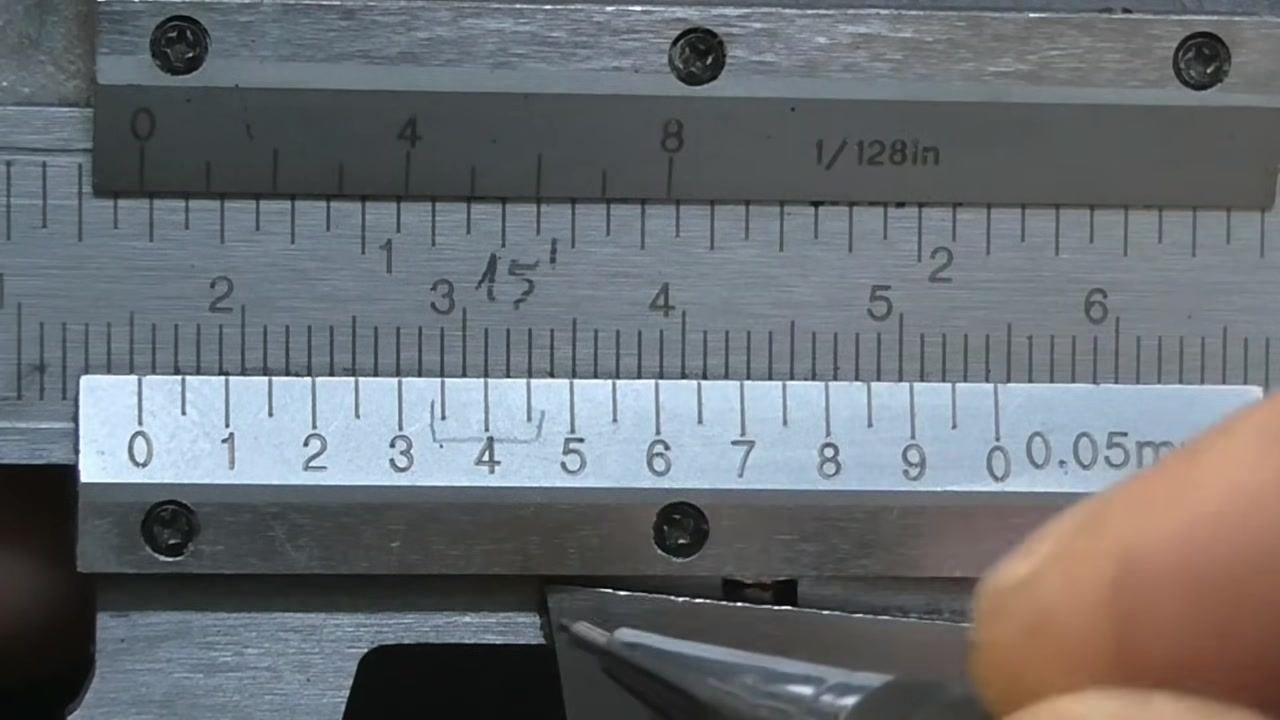
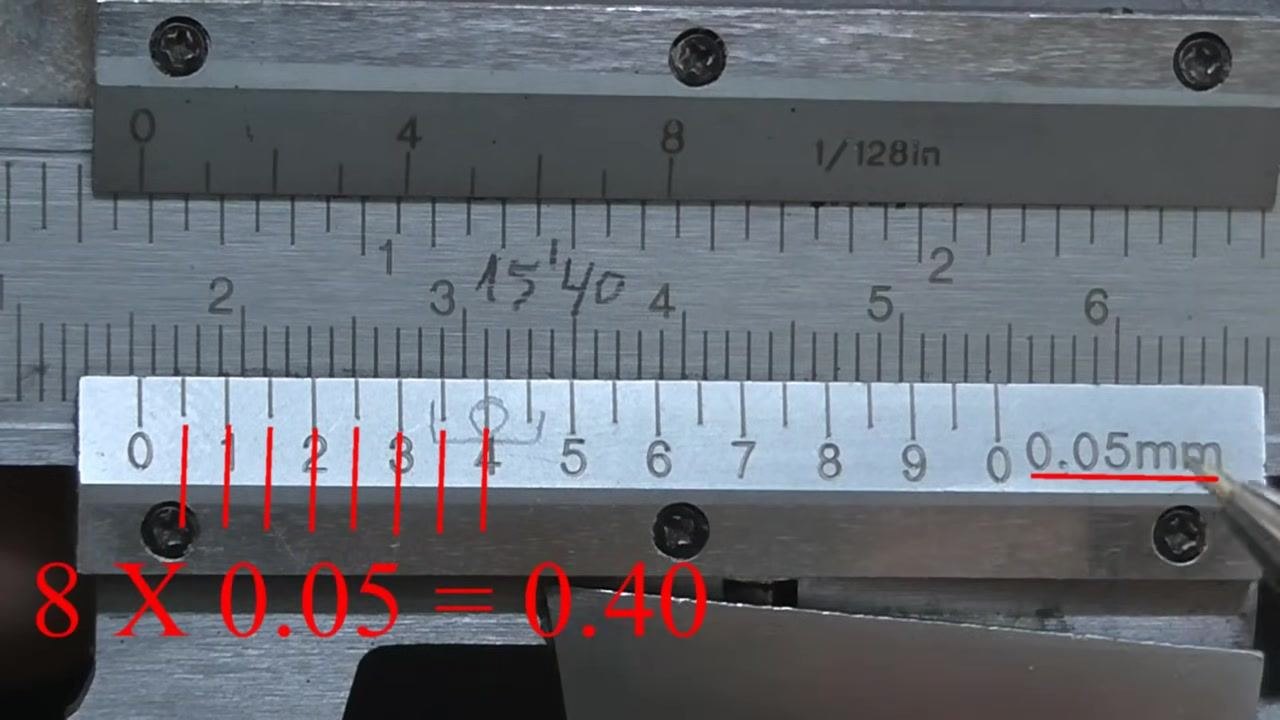
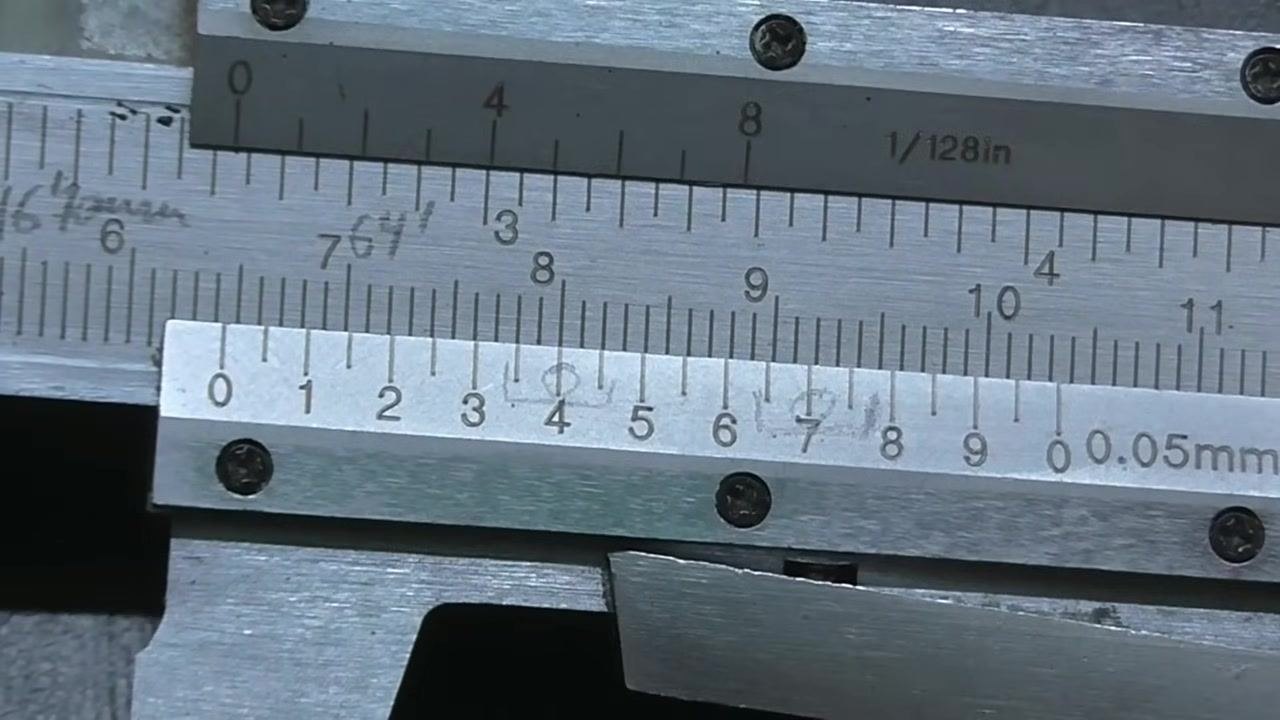
Focus on the middle of the three coinciding lines — this is your vernier reading. Multiply the number of that line by 0.05 mm to get the additional measurement. For example, if the coinciding line is at position 8, then 8 × 0.05 mm = 0.40 mm.
Step 8: Calculate the final measurement
Add the main scale reading to the vernier scale reading to get the total measurement. For example: main scale = 15 mm, vernier scale = 0.40 mm, giving a total of 15.40 mm.
Practice examples
Use the following examples to reinforce the procedure with additional readings.
Step 9: Calculate the vernier scale value
Count the number of lines from the zero on the vernier scale to the line that coincides with a line on the main scale, then multiply that count by 0.05 mm. For example, if 8 lines coincide, the calculation is 8 × 0.05 mm = 0.40 mm.
Step 10: Position the caliper for a new measurement
Move the caliper to a new position to take another reading. Make sure both the vernier and main scales are clearly visible and properly aligned before proceeding.
Step 11: Read the main scale for the new position
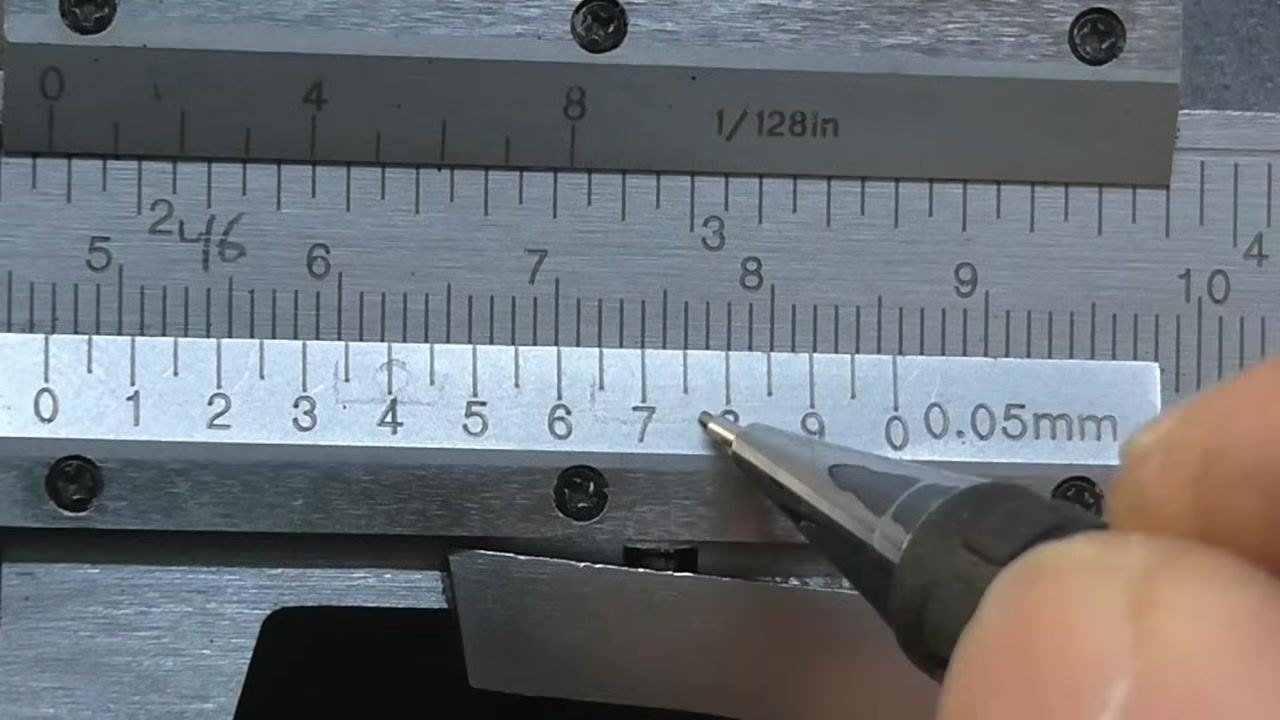
Check where the vernier scale's zero sits relative to the main scale, then read the last whole millimeter marking to its left. For example, if the zero has just passed 46 mm, the main scale reading is 46 mm.
Step 12: Find the vernier line alignment
Look for the three consecutive lines on the vernier scale that best coincide with three lines on the main scale, scanning from left to right to confirm the best alignment.
Step 13: Read the coinciding vernier line
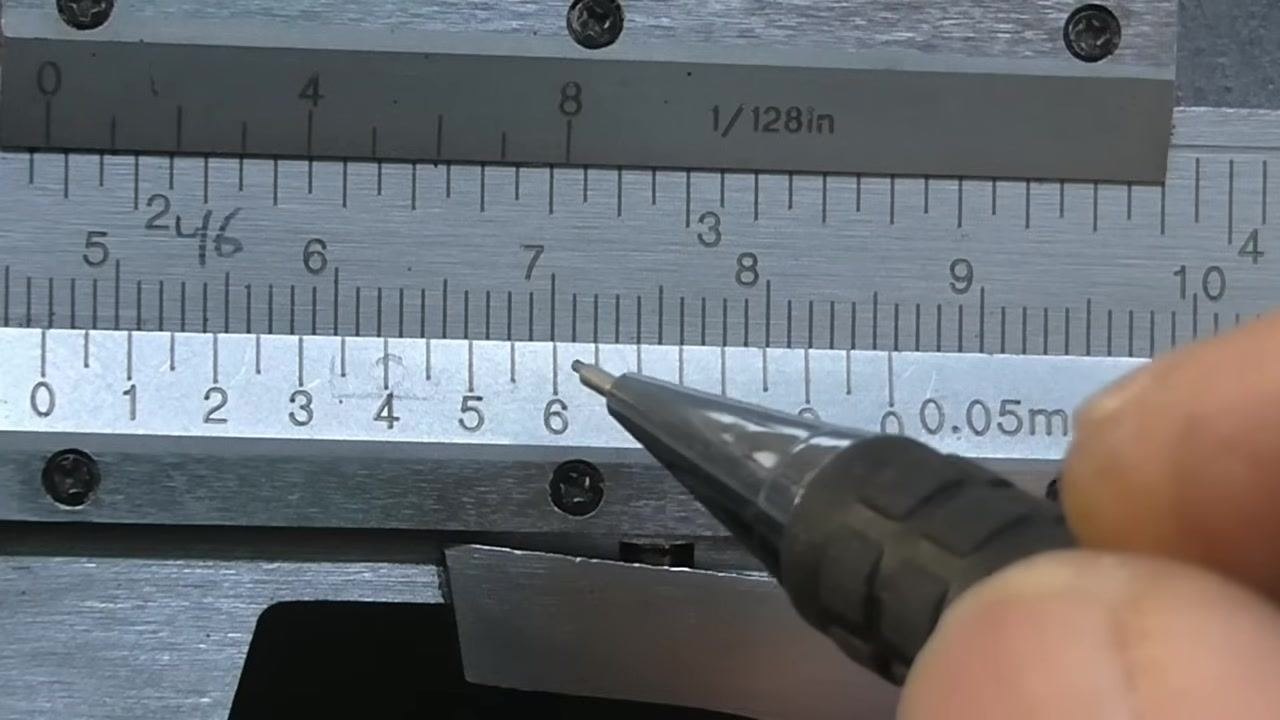
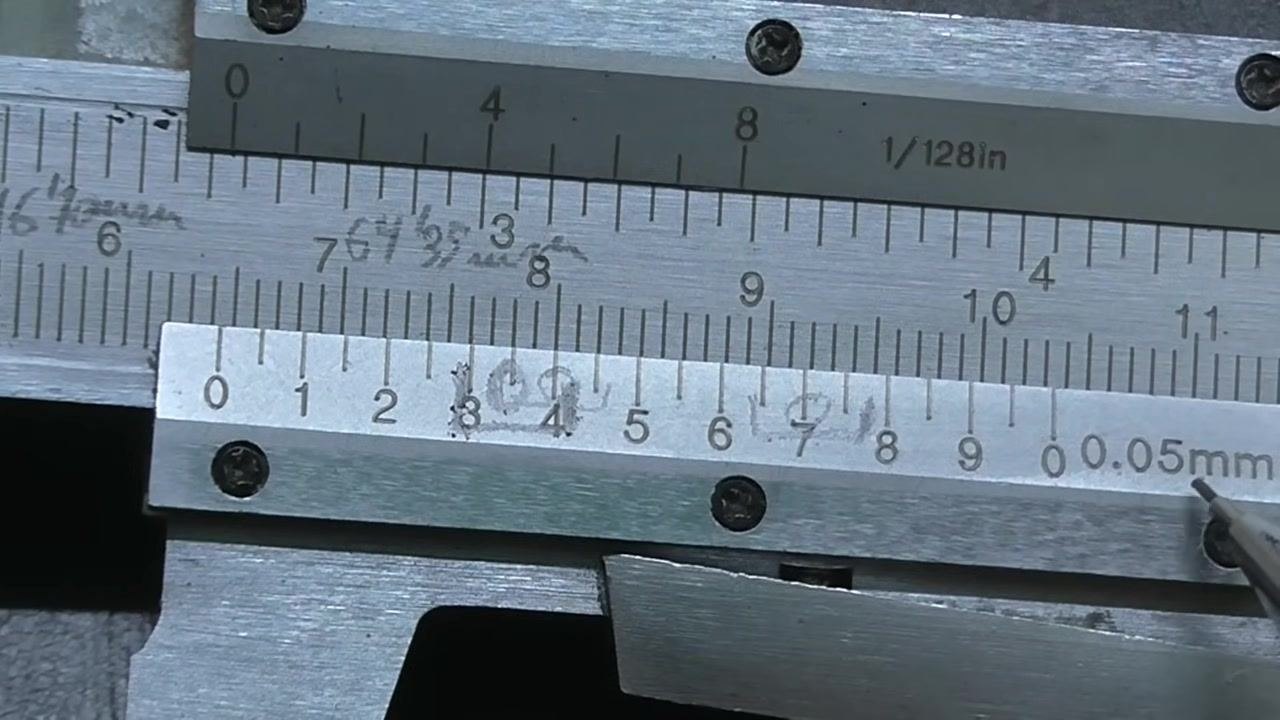
Identify the middle line of the three coinciding lines — this is your vernier reading. For example, if the middle coinciding line is at position 7, then the vernier reading is 7 × 0.05 mm = 0.35 mm.
Step 14: Calculate the total measurement
Add the main scale reading to the vernier scale reading for the final result. For example: main scale = 46 mm, vernier scale = 0.70 mm, giving a total of 46.70 mm.
Step 15: Set up another practice example
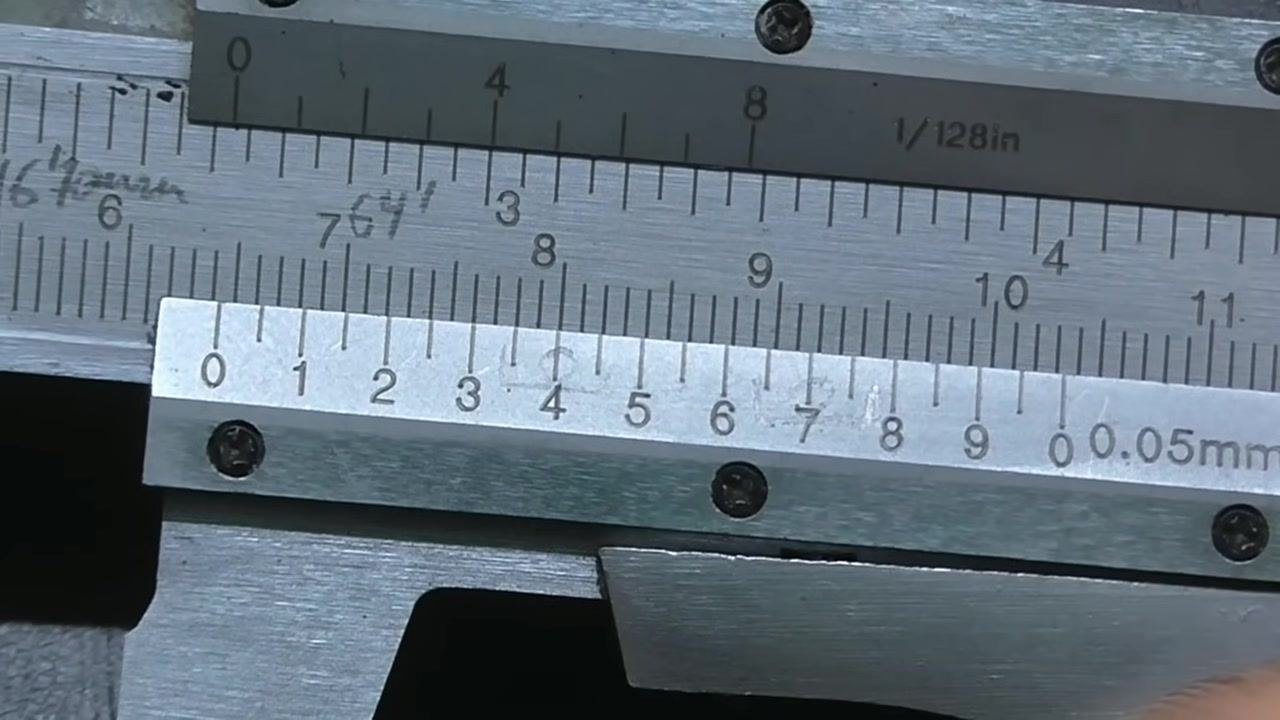
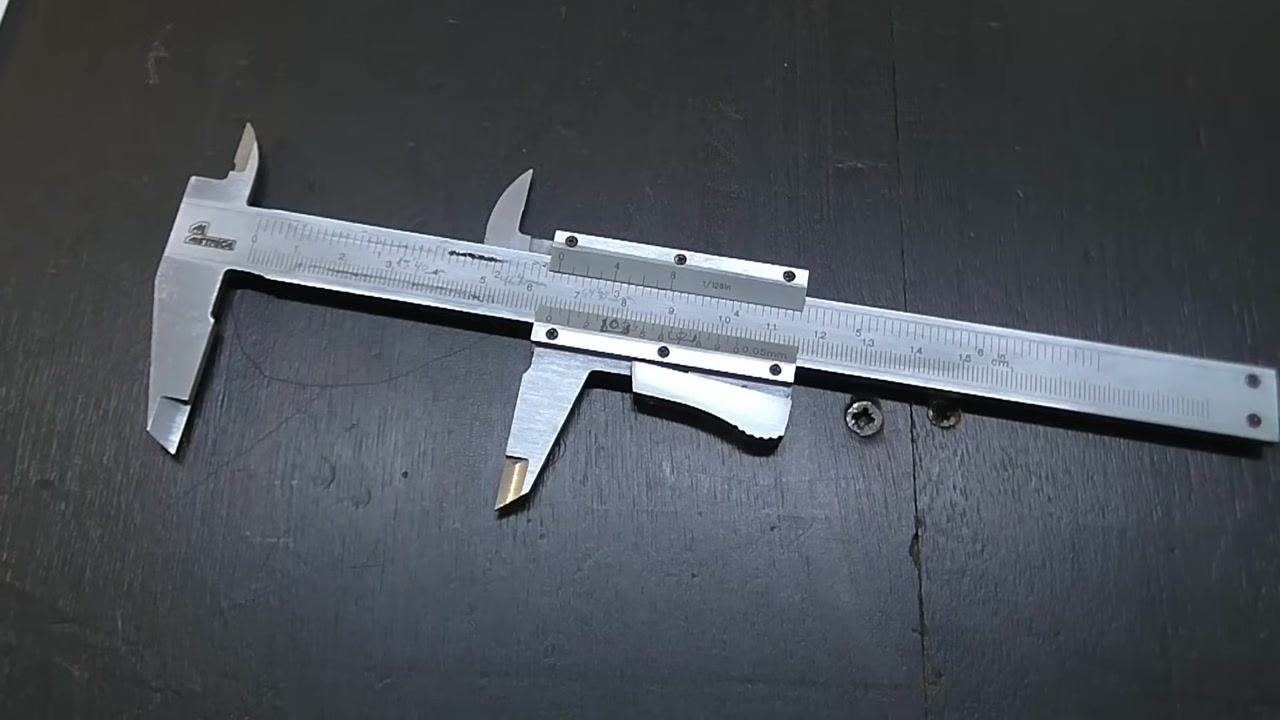
Move the caliper to a new position, such as just past the 64 mm mark on the main scale, and repeat the process: identify the main scale reading, find the coinciding lines, and calculate the vernier value.
Step 16: Search for coinciding lines in the new position
Use a pen or pointer to visually align the vernier and main scale lines, and identify the three best-aligned lines for an accurate reading.
Step 17: Adjust the vernier scale for a further example
Shift the vernier scale slightly to create a new measurement scenario, then prepare to repeat the reading process with the updated alignment.
Step 18: Identify the three coinciding lines
Examine the caliper closely to locate the three lines on the vernier scale that align exactly with three lines on the main scale, and note the middle line for the vernier reading.
Step 19: Select the middle coinciding line
Use a pointer or pen to indicate the middle of the three coinciding lines. In this example, the middle line falls at position 7 on the vernier scale.
Step 20: Confirm the vernier reading
Double-check the alignment by pointing at the 7th line again. This line corresponds to 0.35 mm (7 × 0.05 mm).
Step 21: Calculate and state the final measurement
Add the main scale reading (64 mm) to the vernier scale reading (0.35 mm) to get a total measurement of 64.35 mm.
Step 22: Complete the measurement process
Place the caliper back on the work surface and ensure it is clean and ready for its next use.
Verification and summary
To confirm an accurate reading every time, follow this checklist:
- Read the main scale first to determine the whole-millimeter value.
- Find the three lines on the vernier scale that best align with the main scale.
- Identify the middle of those coinciding lines as your vernier reading.
- Multiply the vernier line number by 0.05 mm.
- Add the main scale reading and the vernier reading together for the final measurement.
By practicing this procedure with multiple examples, such as 15.40 mm, 46.70 mm, and 64.35 mm, you will become proficient at reading a vernier caliper with precision down to 0.05 mm.
Generation details: cost, quality tiers
Docsie billed 2,500 credits ($1.75) to analyze this 5-minute video at standard quality. The rewrite, template fill and Word/PDF exports were included. The same video at each quality tier:
| Quality | Frames sampled | Credits | Approx. cost |
|---|---|---|---|
| Draft | every 16-30 s | 1,250 | $0.88 |
| Standard (this guide) | every 8-15 s | 2,500 | $1.75 |
| Detailed | every 4-7 s | 5,000 | $3.50 |
| Ultra | every 1-3 s | 10,000 | $7.00 |
Credits priced at $0.70 per 1,000; plans include a monthly allowance. Enterprise customers on on-premise or bring-your-own-model deployments run this on their own inference and pay no per-video credits.
Generated by Docsie Video-to-Docs on 2026-09-28 from a 4-minute video. Screenshots are frames from the source video and belong to their creator, Woodworking with DIY tools, whose original is embedded above. If you own this video and want the guide removed or credited differently, contact us and we will act within one business day.