
How to Create a Workflow in HubSpot
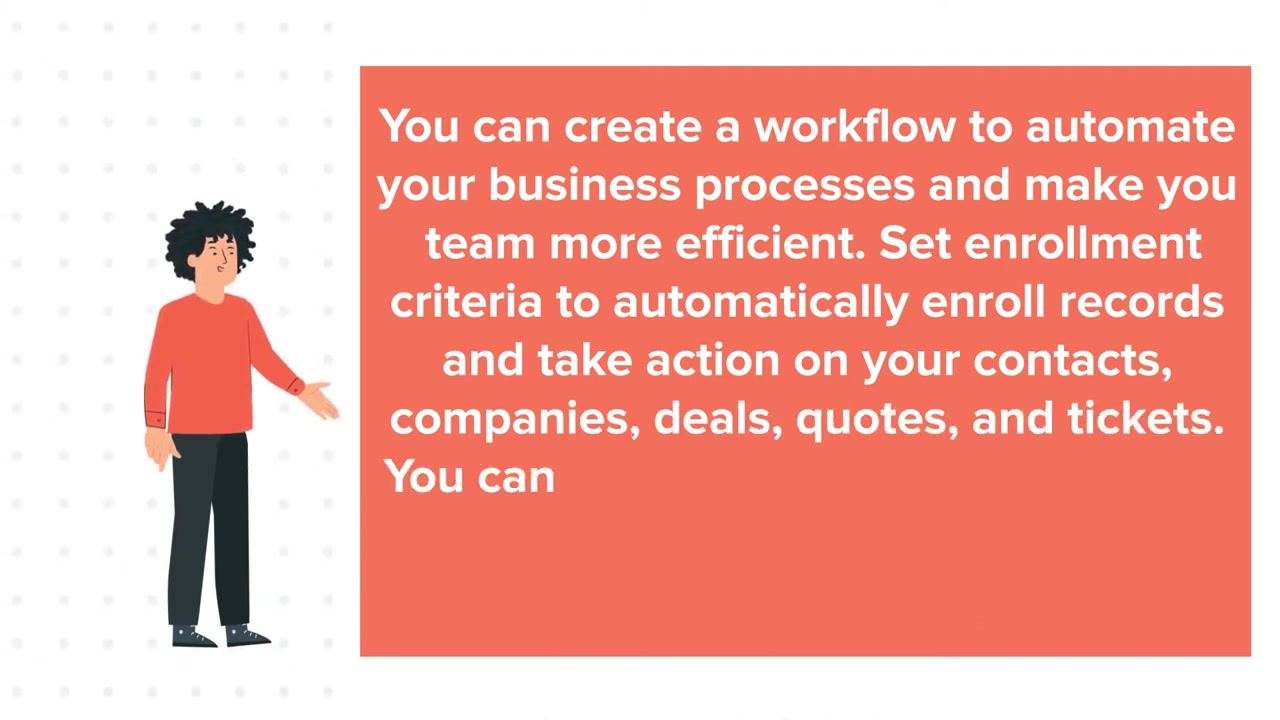
Workflows in HubSpot let you automate business processes, saving your team time and making operations more consistent. You can use workflows to automatically enroll records and trigger actions across contacts, companies, deals, quotes, and tickets — including actions on associated records, such as updating an enrolled contact's associated company. This guide walks you through how to create a workflow in HubSpot, from navigating to the Workflows tool to configuring triggers, actions, and publishing settings.
Video: How to create workflows in HubSpot by HubSpot Tutorials. All credit for the demonstration goes to the creator; watch the original on YouTube. The written guide below was generated from this video by Docsie. Creator? Request a change or removal.
Workflows in HubSpot let you automate business processes, saving your team time and making operations more consistent. You can use workflows to automatically enroll records and trigger actions across contacts, companies, deals, quotes, and tickets — including actions on associated records, such as updating an enrolled contact's associated company. This guide walks you through how to create a workflow in HubSpot, from navigating to the Workflows tool to configuring triggers, actions, and publishing settings.
Prerequisites
- An active HubSpot account with access to the Automation tools.
- Awareness that some workflow object types (such as Tickets, Conversations, Feedback Submissions, Subscriptions, and Payments) may only be available depending on your HubSpot subscription level.
Navigate to the Workflows dashboard
Log in to your HubSpot account and locate the Automation tab in the top menu. Click Automation to open the dropdown menu, then select Workflows to access the workflows dashboard.
Start a new workflow
On the Workflows dashboard, click the orange Create workflow button in the upper right corner. You'll see two options: From scratch, which builds a new workflow from the beginning, or From template, which uses a pre-built template. Click From scratch to proceed with a custom workflow.
Select the workflow object and type
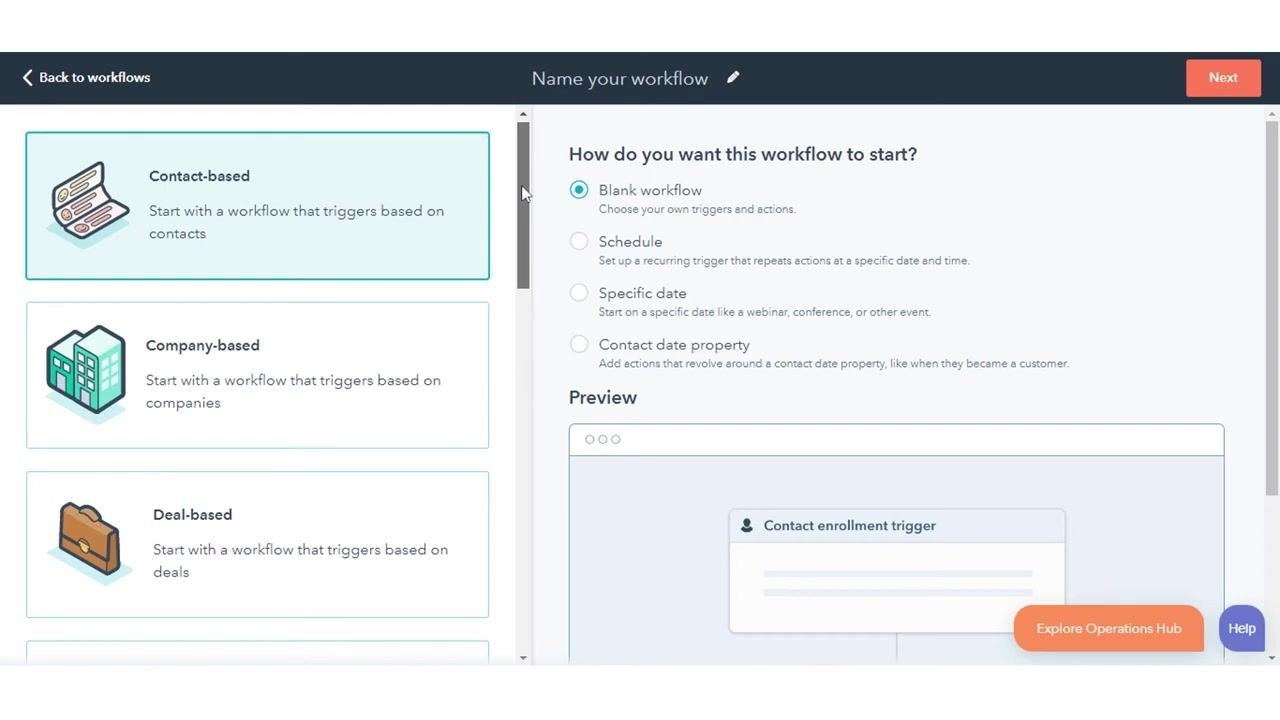
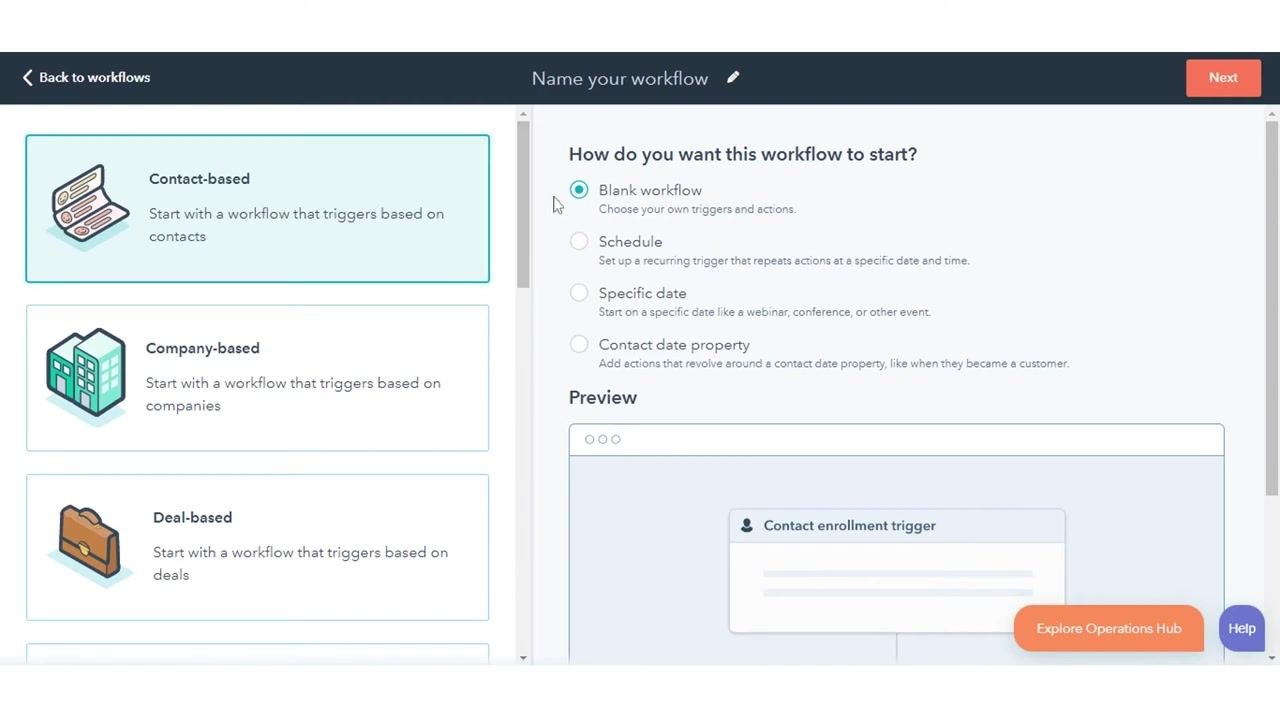
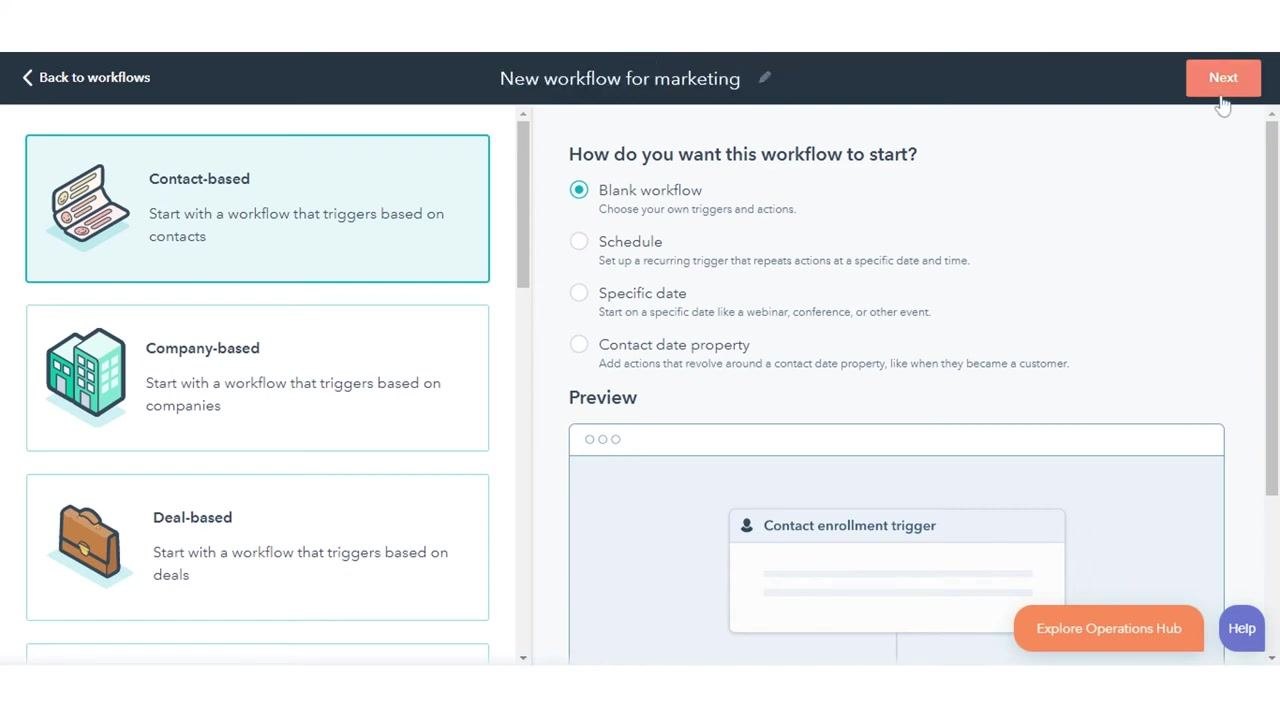
In the left panel, choose the object your workflow will act on. Available options typically include:
- Contact-based: Triggers based on contacts.
- Company-based: Triggers based on companies.
- Deal-based: Triggers based on deals.
- Additional object types, such as Tickets, Conversations, Feedback Submissions, Subscriptions, and Payments, depending on your subscription.
In the right panel, under How do you want this workflow to start?, select your workflow type:
- Blank workflow: Choose your own triggers and actions.
- Schedule: Set up a recurring trigger that repeats actions at a specific date and time.
- Specific date: Start on a specific date, such as for a webinar or event.
- Contact date property: Add actions based on a contact date property, like when the contact became a customer.
Click Next to proceed.
Name your blank workflow
With Blank workflow selected, click the pencil icon next to Name your workflow at the top of the screen and enter a name (for example, "New workflow for marketing"). Click Next in the upper right corner to continue.
After clicking Next, you'll be taken to the Workflow Editor. The editor displays a central box labeled Contact enrollment trigger with a Set up triggers button, and a top menu with tabs for Actions, Settings, Goals, and Changes.
Set up enrollment triggers
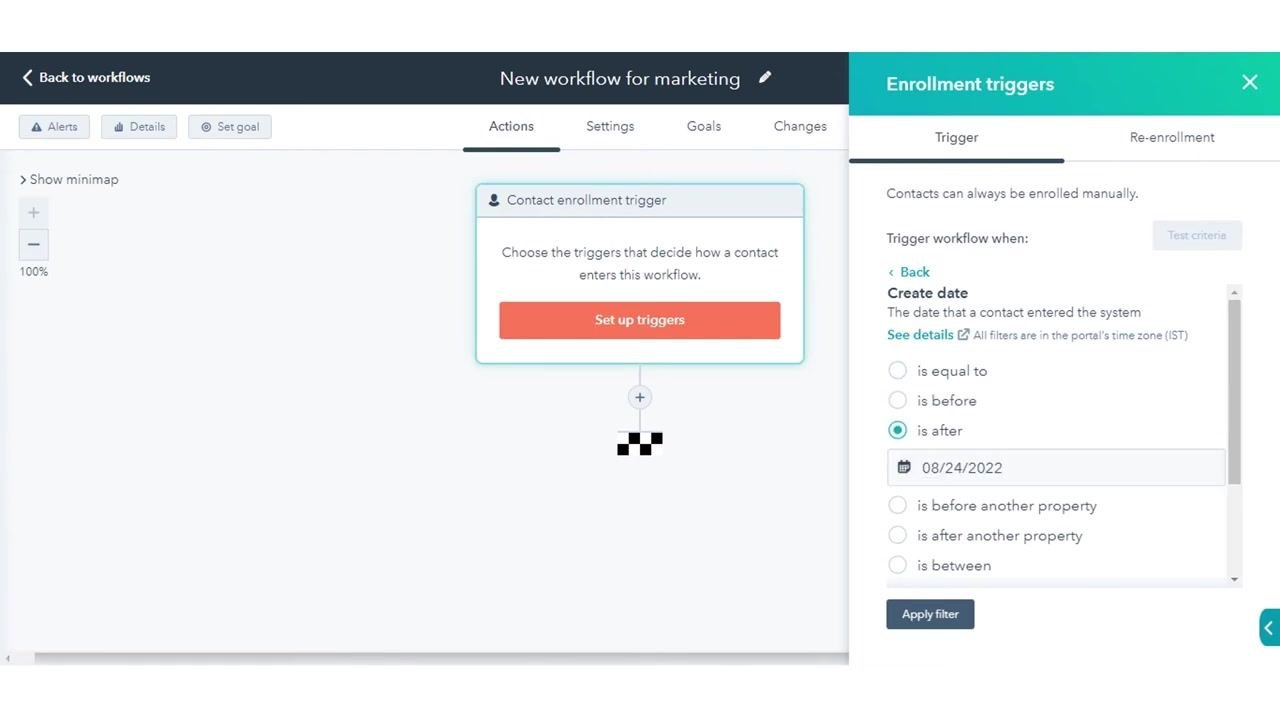
Click Set up triggers in the Contact enrollment trigger box. In the right panel, select a filter type for your enrollment trigger (for example, "Create date"), choose a trigger condition (for example, "is after"), and enter the specific value (for example, "08/24/2022"). Click Apply filter to confirm your trigger.
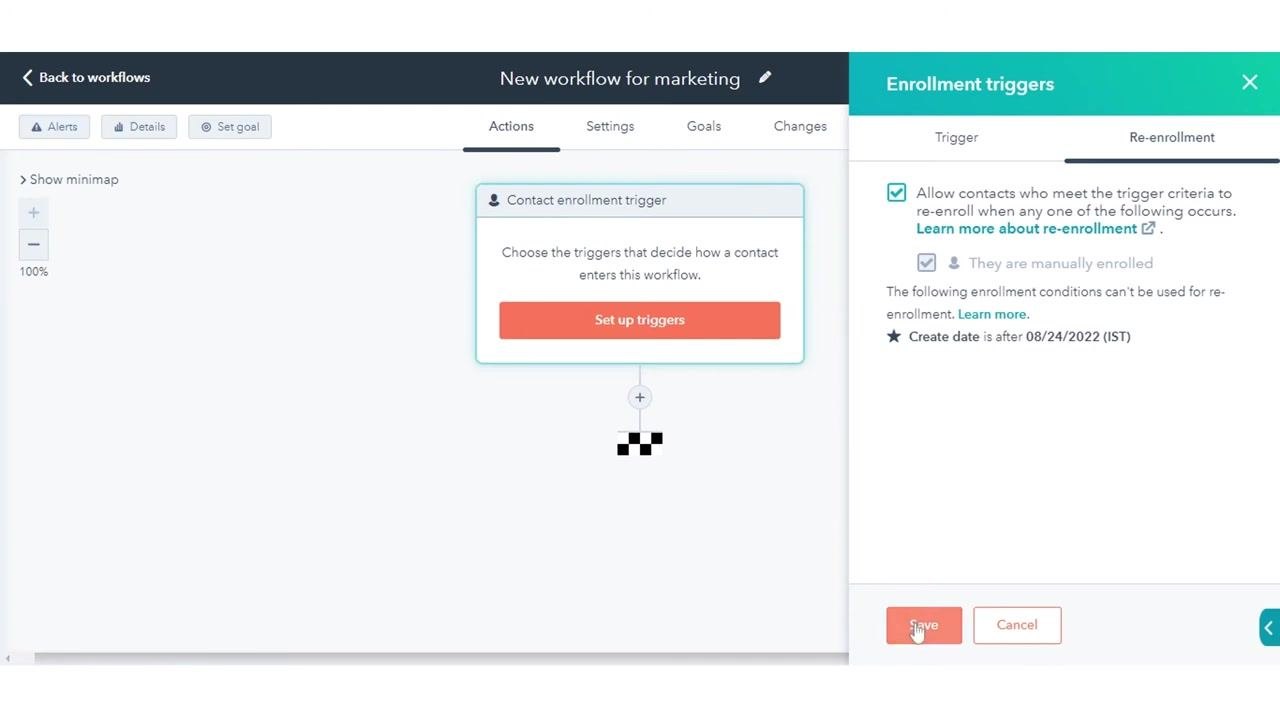
Enable re-enrollment (optional)
In the right panel, click the Re-enrollment tab. Toggle the switch to allow contacts who meet the trigger criteria to re-enroll when any of the selected conditions occur, then select the triggers you want to use for re-enrollment (for example, "Create date is after 08/24/2022"). Click Save to apply your enrollment and re-enrollment settings.
Add workflow actions
Click the plus (+) icon below the enrollment trigger to add your first action. In the right panel, select an action from the available options (for example, "Delay until a day or time") and configure its details, such as choosing "Tuesday" and "Wednesday" as days of the week. Click Save to add the action to your workflow. Repeat this process by clicking the plus icon again to add any additional actions you need.
Use the minimap for larger workflows
As your workflow grows, use the Show minimap option on the left side of the editor. The minimap gives you a quick overview of your workflow's architecture and lets you navigate faster between actions and branches.
Configure general settings
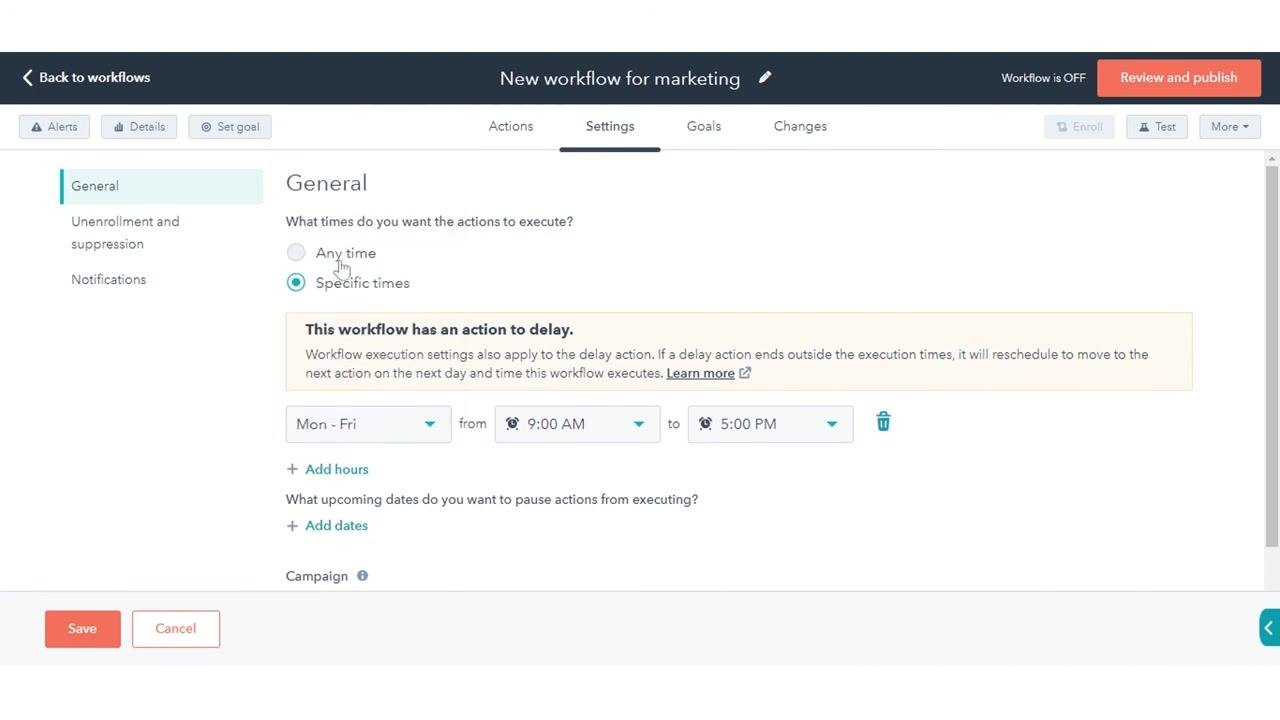
Click the Settings tab at the top of the workflow editor. In the General section, specify when workflow actions should execute:
- Select Any time to allow actions to run at any time.
- Select Specific times to restrict actions to certain days and hours (for example, Mon–Fri, 9:00 AM to 5:00 PM).
- Click + Add hours to define additional time windows if needed.
- Click + Add dates to pause actions on specific dates.
Use the Campaign dropdown to associate a campaign with the workflow.
Set unenrollment and suppression criteria
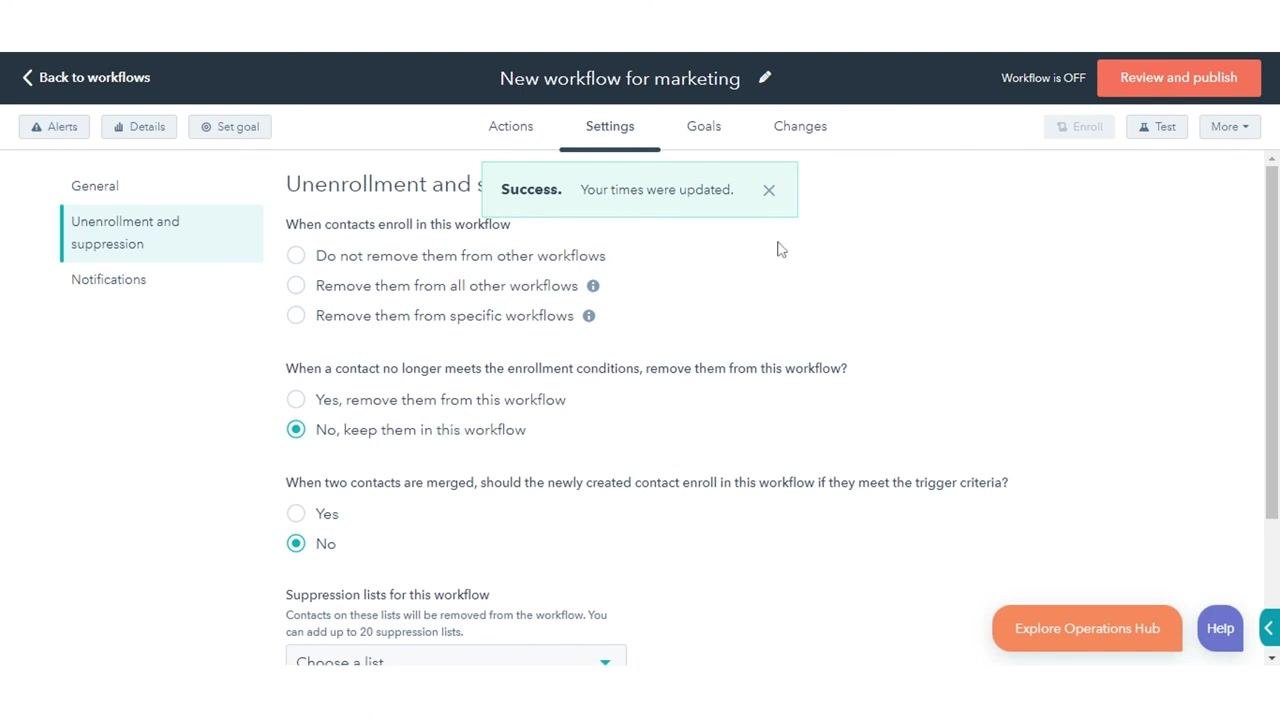
Click the Unenrollment and suppression tab in the left sidebar. Choose how to handle contacts when they enroll in this workflow:
- Do not remove them from other workflows
- Remove them from all other workflows
- Remove them from specific workflows
Decide what happens if a contact no longer meets enrollment conditions by selecting Yes, remove them from this workflow or No, keep them in this workflow. Specify behavior for merged contacts, and add suppression lists (up to 20) to automatically exclude certain contacts from the workflow.
Set up workflow notifications
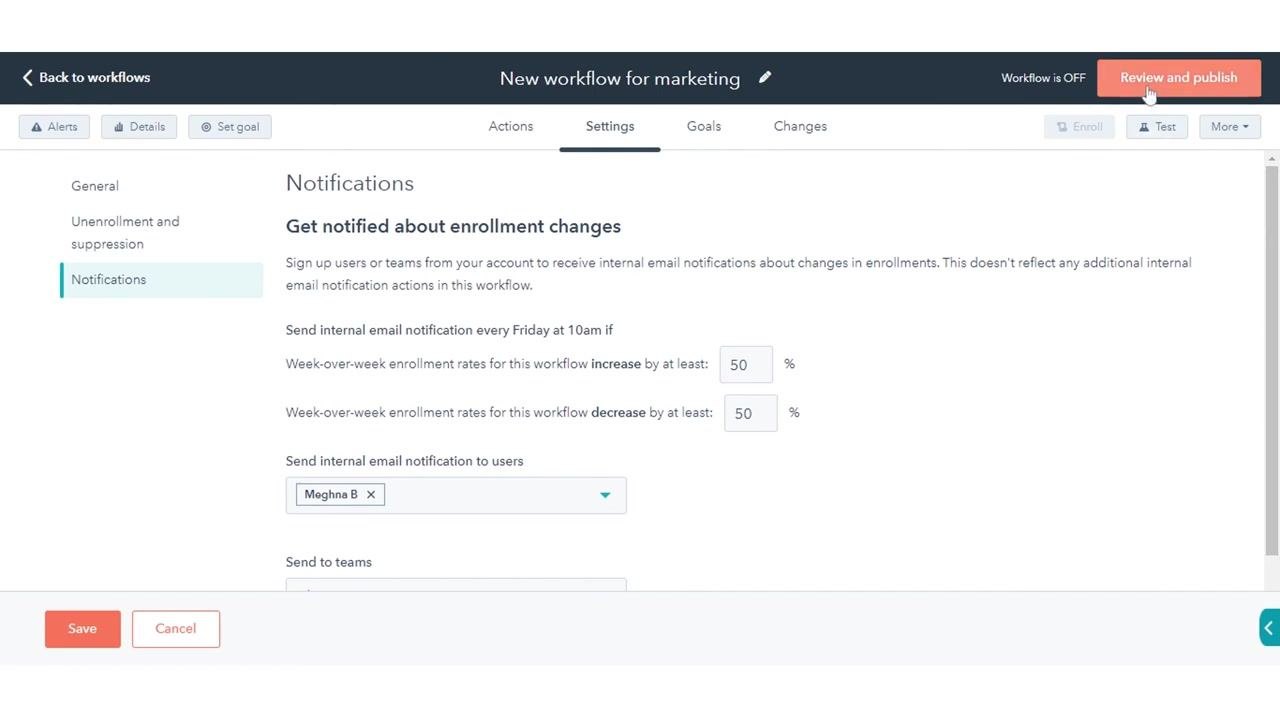
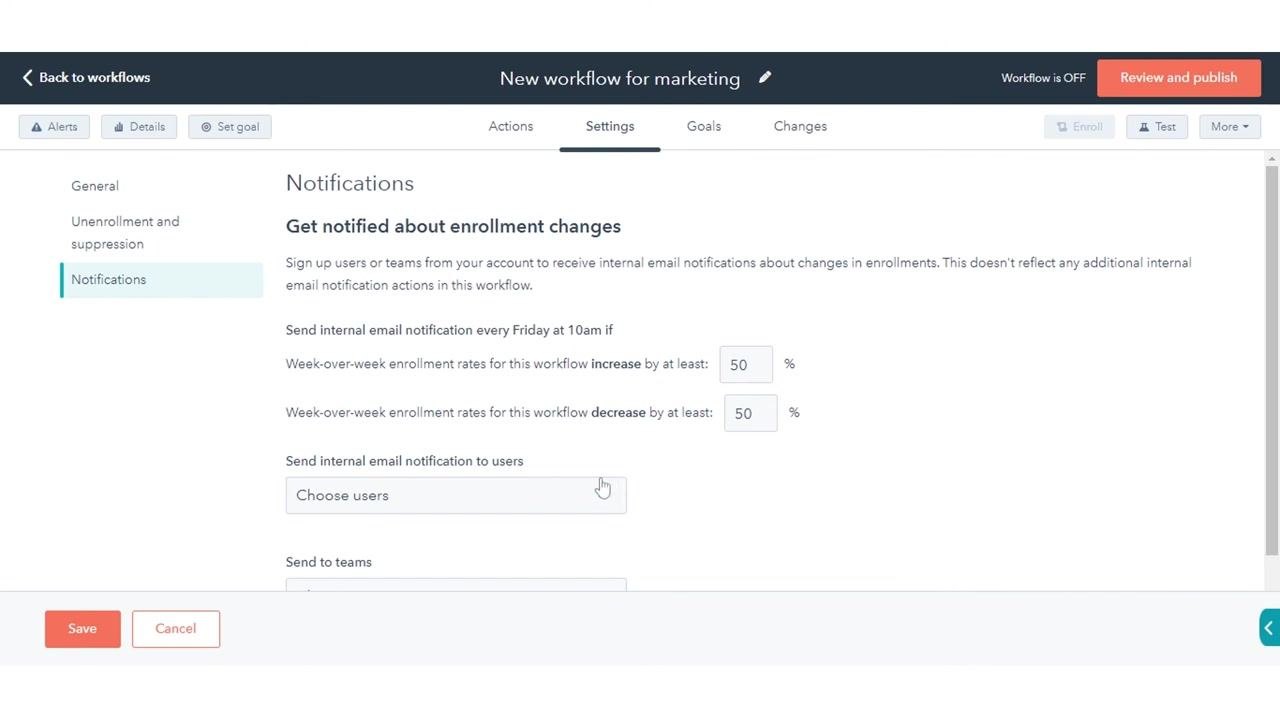
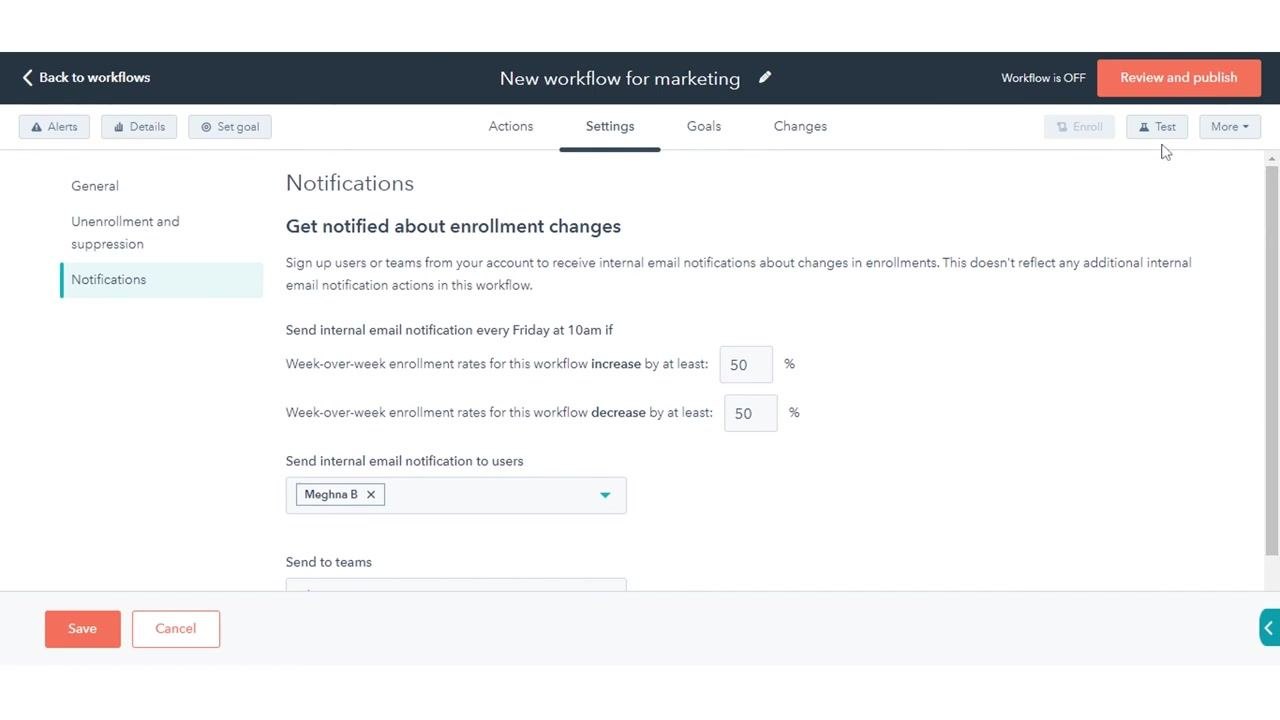
Click the Notifications tab in the left sidebar. Enable notifications to alert users or teams about changes in workflow enrollment rates. Configure the following:
- Send an internal email notification every Friday at 10am if week-over-week enrollment rates increase by at least 50%.
- Send an internal email notification every Friday at 10am if week-over-week enrollment rates decrease by at least 50%.
- Select the users and/or teams who should receive these notifications.
After configuring each settings section, click Save at the bottom left to apply your changes.
Turn on and publish the workflow
Once all settings are configured, turn on the workflow to begin automation. Click the orange Review and publish button in the upper right corner to finalize and activate your workflow.
Summary
You've now learned how to create a workflow in HubSpot from start to finish: navigating to the Workflows dashboard, choosing an object and workflow type, naming your workflow, setting up enrollment and re-enrollment triggers, adding actions, and configuring general settings, unenrollment and suppression criteria, and notifications. Once published, your workflow will run automatically according to the triggers and actions you defined, helping you automate your business processes with consistency.
Generation details: cost, quality tiers
Docsie billed 2,500 credits ($1.75) to analyze this 5-minute video at standard quality. The rewrite, template fill and Word/PDF exports were included. The same video at each quality tier:
| Quality | Frames sampled | Credits | Approx. cost |
|---|---|---|---|
| Draft | every 16-30 s | 1,250 | $0.88 |
| Standard (this guide) | every 8-15 s | 2,500 | $1.75 |
| Detailed | every 4-7 s | 5,000 | $3.50 |
| Ultra | every 1-3 s | 10,000 | $7.00 |
Credits priced at $0.70 per 1,000; plans include a monthly allowance. Enterprise customers on on-premise or bring-your-own-model deployments run this on their own inference and pay no per-video credits.
Generated by Docsie Video-to-Docs on 2026-10-01 from a 4-minute video. Screenshots are frames from the source video and belong to their creator, HubSpot Tutorials, whose original is embedded above. If you own this video and want the guide removed or credited differently, contact us and we will act within one business day.