
How to Create a Form in HubSpot
HubSpot's Forms tool lets you build lead-capture forms, customize their fields and appearance, and connect them to automated follow-up emails. This guide walks you through how to create a form in HubSpot, from selecting a template to publishing a fully branded form with built-in automation.
Video: Create HubSpot Forms For Your Website (For Free) by HubSpot . All credit for the demonstration goes to the creator; watch the original on YouTube. The written guide below was generated from this video by Docsie. Creator? Request a change or removal.
HubSpot's Forms tool lets you build lead-capture forms, customize their fields and appearance, and connect them to automated follow-up emails. This guide walks you through how to create a form in HubSpot, from selecting a template to publishing a fully branded form with built-in automation.
Prerequisites
- An active HubSpot account (Free or Paid). Navigation may differ slightly between plans, but the Forms option is always available in the top navigation.
Access the forms tool in HubSpot
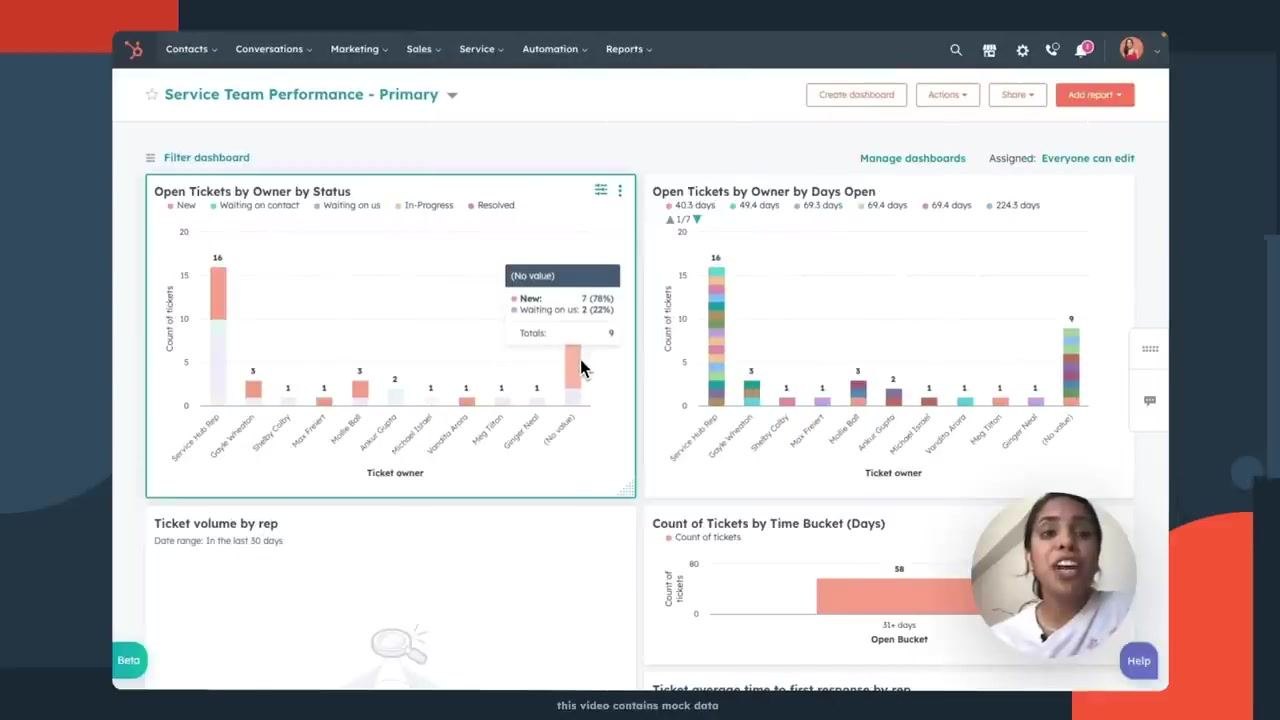
Log in to your HubSpot account and go to the top menu. Click Marketing, then select Lead Capture from the dropdown, and click Forms.
Open the forms management page
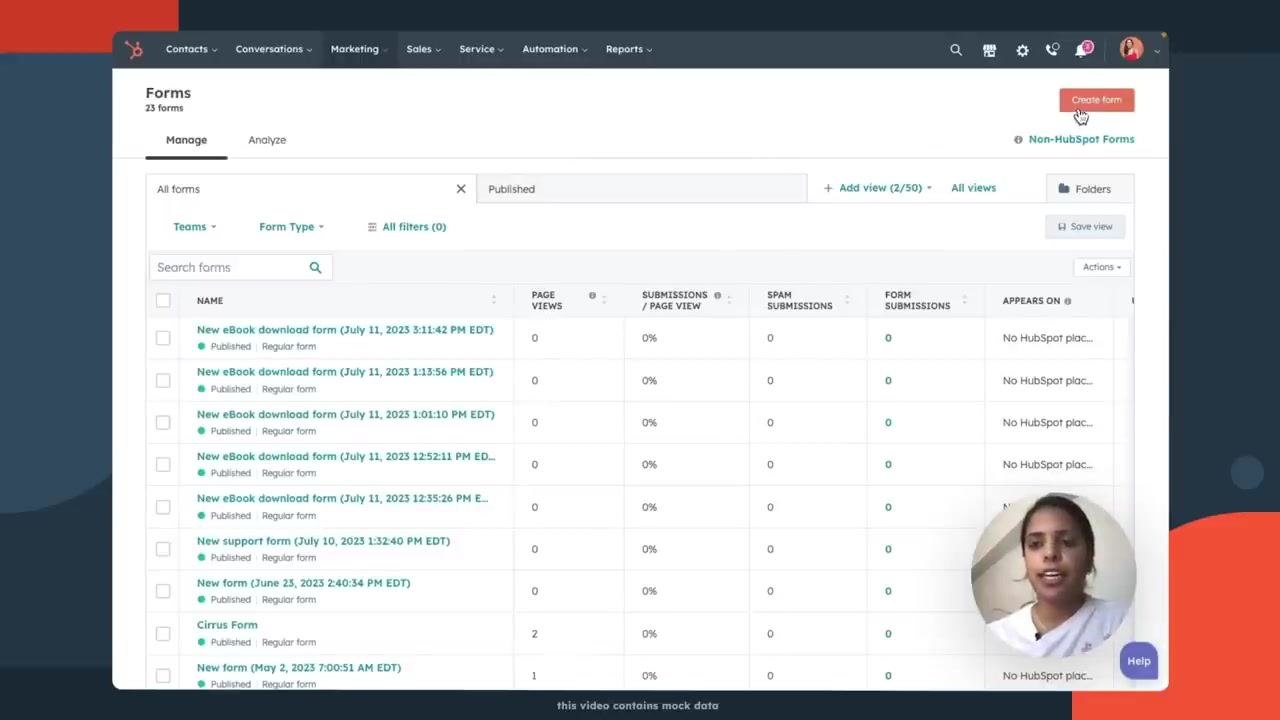
On the Forms page, you can review your list of existing forms. To start a new one, click the orange Create form button in the upper right corner.
Select a form template
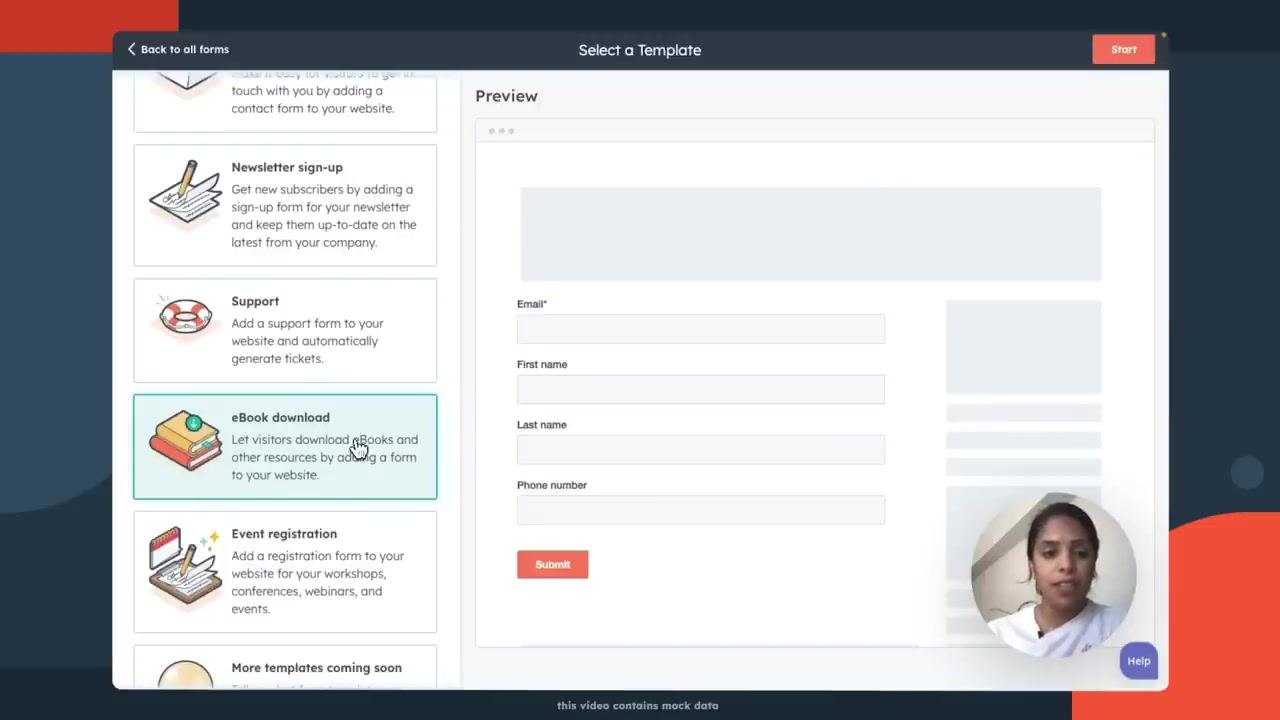
On the template selection screen, choose the type of form you want to build. For example, to create an ebook download form, select the eBook download template from the list on the left, then click Start in the upper right corner.
Customize the form fields
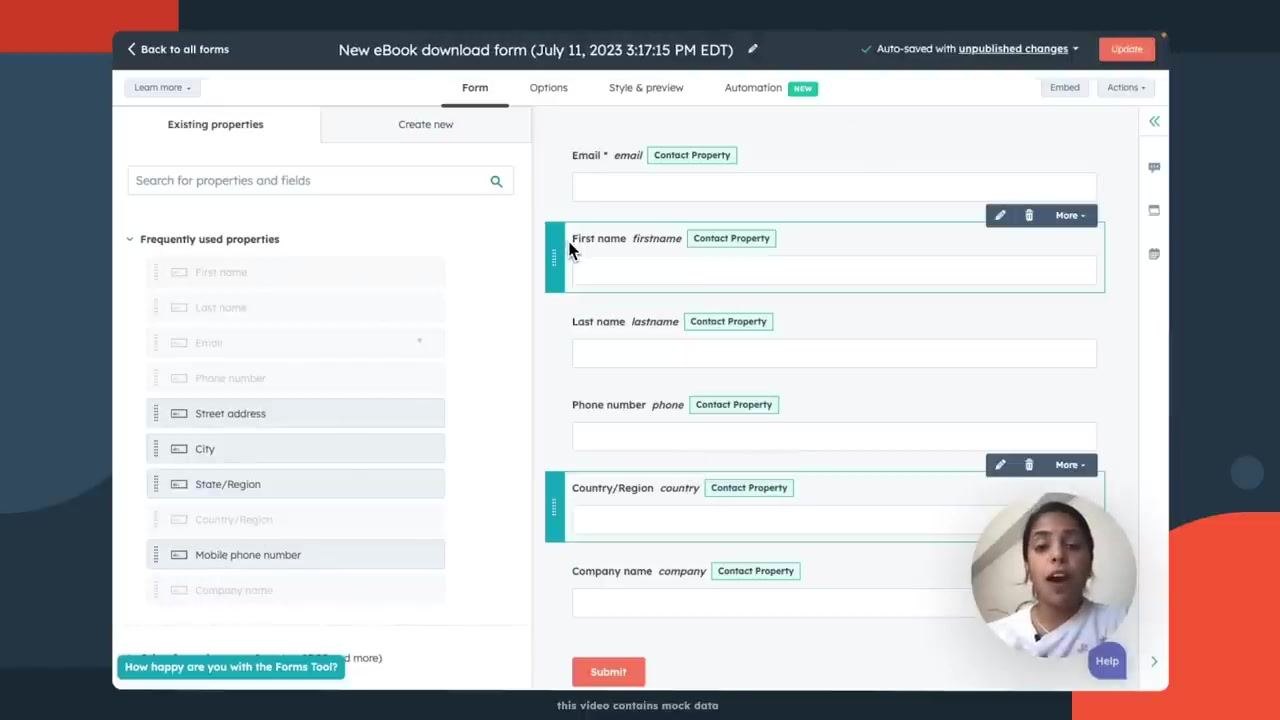
The form editor opens with your selected template already loaded. By default, the eBook download template includes fields for Email, First name, Last name, and Phone number.
To collect more information, add fields such as Company name and Country/Region from the list of frequently used properties on the left, and drag them into your form layout.
Configure thank-you message and lifecycle stage options
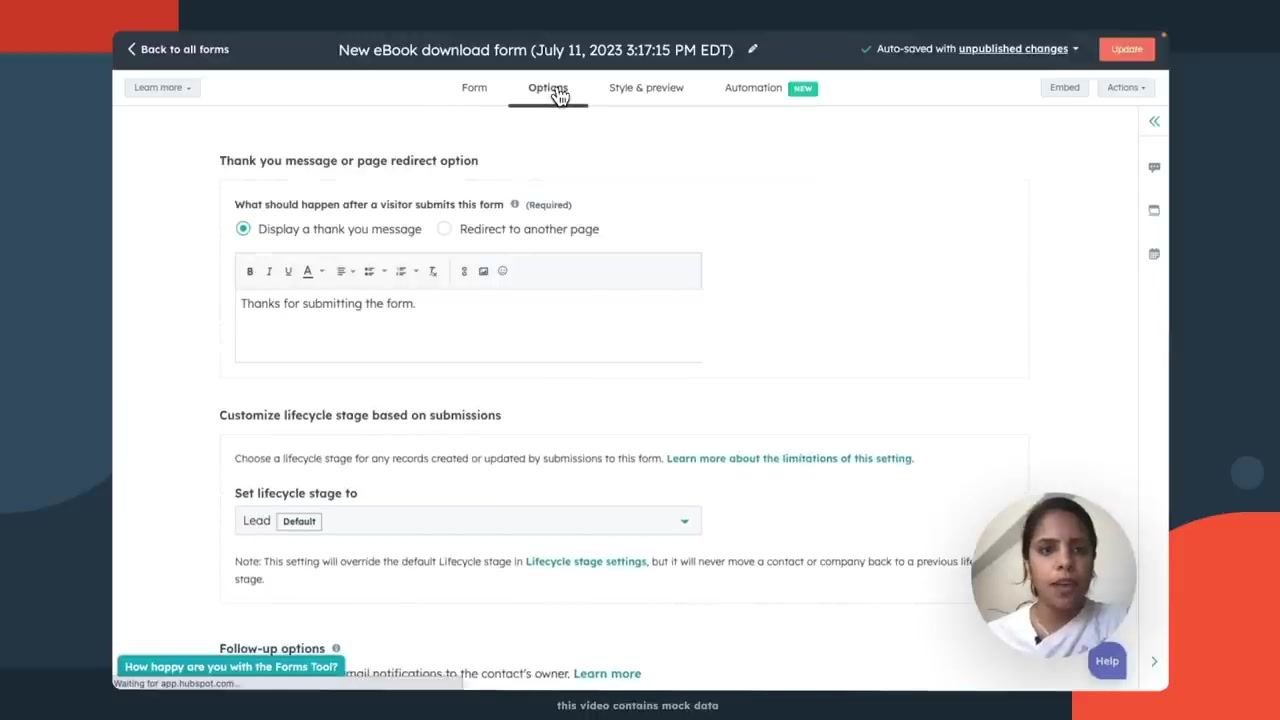
Click the Options tab at the top of the form editor. Under Thank you message or page redirect option, choose what visitors see after they submit the form:
- Select Display a thank you message.
- Enter a custom message, such as "Thanks for submitting the form."
- Add a download link for your ebook, such as "www.ebook.com".
Under Customize lifecycle stage based on submissions, set the lifecycle stage for new contacts — Lead is the default, but you can choose another stage if needed.
Ensure new contacts are created for every submission
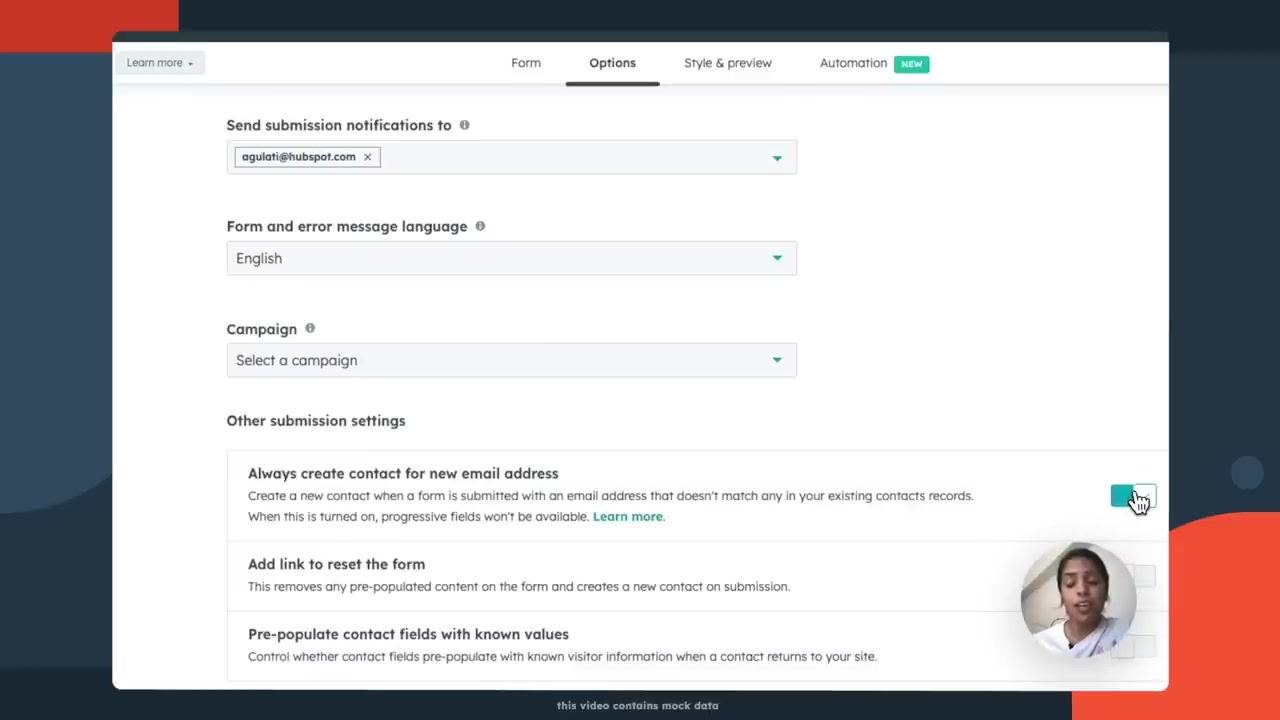
Still in the Options tab, scroll to the Other submission settings section. Toggle on Always create contact for new email address to ensure every new email submitted through the form is automatically added as a contact in your CRM. Confirm the toggle shows as active (blue/checked).
Customize the form's visual style
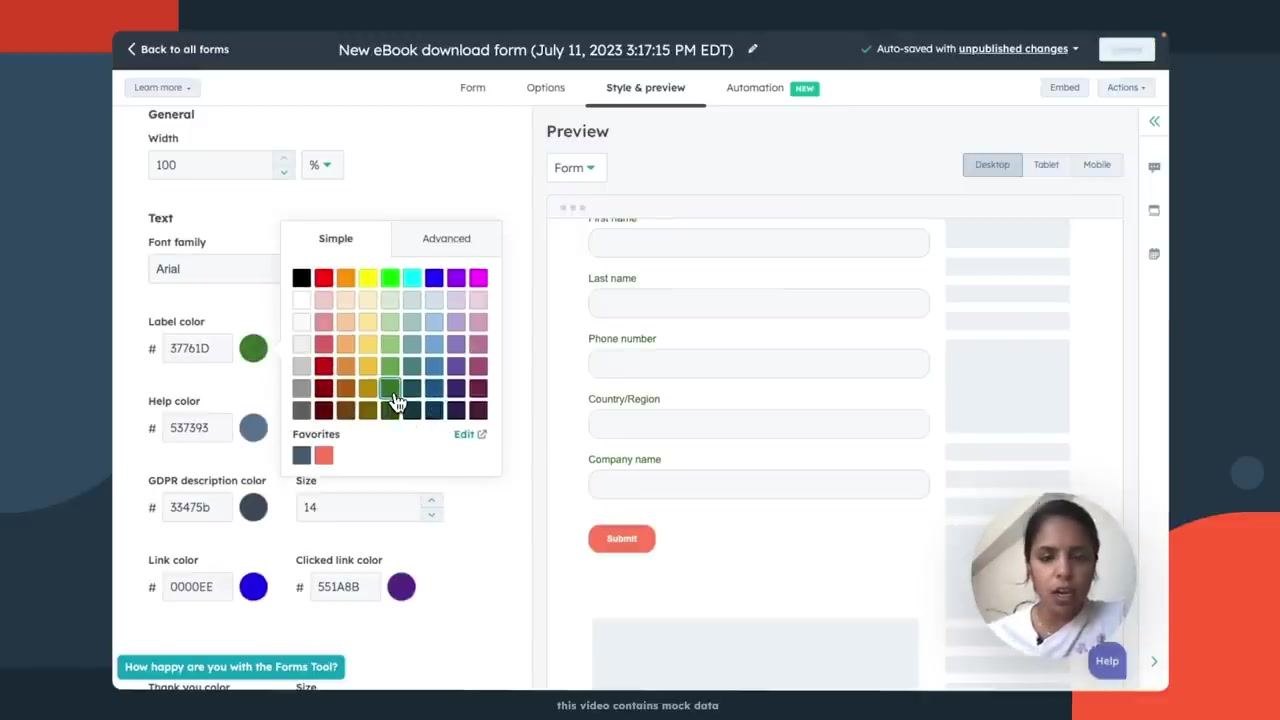
Go to the Style & preview tab at the top of the form editor. Adjust the form's appearance to match your website branding by clicking the color picker next to Label color and selecting a color, such as a green shade (e.g., #37761D). Use the preview on the right side of the screen to check how the form matches your website's look.
Change the submit button color
In the same Style & preview tab, locate the button color settings. Change the submit button color from the default HubSpot orange to another color, such as red, and confirm the update in the form preview.
Set up automation to send a follow-up email
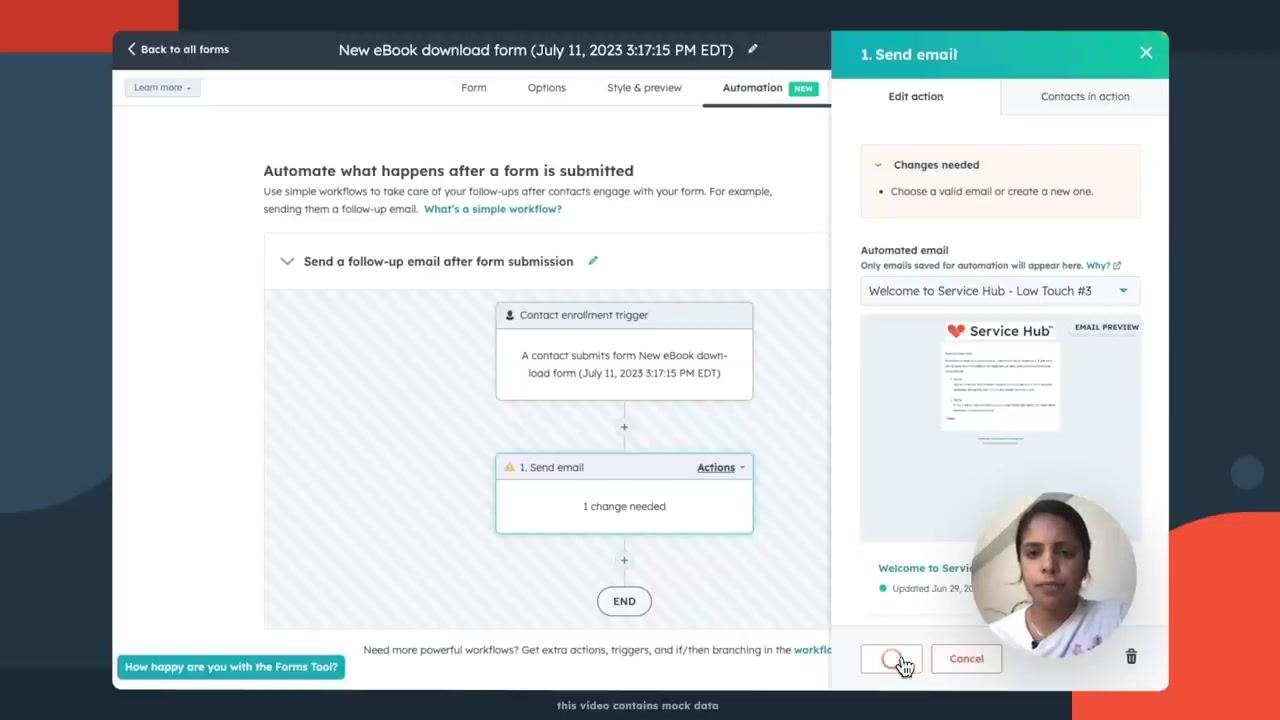
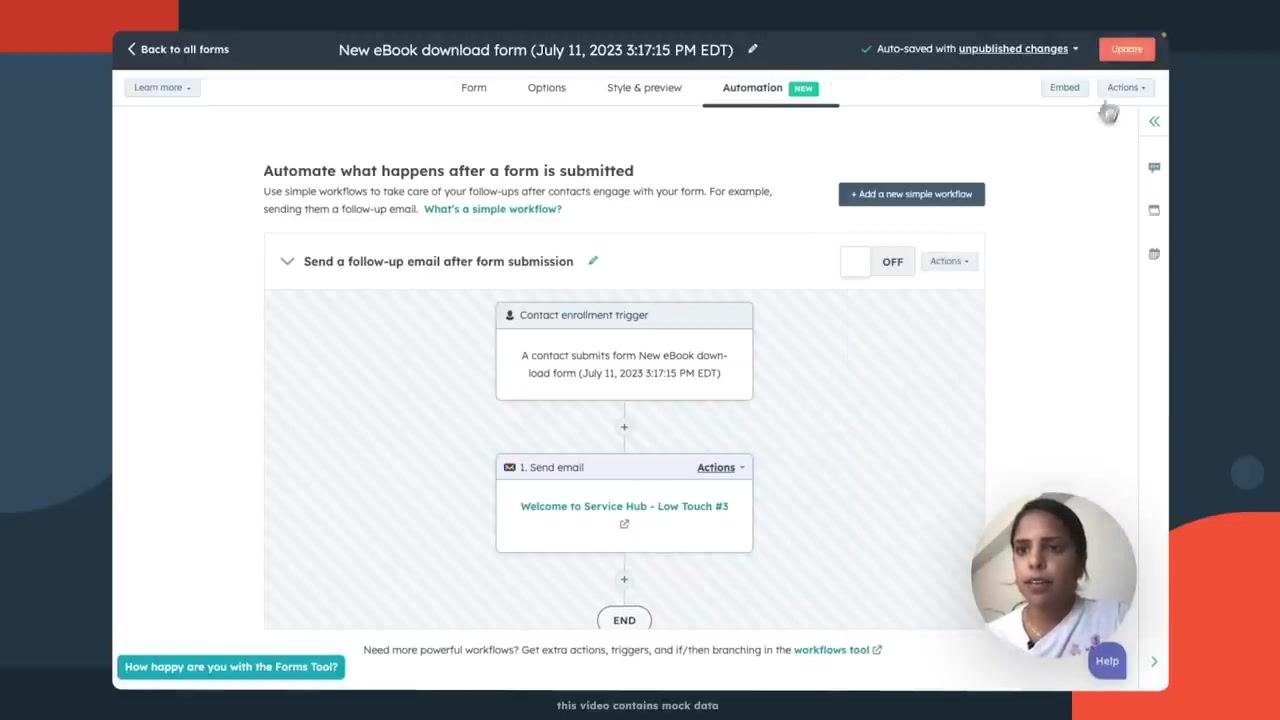
Click the Automation tab at the top of the form editor. Under Automate what happens after a form is submitted, select Send an email after form submission, then click Create this workflow to begin setting up the automation.
Configure the automated follow-up email
In the workflow editor, confirm the trigger is set to "A contact submits form New eBook download form." Under the Send email action, select the email template you want to send (for example, "Welcome to Service Hub - Low Touch #3"), and make sure it includes the download link for your ebook. Review any required changes, such as selecting a valid email template, then save the workflow.
Publish and update the form
Click the Update button in the upper right corner to save all changes and publish both your form and its automation.
Verify your form and automation
Confirm that your setup works as intended:
- Every form submission creates a new contact in your CRM.
- Each contact receives a follow-up email containing the ebook link after submitting the form.
What's next
With these steps complete, you have a fully customized, branded HubSpot form that automatically adds new contacts to your CRM and sends them a follow-up email with your ebook link. This streamlines your lead capture and nurturing process from a single form.
Generation details: cost, quality tiers
Docsie billed 2,000 credits ($1.40) to analyze this 4-minute video at standard quality. The rewrite, template fill and Word/PDF exports were included. The same video at each quality tier:
| Quality | Frames sampled | Credits | Approx. cost |
|---|---|---|---|
| Draft | every 16-30 s | 1,000 | $0.70 |
| Standard (this guide) | every 8-15 s | 2,000 | $1.40 |
| Detailed | every 4-7 s | 4,000 | $2.80 |
| Ultra | every 1-3 s | 8,000 | $5.60 |
Credits priced at $0.70 per 1,000; plans include a monthly allowance. Enterprise customers on on-premise or bring-your-own-model deployments run this on their own inference and pay no per-video credits.
Generated by Docsie Video-to-Docs on 2026-10-01 from a 3-minute video. Screenshots are frames from the source video and belong to their creator, HubSpot , whose original is embedded above. If you own this video and want the guide removed or credited differently, contact us and we will act within one business day.