
How to Create a Patient List in Epic
Creating a personal patient list in Epic CPRS allows you to organize and quickly access the patients you work with most often. This guide walks you through how to create a patient list in Epic CPRS, add patients to it, control who can see it, and update it as your needs change.
Video: 36 Create a Personal Patient List - Tools--Options by MattHaneyMD. All credit for the demonstration goes to the creator; watch the original on YouTube. The written guide below was generated from this video by Docsie. Creator? Request a change or removal.
Creating a personal patient list in Epic CPRS allows you to organize and quickly access the patients you work with most often. This guide walks you through how to create a patient list in Epic CPRS, add patients to it, control who can see it, and update it as your needs change.
Prerequisites
- Access to the CPRS interface with permissions to create personal lists.
Open the Personal Lists window
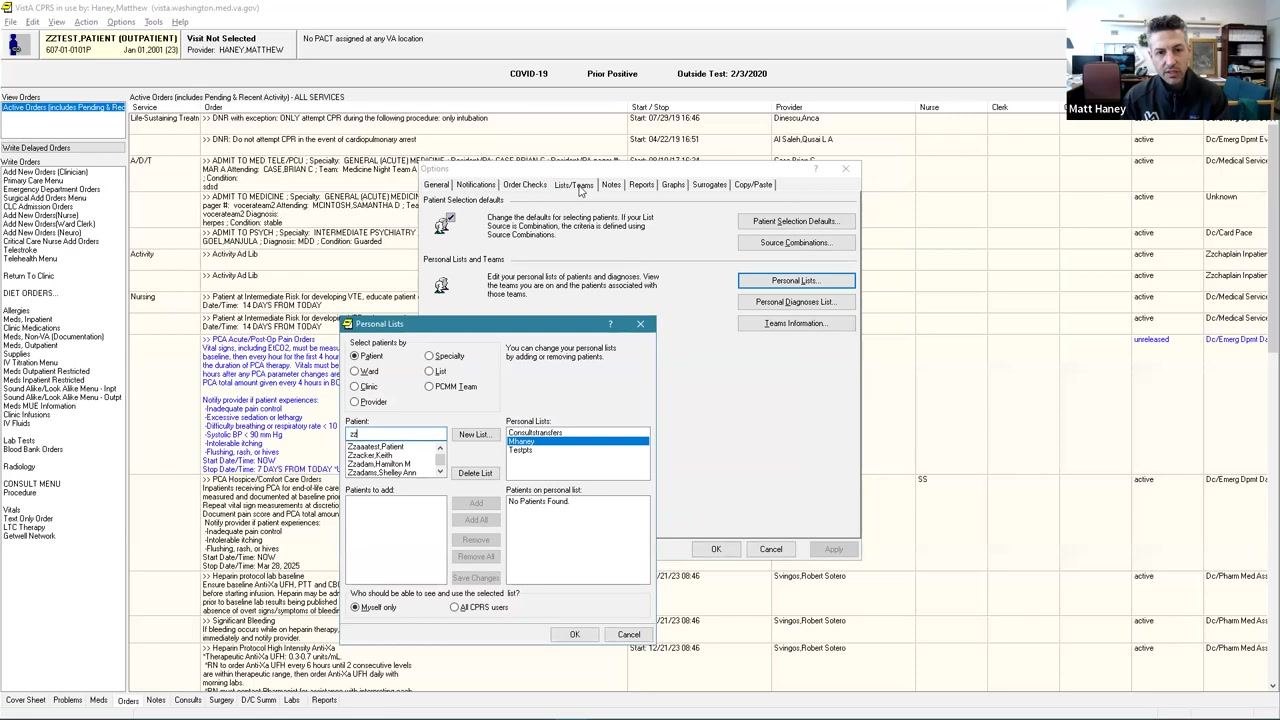
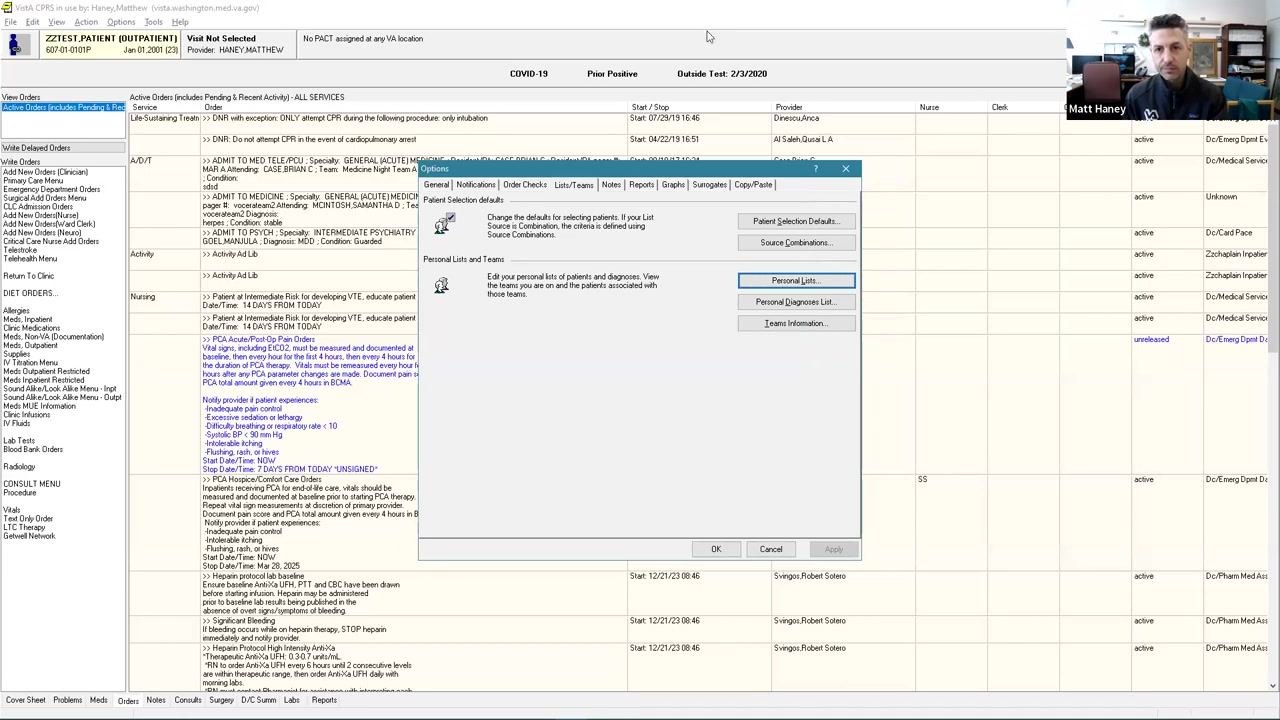
Navigate to the Lists/Teams tab in the CPRS interface. Click the Personal Lists... button to open the Personal Lists window.
Create a new personal list
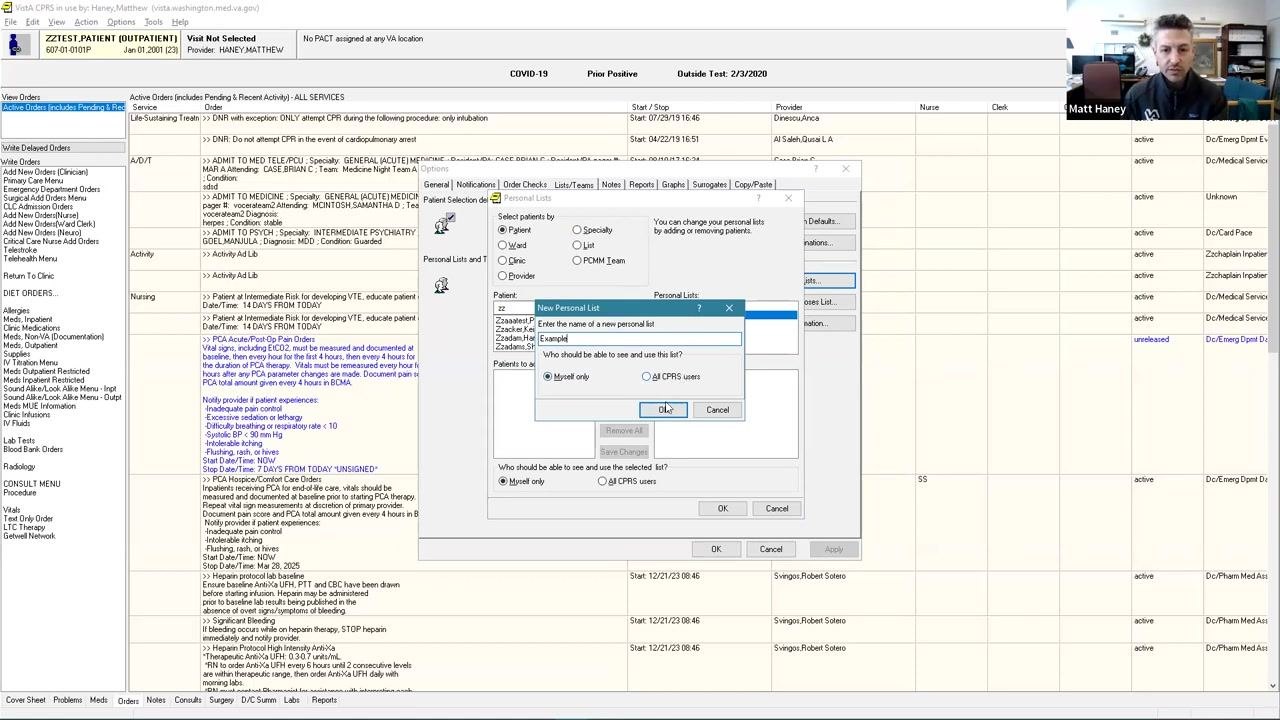
In the Personal Lists window, click the New List... button. Enter a title for your new list in the Enter the name of a new personal list field (for example, "Example1").
Choose who should be able to see and use the list:
- Select Myself only to keep the list private.
- Select All CPRS users to make the list available to others.
Click OK to create the list.
Search for patients to add
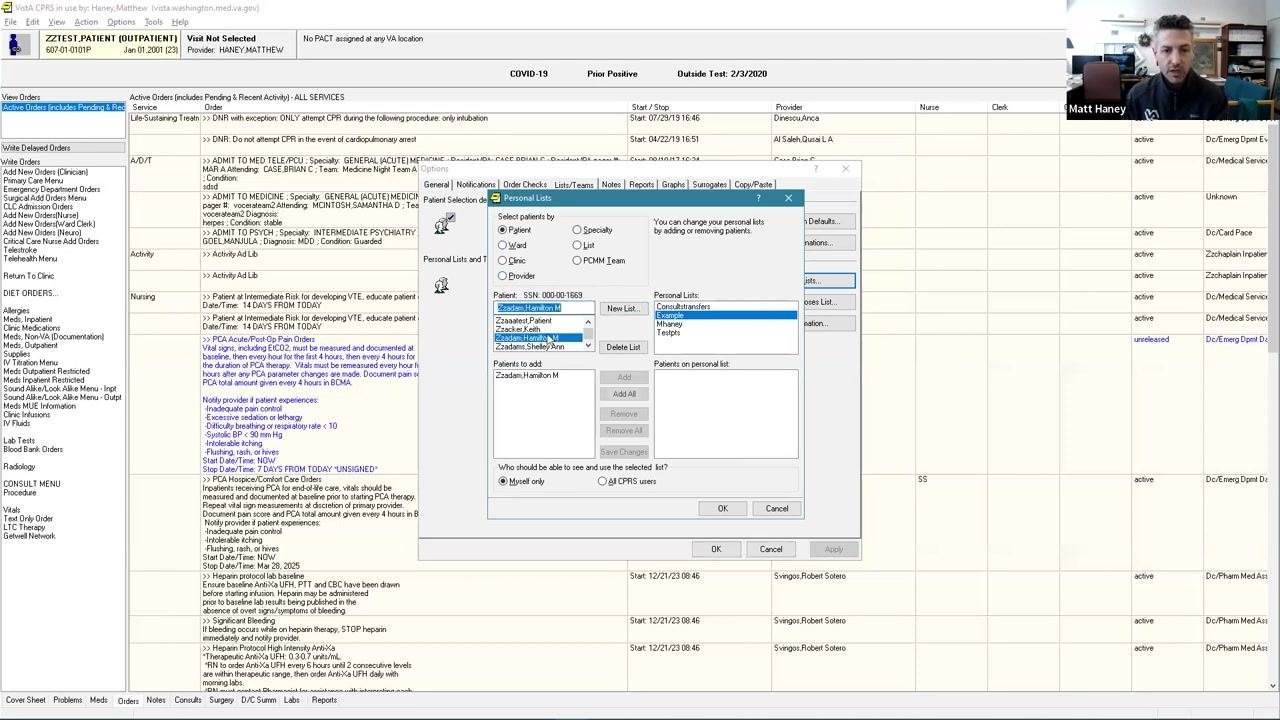
In the Personal Lists window, make sure Patient is selected under Select patients by. Use the search field to find patients by typing the first letter of the patient's last name followed by the last four digits of their social security number for a quick search.
You can also search by Ward, Clinic, Provider, or other criteria using the available radio buttons. Select the desired patient or patients from the list that appears.
Add patients to your list
Add patients to your list using one of the following methods:
- To add a single patient, select the patient and click Add.
- To add multiple patients, hold the Control (Ctrl) key, click to select multiple names, then click Add.
- To add all patients from the search results, click Add All.
The selected patients appear in the Patients on personal list section.
Save your changes
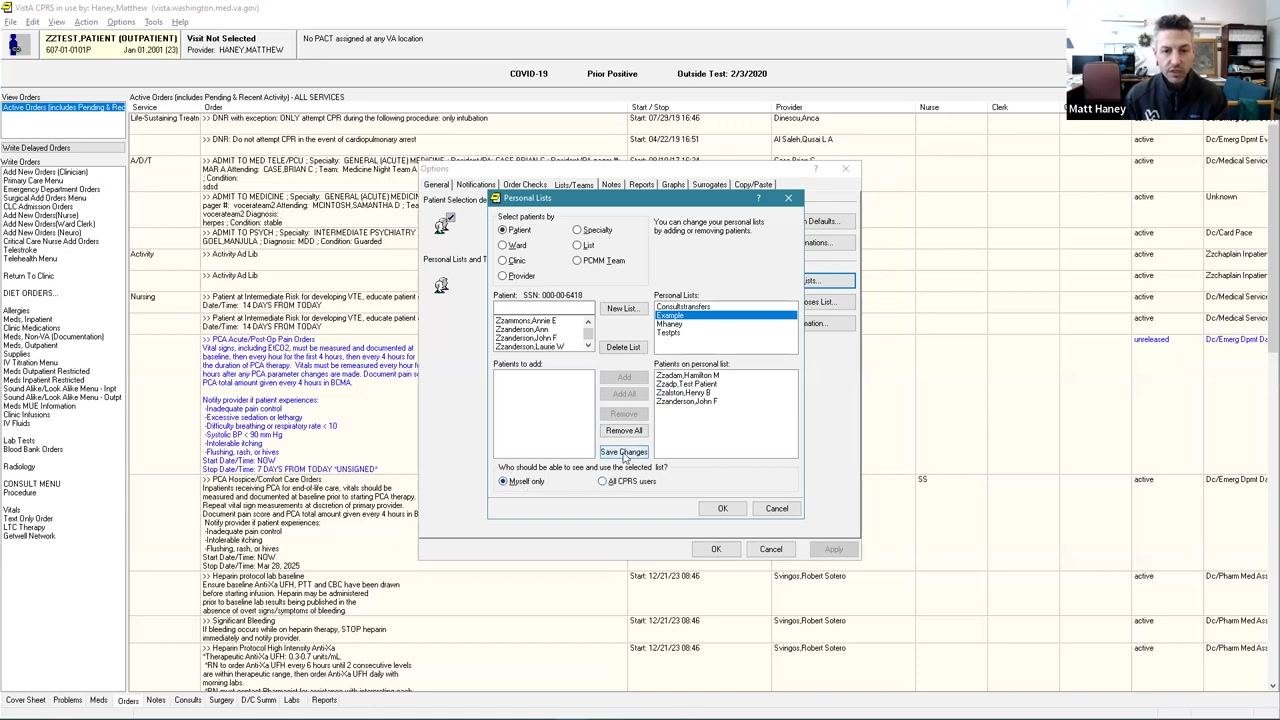
Once you have added the desired patients, click the Save Changes button to update your personal list.
Remove patients from your list
If you need to adjust your list, you can remove patients at any time:
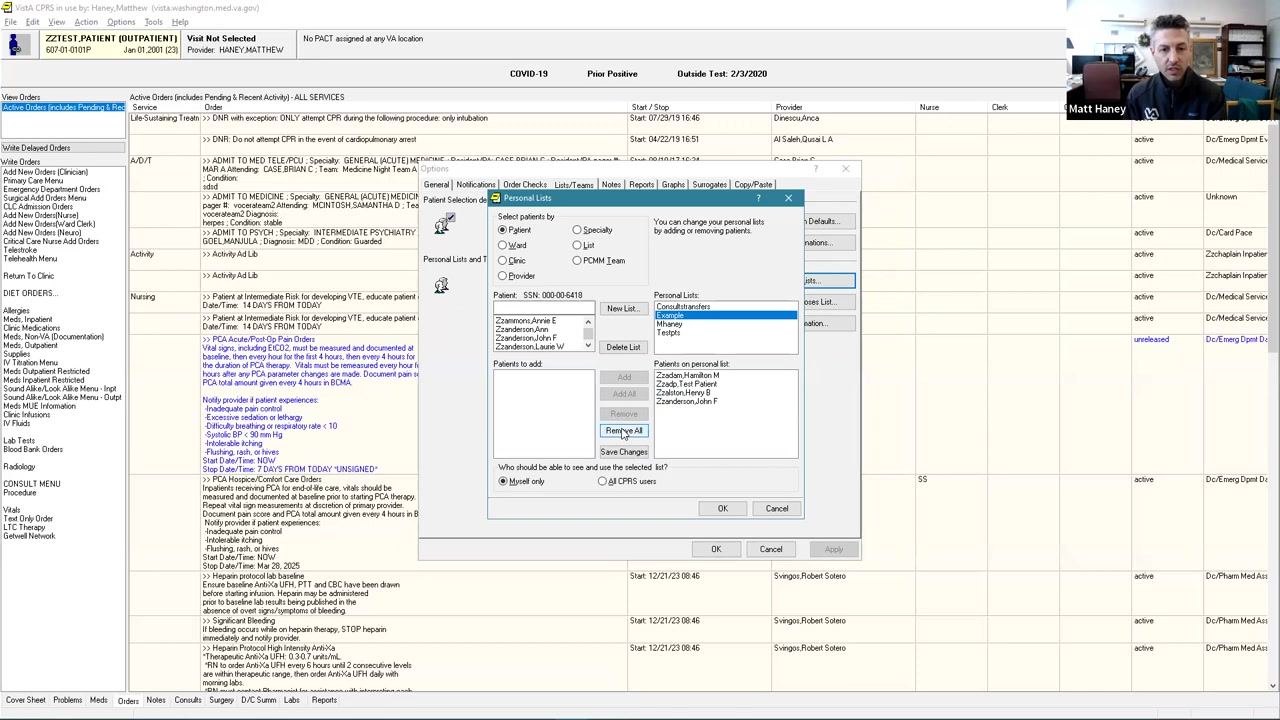
- To remove a single patient, select the patient in the Patients on personal list section and click Remove.
- To remove all patients at once, click Remove All. This clears the entire list.
Click Save Changes again after making any removals to apply your updates.
Use the Remove All option whenever you need to reset or quickly update your list.
Finalize and save your personal list
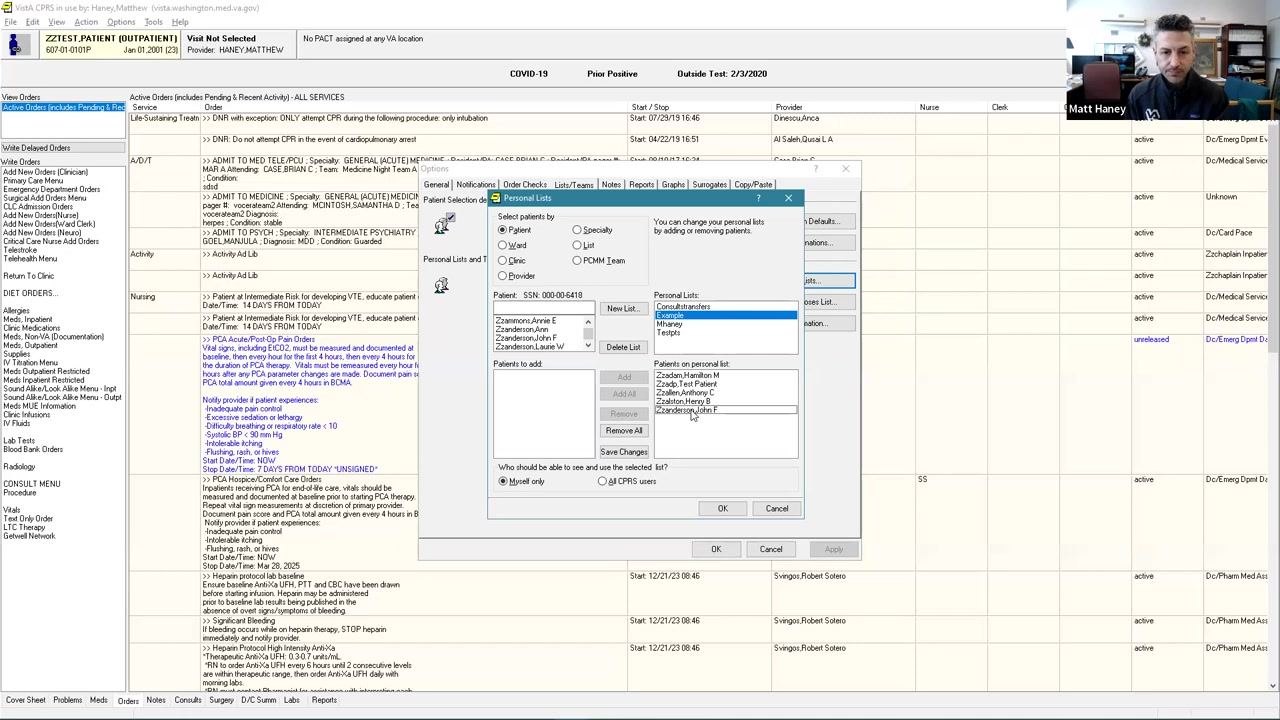
After making any additions or removals, click Save Changes to apply your updates to the list. At the bottom of the Personal Lists window, confirm who should be able to use and view the list:
- Choose Myself only to keep the list private.
- Choose All CPRS users to make the list available to all users.
Click OK to close the Personal Lists window and finalize your changes.
Return to the main Options window
After saving and closing the Personal Lists window, you return to the main Options dialog in CPRS. From here, you can adjust additional settings or click OK to exit the Options menu.
Summary
By following these steps, you can efficiently create, populate, and manage your personal patient lists in CPRS — controlling visibility and making adjustments whenever your workflow requires it.
Generation details: cost, quality tiers
Docsie billed 1,500 credits ($1.05) to analyze this 3-minute video at standard quality. The rewrite, template fill and Word/PDF exports were included. The same video at each quality tier:
| Quality | Frames sampled | Credits | Approx. cost |
|---|---|---|---|
| Draft | every 16-30 s | 750 | $0.52 |
| Standard (this guide) | every 8-15 s | 1,500 | $1.05 |
| Detailed | every 4-7 s | 3,000 | $2.10 |
| Ultra | every 1-3 s | 6,000 | $4.20 |
Credits priced at $0.70 per 1,000; plans include a monthly allowance. Enterprise customers on on-premise or bring-your-own-model deployments run this on their own inference and pay no per-video credits.
Generated by Docsie Video-to-Docs on 2026-10-06 from a 2-minute video. Screenshots are frames from the source video and belong to their creator, MattHaneyMD, whose original is embedded above. If you own this video and want the guide removed or credited differently, contact us and we will act within one business day.