
How to Build a SmartPhrase in Epic
Building a SmartPhrase in Epic doesn't have to mean relying on the cumbersome F2 key and extra navigation steps. This guide shows how to build a SmartPhrase in Epic eRecord using tables and checkboxes instead, giving you a faster, more efficient way to create structured documentation templates.
Video: eRecord SmartPhrase creation with tables and check boxes by Douglas Stockman. All credit for the demonstration goes to the creator; watch the original on YouTube. The written guide below was generated from this video by Docsie. Creator? Request a change or removal.
Building a SmartPhrase in Epic doesn't have to mean relying on the cumbersome F2 key and extra navigation steps. This guide shows how to build a SmartPhrase in Epic eRecord using tables and checkboxes instead, giving you a faster, more efficient way to create structured documentation templates.
Prerequisites
- Access to eRecord with permissions to customize SmartPhrases.
- A user account recognized by the SmartPhrase Manager (for example, STOCKMAN, DOUGLAS L [9364]).
Why use tables and checkboxes instead of F2
Before you start building, it helps to understand the approach this guide takes:
- Avoid using the F2 key for SmartPhrases, since it adds unnecessary complexity.
- Build your SmartPhrase using tables and checkboxes instead, which is simpler and more efficient to create and use.
Open Smart Phrase customization
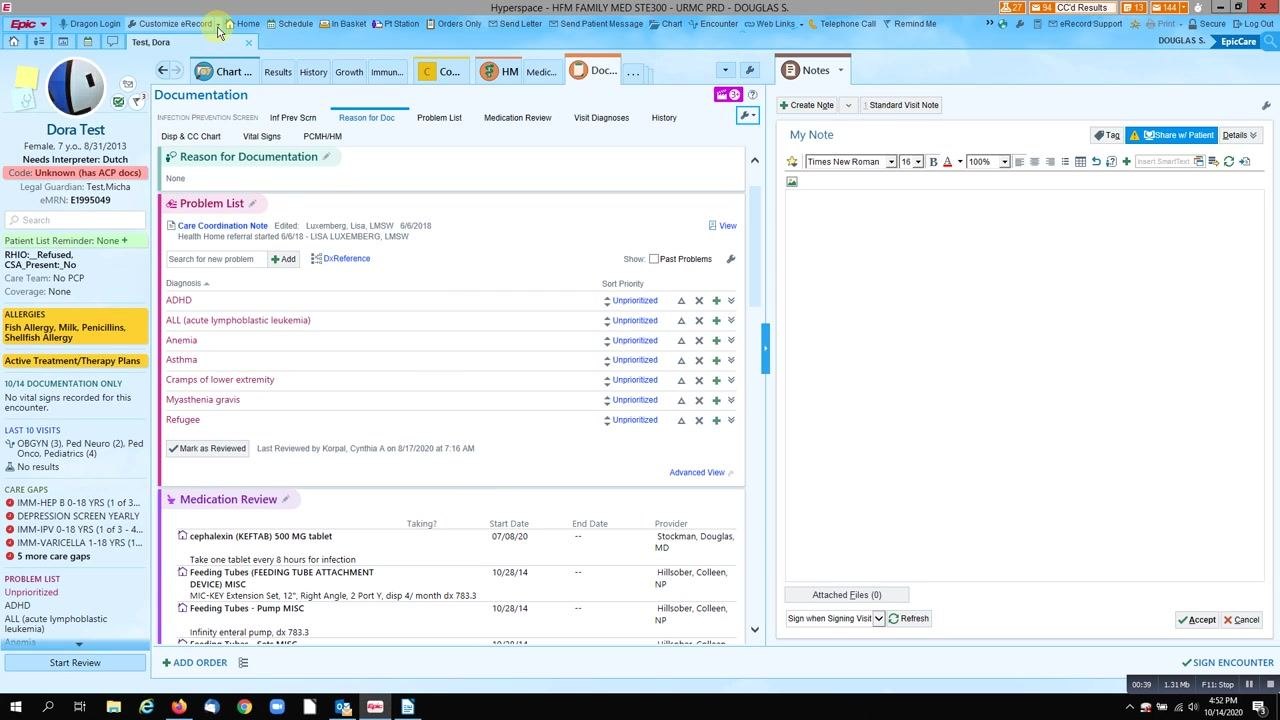
Open your eRecord system, then navigate to the top menu and select Customize eRecord.
Open the SmartPhrase Manager
From the customization options, select Smart Phrase Manager to begin creating or editing a phrase.
Locate or create your SmartPhrase
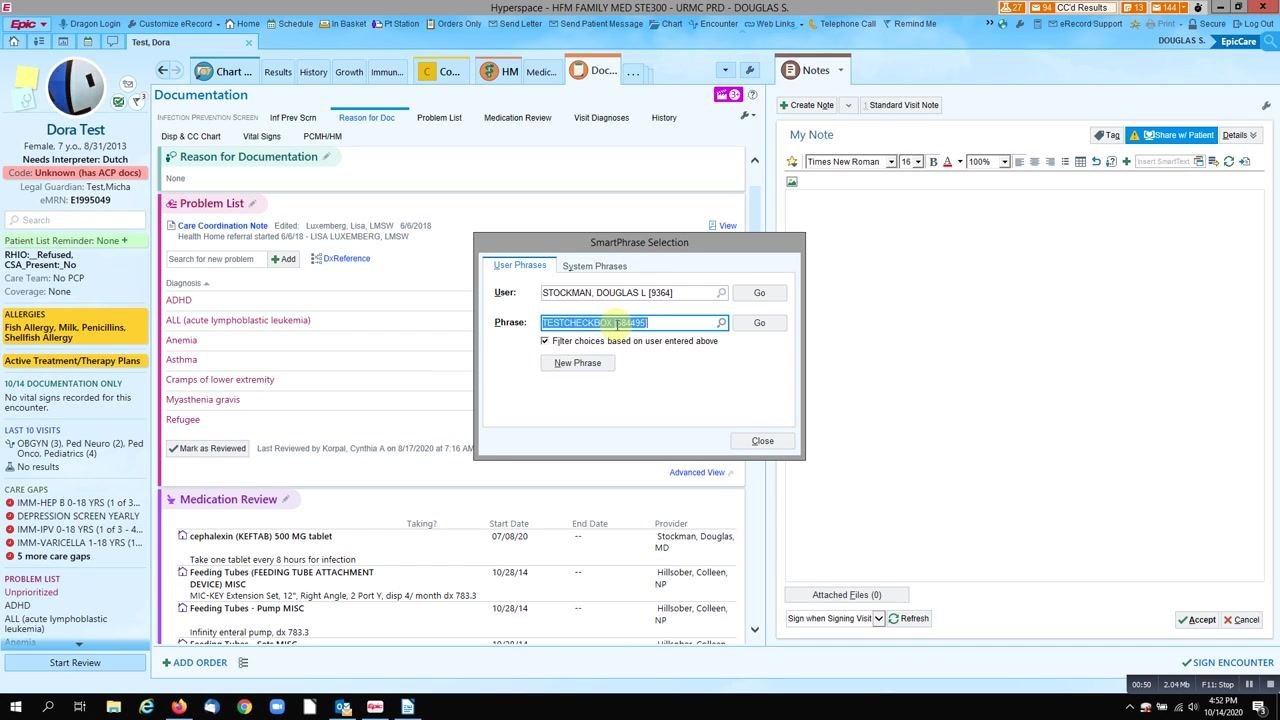
In the SmartPhrase Selection dialog:
- Confirm that your user is selected (for example, STOCKMAN, DOUGLAS L [9364]).
- In the Phrase field, type the name of your SmartPhrase (for example, TESTCHECKBOX).
- Select the phrase from the dropdown, or create a new one if it doesn't exist yet.
Build the initial SmartPhrase content
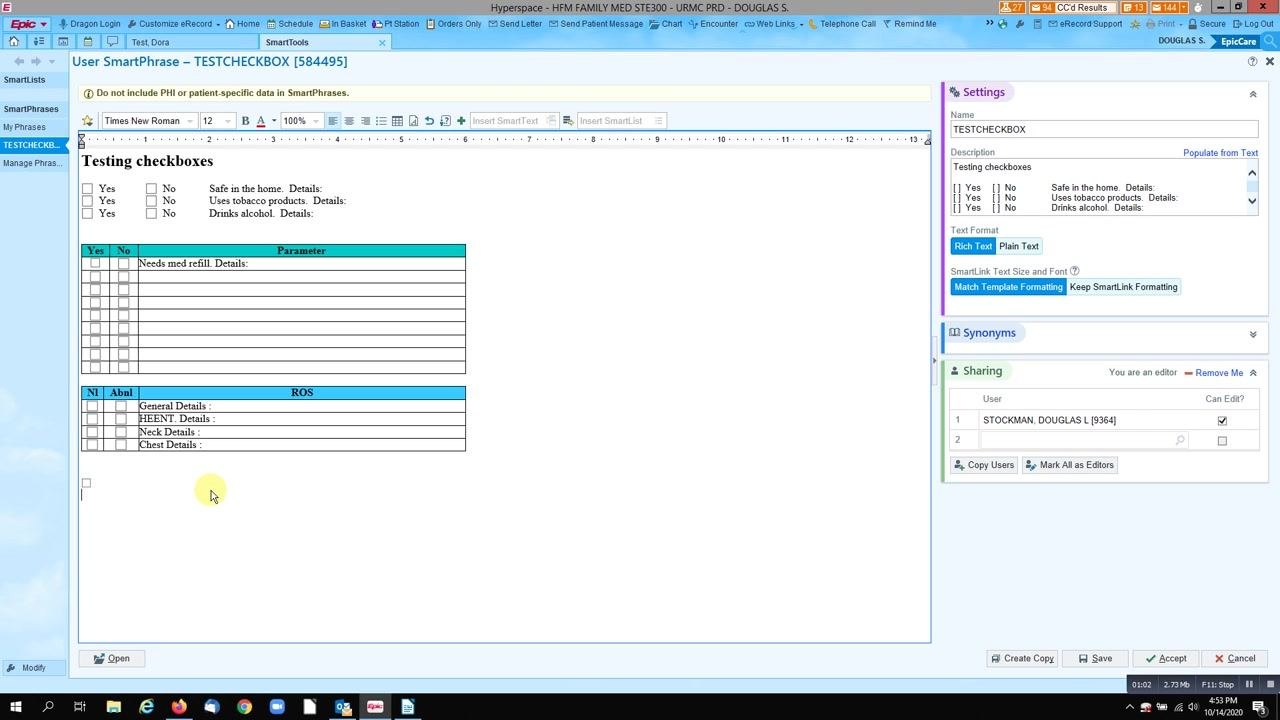
Once the SmartPhrase editor opens, you'll see the phrase content area on the left and settings on the right. Typical content includes:
- Checkbox options for Yes/No questions (for example, "Safe in the home," "Uses tobacco products").
- Tables for structured data entry (for example, medication refill needs, review of systems).
- The Insert SmartText or Insert SmartList buttons, used as needed.
- Checkboxes added by typing "checkbox" or using the UI tools.
Speed up editing with copy and paste
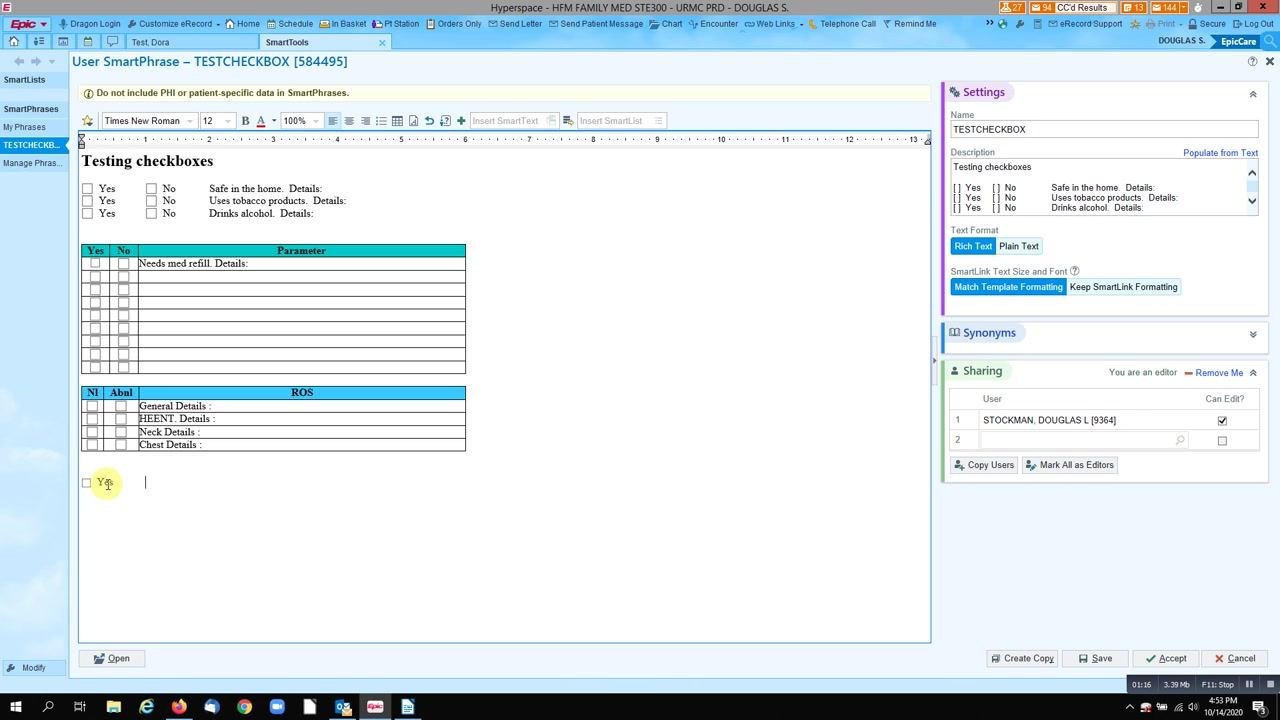
To save time, copy existing rows or sections, such as Yes/No checkbox lines or table rows. Paste them wherever you need to expand your SmartPhrase, then edit the text for each new entry.
Continue building tables
Insert additional tables as needed for more complex data structures. Add rows and columns for each parameter or review item, and use checkboxes in table cells for easy selection.
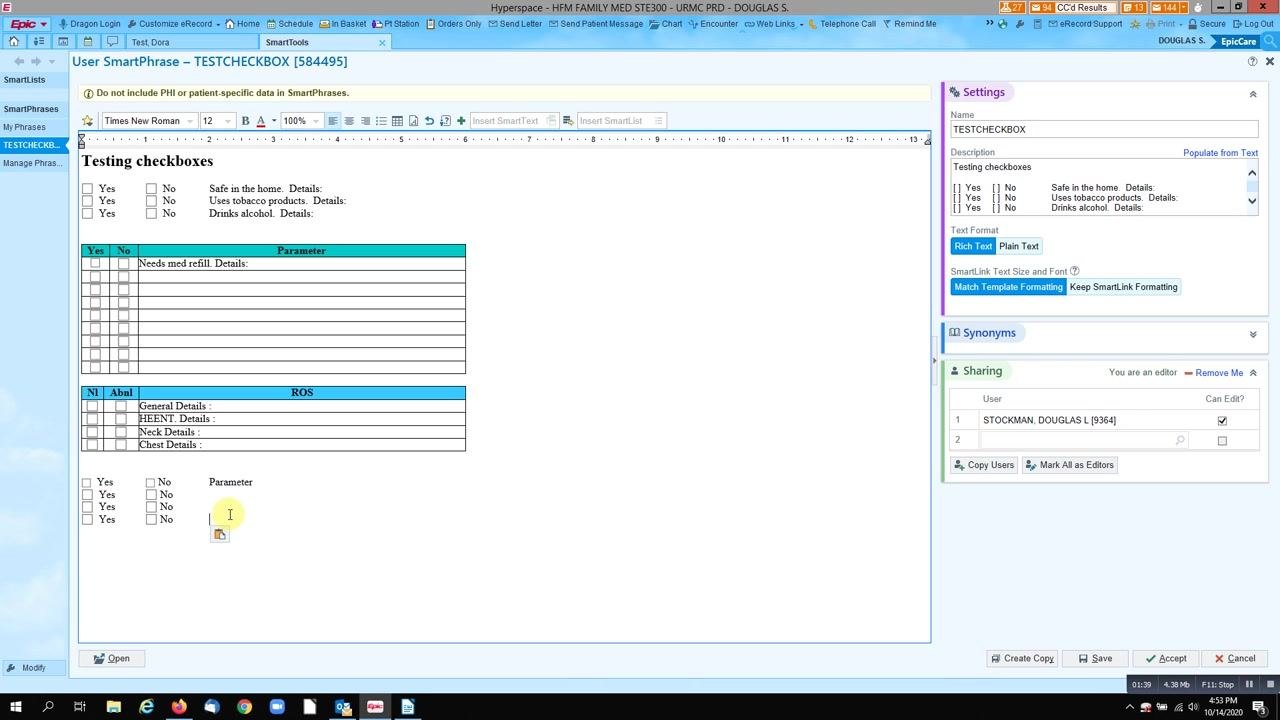
Insert a new table
Click the Insert Table button in the toolbar at the top of the SmartPhrase editor. Choose the number of columns and rows you need; you can always add more later if necessary. For example, insert a table for a new Review of Systems (ROS) section.
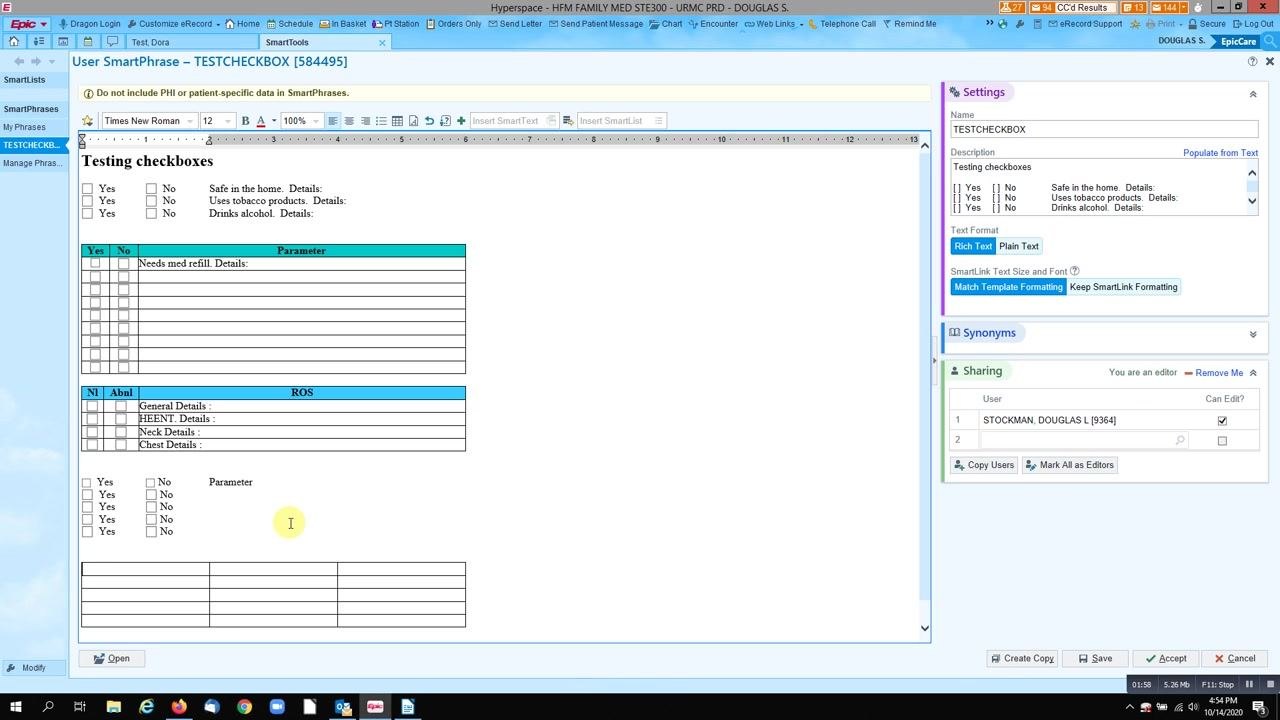
Resize and position the table
Adjust the size of the new table to fit your content needs. Drag the table borders, or use table properties, to size it appropriately for your ROS section or other parameters.
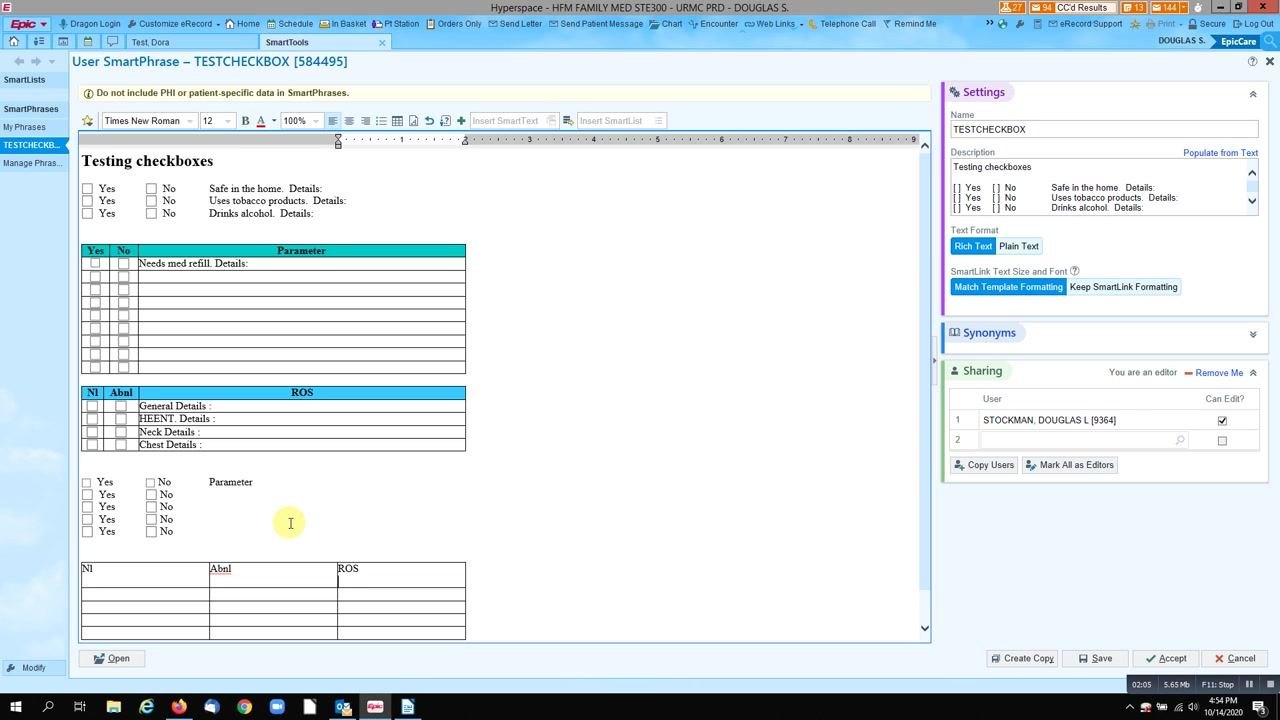
Center and format table content
Select the table or specific cells you want to format, then use the alignment tools in the toolbar to center the content, such as headers or checkboxes. Right-click the table and select Table Properties to further customize its appearance, including color or border, so the table stands out visually.
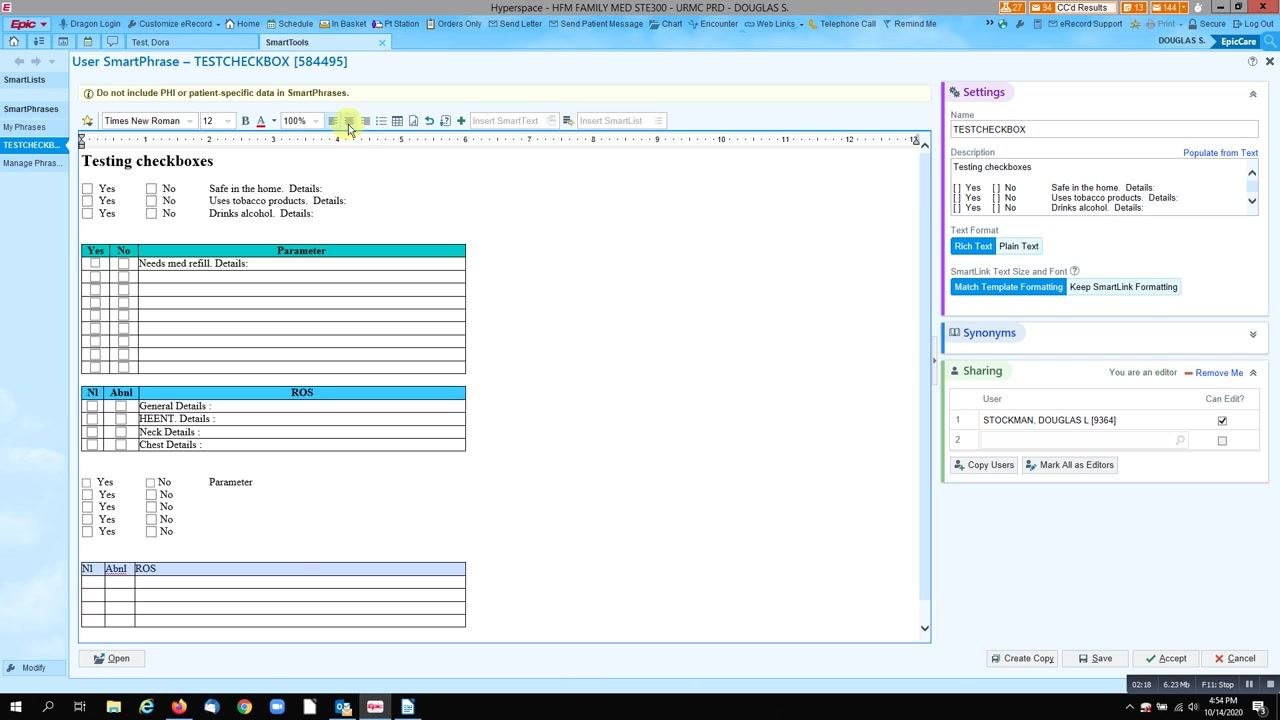
Customize table properties
Right-click the table and choose Table Properties again to adjust background color, border style, or other visual properties for better visibility and organization.
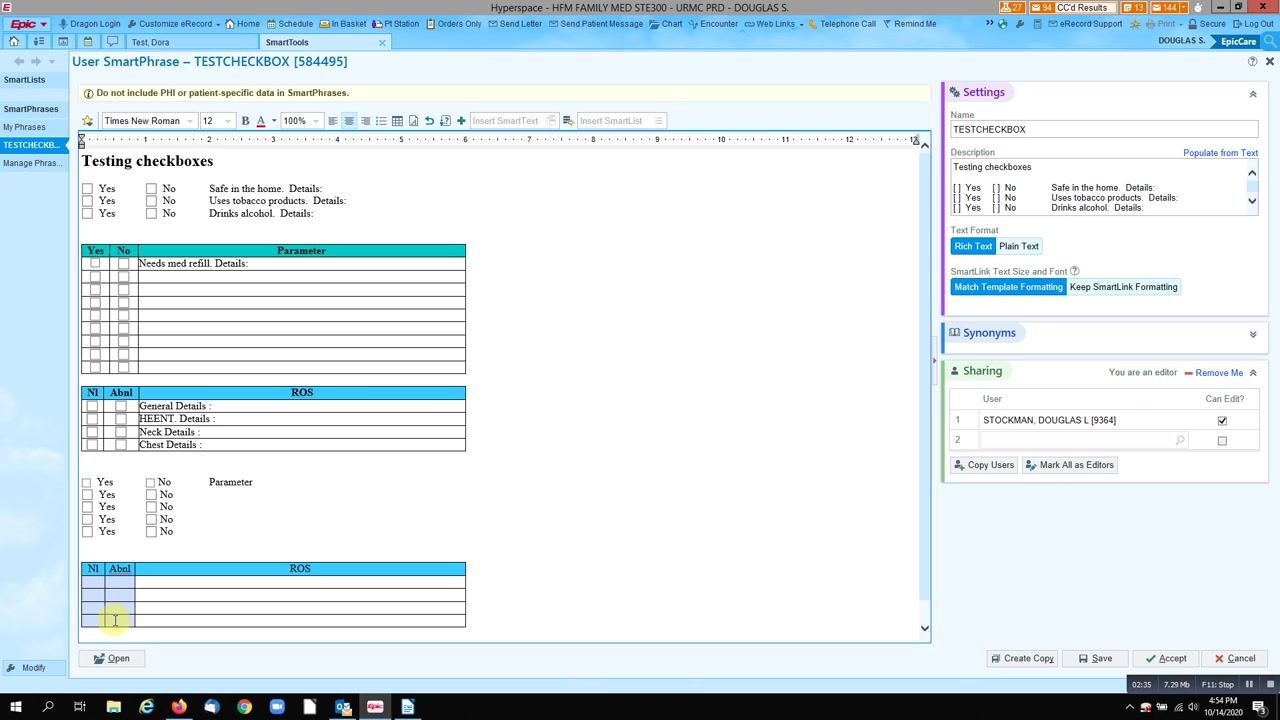
Add checkboxes to the table
Insert checkboxes into the table cells as needed. You can either:
- Copy an existing checkbox from above and paste it into the new table.
- Use the UI tools to insert a new checkbox, for example by typing "checkbox" or using the Insert SmartList/SmartText options.
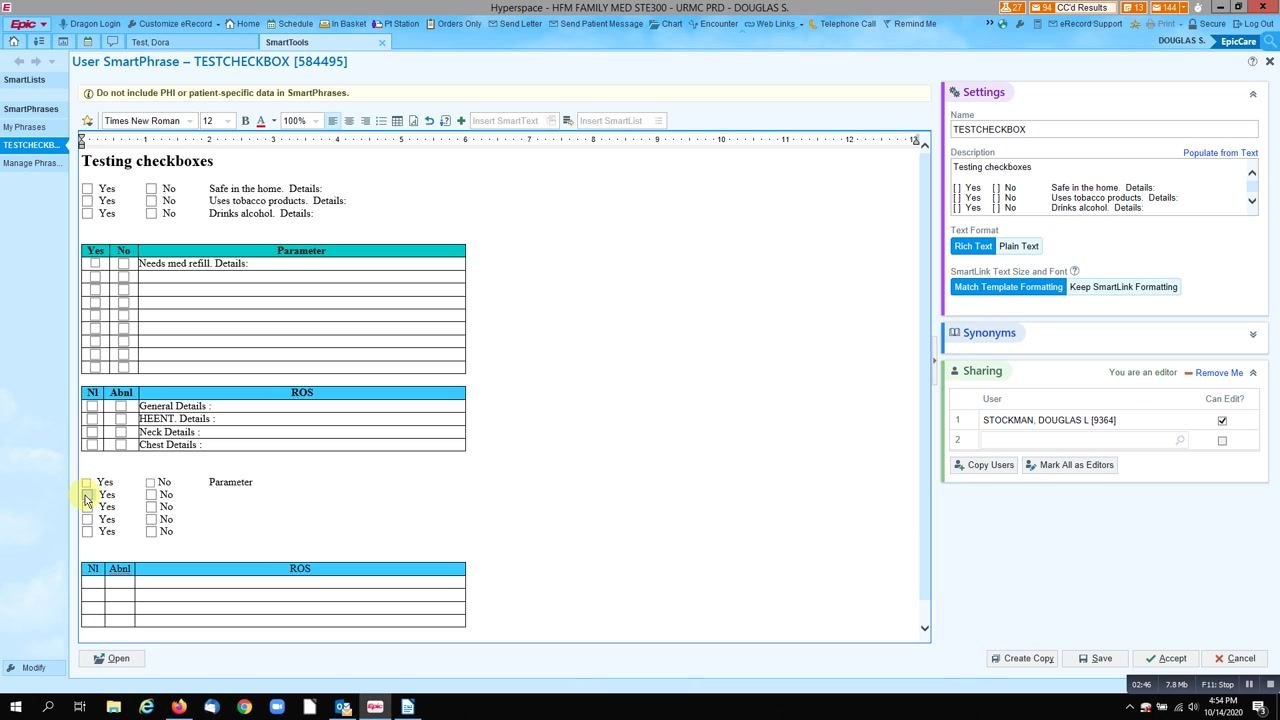
Enter parameters and labels
Fill in the table with the appropriate parameters or review items. For example, enter "Pulm," "Cardiac," and "Abd" as parameters in the ROS table.
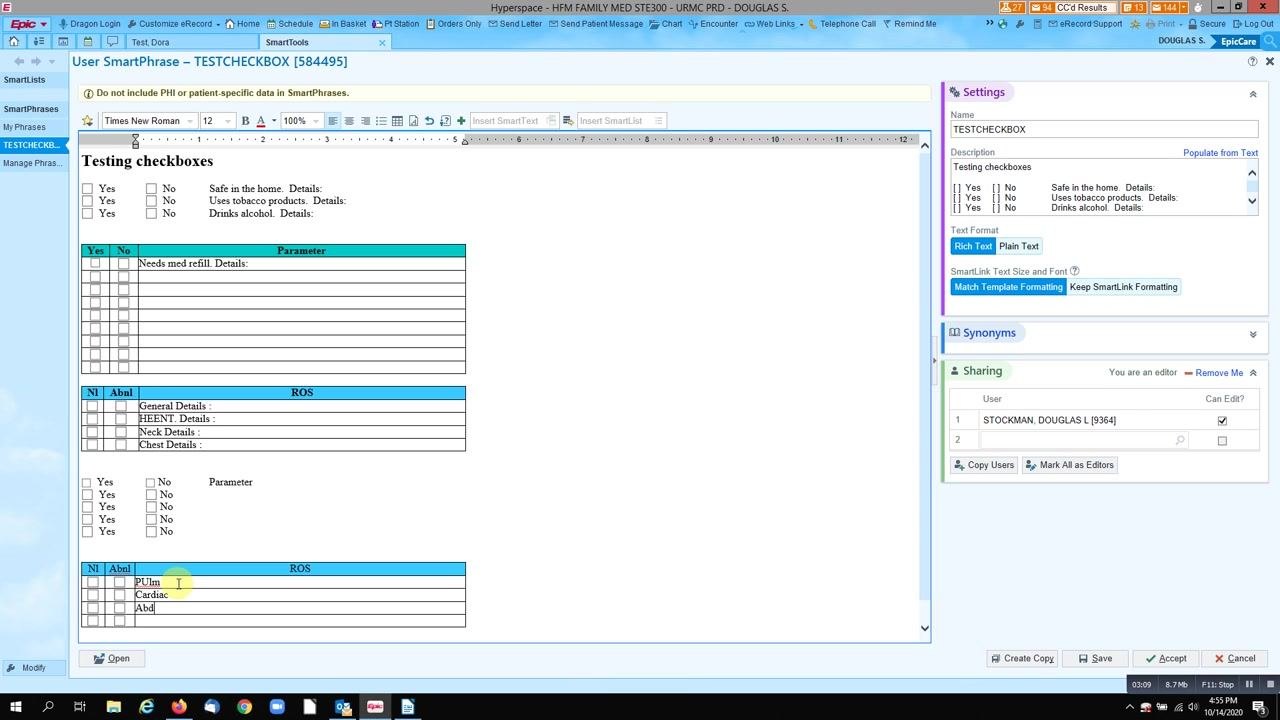
Save and accept the updated SmartPhrase
Click Save at the bottom right of the editor to save your changes, then click Accept to finalize the SmartPhrase and make it available for use.
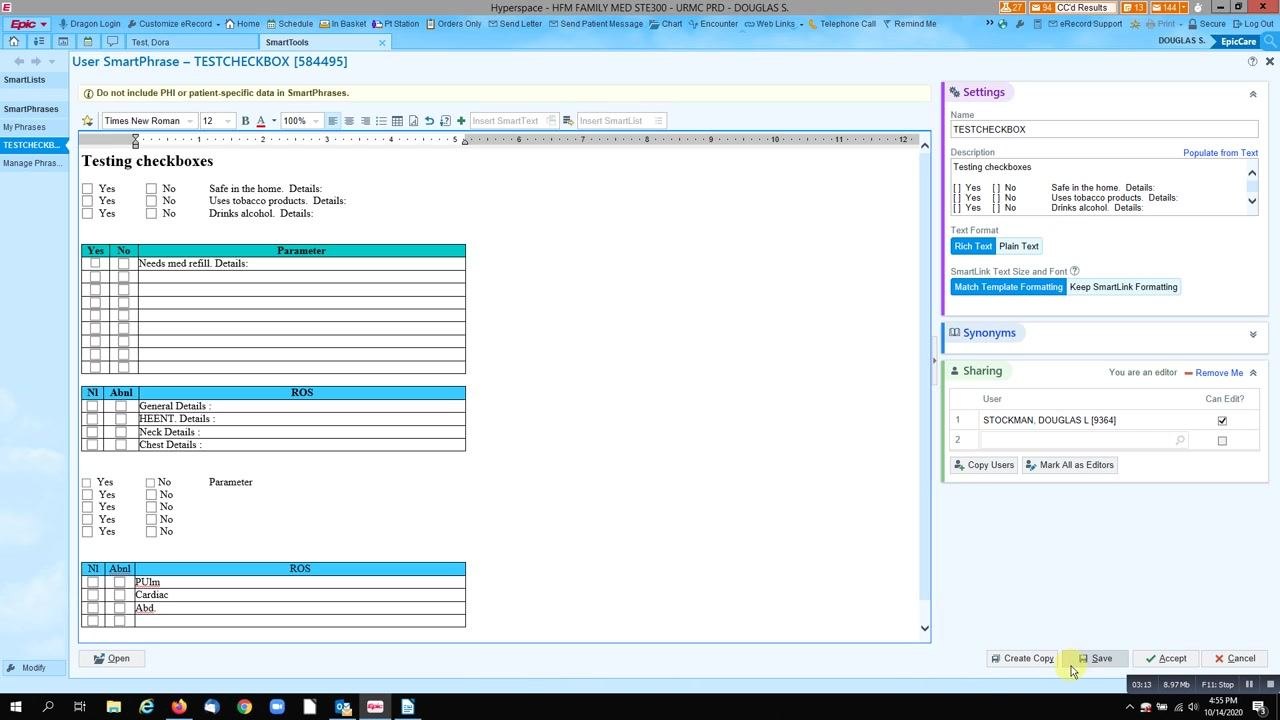
Using the checkbox template in documentation
Once your SmartPhrase is built, you can use it to document quickly:
- Click the appropriate checkboxes in each row to mark the status for each parameter (for example, "Pulm," "Cardiac," "Abd").
- If a parameter is abnormal, enter the relevant details in the corresponding cell.
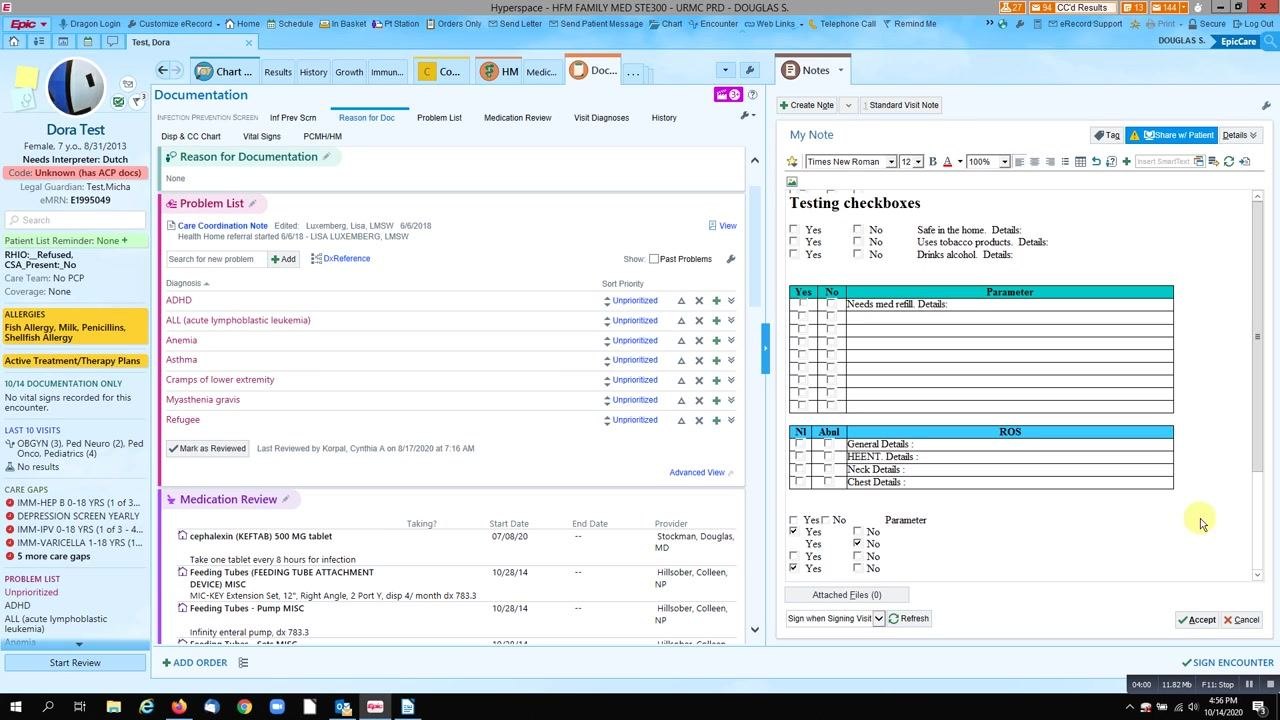
- Checkboxes may occasionally become misaligned, but you can generally click through efficiently.
- This method is typically faster than navigating the form with F2.
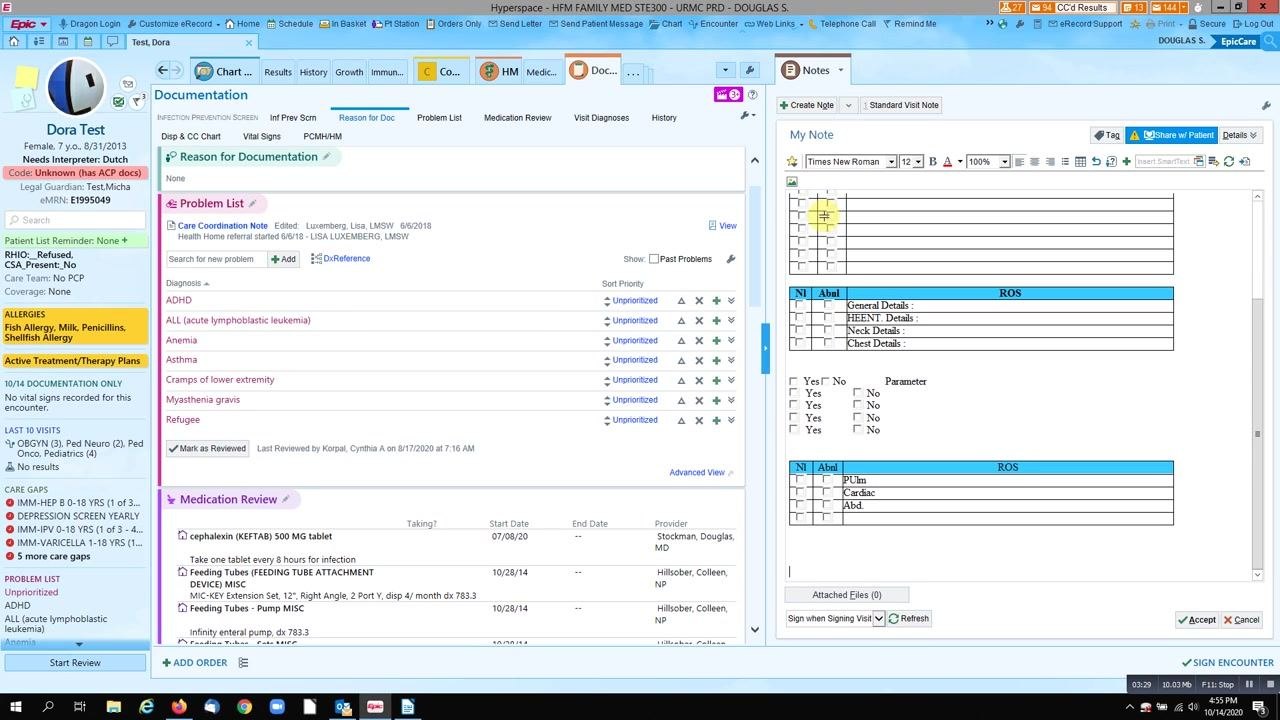
When documenting, enter details only for parameters that are abnormal. This lets you move through the form quickly, focusing on exceptions rather than filling out every field.
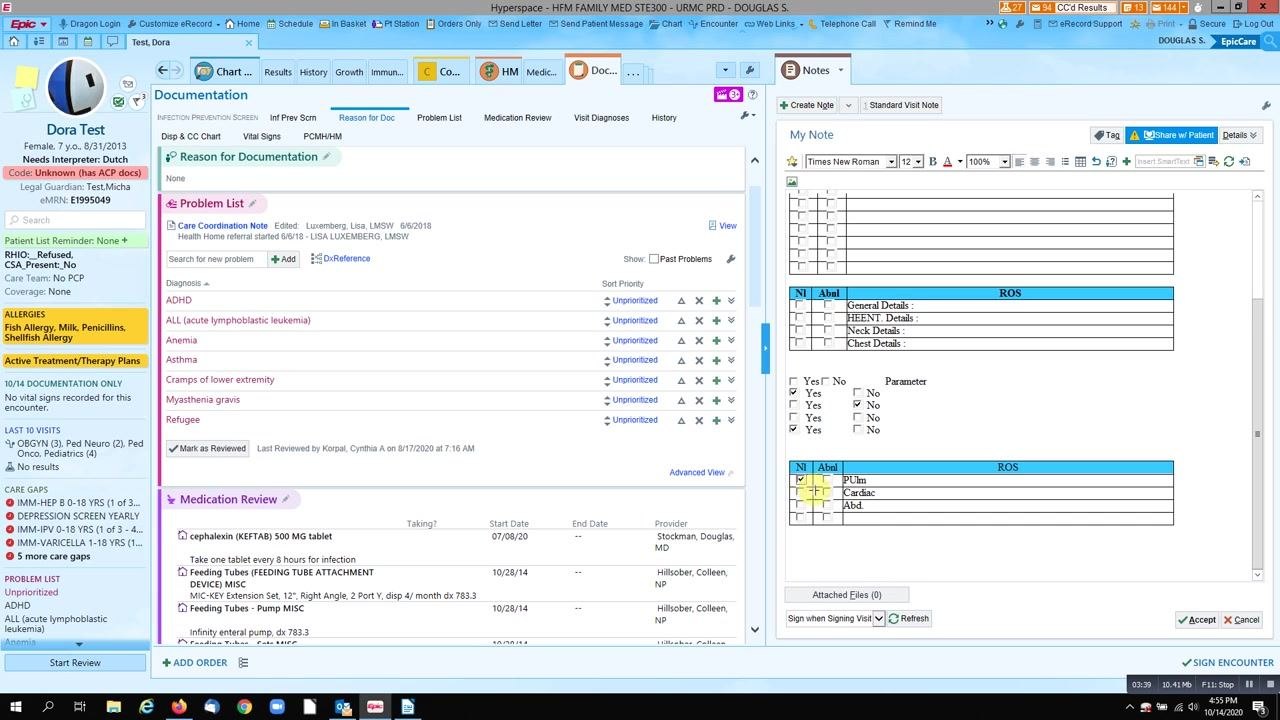
Design your form so abnormal findings are clearly separated from normal ones — for example, by placing them in separate columns. This structure makes it easy to identify items that need attention when you revisit the documentation.
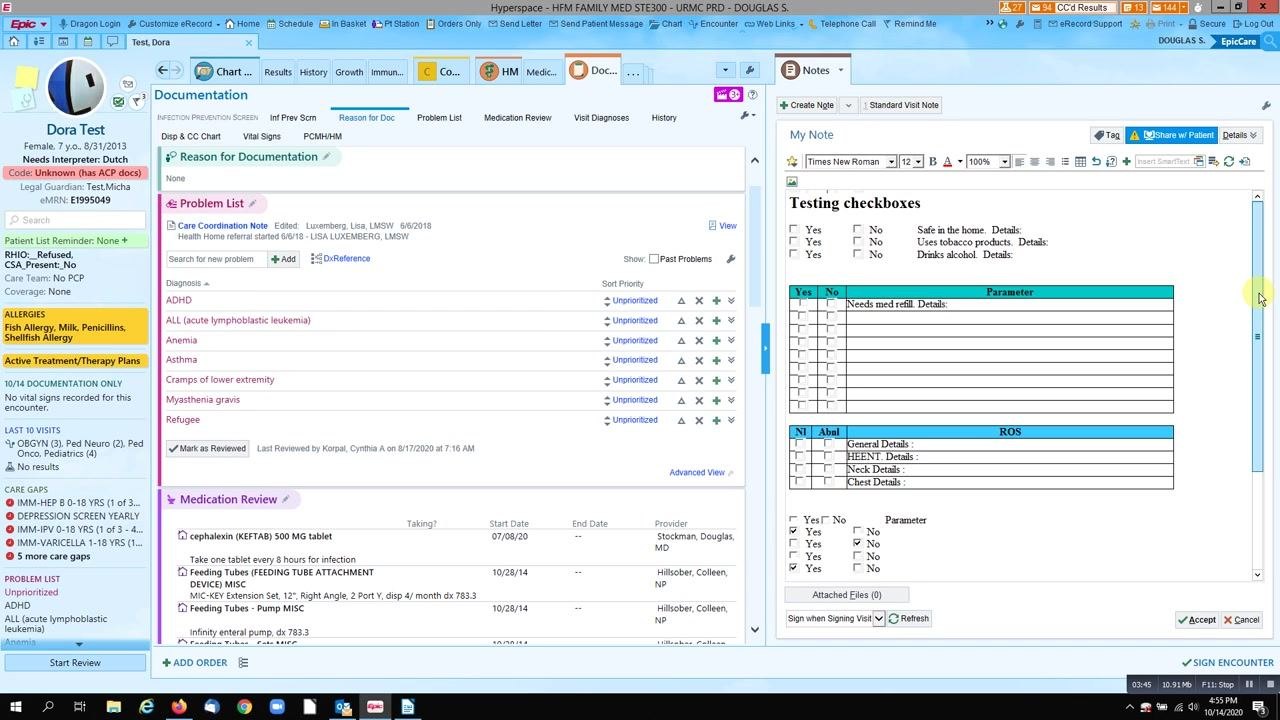
After completing your documentation, review the form to confirm all relevant checkboxes are marked and details are entered where necessary. A clear layout helps you quickly spot anything that needs further attention.
Best practices
- Speed and efficiency: Checkbox templates allow for faster documentation than manual entry or F2 navigation.
- Clarity: Separate columns for normal and abnormal findings make review easier.
- Simplicity: Keep templates straightforward and organized for maximum usability.
- Customization: Adjust your template as your workflow and documentation needs change.
- Use copy and paste to duplicate similar sections and speed up creation.
- Organize your SmartPhrase with clear labels and logical grouping, such as by parameter or review system.
- Use tables for structured data and checkboxes for binary (Yes/No) options.
- You can always add more rows or columns to your tables later as your documentation needs evolve.
What's next
With your SmartPhrase built, you can continue refining it by adding more tables, checkboxes, or parameters as your documentation needs grow. Use the same copy-paste and formatting techniques to keep expanding the template while maintaining a clear, consistent, and efficient layout for clinical workflows.
Generation details: cost, quality tiers
Docsie billed 2,500 credits ($1.75) to analyze this 5-minute video at standard quality. The rewrite, template fill and Word/PDF exports were included. The same video at each quality tier:
| Quality | Frames sampled | Credits | Approx. cost |
|---|---|---|---|
| Draft | every 16-30 s | 1,250 | $0.88 |
| Standard (this guide) | every 8-15 s | 2,500 | $1.75 |
| Detailed | every 4-7 s | 5,000 | $3.50 |
| Ultra | every 1-3 s | 10,000 | $7.00 |
Credits priced at $0.70 per 1,000; plans include a monthly allowance. Enterprise customers on on-premise or bring-your-own-model deployments run this on their own inference and pay no per-video credits.
Generated by Docsie Video-to-Docs on 2026-10-01 from a 4-minute video. Screenshots are frames from the source video and belong to their creator, Douglas Stockman, whose original is embedded above. If you own this video and want the guide removed or credited differently, contact us and we will act within one business day.