
How to Create a Note Template in Epic
Epic's SmartPhrase and SmartList tools let you build reusable note templates that automatically pull patient-specific data into your documentation. This guide walks you through how to create a note template in Epic, customize it with SmartLinks and SmartLists, and share it with your team to streamline clinical documentation and discharge instructions.
Video: General Epic Tips - part 2 - SmartTexts by Elijah Wyatt. All credit for the demonstration goes to the creator; watch the original on YouTube. The written guide below was generated from this video by Docsie. Creator? Request a change or removal.
Epic's SmartPhrase and SmartList tools let you build reusable note templates that automatically pull patient-specific data into your documentation. This guide walks you through how to create a note template in Epic, customize it with SmartLinks and SmartLists, and share it with your team to streamline clinical documentation and discharge instructions.
Prerequisites
- Access to the Epic main interface with permissions to open SmartPhrase Manager.
- Familiarity with your facility's existing SmartPhrases, if any have already been shared with you.
Open the Epic main interface
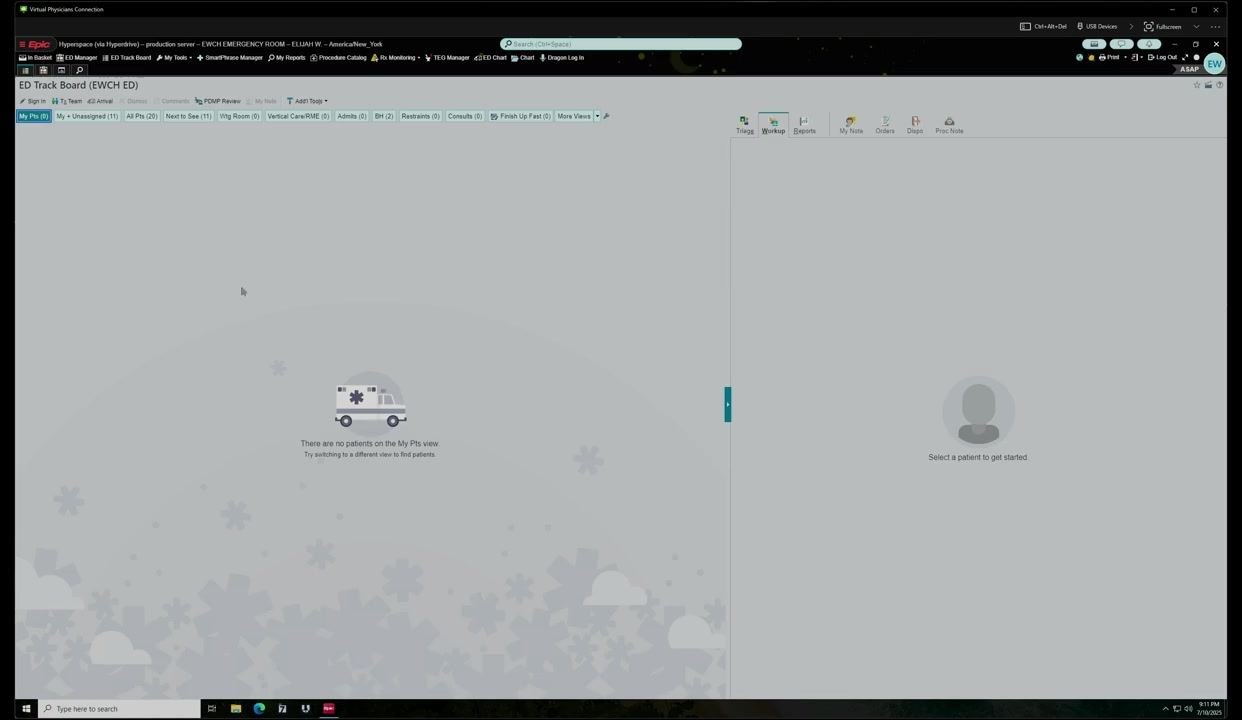
The main screen displays the ED Track Board. The top menu bar includes options such as Epic, ED Manager, ED Track Board, My Tools, and SmartPhrase Manager. The patient list area may be empty if no patients are assigned, and the right panel includes tabs for Triage, Workup, Reports, My Note, Orders, Dispo, and Proc Note.
Navigate to SmartPhrase Manager
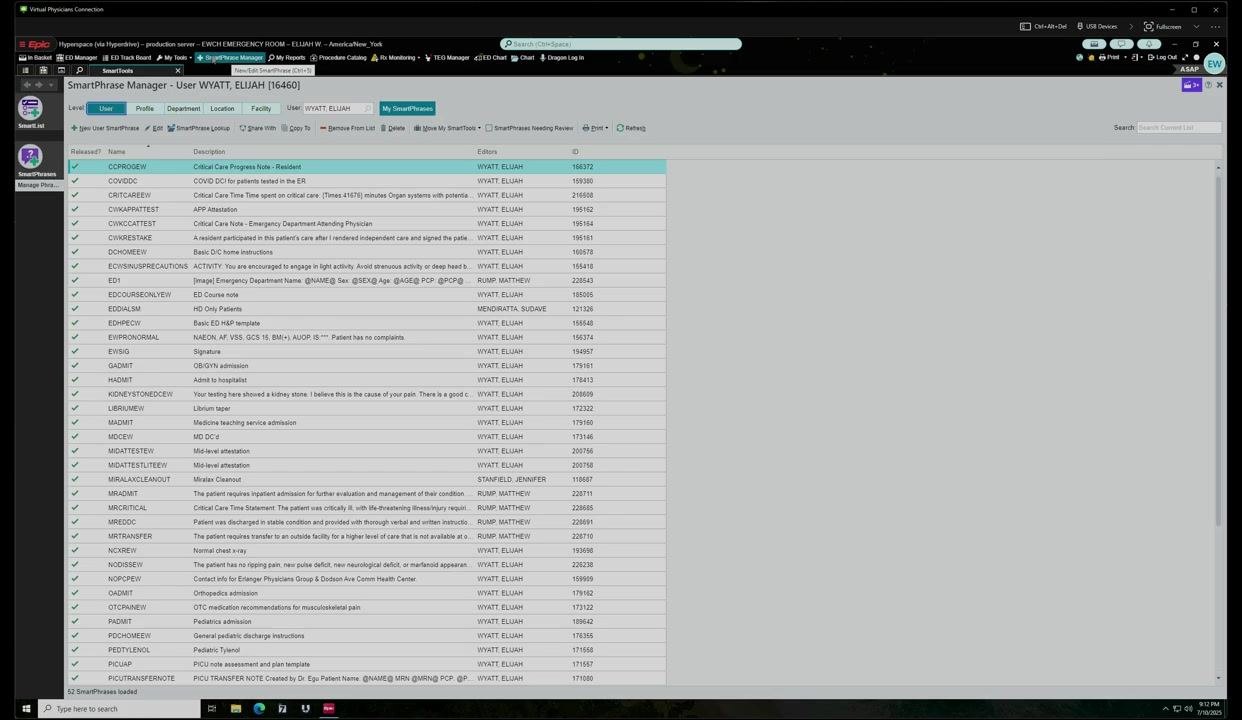
Click the Epic button in the upper left corner, then go to Tools and select SmartPhrase Manager from the dropdown menu. You can right-click SmartPhrase Manager to pin it to your toolbar for quicker access in the future. If it is already pinned, open it directly from the toolbar.
Review your SmartPhrase list
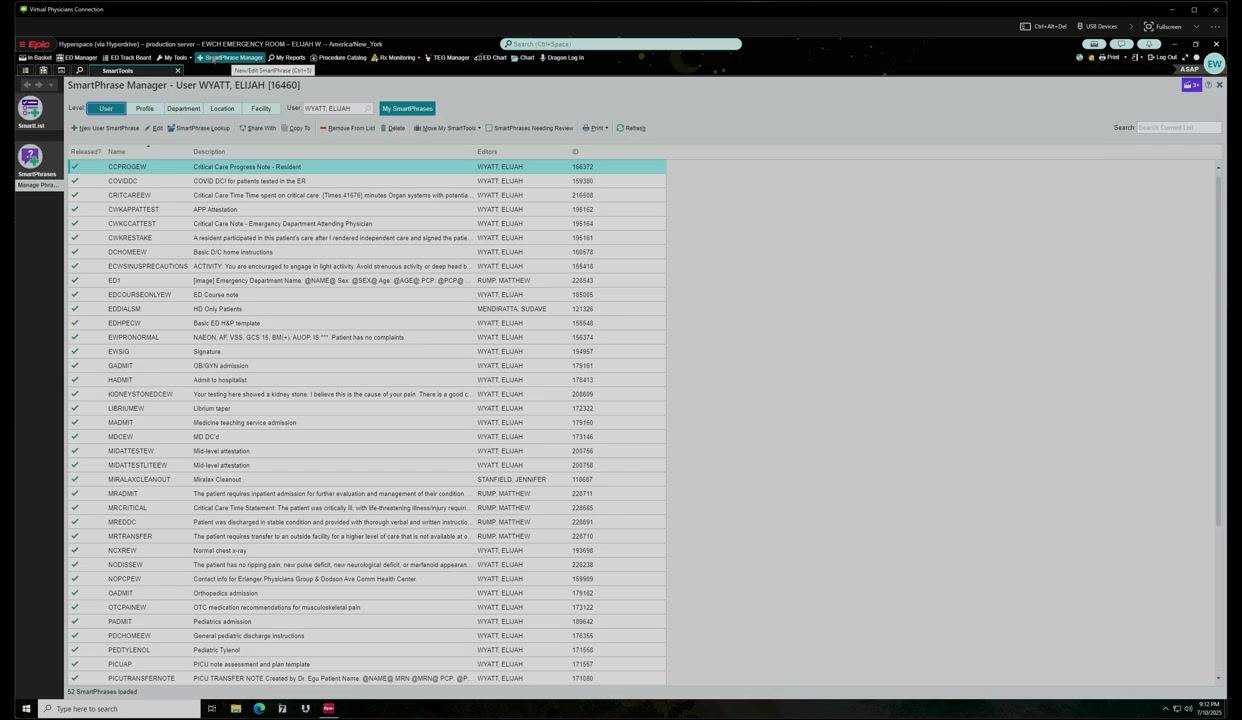
The SmartPhrase Manager window displays a list of available SmartPhrases. Your list may be empty if you have not created or received any, or it may already contain templates shared by colleagues. The list includes columns for the phrase name, description, and editor.
Select a template to view or edit
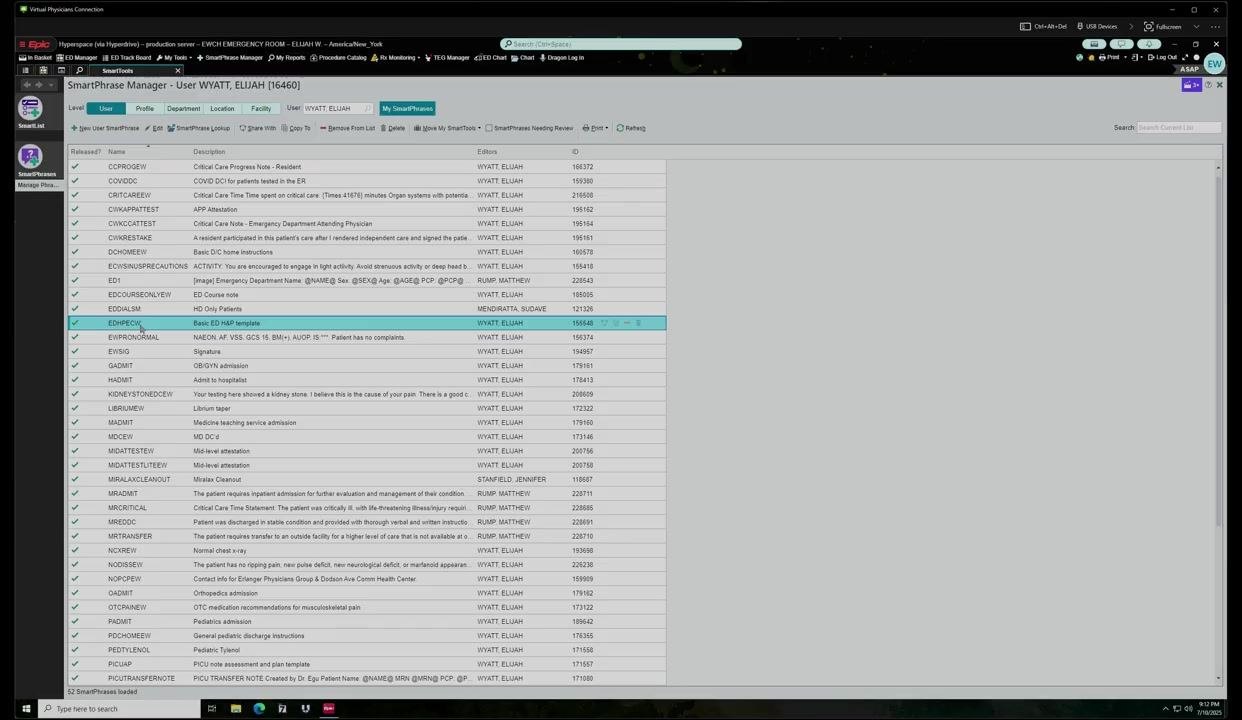
Click on a SmartPhrase from the list, such as EDHPECW for a basic ED H&P template. The selected template opens in an editor that resembles a word processor and supports rich text formatting so you can modify it as needed.
Edit the template content and settings
The template editor displays the content of the SmartPhrase, which you can freely edit, format, and add to or remove from. The right panel includes settings for the template name, description, text format (Rich Text or Plain Text), and sharing options, where you can specify which users can view or edit the template.
Use variables and SmartLinks to auto-populate data
Items surrounded by "@" symbols, such as @NAME@, @AGE@, and @SEX@, are placeholders that automatically pull patient-specific data from the chart. Additional SmartLinks are available for fields like first name and last name, and a database of available SmartLinks can be found online for further customization.
Explore and customize further
Browse the available SmartLinks and templates to enhance your documentation workflow. Modify existing templates or create new ones to suit your needs, then save your changes and share templates with colleagues as appropriate.
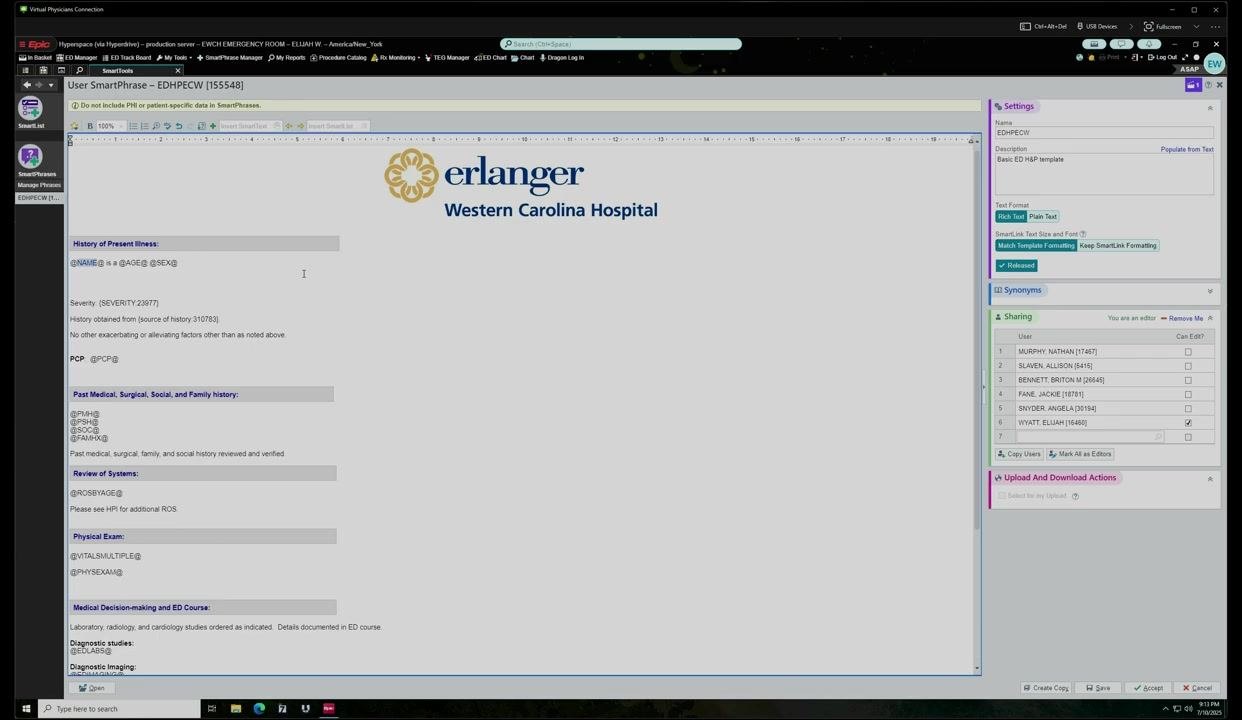
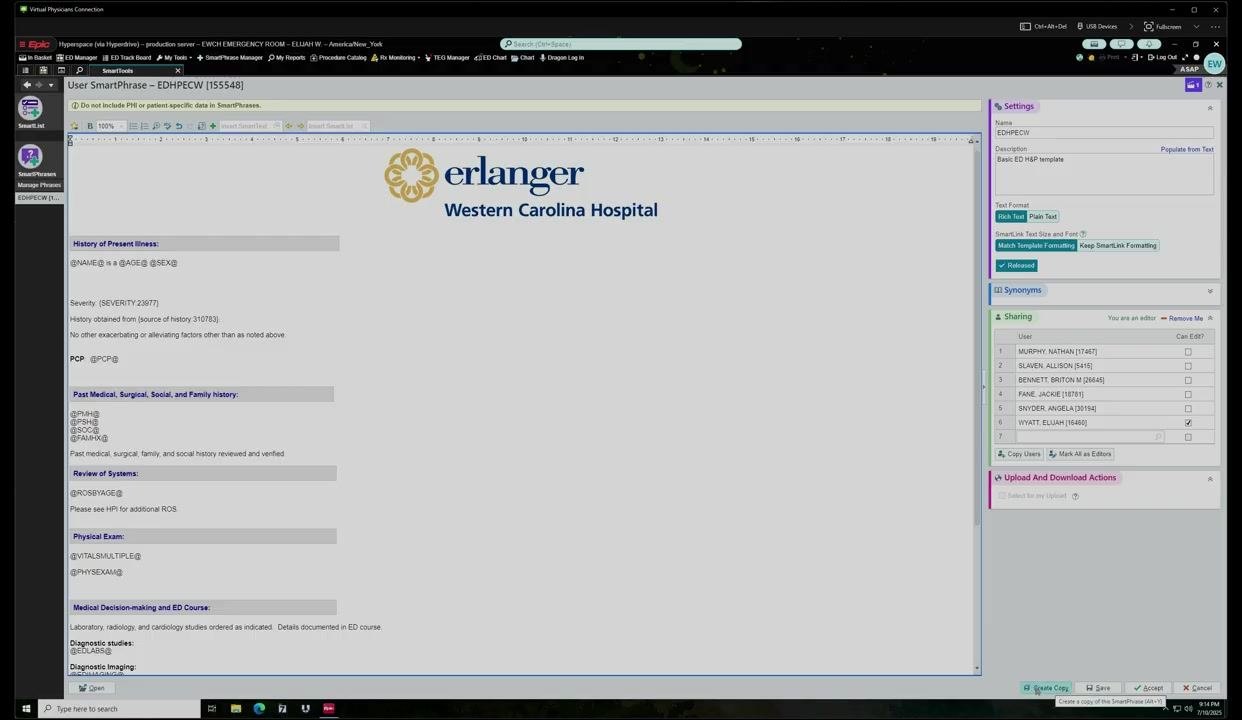
Review a full template structure
A comprehensive note template typically includes these sections:
- History of Present Illness — uses SmartLinks such as
@NAME@,@AGE@,@SEX@to auto-populate patient data - Past Medical, Surgical, Social, and Family History — uses SmartLinks like
@PMH@,@PSH@,@SOC@,@FAMHX@ - Review of Systems — uses
@ROSBYAGE@and prompts for additional review of systems - Physical Exam — uses
@VITALSMULTIPLE@and@PHYSEXAM@ - Medical Decision-making and ED Course — includes SmartLinks for labs, imaging, therapies, procedures, and clinical course
- Final Impression — uses
@DIAG@to pull in the diagnosis - Signature — optionally includes a custom signature SmartPhrase such as
@ME@
The right panel displays template settings, sharing options, and synonym management.
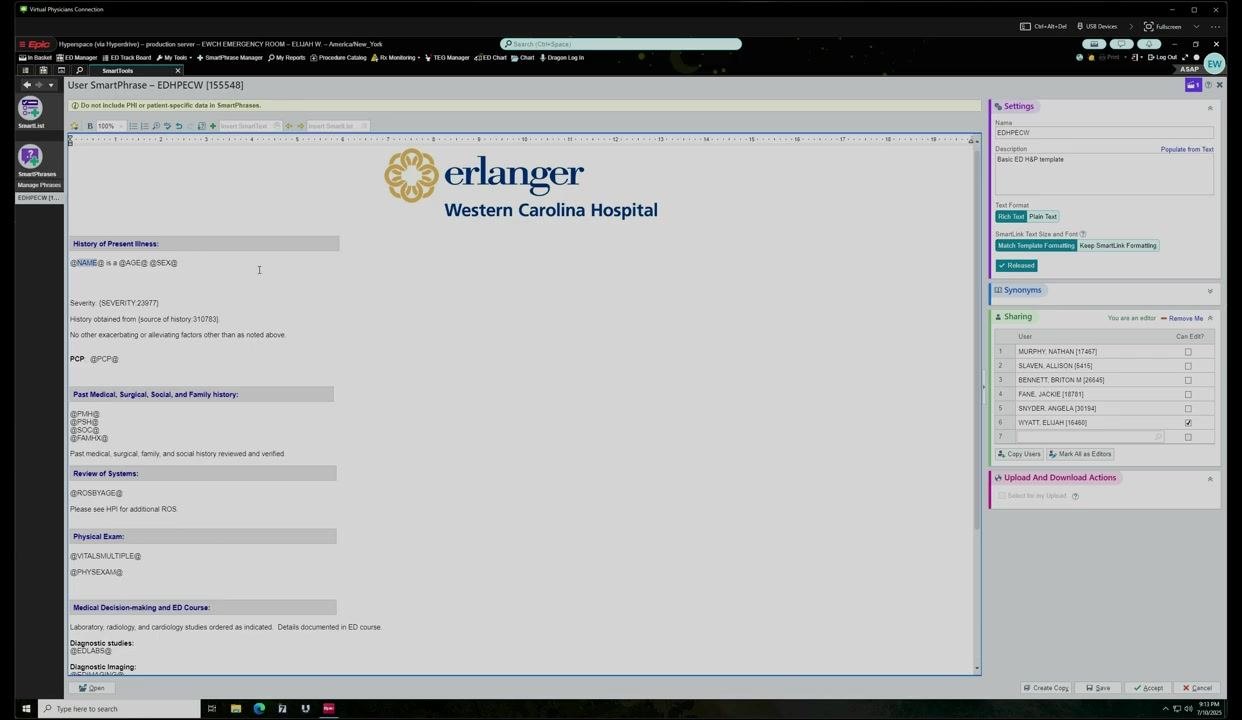
Understand how clinical data is pulled in
SmartLinks such as @EDLABS@, @EDIMAGING@, @EDMEDADMINS@, and @PROCDOC@ automatically insert relevant labs, imaging studies, administered therapies, and procedure notes performed in the ED. Document your Medical Decision Making in the "ED Course" section, and the "Final Impression" section pulls in the diagnosis using @DIAG@. The signature section can use a custom SmartPhrase like @ME@ to insert your name and credentials automatically.
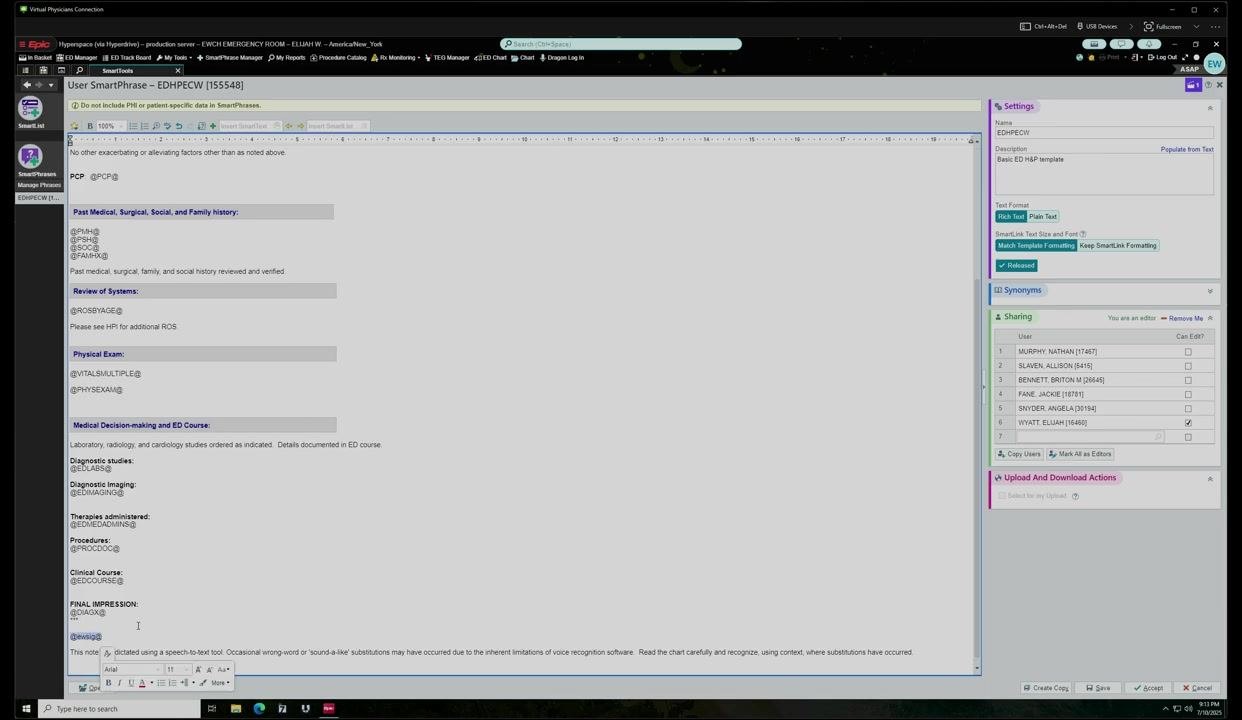
Create a reusable signature SmartPhrase
Develop a separate template for your signature, for example containing your name and "Emergency Medicine." Insert the signature SmartPhrase, such as @ME@, at the end of your main template. This lets you update your signature in one place, and the change will reflect across every template using @ME@.
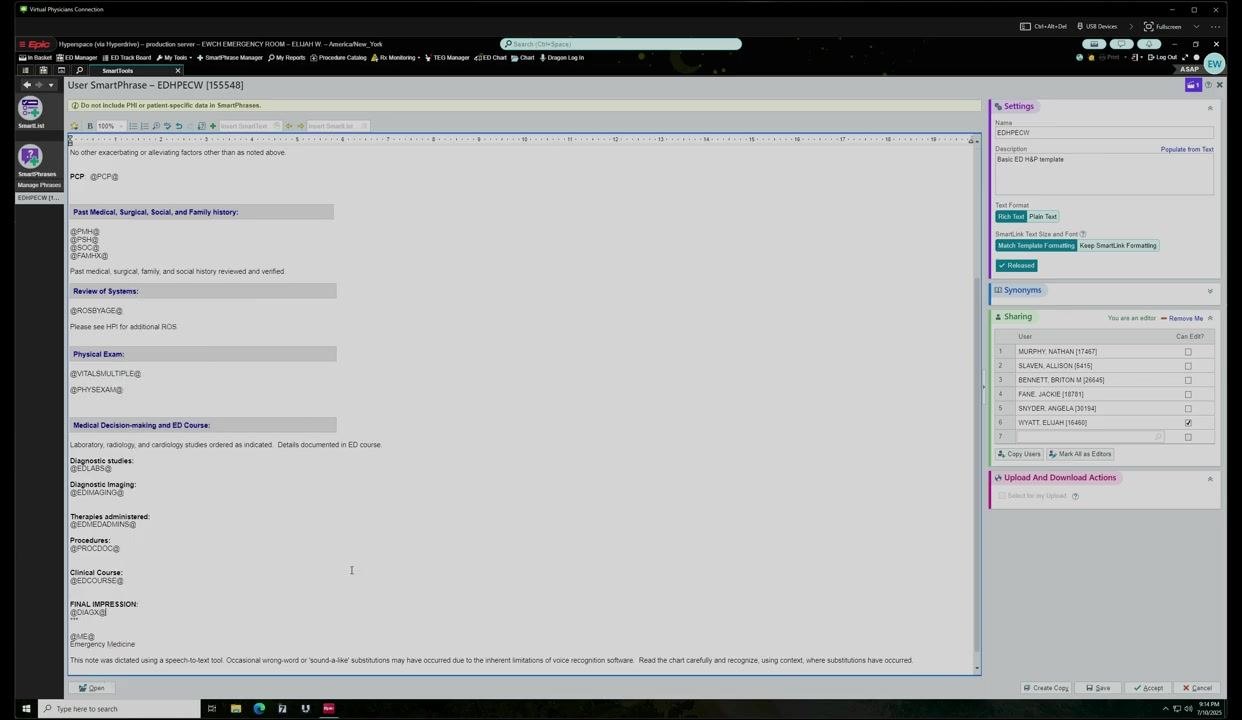
Recognize SmartLists within templates
Items surrounded by brackets with numbers, such as [ ], represent SmartLists. These provide selectable options within your documentation, allowing for quick selection of predefined options and streamlining documentation further.
Copy an existing template
Click Create Copy at the bottom of the SmartPhrase editor window, then enter a new name for the copied template, such as "EWCHP." Save the new template for personal use or for sharing with colleagues.
Browse all available SmartLists
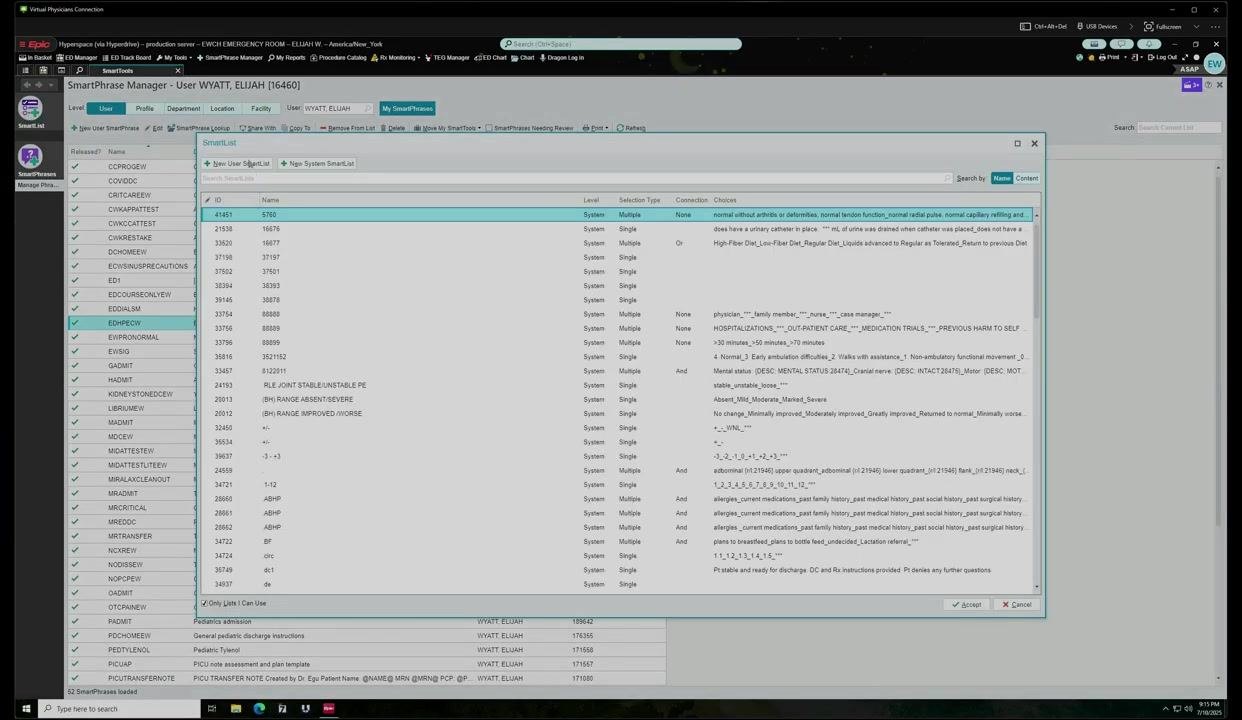
In the SmartPhrase Manager, locate the SmartList tab at the top of the window and click it to display a comprehensive list of all standard SmartLists in the system. There are thousands of SmartLists available, each with a unique ID, name, selection type, and list of choices.
Create a new SmartList
Click New User Smart List at the top of the SmartList window to open a new editor. Enter each option on a separate line, pressing Enter after each one. Optionally, check the Default? box next to any option you want selected by default — useful for discharge instructions where you may want to pre-select the most common instruction.
Configure SmartList settings and save
On the right panel, enter a name for your SmartList in the Name field, and optionally provide a display name and choose whether to include it as a label. Set the selection type (Single or Multiple) and connection logic if needed, and manage sharing permissions by adding users and specifying who can edit the SmartList. Click Save at the bottom right to finish.
Insert a SmartList into a template
While editing a SmartPhrase, click Insert Smart List at the top of the editor and search for your SmartList by name or content. Double-click the desired SmartList to insert it into your template, where it will appear in the note in a bracketed format.
Apply SmartLists to discharge instructions
Create SmartLists for variables such as suture type (absorbable or non-absorbable) and suture removal timing, then insert them into your discharge instruction SmartPhrase template. This lets you quickly select the appropriate options for each patient.
Share SmartLists and SmartPhrases with other users
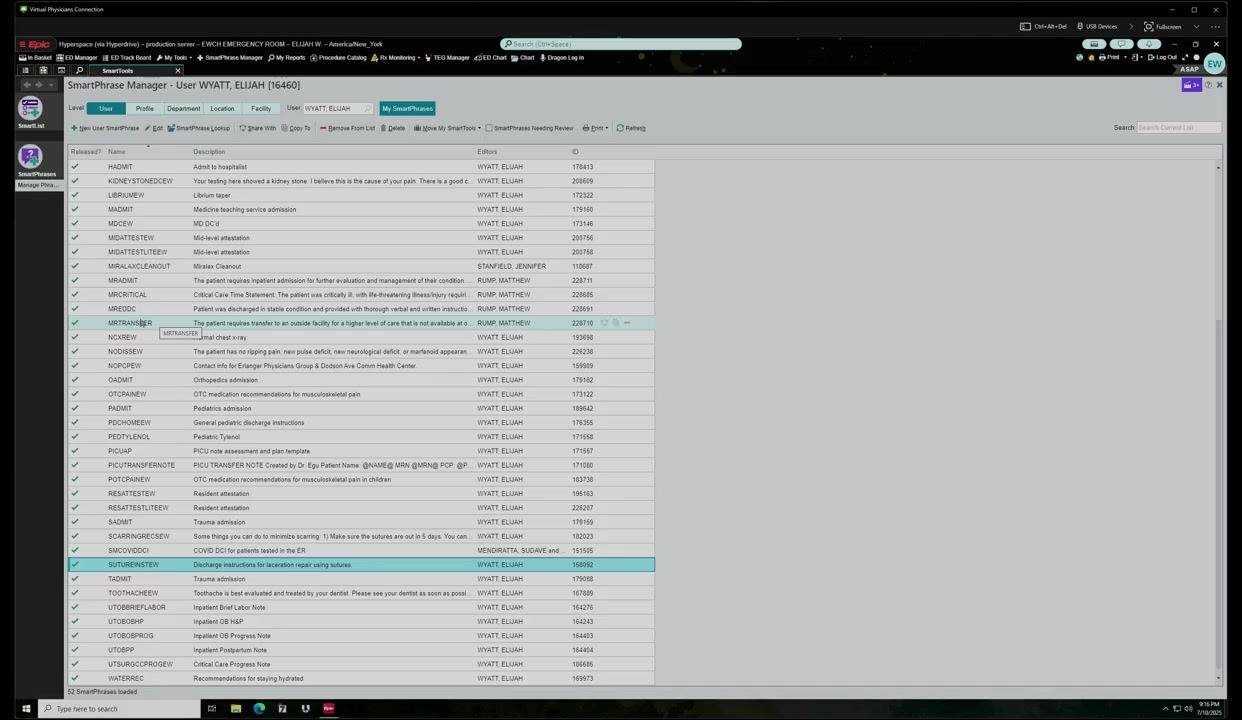
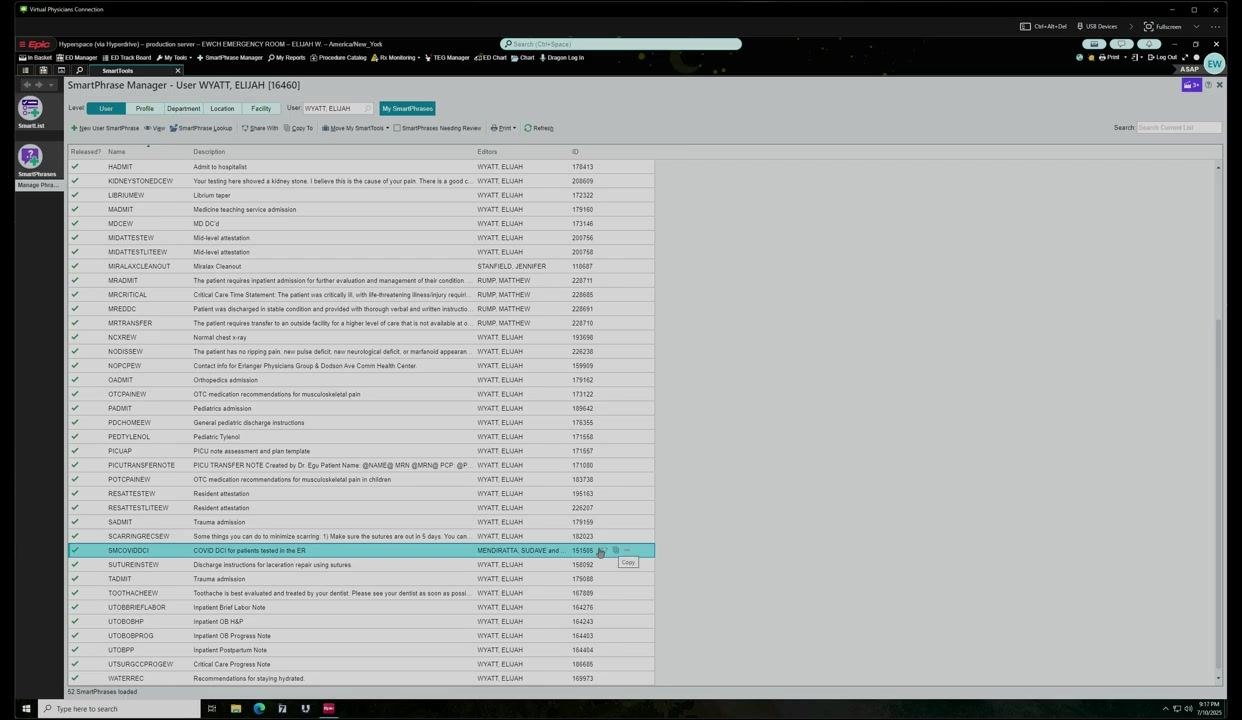
In the SmartPhrase Manager, type the name of the user whose templates you wish to view, then select the desired SmartPhrase or SmartList from their list. Use Share to subscribe to their template so you receive updates if they make changes, or use Copy Users or Mark All as Editors to manage permissions efficiently.
Choose between "Share" and "Copy"
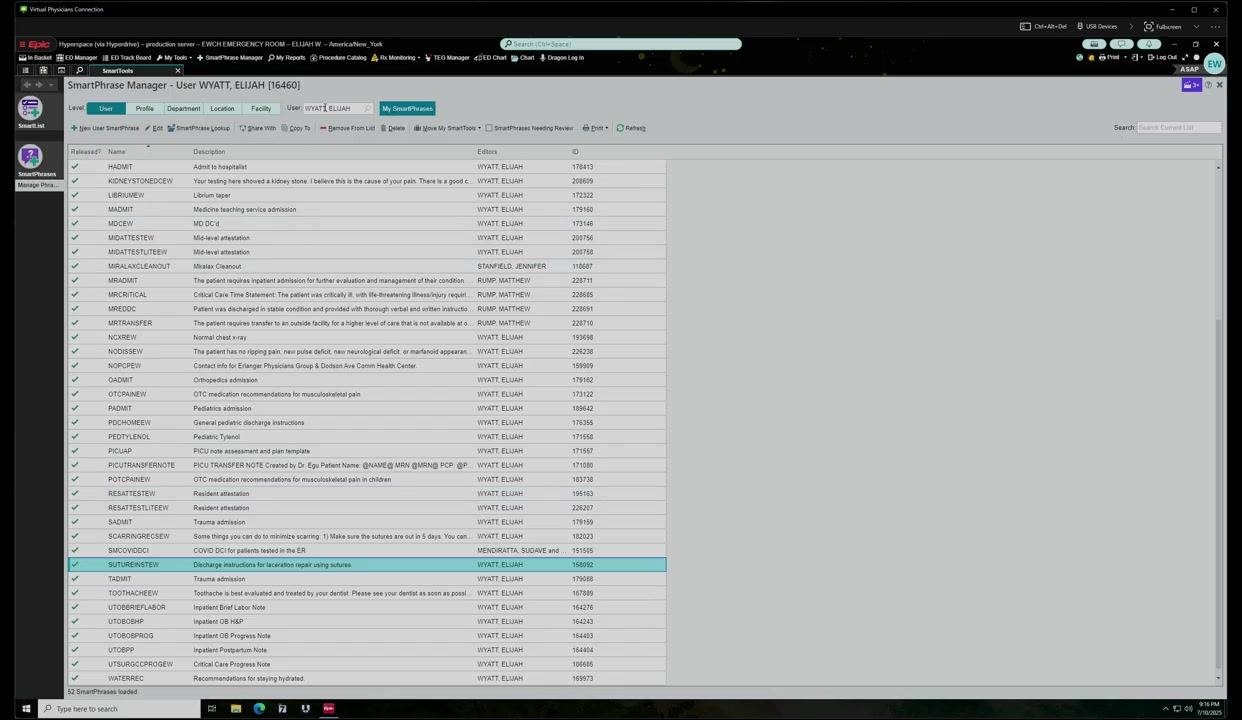
Both options are accessible from the SmartPhrase Manager by selecting a template and clicking either Share or Copy next to the entry. The interface displays available templates with columns for Name, Description, Editors, and ID.
- Use Share to subscribe to the original template; any changes made by the owner will automatically update for you as well.
- Use Copy to create a separate copy in your account; changes made by the original owner will not affect your copy, which is useful for customizing a template without being affected by future updates.
For example, to copy the "COVID D/C for patients tested in the ER" SmartPhrase, click Copy next to it. To subscribe to updates instead, click Share.
Verify your template is available
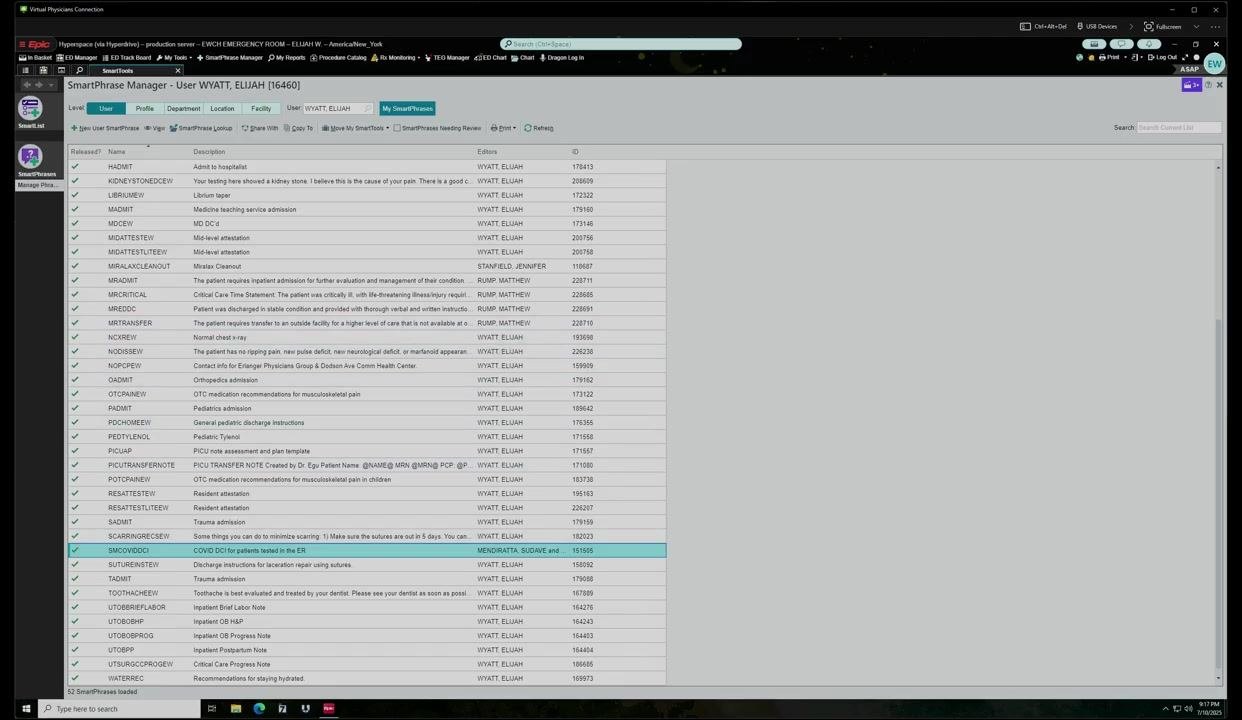
Check the SmartPhrase Manager under My SmartPhrases to confirm that your selected or newly created SmartPhrase or SmartList appears in your account and is ready for use.
Summary
You now know how to create a note template in Epic using SmartPhrases, enrich it with SmartLinks that auto-populate patient data, and add SmartLists for quick, standardized selections such as discharge instructions. You can also copy existing templates for personal customization or share them with colleagues to keep everyone working from the same up-to-date documentation.
What's next
Continue customizing your templates by exploring the full SmartLink database for additional fields, and consider building SmartLists for other repetitive documentation needs across your workflow.
Generation details: cost, quality tiers
Docsie billed 3,000 credits ($2.10) to analyze this 6-minute video at standard quality. The rewrite, template fill and Word/PDF exports were included. The same video at each quality tier:
| Quality | Frames sampled | Credits | Approx. cost |
|---|---|---|---|
| Draft | every 16-30 s | 1,500 | $1.05 |
| Standard (this guide) | every 8-15 s | 3,000 | $2.10 |
| Detailed | every 4-7 s | 6,000 | $4.20 |
| Ultra | every 1-3 s | 12,000 | $8.40 |
Credits priced at $0.70 per 1,000; plans include a monthly allowance. Enterprise customers on on-premise or bring-your-own-model deployments run this on their own inference and pay no per-video credits.
Generated by Docsie Video-to-Docs on 2026-10-01 from a 5-minute video. Screenshots are frames from the source video and belong to their creator, Elijah Wyatt, whose original is embedded above. If you own this video and want the guide removed or credited differently, contact us and we will act within one business day.