
How to Create a Macro in Epic
Macros in Epic let you save a complete set of flowsheet entries and reuse them for other patients who require a similar assessment. This guide walks you through how to create a macro in Epic, starting from a fully charted assessment, saving it as a reusable macro, applying it to another patient, and adjusting the populated data when a patient's findings differ from the default.
Video: Creating Macros in Epic!!! by Jenna Hisey. All credit for the demonstration goes to the creator; watch the original on YouTube. The written guide below was generated from this video by Docsie. Creator? Request a change or removal.
Macros in Epic let you save a complete set of flowsheet entries and reuse them for other patients who require a similar assessment. This guide walks you through how to create a macro in Epic, starting from a fully charted assessment, saving it as a reusable macro, applying it to another patient, and adjusting the populated data when a patient's findings differ from the default.
Prerequisites
- Access to Epic, ideally in a training or playground environment for practice.
- A patient record open with permission to chart on the Flowsheets tab.
Complete a standard patient assessment
Before you can create a macro, you need a fully charted assessment to base it on.
- Open Epic and, if practicing, work in the training or playground environment.
- Click the Flowsheets tab at the top of the screen.
- Select the patient you want to chart on from the patient list, then open the Basic Assessment tab.
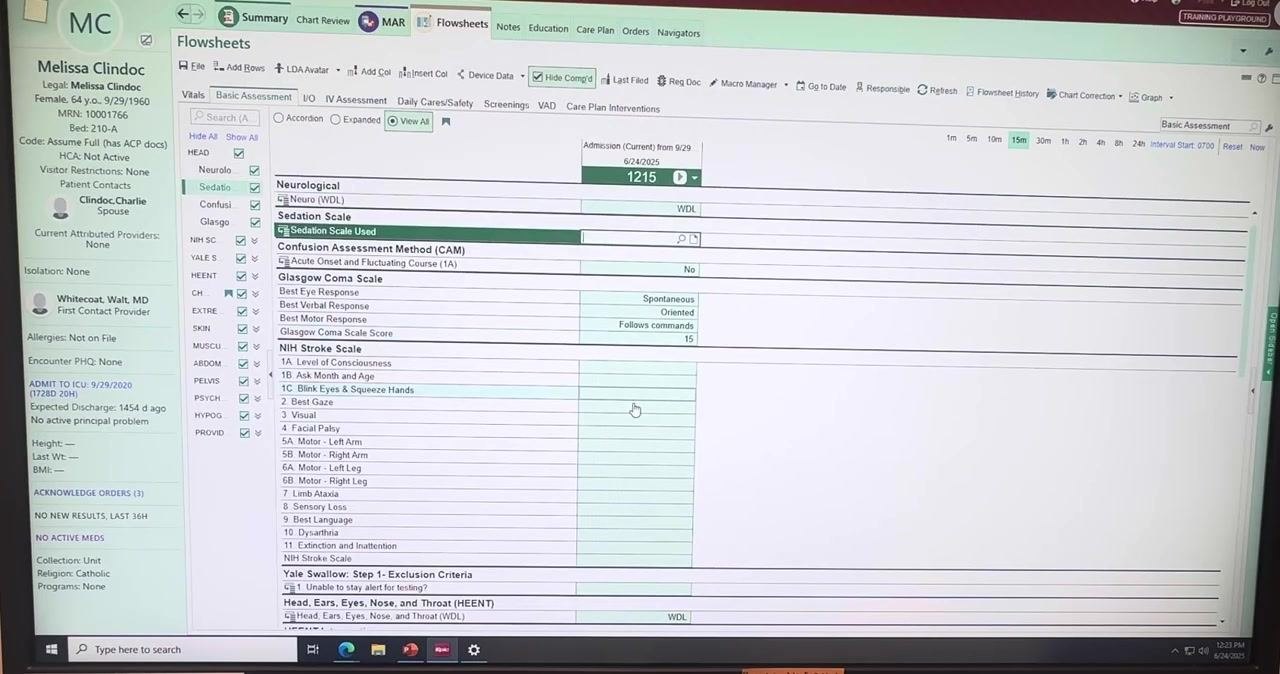
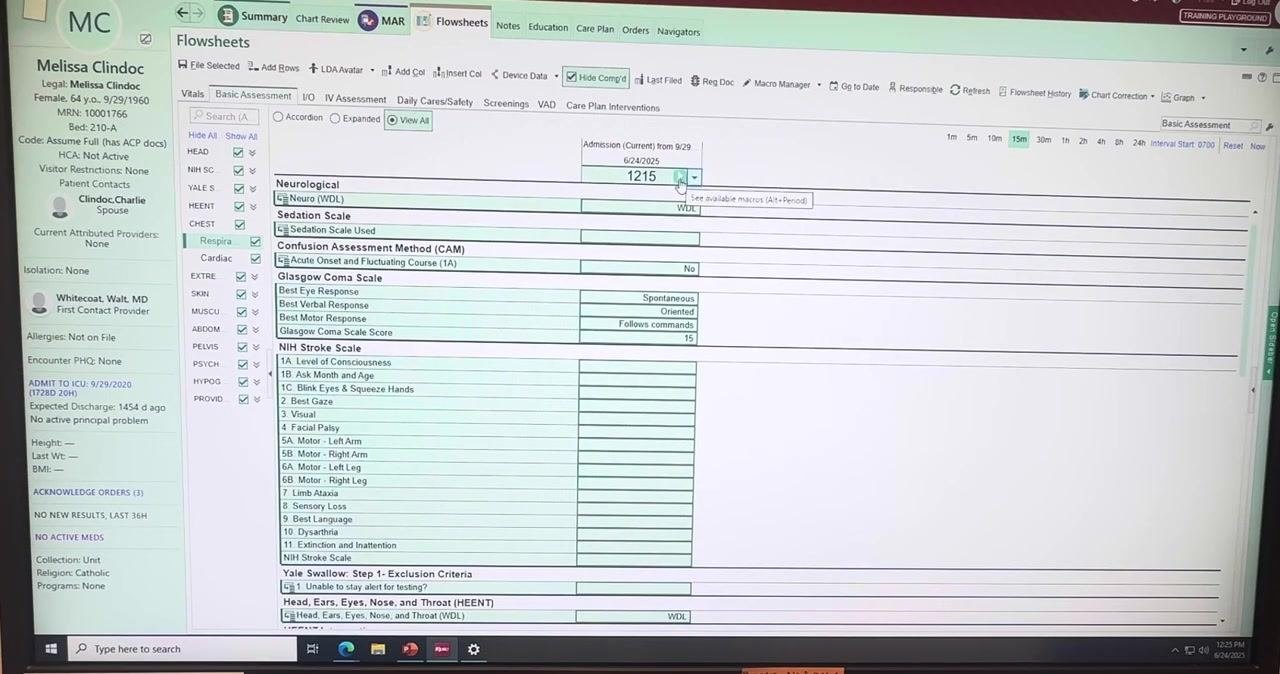
- Enter your standard charting information. For a patient who is within defined limits (WDL), fill out each section accordingly, for example:
- Neurological: WDL
- Sedation Scale: Not used
- Confusion Assessment: No
- Glasgow Coma Scale: Spontaneous, Oriented, Follows commands, Score 15
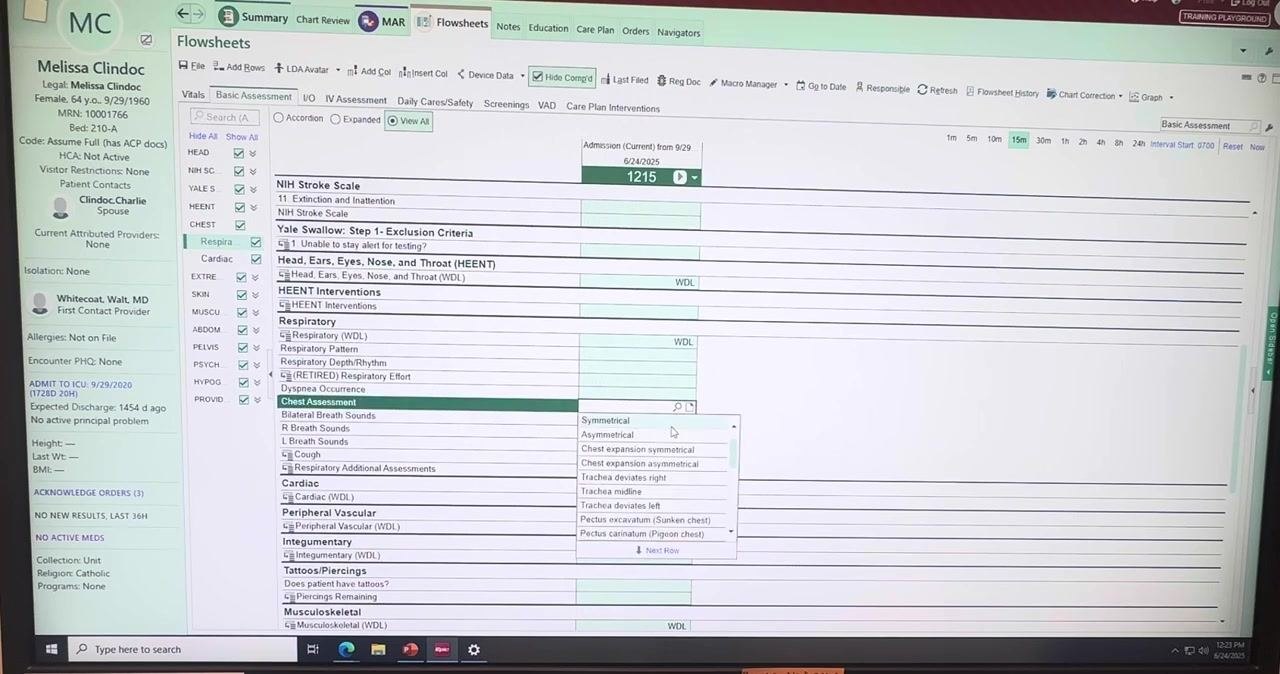
- Head, Ears, Eyes, Nose, and Throat: WDL
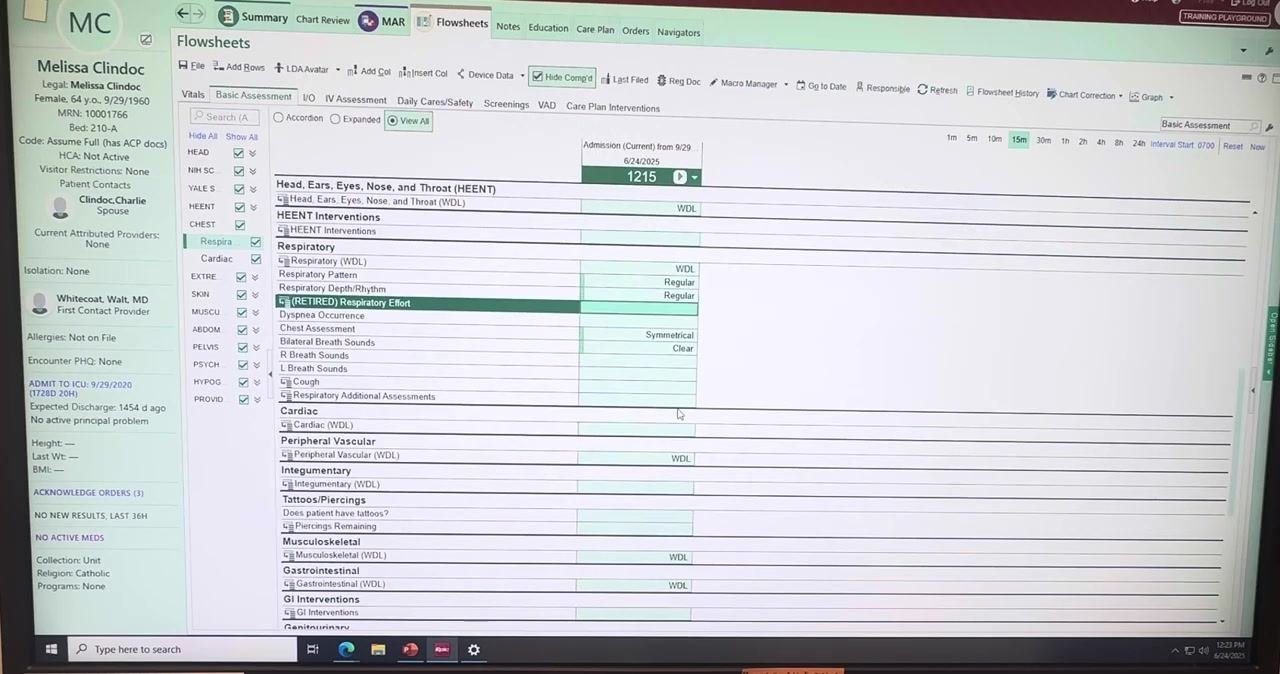
- Respiratory: WDL, Regular pattern, Regular depth/rhythm
- Chest Assessment: Symmetrical, Clear
- Cardiac: WDL
- Peripheral Vascular: WDL
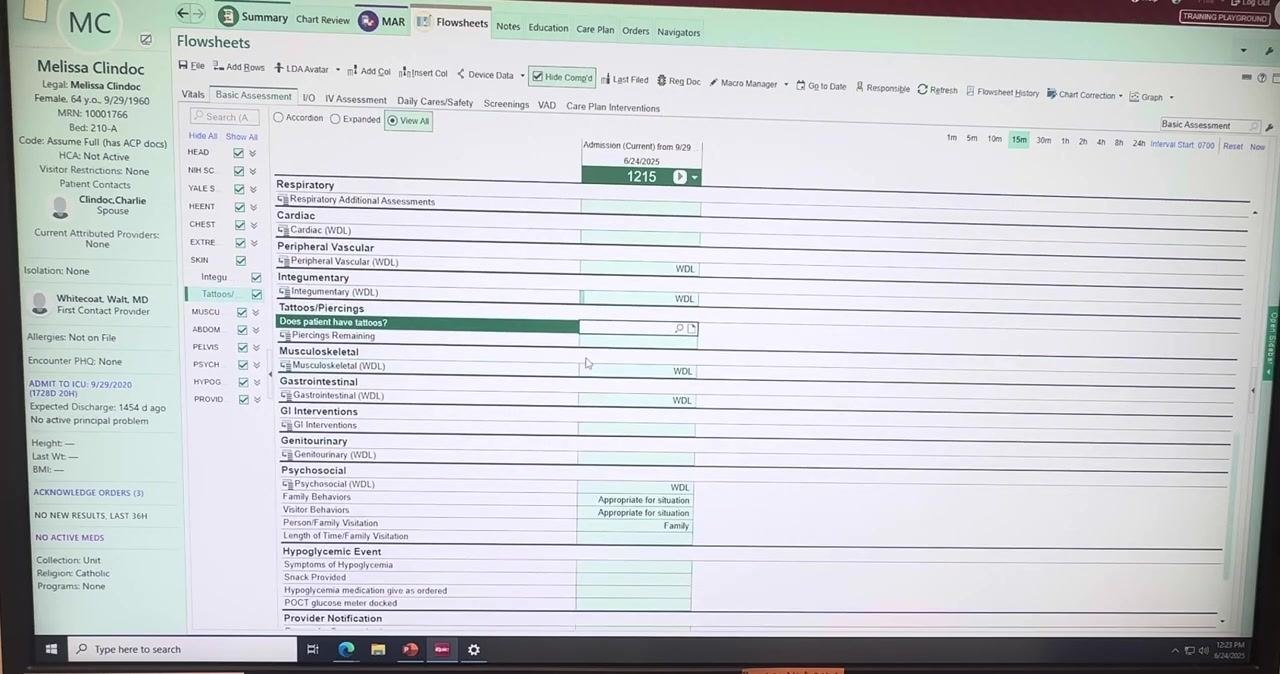
- Integumentary: WDL
- Musculoskeletal: WDL
- Gastrointestinal: WDL
- Genitourinary: WDL
- Psychosocial: Appropriate for situation
- Family: Family present
- Hypoglycemic Event: None
- Tattoos/Piercings: As applicable
Complete all remaining fields
- Scroll through the assessment to make sure every relevant field is filled in.
- Use the dropdown menus to select the appropriate values—for example, choose "Symmetrical" for the Chest Assessment field.
- Confirm that each field reflects the correct patient status, such as Respiratory Pattern: Regular, Depth/Rhythm: Regular, Chest Assessment: Symmetrical, and Breath Sounds: Clear.
- If a value needs to change, click the field and select a new option from its dropdown—for example, change "Cough" from "Non-productive" to another option if needed.
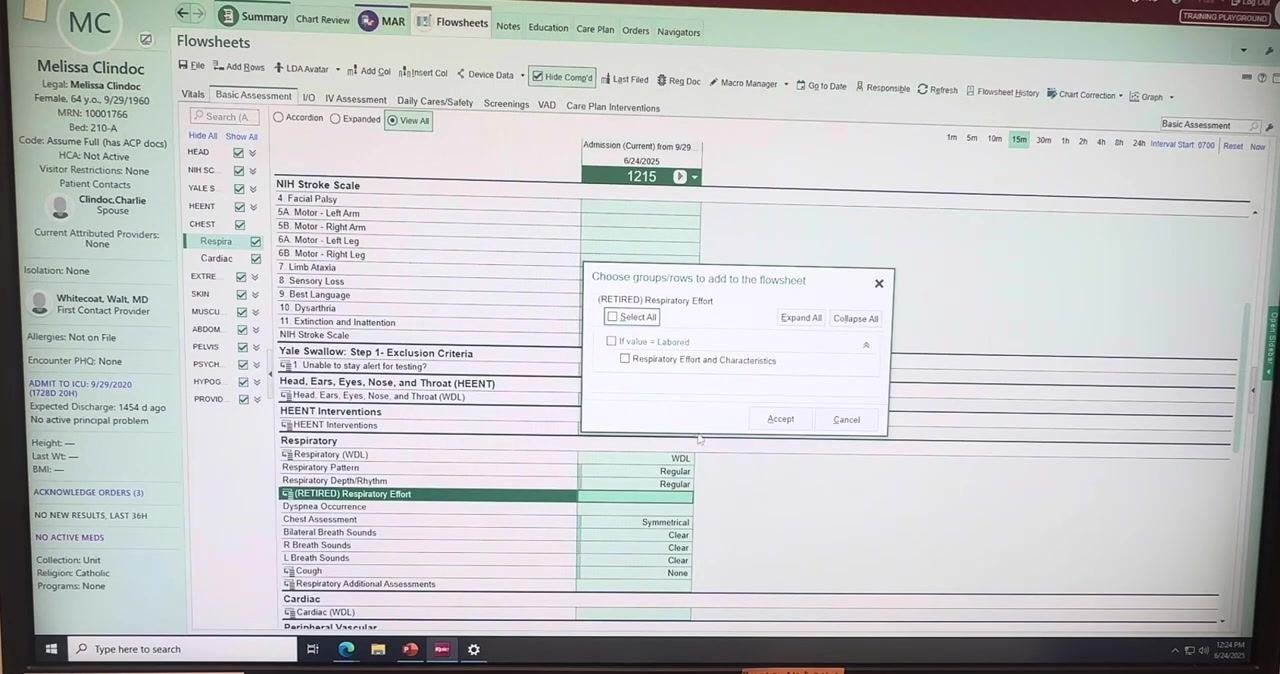
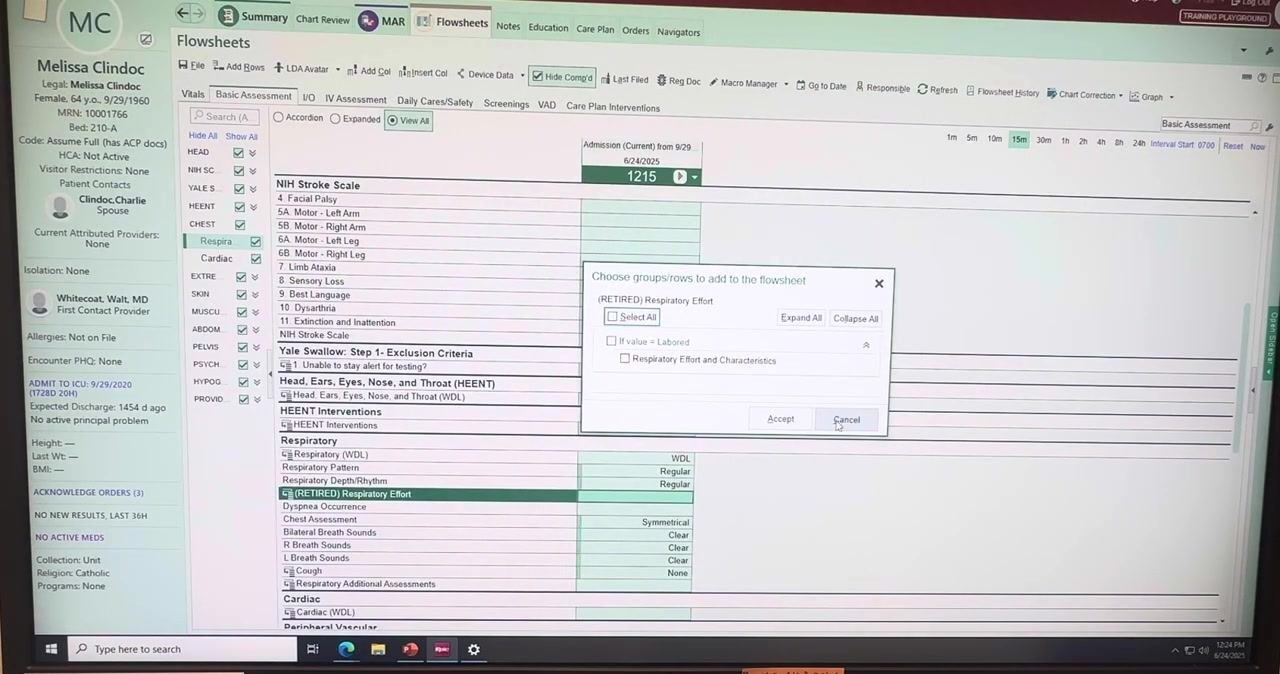
- If prompted, use the Choose groups/rows to add to the flowsheet dialog to add or remove specific assessment rows. Select or deselect the rows you need, then click Accept or Cancel to proceed.
- Once your charting is complete and accurate, move your cursor to the top of the screen and locate the small arrow or play icon—this is the Macros button, which you'll use to create or apply macros.
With your assessment fully charted, you're ready to create a macro from this data.
Create a macro from your current data
This is the core step for how to create a macro in Epic, turning your completed assessment into a reusable template.
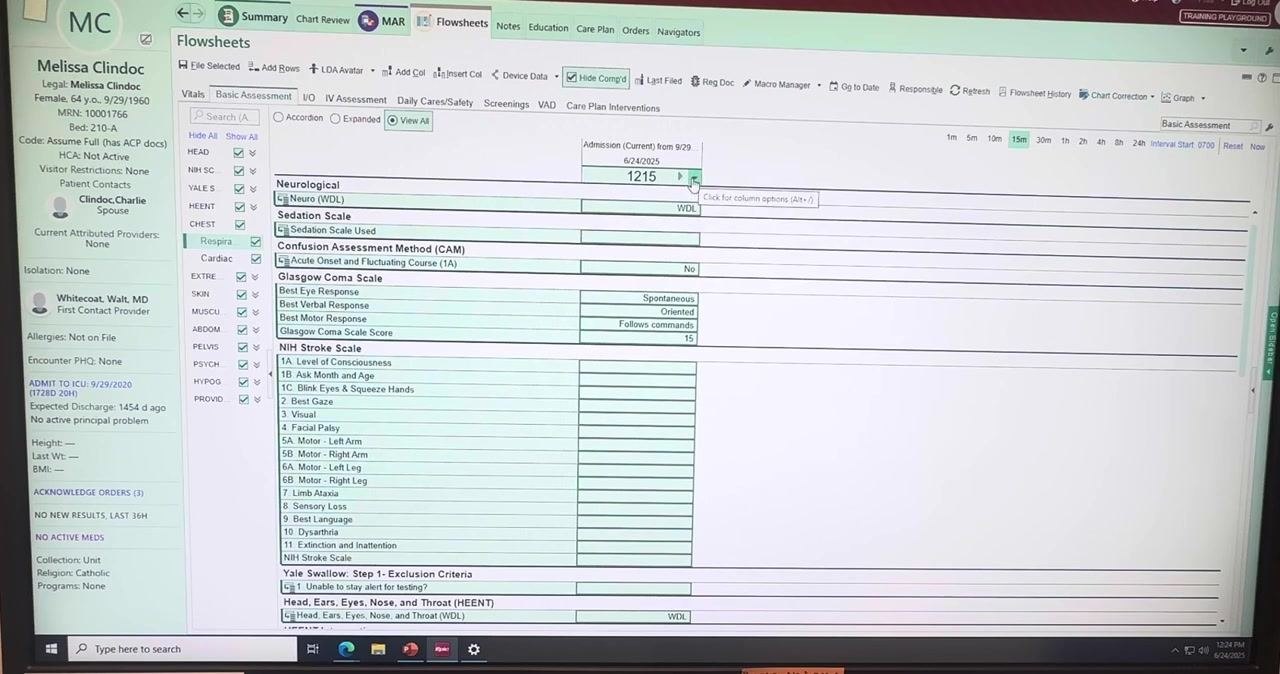
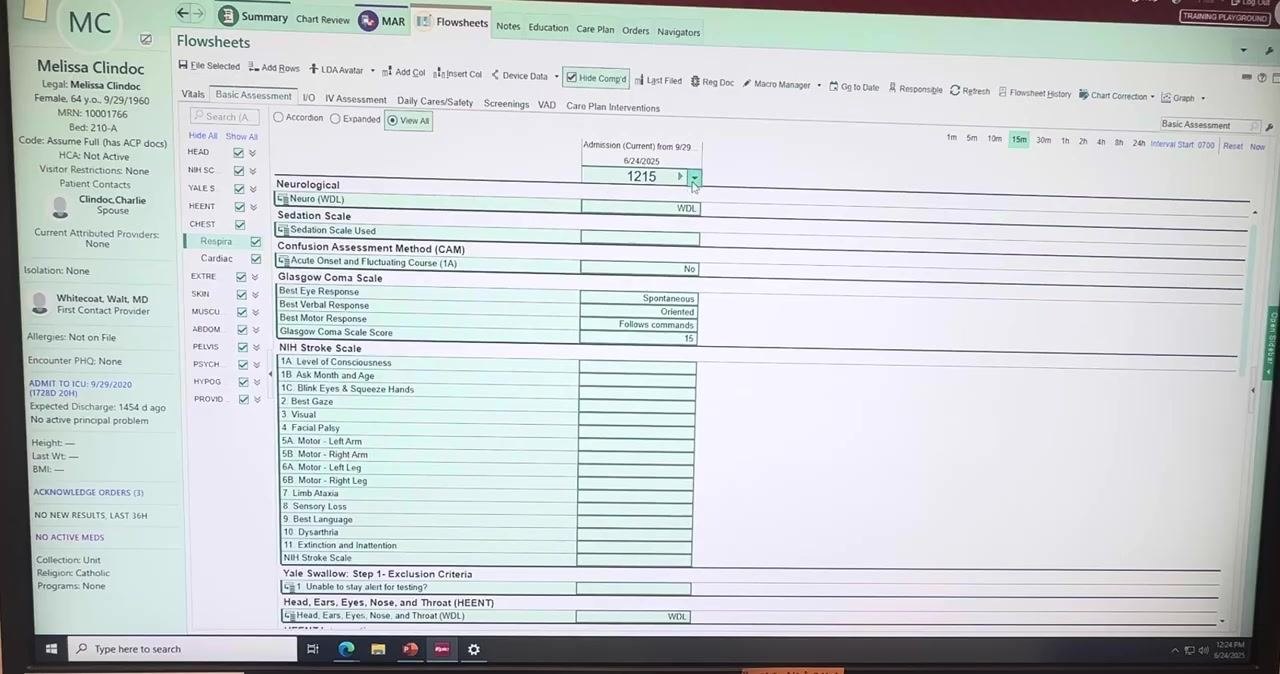
- Locate the downward-pointing arrow next to the time entry field (for example, "1215") at the top of the Flowsheets screen, and click it to open the macro options menu.
-
In the dropdown menu, click Create Macro from Current Data. This opens the Flowsheet Macro Manager window.
-
In the Flowsheet Macro Manager, enter a name for your macro in the Name field at the top—for example, "normal patient assessment WDL."
- Review all the fields in the Macro Manager to confirm the data is accurate and up to date. Check that each section—Neuro, Cardiac, Peripheral Vascular, Integumentary, Musculoskeletal, Gastrointestinal, Genitourinary, and Psychosocial—reflects the correct values, such as:
- WDL (Within Defined Limits) for all applicable systems
- Family Behaviors: Appropriate for situation
- Visitor Behaviors: Appropriate for situation
- Family: Family present
Make any necessary adjustments before saving.
- Click Accept at the bottom right of the Macro Manager window to save your macro.
Verify and apply the macro to another patient
-
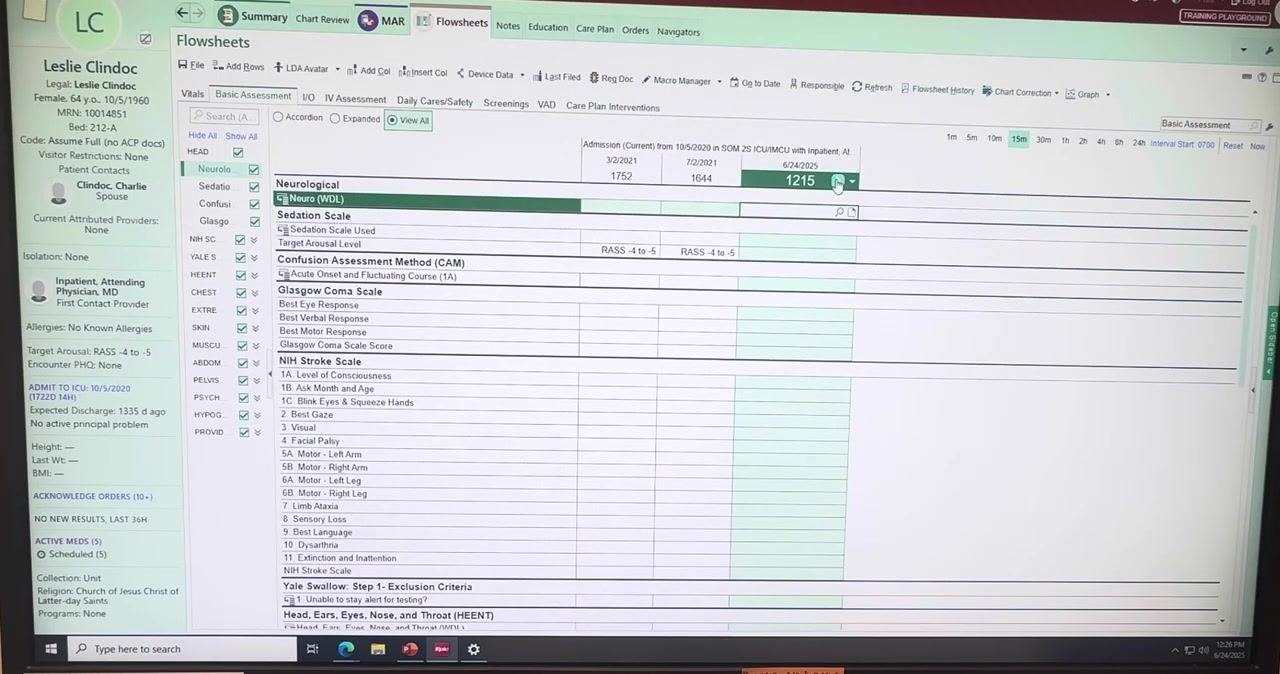
Return to the Flowsheets screen and click the downward arrow again to open the macro options. Confirm your newly created macro (for example, "normal patient assessment WDL") appears in the list of available macros.
-
File the charting for your current patient as usual.
-
Navigate back to your patient list or "brain" view, then select another patient who also requires a similar assessment.
-
Open the Flowsheets for the new patient and click the downward arrow next to the time entry field. Select your previously created macro (for example, "normal patient assessment WDL") from the list.
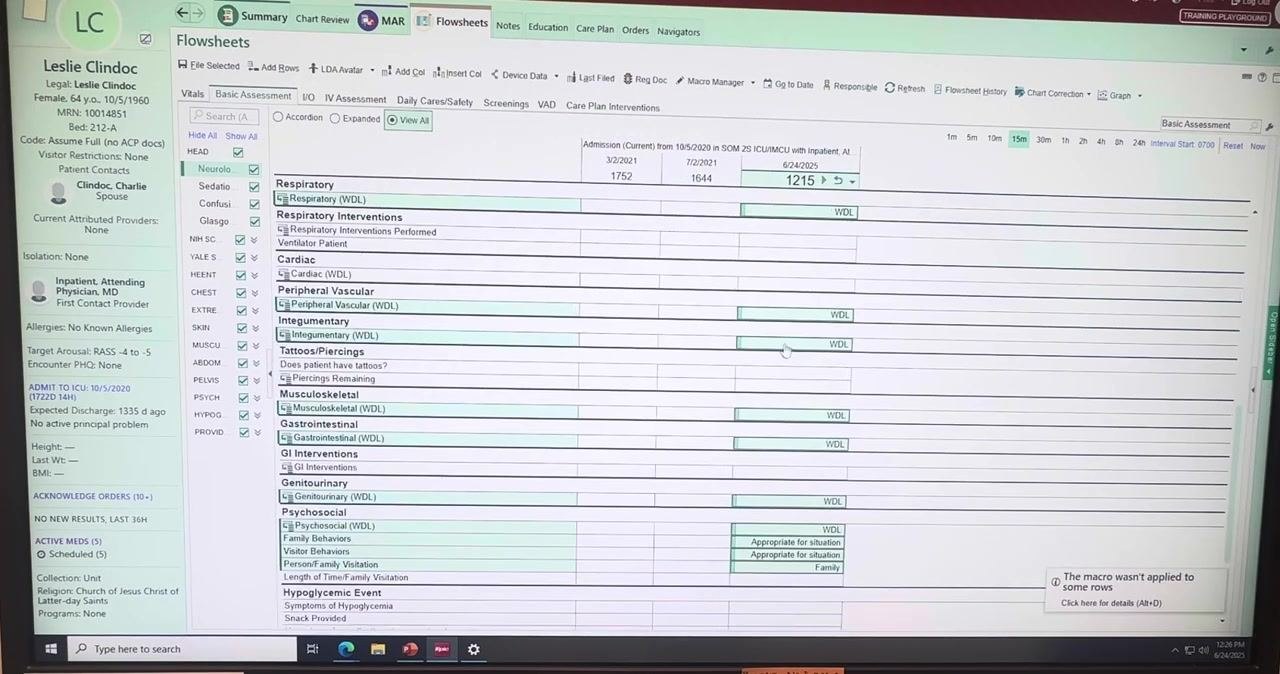
The macro automatically populates the assessment fields with the predefined values, streamlining your charting process.
Customize macro-populated data for patient-specific findings
A macro applies default values, so you need to update any section where the new patient's status differs.
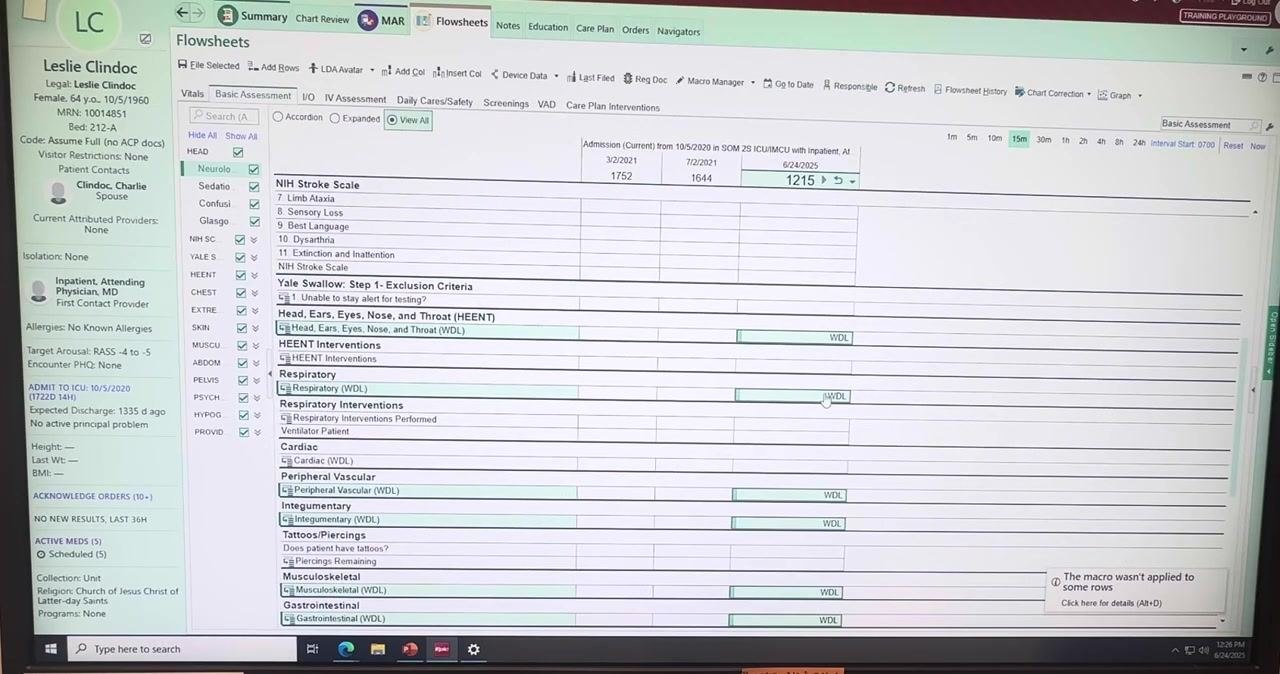
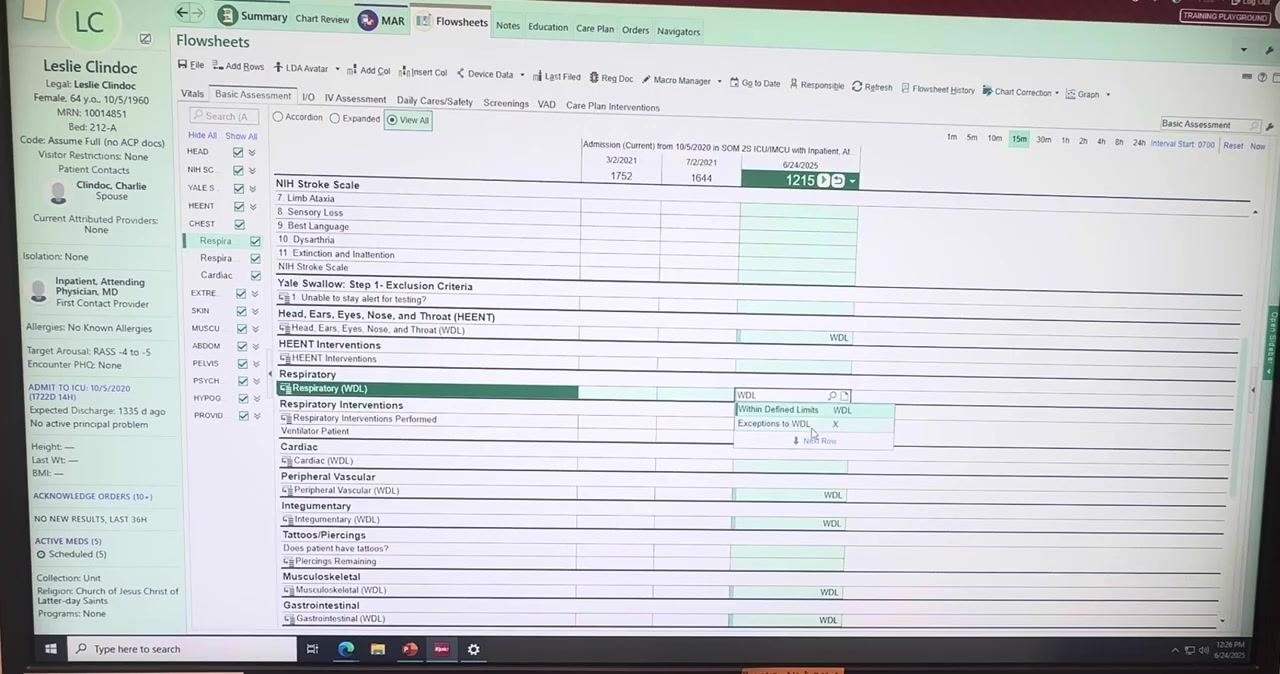
- After applying your macro, review each section of the Flowsheet for accuracy. Identify any areas where the patient's current status doesn't match the macro's default values—for example, a Respiratory status that is not within defined limits.
- Scroll to the relevant section—for example, Respiratory—and click the field that needs to change, such as "Respiratory (WDL)."
- Click the dropdown menu in the field and select Exceptions to WDL, or the appropriate value, to indicate the patient is not within defined limits.
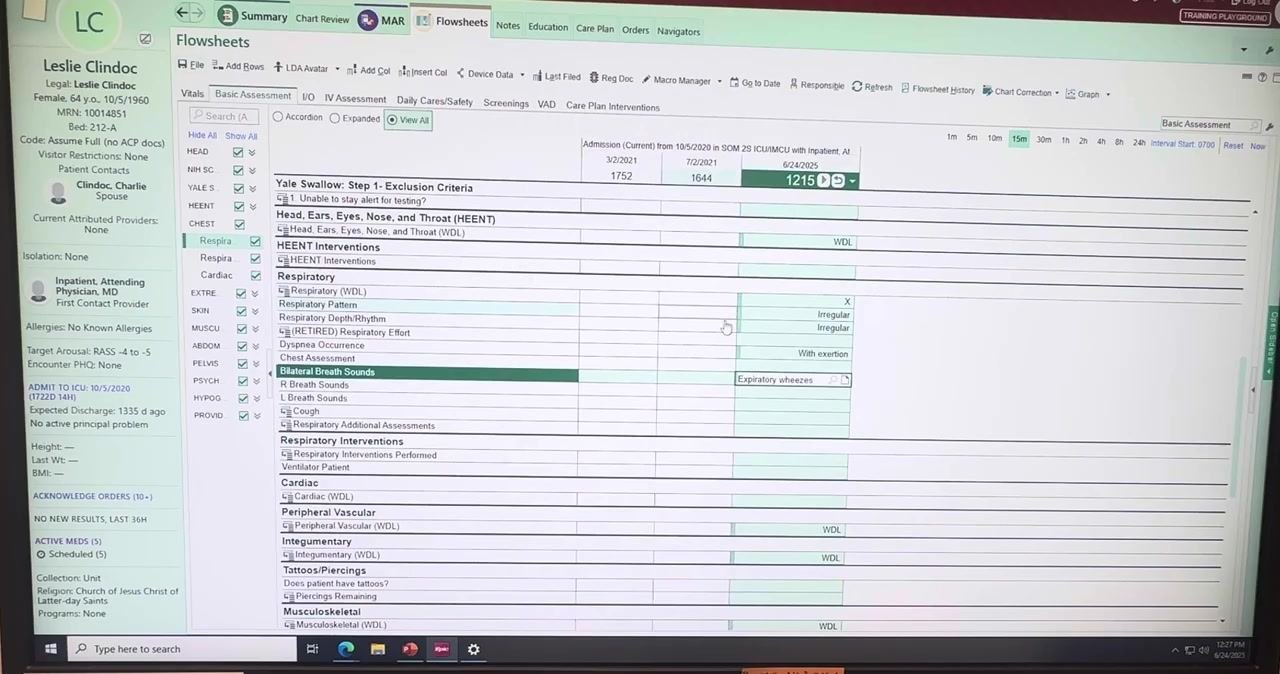
- Enter or select the specific findings that apply to the patient. For example:
- Set "Respiratory Pattern" to "Irregular"
- Indicate the context, such as "With exertion"
- Set "Bilateral Breath Sounds" to "Expiratory wheezes"
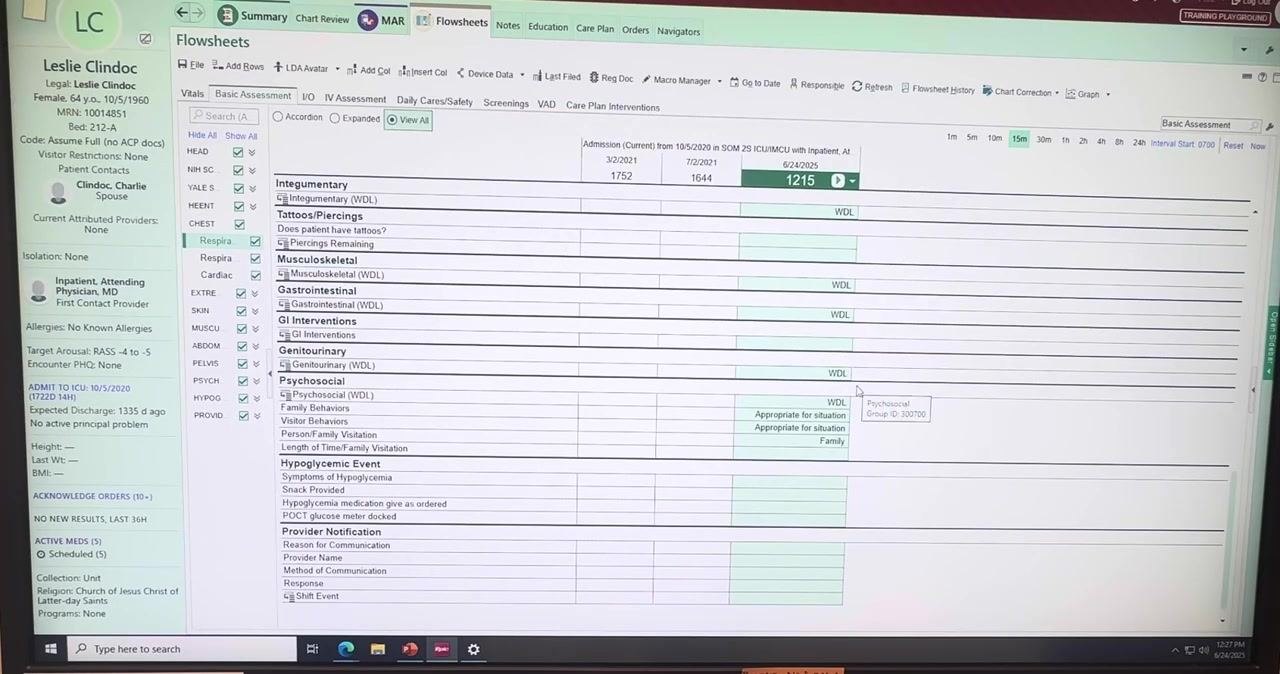
- Review the rest of the Flowsheet to confirm all other data is correct, and make any additional edits needed for other systems or findings.
- Once all necessary edits are complete and the Flowsheet accurately reflects the patient's current status, file the charting as usual to finalize your documentation.
Summary
You now know how to create a macro in Epic: complete a standard assessment, save it as a macro using Create Macro from Current Data, and apply it to other patients to speed up charting. You've also seen how to adjust macro-populated fields so each patient's record reflects their specific findings, keeping your documentation both efficient and accurate.
Generation details: cost, quality tiers
Docsie billed 2,500 credits ($1.75) to analyze this 5-minute video at standard quality. The rewrite, template fill and Word/PDF exports were included. The same video at each quality tier:
| Quality | Frames sampled | Credits | Approx. cost |
|---|---|---|---|
| Draft | every 16-30 s | 1,250 | $0.88 |
| Standard (this guide) | every 8-15 s | 2,500 | $1.75 |
| Detailed | every 4-7 s | 5,000 | $3.50 |
| Ultra | every 1-3 s | 10,000 | $7.00 |
Credits priced at $0.70 per 1,000; plans include a monthly allowance. Enterprise customers on on-premise or bring-your-own-model deployments run this on their own inference and pay no per-video credits.
Generated by Docsie Video-to-Docs on 2026-10-06 from a 4-minute video. Screenshots are frames from the source video and belong to their creator, Jenna Hisey, whose original is embedded above. If you own this video and want the guide removed or credited differently, contact us and we will act within one business day.