
How to Create an Application User in Dynamics 365
This guide walks you through how to create an application user in Dynamics 365 and connect it to the Redware Connector application. You'll register a new app in Azure, configure its API permissions and credentials, create the matching application user in Dynamics 365, assign security roles, and finish by configuring the Redware Connector to authenticate using that application user.
Video: Create an Application User in Microsoft Dynamics 365 CRM by Redware Research Limited. All credit for the demonstration goes to the creator; watch the original on YouTube. The written guide below was generated from this video by Docsie. Creator? Request a change or removal.
This guide walks you through how to create an application user in Dynamics 365 and connect it to the Redware Connector application. You'll register a new app in Azure, configure its API permissions and credentials, create the matching application user in Dynamics 365, assign security roles, and finish by configuring the Redware Connector to authenticate using that application user.
Prerequisites
- Access to the Azure Portal with permissions to register applications and grant admin consent.
- Access to Dynamics 365 with security administration rights to manage users and roles.
- The Redware Connector application installed on your computer.
1. Register a new application in Azure
Open the Azure Portal and go to App registrations. Click New registration at the top of the screen to start creating a new app entry.
Enter a Name for your application (for example, "REDWARE 02"). For Supported account types, select Single tenant only – [Your Organization Name]. Optionally, enter a Redirect URI if your scenario requires one. Click Register to create the application.
2. Configure API permissions
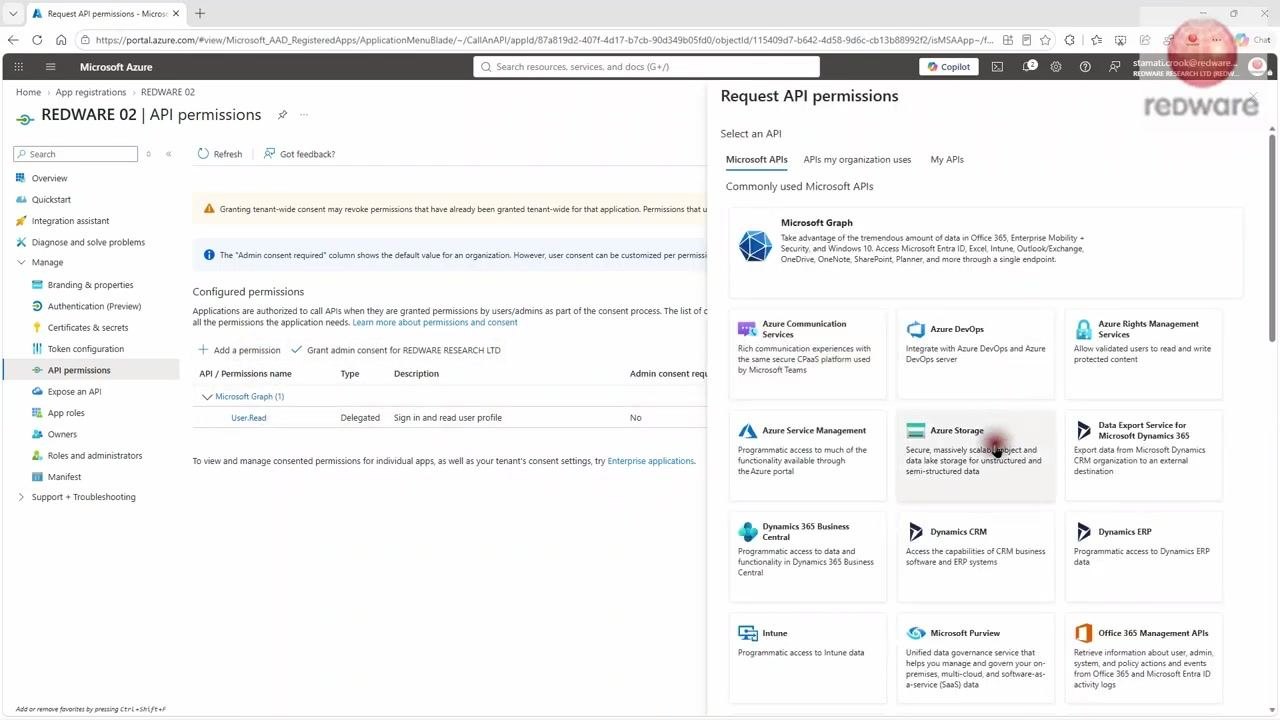
In the application's menu, select API permissions, then click Add a permission. From the list of APIs, select Dynamics CRM, choose the user_impersonation permission (Access Common Data Service as organization users), and click Add permissions.
After the permission is added, select it and click Grant admin consent for [Your Organization]. Confirm by clicking Yes in the admin consent confirmation dialog.
3. Copy the application (client) ID
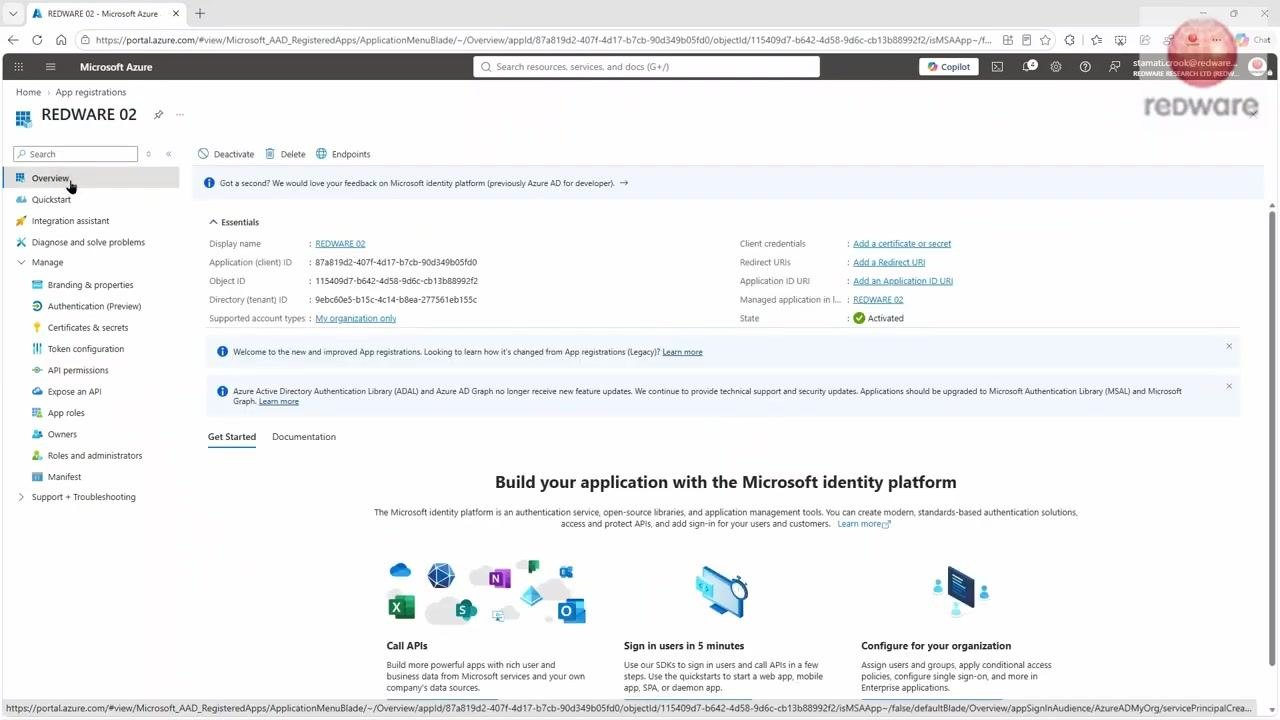
Go to the Overview section of your registered application and copy the Application (client) ID. You'll need this value later when configuring the Redware Connector.
4. Generate a client secret
In the application menu, select Certificates & secrets. Under Client secrets, click + New client secret, enter a description (for example, "Redware Connector"), and set the expiry to 180 days (6 months) as recommended. Click Add.
Copy the Value of the client secret immediately after it's created — it will not be shown again.
5. Open the application users list in Dynamics 365
Open Dynamics 365 and navigate to Advanced Settings. Go to Security > Users, then click the link to open the application users list.
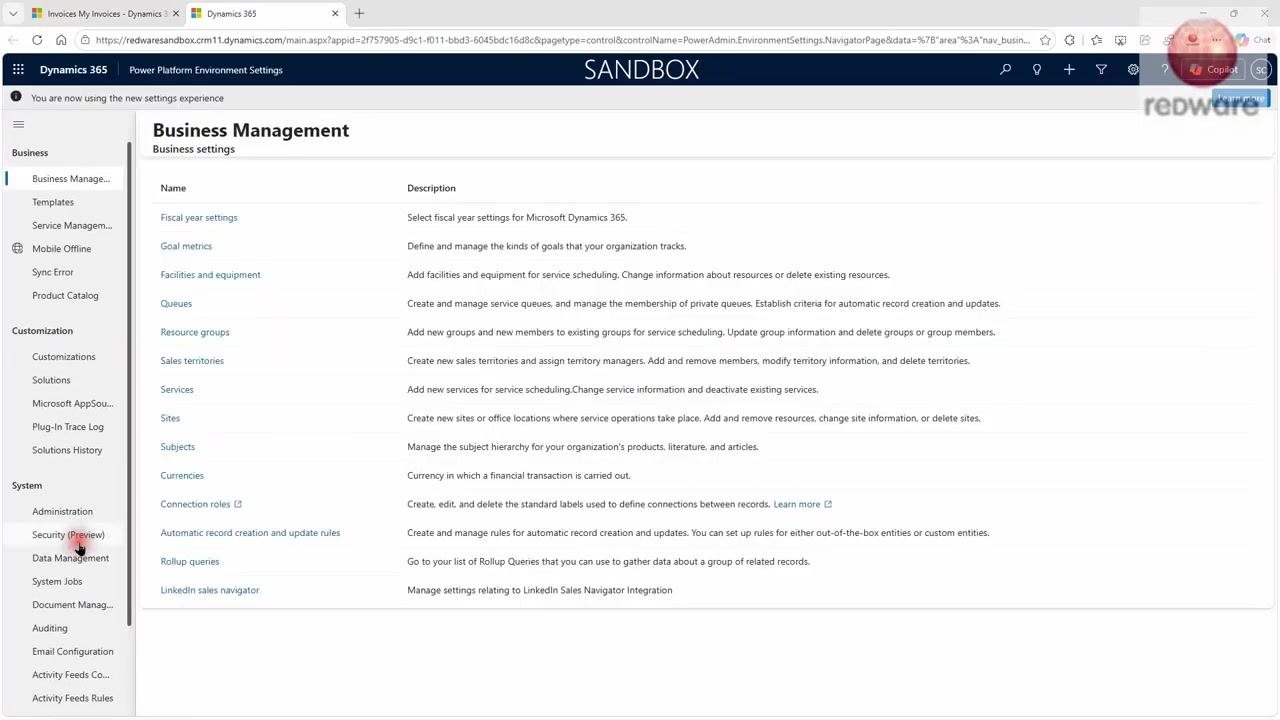
In the Users section, select Application Users. Click + New user to add a new application user, then search for and select the app you registered in Azure (for example, "Redware Connector").
6. Create the application user and assign security roles
In Dynamics 365, navigate to Settings > Security > Application users. Click + New app user to begin adding your Azure-registered app as an application user.
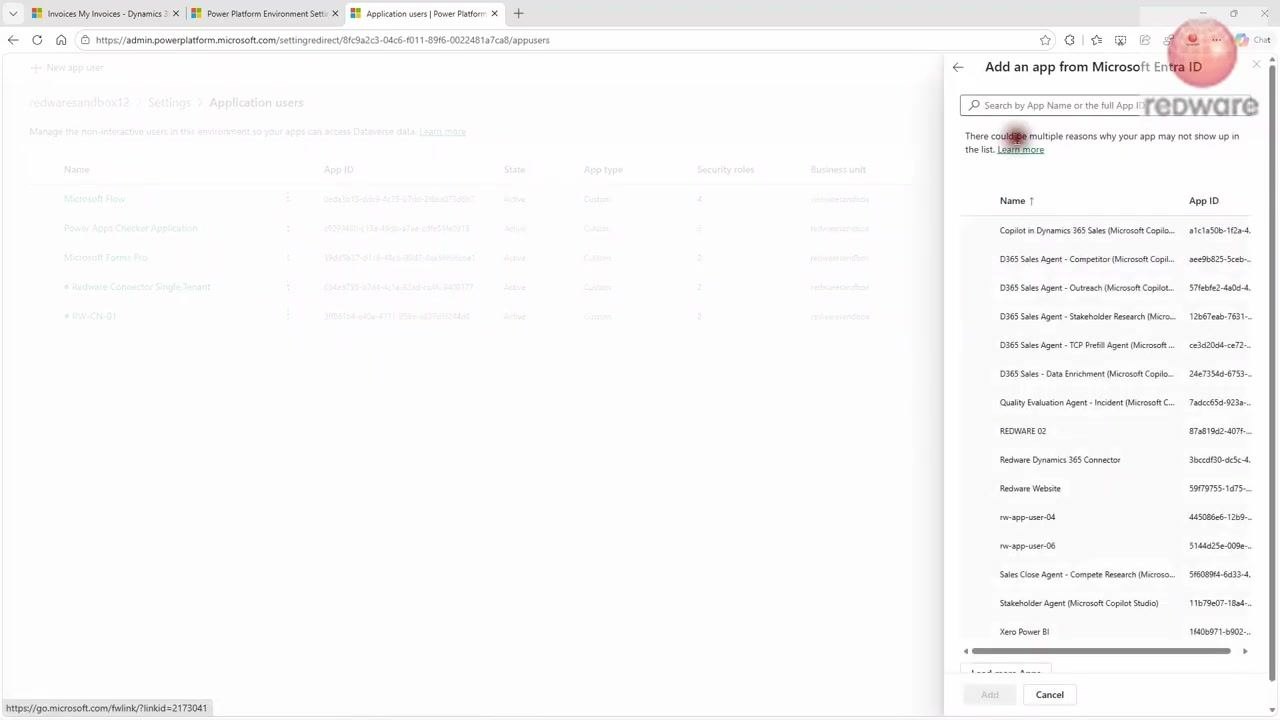
In the Add an app from Microsoft Entra ID panel, search for your registered app (for example, REDWARE 02). Select it from the list and click Add.
In the Create a new app user panel, confirm the App field is set to REDWARE 02, set the Business unit to your organization's business unit (for example, redwaresandbox), then click the pencil/edit icon next to Security roles to assign roles.
In the security roles selection panel, assign the following roles:
- Redware Billing
- Sales Manager
Select each role, then confirm your selection.
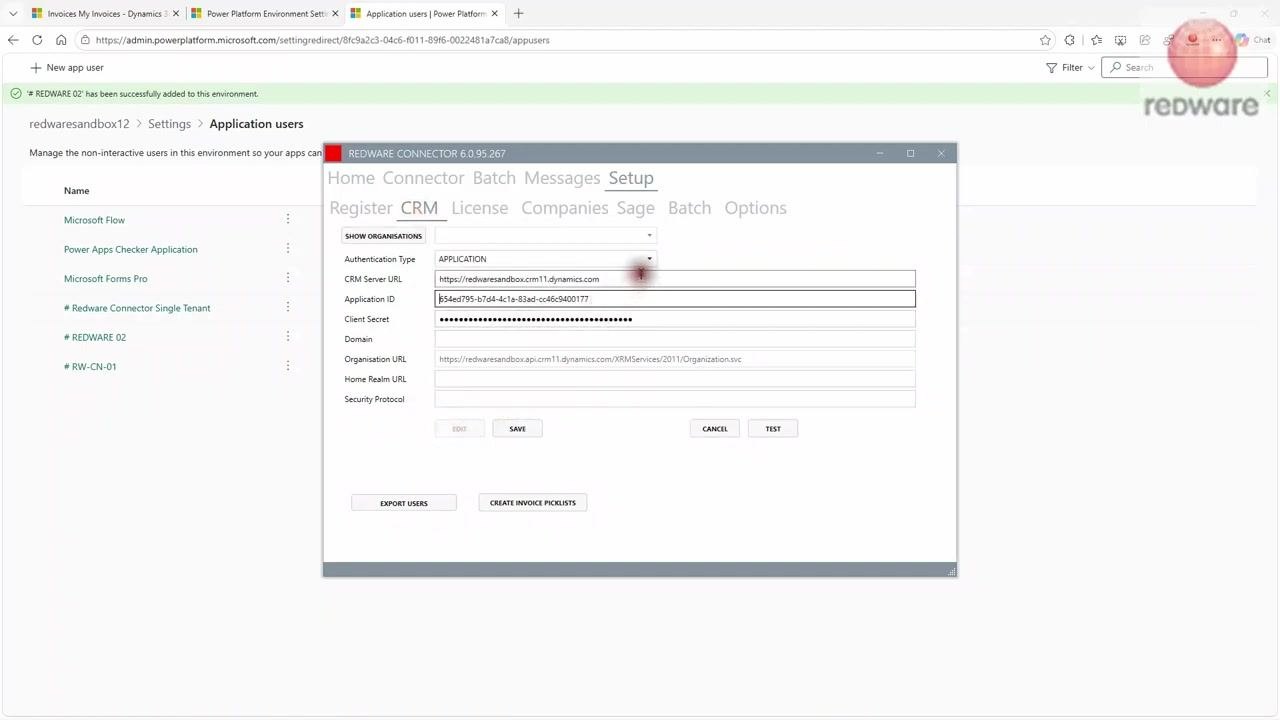
Click Create to finish adding the application user. Confirm that REDWARE 02 now appears in the Application users list with the correct business unit and assigned security roles.
7. Configure the Redware Connector application
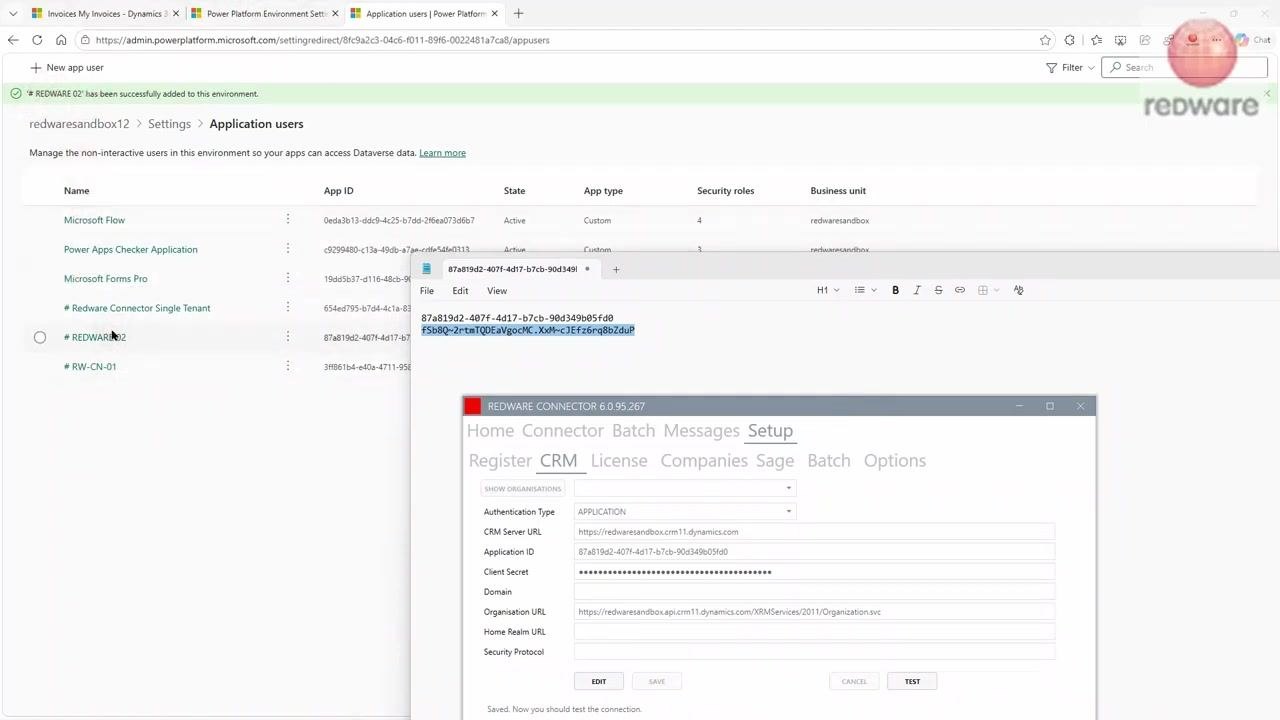
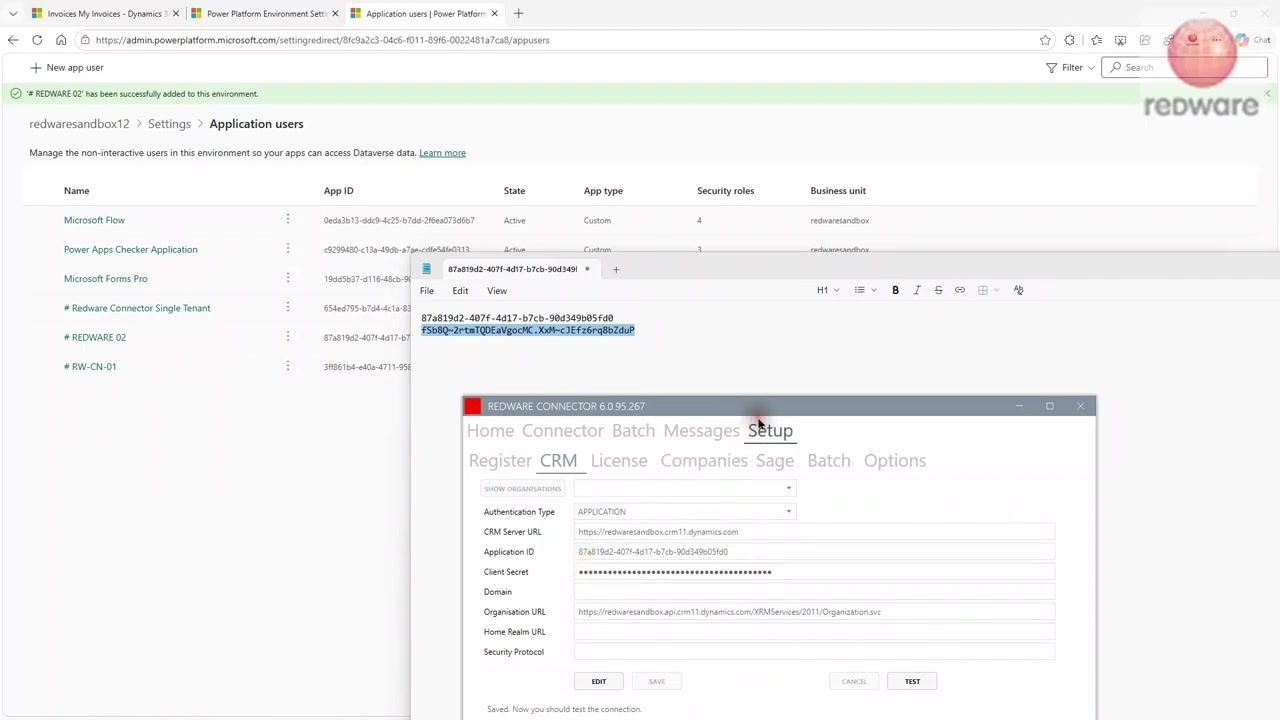
Open the Redware Connector application on your computer. Go to the Setup tab, then select CRM. Click Edit to enable editing of the CRM connection settings, and set Authentication Type to APPLICATION.
Enter the following details:
- CRM Server URL:
http://redwaresandbox.crm11.dynamics.com - Application ID: paste the Application (client) ID you copied from Azure (for example,
65e4f795-b7d4-4c1a-83ad-cc646c940177, or your actual app ID) - Client Secret: paste the client secret you generated in Azure
- Organisation URL:
https://redwaresandbox.api.crm11.dynamics.com/XRMServices/2011/Organization.svc
Click Test to verify the connection, then click Save to store the settings.
8. Verify the connection
If the test is successful, close and reopen the Redware Connector application to ensure the new settings are applied. Confirm that the connector is now using the application user for authentication.
Summary checklist
- Go to the Azure portal and create the app registration.
- In Dynamics CRM, add the application user and assign the required security roles (Redware Billing and Sales Manager).
- In the Redware Connector, change the authentication type to Application, and paste in the Application ID and Client Secret.
- Test and save your configuration.
What's next
Do not forget to assign the required security roles when you create the application user in Dynamics 365 — this is essential for the application user to have the correct permissions to interact with your CRM data.
After completing all configuration steps, verify that:
- The application user (for example, REDWARE 02) appears in the Application users list in Dynamics CRM.
- The correct security roles (for example, Redware Billing, Sales Manager) are assigned to the application user.
- The Redware Connector application is configured with:
- Authentication Type: APPLICATION
- CRM Server URL:
https://redwaresandbox.crm11.dynamics.com - Application ID: your registered app's Application ID
- Client Secret: the secret generated in Azure
- Organisation URL:
https://redwaresandbox.api.crm11.dynamics.com/XRMServices/2011/Organization.svc
Use the Test button in the Redware Connector to confirm a successful connection, then save your settings. You should see a confirmation in Dynamics CRM indicating that the application user has been successfully added to the environment.
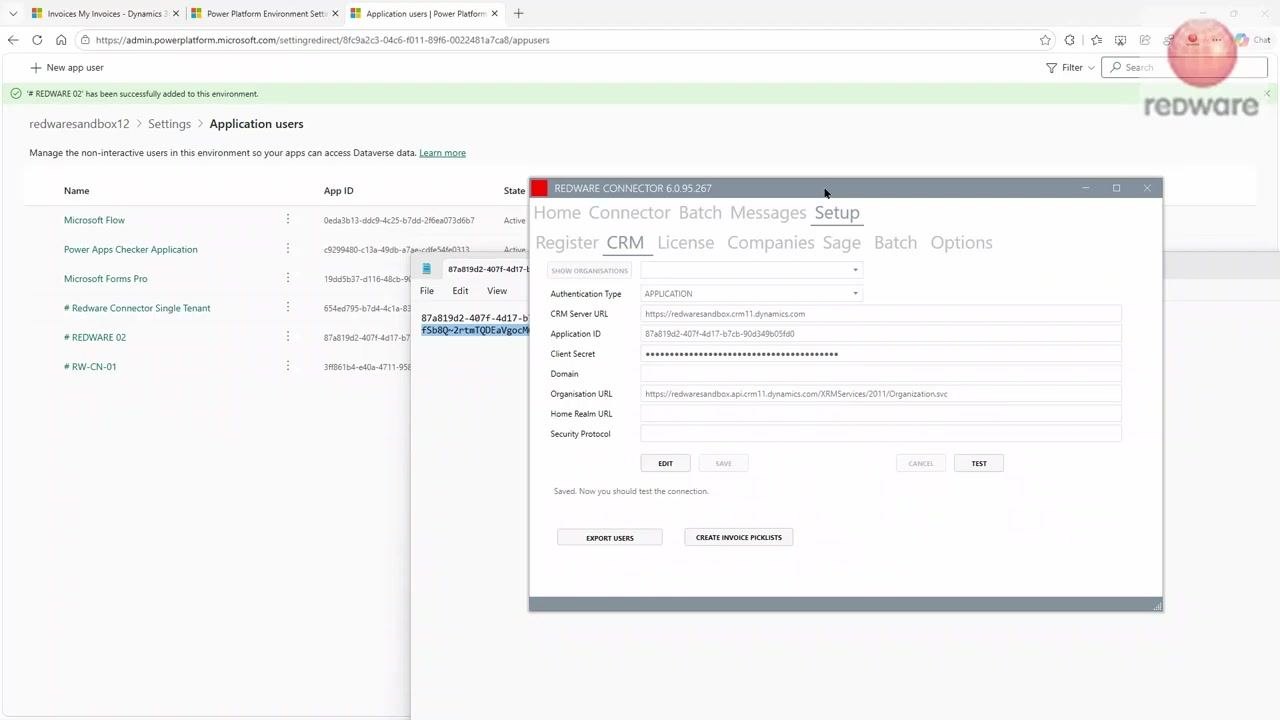
You have now completed the process of creating an application user in Dynamics 365 and configuring the Redware Connector to use it for secure integration with Dynamics CRM.
Generation details: cost, quality tiers
Docsie billed 2,000 credits ($1.40) to analyze this 4-minute video at standard quality. The rewrite, template fill and Word/PDF exports were included. The same video at each quality tier:
| Quality | Frames sampled | Credits | Approx. cost |
|---|---|---|---|
| Draft | every 16-30 s | 1,000 | $0.70 |
| Standard (this guide) | every 8-15 s | 2,000 | $1.40 |
| Detailed | every 4-7 s | 4,000 | $2.80 |
| Ultra | every 1-3 s | 8,000 | $5.60 |
Credits priced at $0.70 per 1,000; plans include a monthly allowance. Enterprise customers on on-premise or bring-your-own-model deployments run this on their own inference and pay no per-video credits.
Generated by Docsie Video-to-Docs on 2026-10-01 from a 3-minute video. Screenshots are frames from the source video and belong to their creator, Redware Research Limited, whose original is embedded above. If you own this video and want the guide removed or credited differently, contact us and we will act within one business day.