
How to Move a Page in Confluence
Confluence lets you reorganize your documentation by moving pages between spaces, copying pages while keeping the originals intact, and reordering pages within a space's sidebar. This guide walks you through how to move a page in Confluence to a different space, how to copy a page between spaces, and how to reorder pages so your content stays organized and easy to find.
Video: #13 Move & Reorder Pages in Confluence | Explore Atlassian Confluence by NextGen Learning (2021). All credit for the demonstration goes to the creator; watch the original on YouTube. The written guide below was generated from this video by Docsie. Creator? Request a change or removal.
Confluence lets you reorganize your documentation by moving pages between spaces, copying pages while keeping the originals intact, and reordering pages within a space's sidebar. This guide walks you through how to move a page in Confluence to a different space, how to copy a page between spaces, and how to reorder pages so your content stays organized and easy to find.
Prerequisites
- Access to a Confluence instance with at least two spaces (a source space and a destination space).
- Permission to edit pages and access Space Settings in the relevant spaces.
How to move a page in Confluence to another space
Use these steps to move a page from one Confluence space to another and confirm the page structure updates correctly in the destination space.
-
Open your Confluence instance in a web browser.
-
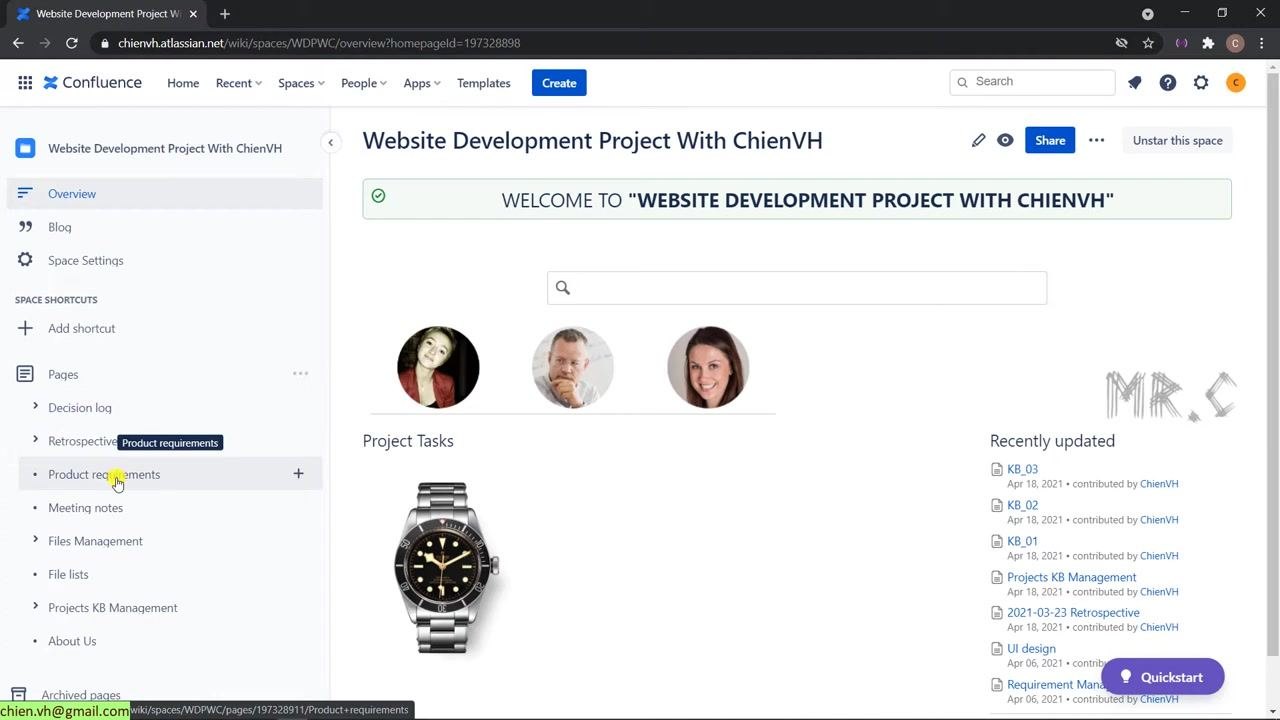
Navigate to the source space. In this example, open the Website Development Project With ChienVH space. The left sidebar lists sections including Decision log, Retrospectives, Product requirements, Meeting notes, Files Management, File lists, Projects KB Management, and About Us, with the About Us page at the end of the list.
-
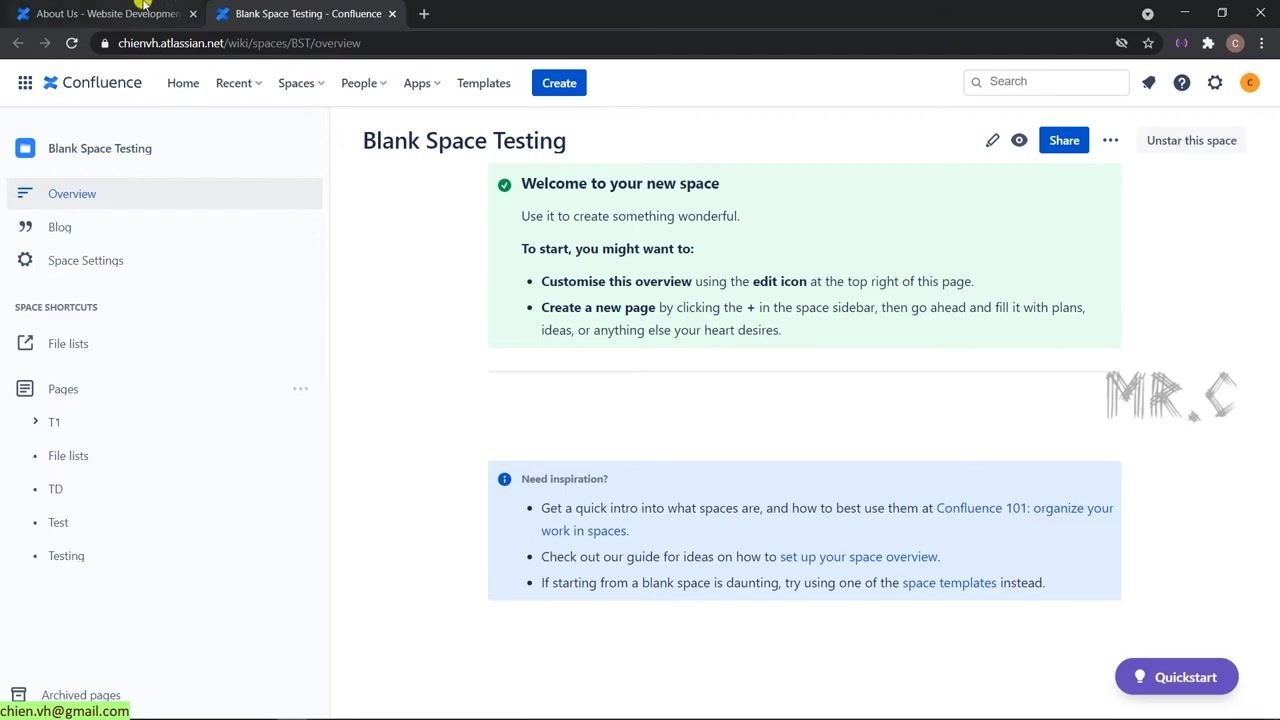
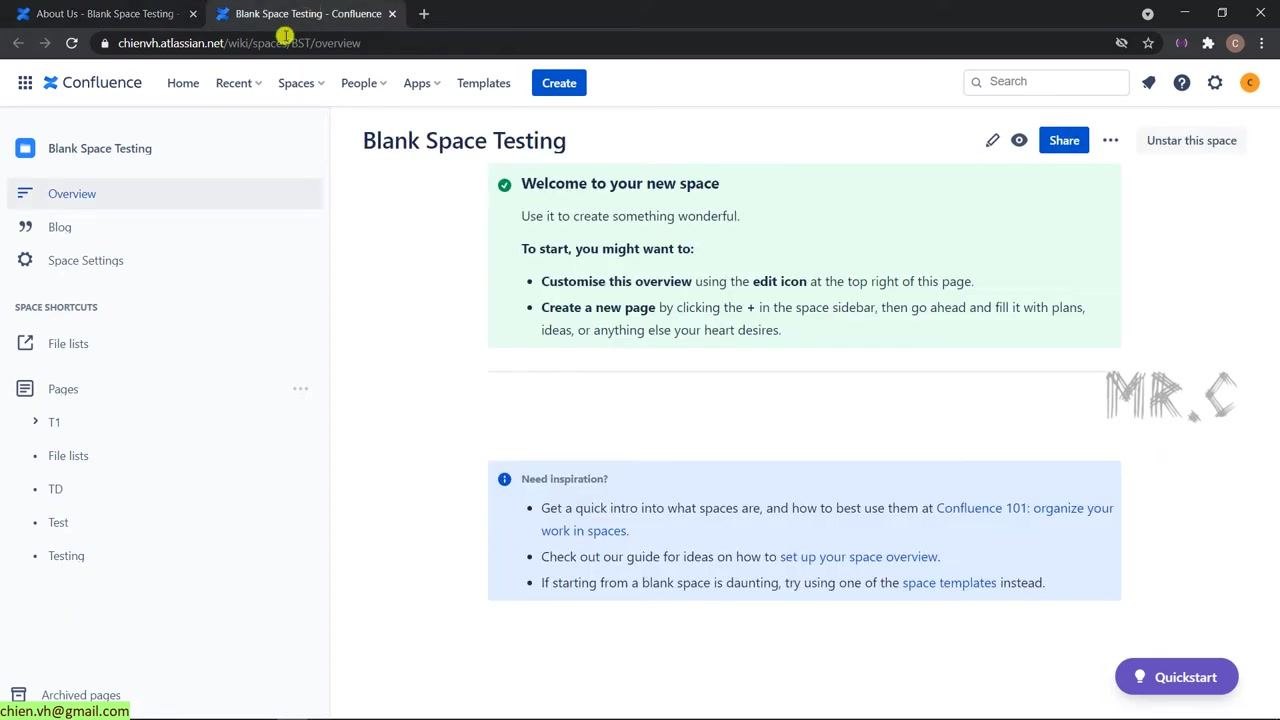
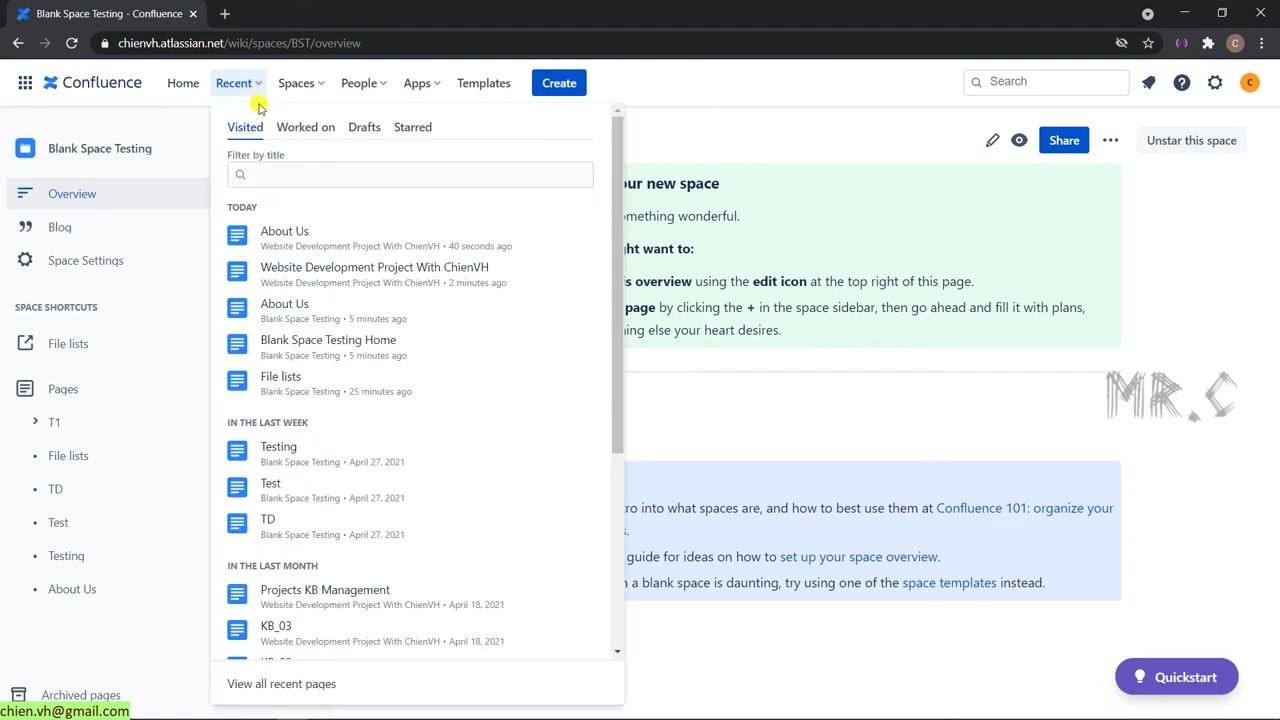
Open the destination space in a new tab. In this example, open the Blank Space Testing space. Notice that About Us does not appear here. The sidebar instead lists T1, File lists, TD, Test, and Testing.
-
Return to the source space and open the page you want to move. Go back to the Website Development Project With ChienVH space and click About Us in the sidebar to open it.
-
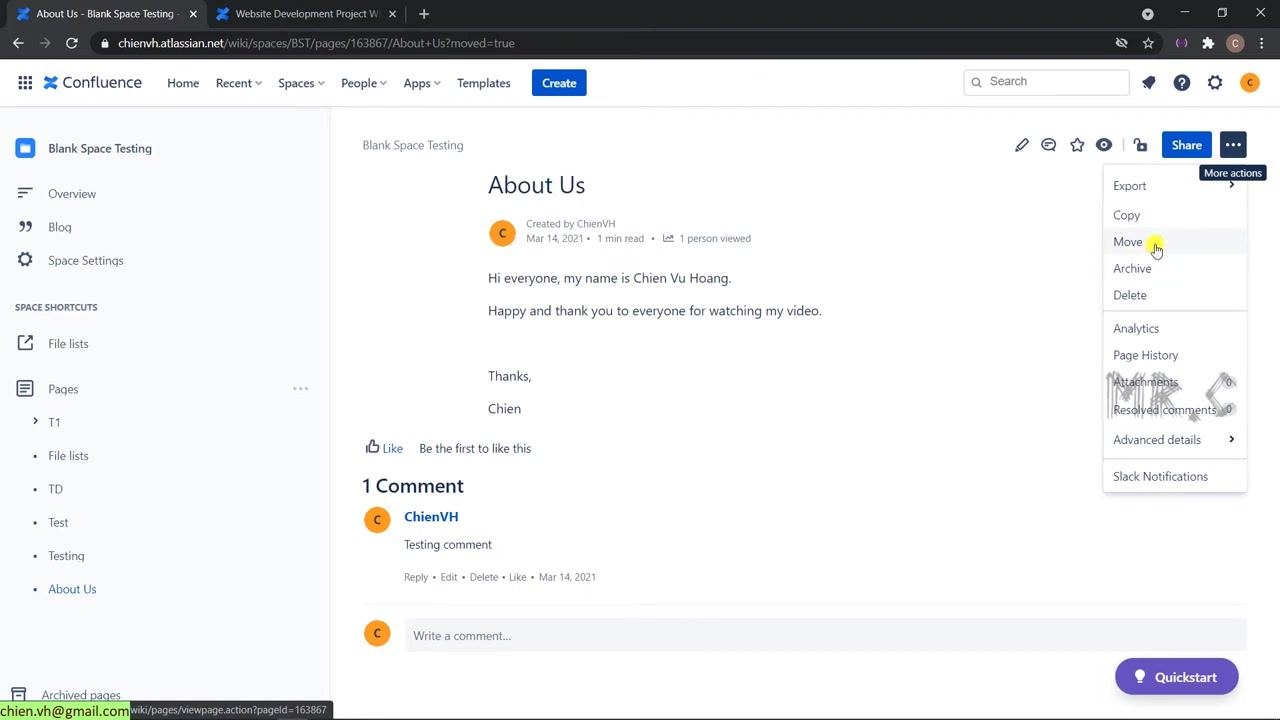
Start the move operation. On the About Us page, click the three-dot More actions icon in the top right corner, then select Move from the dropdown menu.
-
Configure the move settings. In the Move page – "About Us" dialog, you can specify the new space and new parent page for the page and its children.
-
Enter the new space. Delete the current space name from the New space field and type "Blank." Confluence auto-completes and suggests Blank Space Testing — select it. Leave New parent page at its default value, which automatically selects the destination space's home page (Blank Space Testing Home).
-
Complete the move. Click Move to finalize the operation. The About Us page moves to the Blank Space Testing space under its home page.
-
Verify the page in the destination space. Navigate to Blank Space Testing and confirm About Us now appears in the left sidebar under Pages. Open it to confirm the content and comments are intact.
-
Verify removal from the source space. Return to Website Development Project With ChienVH and confirm About Us no longer appears in the sidebar under Pages.
How to copy a page between Confluence spaces
Copying a page duplicates its content into another space while leaving the original page untouched.
-
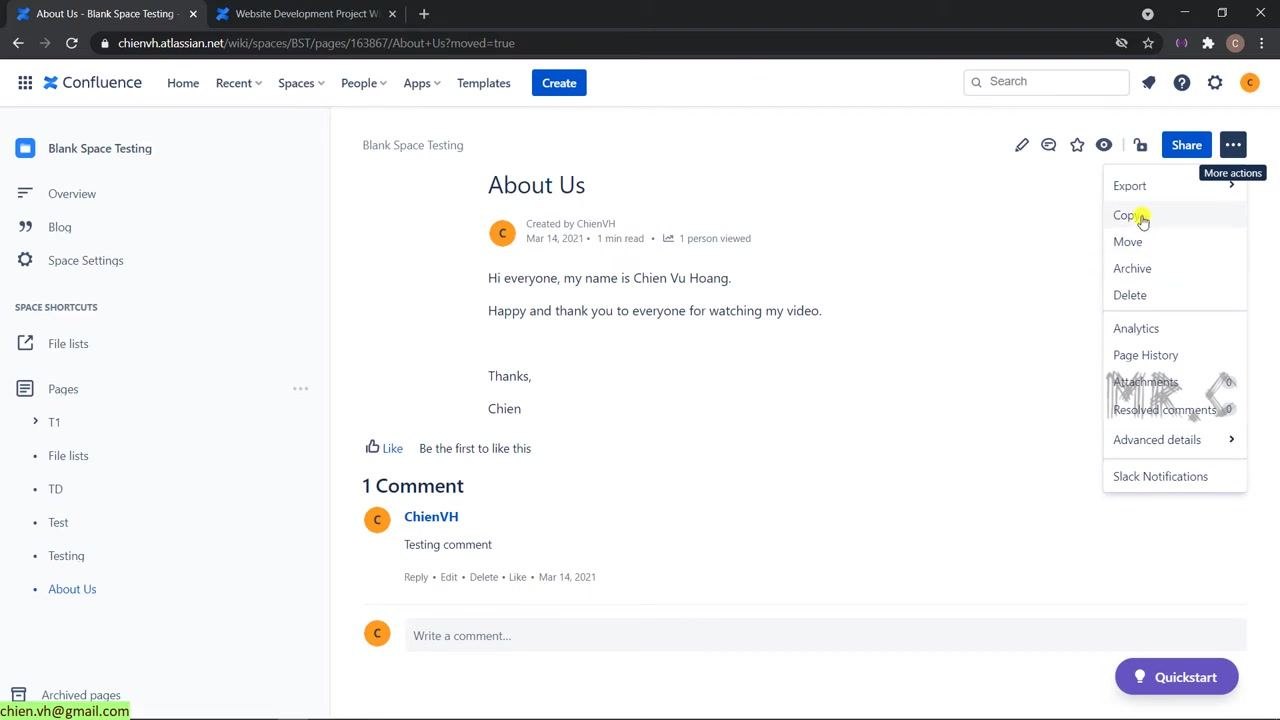
Open the page you want to copy. In this example, open the About Us page in the Blank Space Testing space.
-
Access the copy option. Click the three-dot More actions icon in the top right corner, then select Copy from the dropdown menu.
-
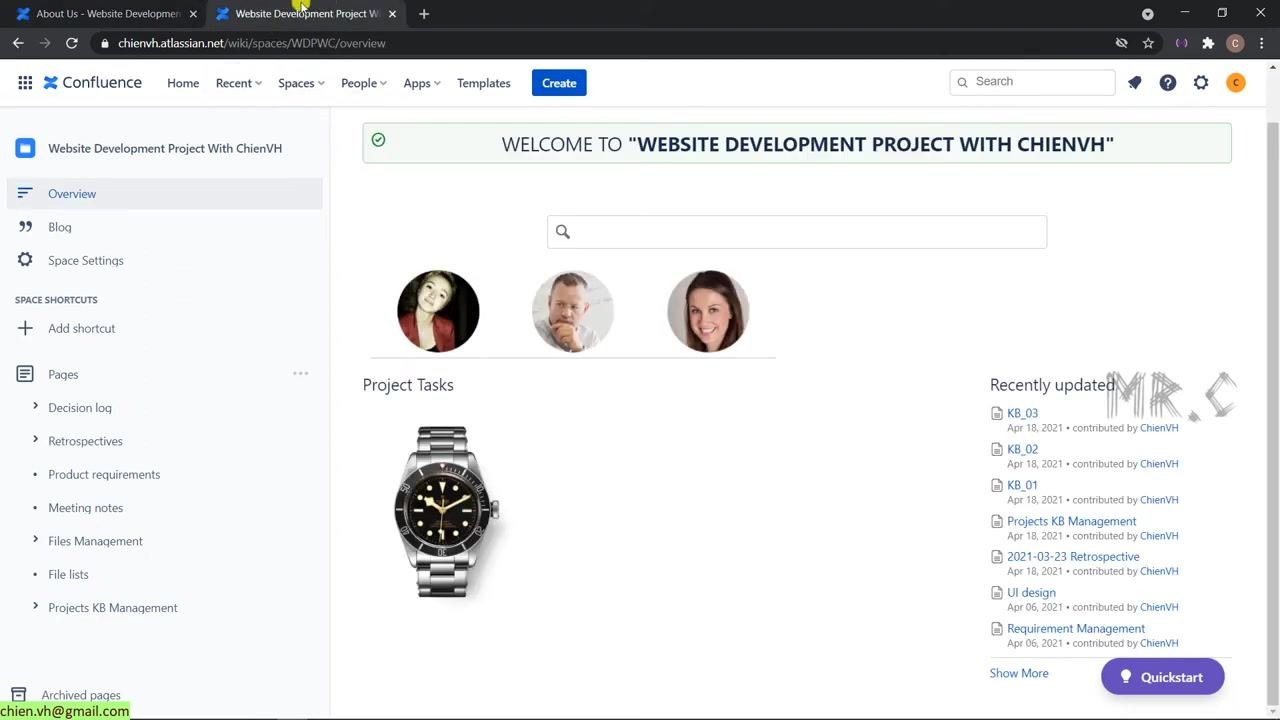
Choose the destination space. In the Copy page dialog, click the Select space dropdown and choose the space to copy into. In this example, select Website Development Project With ChienVH.
-
(Optional) Select a parent page. By default, the parent page is set to the home page of the selected space. Change this if you want the copy placed elsewhere.
-
Click Copy to finalize the operation. The page and its content are duplicated into the selected space under the chosen parent page.
-
Edit the copied page's title. Confluence automatically adds the prefix "Copy of" to the title (for example, "Copy of About Us"). Click into the title field at the top of the page and delete the "Copy of" prefix so the title reads "About Us."
-
Publish the copied page. Click the blue Publish button in the top right corner to save the page in the destination space.
-
Verify the copy in the destination space. Navigate to Website Development Project With ChienVH and confirm About Us now appears in the sidebar under Pages. Click it to check that the content matches the original.
-
Confirm the original page remains in the source space. Switch to Blank Space Testing and use the Recent menu or sidebar to locate the original About Us page. Confirm it is still present and unchanged.
How to reorder pages in the space sidebar
Reordering pages changes their position in the sidebar without moving them to a different space — useful for prioritizing pages like About Us.
-
Navigate to the space where you want to reorder pages. In this example, go to Website Development Project With ChienVH.
-
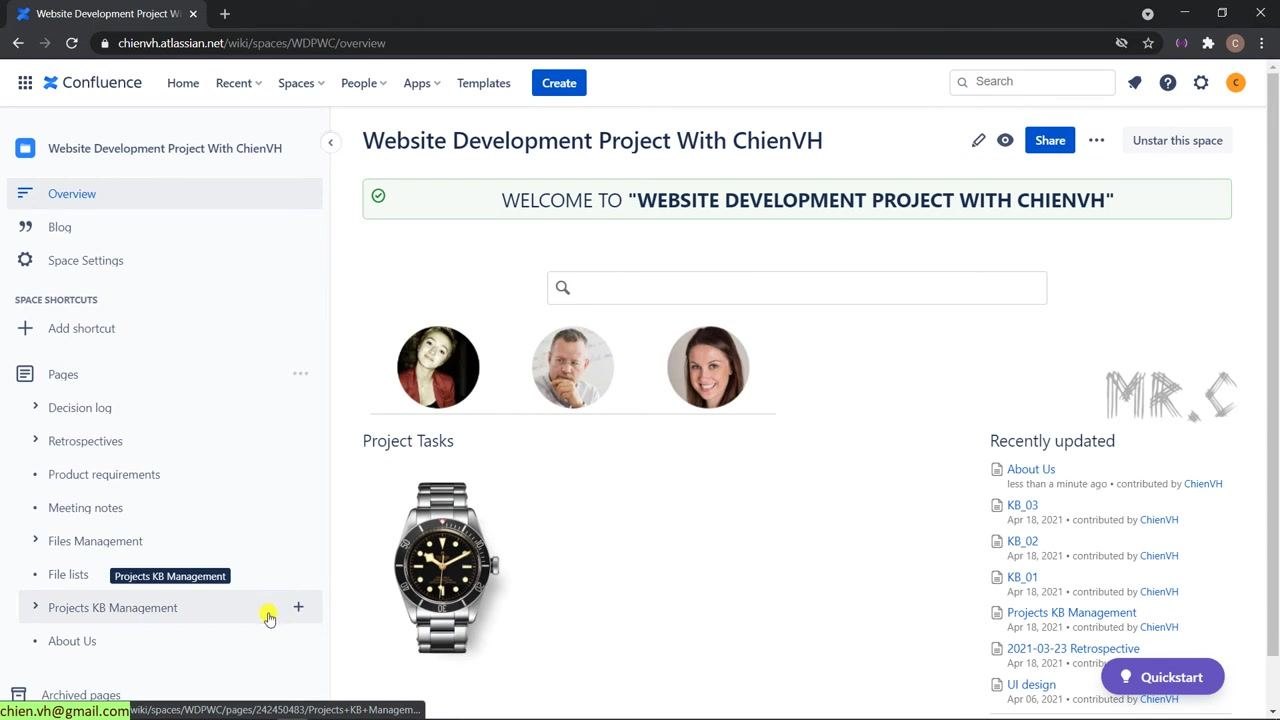
Review the current page order. Note the existing order under Pages (for example, Decision log, Retrospectives, Product requirements) and identify the page you want to move, such as About Us.
-
Open Space Settings. Click Space Settings in the left sidebar menu.
-
Review the Space Settings overview. The sidebar shows sections including Overview, Blog, Space Settings, Space Shortcuts, and Pages. Under Pages, you can see the current order: Decision log, Retrospectives, Product requirements, Meeting notes, Files Management, File lists, Projects KB Management, and About Us. The main content area displays the space overview, including a welcome message, user avatars, a search bar, a "Project Tasks" section, and a "Recently updated" list.
Reordering pages using Content Tools
Confluence's Content Tools include a dedicated Reorder Pages view for rearranging the page hierarchy by drag and drop.
-
Navigate to Space Settings. Open your Confluence space and click Space Settings in the left sidebar.
-
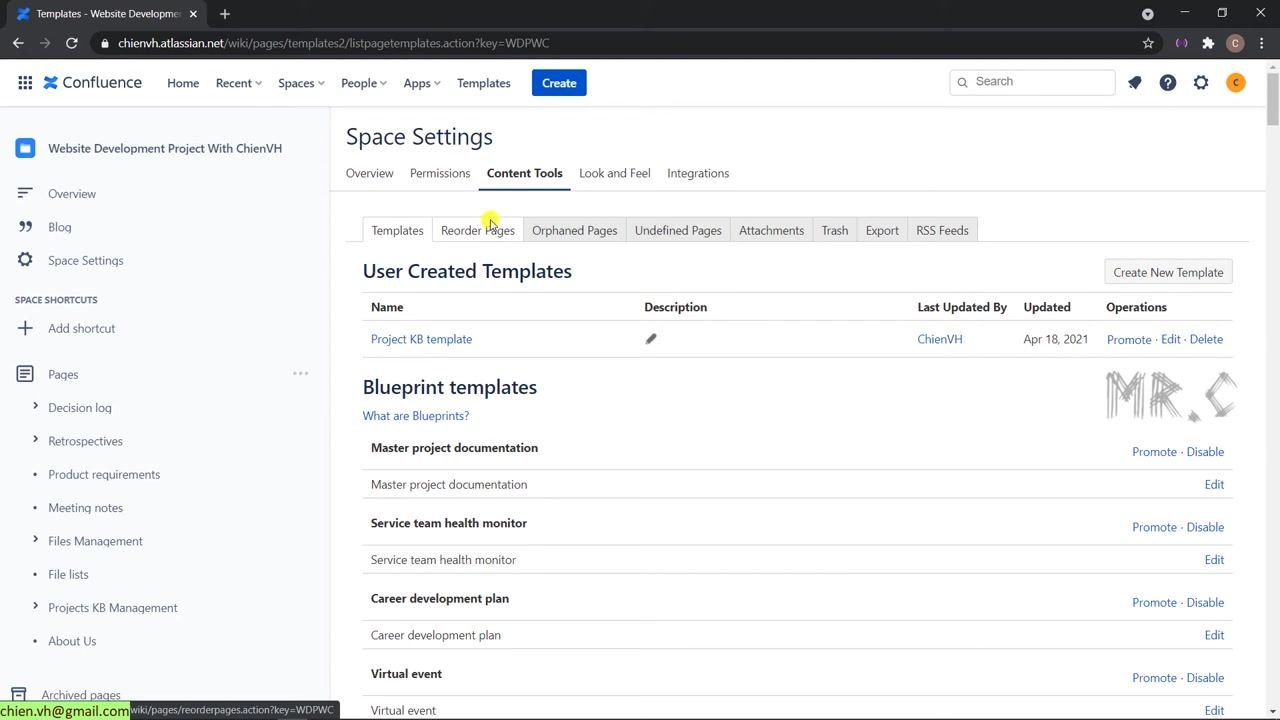
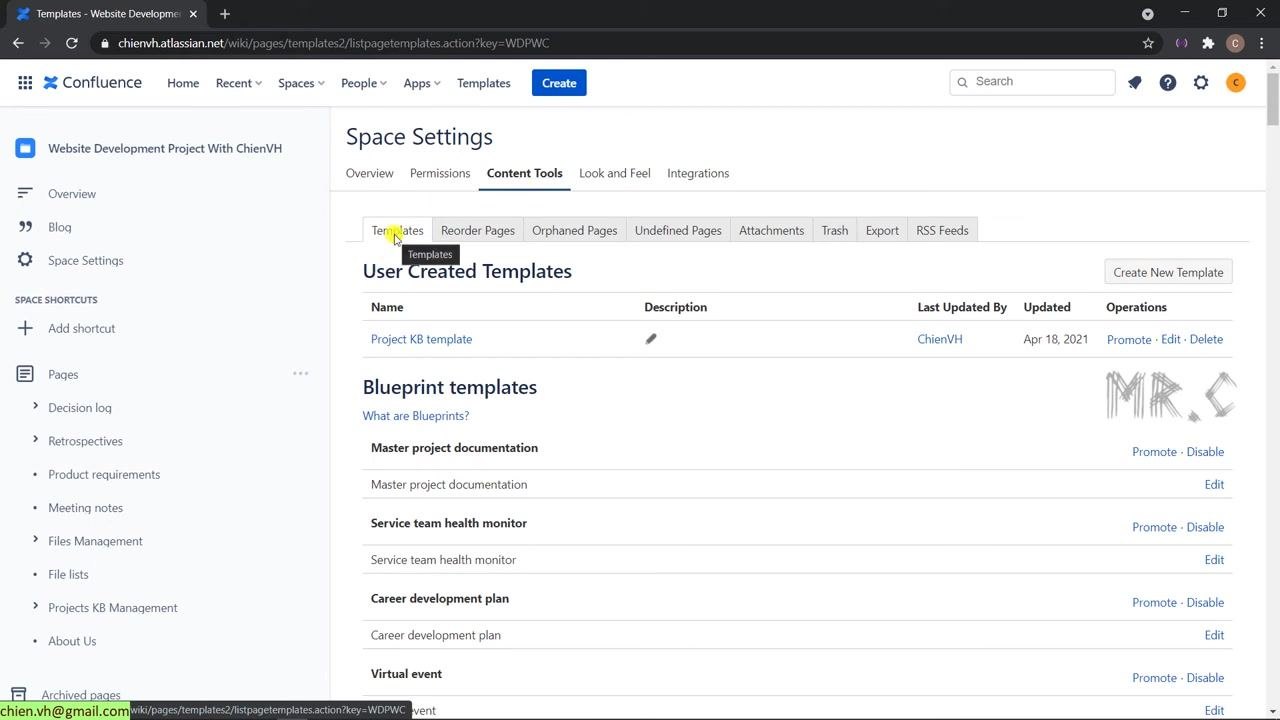
Access Content Tools. In the Space Settings menu, select the Content Tools tab at the top.
-
Open the Reorder Pages tool. In the Content Tools section, locate the row of tabs — Templates, Reorder Pages, Orphaned Pages, Undefined Pages, and others — then click Reorder Pages.
-
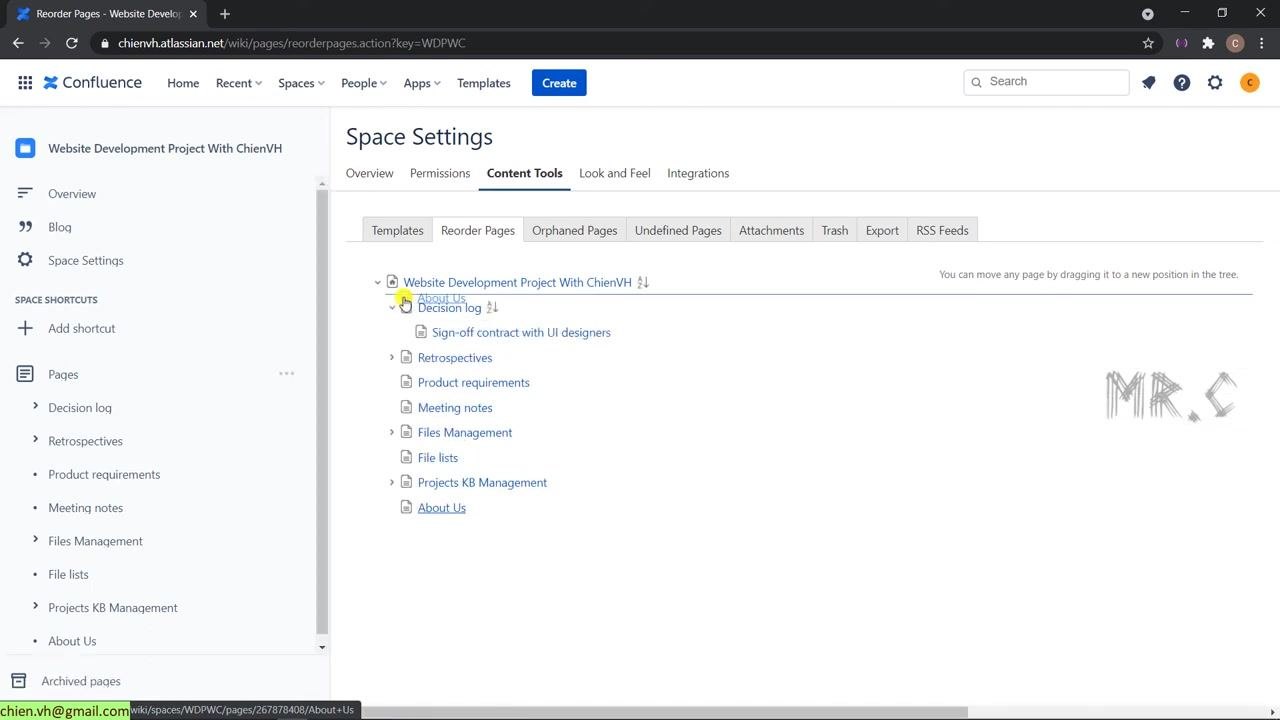
View the page tree. The right pane displays a hierarchical tree of all pages in the space, each with a hyperlink, mirroring the structure shown in the left sidebar under Pages.
-
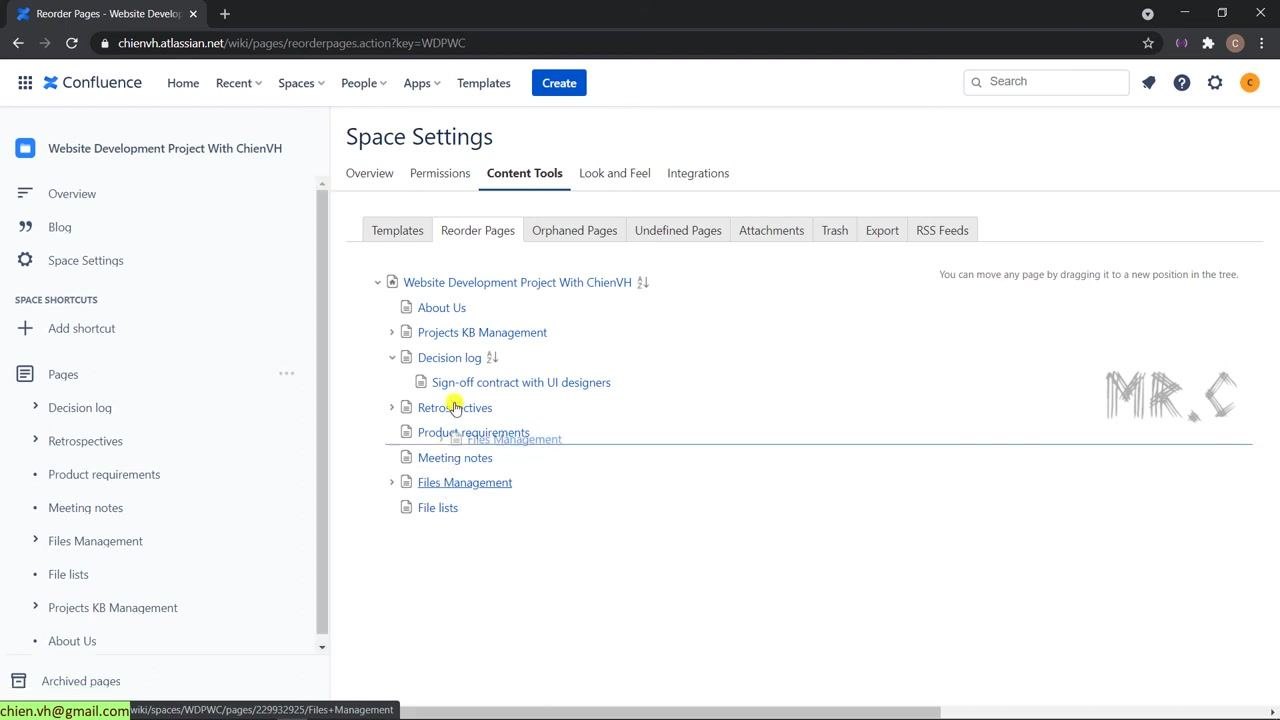
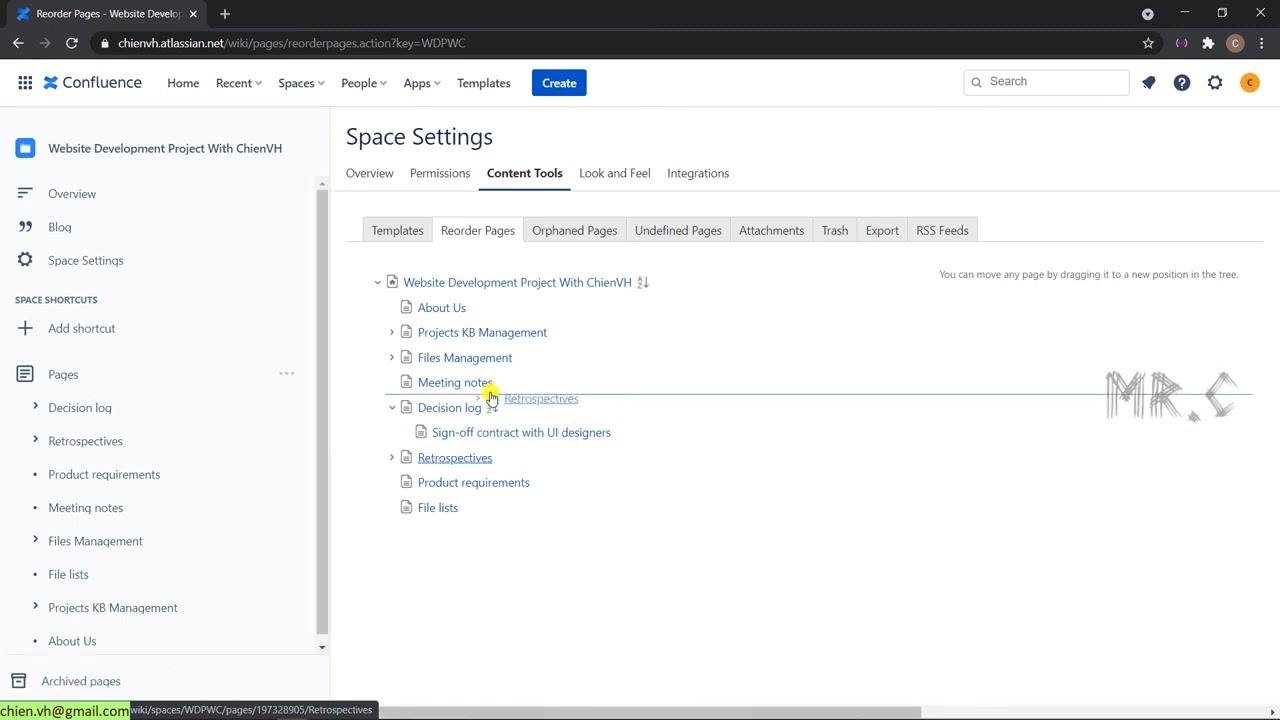
Drag and drop to reorder pages. Click and hold a page name in the tree, then drag it to the desired position. For example, drag About Us above the other pages to move it to the top.
-
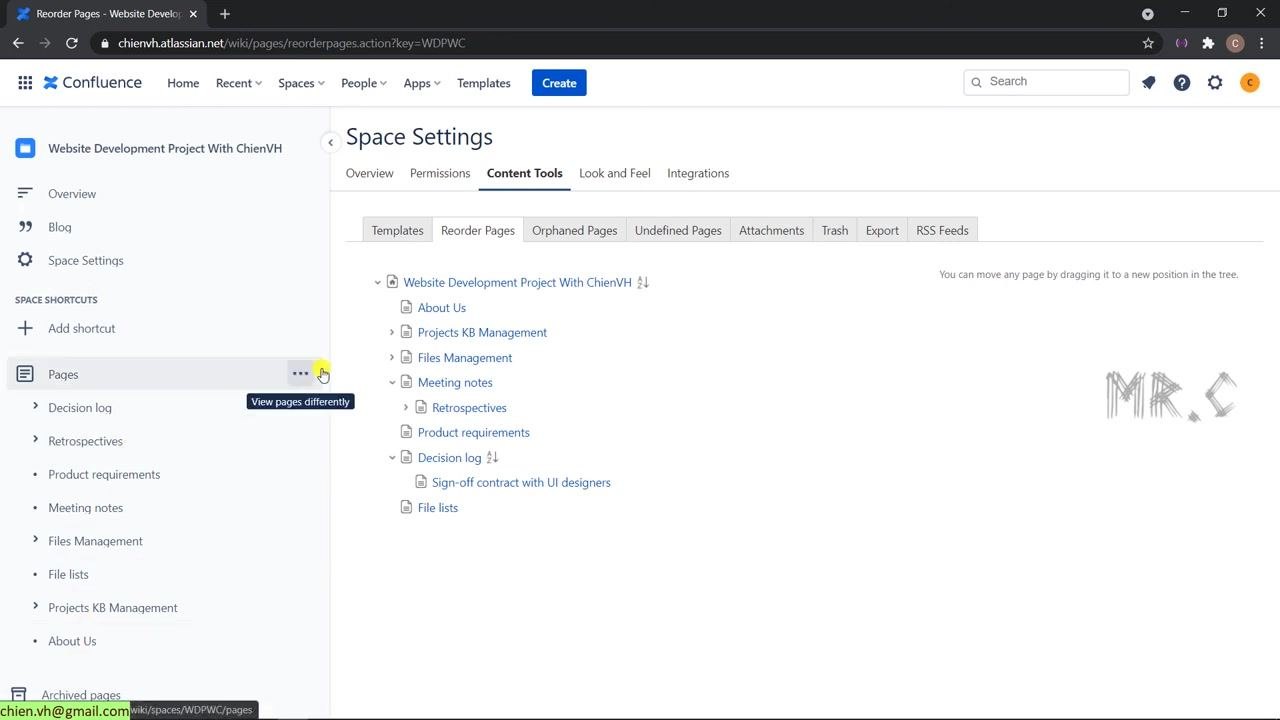
Nest a page under another page. To nest a page, drag it slightly to the right beneath its intended parent. For example, drag Retrospectives to nest it under Meeting notes.
-
Reorder additional pages as needed. Continue dragging and dropping pages. For example, move Product requirements above Decision log by dragging it to the appropriate position.
-
Review the tree to confirm changes. Check that the pages appear in the desired order, matching the structure you want reflected in the sidebar.
-
Refresh the page list to see updated order in the sidebar. Refresh the page, or click the options menu (three dots) next to Pages in the sidebar and select View pages differently, or refresh to update the view.
Verifying page order and navigating the space
After reordering pages, confirm the changes appear correctly and that navigation works as expected.
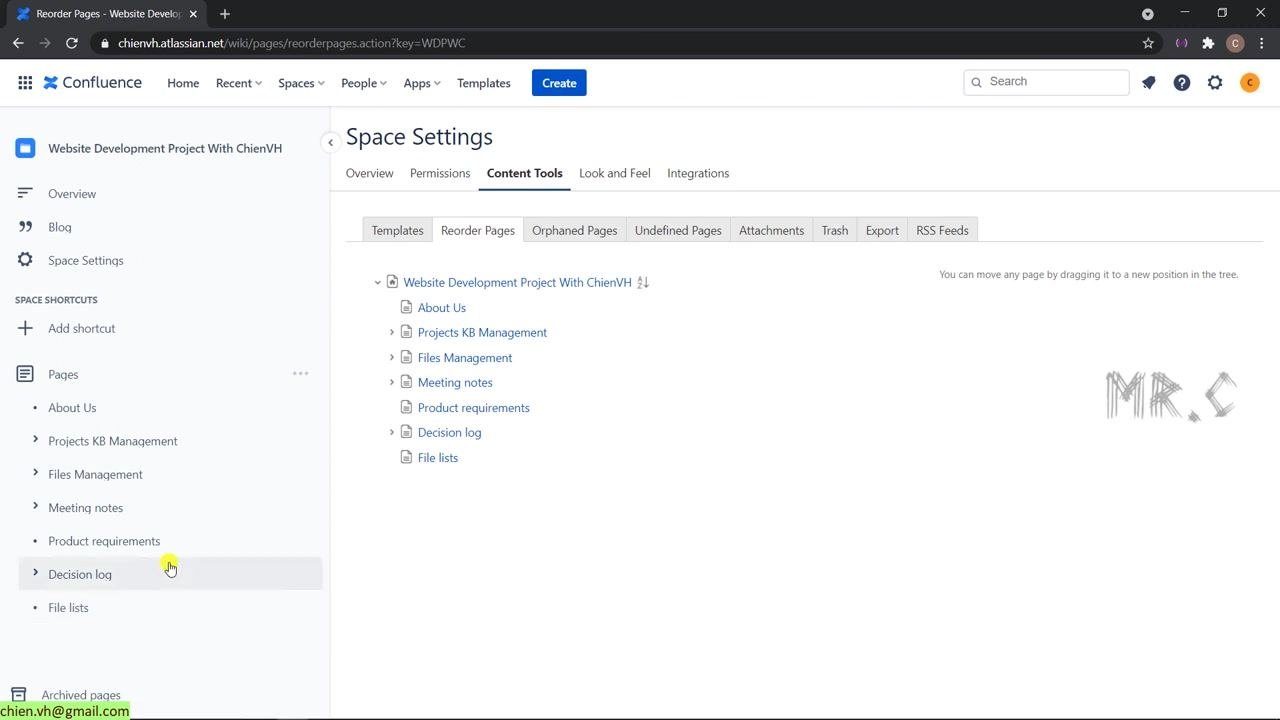
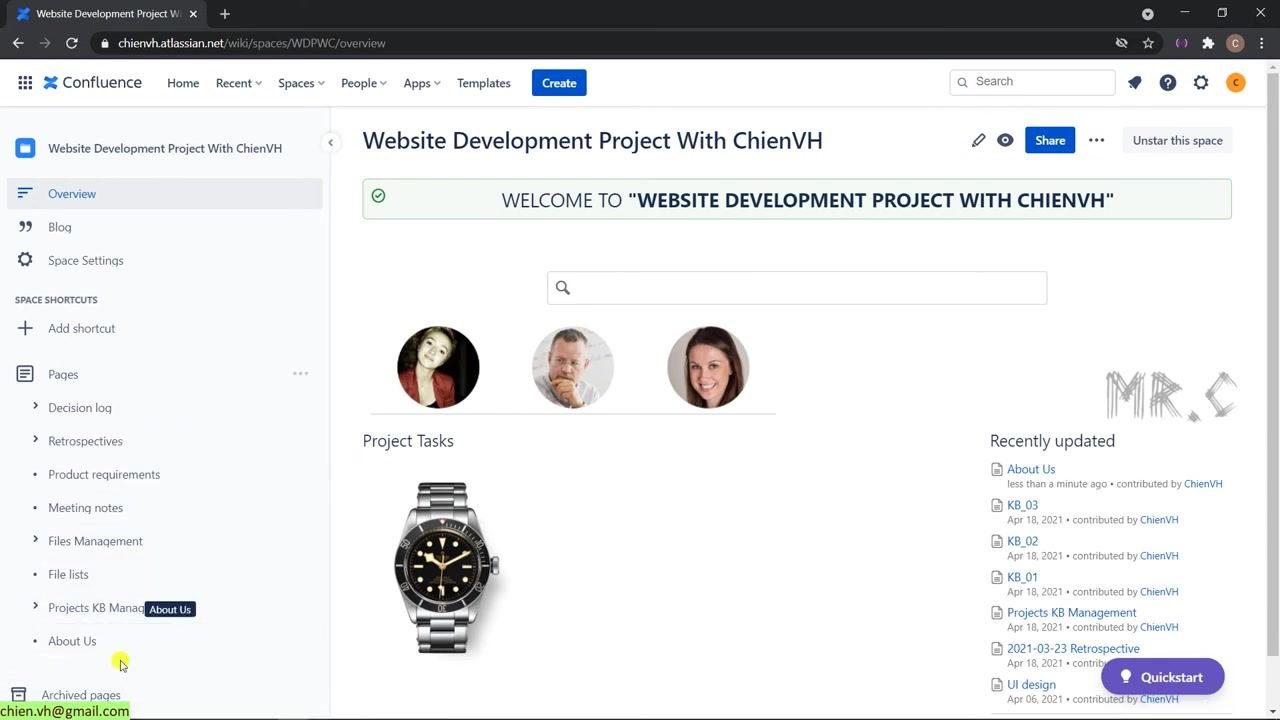
- Review the left sidebar menu. Check the Pages section in the sidebar and confirm the order matches your changes in the Reorder Pages tool. For example, the sidebar may now show: About Us, Projects KB Management, Files Management, Meeting notes, Product requirements, Decision log, and File lists.
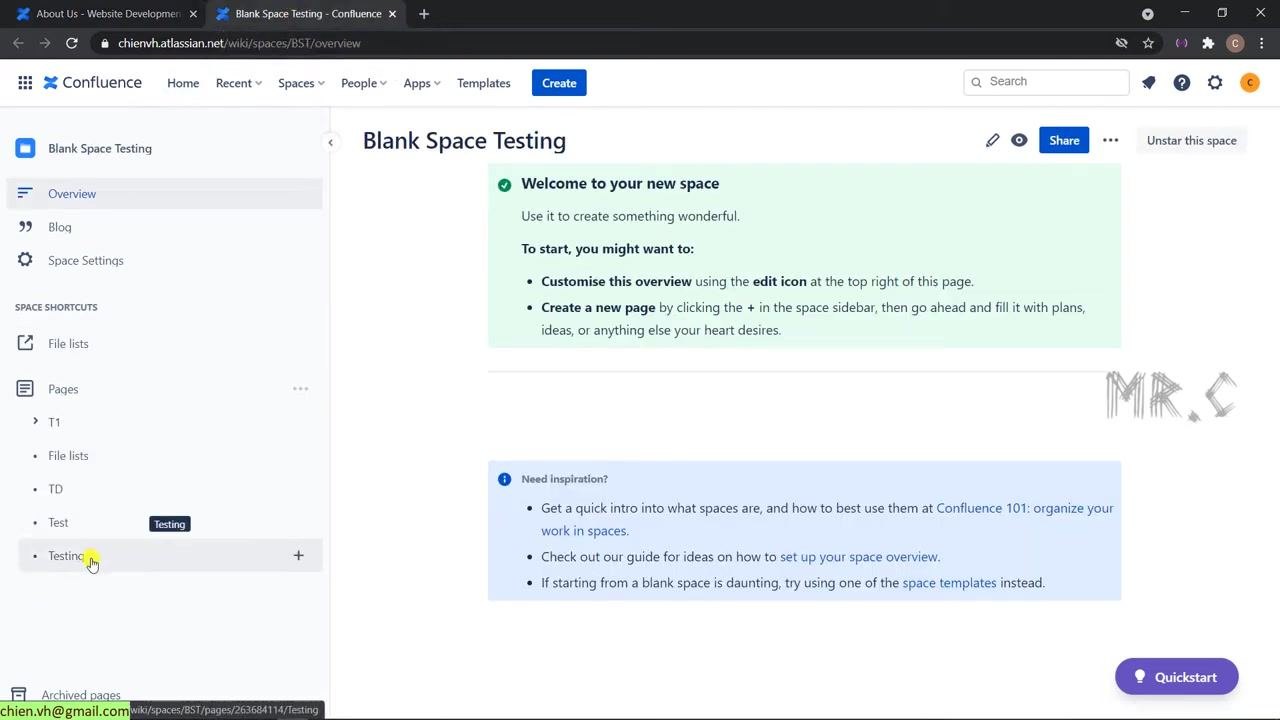
- Use the sidebar to navigate. Click any page name in the sidebar to open it — for example, Blog or Decision log. The cursor changes to a hand or pointer when hovering over clickable items.
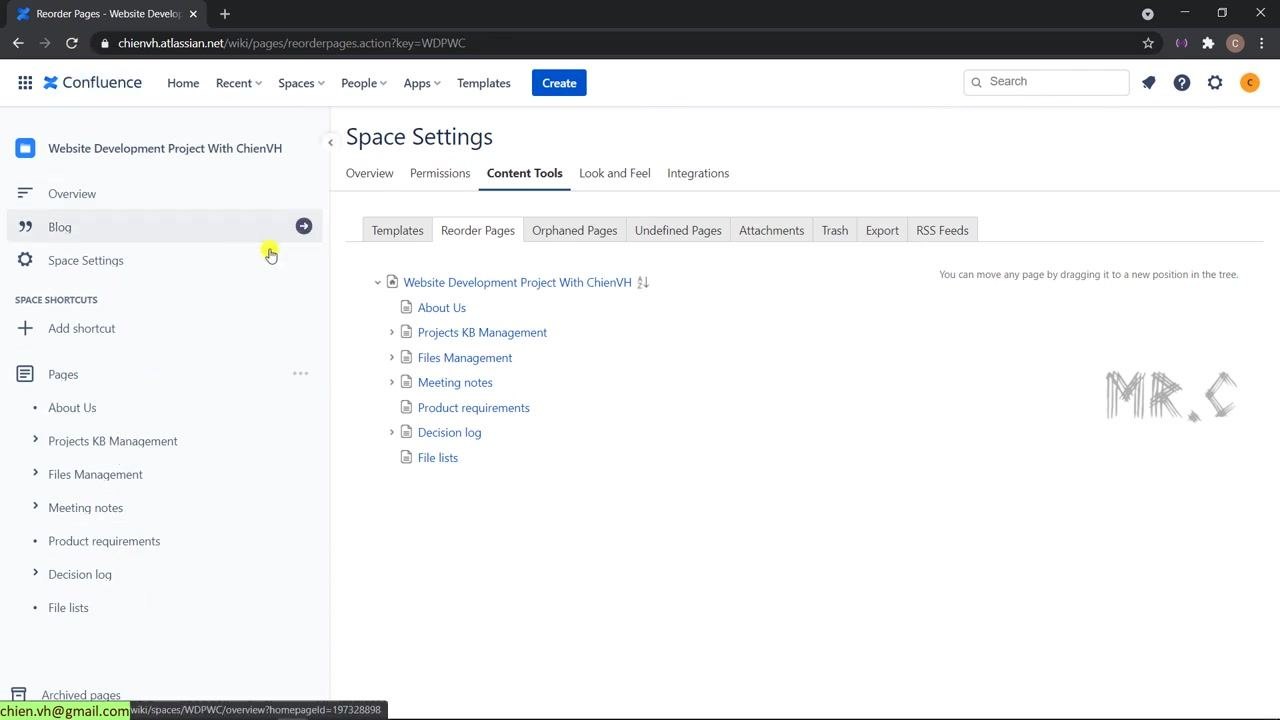
- Open and view a page. After clicking a page in the sidebar, such as Decision log or About Us, the main content area displays that page. Confirm it loads correctly and is accessible from the sidebar.
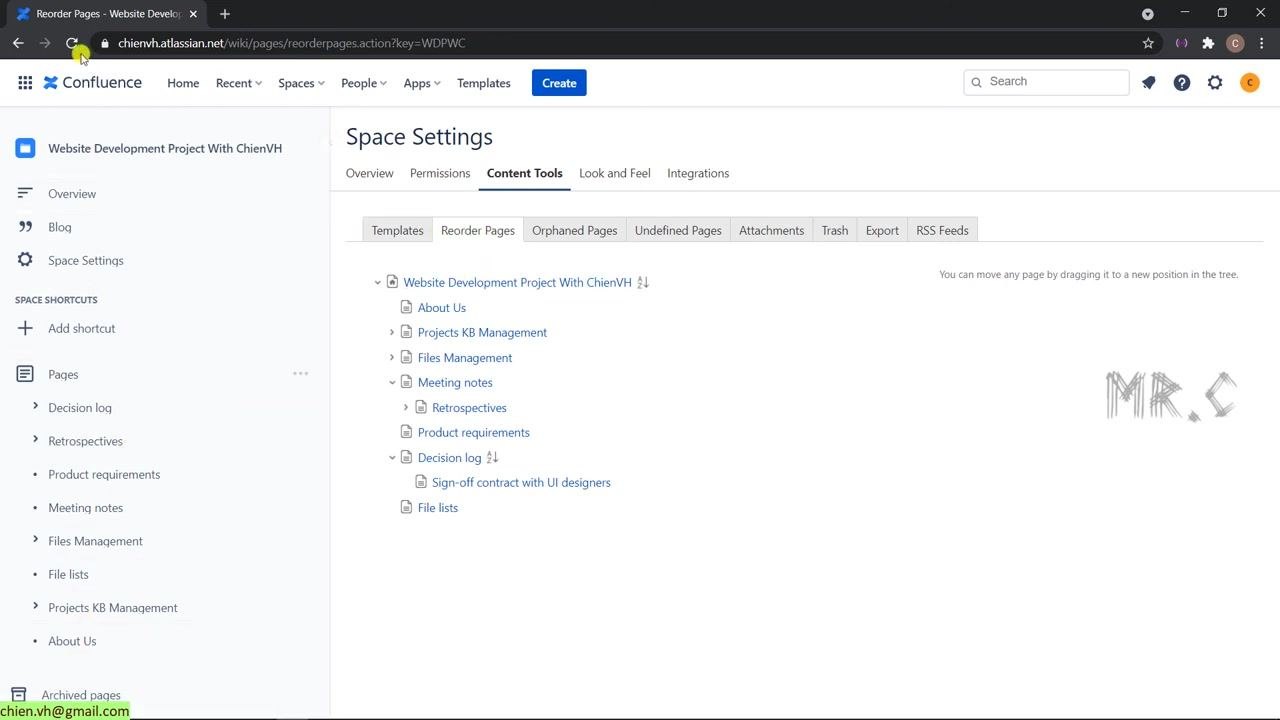
- Confirm navigation and completion. Make sure you can freely move between all reordered pages using the sidebar, and that the structure matches your intended organization.
What's next
Now that you know how to move a page in Confluence, copy a page between spaces, and reorder pages within a space, you can keep your documentation structured and easy to navigate. Revisit Space Settings > Content Tools > Reorder Pages any time you need to adjust the hierarchy further.
Generation details: cost, quality tiers
Docsie billed 4,000 credits ($2.80) to analyze this 8-minute video at standard quality. The rewrite, template fill and Word/PDF exports were included. The same video at each quality tier:
| Quality | Frames sampled | Credits | Approx. cost |
|---|---|---|---|
| Draft | every 16-30 s | 2,000 | $1.40 |
| Standard (this guide) | every 8-15 s | 4,000 | $2.80 |
| Detailed | every 4-7 s | 8,000 | $5.60 |
| Ultra | every 1-3 s | 16,000 | $11.20 |
Credits priced at $0.70 per 1,000; plans include a monthly allowance. Enterprise customers on on-premise or bring-your-own-model deployments run this on their own inference and pay no per-video credits.
Generated by Docsie Video-to-Docs on 2026-09-20 from a 7-minute video. Screenshots are frames from the source video and belong to their creator, NextGen Learning, whose original is embedded above. If you own this video and want the guide removed or credited differently, contact us and we will act within one business day.