
How to Create a Page in Confluence
Knowing how to create a page in Confluence is one of the most useful skills for organizing team content in Confluence Cloud. You can create a new page from the main navigation bar or directly from the page tree in a space's sidebar, then customize it with titles, templates, emojis, and header images. This guide walks you through both methods, plus how to structure and personalize your new page.
Video: How to Create Pages in Confluence Cloud by Atlassian (2022). All credit for the demonstration goes to the creator; watch the original on YouTube. The written guide below was generated from this video by Docsie. Creator? Request a change or removal.
Knowing how to create a page in Confluence is one of the most useful skills for organizing team content in Confluence Cloud. You can create a new page from the main navigation bar or directly from the page tree in a space's sidebar, then customize it with titles, templates, emojis, and header images. This guide walks you through both methods, plus how to structure and personalize your new page.
Prerequisites
- Access to a Confluence Cloud workspace.
- Permission to create pages in the space where you want to add content.
Method 1: Create a page from the main navigation bar
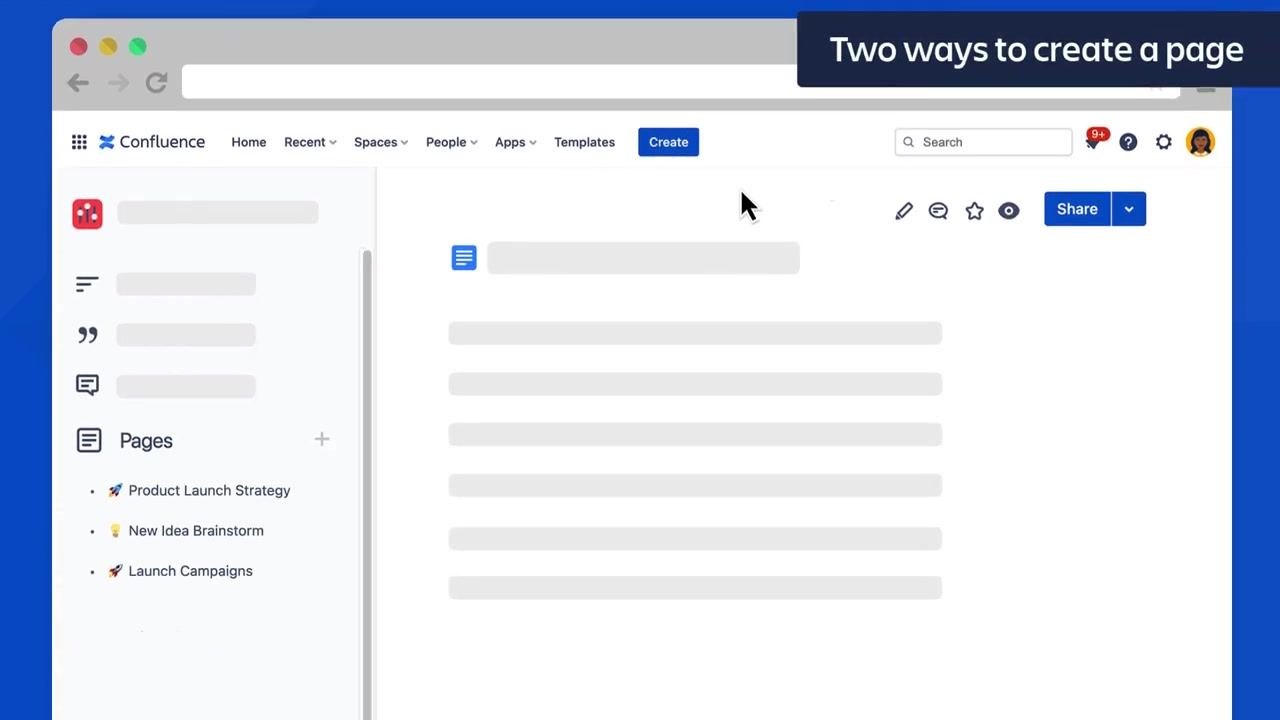
- Locate the main navigation bar at the top of your Confluence workspace.
- Click the blue Create button in the navigation bar to start a new page. This method works similarly to the classic Confluence experience.
Method 2: Create a page from the space page tree
- Once you are inside a space, look at the left sidebar to find the Pages section.
-
To create a new top-level page, click the plus (+) icon next to the "Pages" label in the sidebar.
-
To create a child page under an existing page, hover your cursor over any page listed in the page tree (for example, "Product Launch Strategy"). A plus (+) icon appears next to the page name.
- Click this plus icon to create a new child page directly beneath the selected parent page.
Add a title and content to your new page
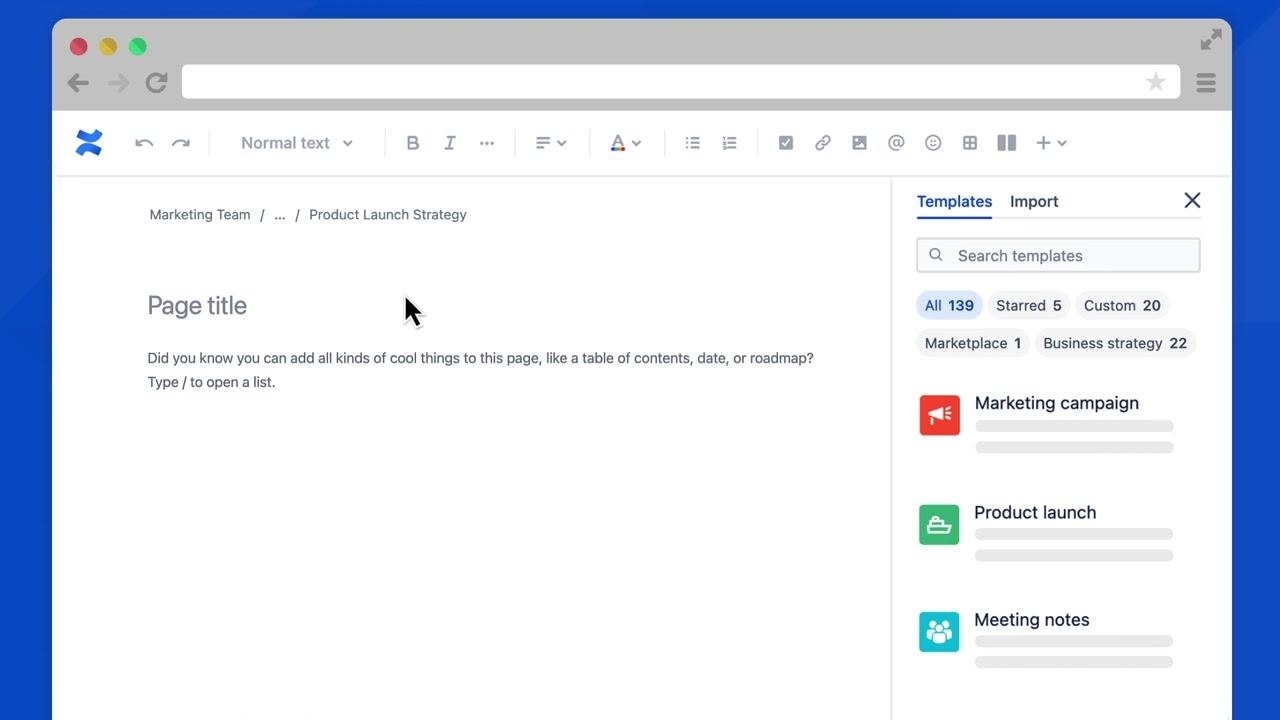
- After creating a new page or child page, you are taken to the page editor.
- At the top of the editor, confirm the page's location within the space (for example, "Marketing Team / Product Launch Strategy").
- Enter your Page title and begin adding content. The editor displays a prompt letting you know you can add elements like a table of contents, date, or roadmap by typing "/" to open a list of options.
Apply a page template
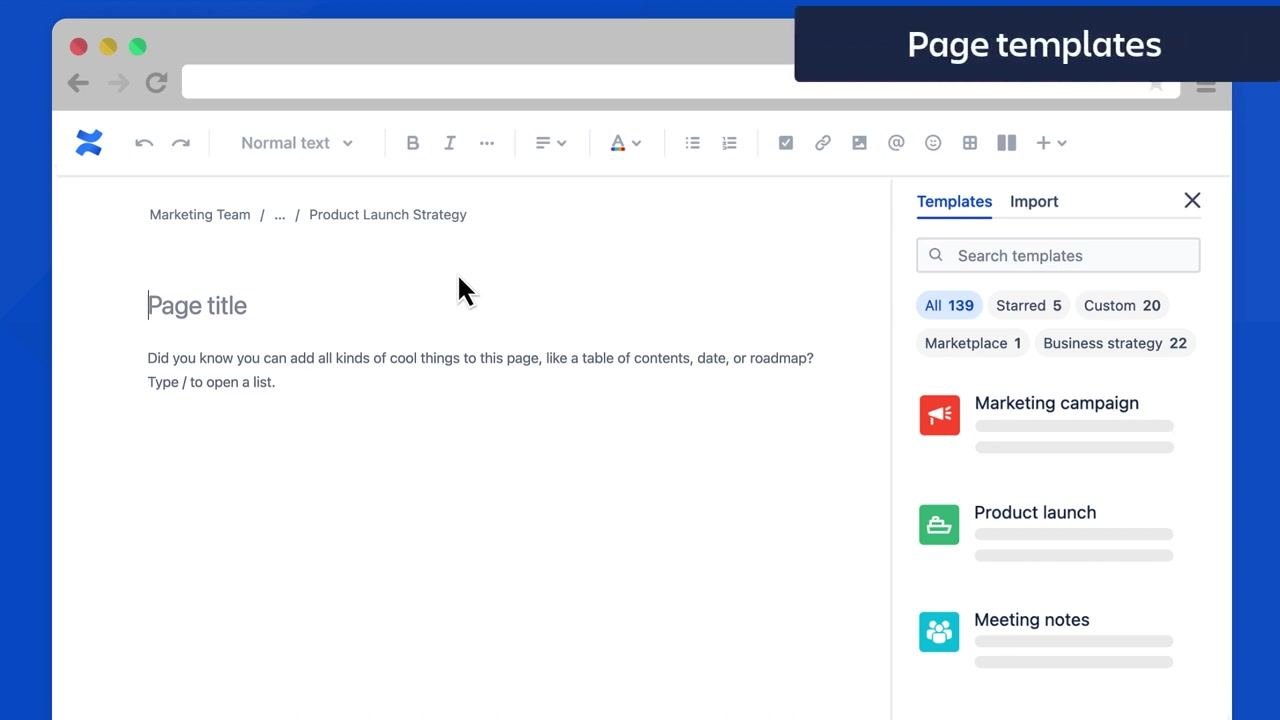
- On the right side of the editor, find the Templates panel.
-
Use the search bar or the filters (such as All, Starred, Custom, Marketplace, or Business strategy) to browse hundreds of pre-formatted page templates. Example templates include "Marketing campaign," "Product launch," and "Meeting notes."
-
Hover your cursor over any template to preview it before selecting.
- Click a template (for example, "Product launch") to automatically populate your new page with that template's content.
Customize your page with an emoji and header image
Adding an emoji to your page title and a custom header image makes your pages more engaging and easier to find.
Add an emoji to the page title
- Hover your cursor over the page title area at the top of the editor.
- Click the Add emoji button that appears above the page title field.
- In the emoji picker dialog, browse or search for an emoji that represents your page. For example, select the "pepperoni pizza" emoji from the Frequent section.
- The selected emoji appears next to your page title. Emojis in page titles help your pages stand out in search results, making them easier to locate later.
Add a header image
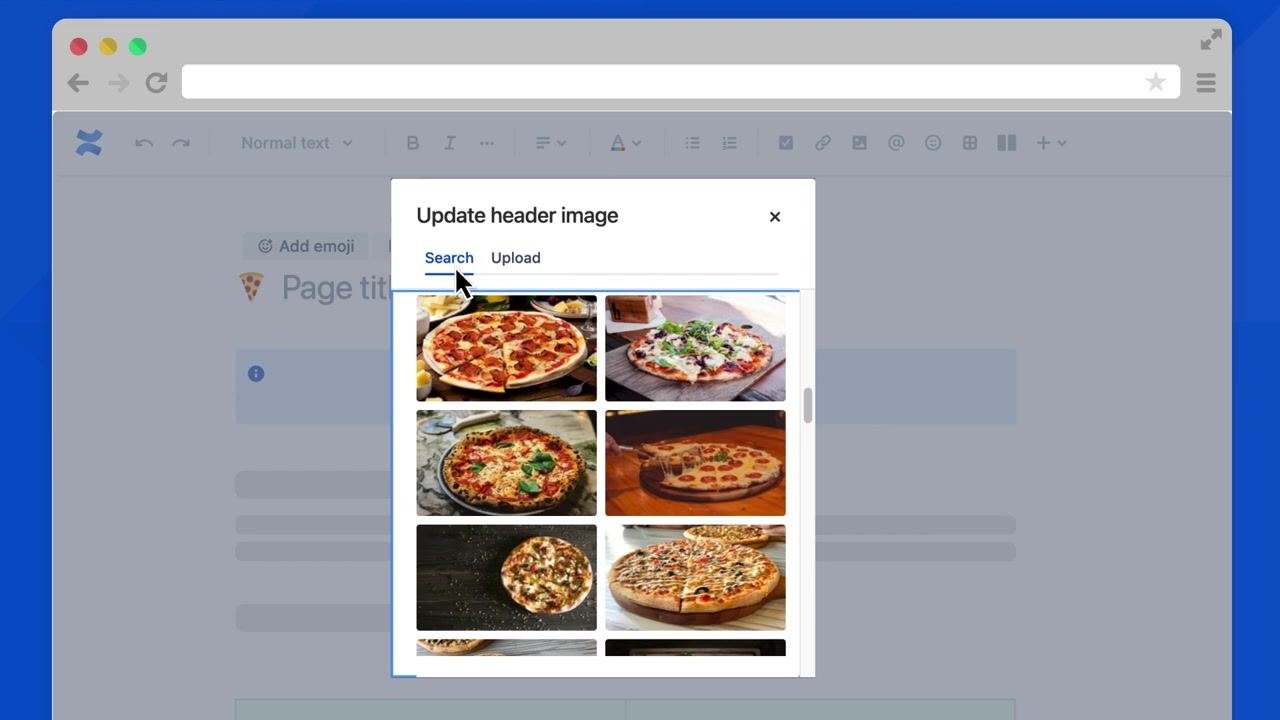
- Hover over the page title area again and click the Add header image button.
- In the "Update header image" dialog, choose either:
- Search: Browse a gallery of free images by keyword.
- Upload: Add your own custom image from your device.
- Use the search feature to find a suitable image, or scroll through the available options. For example, select a pizza image from the search results.
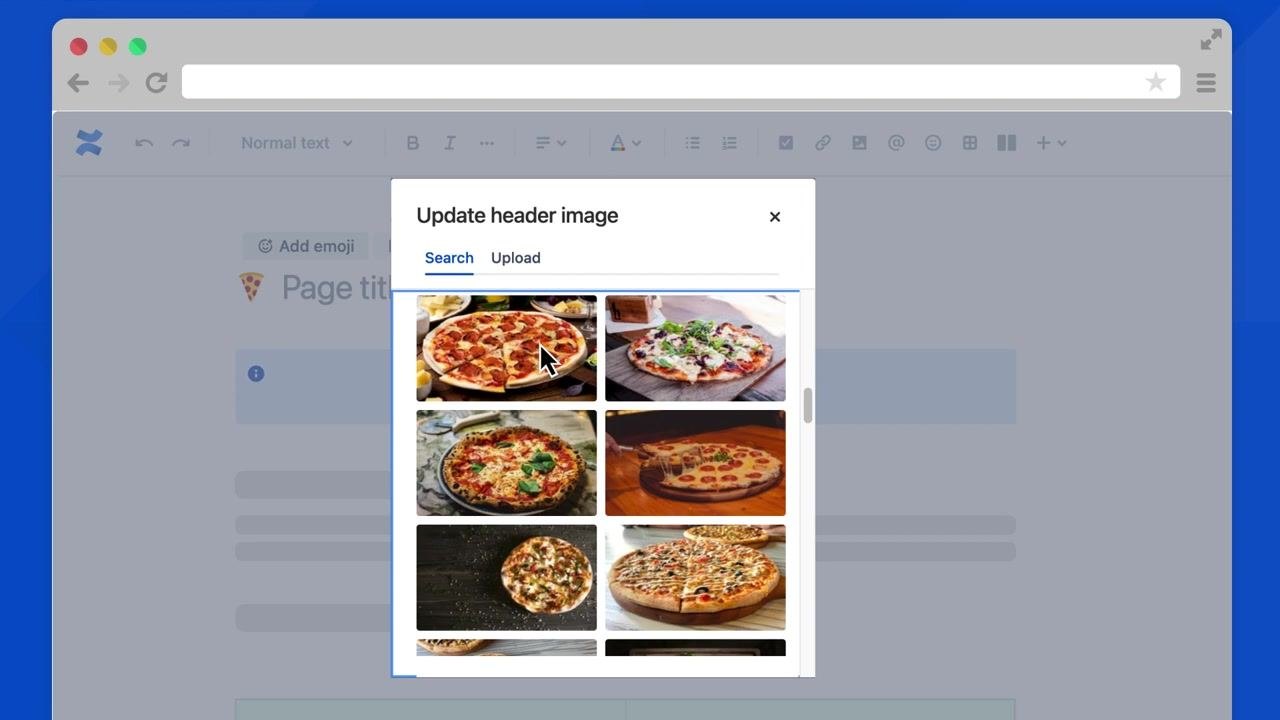
- The chosen image displays as a banner above your page title, giving your page a unique and visually appealing look.
Tips
- Creating child pages directly from the page tree helps keep your content organized and saves time.
- Use templates to quickly structure your pages and add visual appeal for your readers.
- Emojis and header images personalize your pages while also improving navigation and discoverability within Confluence.
- Experiment with different emojis and images to match the theme or purpose of your page.
What's next
Now that you know how to create a page in Confluence, apply a template, and add an emoji or header image, you have a solid foundation for building well-organized, visually engaging pages. Continue exploring additional templates and page tree structures to keep your team's content organized and easy to navigate.
Generation details: cost, quality tiers
Docsie billed 1,500 credits ($1.05) to analyze this 3-minute video at standard quality. The rewrite, template fill and Word/PDF exports were included. The same video at each quality tier:
| Quality | Frames sampled | Credits | Approx. cost |
|---|---|---|---|
| Draft | every 16-30 s | 750 | $0.52 |
| Standard (this guide) | every 8-15 s | 1,500 | $1.05 |
| Detailed | every 4-7 s | 3,000 | $2.10 |
| Ultra | every 1-3 s | 6,000 | $4.20 |
Credits priced at $0.70 per 1,000; plans include a monthly allowance. Enterprise customers on on-premise or bring-your-own-model deployments run this on their own inference and pay no per-video credits.
Generated by Docsie Video-to-Docs on 2026-09-08 from a 2-minute video. Screenshots are frames from the source video and belong to their creator, Atlassian, whose original is embedded above. If you own this video and want the guide removed or credited differently, contact us and we will act within one business day.