
How to Add a Table of Contents in Confluence
Adding a table of contents to a Confluence page is a quick task that makes long documents much easier to navigate. This guide shows you how to add a table of contents in Confluence using the built-in Table of Contents macro, and how to customize its appearance so it fits your documentation style. The examples below use a page called Demonstrate Table of Contents in the Project A - RCV Academy space, which contains several dummy sections that will become the entries in the finished table of contents.
Video: Confluence Tutorial #30 - How to add Table of Contents in Confluence by RCV Academy (2021). All credit for the demonstration goes to the creator; watch the original on YouTube. The written guide below was generated from this video by Docsie. Creator? Request a change or removal.
Adding a table of contents to a Confluence page is a quick task that makes long documents much easier to navigate. This guide shows you how to add a table of contents in Confluence using the built-in Table of Contents macro, and how to customize its appearance so it fits your documentation style. The examples below use a page called Demonstrate Table of Contents in the Project A - RCV Academy space, which contains several dummy sections that will become the entries in the finished table of contents.
Prerequisites
- Edit access to the Confluence page where you want to add the table of contents.
- A page that already contains headings (Heading 1, Heading 2, and so on), since the macro builds its list from these headings.
Reviewing the page before adding a table of contents
Step 1: Check the current page for a table of contents
Open the page you want to document. In this example, the page has multiple sections — "What is Lorem Ipsum?", "Lorem Ipsum 1", "Lorem ipsum how to?", "Lorem ipsum 2000 years?", and "Where can I get some?" — but no table of contents yet, which means readers must scroll through the whole page to find a specific section.
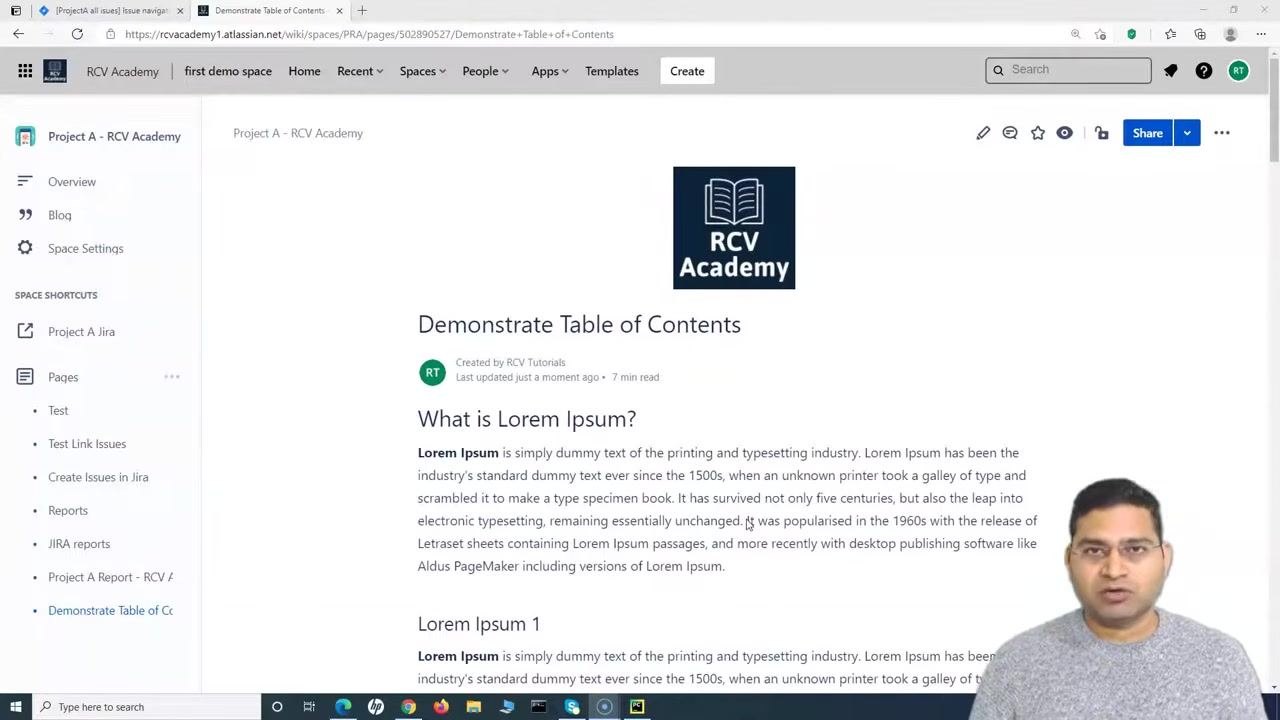
Step 2: Note the headings that will populate the table of contents
Scroll down to see the remaining headings on the page. These headings, along with the ones above, are what the Table of Contents macro will use to generate the navigation list.

Inserting the table of contents macro
Step 3: Enter edit mode
Click the Edit icon (pencil) at the top right of the page to open the editor.
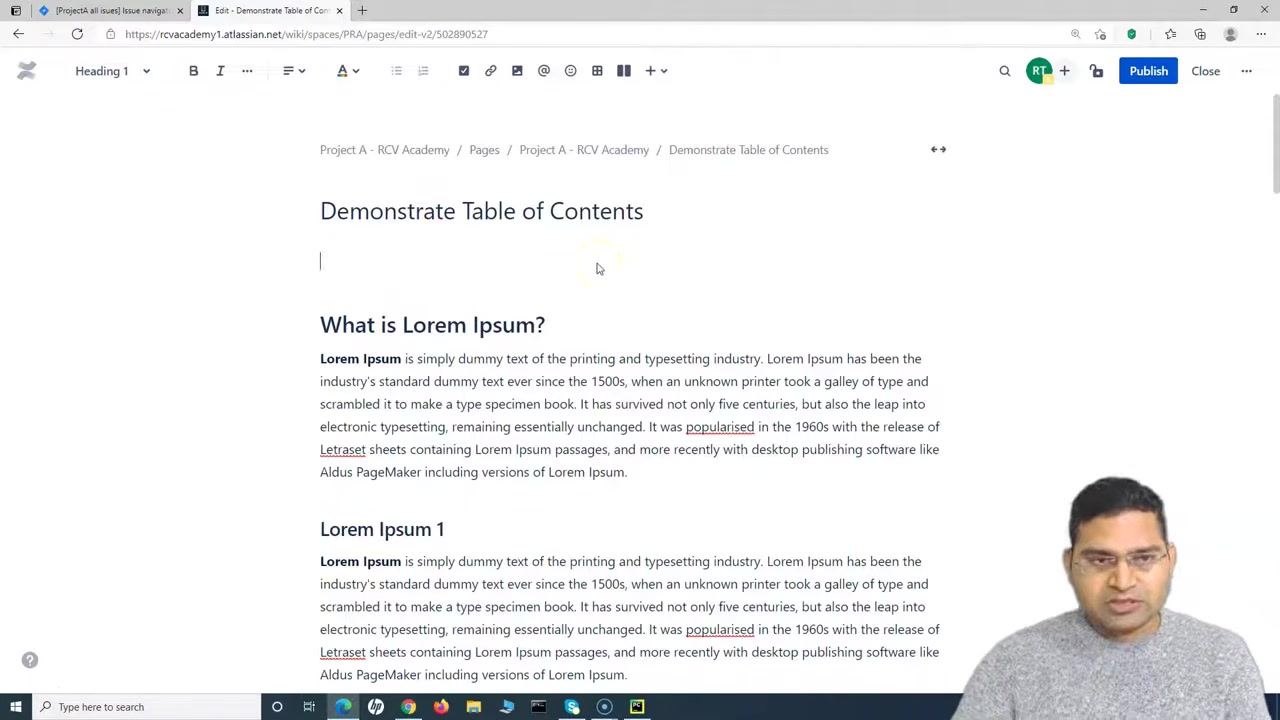
Step 4: Position your cursor
Place your cursor where you want the table of contents to appear on the page. Typically, this is at the top of the page, just below the page title.
Step 5: Insert the macro using the slash command
Type a forward slash (/) to open the macro quick-insert menu, then begin typing table to filter the list. Select Table of Contents from the results that appear.
Step 6: Insert the macro using the toolbar (alternative method)
If you prefer, click the + (Insert More Content) button in the toolbar and scroll through the dropdown to find Table of Contents. If it isn't visible right away, click View more at the bottom of the dropdown, then type table of contents in the search bar of the macro browser and select the macro.
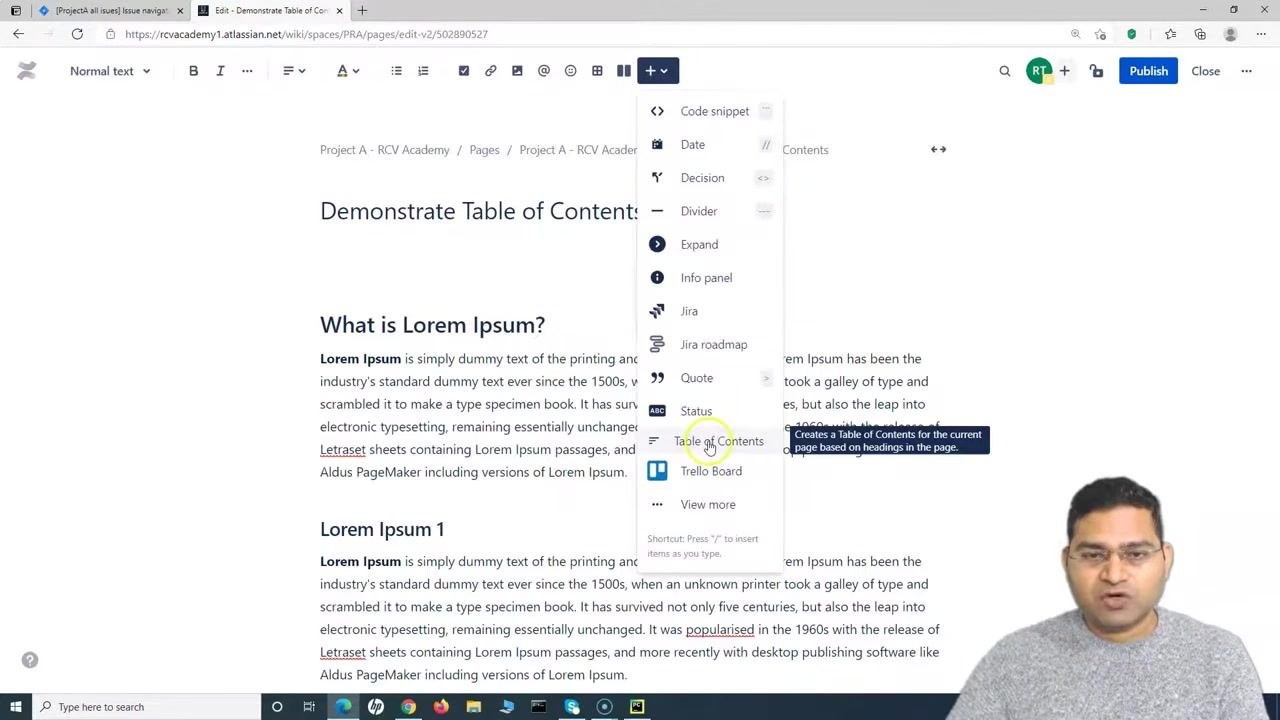
Step 7: Select Table of Contents from the Navigation category
In the macro selection dialog, locate Table of Contents under the "Navigation" section and click it.
Step 8: Review the default macro configuration
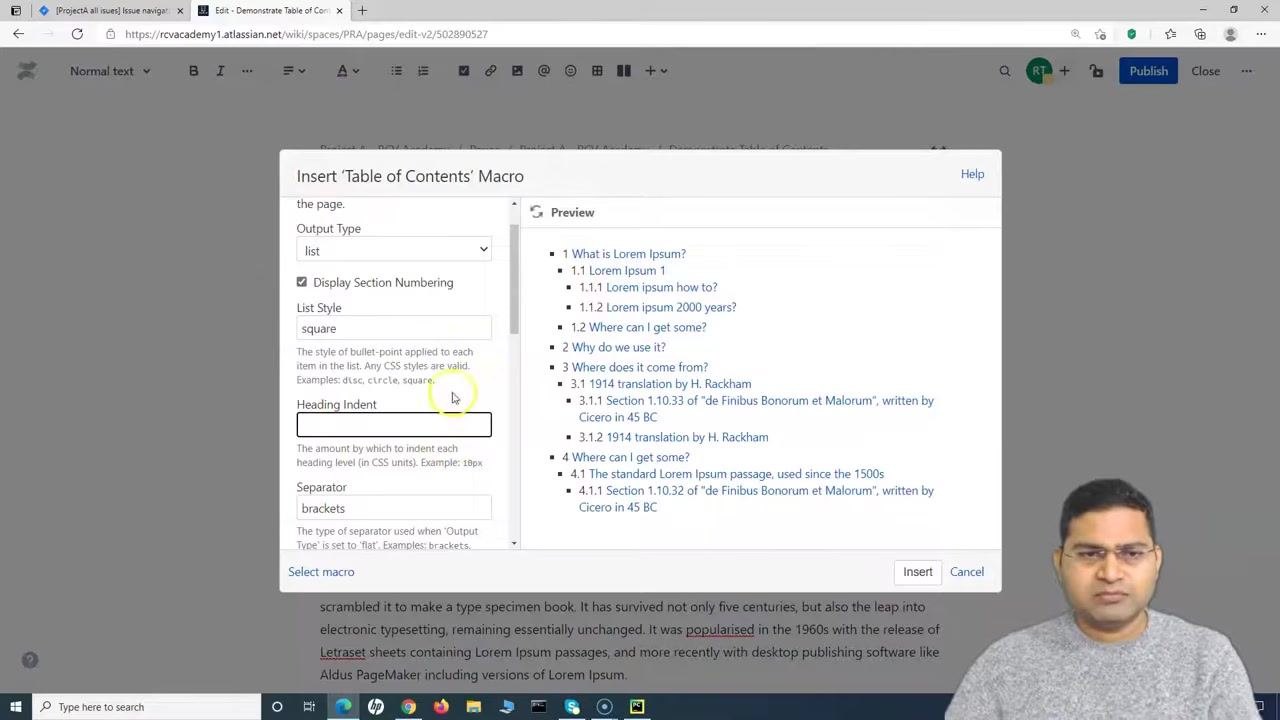
The Insert 'Table of Contents' Macro dialog opens. By default, the macro lists all headings on the page in a hierarchical (nested) list. Use the Preview pane on the right to see how the table of contents will look before you insert it.
Choosing an output type
Step 9: Select a hierarchical or flat layout
In the Output Type dropdown, choose the style that fits your page:
- list: displays the table of contents as a hierarchical, nested list (the default).
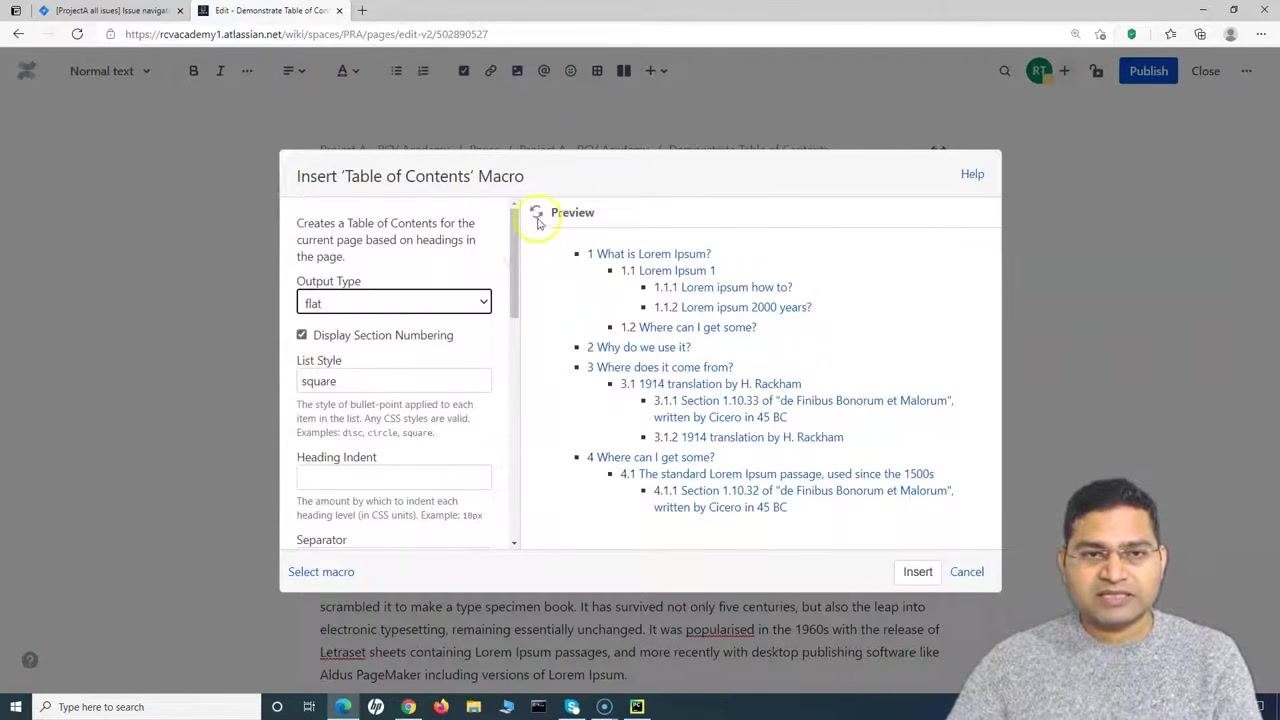
- flat: displays all headings in a single, non-nested list.
Switch between the two options and watch the Preview pane update accordingly.
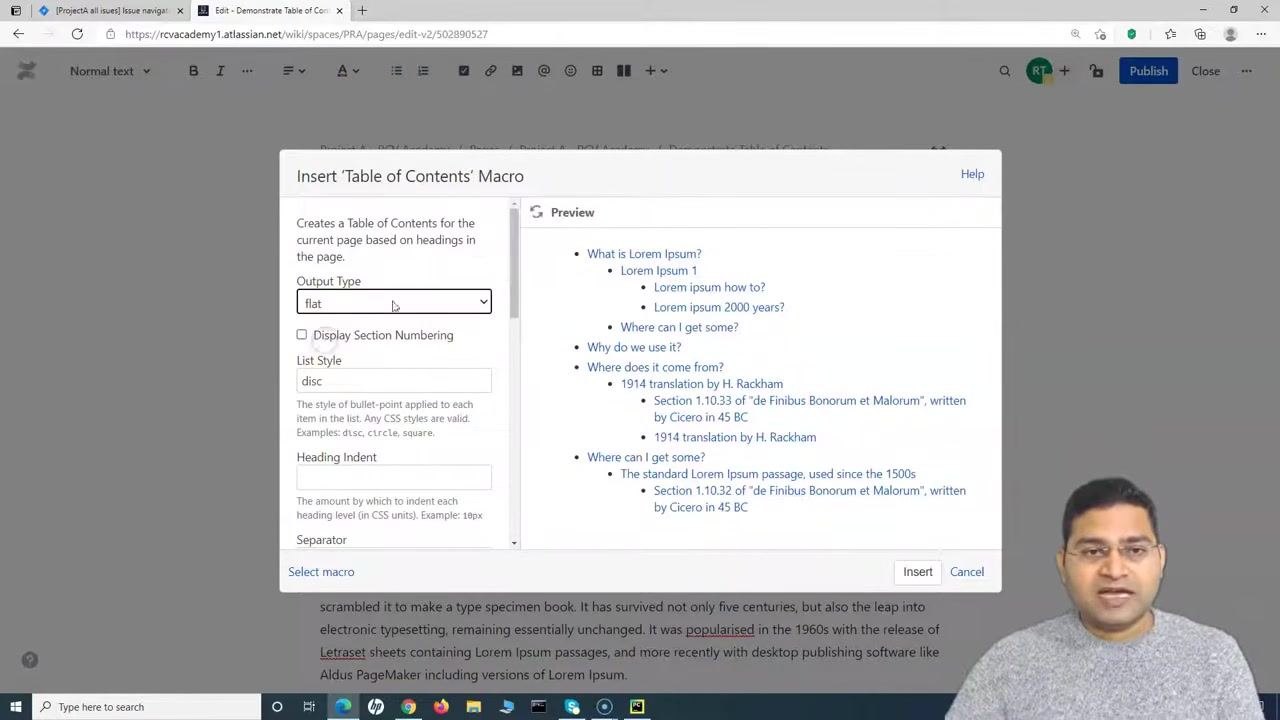
Step 10: Note the other available settings
Beyond the output type, the dialog offers several more options you can adjust:
- Display Section Numbering: adds numbers to each section in the table of contents.
- List Style: a CSS value (such as
disc,circle, orsquare) that sets the bullet style. - Heading Indent: a CSS value (such as
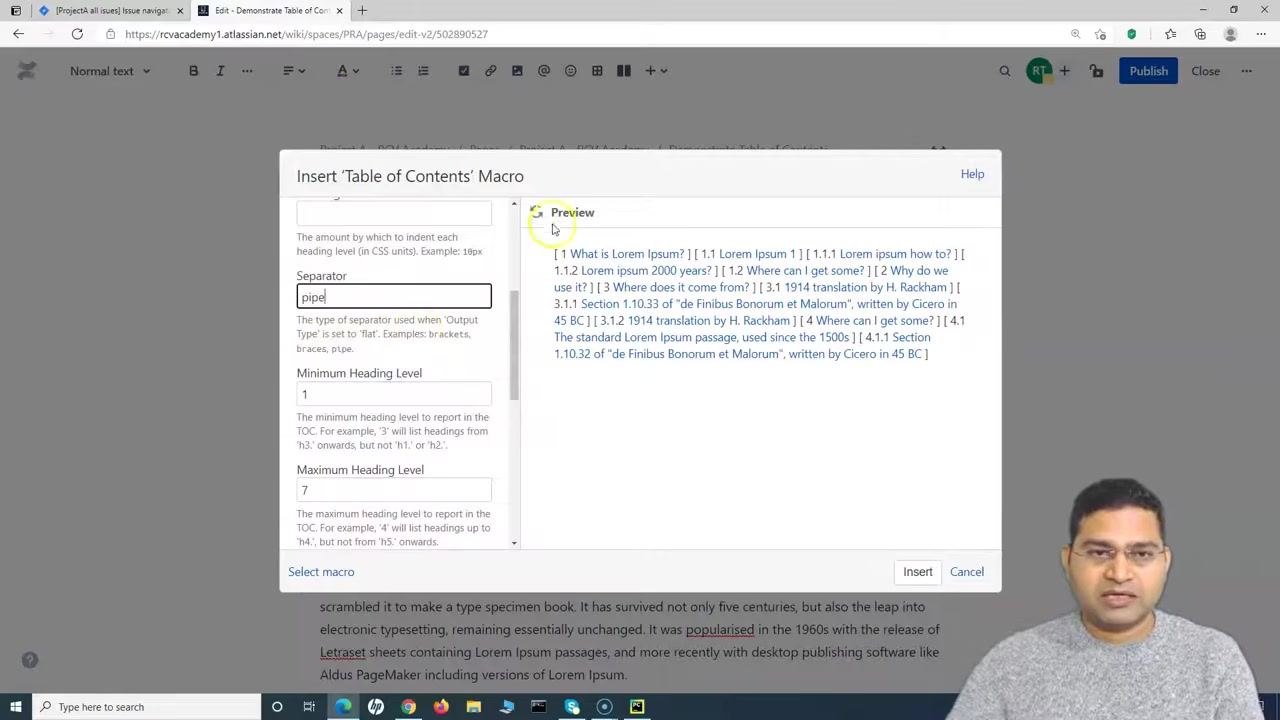
18px) that controls how much each heading level is indented. - Separator: a custom separator, available only when Output Type is set to flat.
Customizing the list style and section numbering
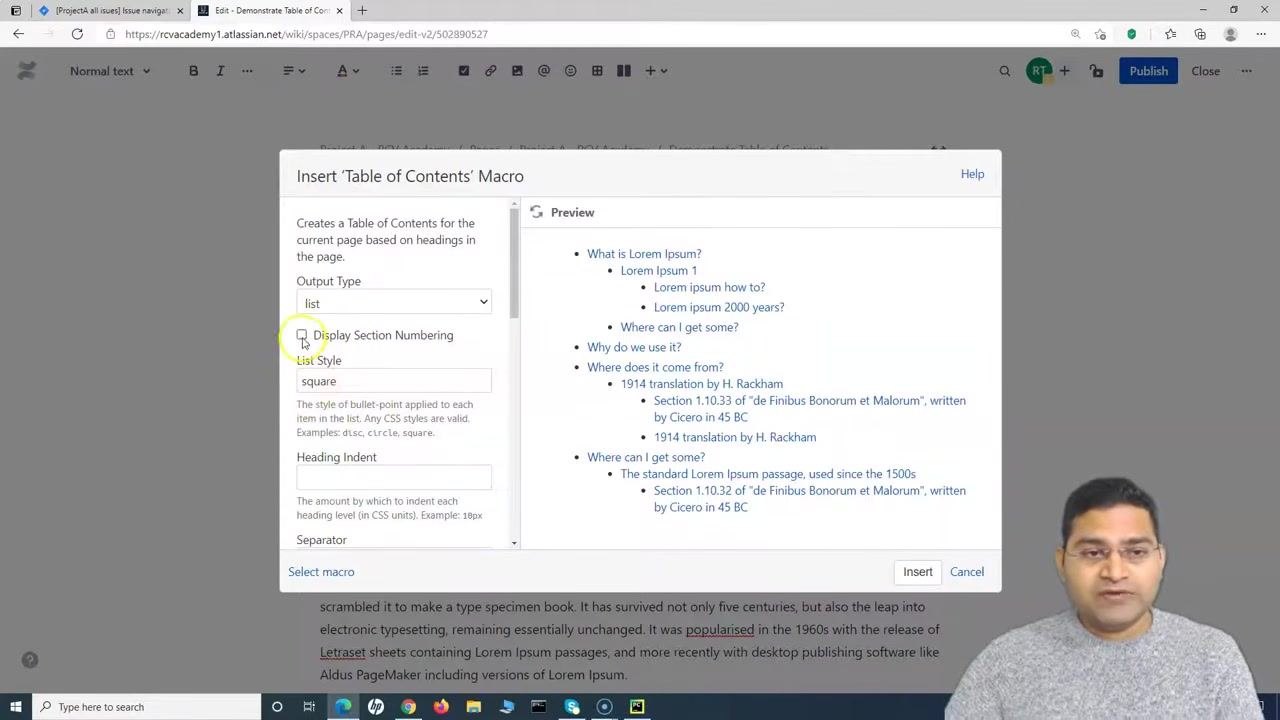
Step 11: Change the bullet style
In the List Style field, enter your preferred bullet style. Supported values include disc (default), circle, and square. For example, type square to switch to square bullets, and check the Preview pane to confirm the change.
Step 12: Turn on section numbering
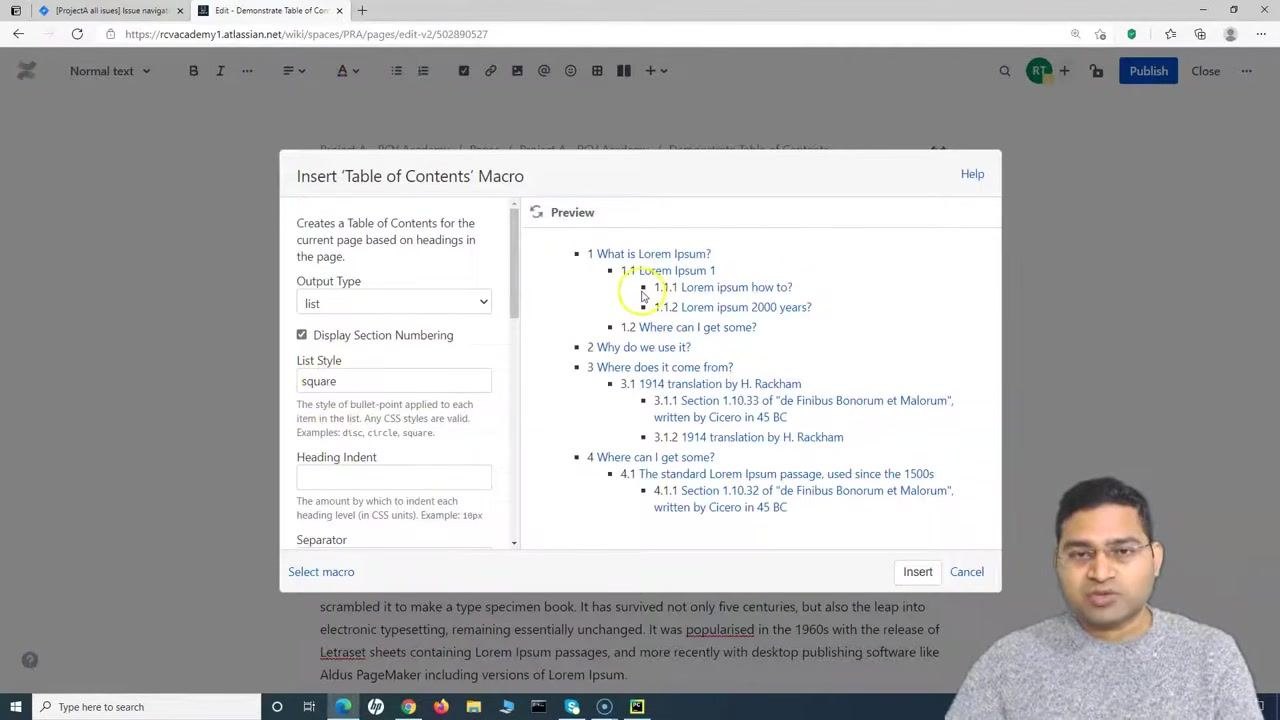
Check the Display Section Numbering box to add numbers to each heading and subheading in the table of contents. This makes it easier for readers to reference specific sections.
Adjusting heading indentation
Step 13: Set a small indent
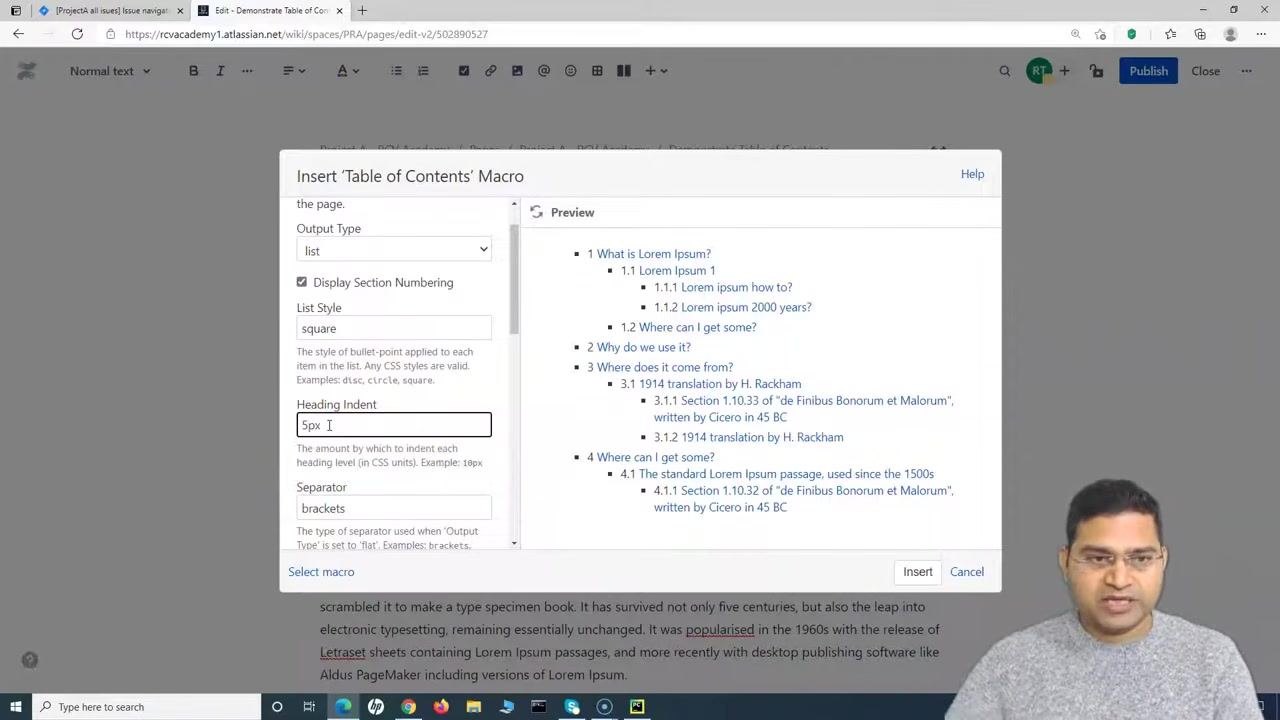
In the Heading Indent field, enter a CSS value such as 5px for a small indent between heading levels. The Preview pane updates to reflect the new spacing.
Step 14: Try a larger indent
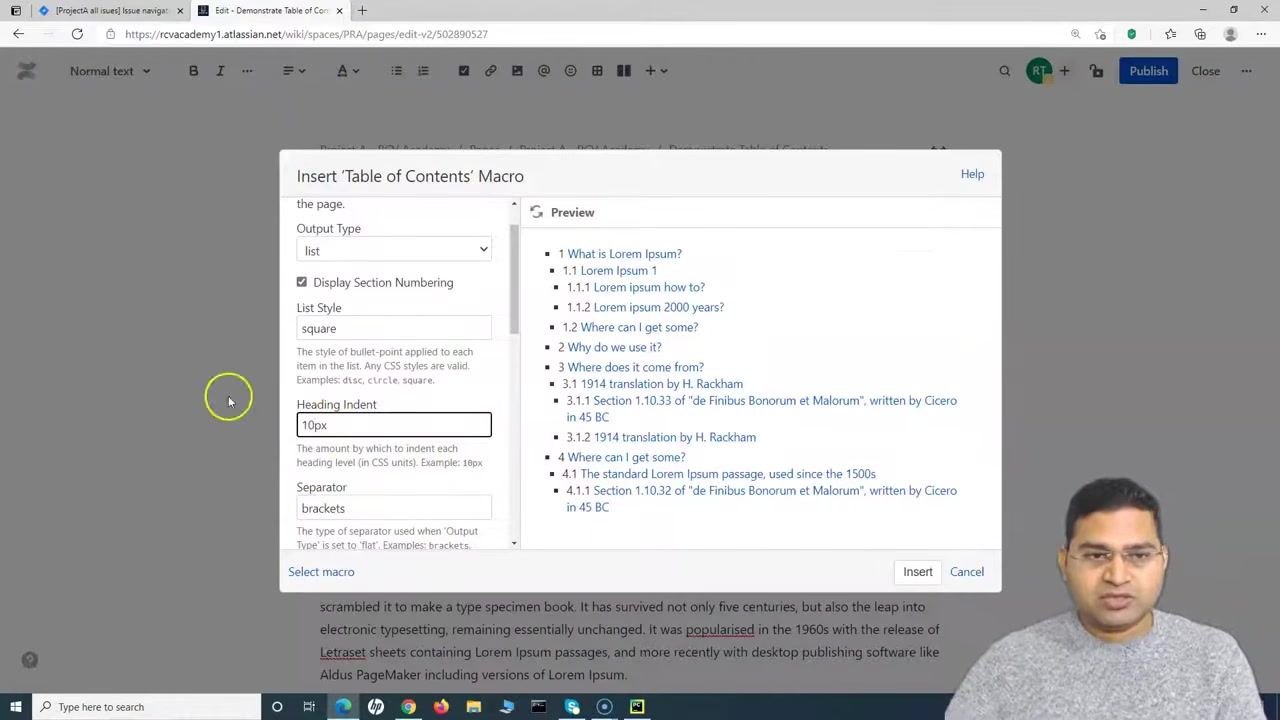
Increase the value to 10px for more pronounced indentation between levels, and compare the result in the Preview pane. If you want to return to the default spacing, clear the field and leave it blank.
Step 15: Review the combined settings
With list style, section numbering, and heading indent all configured, check the Preview pane one more time to confirm the overall look before moving on. Adjust any of the values again if needed.
Switching to a flat list with a custom separator
Step 16: Set Output Type to flat with your preferred numbering and style
Change the Output Type dropdown to flat. Keep Display Section Numbering checked if you want numbered entries, confirm List Style is set to square (or your preferred style), and leave Heading Indent blank since indentation does not apply to a flat list.
Step 17: Enter a separator
In the Separator field, type pipe to use the pipe character (|) between headings. This option is only applicable when Output Type is set to flat. Check the Preview pane to see the headings separated by pipes.
Refining which heading levels appear
Step 18: Switch back to a hierarchical list
Set Output Type back to list for a hierarchical, indented layout, keep Display Section Numbering checked, and confirm List Style is set to square.
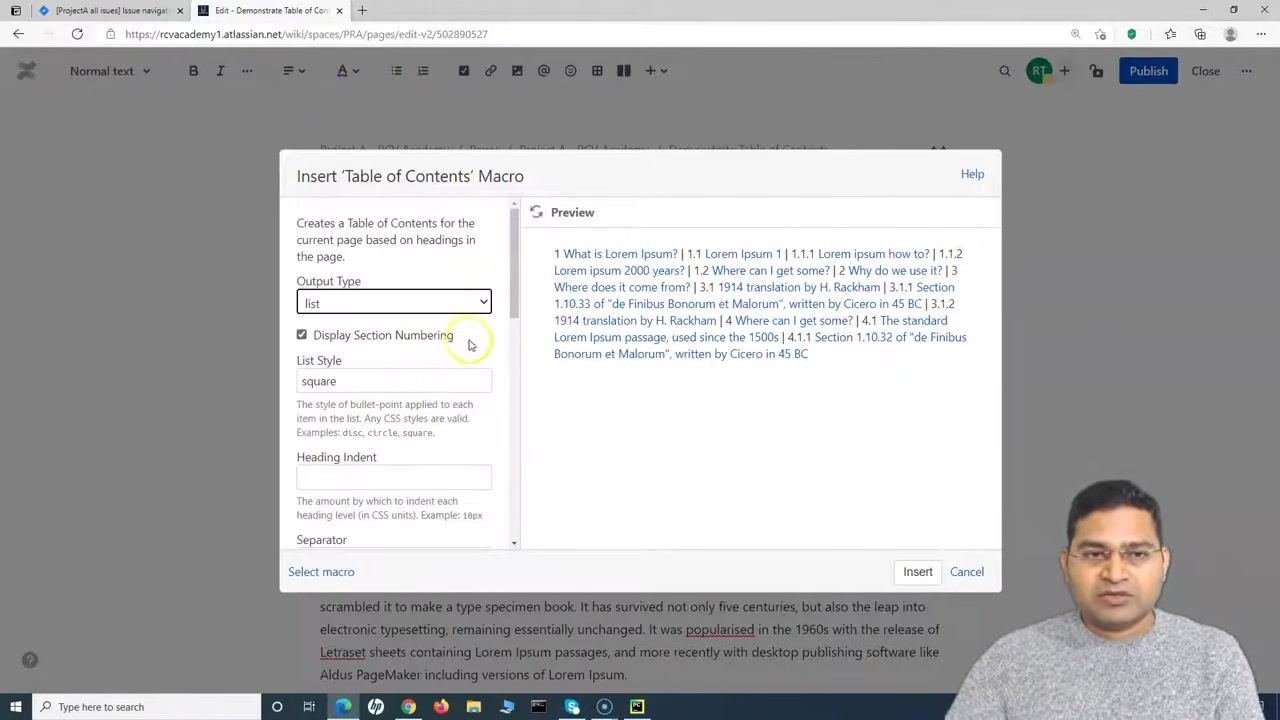
Step 19: Set the minimum and maximum heading level
In the Minimum Heading Level field, enter the lowest heading level to include (for example, 1 for H1). In the Maximum Heading Level field, enter the highest heading level to include (for example, 7 for H7). The Preview pane updates to show only headings within this range.
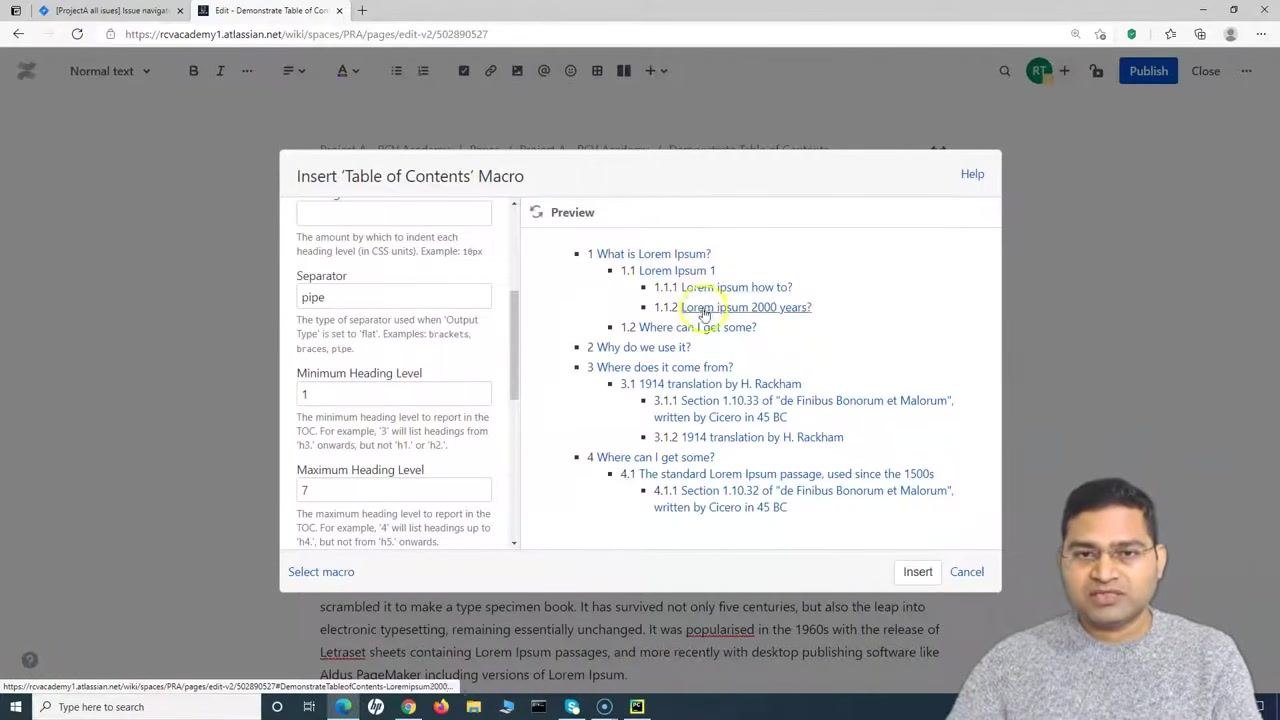
Step 20: Lower the maximum heading level
Set Maximum Heading Level to 4 to include headings only up to H4. Check the Preview pane to confirm that lower-level headings are now excluded.
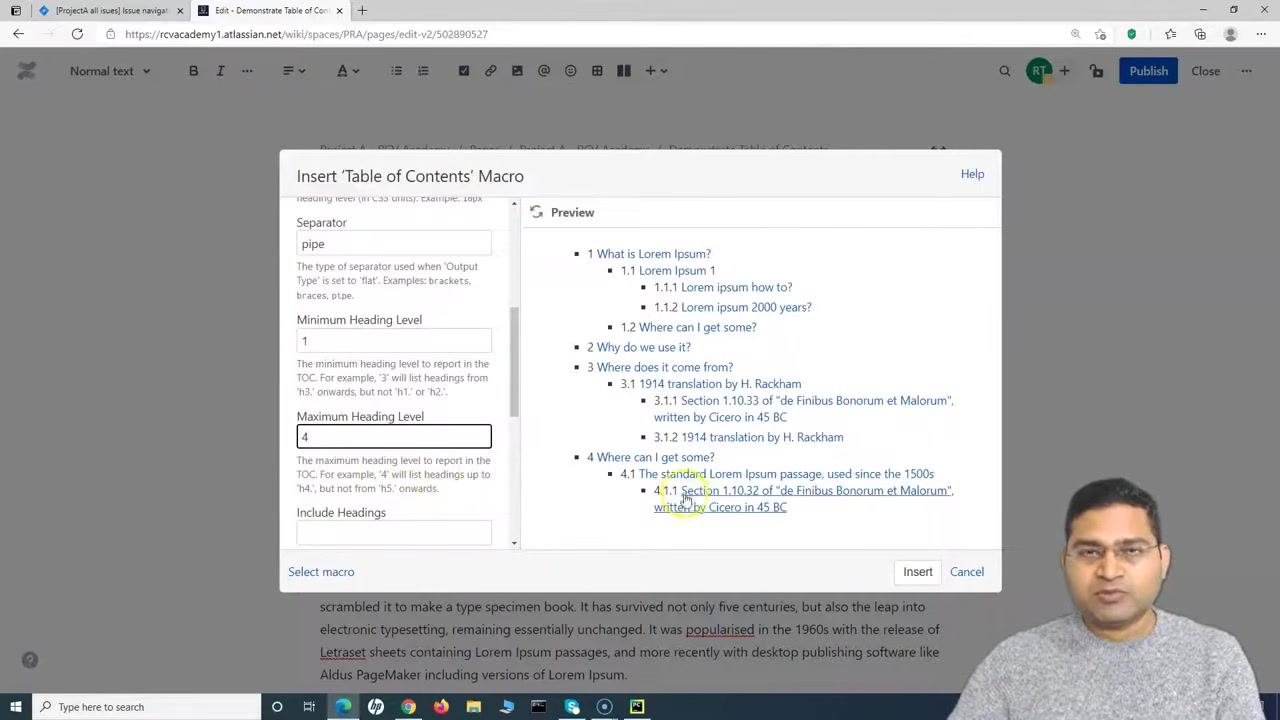
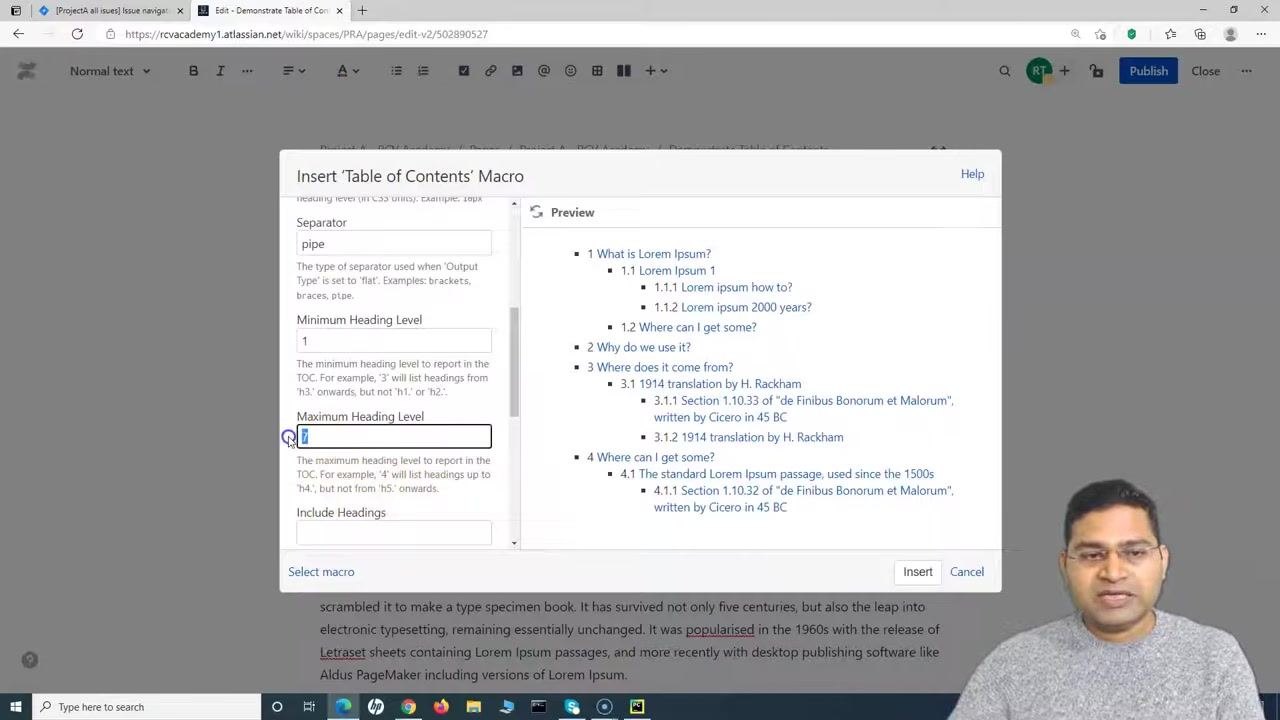
Step 21: Restrict the table of contents further
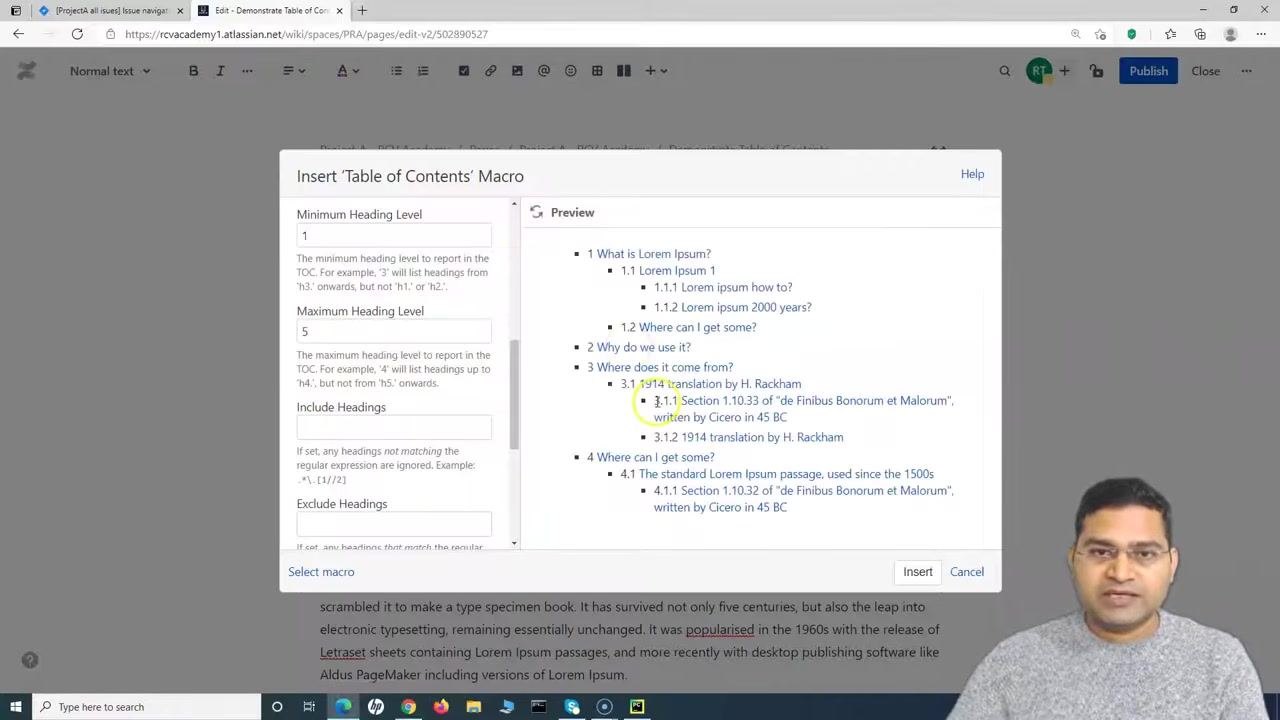
Set Maximum Heading Level to 2 to show only H1 and H2 headings in the table of contents. This is useful if your page has many nested subheadings that you don't want cluttering the navigation list.
Controlling print visibility
Step 22: Decide whether the table of contents should print
Find the Printable checkbox in the dialog. Check this box if you want the table of contents to appear when the page is printed. If you clear the box, the table of contents will not be visible in printouts.
Setting advanced options
Step 23: Configure CSS class and URL behavior (optional)
For further control, the dialog includes two advanced options:
- CSS Class Name: enter a CSS class if you want to apply custom styles to the table of contents using your own CSS rules.
- Absolute URL: check this box if you want the links in the table of contents to use full URLs instead of relative links.
These settings are intended for advanced users who want to further style or control the macro's behavior.
Inserting the macro and publishing the page
Step 24: Insert the macro
Once you're satisfied with the settings and the Preview pane, click the Insert button at the bottom of the dialog to add the macro to the page.
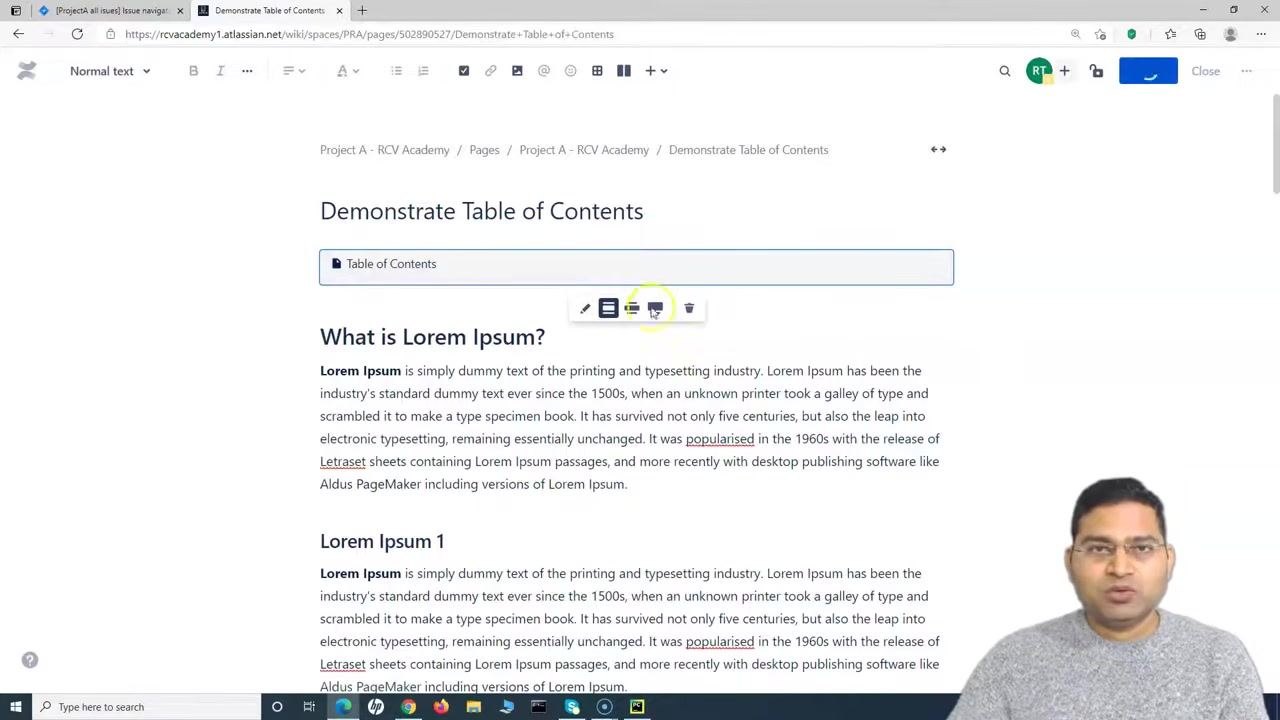
Step 25: View the macro block in the editor
The macro now appears as a block labeled "Table of Contents" in your page. Select it to reveal a toolbar that lets you move, edit, or delete the macro.
Step 26: Use the table of contents to navigate
Click any heading listed in the table of contents to jump directly to that section of the page. This gives readers quick navigation, especially on long pages.
Verifying heading levels in the table of contents
Step 27: Confirm which headings are included
Headings such as "What is Lorem Ipsum?" (Heading 1) and "Lorem Ipsum 1" (Heading 2) appear in the table of contents based on the minimum and maximum heading levels you configured. Select a heading in the editor to confirm its assigned level.
Step 28: Check additional heading levels
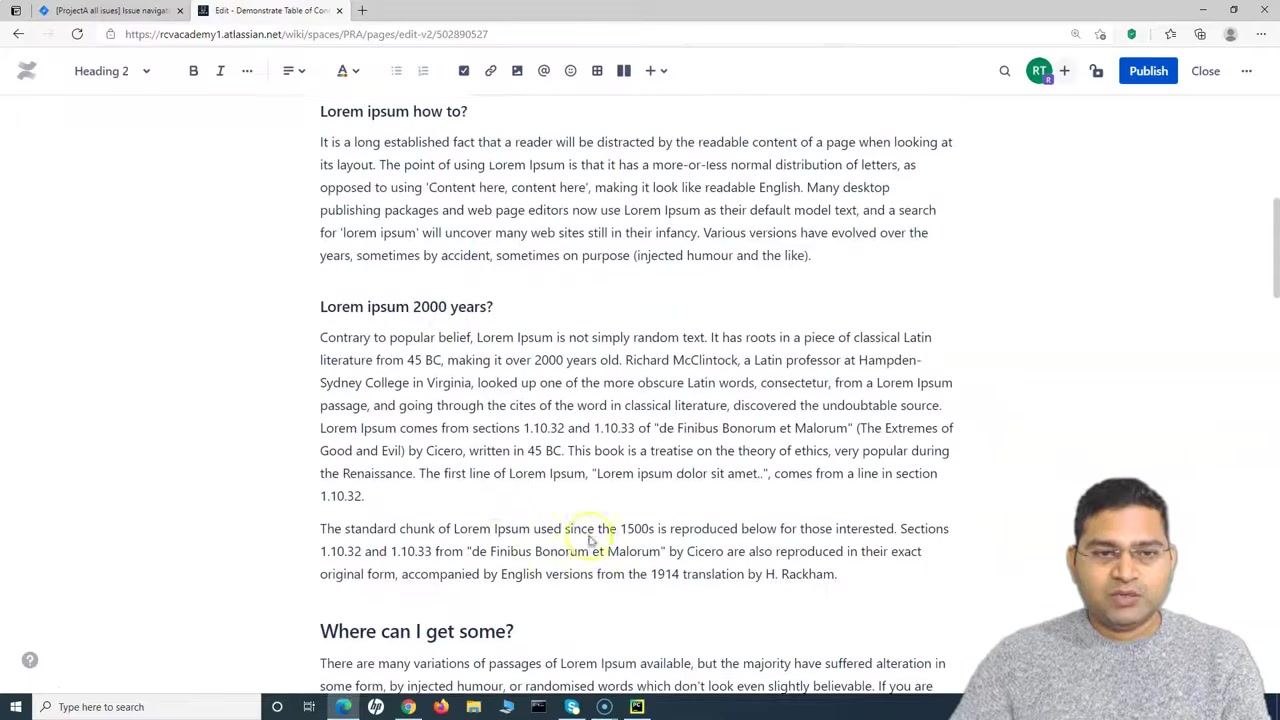
Scroll through the page to verify that headings at different levels are correctly included or excluded based on your settings. For example, "Lorem ipsum how to?" and "Lorem ipsum 2000 years?" are both formatted as Heading 2.
Step 29: Test the effect of minimum and maximum heading level settings
Reopen the macro and set Minimum Heading Level to 1 and Maximum Heading Level to 2. Only H1 and H2 headings will appear in the table of contents; lower-level headings such as H3 and H4 will not be included.
Reviewing the final result
Step 30: Review the macro block in the page editor
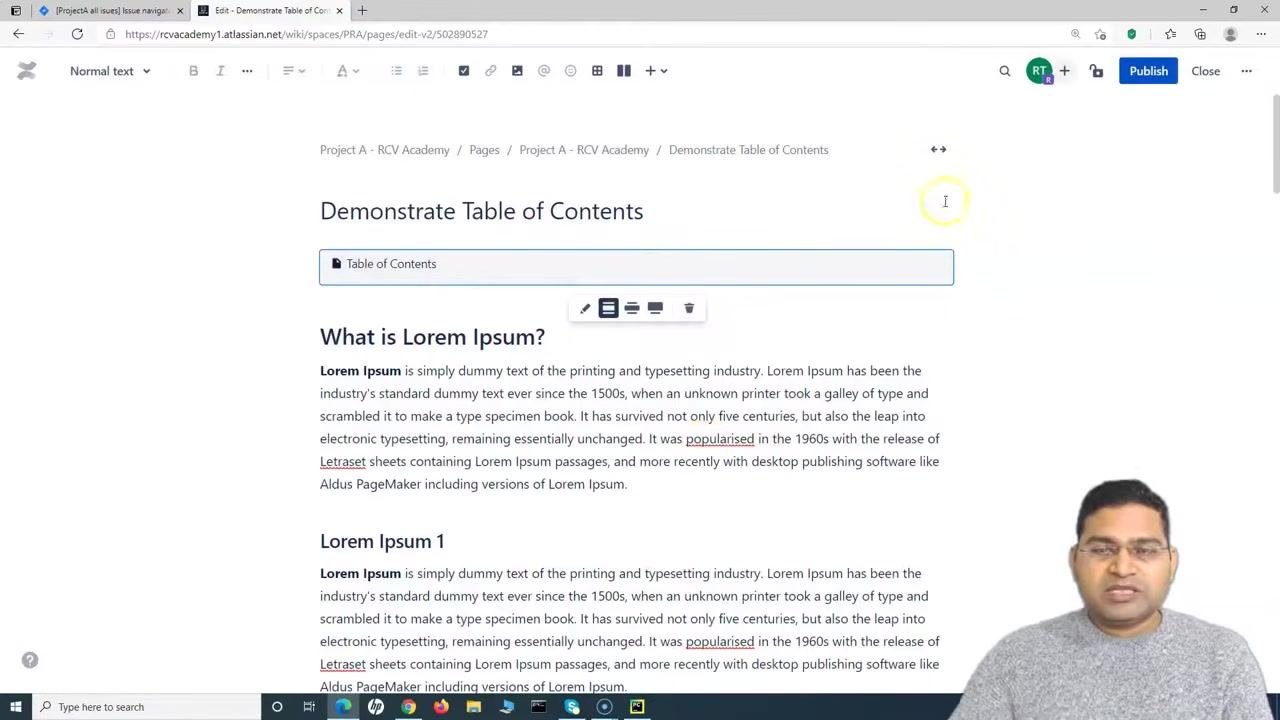
In edit mode, the "Demonstrate Table of Contents" heading appears at the top of the page, with the Table of Contents macro block directly below it. Sample headings such as "What is Lorem Ipsum?" (Heading 1) and "Lorem Ipsum 1" (Heading 2) appear further down the page, and the macro toolbar is visible when the block is selected.
Step 31: Publish the page
Click Publish in the top right corner of the editor. Wait for the page to reload and display the published version. In the published view, the page title, author information, and main headings appear, though the table of contents may not be rendered in the very first moment the page loads.
Step 32: Confirm the table of contents renders correctly
Once the page finishes loading, the table of contents appears at the top, below the title, listing every included heading as a clickable link that reflects your configured heading levels and structure:
- 1 What is Lorem Ipsum?
- 1.1 Lorem Ipsum 1
- 1.2 Where can I get some?
- 2 Why do we use it?
- 3 Where does it come from?
- 3.1 1914 translation by H. Rackham
- 4 Where can I get some?
- 4.1 The standard Lorem Ipsum passage, used since the 1500s
The rest of the page content appears below the table of contents.
What's next
You've now added a table of contents to your Confluence page and configured its output type, list style, section numbering, indentation, separator, heading level range, print visibility, and advanced CSS/URL options. You can reopen the macro at any time to adjust these settings further, or apply the same steps to other pages that would benefit from easier navigation.
Generation details: cost, quality tiers
Docsie billed 4,500 credits ($3.15) to analyze this 9-minute video at standard quality. The rewrite, template fill and Word/PDF exports were included. The same video at each quality tier:
| Quality | Frames sampled | Credits | Approx. cost |
|---|---|---|---|
| Draft | every 16-30 s | 2,250 | $1.57 |
| Standard (this guide) | every 8-15 s | 4,500 | $3.15 |
| Detailed | every 4-7 s | 9,000 | $6.30 |
| Ultra | every 1-3 s | 18,000 | $12.60 |
Credits priced at $0.70 per 1,000; plans include a monthly allowance. Enterprise customers on on-premise or bring-your-own-model deployments run this on their own inference and pay no per-video credits.
Generated by Docsie Video-to-Docs on 2026-09-08 from a 8-minute video. Screenshots are frames from the source video and belong to their creator, RCV Academy, whose original is embedded above. If you own this video and want the guide removed or credited differently, contact us and we will act within one business day.