
How to Record Video in CATIA
This guide shows you how to record video in CATIA V5 so you can capture your design process for documentation, tutorials, or sharing. You open a Part Design document, set the video recording properties, record your actions, preview the result, and find the saved file. The guide also explains how to capture still images of your workspace.
Video: How to capture Image and record video in catia V5 by Tech vaathi (2021). All credit for the demonstration goes to the creator; watch the original on YouTube. The written guide below was generated from this video by Docsie. Creator? Request a change or removal.
This guide shows you how to record video in CATIA V5 so you can capture your design process for documentation, tutorials, or sharing. You open a Part Design document, set the video recording properties, record your actions, preview the result, and find the saved file. The guide also explains how to capture still images of your workspace.
Prerequisites
Before you begin, make sure you have:
- CATIA V5 installed and ready to launch.
- A folder where you want to save the recording, such as your Desktop.
Open a Part Design document
Step 1: Start a new part in CATIA V5
Start a Part Design session so you have a workspace to record.
- Launch CATIA V5.
- In the top menu, click Start.
- Hover over Mechanical Design and select Part Design from the dropdown menu.
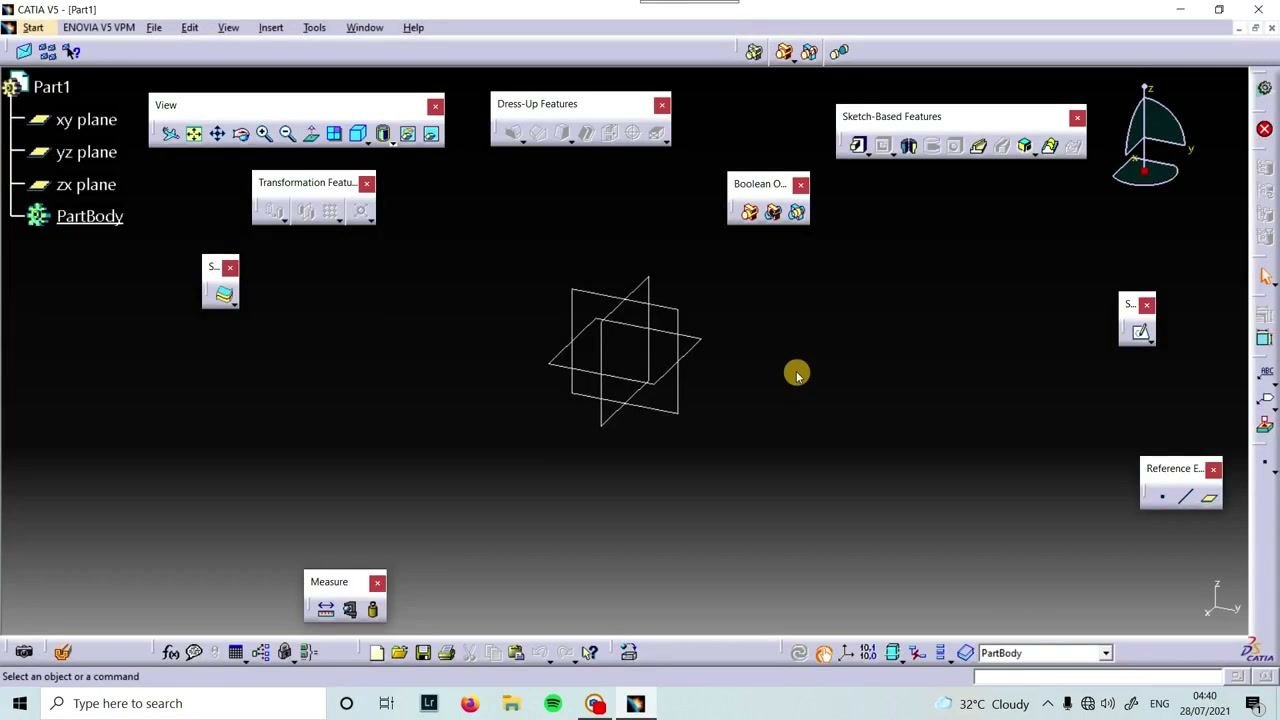
Wait for the Part Design workbench to load. The left panel shows the structure Part1, xy plane, yz plane, zx plane, and PartBody. Toolbars such as View, Dress-Up Features, Sketch-Based Features, Transformation Features, and Boolean Operations are visible.
Step 2: Prepare your workspace
Make sure the 3D workspace is clear and the toolbars are arranged for easy access. The central area displays the three main planes intersecting at the origin.
Set the video recording properties
Step 3: Open the video recording feature
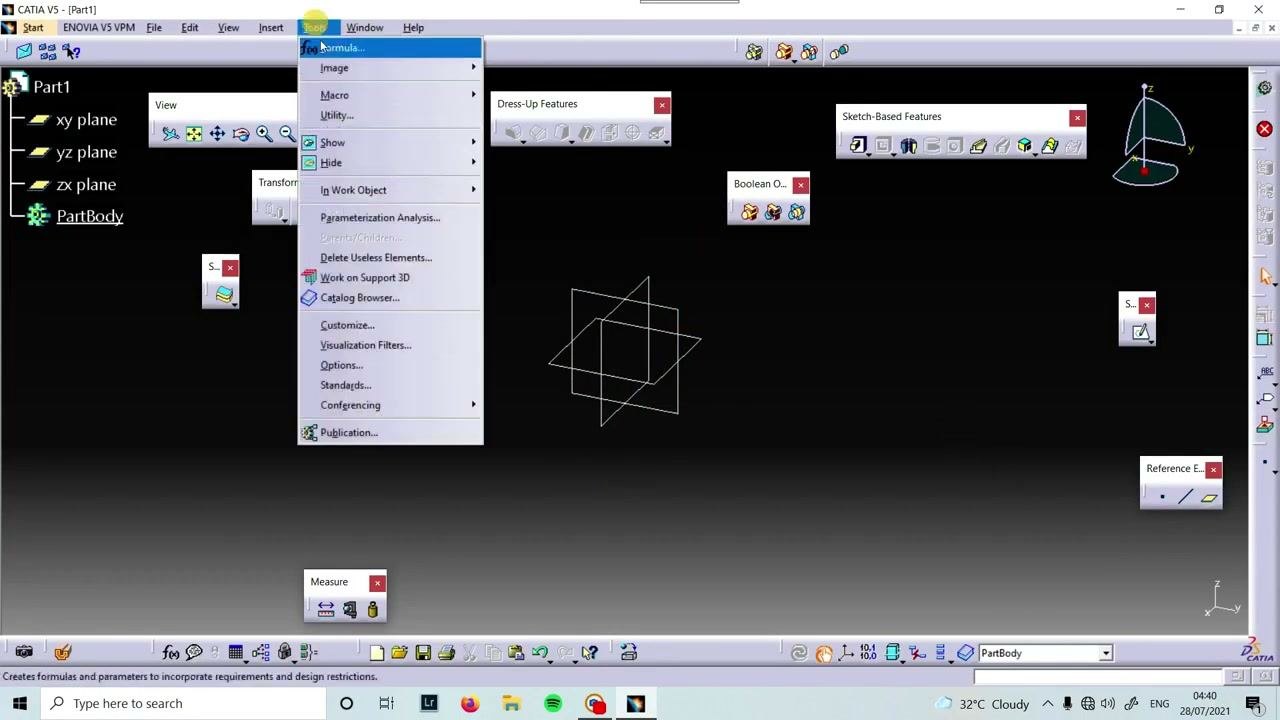
To record video in CATIA, start from the Tools menu.
- In the top menu, click Tools.
- Hover over Image.
- Select Video... from the submenu.
Step 4: Choose the file location and name
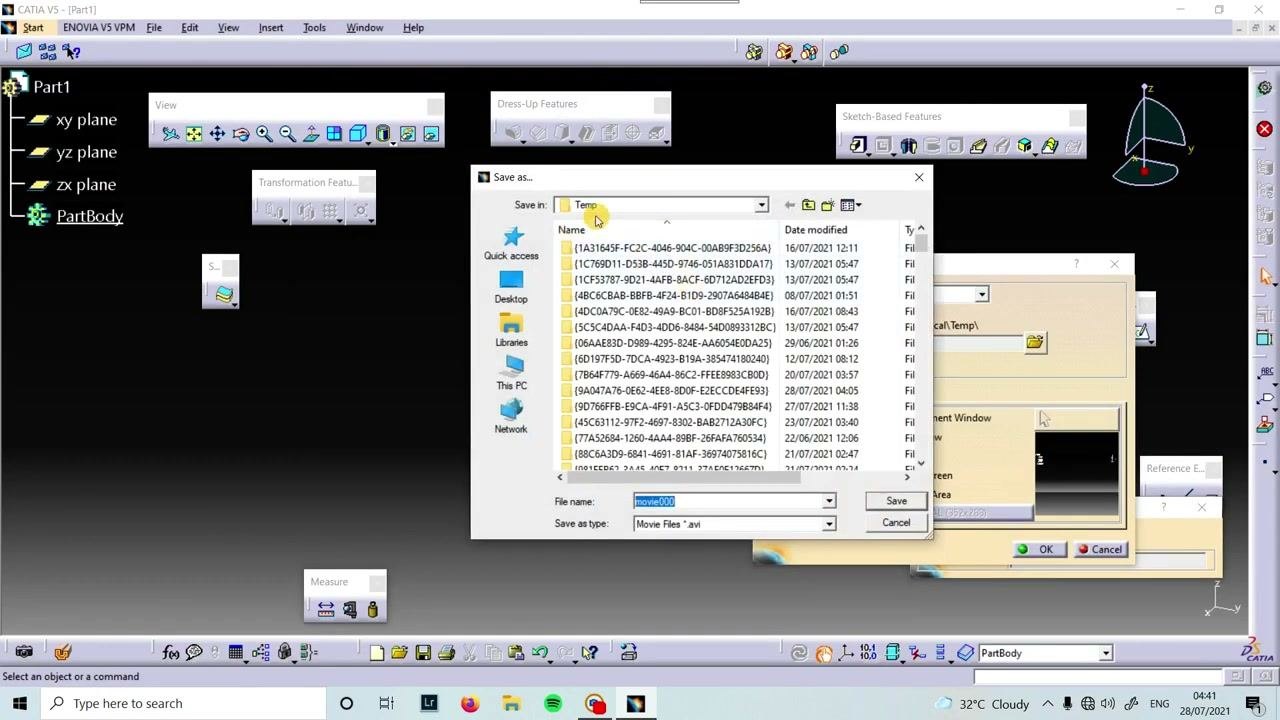
A Save As dialog appears. By default, the file location is the Temp folder.
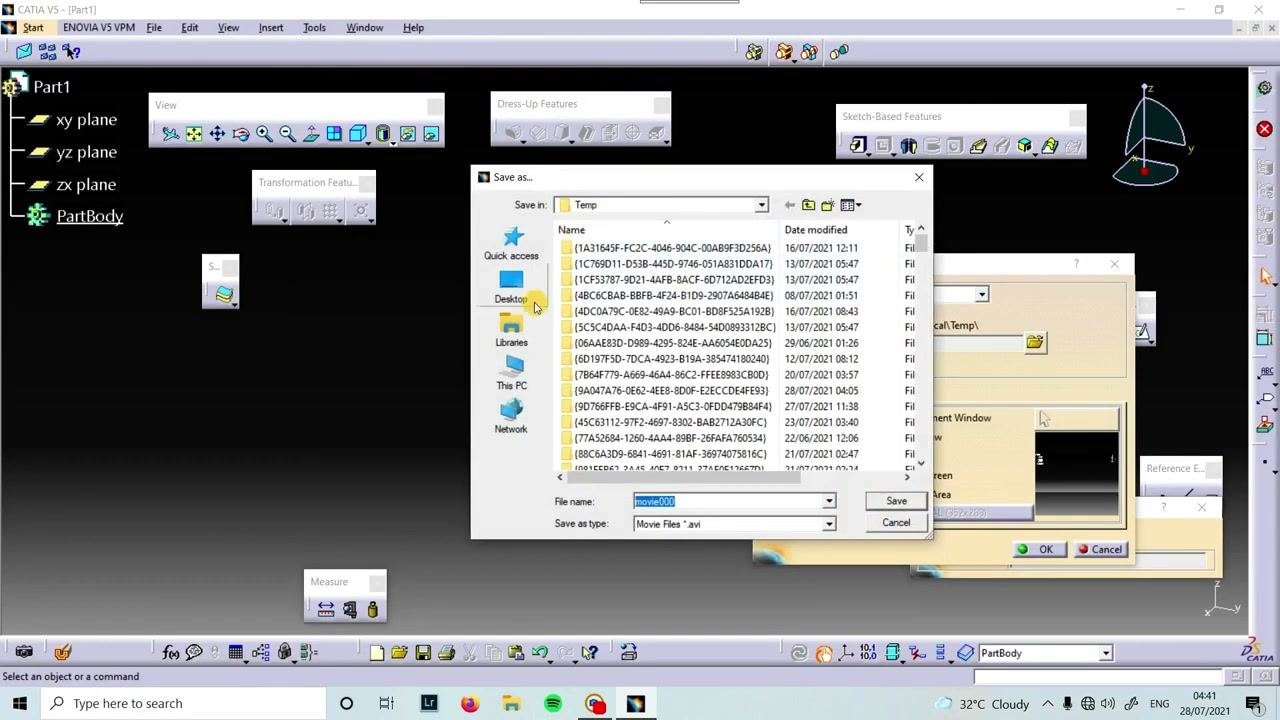
- To change the location, click Desktop or your preferred folder in the left sidebar.
- Enter a file name, for example
movie000.avi. - Click Save.
Step 5: Configure the video properties
In the Video Properties window, review these settings:
- Format:
VFW Codecis the default. - Directory: Confirm your chosen save path, for example
C:\Users\Mr.BK\Desktop. - Name: Make sure the file name is correct, for example
movie000.avi.
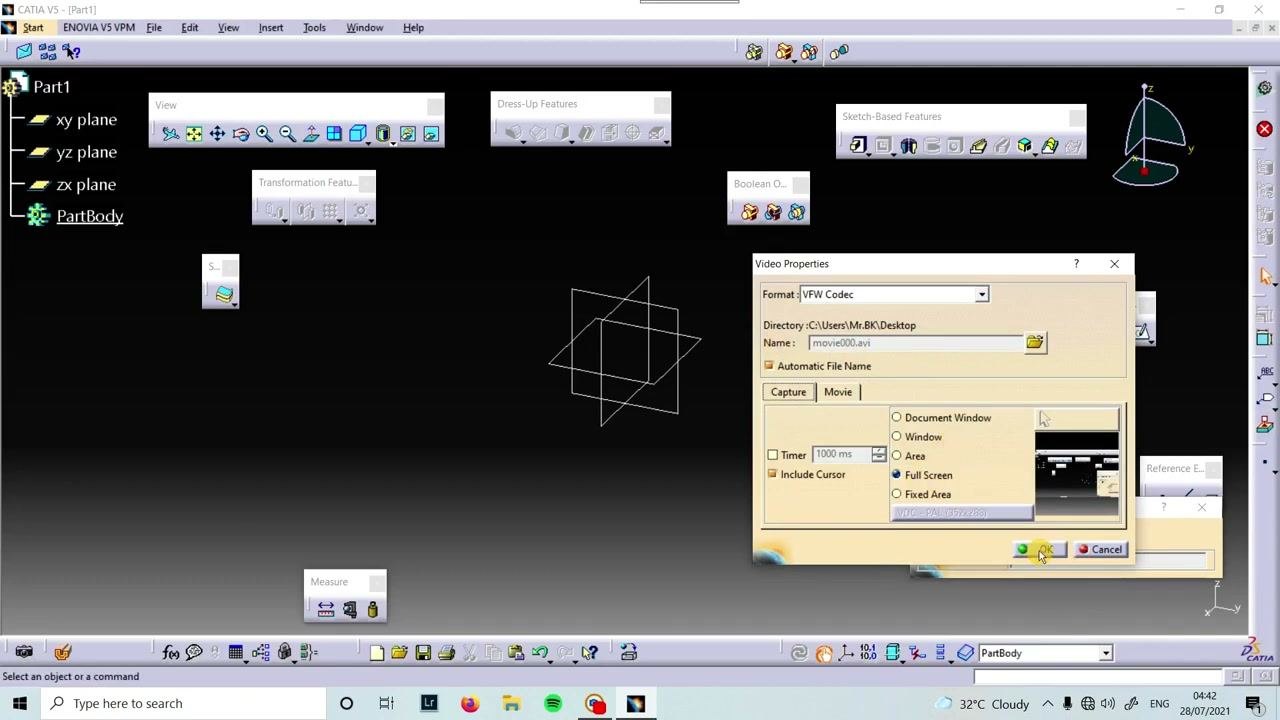
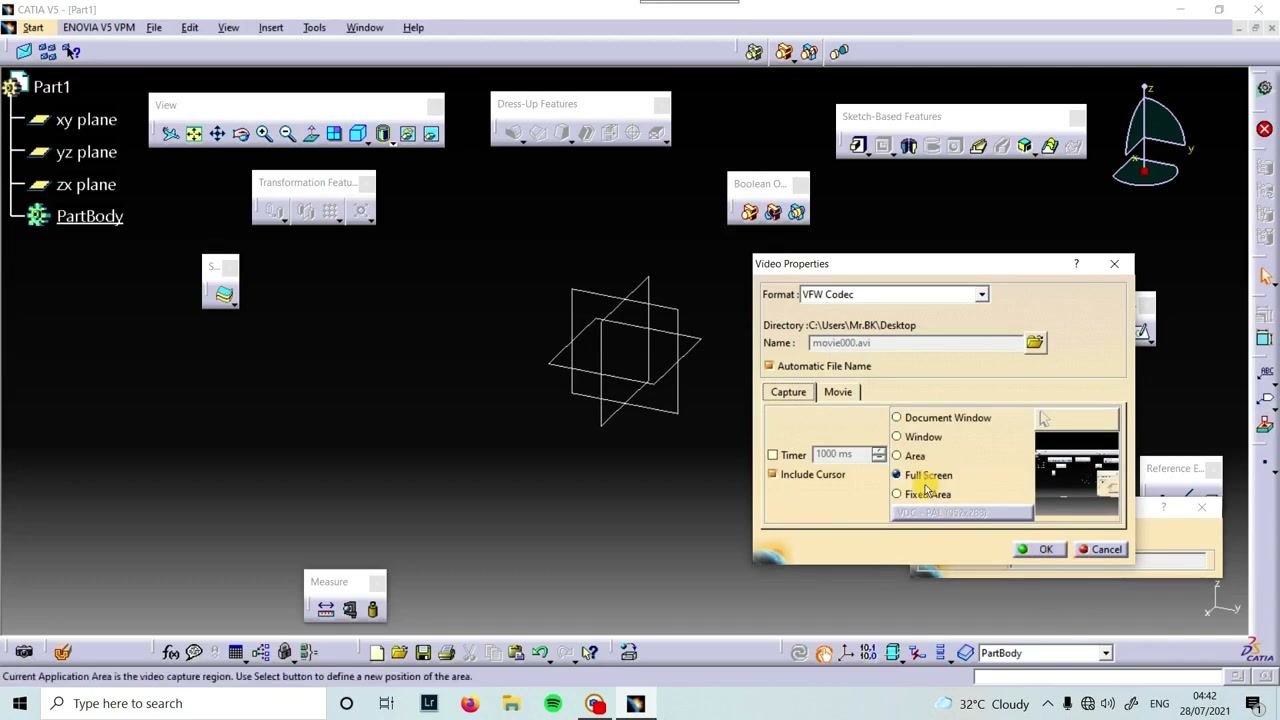
Under the capture options, select the recording area. You can choose Document Window, Window, Area, Full Screen, or Fixed Area. Then set the timer interval, for example 1000 ms. Optionally, check Include Cursor if you want the mouse pointer visible in the recording.
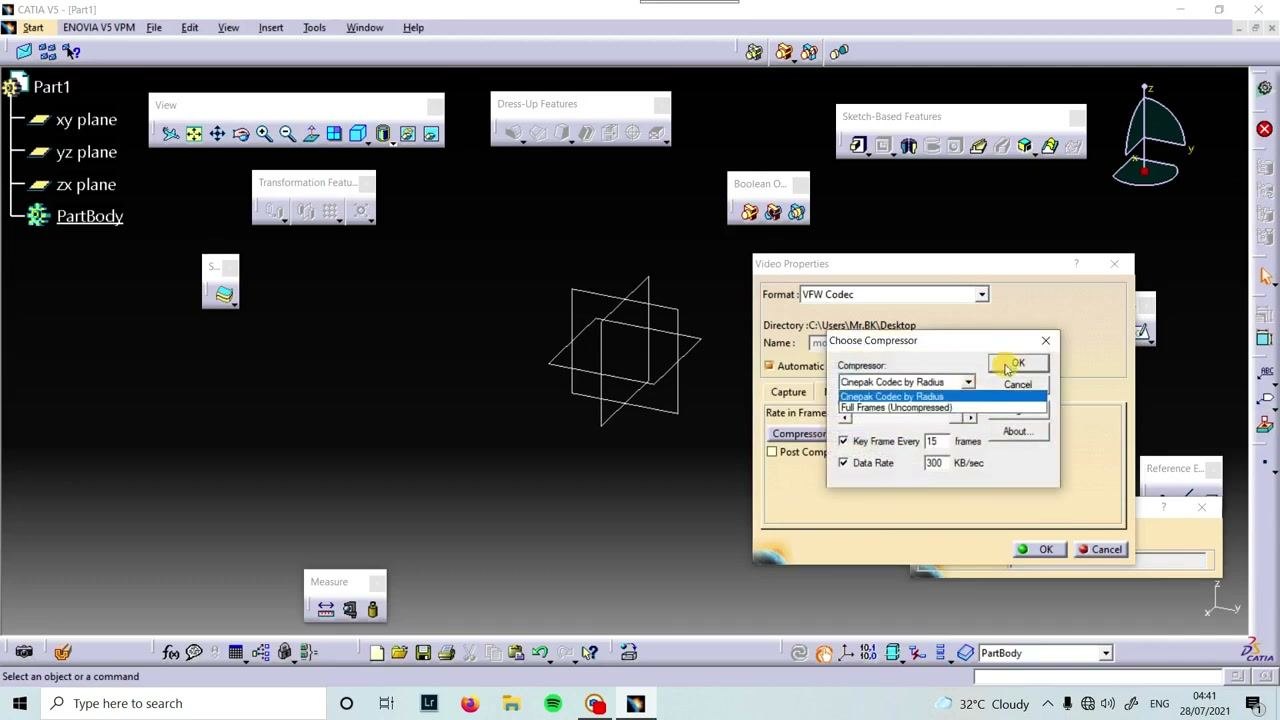
Step 6: Adjust the compressor settings (optional)
You can change how the recording is compressed.
- In the Video Properties dialog, click Compressor Setup....
- Choose a compressor, for example
Cinepak Codec by RadiusorFull Frames (Uncompressed). - Click OK to confirm your selection.
Step 7: Set the frame rate
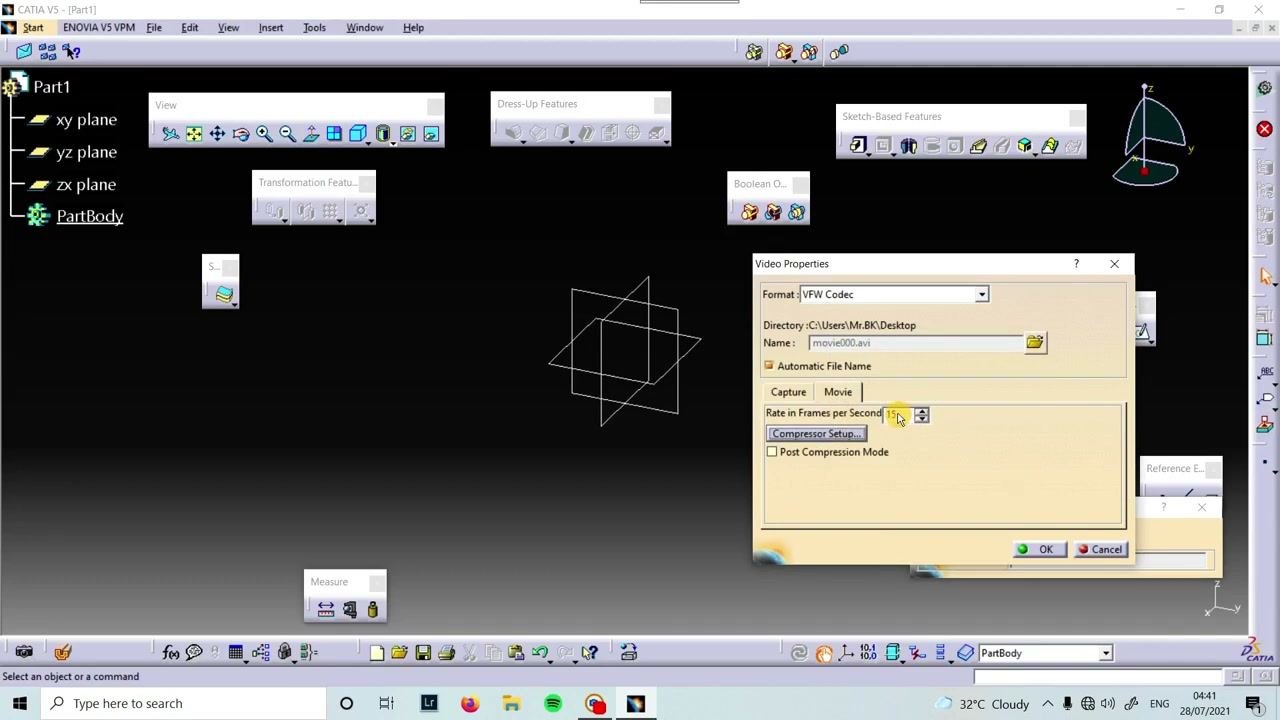
In the Video Properties dialog, find the Rate in Frames per Second field. Enter the frame rate you want, for example 10 for 10 FPS, or leave the default of 15 FPS. Adjust the value based on how smooth you need the recording to be.
Step 8: Confirm your settings
Before you record, check that every setting is correct:
- Format:
VFW Codec - Directory: for example,
C:\Users\Mr.BK\Desktop - File name: for example,
movie000.avi - Frame rate: for example,
10or15 - Capture area: for example,
Full Screen
Click OK to close the Video Properties dialog.
Record your CATIA session
Step 9: Start recording in CATIA V5
The Video Recorder control panel appears and shows the file name and recording status.
- Click the red Record button to start capturing your actions.
- Continue your design work as usual. CATIA records all your actions.
Step 10: Perform the design actions you want to record
Keep working in CATIA, for example by creating sketches or features. For instance, select PartBody, create a sketch, and use the Pad tool to extrude a feature. The Video Recorder displays the current frame count as it records.
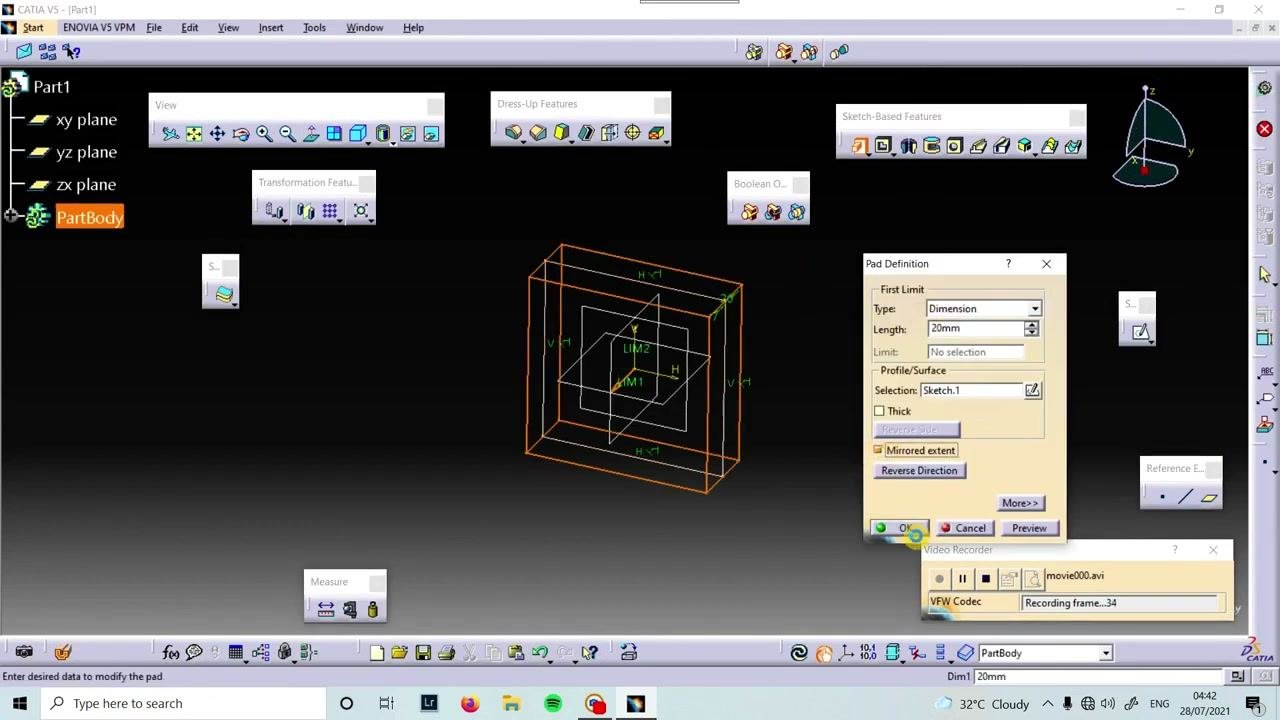
Step 11: Stop the recording
When you finish your demonstration, click the Stop button (square icon) on the Video Recorder panel. CATIA saves the recording to the location you specified, for example your Desktop.
Step 12: Preview the recording
Click the Preview button (play icon) in the Video Recorder panel. The recording plays back all captured actions at the selected frame rate.
Step 13: Find and open the saved file
- Minimize or close CATIA V5 to return to your desktop.
- Find the recorded file, for example
movie000.avi, on your Desktop or in the directory you selected earlier. - Double-click the file to open it in your preferred media player.
Capture still images in CATIA V5
You can also capture still images of your workspace using the same Image menu.
Step 14: Open the Capture dialog
- Reopen CATIA V5 if needed.
- In the top menu, click Tools.
- Select Image to access the image capture options.
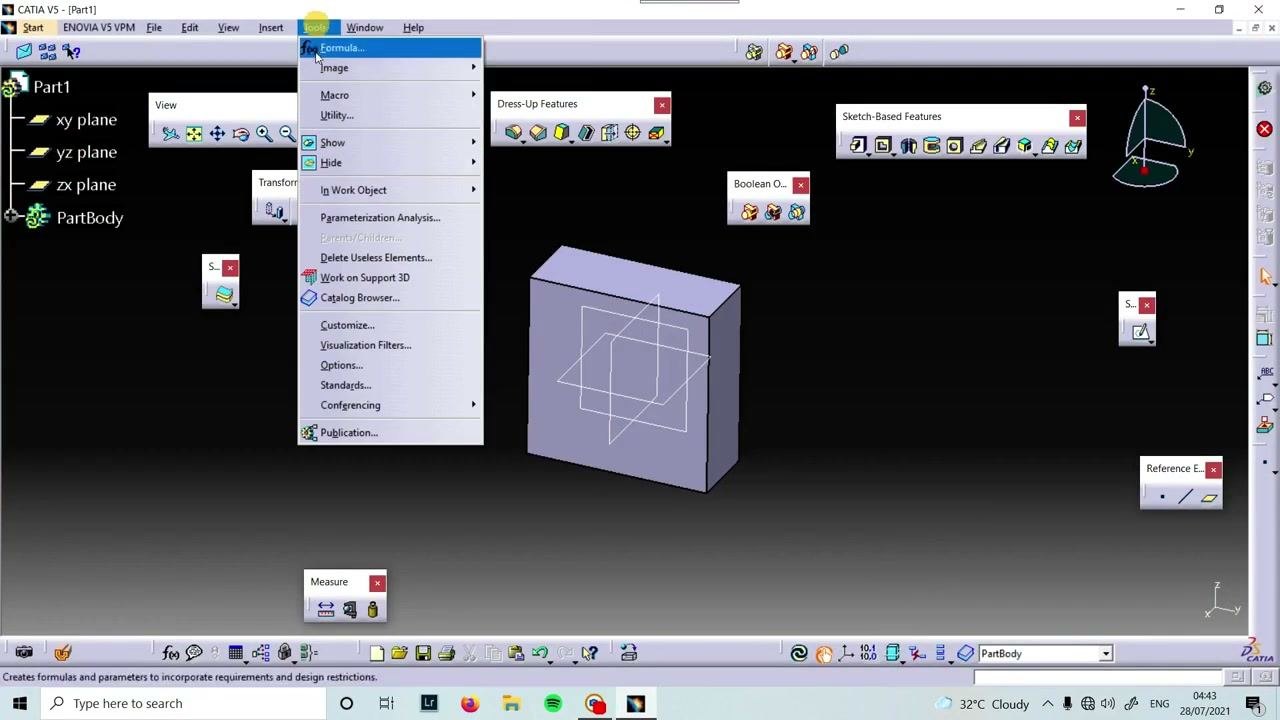
Then click Capture from the Tools > Image menu. The Capture dialog appears so you can configure the image capture settings.
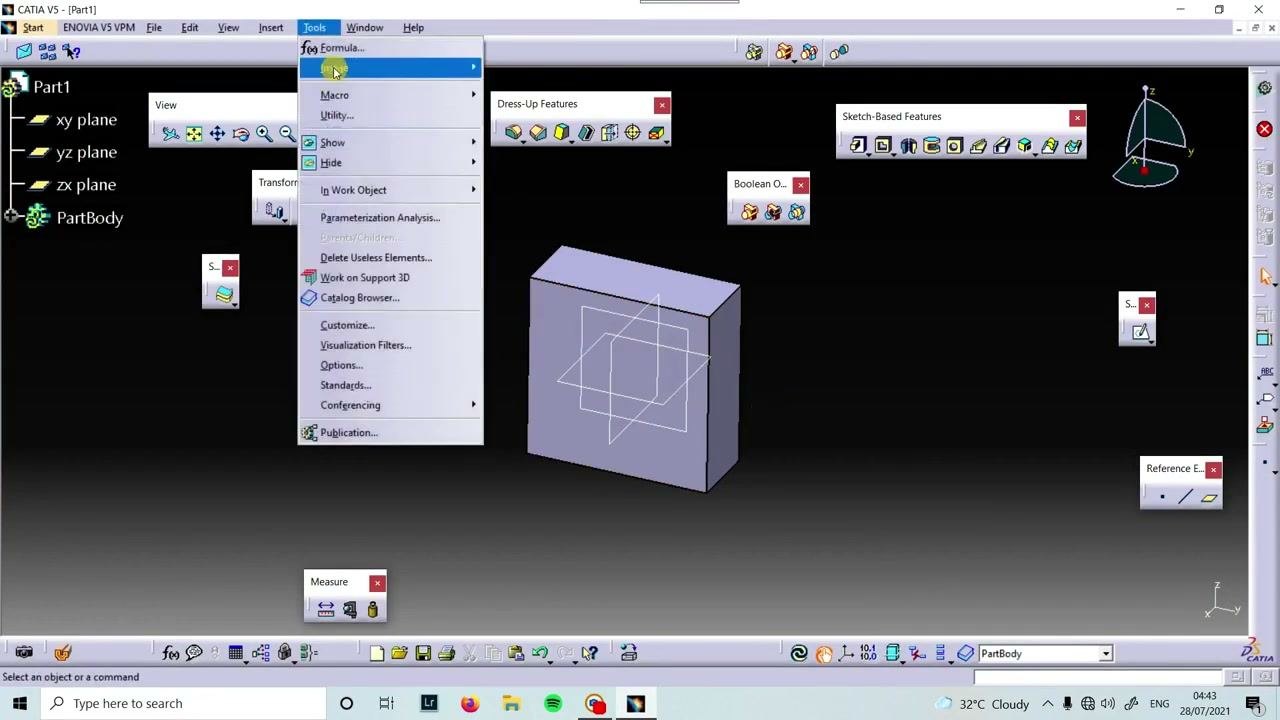
Step 15: Explore the capture options
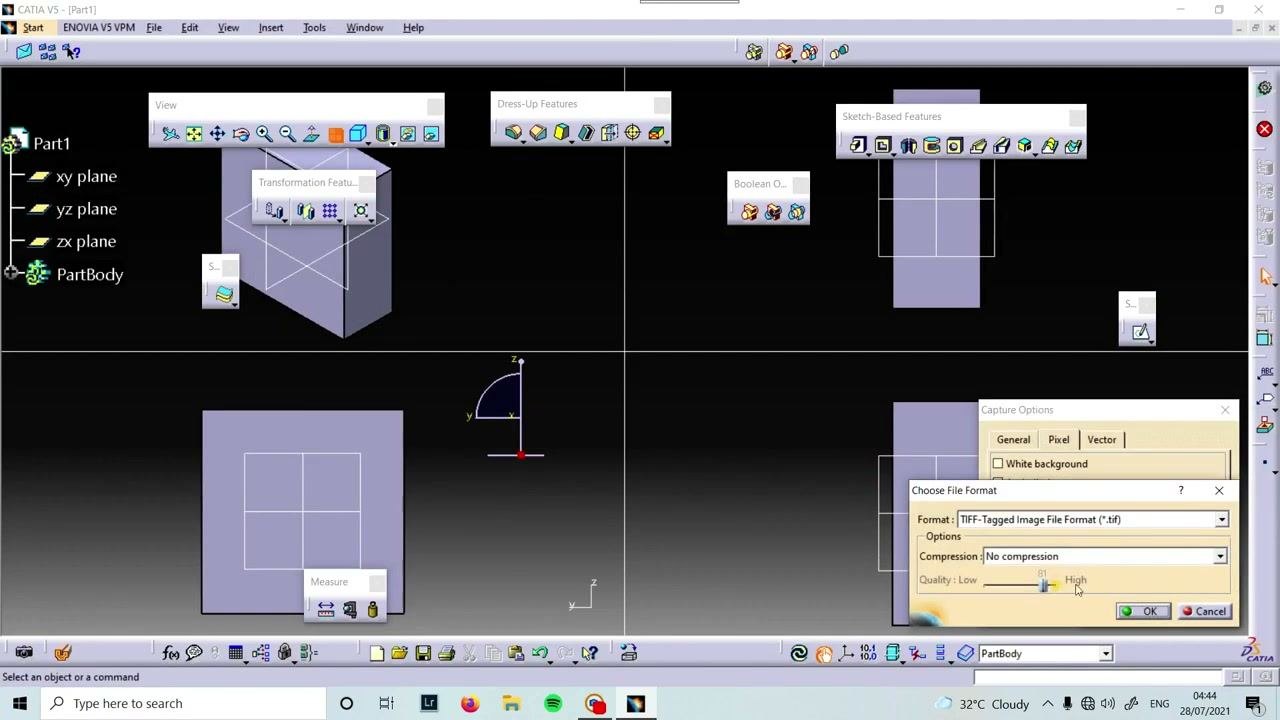
In the Capture Options dialog, move between the General, Pixel, and Vector tabs to see all available settings. Adjust the color, pixel, and vector options to suit your documentation needs. Settings such as album location, compressor, and file format are all available here.
Step 16: Set the file format and compression
- Select your preferred file format, for example
TIFF-Tagged Image File Format (*.tif). - Set compression to
No compressionfor maximum quality, or adjust it as needed. - Use the quality slider to set the image quality, for example
High.
Step 17: Set the image capture options
Adjust these settings in the Capture Options dialog:
- Rendering Quality: Select
Highestfor the best image resolution. - Monochrome Filter: Choose a filter, for example
Dither. - Other preferences: Enable or disable options such as
White background,Anti-aliasing, andConstant size capture.
Click OK to confirm your settings.
Step 18: Arrange multiple views
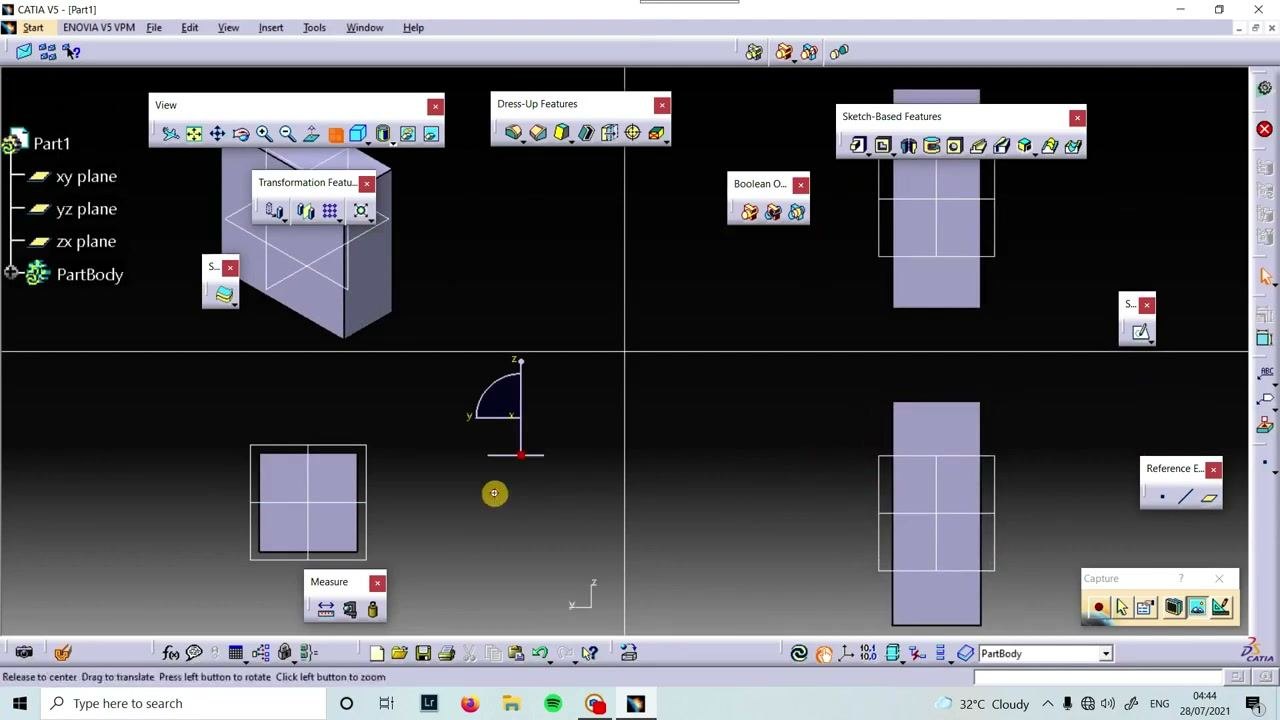
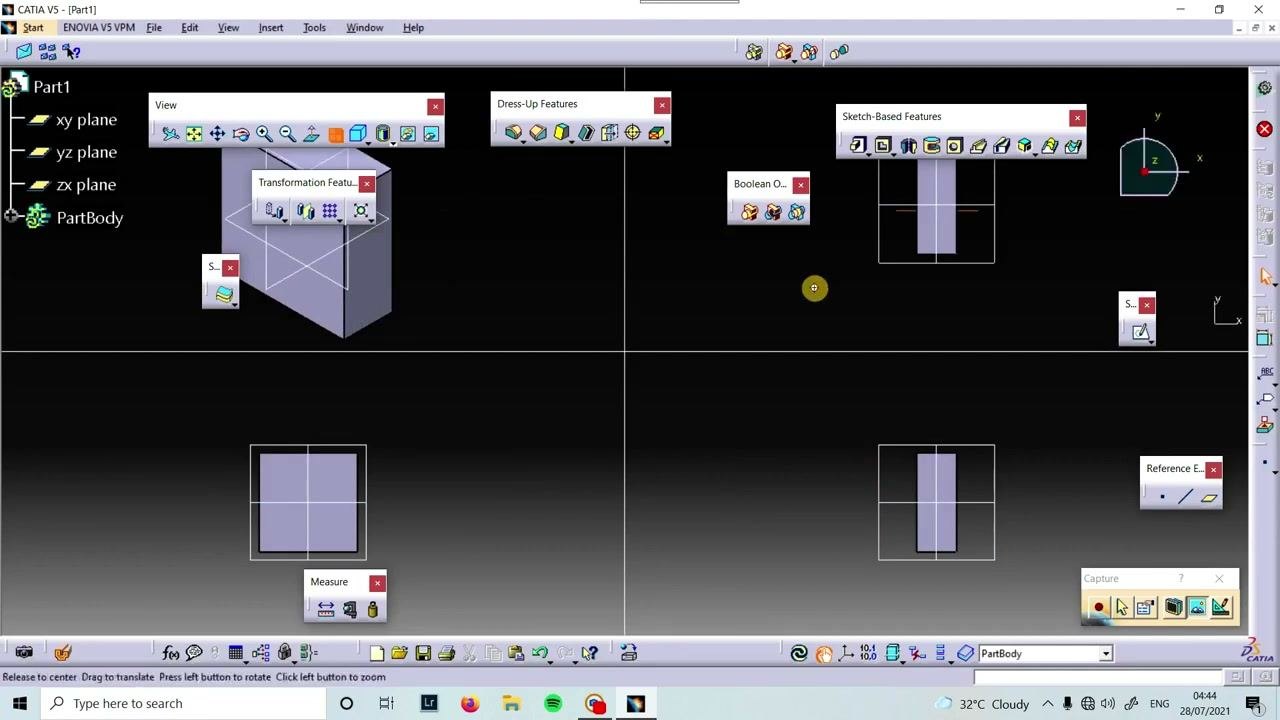
To capture images from different perspectives, switch to the four-view layout. Use the zoom and pan tools to adjust each view before you capture. The Capture toolbar stays accessible for quick image capture.
Step 19: Take the snapshot
- Make sure the capture settings, such as resolution, background, and file format, are configured in the Capture Options dialog.
- In the CATIA V5 workspace, find the Capture toolbar, typically at the bottom right of the screen.
- Click the Record button (red circle icon) to take a snapshot of your current workspace.
Save and open the captured image
Step 20: Save the image
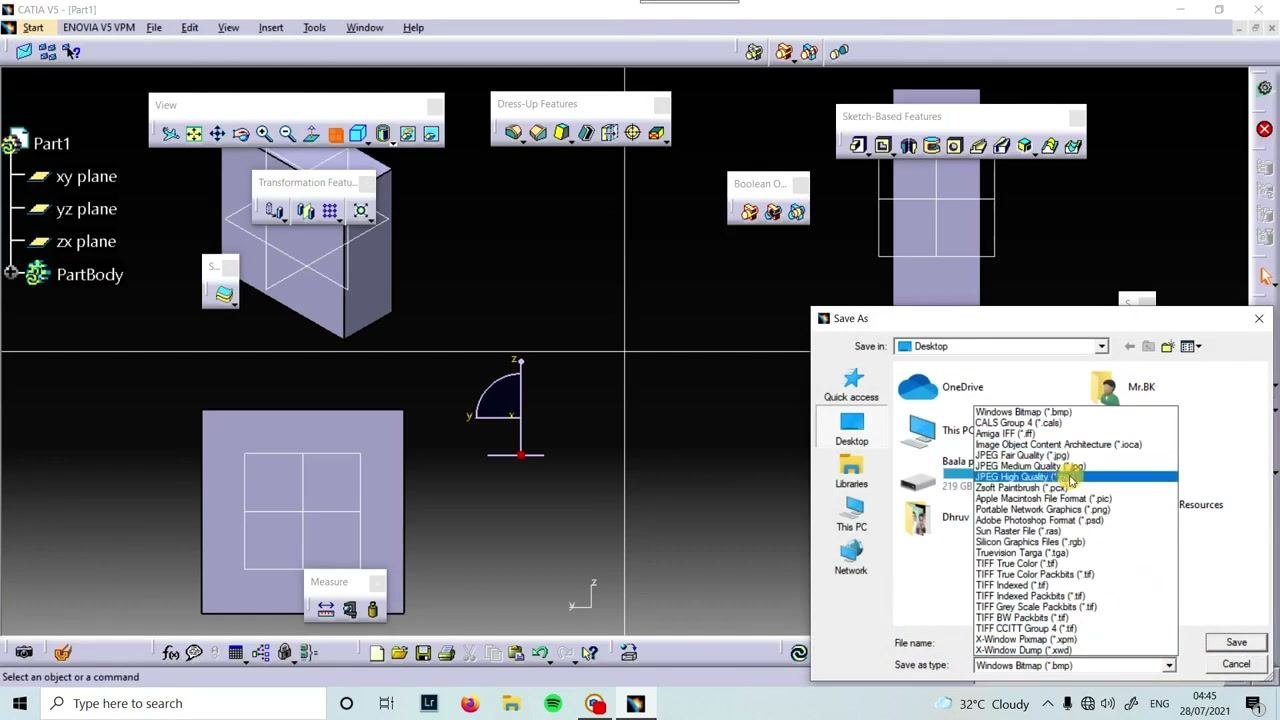
After you click Record, a Save As dialog appears.
- Choose where to save the image, for example your Desktop.
- Select a file format from the dropdown menu, for example
JPEG High Quality (*.jpg),PNG, orTIFF. - Enter a file name.
- Click Save.
If the Save As dialog does not close automatically, close it. Then confirm that the image file appears in your chosen directory.
Step 21: Verify the saved image
- Minimize or close CATIA V5 to view your desktop or the folder where you saved the image.
- Find the new image file.
- Double-click it to open it in your default image viewer and check the capture quality.
Step 22: Return to CATIA V5 or finish
Return to CATIA V5 if you want to capture more images or keep working. If you are finished, you can close CATIA V5.
Summary
You now know how to record video in CATIA V5. Open a Part Design document, go to Tools > Image > Video..., set the file name, format, capture area, and frame rate, and click Record. When you finish, click Stop, preview the recording, and open the saved file from your chosen folder. You can use the Capture options in the same menu to save still images of your workspace.
Generation details: cost, quality tiers
Docsie billed 3,000 credits ($2.10) to analyze this 6-minute video at standard quality. The rewrite, template fill and Word/PDF exports were included. The same video at each quality tier:
| Quality | Frames sampled | Credits | Approx. cost |
|---|---|---|---|
| Draft | every 16-30 s | 1,500 | $1.05 |
| Standard (this guide) | every 8-15 s | 3,000 | $2.10 |
| Detailed | every 4-7 s | 6,000 | $4.20 |
| Ultra | every 1-3 s | 12,000 | $8.40 |
Credits priced at $0.70 per 1,000; plans include a monthly allowance. Enterprise customers on on-premise or bring-your-own-model deployments run this on their own inference and pay no per-video credits.
Generated by Docsie Video-to-Docs on 2026-11-15 from a 5-minute video. Screenshots are frames from the source video and belong to their creator, Tech vaathi , whose original is embedded above. If you own this video and want the guide removed or credited differently, contact us and we will act within one business day.