
How to Salesforce How to Switch to Lightning in Salesforce
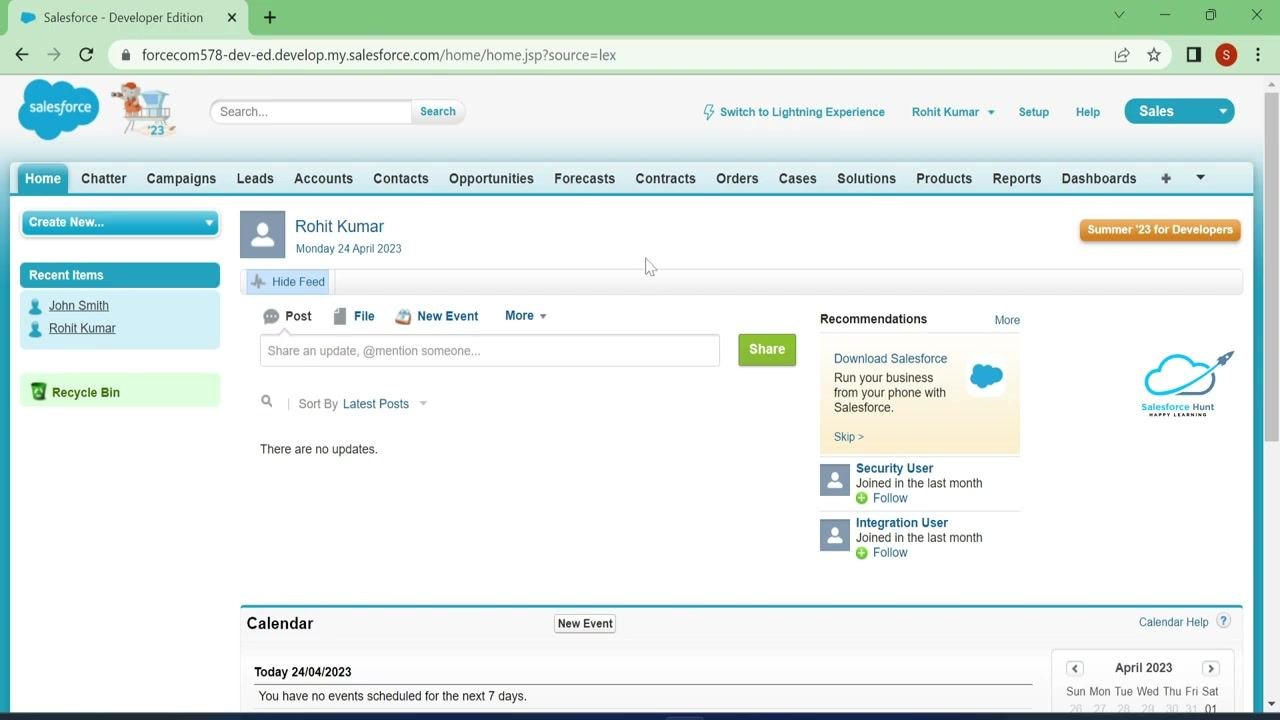
Salesforce lets administrators control whether users can switch to Lightning Experience or remain on Salesforce Classic. This guide walks you through the full process of enabling or disabling the "Switch to Lightning Experience" option for a user, verifying the setting, and configuring the related profile permissions so you can manage exactly how your organization's users move between Lightning Experience and Classic.
Video: Switching between Lightning and Classic: How to Enable and Disable the Salesforce User Interface by Salesforce Hunt (2023). All credit for the demonstration goes to the creator; watch the original on YouTube. The written guide below was generated from this video by Docsie. Creator? Request a change or removal.
Salesforce lets administrators control whether users can switch to Lightning Experience or remain on Salesforce Classic. This guide walks you through the full process of enabling or disabling the "Switch to Lightning Experience" option for a user, verifying the setting, and configuring the related profile permissions so you can manage exactly how your organization's users move between Lightning Experience and Classic.
Prerequisites
- A Salesforce account with System Administrator privileges, since only administrators can modify user profiles and permissions.
- Access to Setup in your Salesforce org.
- A test user account (for example, a user with a Custom Sales Profile) to verify the changes you make.
Open Setup
Click your user avatar or profile icon in the top right corner of the Salesforce interface, then select Setup from the dropdown menu.
Search for users in Setup
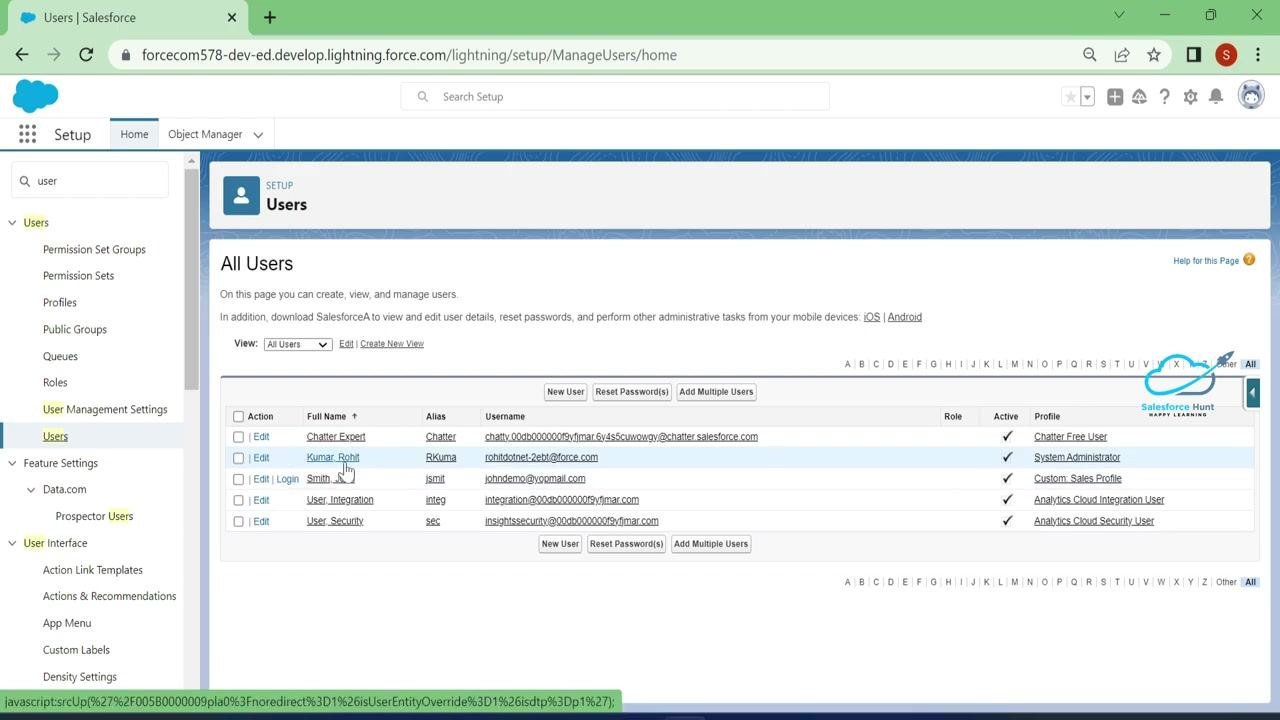
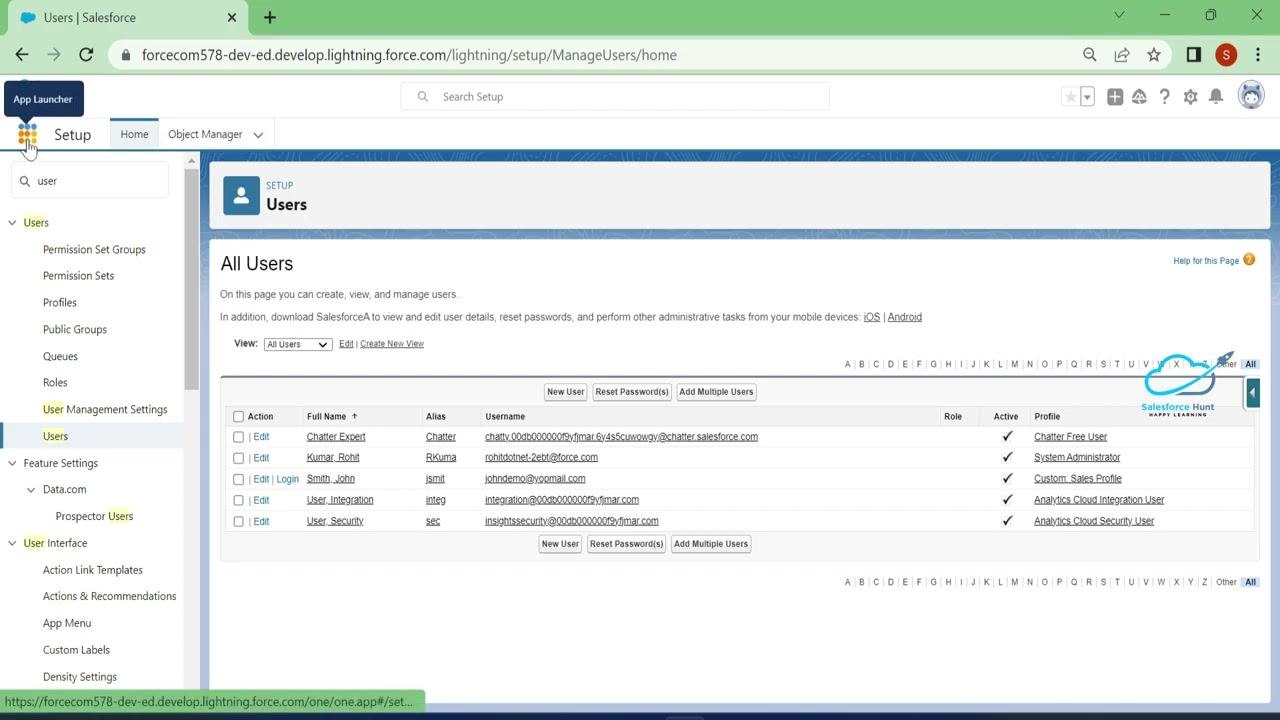
On the Setup page, use the Quick Find search box in the left sidebar and type user. Under the Administration section, click Users.
View the list of all users
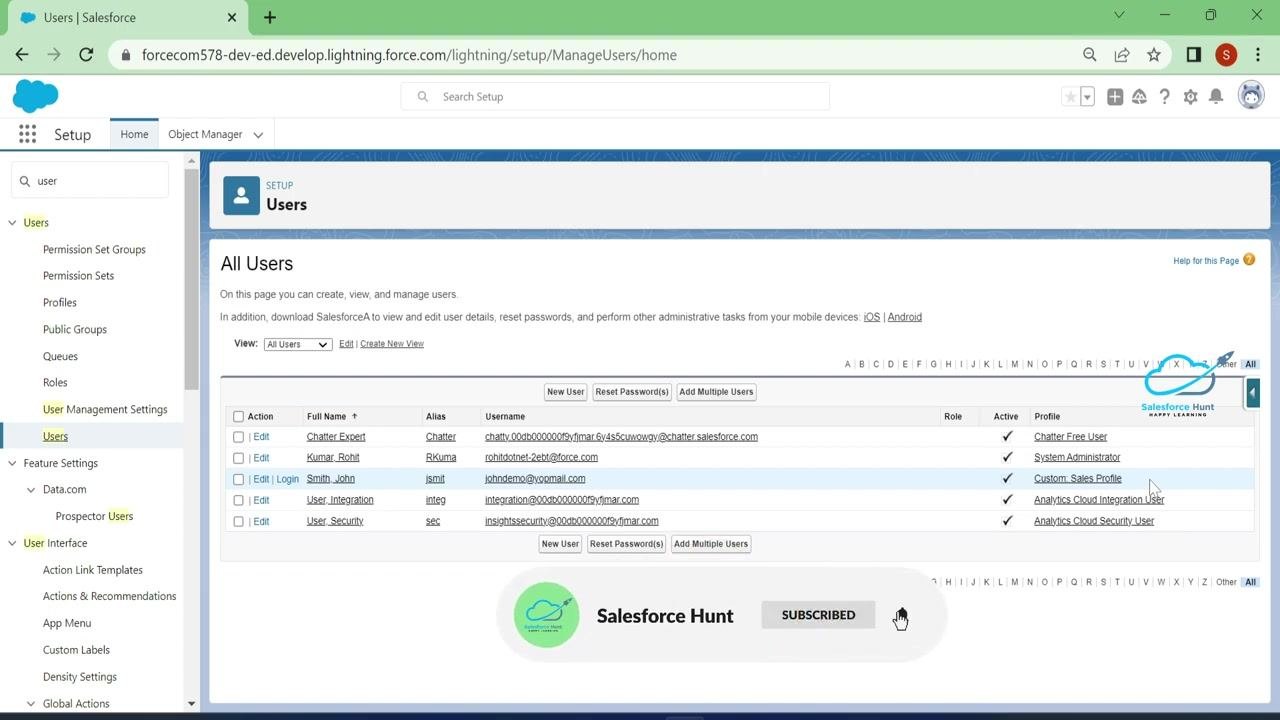
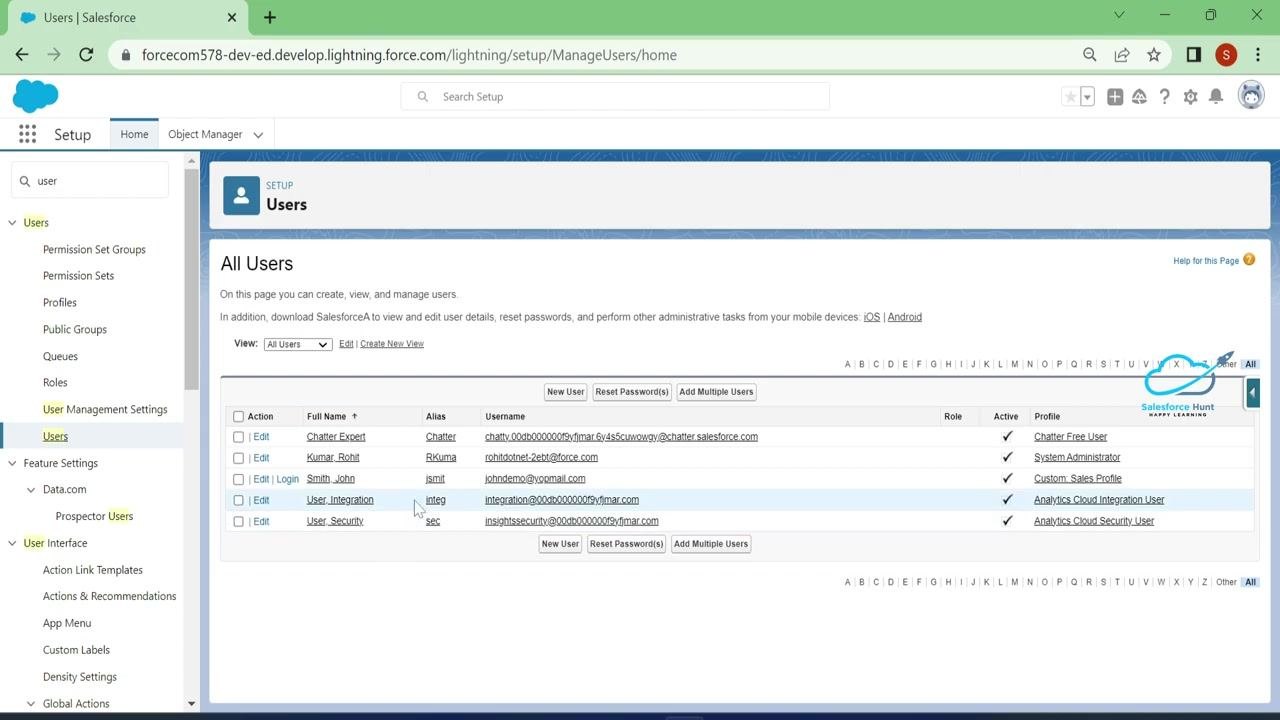
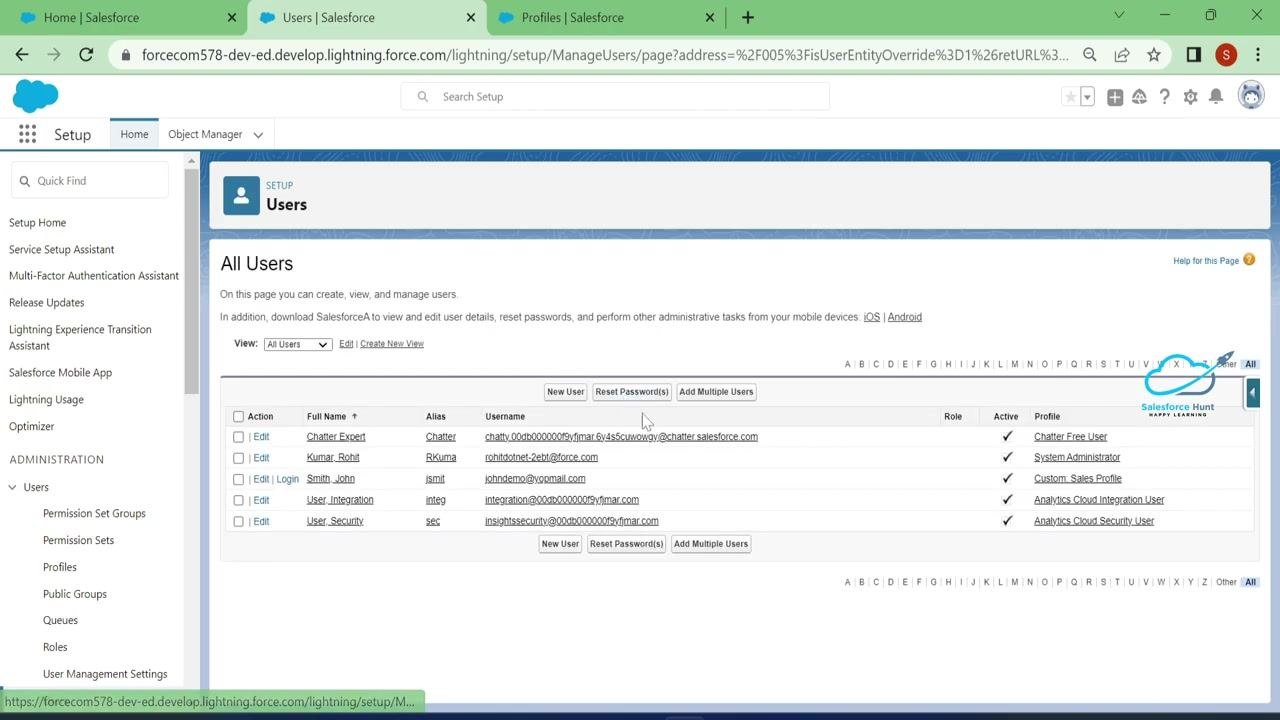
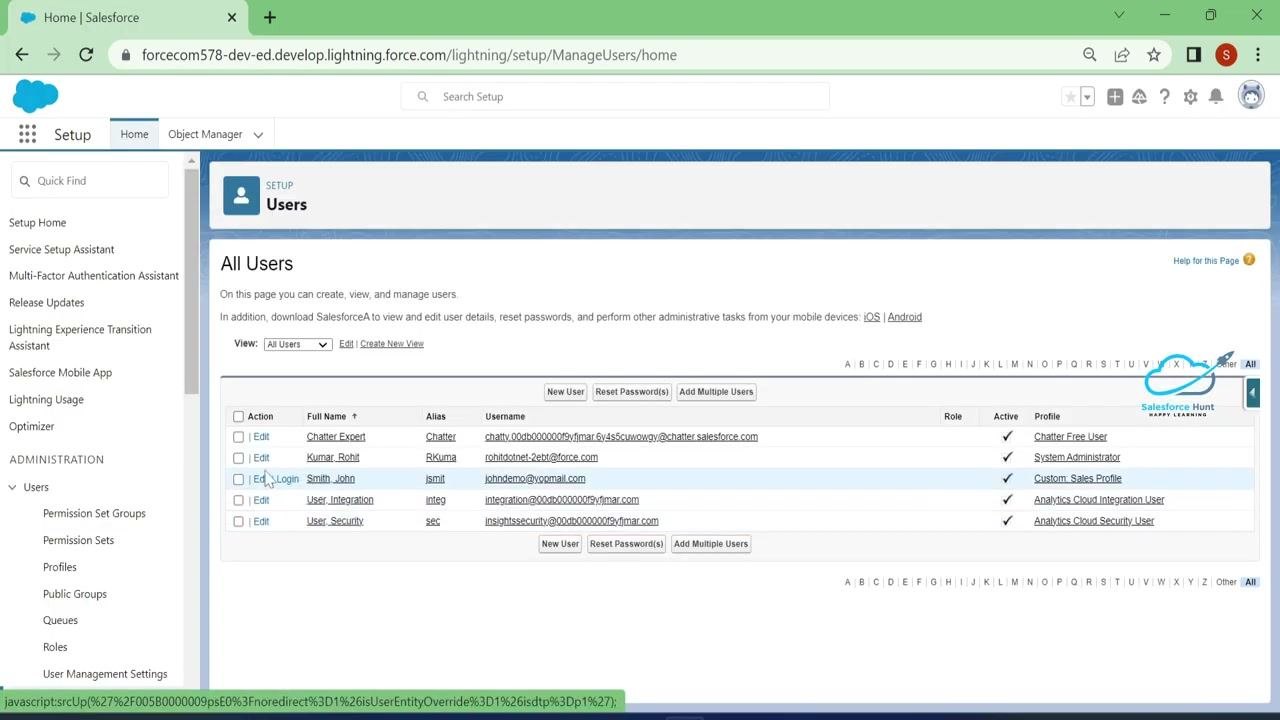
The All Users page displays every user in your org along with their roles and profiles. Look for your own account (for example, a user with the System Administrator profile) and any test users you have created.
Identify your test user
Confirm that your test user appears on the list with the appropriate profile (for example, "Custom Sales Profile"). You will use this account to verify whether the "Switch to Lightning Experience" option is available.
(Optional) Open the App Launcher
If you need to navigate to a specific object, such as Accounts, click the App Launcher (grid icon) in the top left corner and select the desired app or object.
Switch from Lightning Experience to Salesforce Classic
Click your user avatar in the top right corner and select Switch to Salesforce Classic from the dropdown menu.
Switch back to Lightning Experience
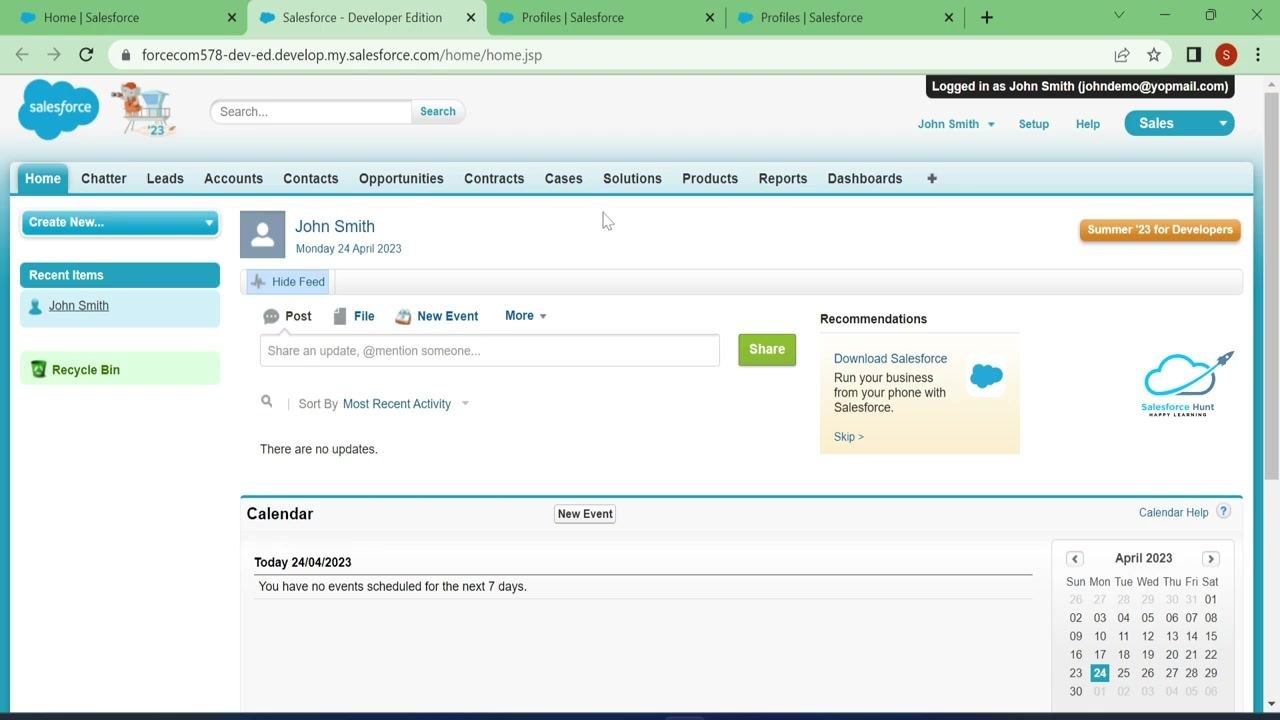
While in Salesforce Classic, click Switch to Lightning Experience at the top of the page to return to the Lightning interface.
Confirm your administrator access
Make sure you are logged in as a System Administrator. The Lightning Experience dashboard should be visible if your permissions are correct, since only admins can modify user profiles.
Log in as the test user
Go to Setup, use Quick Find to search for user, and select Users. On the All Users page, find your test user and click Login next to their name to log in as that user.
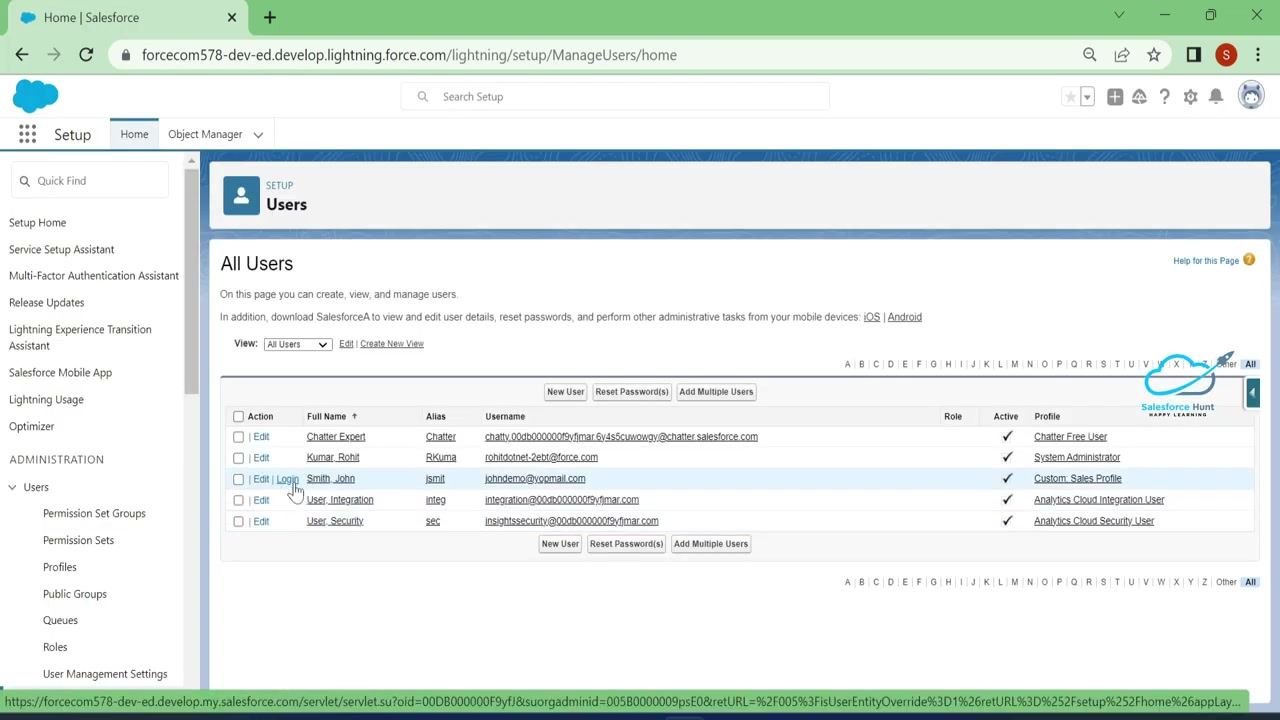
Check whether the test user can switch to Lightning
While logged in as the test user, check whether the Switch to Lightning Experience option is available. If the user only sees Salesforce Classic with no option to switch, Lightning Experience is not yet enabled for their profile.
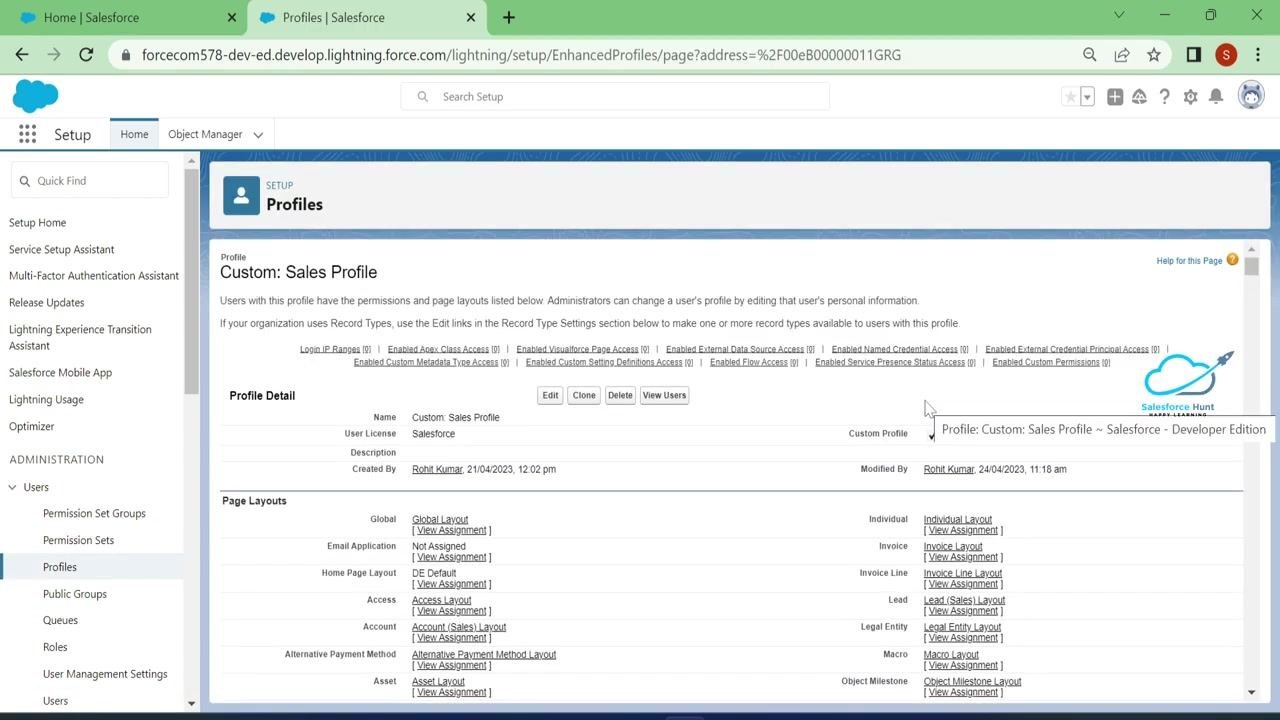
Open the user's profile
Log out of the test user account and return to your System Administrator account. In Setup, go to Users, note the test user's profile (for example, "Custom Sales Profile"), then click Profiles under Administration in the left sidebar. Select the relevant profile and click Edit.
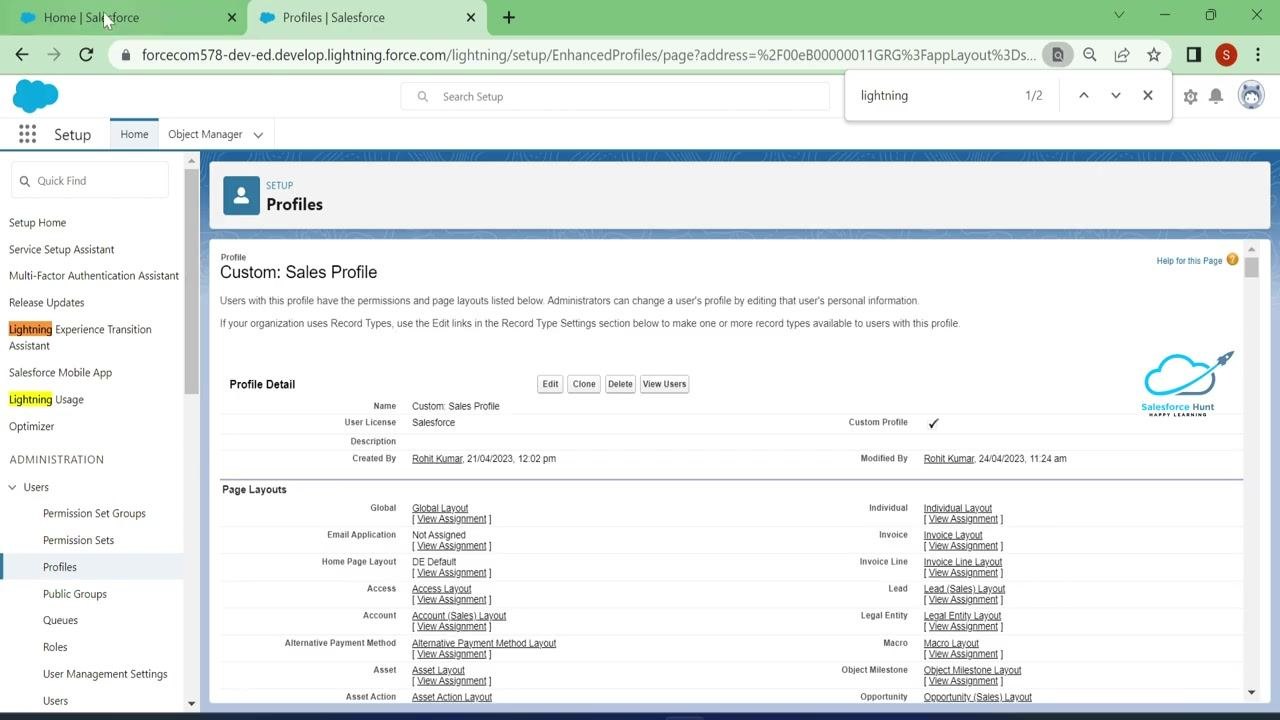
Review the Lightning Experience User setting
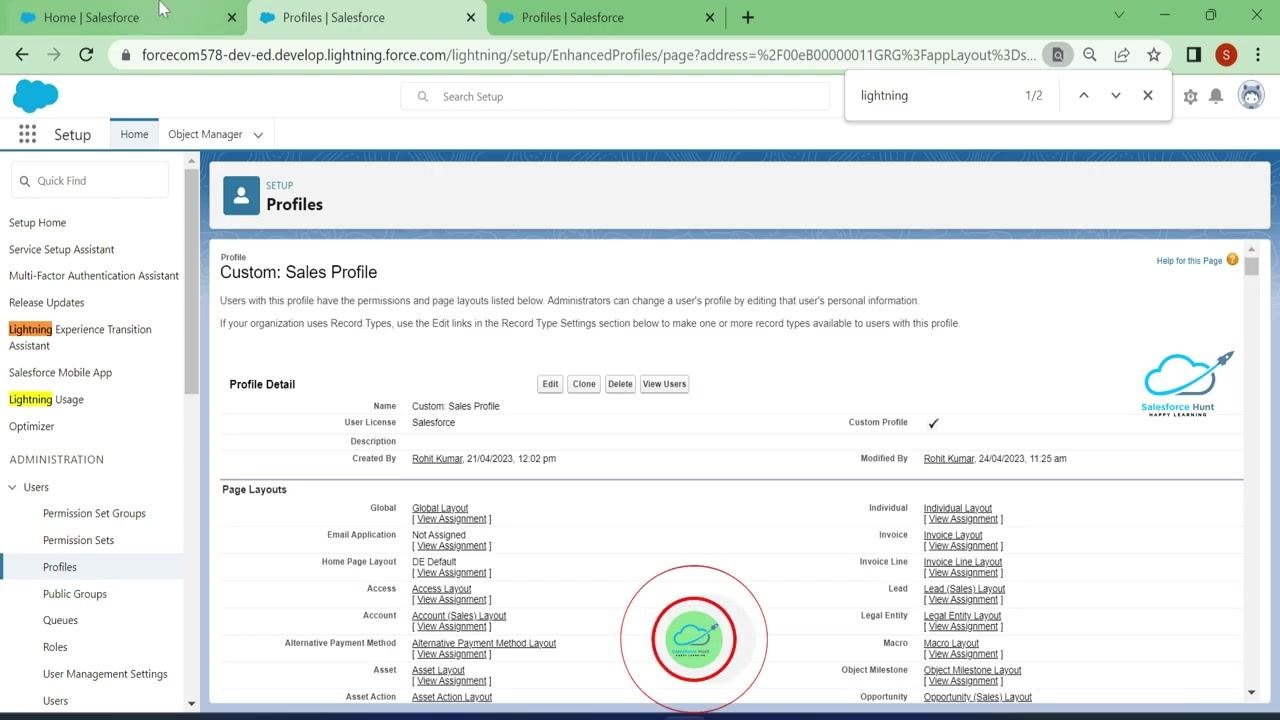
On the profile edit page, use your browser's search (Ctrl+F or Cmd+F) and type lightning to quickly locate the Lightning Experience User checkbox. If the box is unchecked, the user cannot access Lightning Experience.
To enable Lightning Experience for the user, check the Lightning Experience User box and click Save at the top or bottom of the profile page to apply the change.
Log in as the user to verify access
Return to the Users tab, locate your test user in the All Users list, and click Login next to their name. You should now see the Lightning Experience interface by default, with the top bar confirming you are logged in as that user and the modern Lightning dashboard visible.
Switch to Classic as the test user
While logged in as the test user, click their avatar in the top right corner and select Switch to Salesforce Classic from the dropdown menu.
Switch back to Lightning as the test user
In Salesforce Classic, click Switch to Lightning Experience at the top of the page to confirm the user can move freely between the two interfaces.
Return to your administrator account
Log out as the test user and return to your System Administrator account. The Lightning Experience dashboard should be visible again.
Open the user's profile to disable Lightning
Go back to the Users tab, locate the test user, and click on their profile (for example, "Custom Sales Profile") to open the profile settings.
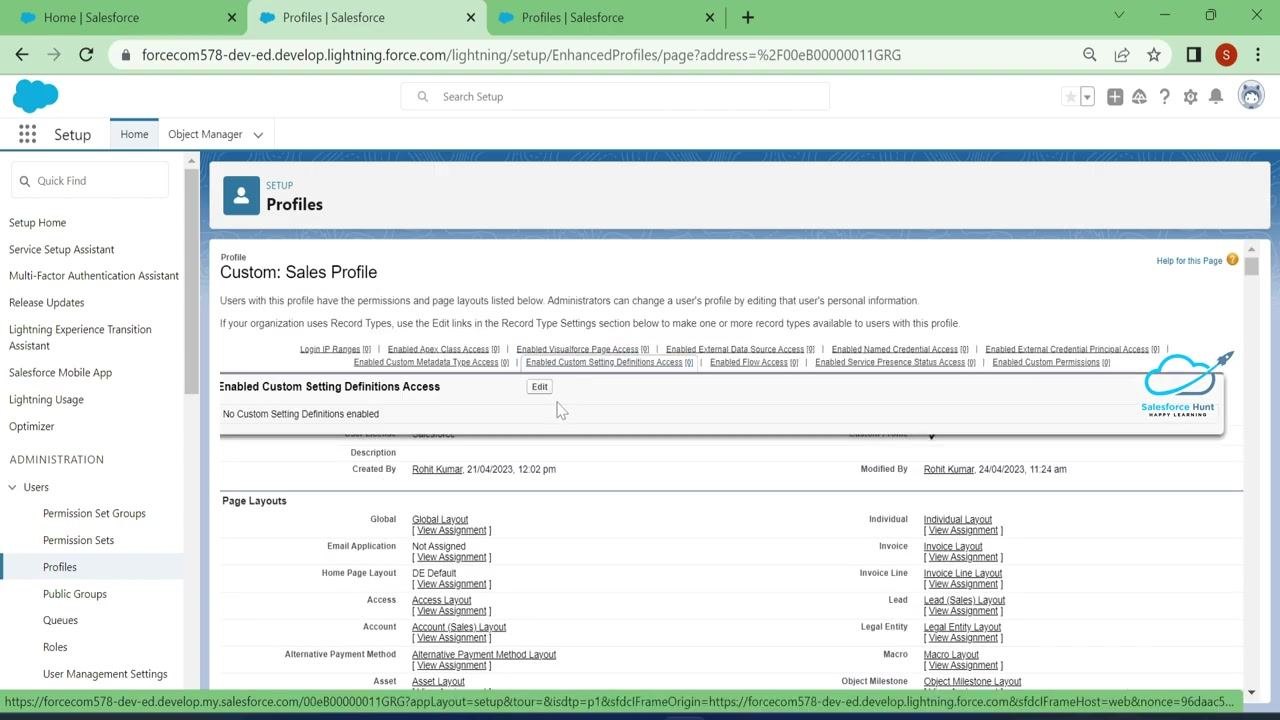
Disable Lightning Experience for the user
On the profile page, click Edit, use your browser's search to find "Lightning Experience User," and uncheck the Lightning Experience User box to remove access. Click Save to apply the change.
Review Lightning-related permissions
Go to Setup, select Profiles under Administration in the left sidebar, and use the search bar to search for "lightning." Review the permissions list, which includes Lightning Console User, Lightning Experience User, and options such as Hide Option to Switch to Salesforce Classic and Enable Lightning Experience. Adjust the checkboxes according to your organization's requirements.
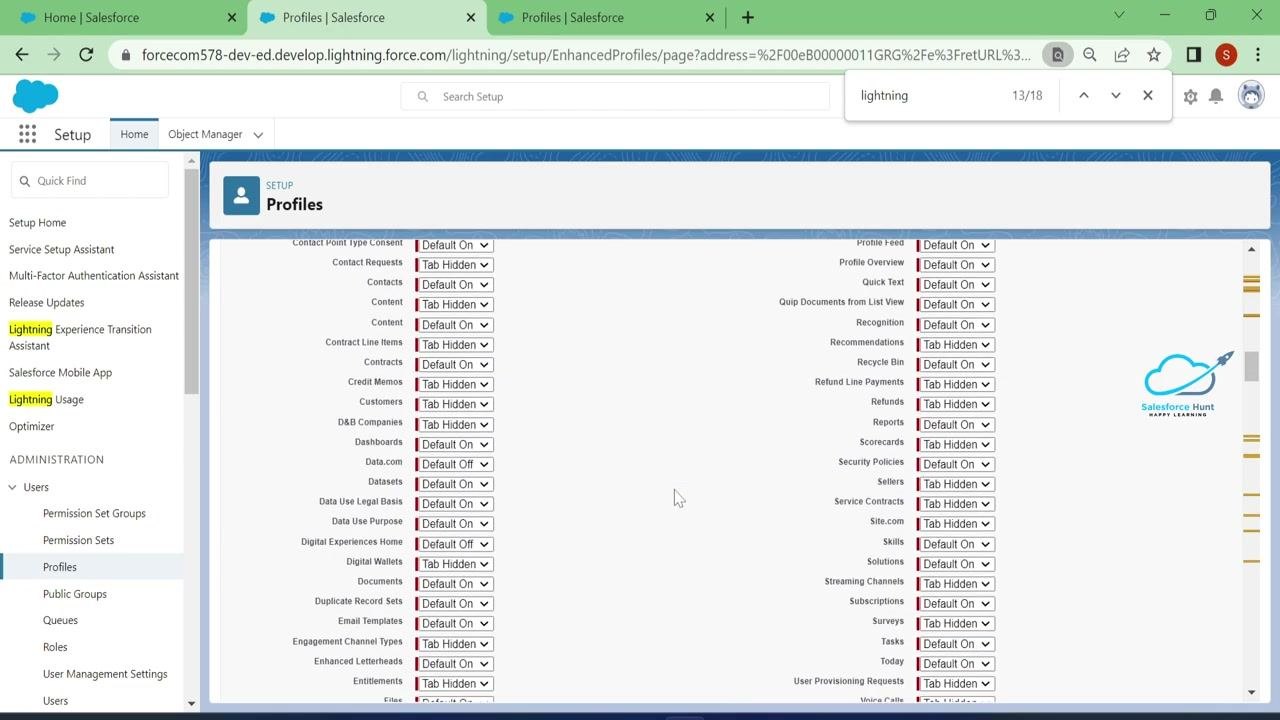
Review tab and feature visibility
Scroll through the profile settings to review the visibility and default settings for tabs and features such as Contacts, Content, and Reports. Use the dropdowns to set each item to Default On, Tab Hidden, or Default Off, ensuring Lightning-related tabs and features match your intended user experience.
Edit and save the custom profile
Click the profile you want to edit (for example, "Custom: Sales Profile"). Review the profile name, user license, and description, then under Custom App Settings, make sure Lightning apps such as "Sales (standard__LightningSales)" and "Sales Console (standard__LightningSalesConsole)" are set to Visible and, if needed, marked as Default. Click Save at the top of the page to apply your updates.
Verify the profile changes
After saving, you are redirected to the profile detail page. Review the Profile Detail section to confirm your changes, then click the login button (often a green icon) to log in as a user with the updated profile.
Test the updated user experience
After logging in as the user, verify that the correct interface—Lightning Experience or Classic—appears based on your profile settings. Confirm that the user can or cannot switch between the two interfaces as intended, and that all relevant tabs and features are visible or hidden as configured.
If needed, repeat the login and verification process for other profiles or users to ensure consistency across your organization, making further adjustments to the profile settings as required.
Summary
By following these steps, you can control which Salesforce users have access to Lightning Experience and which remain on Salesforce Classic. You have learned how to locate and manage user profiles in Setup, switch between Lightning Experience and Classic as both an administrator and a test user, enable or disable the Lightning Experience User permission, and configure related profile settings such as tab visibility and Lightning app defaults. This gives you full control over a consistent and secure interface experience across your organization.
Generation details: cost, quality tiers
Docsie billed 3,500 credits ($2.45) to analyze this 7-minute video at standard quality. The rewrite, template fill and Word/PDF exports were included. The same video at each quality tier:
| Quality | Frames sampled | Credits | Approx. cost |
|---|---|---|---|
| Draft | every 16-30 s | 1,750 | $1.22 |
| Standard (this guide) | every 8-15 s | 3,500 | $2.45 |
| Detailed | every 4-7 s | 7,000 | $4.90 |
| Ultra | every 1-3 s | 14,000 | $9.80 |
Credits priced at $0.70 per 1,000; plans include a monthly allowance. Enterprise customers on on-premise or bring-your-own-model deployments run this on their own inference and pay no per-video credits.
Generated by Docsie Video-to-Docs on 2026-09-10 from a 6-minute video. Screenshots are frames from the source video and belong to their creator, Salesforce Hunt, whose original is embedded above. If you own this video and want the guide removed or credited differently, contact us and we will act within one business day.