
How to Inspect a Safety Harness
This procedure explains how to inspect a safety harness before use and how to correctly don a vest-style fall protection harness. Following these steps ensures your personal fall arrest system is safe, compliant, and properly fitted before you rely on it at height.
Video: How to Inspect and Don a Full-Body Harness [2015] | FallTech® by FallTech (2014). All credit for the demonstration goes to the creator; watch the original on YouTube. The written guide below was generated from this video by Docsie. Creator? Request a change or removal.
This procedure explains how to inspect a safety harness before use and how to correctly don a vest-style fall protection harness. Following these steps ensures your personal fall arrest system is safe, compliant, and properly fitted before you rely on it at height.
Purpose
This SOP provides a standardized method for inspecting a vest-style fall protection harness and donning it correctly. It also covers proper storage and cleaning practices to extend the service life of the equipment.
Scope
This procedure applies to anyone who uses a vest-style fall protection harness as part of a personal fall arrest system. Before using any part of the system, you are required to inspect it. If any component fails inspection, remove it from service immediately.
Required equipment
- Vest-style fall protection harness
- No gloves (required for the webbing inspection step, to allow tactile feedback)
Step-by-step inspection procedure
Understand the importance of inspection
Before using any part of a personal fall arrest system, you are required to inspect it. If you find anything wrong with the equipment, or if it does not pass inspection, immediately remove it from service.
Prepare the harness for inspection
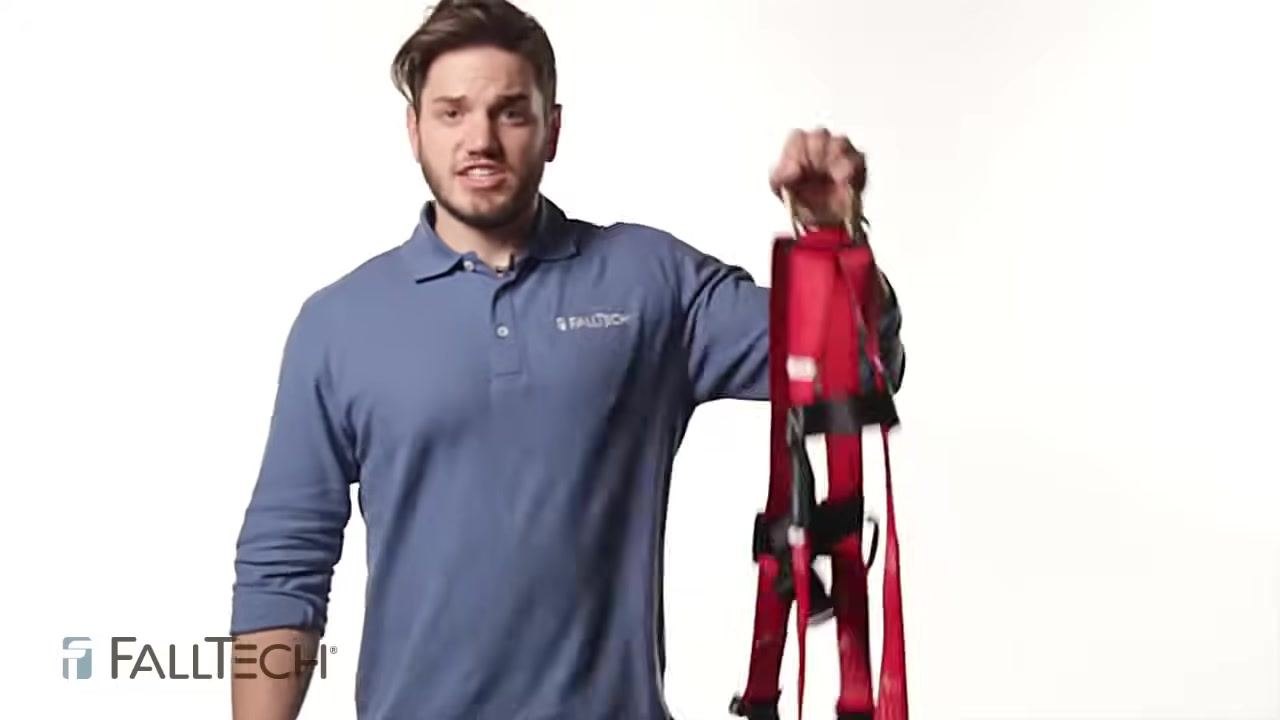
Grab the harness by the back dorsal D-ring. Raise the harness and shake it so the leg straps fall downward into their correct position. If the harness is jumbled, shaking it smooths it out so it hangs correctly.
Inspect the impact indicators
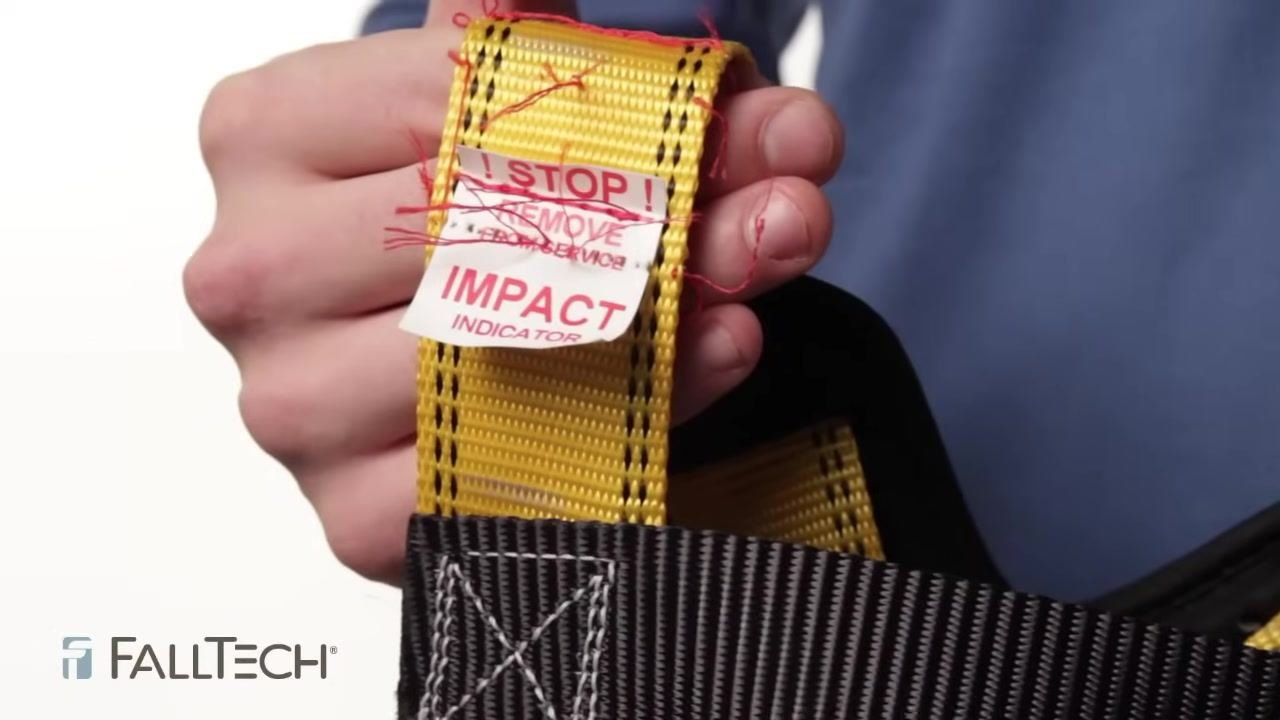
Locate the two impact indicators on the harness — sections of webbing folded over and labeled "impact indicator." Check that both are present and have not been exposed. If an impact indicator is missing or exposed, stop the inspection and remove the harness from service.
Check the labels
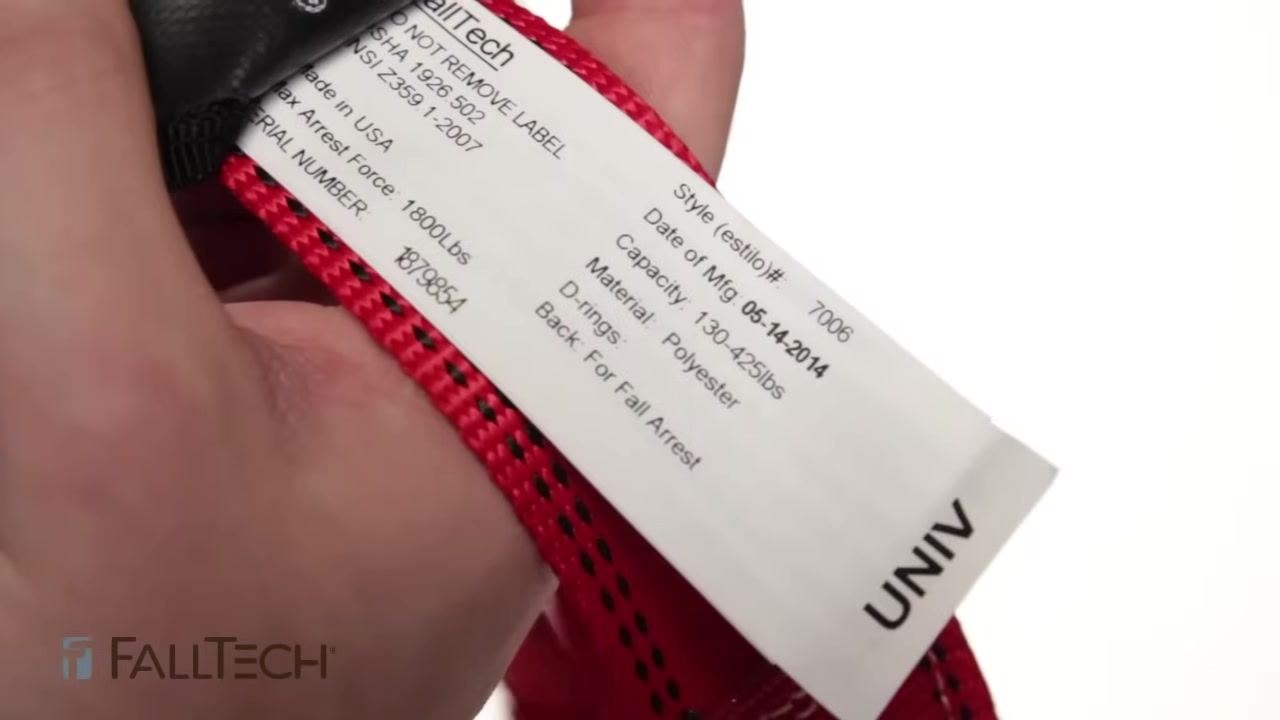
Inspect all labels on the harness. Ensure they are present and legible. If you cannot read the labels, take the harness out of service.
Inspect the hardware
Work from the top of the harness downward. Examine the back dorsal D-ring for major bends, cracks, or discoloration. Check the chest strap and its buckle:
- For a quick connect buckle, confirm it closes and locks into itself; a visible green dot indicates it is properly locked.
- For a mating buckle, pass the buckle through the slot and give it a couple of short pulls to confirm it stays in place.
Inspect the adjusters
Examine all adjusters, including mating buckle adjusters and rolling friction buckle adjusters, to confirm they function properly and securely hold the webbing.
Inspect hardware with springs or rollers
For any hardware component with a spring or roller, confirm the roller spins freely and the spring functions properly. Rotate the roller to check it is not bent and moves without obstruction. For mating buckle adjusters, verify the webbing passes through easily and the adjuster locks down securely. If any hardware fails to function as intended, remove the harness from service.
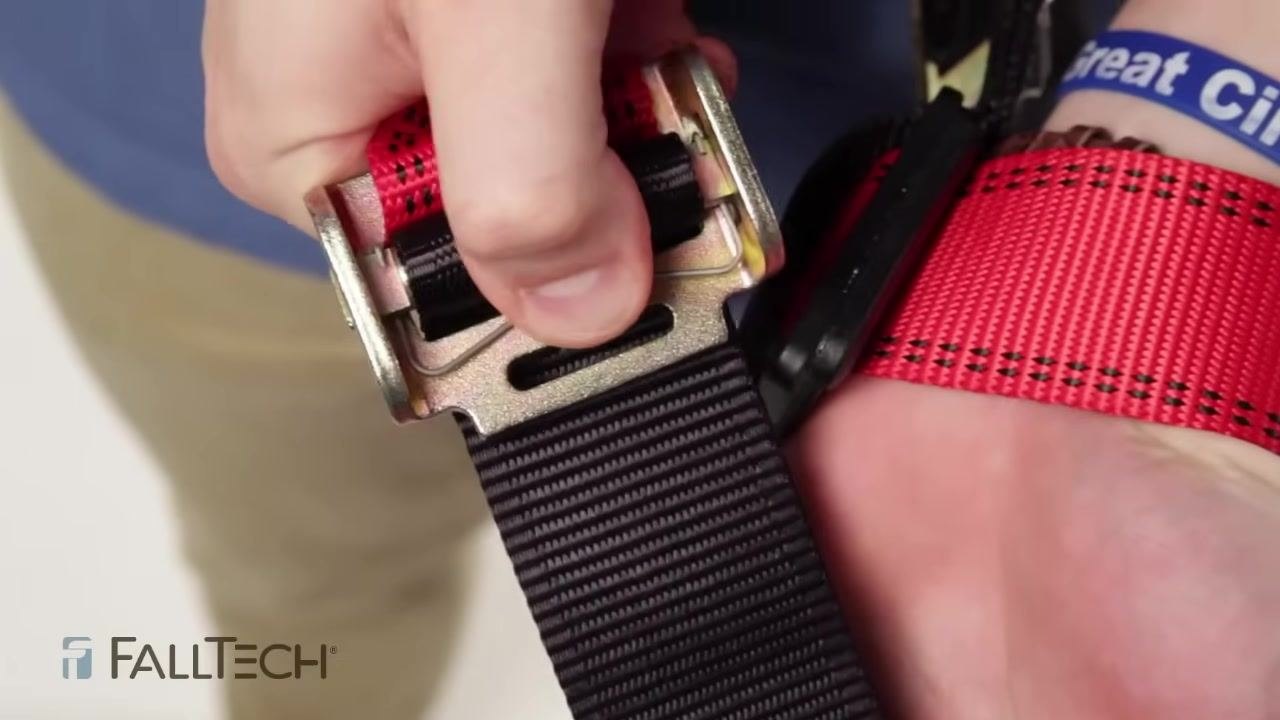
Inspect the leg straps and buckles
Identify the leg buckle type on your harness: tongue and buckle, mating buckle, or quick connect.
- Tongue and buckle: Examine all grommets for cracks, bends, or missing pieces. Confirm the tongue sits neatly by itself against the gate, not moving against the bar, and that the buckle is not bent and rotates as designed.
- Quick connect: Confirm the buckle locks into itself and displays a green dot, indicating it is properly locked.
- Mating buckle: Pass the buckle through the slot and give it a couple of short pulls to confirm it stays in place.
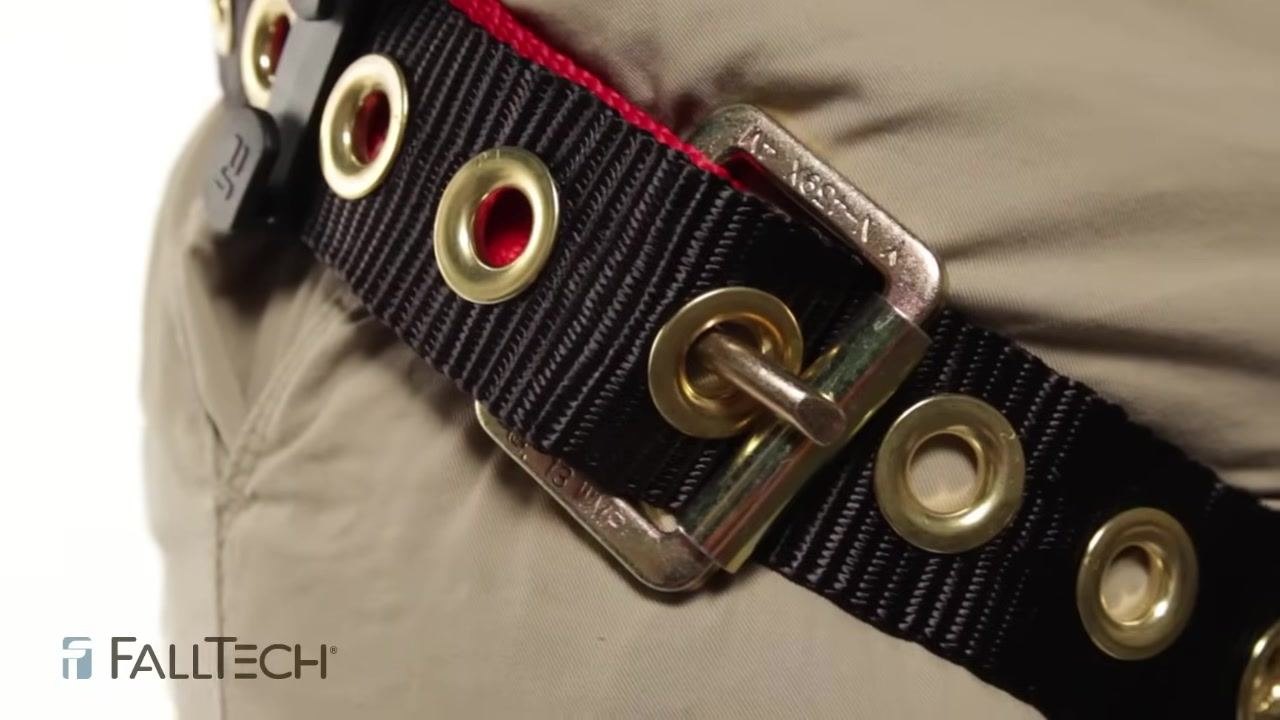
Inspect the webbing thoroughly
Perform the webbing inspection without gloves for better tactile feedback. Check for tears, holes, or discoloration. Grasp the webbing with your hands and bend it into an inverted "U" shape, inspecting both sides — this creates surface tension that makes damaged fibers or cuts easier to see. Run your hands down the webbing to feel for hard, shiny spots that may indicate heat damage. Confirm the webbing thickness is uniform throughout; thinner or stretched areas may indicate the harness was subjected to a fall. Inspect the edges to ensure they are not excessively worn.
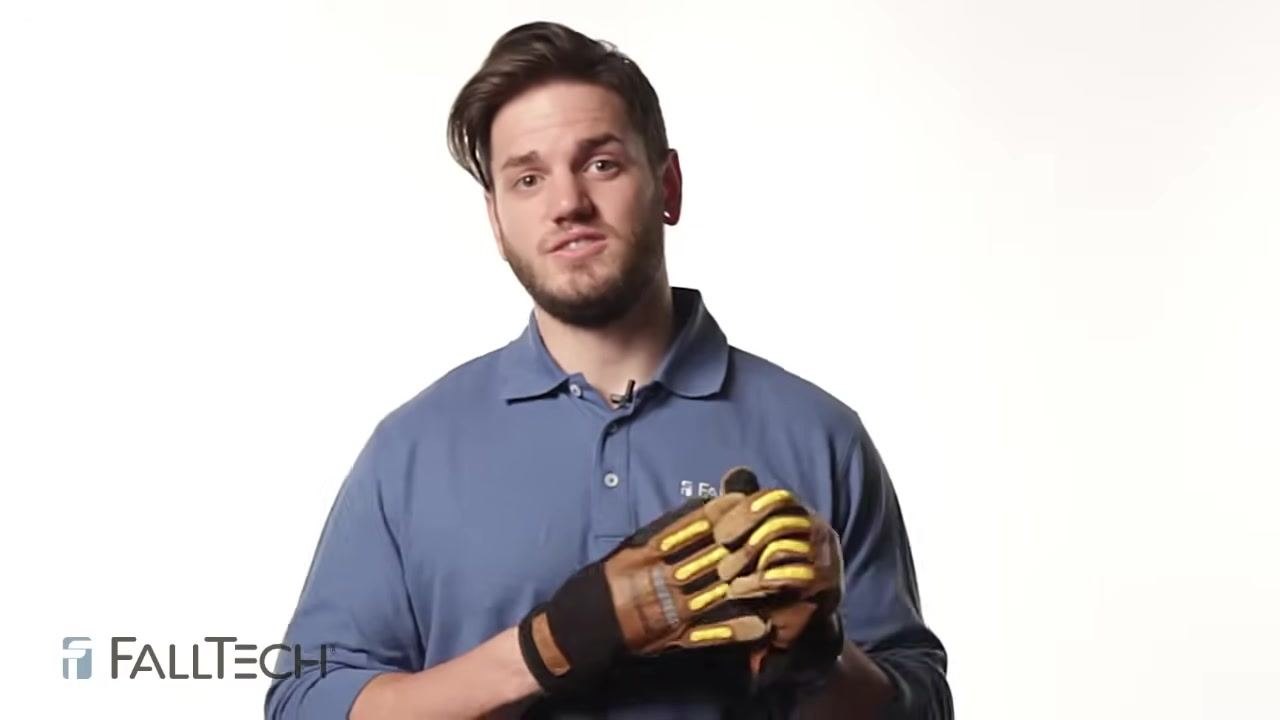
Inspect both sides of the webbing
Visually and physically inspect both the front and back sides of the webbing for signs of damage or wear.
Identify signs of webbing damage
Look for areas where the webbing is thinned, stretched, or shows signs of undue wear. Any such areas may indicate the harness has been subjected to a fall and must be removed from service.
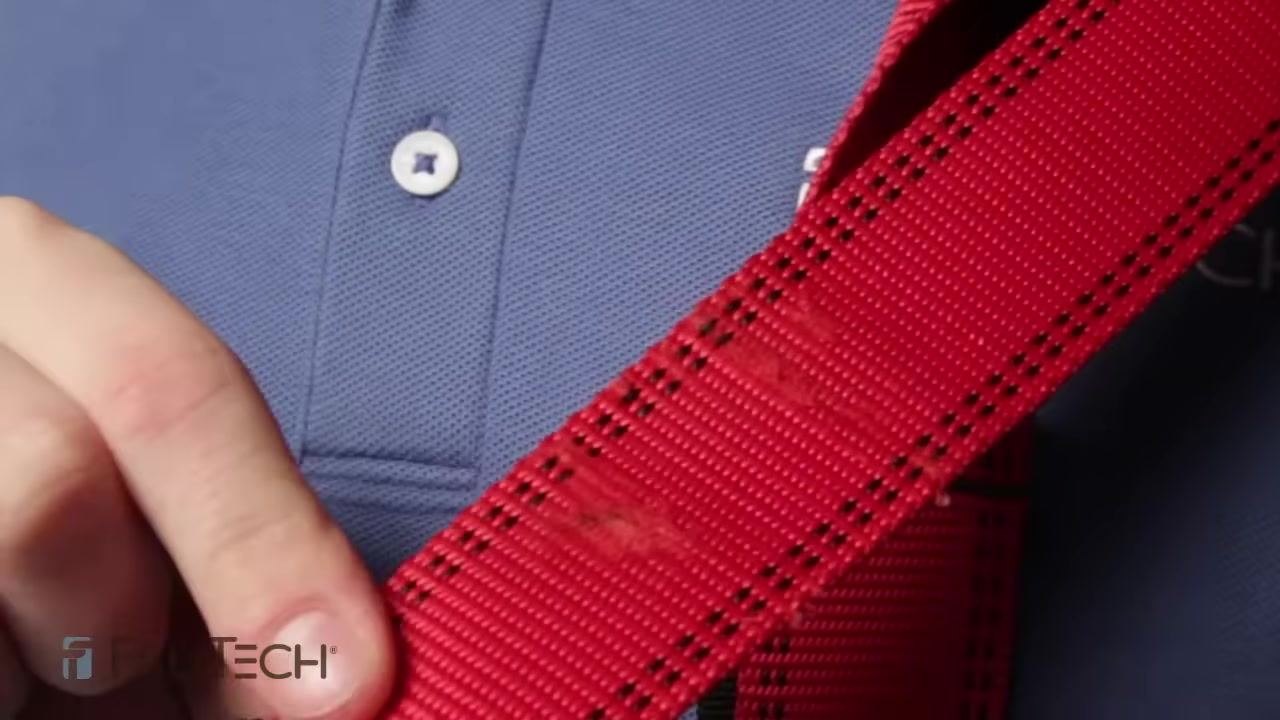
Remove the harness from service if excessive wear is found
If you observe 10% or more wear on the outside of the webbing, immediately remove the harness from service.
Inspect all stitching
Carefully examine all stitched areas of the harness. Ensure there are no loose, frayed, or missing stitches, paying special attention to high-stress areas and connection points. Do not use the harness if any stitching is compromised.
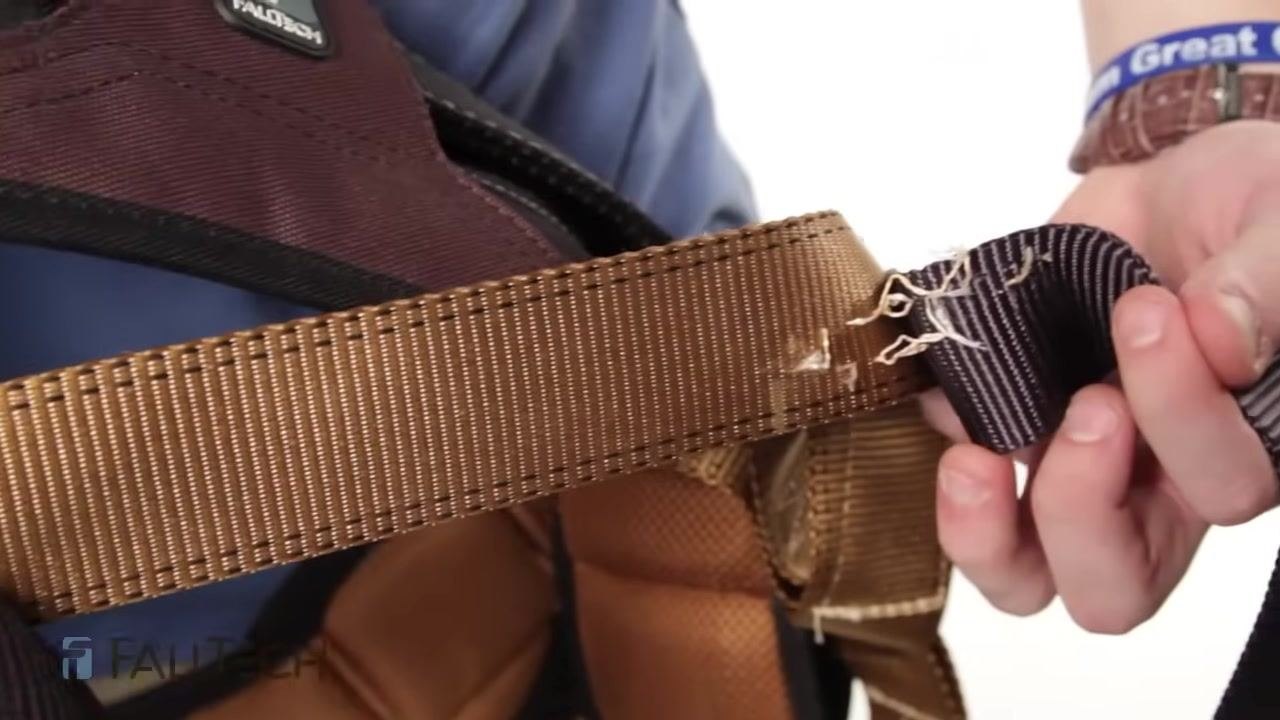
Check the sub-pelvic strap
Inspect the sub-pelvic strap thoroughly, as this area often experiences significant wear. Look underneath the harness and check all stitching and webbing for damage or excessive wear.
Donning the harness
Prepare to don the harness
After confirming the harness has passed inspection, prepare to put it on. Hold the harness by the dorsal D-ring (the large ring at the back) and locate the chest strap before putting the harness on.
Put on the harness
Slip one arm through one shoulder strap, then the other arm through the opposite strap, as if putting on a shirt. Ensure the dorsal D-ring is positioned at the center of your back. Do not secure the chest strap at this stage.
Adjust the harness from the bottom up
Begin adjustments at the bottom of the harness for the best fit. Ensure the sub-pelvic strap hangs just below the buttocks — this strap supports the bulk of your weight in the event of a fall. Adjust the height of the sub-pelvic strap using the torso adjusters as needed.
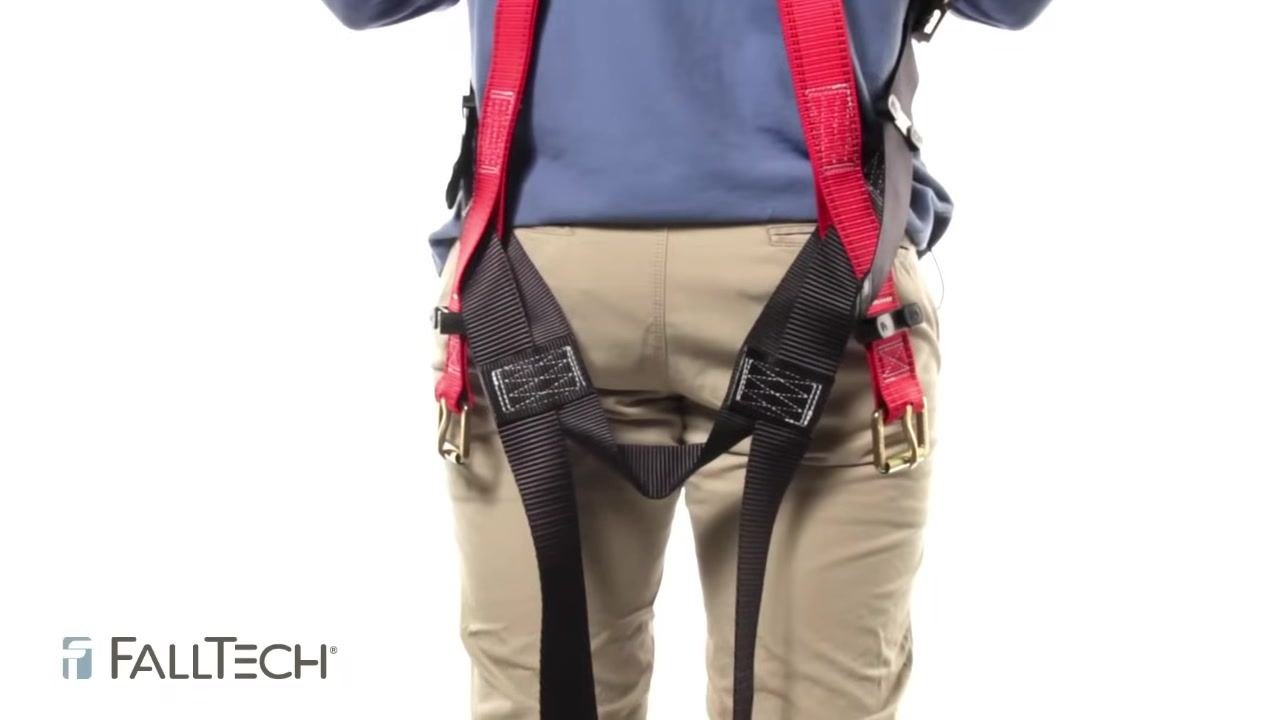
Secure the leg straps
Fasten the leg straps using the appropriate buckle type (tongue buckle, mating buckle, or quick connect). Tighten each leg strap so that only two to three fingers fit between your leg and the strap, ensuring a snug but comfortable fit.
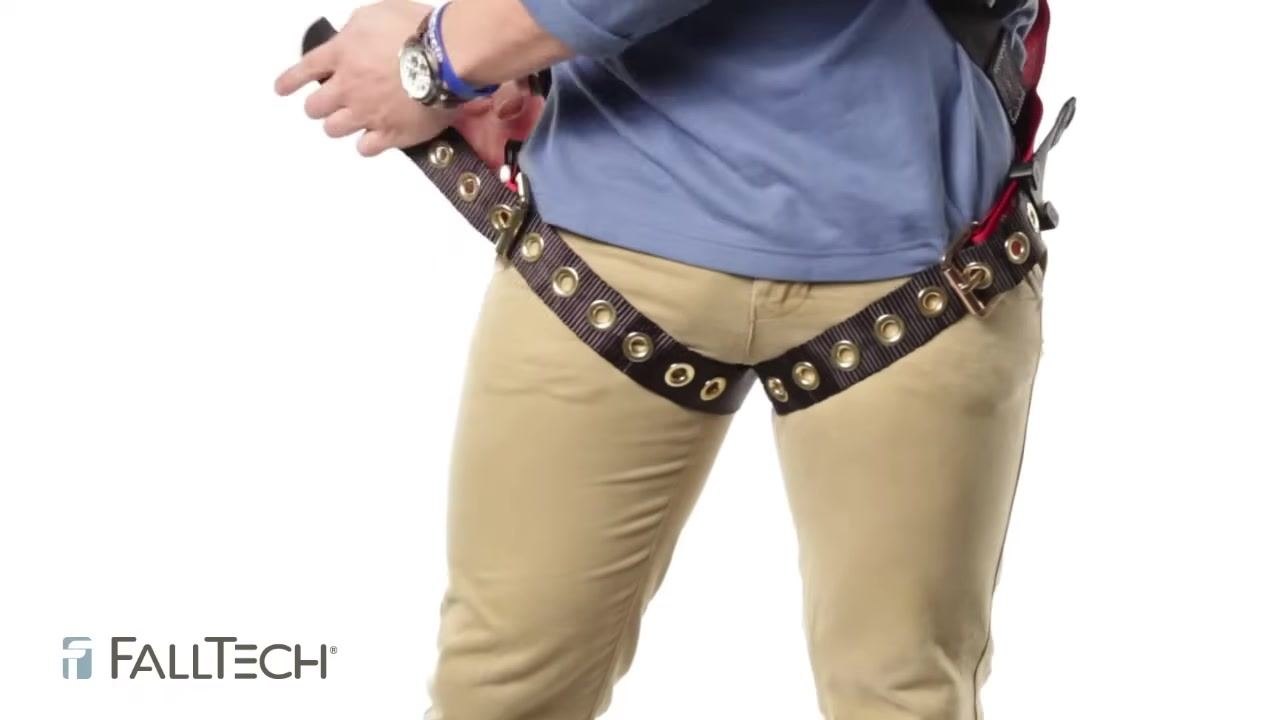
Double-check torso and sub-pelvic strap adjustment
After securing the leg straps, recheck the torso adjustment and confirm the sub-pelvic strap remains correctly positioned just below the buttocks.
Position and secure the chest strap correctly
Ensure the chest strap is straight and tight against the center of your chest. Do not position it too high, as it could ride up under your chin during a fall and cause injury. The chest strap should be snug enough to prevent slipping out of the harness if you fall head over heels.
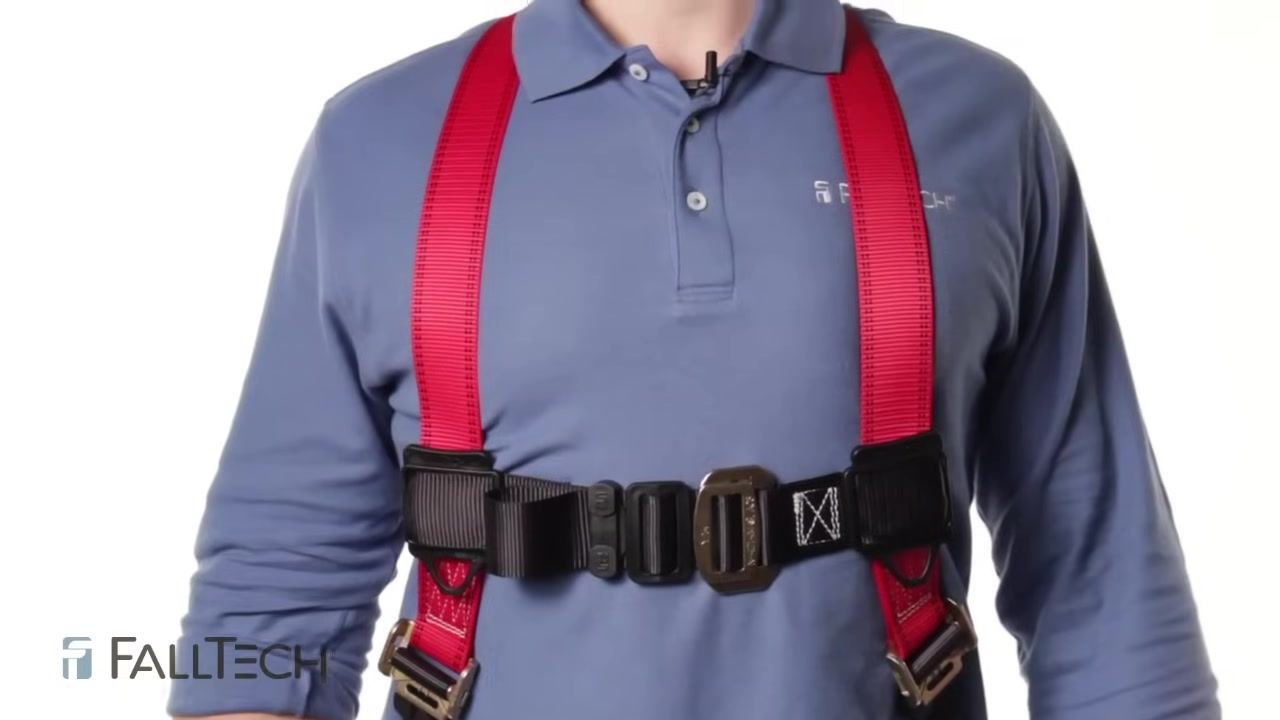
Double-check chest strap placement
Adjust the chest strap if necessary to ensure it is not too high or too low. Confirm the strap is flat, not twisted, and securely fastened.
Harness care and maintenance
Store the harness properly
Store your harness in a cool, dry place, out of direct sunlight to prevent UV damage. Keep it away from chemicals and corrosive substances.

Clean the harness when needed
If the webbing becomes dirty, clean it using mild soap and water. Do not use harsh chemicals or abrasive cleaners. Hang the harness to air dry completely before storing or using it again.
Contact for questions or product information
If you have questions or need additional product information, contact FallTech. Visit the website for more resources: falltech.com.

Verification and summary
By following this procedure, you confirm that every component of your vest-style fall protection harness — impact indicators, labels, hardware, adjusters, webbing, stitching, and sub-pelvic strap — has passed inspection before use. Remove the harness from service immediately if you find an exposed impact indicator, illegible labels, malfunctioning hardware, webbing wear of 10% or more, compromised stitching, or excessive fraying on the sub-pelvic strap.
Once inspection is complete, don the harness by adjusting from the bottom up: position the sub-pelvic strap below the buttocks, secure the leg straps with a two-to-three-finger fit, and center the chest strap snugly across your chest. Store the harness in a cool, dry place away from sunlight and chemicals, and clean it with mild soap and water only. Contact FallTech at falltech.com with any additional questions.
Generation details: cost, quality tiers
Docsie billed 3,000 credits ($2.10) to analyze this 6-minute video at standard quality. The rewrite, template fill and Word/PDF exports were included. The same video at each quality tier:
| Quality | Frames sampled | Credits | Approx. cost |
|---|---|---|---|
| Draft | every 16-30 s | 1,500 | $1.05 |
| Standard (this guide) | every 8-15 s | 3,000 | $2.10 |
| Detailed | every 4-7 s | 6,000 | $4.20 |
| Ultra | every 1-3 s | 12,000 | $8.40 |
Credits priced at $0.70 per 1,000; plans include a monthly allowance. Enterprise customers on on-premise or bring-your-own-model deployments run this on their own inference and pay no per-video credits.
Generated by Docsie Video-to-Docs on 2026-09-09 from a 5-minute video. Screenshots are frames from the source video and belong to their creator, FallTech, whose original is embedded above. If you own this video and want the guide removed or credited differently, contact us and we will act within one business day.