
How to Schedule an OTBI Report in Oracle Fusion
This guide shows you how to schedule an OTBI report in Oracle Fusion to automatically send managers a personalized list of their team members' upcoming birthdays. By building an agent around the Birthday E-mail Analysis, you can automate monthly delivery so each manager receives only information relevant to their own team.
Video: HCM Analytics | How do I create an agent to deliver the results of an OTBI analysis? by Oracle Applications Cloud Tutorials (2023). All credit for the demonstration goes to the creator; watch the original on YouTube. The written guide below was generated from this video by Docsie. Creator? Request a change or removal.
This guide shows you how to schedule an OTBI report in Oracle Fusion to automatically send managers a personalized list of their team members' upcoming birthdays. By building an agent around the Birthday E-mail Analysis, you can automate monthly delivery so each manager receives only information relevant to their own team.
Prerequisites
- Access to Oracle Transactional Business Intelligence (OTBI) with the Birthday E-mail Analysis available under the Others section.
- Permissions to create and schedule agents in the Catalog.
Reviewing the Birthday E-mail Analysis
Open the Birthday E-mail Analysis
From the Oracle Transactional Business Intelligence home screen, locate Birthday E-mail Analysis under the Others section. Click Open next to it to launch the analysis.
Review the analysis data
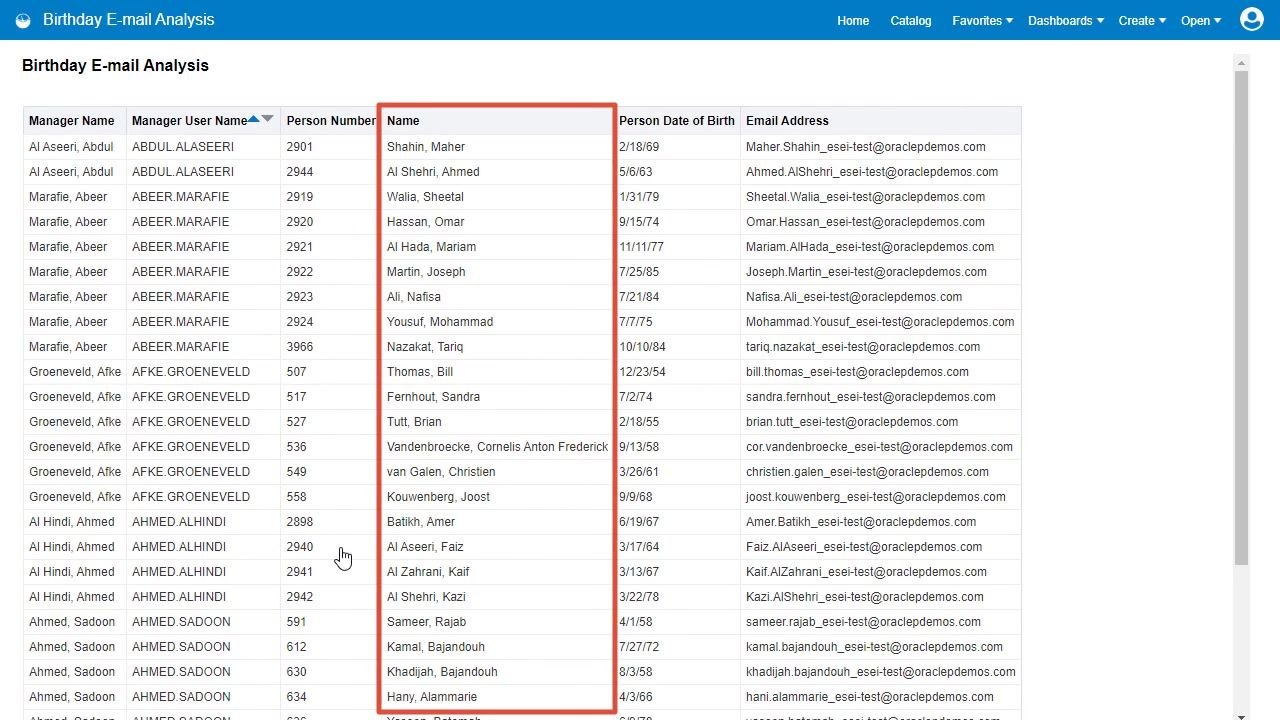
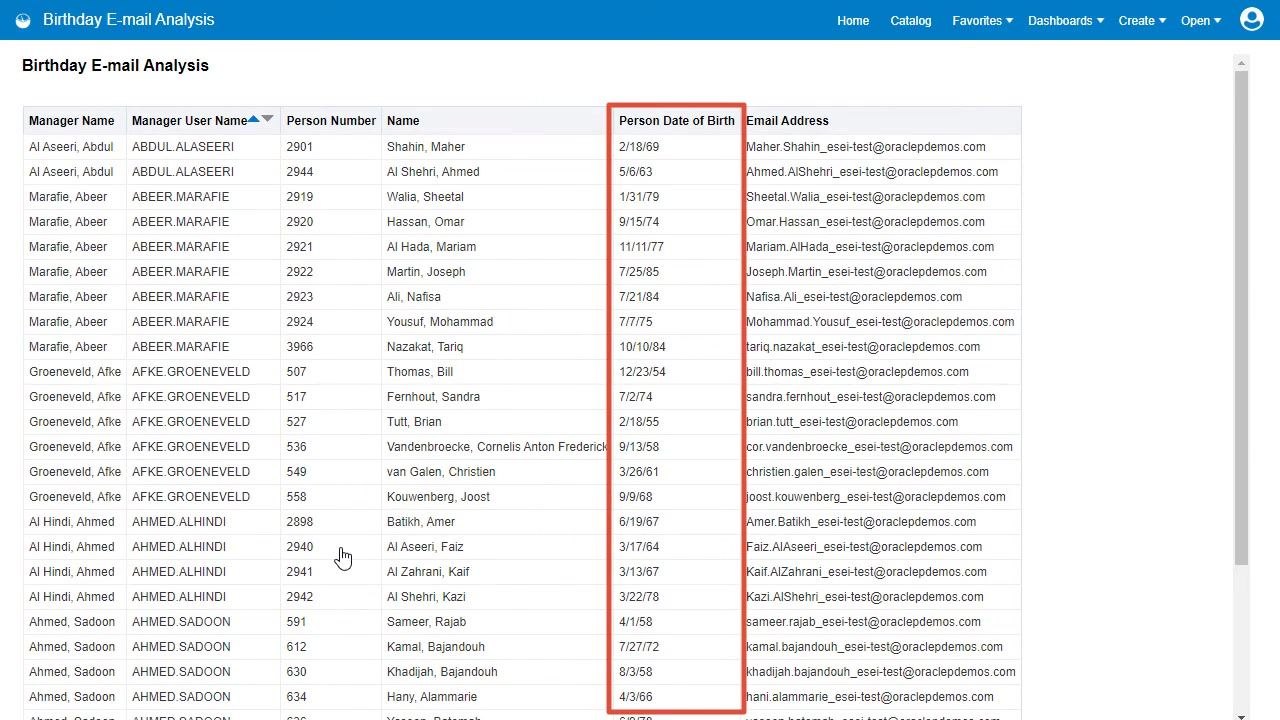
The analysis displays a table with the following columns: Manager Name, Manager User Name, Person Number, Name, Person Date of Birth, and Email Address. Confirm that the table lists all managers, their employees, and the employees' upcoming birthdays.
Note that "upcoming" refers to employees who have birthdays in the following month. Verify that the Person Date of Birth column is present and contains relevant dates.
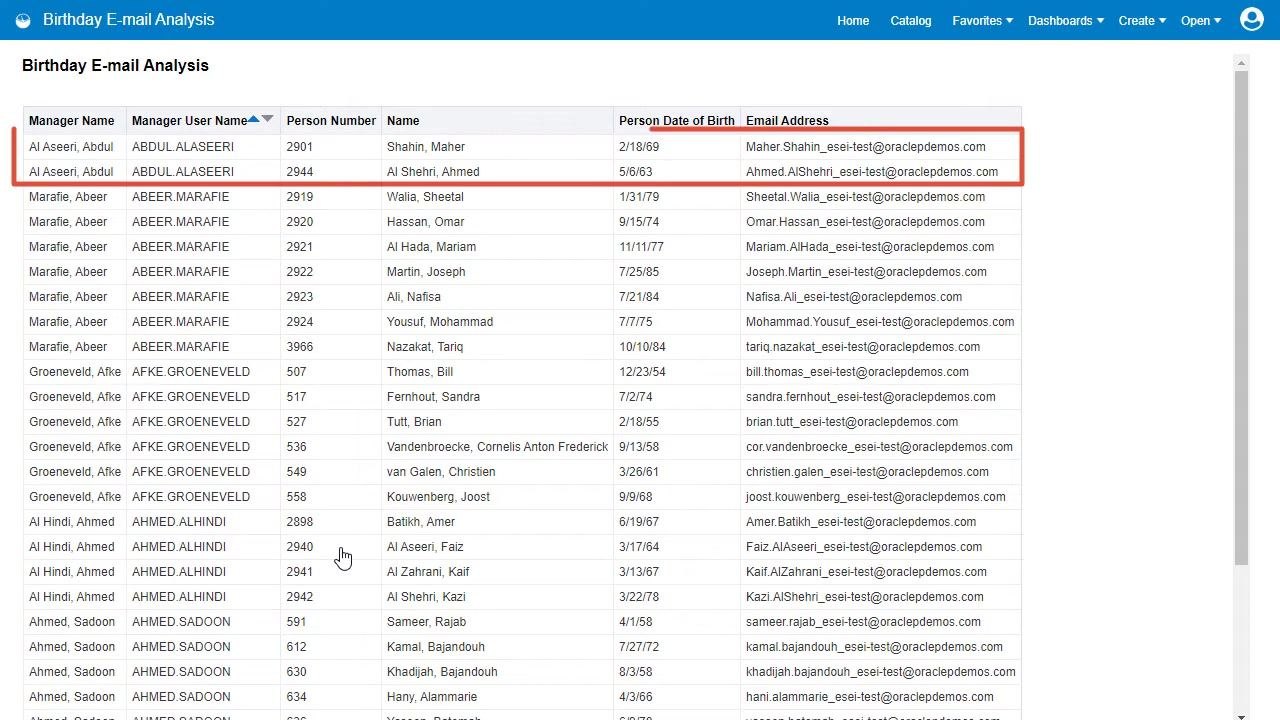
Confirm that each manager should only receive the list of their direct reports, not all employees. The analysis groups employees under their respective managers.
Creating and scheduling the agent
Return to the Catalog to create a new agent
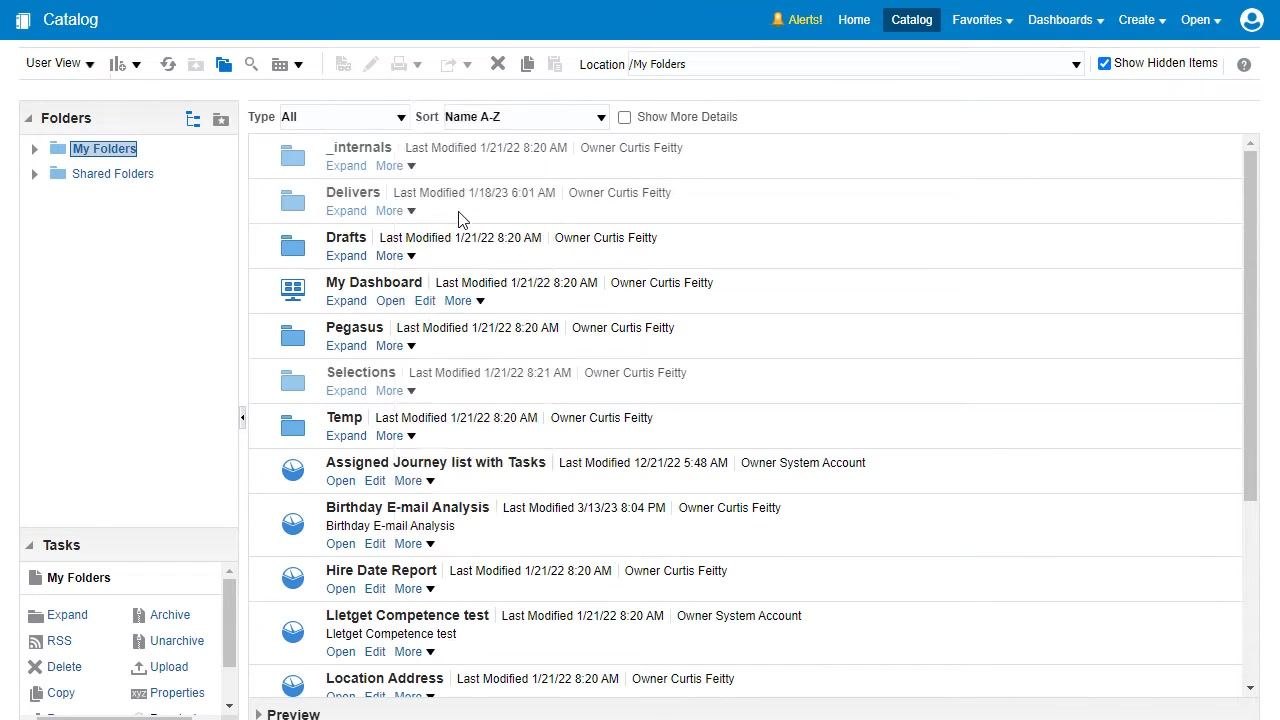
Click the Catalog button in the top navigation bar, then navigate to the folder where you want to create the agent (for example, My Folders).
Create and schedule the agent
Start creating a new agent, then open the Schedule tab. Set the frequency to Monthly, select Day 1, and ensure all months are checked. Set the start date and time as needed, and make sure the agent is Enabled.
Set the condition for the agent
Go to the Condition tab and use the default condition, which checks whether there are birthdays for the current month. Test the condition to confirm it works as expected.
Configuring delivery content and recipients
Configure delivery content
Go to the Delivery Content tab and set the subject to "Manager Team Birthday List". For content, select the path to your Birthday E-mail Analysis, and leave the format as Device default. Choose whether to deliver results directly or as an attachment.
Configure recipients to include only managers
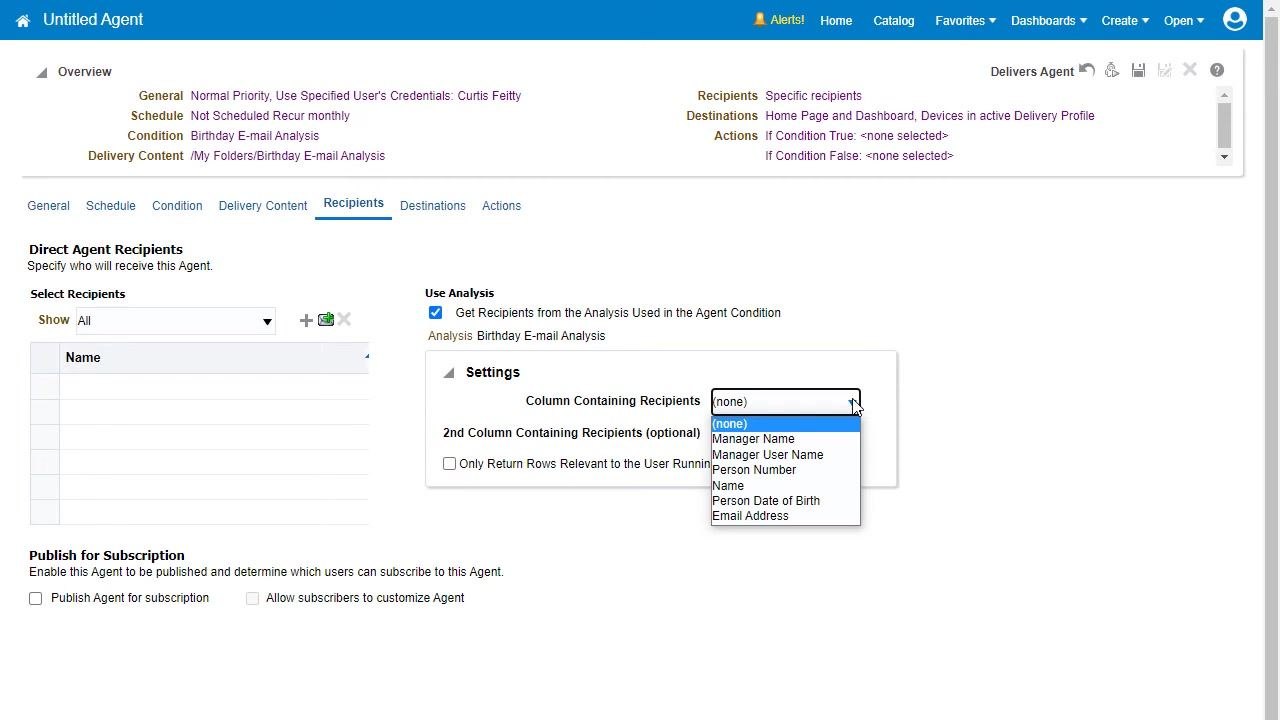
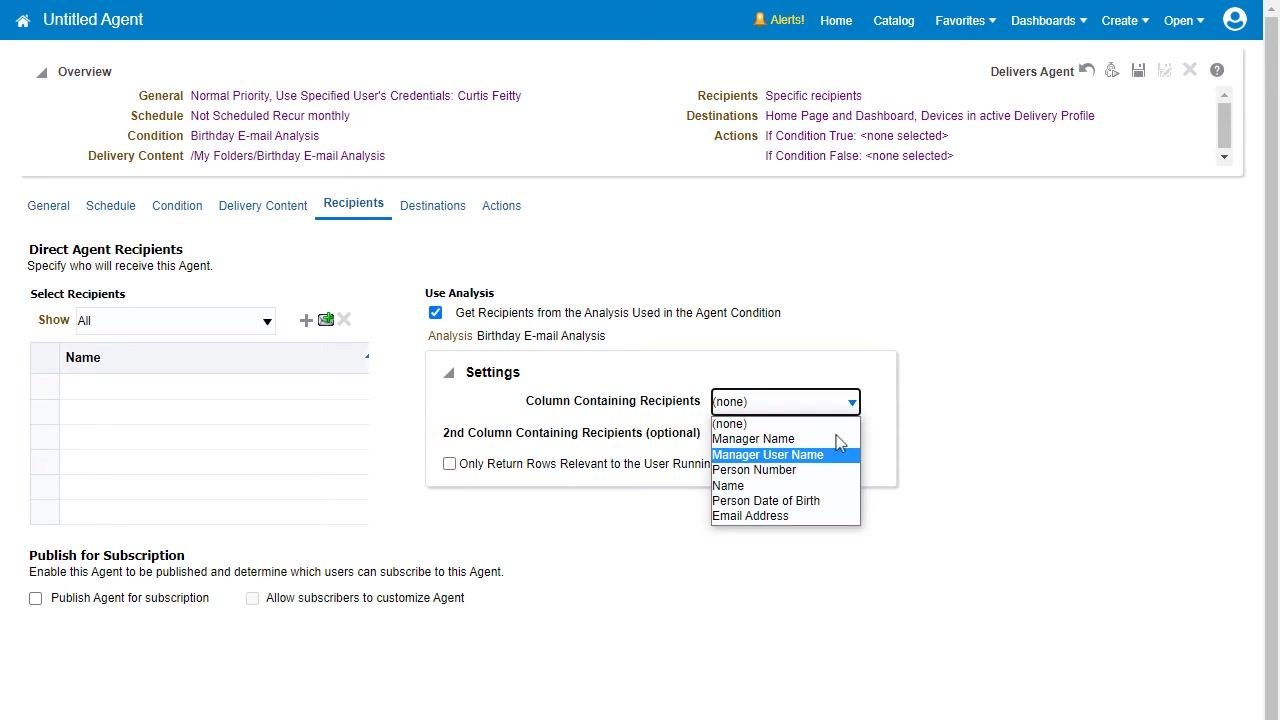
Go to the Recipients tab and remove any default recipients. Check the box for Get Recipients from the Analysis Used in the Agent Condition, then select Birthday E-mail Analysis as the source.
In the recipient column settings, choose Manager User Name from the dropdown menu for Column Containing Recipients. Do not select a second column, since only the manager's username is needed.
(Optional) Restrict rows to the user running the agent
In the Recipients tab, under Settings, check Only Return Rows Relevant to the User Running the Agent if you want each manager to see only their own team's birthdays. This filters the results so each recipient only receives information relevant to them.
Saving and verifying the agent
Save the agent
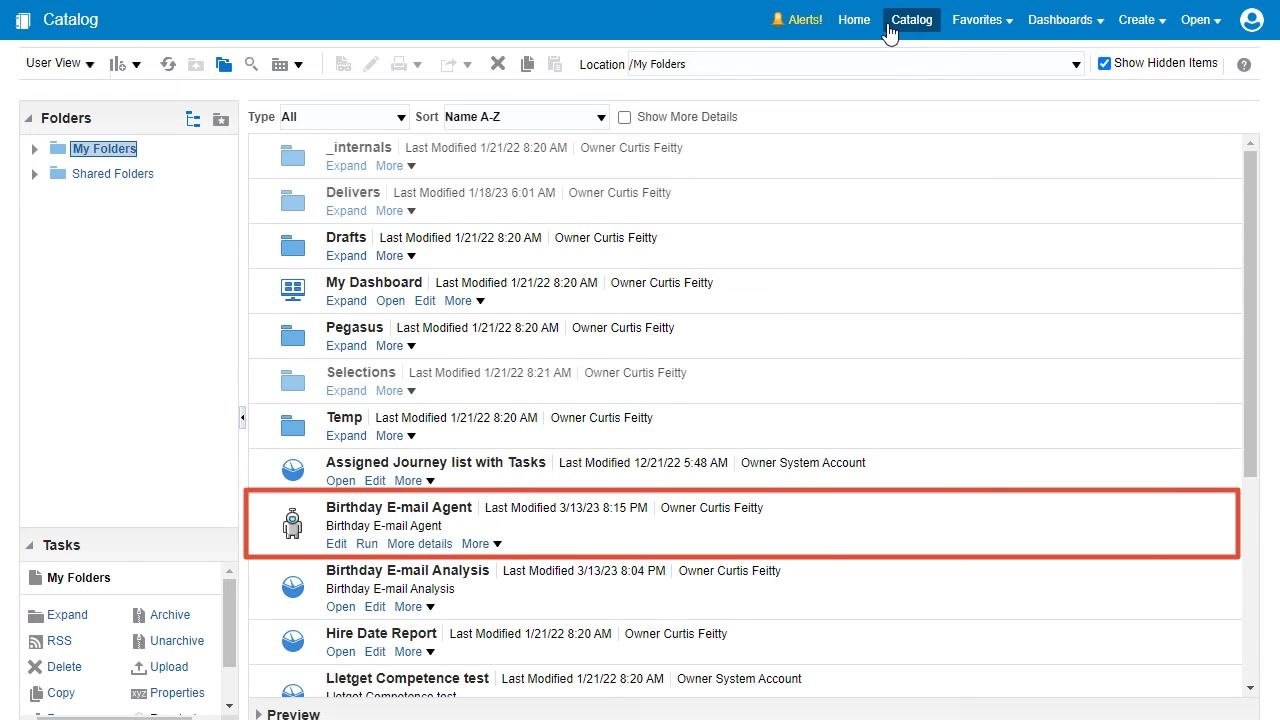
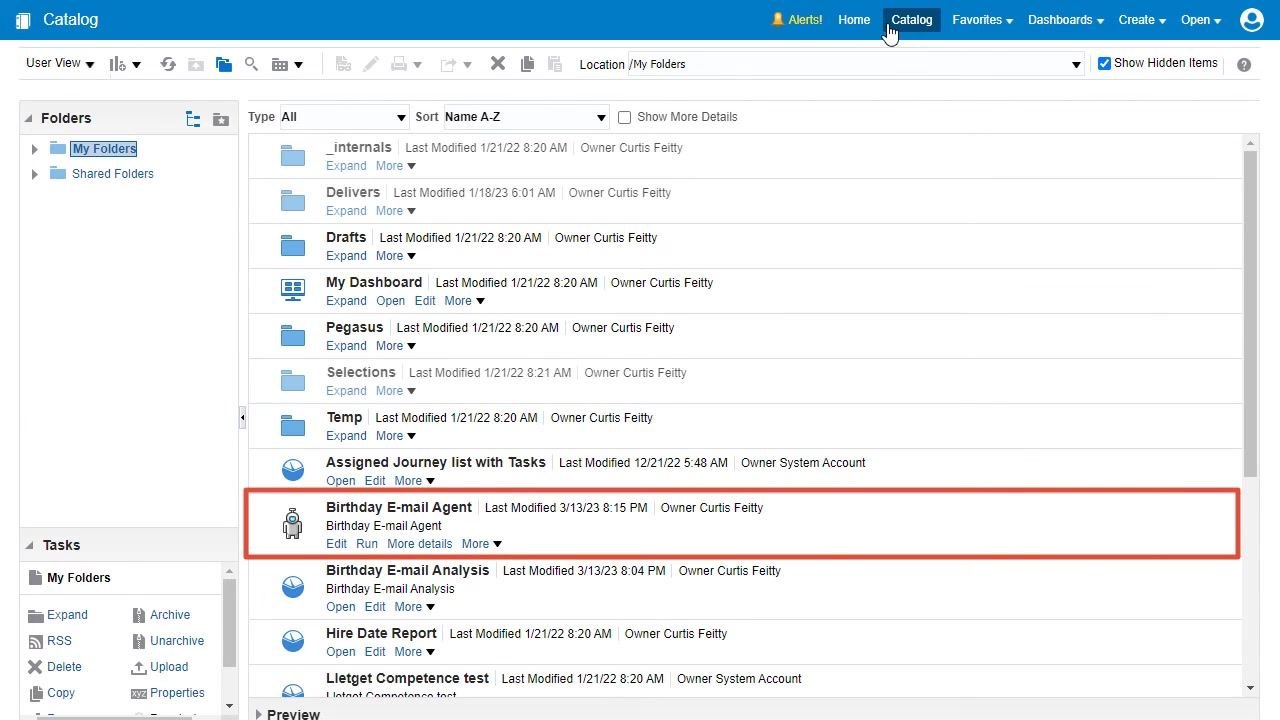
Click the Save icon (floppy disk) in the agent setup window. Confirm that your agent is now listed in the Catalog under your chosen folder (for example, My Folders) as Birthday E-mail Agent. The agent is now configured to run automatically on the first day of every month.
Verify agent setup
In the Catalog, locate the Birthday E-mail Agent entry. Confirm the last modified date and owner details to ensure your changes have been saved. The agent is now ready to deliver the list of upcoming birthdays to each manager as scheduled.
Summary
By completing these steps, you have successfully learned how to schedule an OTBI report in Oracle Fusion that automatically sends each manager a personalized list of their team members with upcoming birthdays on the first day of every month. This approach ensures privacy, relevance, and automation for your organization's birthday notifications.
Generation details: cost, quality tiers
Docsie billed 1,500 credits ($1.05) to analyze this 3-minute video at standard quality. The rewrite, template fill and Word/PDF exports were included. The same video at each quality tier:
| Quality | Frames sampled | Credits | Approx. cost |
|---|---|---|---|
| Draft | every 16-30 s | 750 | $0.52 |
| Standard (this guide) | every 8-15 s | 1,500 | $1.05 |
| Detailed | every 4-7 s | 3,000 | $2.10 |
| Ultra | every 1-3 s | 6,000 | $4.20 |
Credits priced at $0.70 per 1,000; plans include a monthly allowance. Enterprise customers on on-premise or bring-your-own-model deployments run this on their own inference and pay no per-video credits.
Generated by Docsie Video-to-Docs on 2026-10-14 from a 2-minute video. Screenshots are frames from the source video and belong to their creator, Oracle Applications Cloud Tutorials, whose original is embedded above. If you own this video and want the guide removed or credited differently, contact us and we will act within one business day.