
How to Share Screen in Microsoft Teams
Microsoft Teams offers multiple ways to share your screen during a meeting, letting you present content, demonstrate workflows, or collaborate with participants in real time. This guide walks you through starting a screen share, choosing between sharing your entire screen or a single window, understanding the privacy implications of each option, and optimizing your shared content for readability.
Video: Share Your Screen in a Microsoft Teams Meeting | Microsoft Teams Tutorial by MyExcelOnline.com (2022). All credit for the demonstration goes to the creator; watch the original on YouTube. The written guide below was generated from this video by Docsie. Creator? Request a change or removal.
Microsoft Teams offers multiple ways to share your screen during a meeting, letting you present content, demonstrate workflows, or collaborate with participants in real time. This guide walks you through starting a screen share, choosing between sharing your entire screen or a single window, understanding the privacy implications of each option, and optimizing your shared content for readability.
Prerequisites
- Access to Microsoft Teams with an active or joinable meeting
- The application, document, or content you want to share already open on your desktop
- Familiarity with basic Teams meeting controls (Camera, Mic, Chat, etc.)
Starting a screen share
- Join or start a Teams meeting.
- Locate the top menu bar in your meeting window.
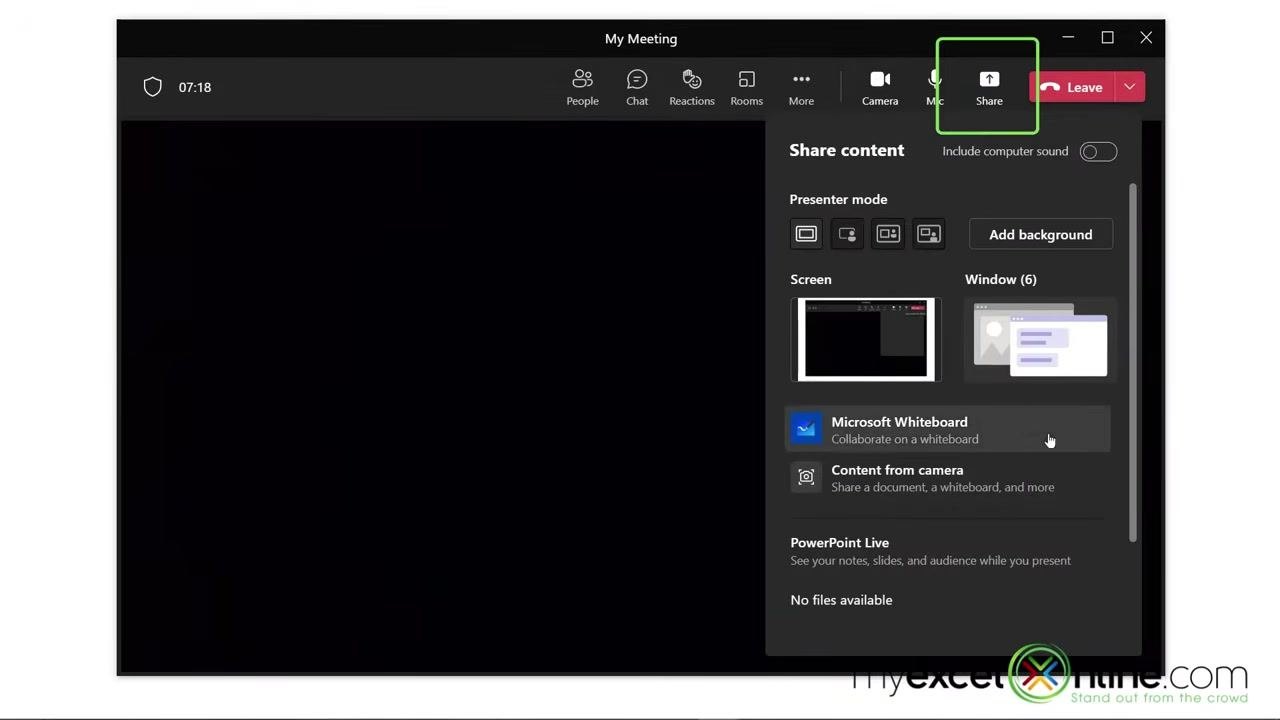
- Click the Share button (the icon with an upward arrow).

Choosing what to share
Once you click Share, a panel opens on the right side of your meeting window under Share content, offering several options:
- Screen: Shares your entire desktop, including everything visible on your monitor.
- Window (6): Shares only a specific application window. The number in parentheses shows how many windows are currently open.
- Microsoft Whiteboard: Lets you collaborate on a digital whiteboard.
- Content from camera: Shares a document, whiteboard, or other physical content using your camera.
- PowerPoint Live: Shares a PowerPoint presentation directly.
Select Screen to share your entire desktop.

Screen sharing vs. window sharing
Before you continue, it helps to understand the difference between the two main sharing modes:
- Screen sharing: Everything on your desktop is visible to meeting participants. If you switch between applications or windows, all changes are visible — similar to someone sitting next to you and watching your entire monitor.
- Window sharing: Only the selected application window is visible to participants. If you switch to another window, participants will not see it unless you specifically share that window.
Initiating screen sharing
- Click the Screen thumbnail, usually labeled with your monitor name (for example, "Generic PnP Monitor").
- The selected screen will be outlined, indicating it is ready to be shared.
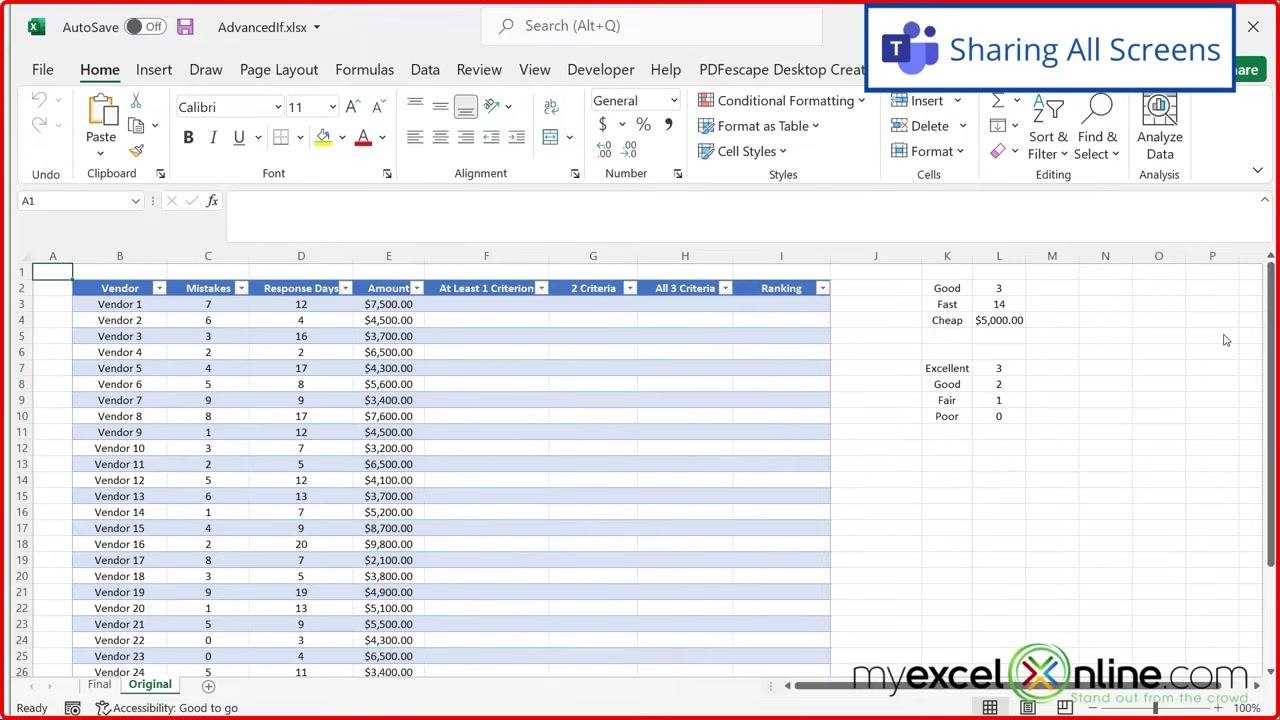
- Once sharing begins, a prominent red box appears around the edges of your screen. This red outline confirms that everything inside it is being broadcast to the meeting. Always check for this red box to verify you are sharing the intended content.
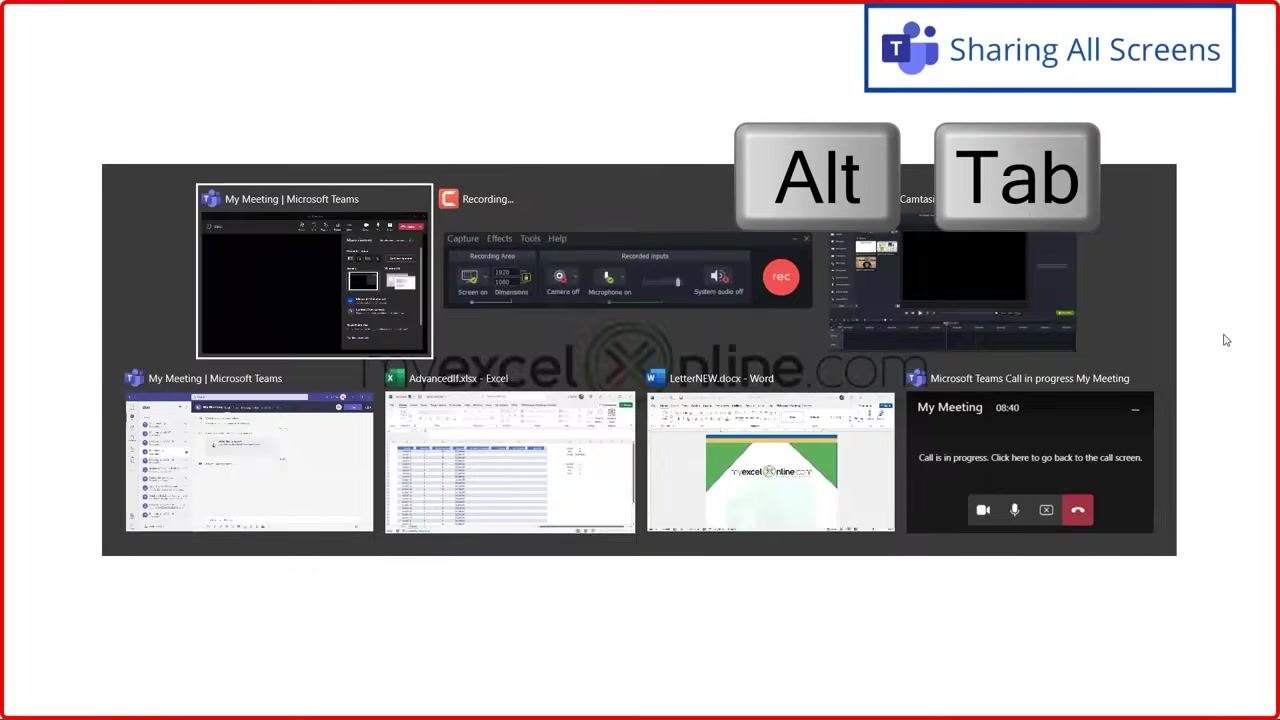
- If you use Alt + Tab to switch between open applications while sharing your screen, all participants will see each window you open or switch to, since you are sharing your entire desktop rather than a single window.
Summary
- Use the Share button in Teams to choose between sharing your entire screen or a specific window.
- Sharing your screen shows everything on your desktop, including any switches between applications.
- Look for the red outline to confirm what is currently being shared.
- Use window sharing instead of screen sharing for more privacy if you don't want participants to see everything on your desktop.
Stopping and switching to window sharing
- While sharing your entire screen, notice the red border around the edge of your display. This confirms everything within it is visible to participants. If you switch to another application (for example, Microsoft Word), the red border remains, confirming your entire desktop is still being shared.
- To stop sharing your screen, locate the screen sharing control box, typically at the bottom of your screen.
-
Click the screen sharing button, which now displays an "X" icon.
-
Confirm the red border has completely disappeared to verify sharing has stopped.
-
To share a specific window instead, click the Share button in the Teams meeting controls again.
- In the Share content panel, select Window instead of Screen.
- Choose which open window you want to share.
-
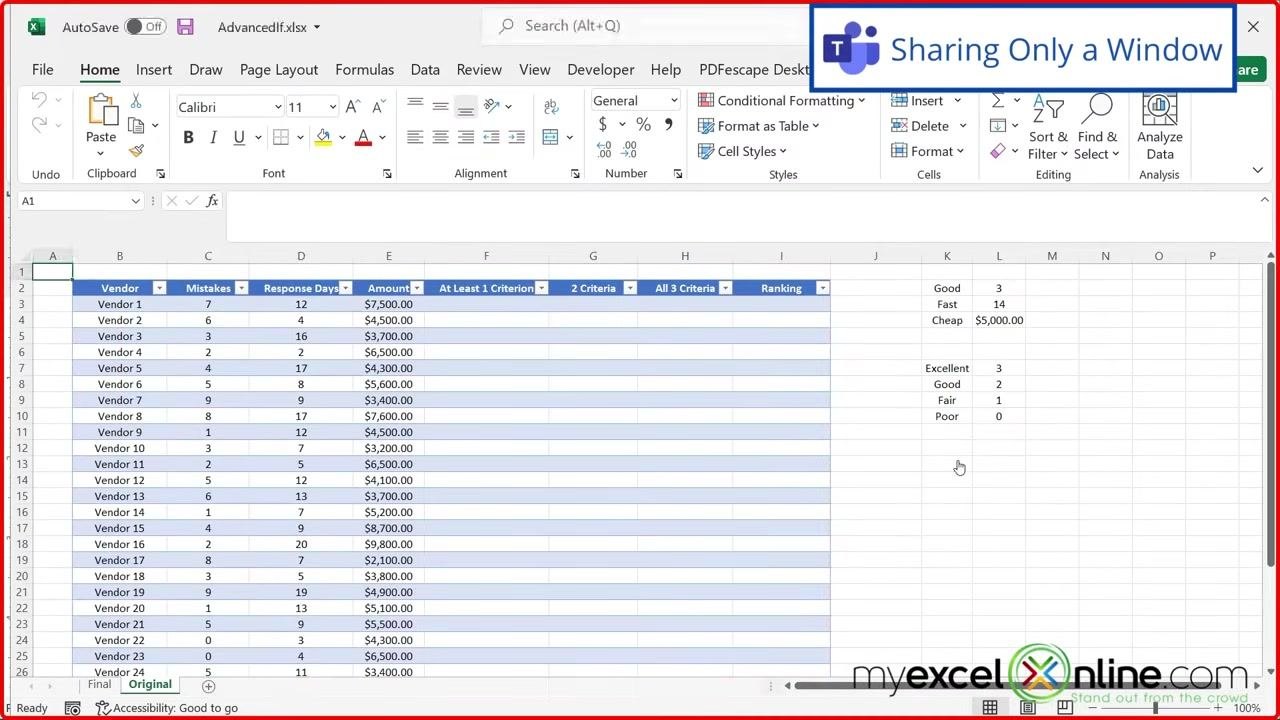
After selecting a specific window (for example, Excel), only that window will have a red border. A "Sharing Only a Window" notification confirms that only the selected application is being shared.
-
If you switch to another application (for example, Microsoft Word) while sharing only a window, the red border disappears from the new application, meaning participants cannot see it — only the originally shared window remains visible to them.
-
If you return to the shared window (for example, Excel), the red border reappears, confirming it is the active shared window.
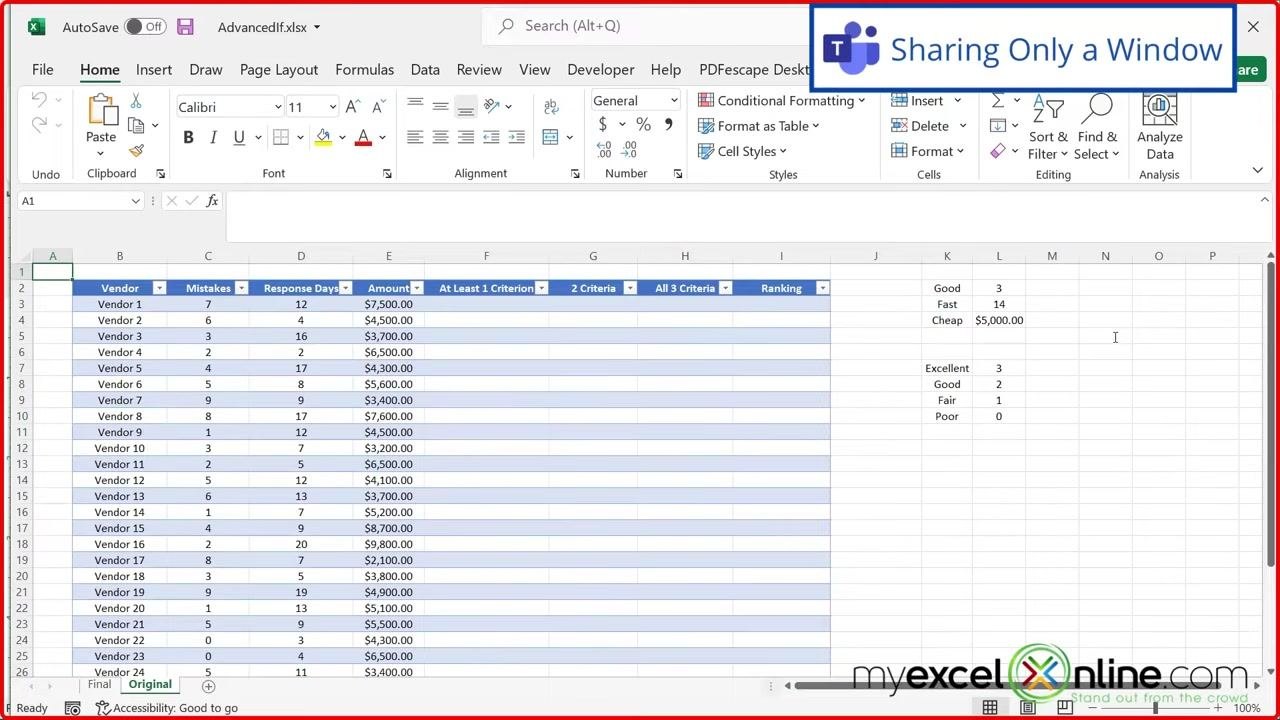
-
If you accidentally close the window you are sharing, Teams automatically stops sharing. You are returned to the Teams meeting window, and the Share button reverts to its default up-arrow icon, indicating you are no longer sharing content.
-
To share another window, click the Share button in the Teams meeting controls again, and the Share content panel will appear so you can select a new window.
Summary
- The red border is your key visual indicator of what is being shared — either your entire screen or a specific window.
- Stopping a share removes the red border and ends the content broadcast.
- Window sharing provides privacy by showing only the selected application, even if you switch to others.
- Accidentally closing a shared window automatically stops sharing and returns you to the Teams meeting interface.
Understanding pop-up dialog box visibility when sharing windows
- Share the Excel window again. Notice the red border around it, indicating it is being shared.
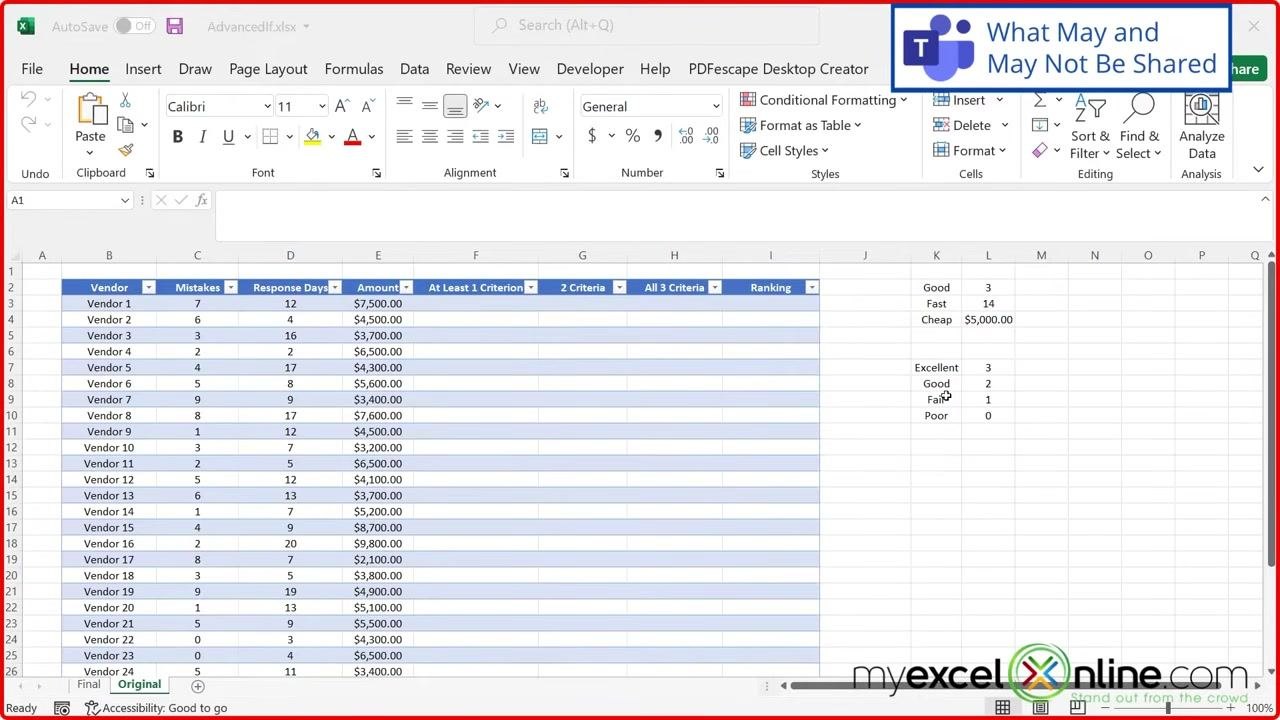
- Be aware that pop-up dialog boxes in Excel (such as right-click menus or formatting dialogs) may not always be visible to participants. For example, if you right-click a cell and select Format Cells, participants may see the dialog box. However, pop-ups from Conditional Formatting may not be visible when sharing only the Excel window.
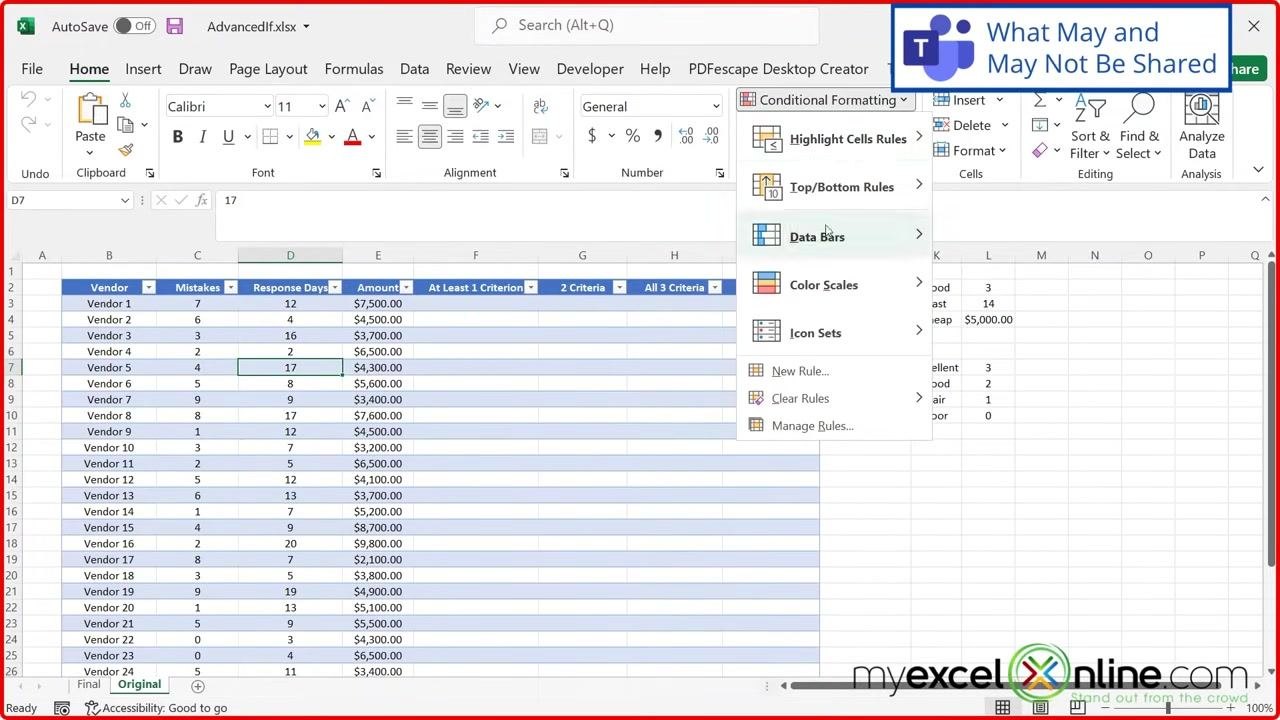
- Open the Conditional Formatting menu and select a rule (for example, "Greater Than"). The dialog box appears on your screen, but in window sharing mode it may not be visible to your meeting participants, even though you can see it.
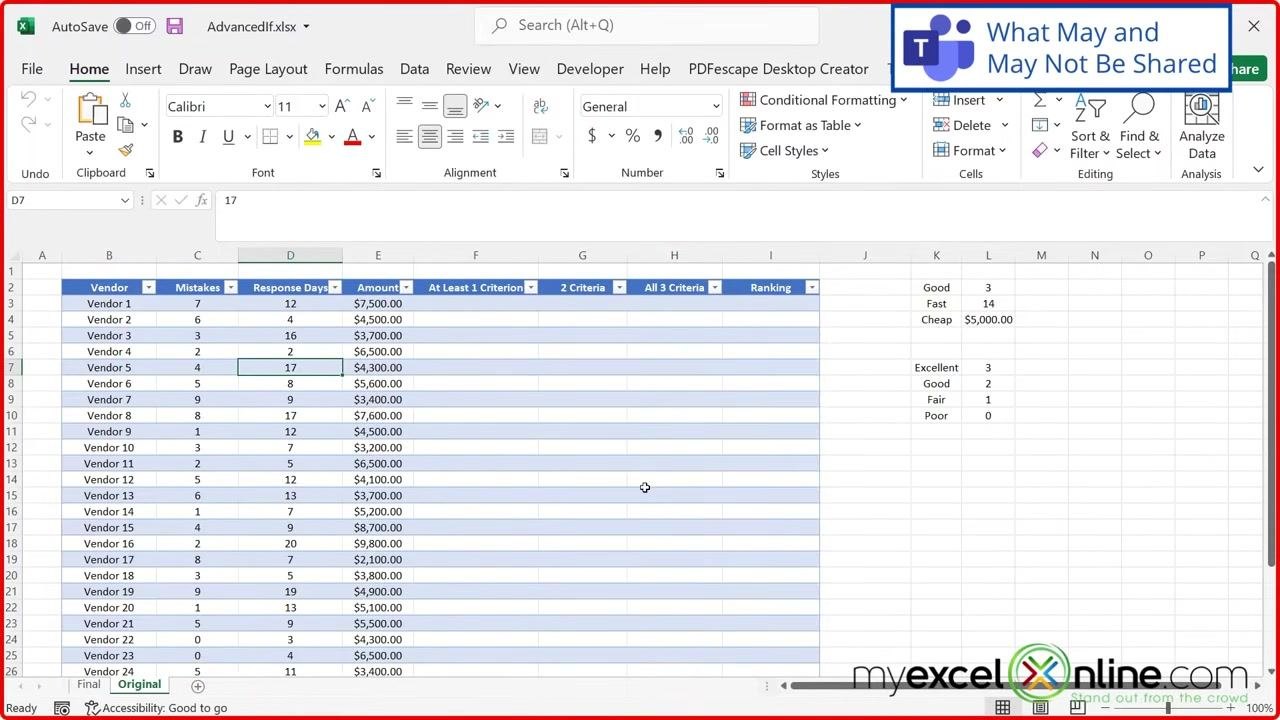
-
If your demonstration or training requires participants to see all dialog boxes and pop-up windows, share your entire desktop instead of just the Excel window. Sharing the desktop ensures all pop-up dialog boxes, regardless of how Excel presents them, are visible to your audience.
-
Keep in mind that some pop-up dialog boxes are treated as part of the main Excel window and will be shared, while others are treated as separate windows and may not be visible when sharing only the Excel window. This inconsistent behavior can impact the effectiveness of your demonstration.
-
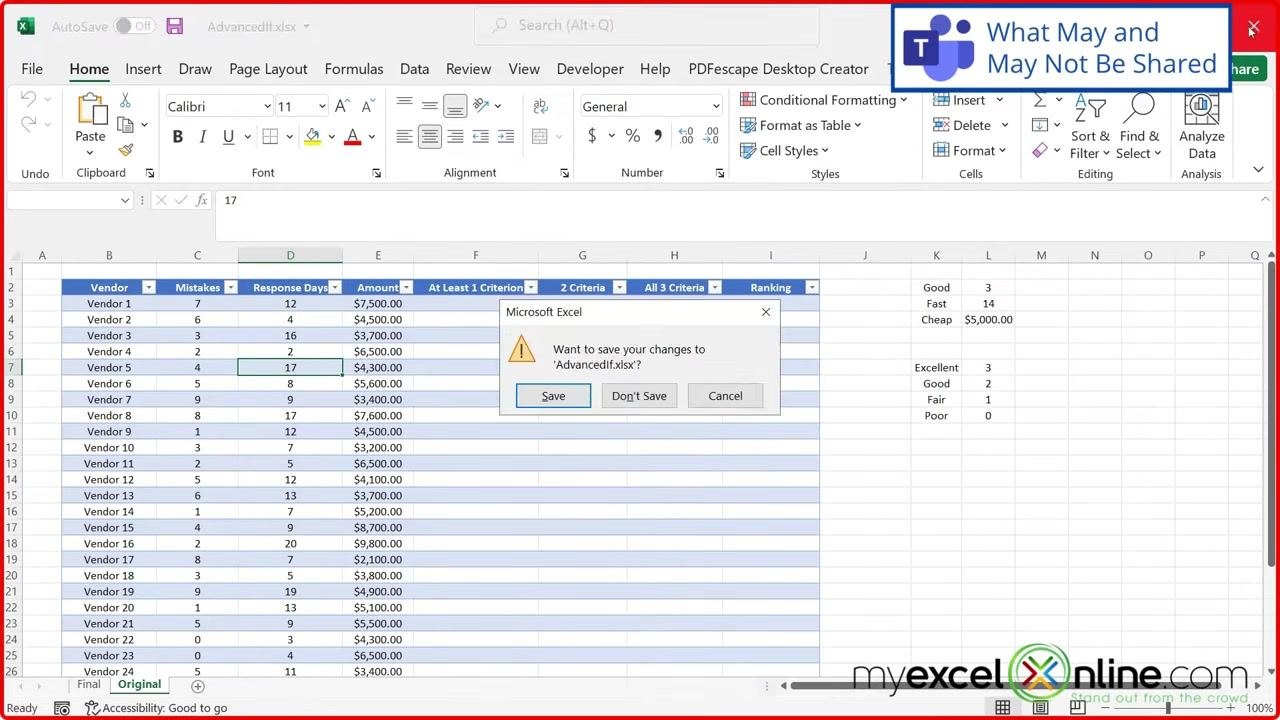
If you close the Excel window, you may be prompted to save your changes. Choose Save, Don't Save, or Cancel as appropriate. After closing, you return to the Teams meeting interface.
Key takeaways
- When sharing only an application window in Teams, not all pop-up dialog boxes may be visible to participants.
- For comprehensive demonstrations involving multiple dialog boxes, share your entire desktop and keep only the relevant application open.
- Always verify what your audience can see by testing or asking for feedback during your session.
Managing privacy while sharing your screen
- Understand that pop-up windows and other content on your desktop are not visible to others unless you choose to share your screen. The Teams interface displays options such as People, Chat, Reactions, Rooms, More, Camera, Mic, and Share. The Share content panel lets you select Presenter mode, share your entire screen, a specific window, Microsoft Whiteboard, or content from your camera.
-
Click Share, then select the screen or window you want to share. If you select your entire screen, any application or window you open — including pop-ups — will be visible to meeting participants.
-
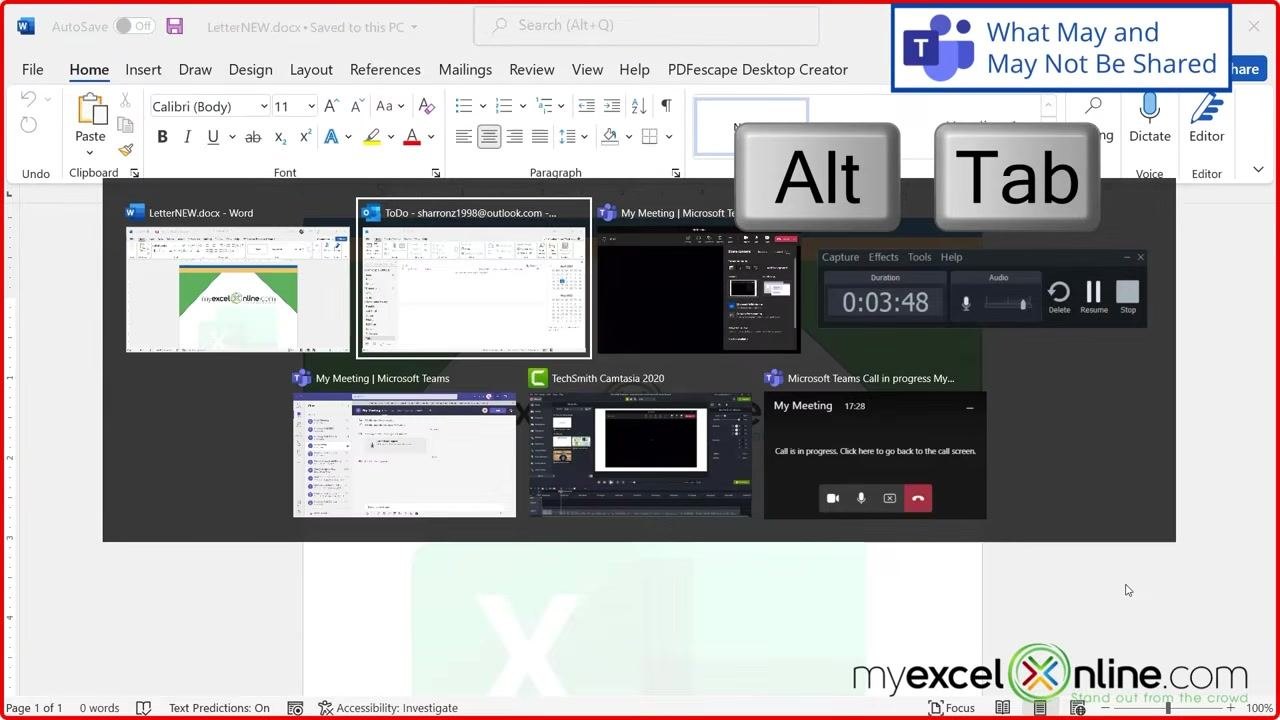
Be cautious when using Alt+Tab or switching between applications while sharing your entire screen, since all open windows, including potentially sensitive information, can be seen by meeting participants.
-
Avoid composing private or sensitive messages while sharing your screen. If you open a new email or document, its contents will be visible to everyone in the meeting.
-
Remember that your shared screen may appear very small to other participants, making small text difficult to read. Consider increasing content size or using larger fonts for better visibility.
-
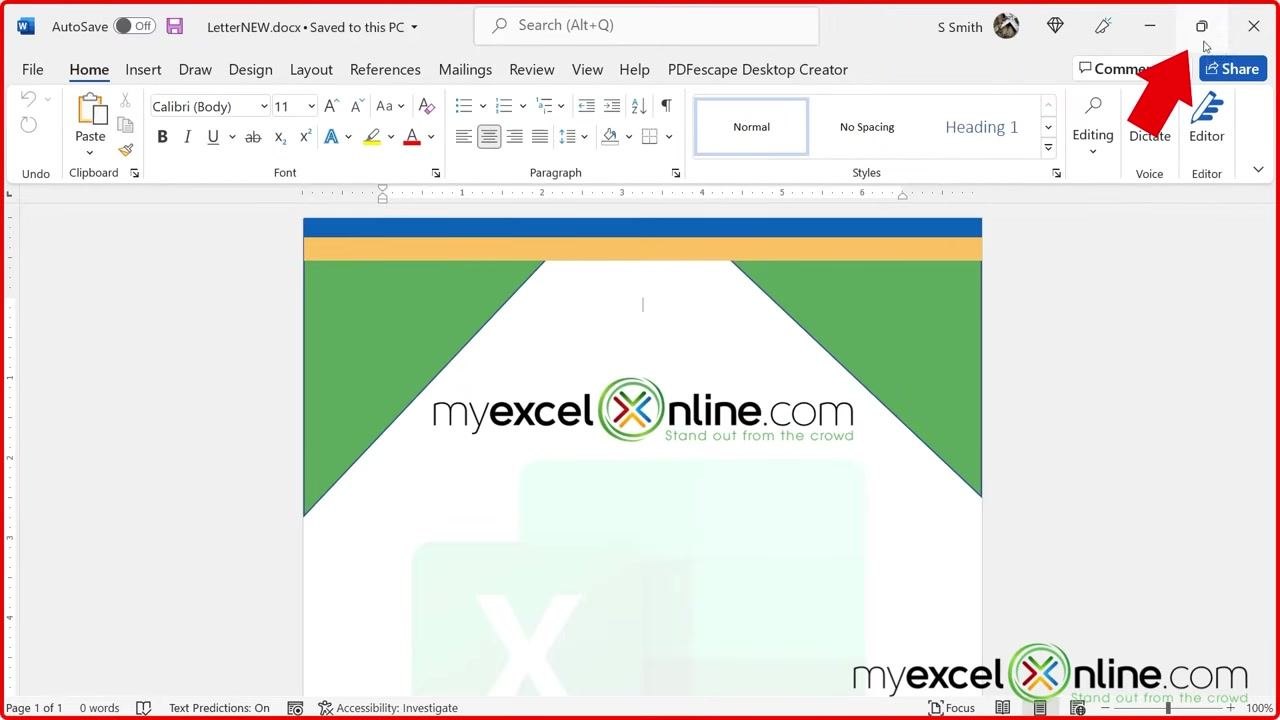
For better readability, restore down (resize) your application window instead of maximizing it before sharing. Click the Restore Down button (the middle button in the top-right corner) to shrink the window. Sharing a non-maximized window makes text appear larger and easier to read for participants.
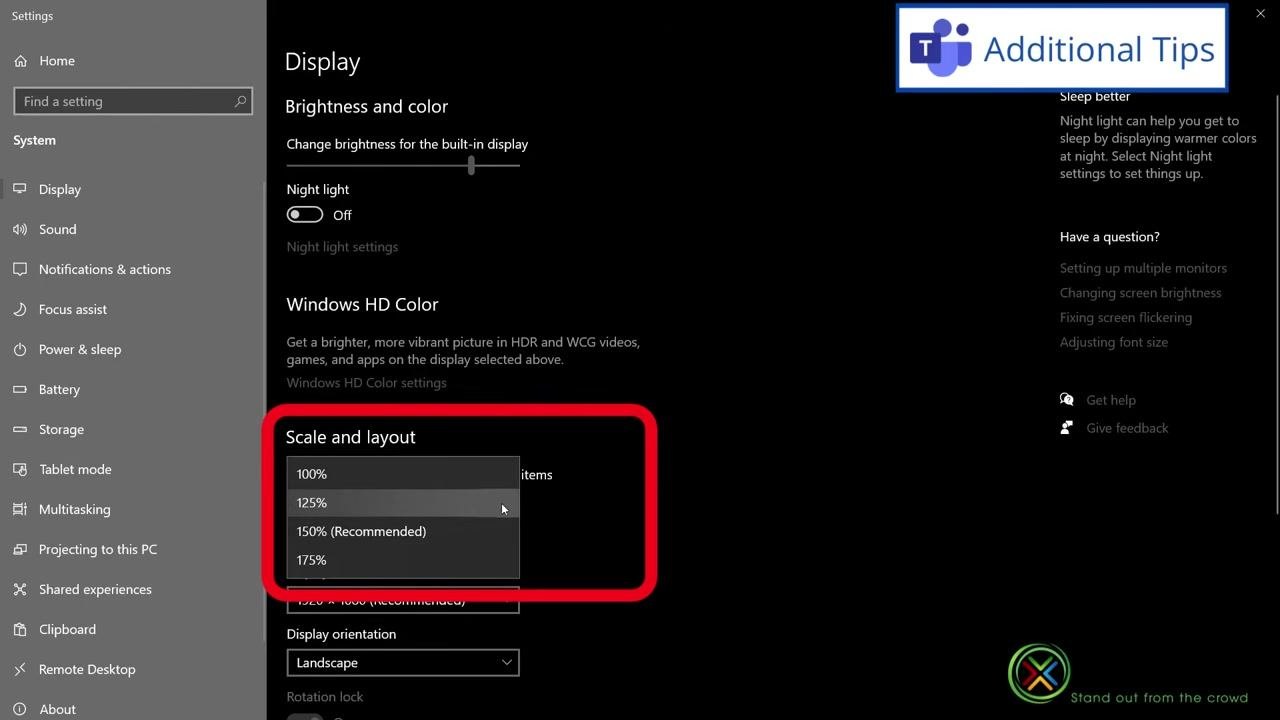
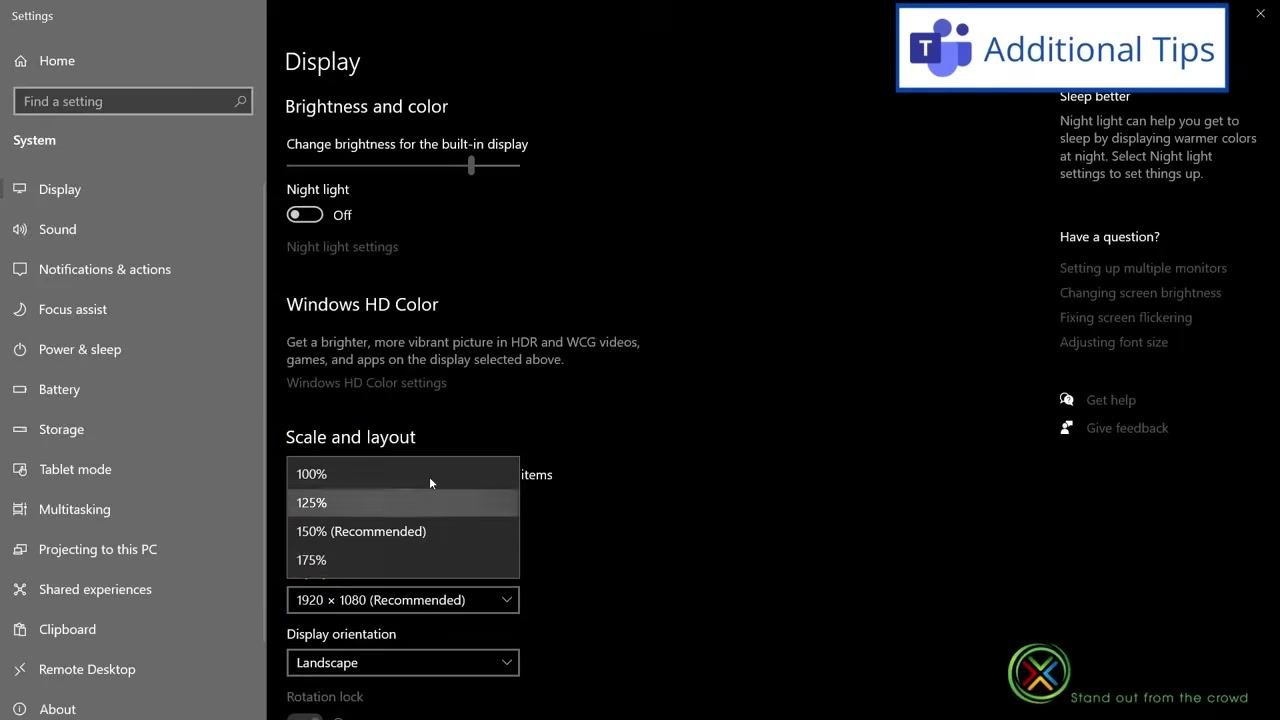
- Adjust your display scaling settings to make text and apps larger for viewers:
- Go to Windows Settings > System > Display.
- Under Scale and layout, change the size of text, apps, and other items to 125%, 150%, or 175% as needed.
This setting helps make shared content more readable for meeting participants.
By following these steps, you can ensure that you share only the intended content in Microsoft Teams meetings and make your shared screen easier for others to view. Always be mindful of what is visible when sharing your entire screen, and use windowed sharing or adjust scaling settings for better clarity.
Advanced tips for sharing windows
- Adjust your display scaling for better readability before sharing:
- Open Windows Settings and navigate to System > Display.
- Under Scale and layout, select a scaling option such as 125%, 150% (Recommended), or 175% to make text and apps larger for viewers.
This adjustment helps meeting participants more easily follow along with your shared content.
- Share a specific window instead of your entire screen for increased privacy:
- In your Teams meeting, click the Share button.
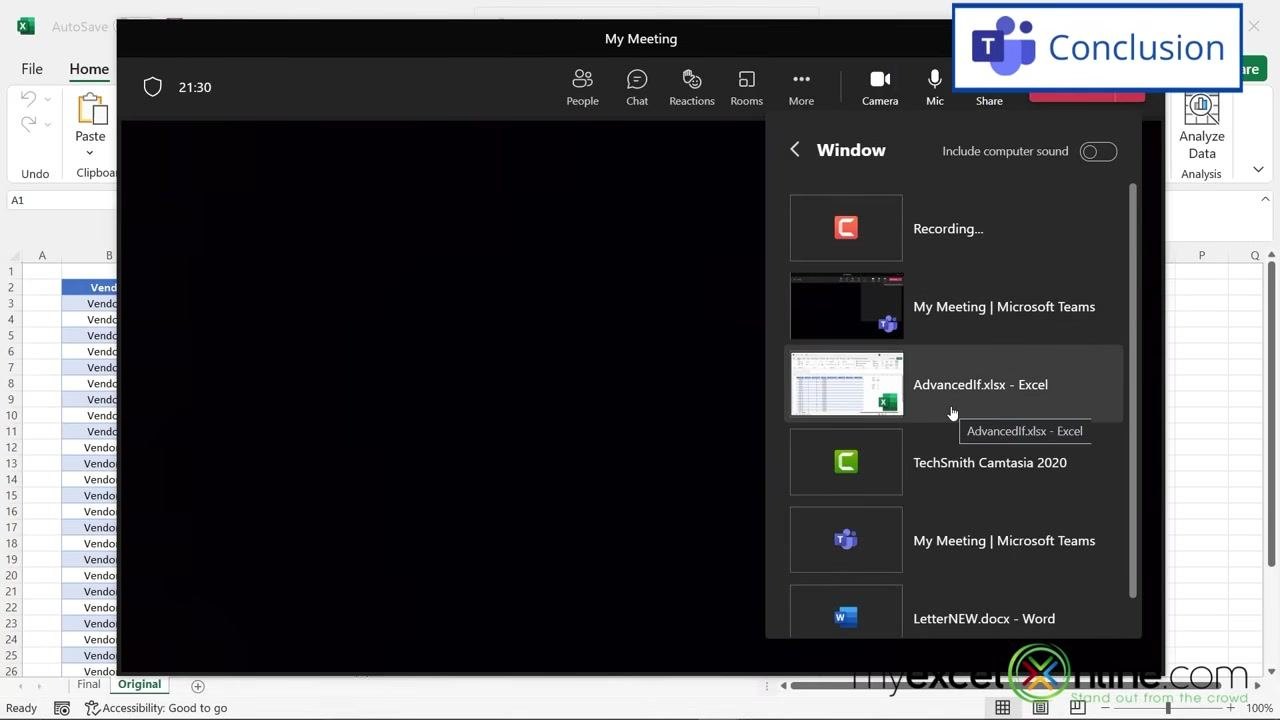
- In the Share content panel, select the Window option to display a list of only your currently open windows.
Only the selected window will be visible to participants, keeping other content private.
-
Only currently open windows appear in the sharing list. If a window or file is not open, it will not appear as an option. For example, the list may display open applications such as "Recording...", "My Meeting | Microsoft Teams", "TechSmith Camtasia 2020", and "LetterNEW.docx - Word." Open the file or application you wish to share before attempting to select it in Teams.
-
Open the desired file or application to make it available for sharing. Once you open a new file (for example, an Excel workbook), it appears in the Teams window sharing list.
Additional resources
- Access additional training resources to improve your Microsoft Excel and Office skills. Explore over 1,000 training videos covering topics such as Intro to Excel, Formulas & Functions, Pivot Tables, Macros & VBA, Power Query, Power Pivot, Power BI, Charts, Data & Analysis, Financial Modeling, and Dashboards. Look for the link in the video description to join the MyExcelOnline Academy.

- These resources are designed to help you gain promotions, pay raises, or new job opportunities by standing out in your career.

-
Subscribe and enable notifications to stay updated on new training content and improve your Excel skills.
-
Connect with MyExcelOnline for more learning opportunities:
- Visit MyExcelOnline.com for more resources.
- Follow on Instagram (@myexcelonline) and LinkedIn (johnmichaloudis) for updates and community engagement.
- Subscribe to the channel for ongoing tips and tutorials.

What's next
By following these steps, you can share content securely and effectively in Microsoft Teams meetings — choosing the right sharing mode for your needs, verifying what participants can see via the red border indicator, and optimizing readability through window sizing and display scaling. To continue building your Excel and Office skills, explore the MyExcelOnline Academy's training library and subscribe for ongoing tips and tutorials.
Generation details: cost, quality tiers
Docsie billed 4,500 credits ($3.15) to analyze this 9-minute video at standard quality. The rewrite, template fill and Word/PDF exports were included. The same video at each quality tier:
| Quality | Frames sampled | Credits | Approx. cost |
|---|---|---|---|
| Draft | every 16-30 s | 2,250 | $1.57 |
| Standard (this guide) | every 8-15 s | 4,500 | $3.15 |
| Detailed | every 4-7 s | 9,000 | $6.30 |
| Ultra | every 1-3 s | 18,000 | $12.60 |
Credits priced at $0.70 per 1,000; plans include a monthly allowance. Enterprise customers on on-premise or bring-your-own-model deployments run this on their own inference and pay no per-video credits.
Generated by Docsie Video-to-Docs on 2026-09-08 from a 8-minute video. Screenshots are frames from the source video and belong to their creator, MyExcelOnline.com, whose original is embedded above. If you own this video and want the guide removed or credited differently, contact us and we will act within one business day.