
How to Use a Tap and Die Set
This procedure explains how to use a tap and die set to create or clean internal and external threads on metal workpieces. Threading adds functionality to your projects—such as building more complex or easier-to-use jigs—and the process is not difficult to learn once you understand the tools and the correct technique.
Video: Using Taps and Dies by NewMetalworker (2011). All credit for the demonstration goes to the creator; watch the original on YouTube. The written guide below was generated from this video by Docsie. Creator? Request a change or removal.
This procedure explains how to use a tap and die set to create or clean internal and external threads on metal workpieces. Threading adds functionality to your projects—such as building more complex or easier-to-use jigs—and the process is not difficult to learn once you understand the tools and the correct technique.

Purpose
This SOP provides the standard method for drilling a hole, tapping it to create internal threads, and using a die to cut or clean external threads on a rod or bolt. It also covers special handling for tapered pipe thread taps.
Scope
This procedure applies to anyone using a tap and die set on metal workpieces, including general-purpose threading (plug style taps and standard dies) and pipe fitting threading (National Pipe Thread taps).
Required equipment
- Drill press
- Correctly sized drill bit (matched to the tap you plan to use)
- Tap and die set, including a plug style tap, an NPT tap, and a standard die
- Tap handle or ratcheting tap handle
- Die handle
- Cutting oil (such as 3-IN-ONE oil)
- Clamps or a vise to secure the workpiece
- Tap drill size reference chart (available in the reference section of newmetalworker.com)
Preparing the hole
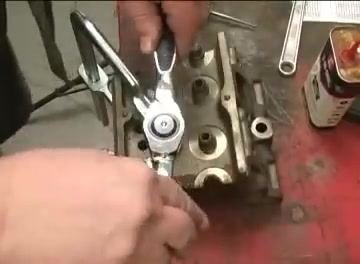
Step 1: Drill a straight, consistent hole. Use a properly set up drill press for best results, and ensure the workpiece is securely clamped before drilling.
Step 2: Drill the correct size hole for the tap you plan to use. Refer to a tap drill size chart for accuracy. The reference section of newmetalworker.com provides several charts with the correct drill sizes for different taps.
Identifying your taps and dies
Step 3: Recognize the common types of taps and dies. - Plug Style Tap: The most common type, typically used for general threading. - National Pipe Thread (NPT) Tap: Common for pipe fittings, but requires special attention (see the special considerations section below). - Standard Die: Used for cutting external threads on rods or bolts.
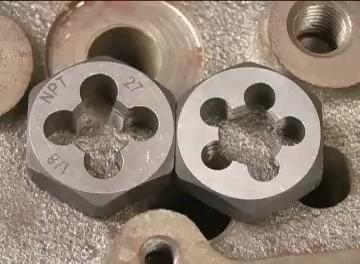
Step 4: Identify the parts of a die before installing it. The bottom side of the die usually has writing (for example, "NPT 1/8 27"). The cutting threads taper out to nothing on one side (bottom) and are full on the other (top). When installing the die into a holder, make sure the bottom (with writing) faces out.
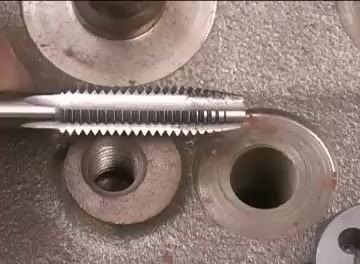
Step 5: Examine the plug style tap before use. Notice the tapered end, which helps you start the tap in the hole. Keep in mind that this taper means threads will not reach all the way to the bottom of a blind hole.
Step 6: Account for the tapered section when determining hole depth. Most threaded holes have an unthreaded space at the bottom to collect debris or scale, preventing interference with the bolt.
Tapping a hole
Step 7: Start the tap in the hole. Insert the tap into the correctly sized hole. The tapered end helps you get it started straight. Focus on keeping the tap perfectly aligned with the hole for the first few turns.
Step 8: Apply cutting oil to the tap. Add a small amount of oil to the tap before you begin cutting. The oil helps the tap cut cleanly and keeps chips from clogging the flutes.
Step 9: Cut the threads using a forward-and-back motion. Turn the tap about a half to one full turn forward, then back it up a quarter to a half turn to break the chips. Repeat this forward-and-back motion until the tap is fully through the hole or reaches the desired depth. This prevents chips from binding and ensures clean threads.
Step 10: Use a ratcheting tap handle if available. A ratcheting tap handle makes tapping easier and straighter, since it lets you keep the tap aligned without repositioning your hands. Once the tap is well established in the hole, you can spin it more easily, similar to a regular handle. Use the directional lever to switch between cutting and backing up to break chips.
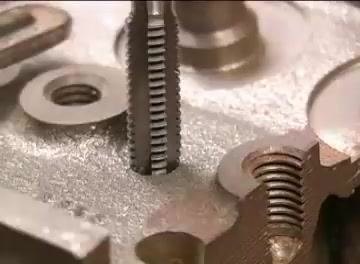
Step 11: Clean the threads after cutting. Remove the tap from the hole and clean the flutes to remove all chips. Add a little more oil and run the tap through the threads a couple more times to ensure they are clean and smooth.
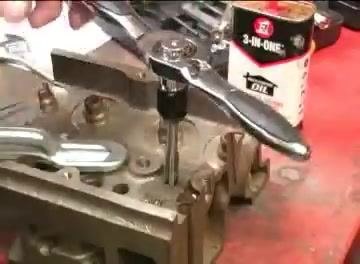
Step 12: Test the threads. Screw the intended piece, such as a bolt, into the newly threaded hole to check the fit and quality of the threads.
Using a die to cut or clean external threads
Step 13: Start the die on the rod or bolt. Place the die onto the end of the rod or bolt, ensuring it is square to the workpiece. Proper alignment is crucial whether you are cutting new threads or cleaning up old ones.
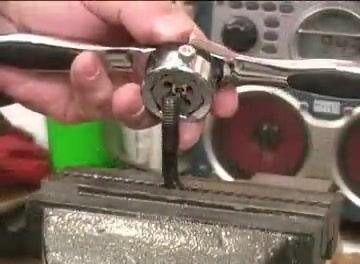
Step 14: Cut or clean the threads. Turn the die handle to cut or clean the threads. As with tapping, periodically back up the die to break chips and prevent binding.
Step 15: Perform a final cleaning pass. After threading, run the die up and down the threads a couple of times to ensure they are clean and smooth.
Special considerations for tapered pipe thread taps
Step 16: Understand the purpose of the taper. A National Pipe Thread (NPT) tap is tapered along its full length. This taper is designed so that when threading a pipe or plug, the threads seal as the plug is tightened, preventing leaks.
Step 17: Stop tapping before passing completely through the hole. Do not thread all the way through the hole with a tapered tap. Stop threading with several threads—typically six to eight—still visible above the hole. This ensures the plug or pipe will tighten and seal before passing completely through. Try fitting the plug after stopping to check for proper engagement and sealing.

Safety notes
Always read, understand, and follow all instructions provided with your tools. Prioritize safety by wearing appropriate personal protective equipment and working in a well-ventilated area. Refer to manufacturer guidelines for specific tool use and maintenance.
Summary and verification
- Use a drill press for straight, consistent holes.
- Always drill the correct size hole for your tap, using reference charts.
- Identify and use the correct tap or die for your application.
- Install dies with the bottom (writing side) facing out in the holder.
- Allow for the tapered end of the tap when determining hole depth.
- Leave a small unthreaded space at the bottom of blind holes for debris.
- For tapered pipe thread taps, stop with six to eight threads still visible above the hole and verify the plug fits and seals properly.
- Verify internal threads by screwing in the intended bolt, and verify external threads by checking fit on the mating part.
What's next
Once you have confirmed clean, well-fitting threads, you can proceed with assembling your project using the newly threaded parts. Always keep oil on hand, work chips loose frequently, and follow manufacturer safety guidance each time you use a tap and die set.
Generation details: cost, quality tiers
Docsie billed 2,000 credits ($1.40) to analyze this 4-minute video at standard quality. The rewrite, template fill and Word/PDF exports were included. The same video at each quality tier:
| Quality | Frames sampled | Credits | Approx. cost |
|---|---|---|---|
| Draft | every 16-30 s | 1,000 | $0.70 |
| Standard (this guide) | every 8-15 s | 2,000 | $1.40 |
| Detailed | every 4-7 s | 4,000 | $2.80 |
| Ultra | every 1-3 s | 8,000 | $5.60 |
Credits priced at $0.70 per 1,000; plans include a monthly allowance. Enterprise customers on on-premise or bring-your-own-model deployments run this on their own inference and pay no per-video credits.
Generated by Docsie Video-to-Docs on 2026-09-09 from a 3-minute video. Screenshots are frames from the source video and belong to their creator, NewMetalworker, whose original is embedded above. If you own this video and want the guide removed or credited differently, contact us and we will act within one business day.