
How to Use a Micrometer
This procedure explains how to use a micrometer, a precision measuring instrument designed to measure small distances with high accuracy. It covers identifying the parts of the tool, reading the sleeve and thimble scales, holding the micrometer correctly, measuring a workpiece, and reading a micrometer to the fourth decimal place using the auxiliary (vernier) scale.
Video: How to Read a Micrometer by Travers Tool Co (2022). All credit for the demonstration goes to the creator; watch the original on YouTube. The written guide below was generated from this video by Docsie. Creator? Request a change or removal.
This procedure explains how to use a micrometer, a precision measuring instrument designed to measure small distances with high accuracy. It covers identifying the parts of the tool, reading the sleeve and thimble scales, holding the micrometer correctly, measuring a workpiece, and reading a micrometer to the fourth decimal place using the auxiliary (vernier) scale.
Purpose
This SOP provides a repeatable method for reading and operating a micrometer so that measurements are accurate, consistent, and correctly interpreted to three or four decimal places.
Scope
This procedure applies to standard one-inch micrometers with a sleeve, thimble, anvil, spindle, and ratchet stop. It covers basic scale reading, workpiece measurement, and advanced reading techniques including the auxiliary scale for four-decimal precision.
Required equipment
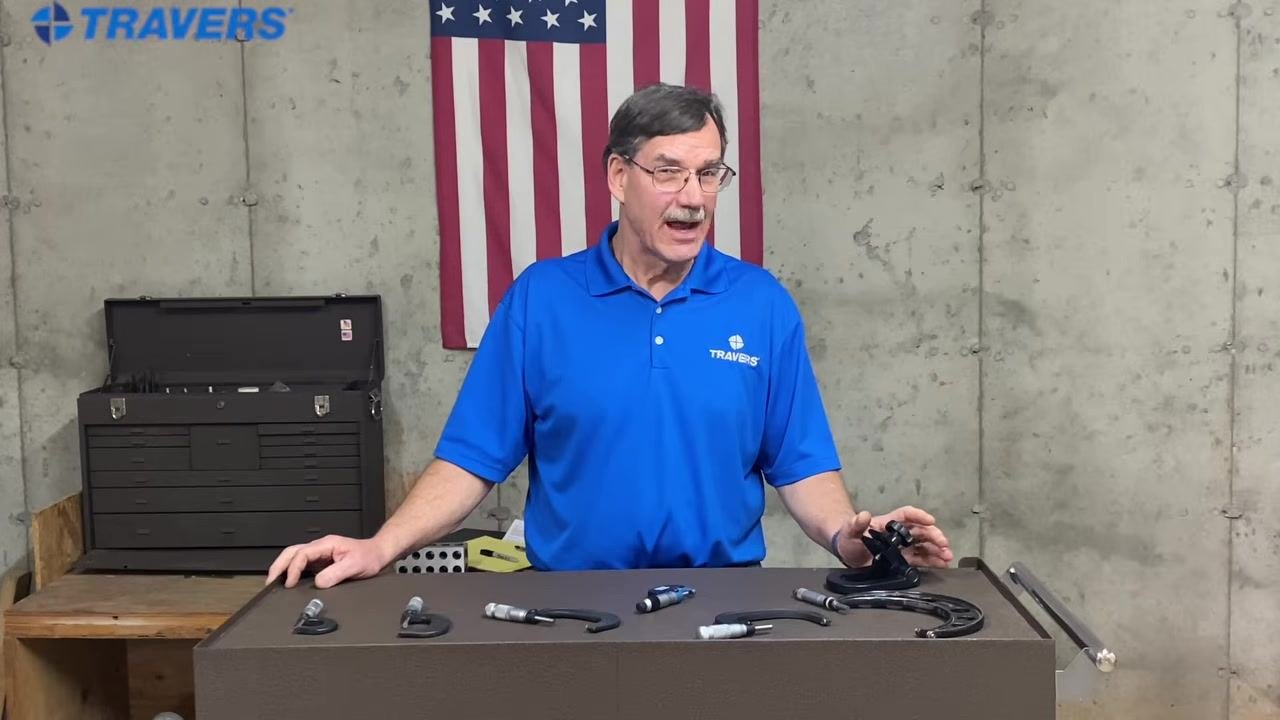
- A standard micrometer (typical range: one inch; multiple sizes exist for different measurement ranges)
- A workpiece to measure (for example, a washer)
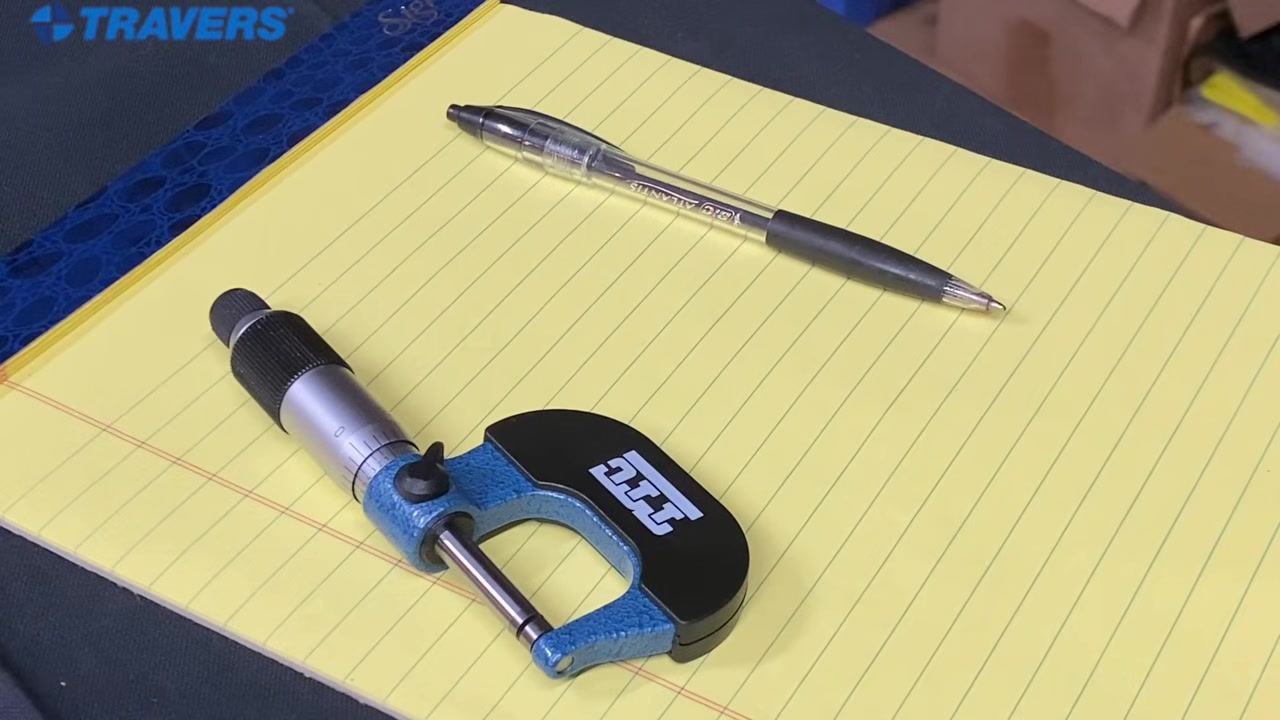
- A pen or pointer for indicating scale lines during practice or verification
- A flat, organized workspace (a notepad is useful for recording readings)
Procedure
Identify the micrometer parts
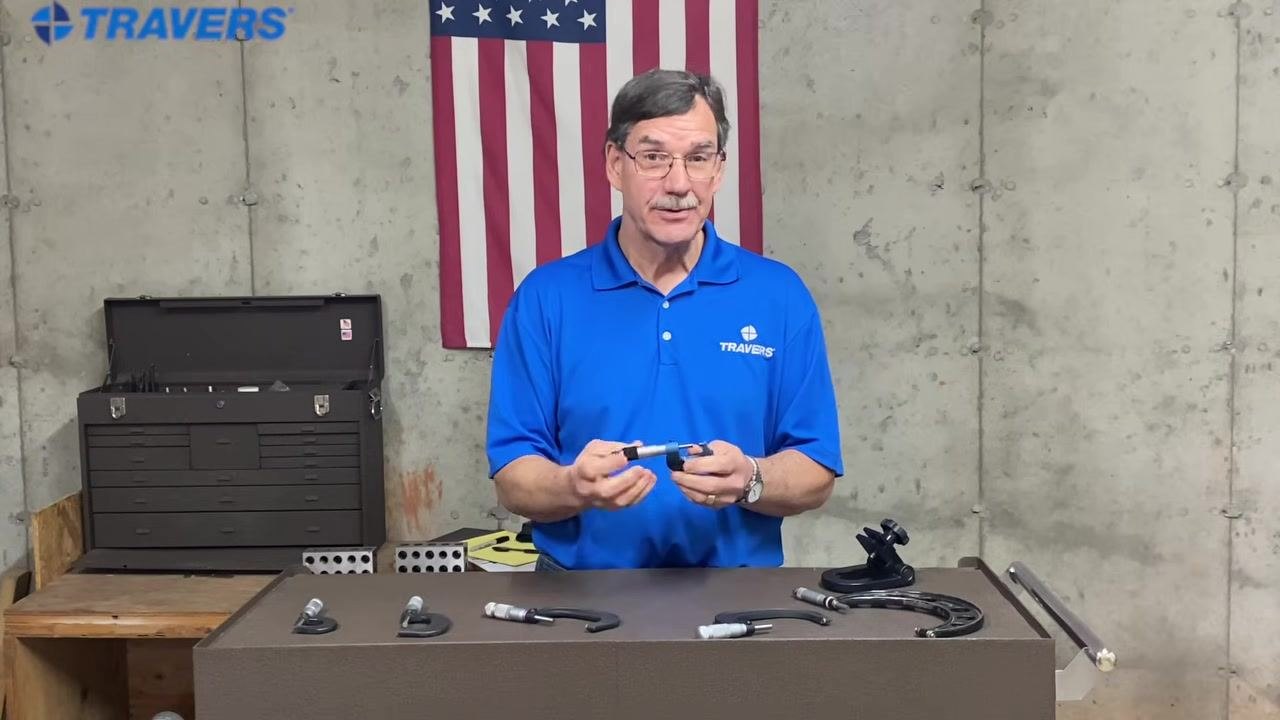
- Recognize the two main parts of a micrometer relevant to reading measurements:
- Sleeve: the stationary part with a linear scale and numbers.
- Thimble: the rotating part with a circular scale, used to adjust and read fine measurements.
- Look closely at the sleeve and thimble to confirm their layout:
- The sleeve has numbers and lines running along its length.
- The thimble is the part you turn to open or close the micrometer.
Confirm the zero reading
- Check the alignment when the micrometer is fully closed and not measuring anything:
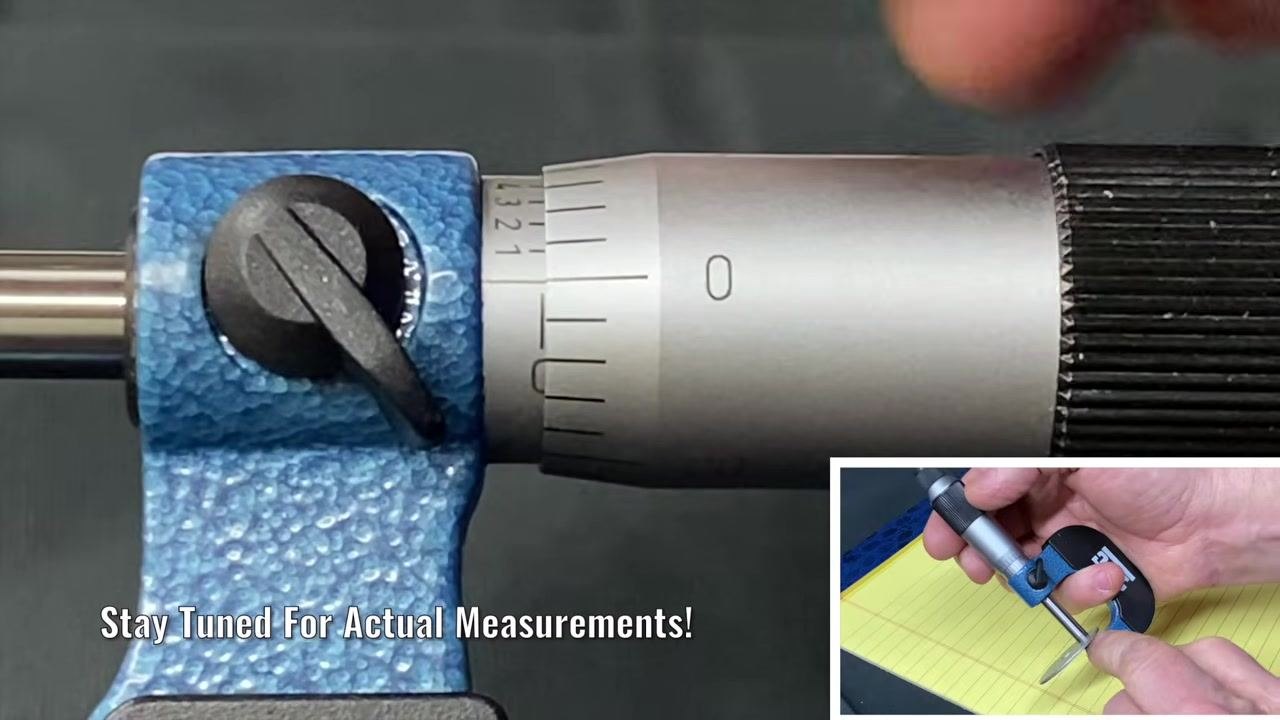
- The "0" on the thimble and the reference line on the sleeve should align exactly, indicating a measurement of zero.
- Confirm the zero position before beginning any measurement:
- Ensure the zero on the thimble lines up exactly with the reference line on the sleeve for an accurate starting point.
Read the micrometer in 0.025-inch increments
-
Make one full revolution of the thimble:
- Rotate the thimble one complete turn. This moves the spindle by 0.025 inches (25 thousandths).
- The "25" mark on the thimble should now align with the reference line on the sleeve.
- The next line on the sleeve will also appear, confirming the 0.025-inch movement.
-
Read the 25-thousandths position after one full revolution:
- Check that the "25" on the thimble aligns with the reference line.
- Look for the small line on the sleeve that confirms the 0.025-inch increment.
-
Use a pointer to highlight the reading for clarity:
- Indicate the exact line on the sleeve that corresponds to the thimble's position.
-
Continue rotating the thimble for additional increments:
- Each full revolution adds another 0.025 inches.
- At four full revolutions, the "1" (representing 0.100 inches) begins to appear on the sleeve.
- This confirms that the micrometer measures in increments of 0.025 inches per revolution, up to its maximum range.
Read actual measurements on the sleeve and thimble
-
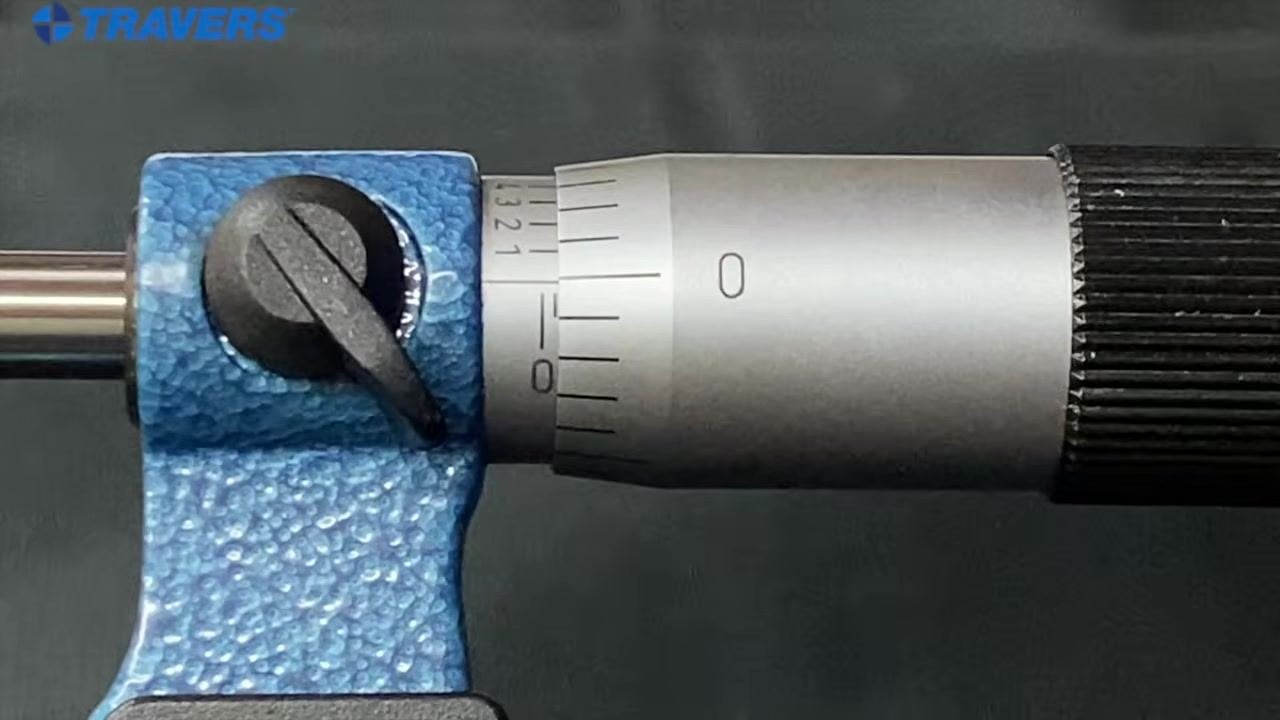
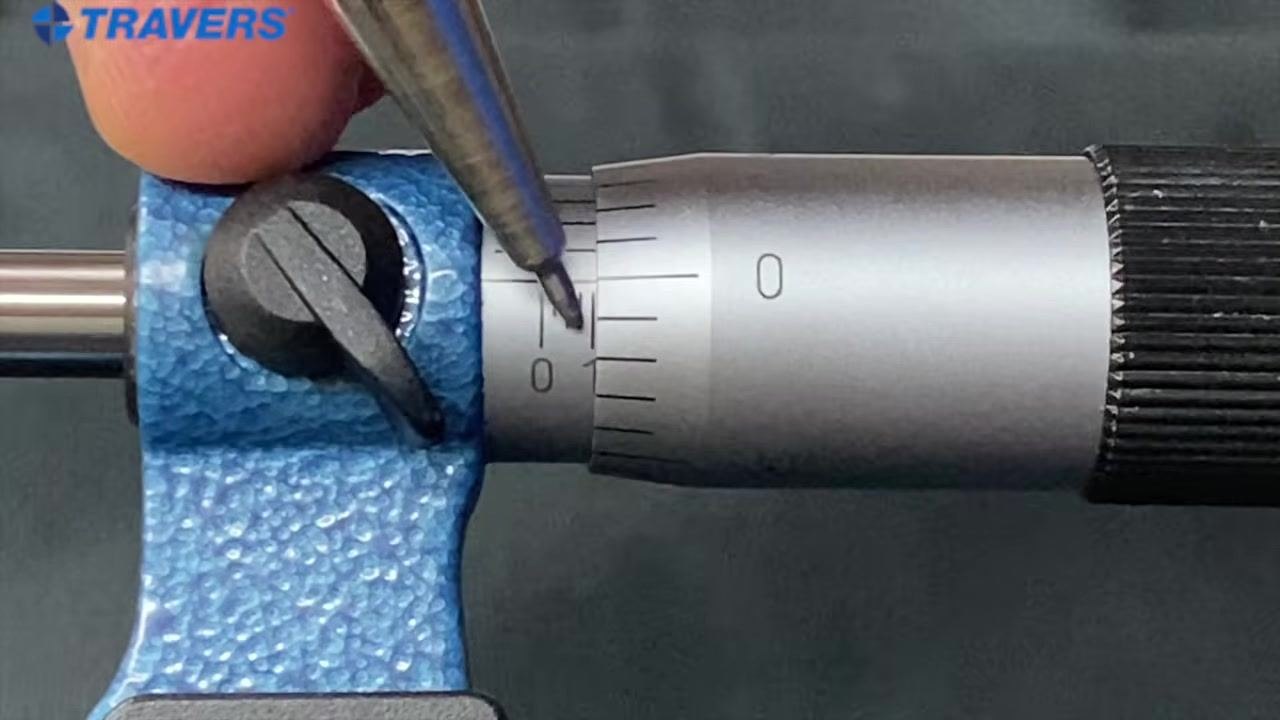
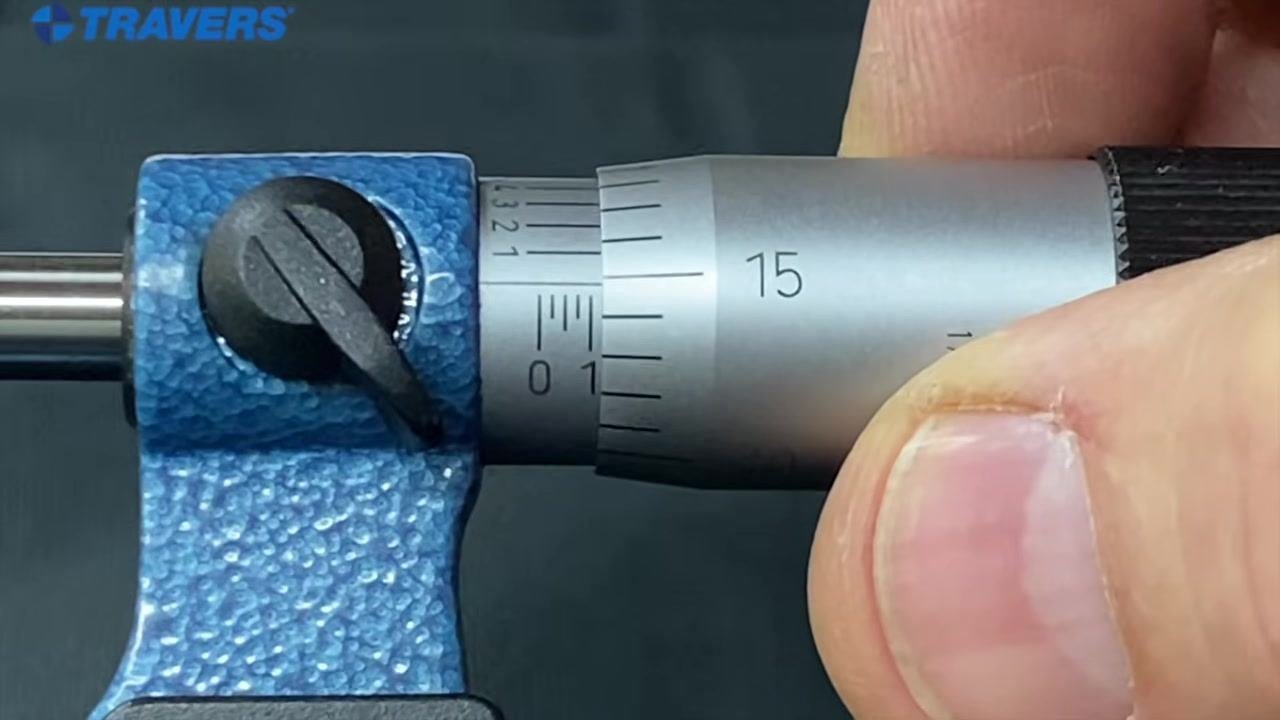
Read a measurement of 0.100 inches (100 thousandths):
- The sleeve's "1" mark (0.100 inches) is just visible, starting to emerge from behind the thimble.
- The "0" on the thimble aligns with the reference line on the sleeve.
- This confirms a reading of exactly 0.100 inches.
-
Set the micrometer to 0.110 inches (110 thousandths):
- Rotate the thimble so the "10" mark aligns with the reference line on the sleeve.
- The sleeve shows the "1" mark (0.100 inches) fully visible.
- The thimble shows "10" aligned, adding 0.010 inches.
- The total measurement is 0.110 inches.
-
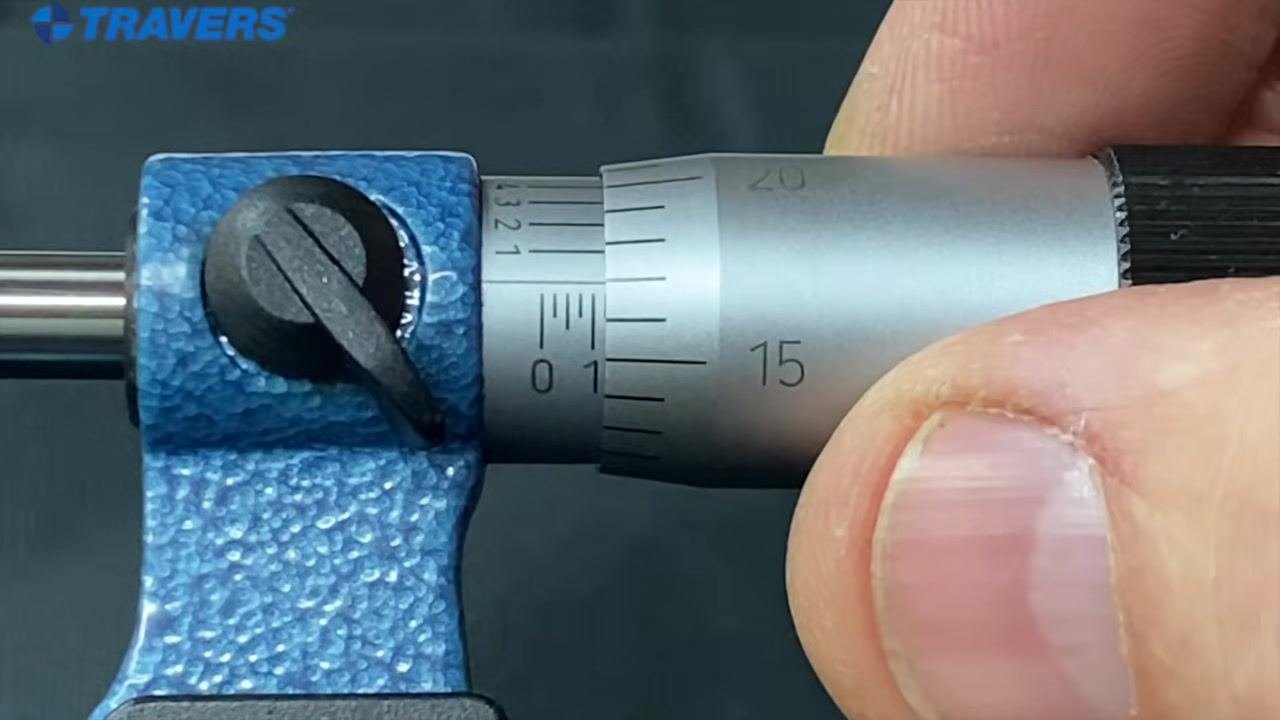
Read a measurement of 0.115 inches (115 thousandths):
- Rotate the thimble so the "15" mark aligns with the reference line.
- The sleeve shows "1" (0.100 inches); the thimble shows "15" aligned, adding 0.015 inches.
- The total measurement is 0.115 inches.
-
Read a measurement of 0.117 inches (117 thousandths):
- Rotate the thimble so the "17" mark aligns with the reference line.
- The sleeve shows "1" (0.100 inches); the thimble shows "17" aligned, adding 0.017 inches.
- The total measurement is 0.117 inches.
-
Practice with a random measurement:
- Set the micrometer to a new position and observe the scales.
- For example, if the sleeve shows "2" (0.200 inches) and the thimble shows "35" aligned (0.035 inches), the total is 0.235 inches.
- Confirm by adding the sleeve and thimble values: 0.200 + 0.035 = 0.235 inches.
Read measurements beyond 0.500 inch
-
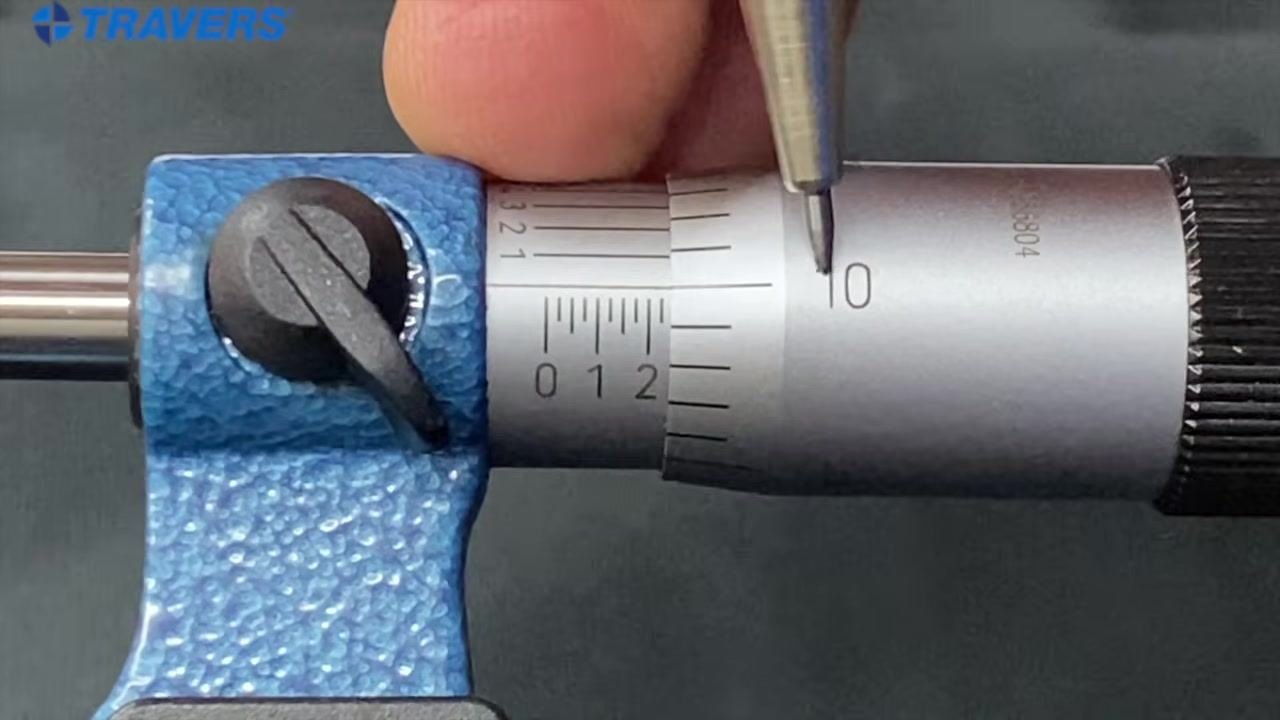
Identify the half-inch mark on the micrometer:
- Locate the "5" mark on the sleeve, representing 0.500 inches.
- Confirm the thimble is set to "0", aligning with the reference line, indicating exactly 0.500 inches.
-
Add values from the thimble for measurements above 0.500 inches:
- Rotate the thimble to align the "5" mark with the reference line for 0.505 inches.
- Continue rotating to "10" for 0.510 inches, "25" for 0.525 inches, and so on.
- Each increment on the thimble adds 0.001 inches (one thousandth) to the base sleeve reading.
-
Practice reading incremental values:
- Set the thimble to various positions and add the thimble value to the sleeve value.
- If the sleeve shows "5" (0.500 inches) and the thimble shows "0", the total is 0.500 inches.
-
Confirm the three-decimal-place limitation:
- Using only the sleeve and thimble, you can read measurements to three places past the decimal (for example, 0.510 inches).
- Add the sleeve and thimble values together for the final measurement.
-
Locate the auxiliary lines for four-decimal precision:
- Notice the additional set of lines and numbers on the sleeve, located behind the main scale.
- These lines extend accuracy to four decimal places.
- There are 10 lines, numbered 1 to 9, with the 10th line marked as "0".
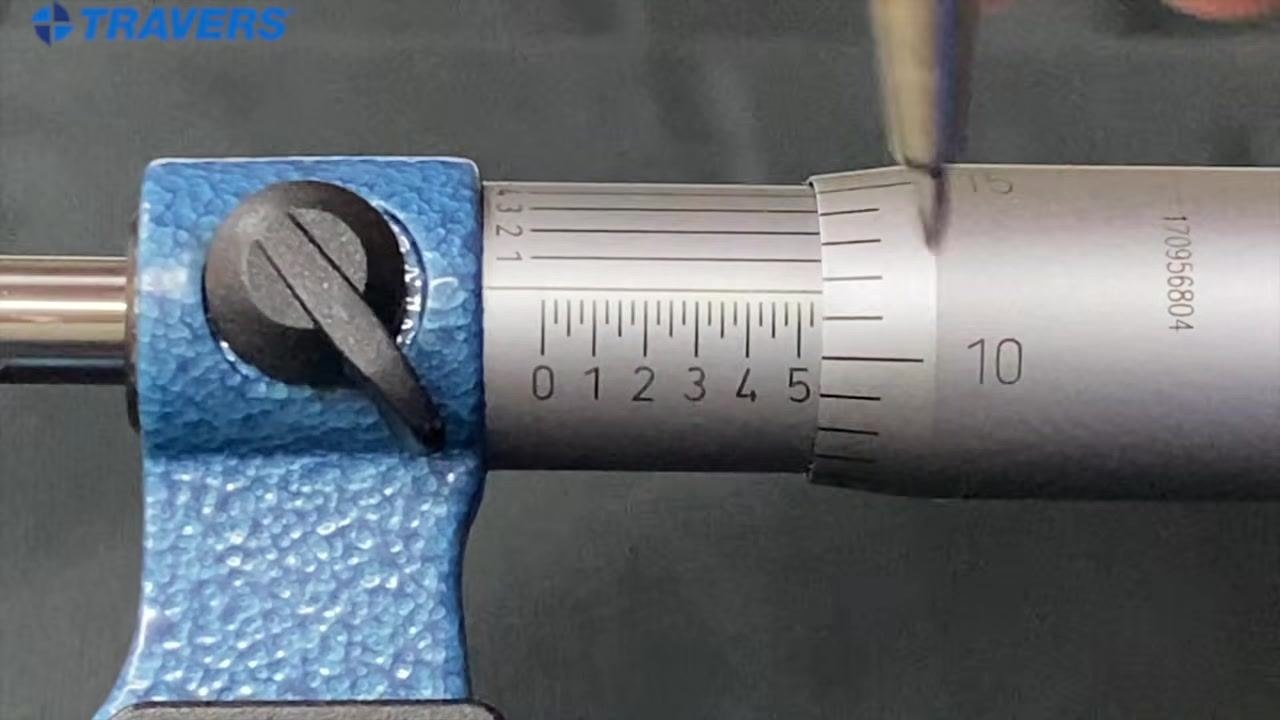
- Prepare to read 0.505 inches using the auxiliary scale:
- Observe the sleeve showing the "5" mark (0.500 inches).
- Add the thimble value as before.
- Use the auxiliary lines for even finer measurement.
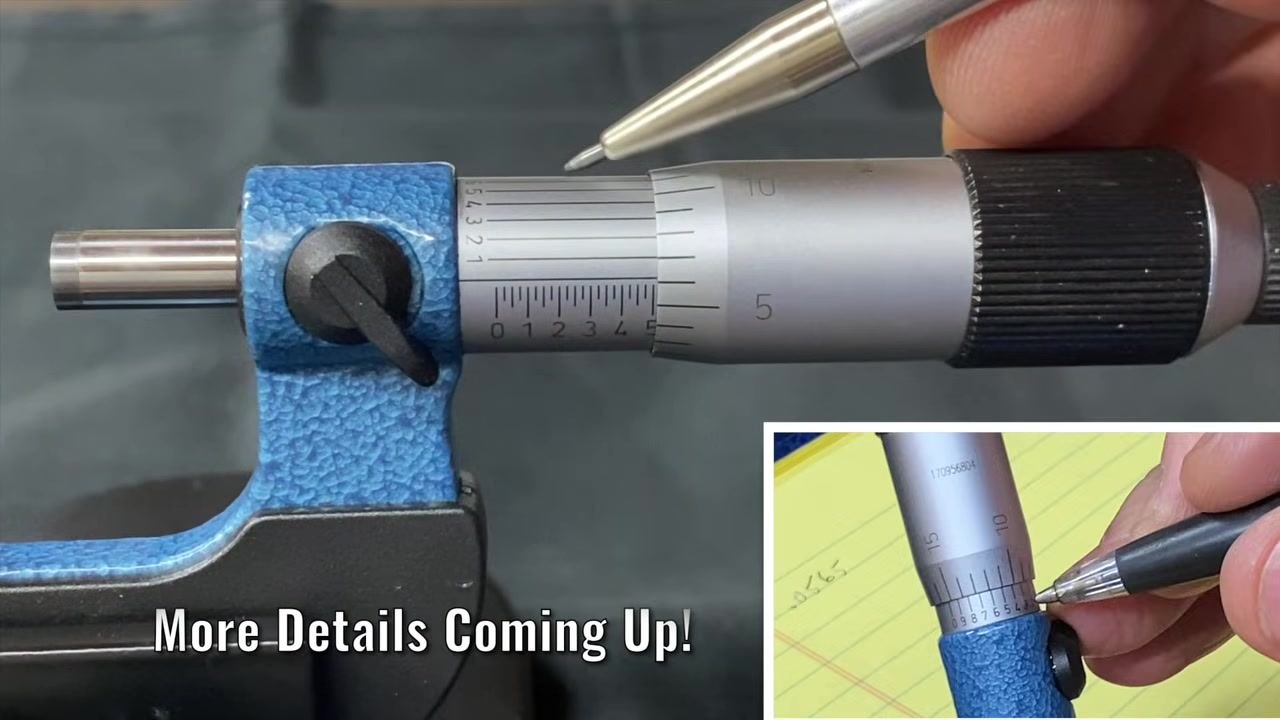
Use the auxiliary scale for four-decimal precision
- Add the thimble value to the sleeve reading:
- Locate the "5" mark on the sleeve (0.500 inches).
- Find the "5" mark on the thimble aligned with the reference line, adding 0.005 inches.
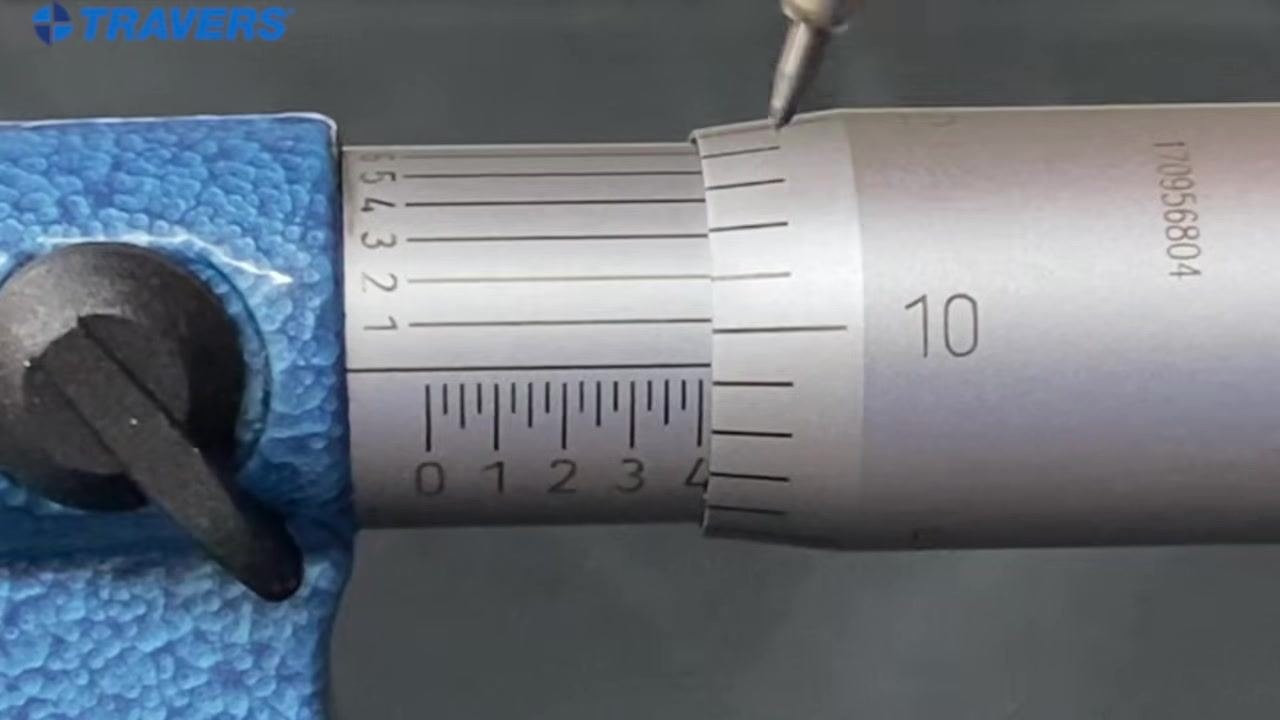
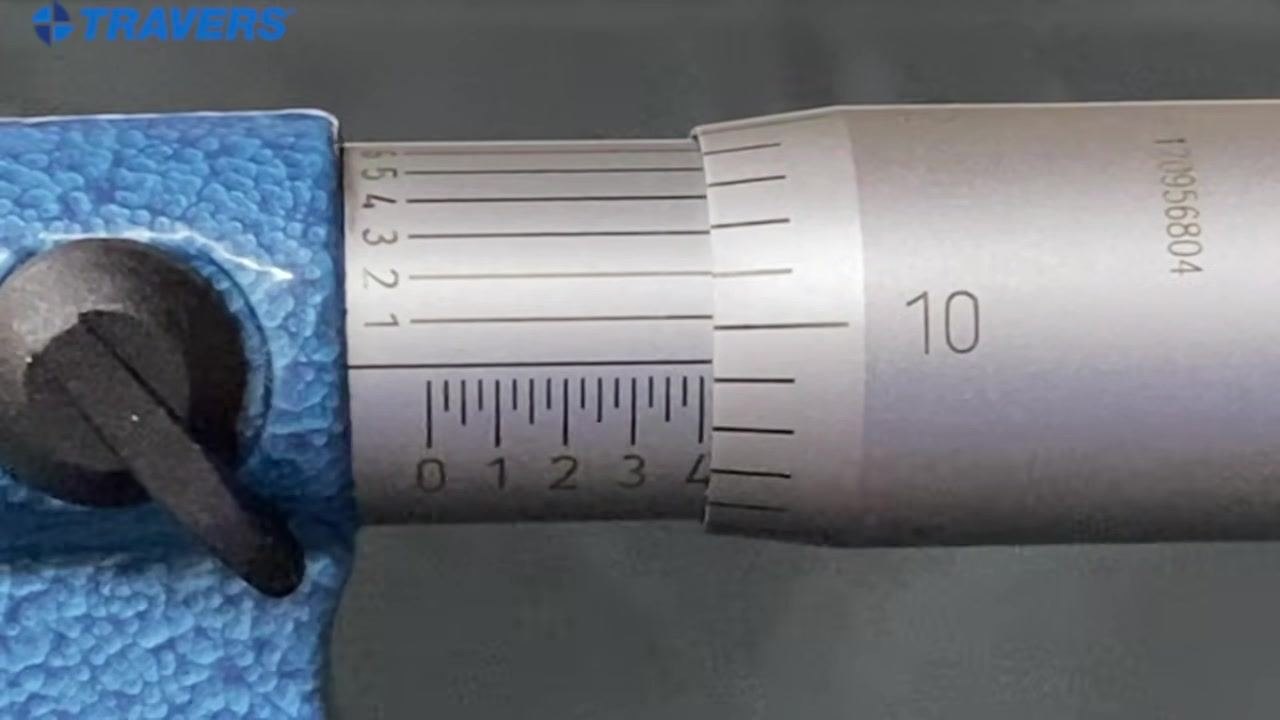
- The running total is 0.505 inches. Note the set of vertical lines and numbers (1–5) on the sleeve, just above the main scale — this is the auxiliary (vernier) scale used to read the fourth decimal place (ten-thousandths of an inch).
Read a micrometer to the fourth decimal place
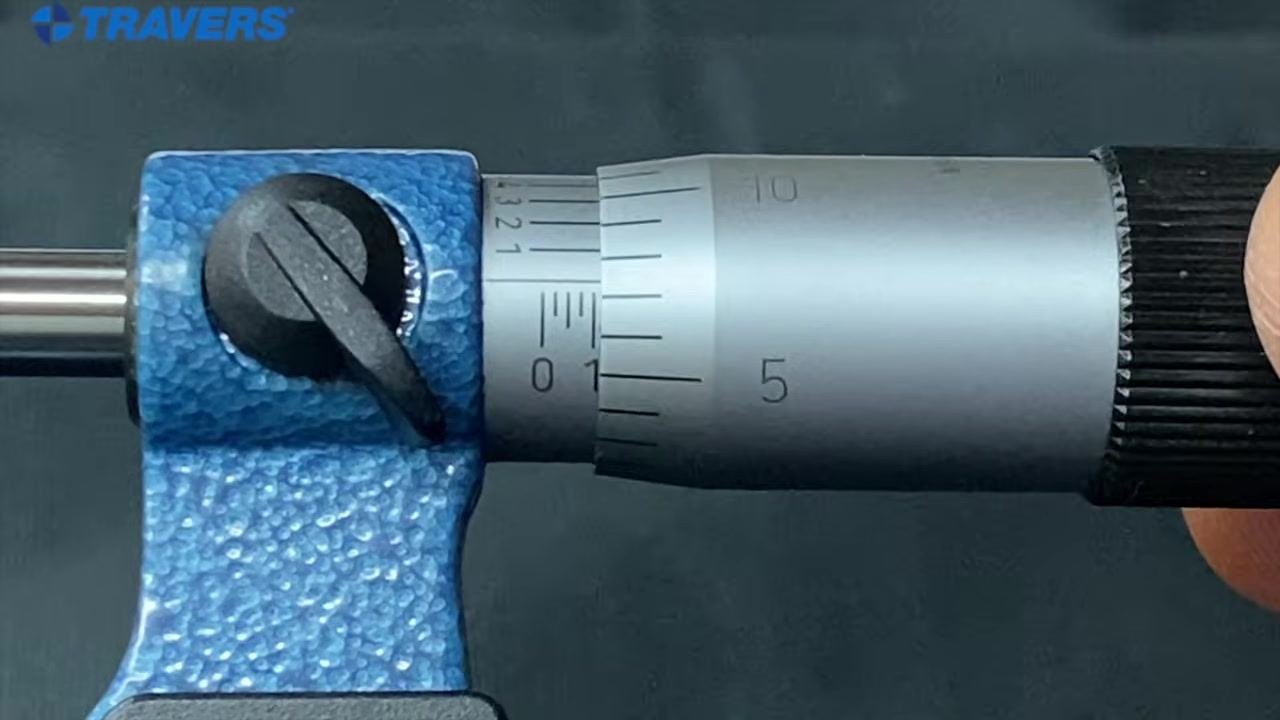
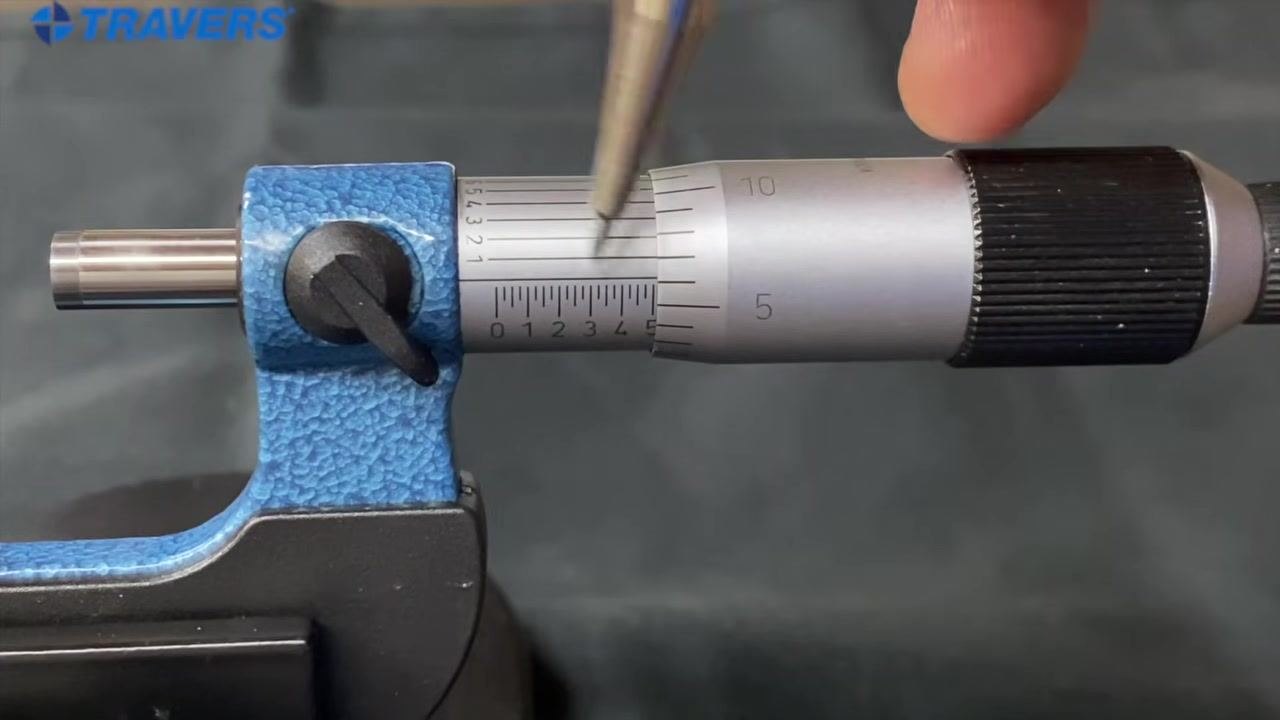
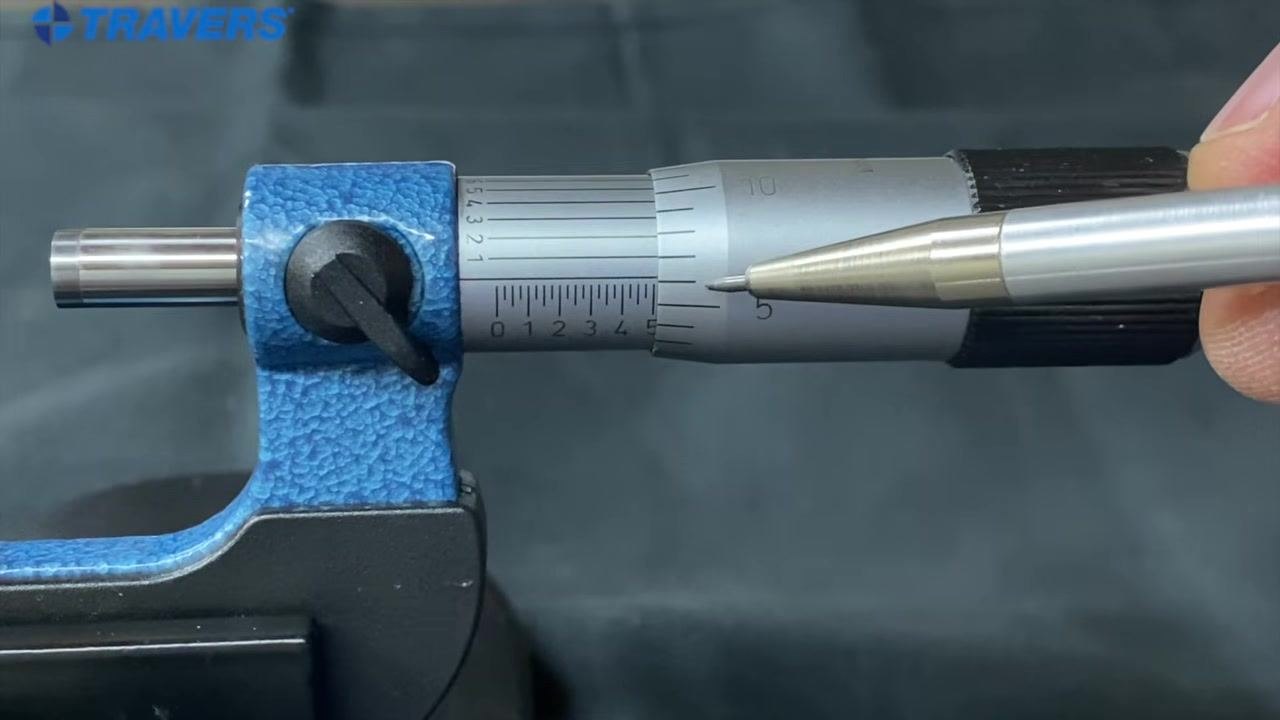
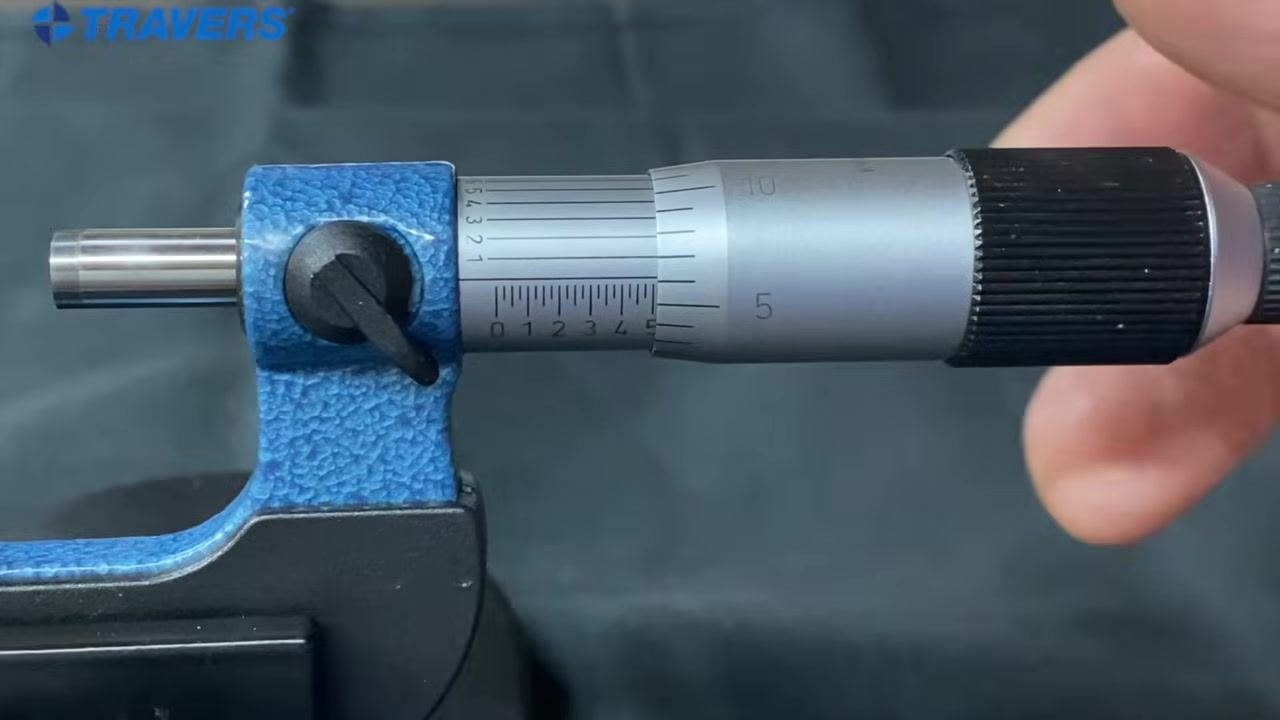
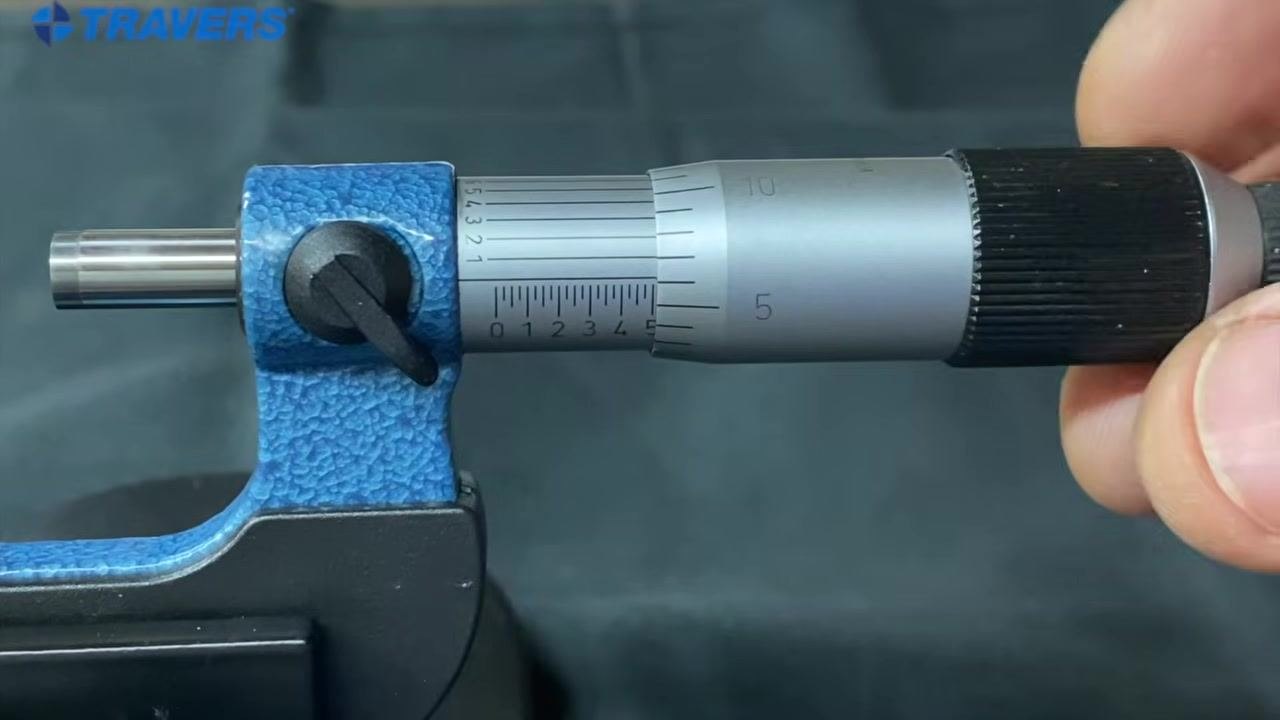
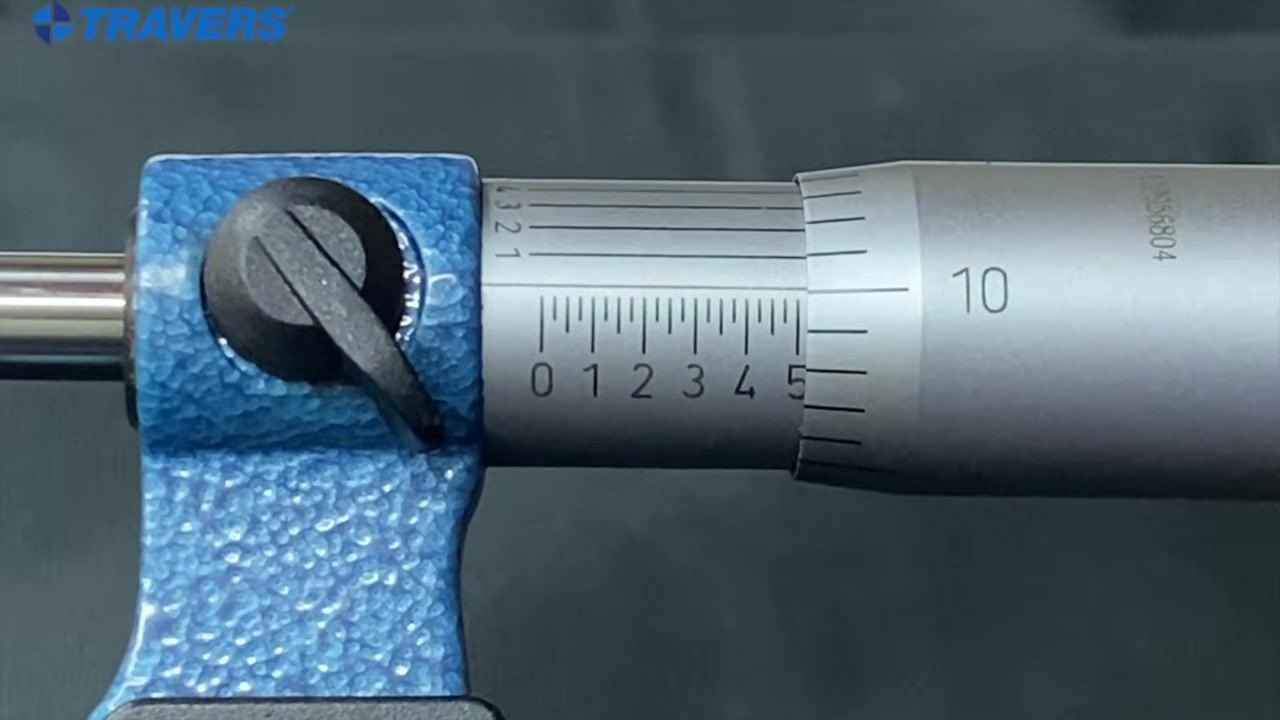
- Locate the reference line and read the main scale:
- Find the horizontal reference line on the sleeve.
- Read the value on the main scale just to the left of the thimble edge. In this example, the reference line falls past the "5" mark, so the reading is 0.506 (the main scale reads 0.5, and the thimble adds 0.006).
-
Check the vernier scale for alignment:
- Look closely at the vernier scale to determine which line, if any, aligns perfectly with a line on the thimble.
- Use the line that aligns best for the most precise reading; a line that is not quite in alignment should be disregarded in favor of one that matches exactly.
-
Understand decimal place relevance:
- When reading to the fourth place, only the aligned vernier line matters.
- Focus on the vernier alignment rather than the thimble numbers at this level of precision.
-
Combine the readings for the final measurement:
- Add the main scale, thimble, and vernier readings together.
- Example: main scale = 0.5, thimble = 0.006, vernier = 0.0003, resulting in a total of 0.5063.
-
Reset the micrometer for a new measurement:
- Adjust the thimble to a new position to practice another reading.
-
Read a new measurement example:
- Locate the "10" mark on the thimble and identify the aligned line, in this case a "9", giving a reading of 4.409.
-
Confirm the new measurement:
- Re-check the pen's position on the aligned line to reinforce the reading of 4.409.
-
Verify alignment from a direct angle:
- View the scales straight-on rather than at an angle, since an off-angle view can make it difficult to see which line truly lines up.
-
Confirm the final reading:
- Combine the main, thimble, and vernier readings to arrive at a final value of 0.4093.
Understand decimal place terminology
- Recognize the value of each decimal place before continuing:
- The first place past the decimal (for example, 0.1) represents a tenth of an inch.
- Most machine shops read measurements to three places past the decimal (for example, 0.100).
- The third place past the decimal (for example, 0.001) represents one thousandth of an inch.
- In machine shop terminology, "a tenth" refers to one ten-thousandth of an inch (0.0001) — not a tenth of an inch. Keep this distinction in mind whenever a colleague refers to "a tenth" during measurement work.
Hold a micrometer correctly
- Prepare your tools and workspace:
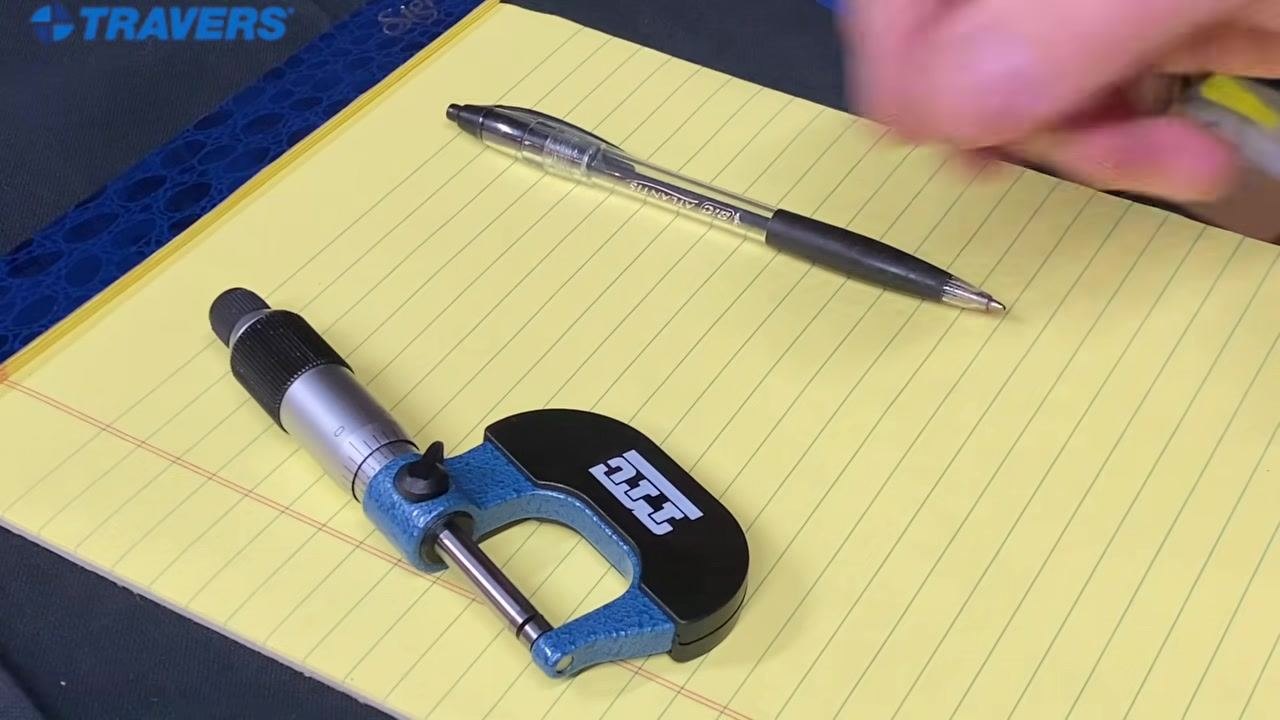
- Place the micrometer and a pen on a flat surface, such as a notepad, for easy note-taking.
- Keep the workspace clean and organized before you begin.
-
Reach for the micrometer to begin the hands-on measurement:
- Pick up the micrometer, keeping the pen nearby for note-taking during the process.
-
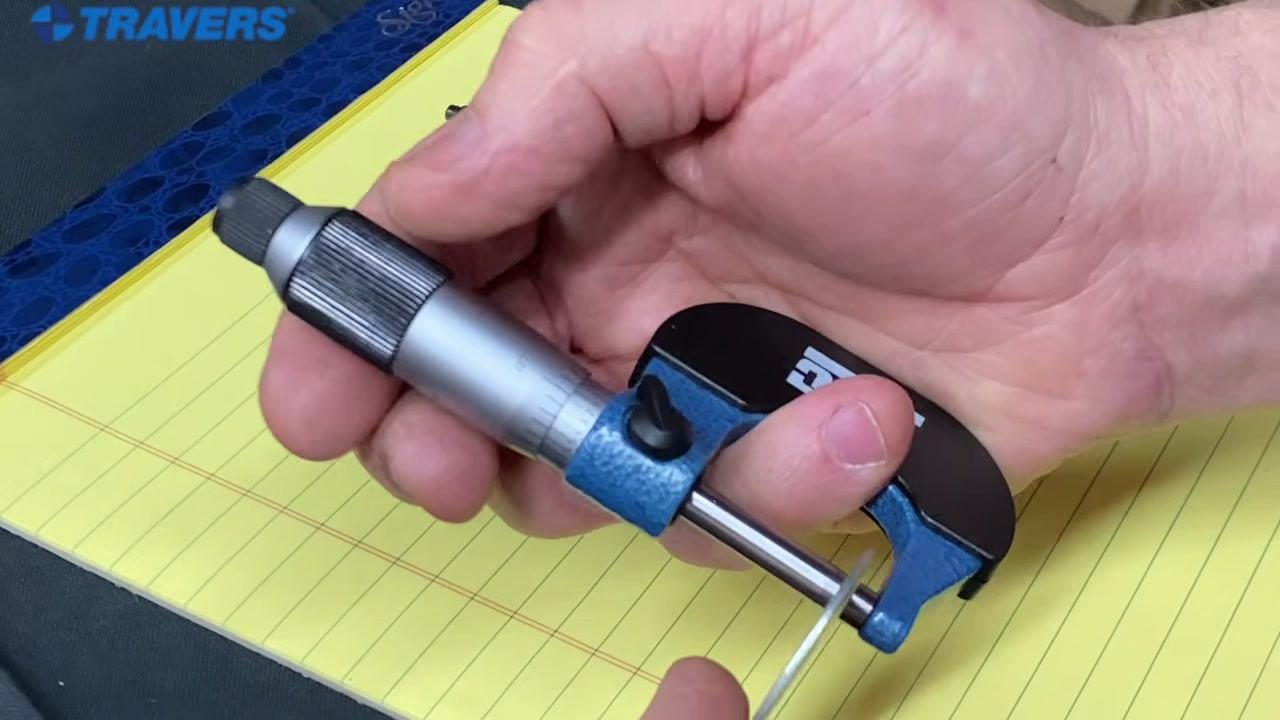
Position the micrometer in your hand:
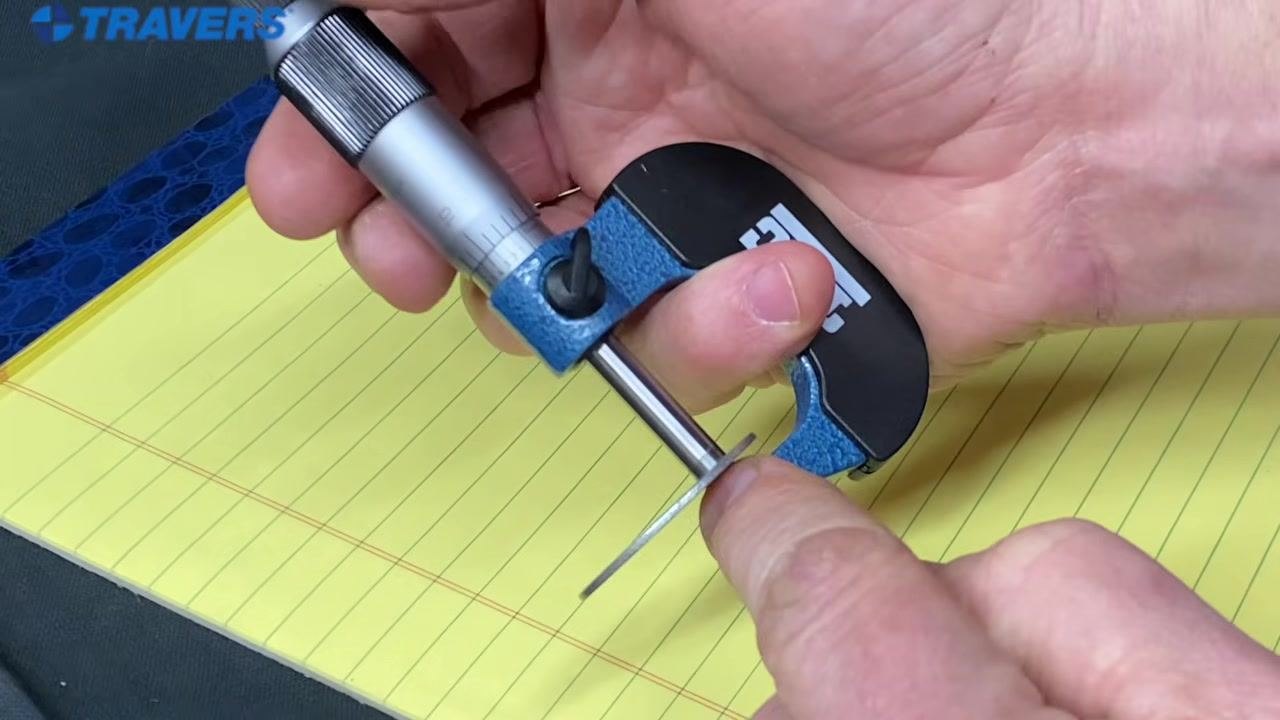
- Place the frame of the micrometer into your palm, ensuring a comfortable and stable grip.
- Rest your ring finger on the thimble for added control and security.
-
Secure the micrometer for measurement:
- Maintain your grip with the frame in your palm and your ring finger on the thimble.
- This grip provides a secure and steady way to hold the micrometer while preparing to measure.
Measure a workpiece
- Insert the workpiece between the anvil and spindle:
- Place the workpiece (for example, a washer) between the anvil and spindle of the micrometer.
- Turn the thimble to close the spindle onto the workpiece; note that the numbers on the scale do not move until the spindle contacts the workpiece.
-
Continue turning until the ratchet slips:
- Keep turning the thimble until you feel it slip, indicating that the anvil and spindle are properly contacting the workpiece.
- The ratchet mechanism on the thimble ensures consistent measuring pressure — do not force the thimble past this point.
-
Open the micrometer to release the workpiece:
- Turn the thimble in the opposite direction to release the workpiece.
- Note that the thimble will not slip when opening, allowing the spindle to move away from the anvil.
-
Ensure the spindle is fully closed for measurement:
- Turn the thimble until the spindle is all the way in and the ratchet slips, confirming proper contact with the workpiece.
- Maintain a steady grip and ensure the workpiece is securely held for an accurate reading.
Read the measurement from the scale
-
Prepare to read the scale:
- After measuring, hold the micrometer steady and use a pen to point at the relevant scale markings for clarity.
-
Identify the correct scale markings:
- Locate the zero mark, then count the visible lines on the sleeve to determine the base measurement.
-
Read the thimble scale:
- On the thimble, identify the numbers and lines that align with the sleeve's reference line.
- In this example, the pen points to the 5 and 6 on the thimble, which are used to determine the fractional part of the measurement.
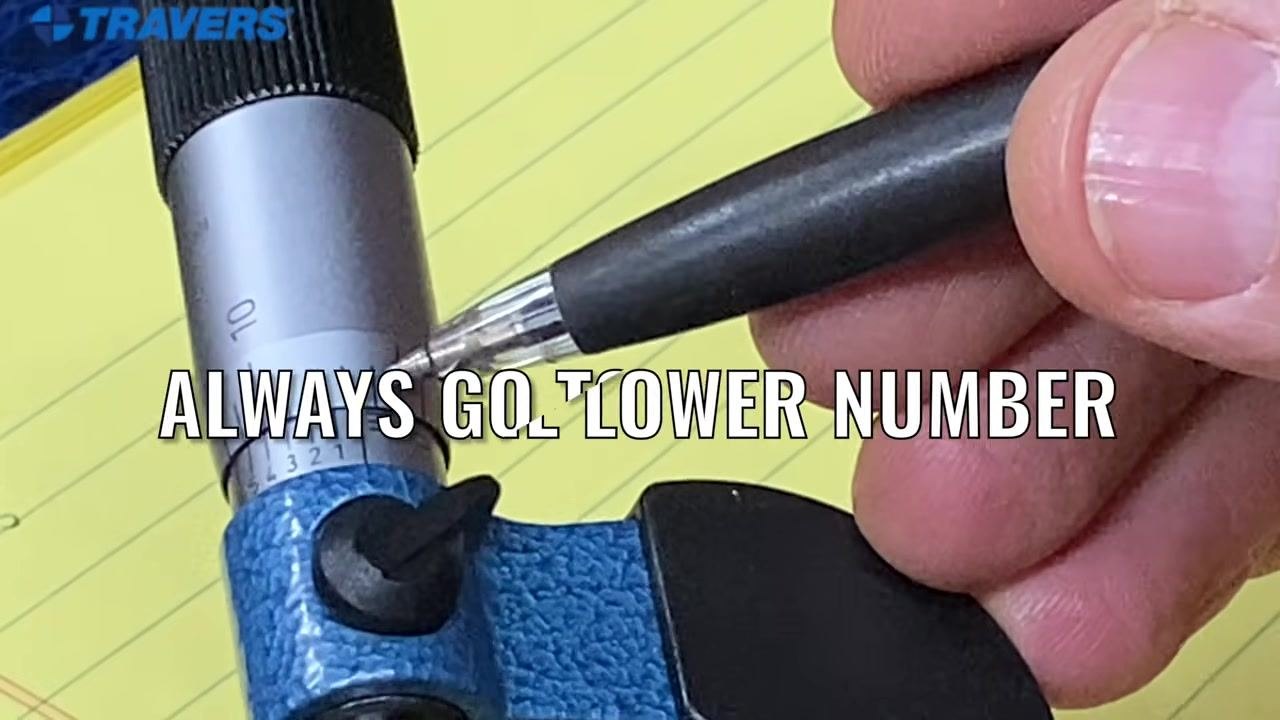
- Always use the lower number when reading:
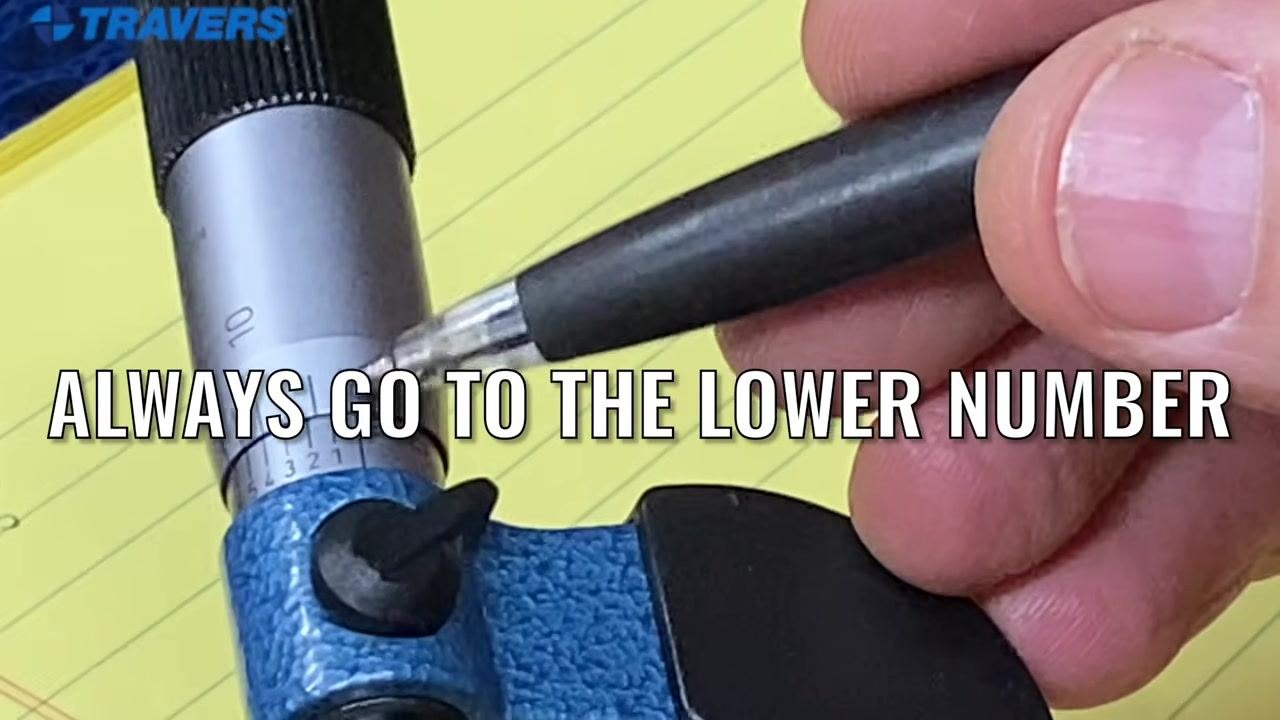
- When two numbers are close together, always use the lower number on the thimble scale, never the higher number. This ensures accuracy and consistency in your readings.
Read to the fourth decimal place: worked example
- Identify the next line past the main marking:
- After reading the main value (for example, 0.505), look for the next visible line past the last whole number on the thimble. If there is another line past the 5, the reading becomes 0.506.
- Check alignment for the fourth decimal place:
- Examine the alignment of the lines on the thimble against the gauge line on the sleeve.
- Only the line that is perfectly aligned with the gauge line is used for the fourth decimal place; ignore any lines that are not in perfect alignment.
-
Determine the fourth decimal digit:
- Once you have 0.506, look for the line on the thimble that aligns exactly with the gauge line.
- Add the number corresponding to this aligned line as the fourth decimal digit. For example, if the number 1 aligns, the measurement becomes 0.5061.
-
Disregard other thimble numbers for the fourth place:
- When determining the fourth decimal, only the aligned line matters; other numbers on the thimble are not relevant at this stage.
-
Apply the process to a new measurement:
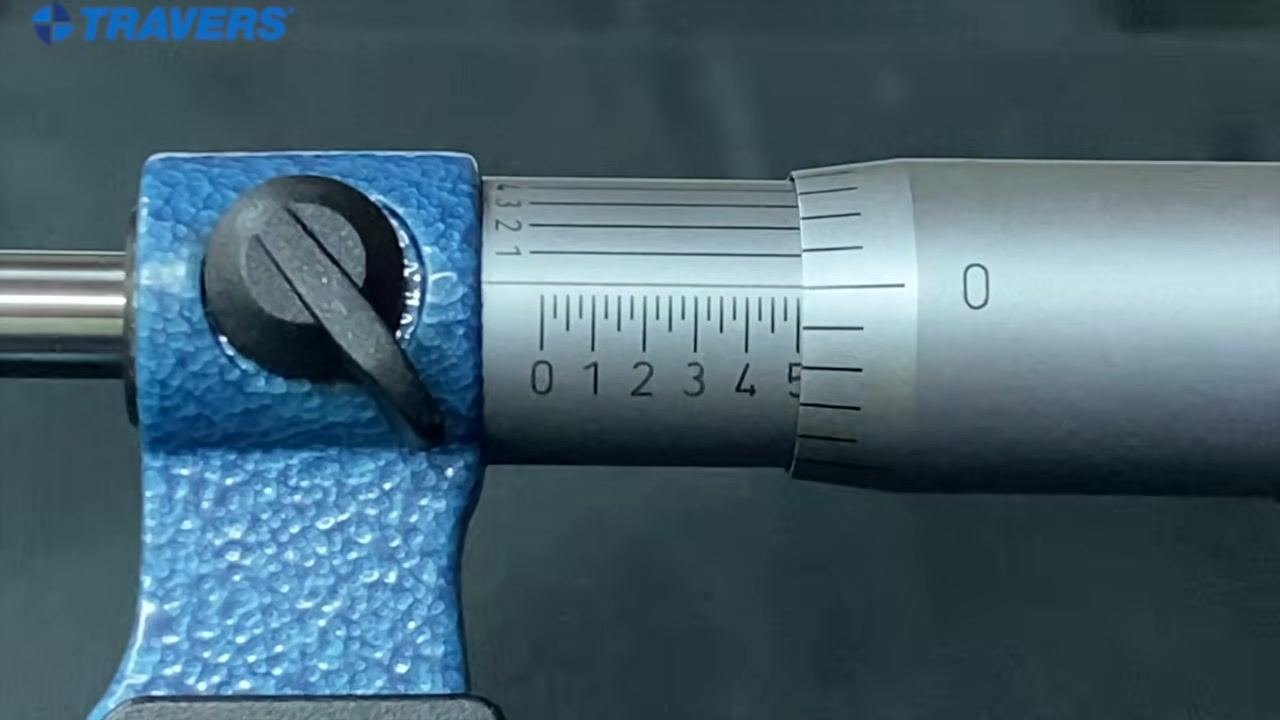
- Identify the main sleeve number (for example, 4). If no line is visible past the 4, the value is below 0.025.
- Find the thimble number that aligns (for example, 10) and the corresponding line (for example, 9), making the reading 4.409.
- Check the auxiliary scale for the fourth decimal alignment (for example, 3), resulting in a final value of 4.4093.
- Verify each step for accuracy:
- Always confirm the alignment visually, and reposition for a direct line of sight to the gauge line and thimble if the view is unclear.
Reading the fourth decimal place: live example
- Identify the fourth decimal place on the micrometer:
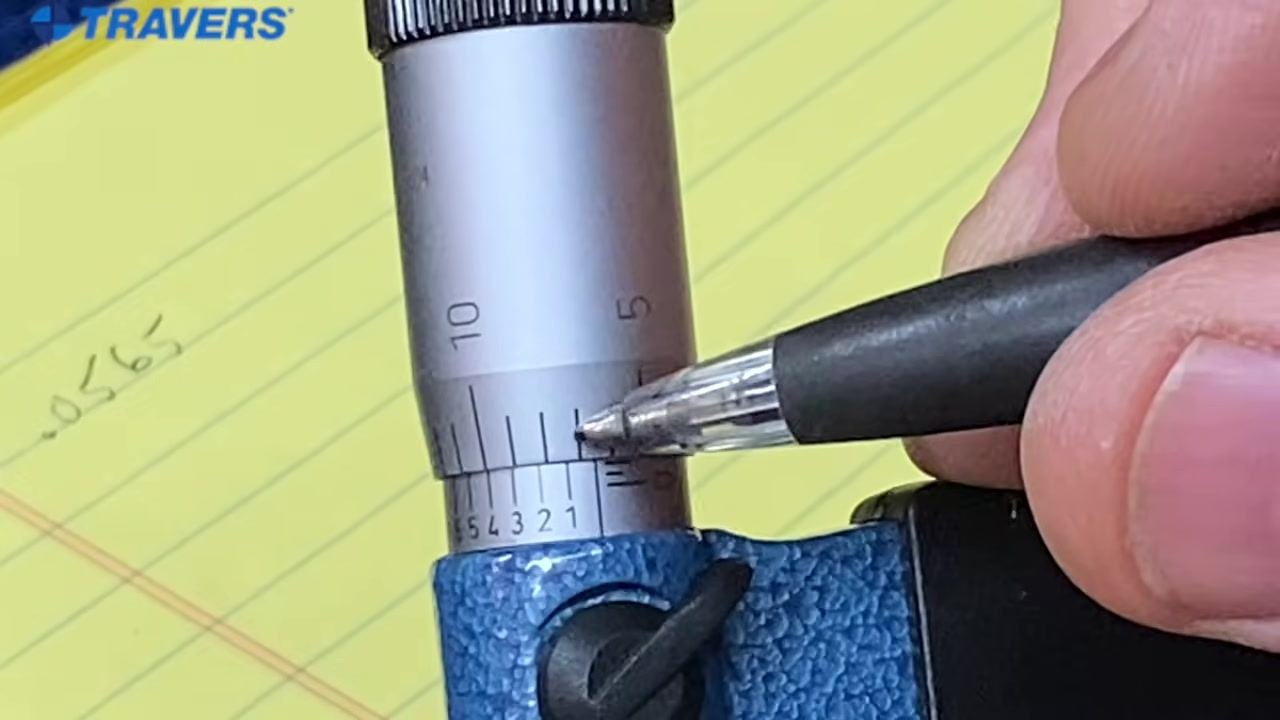
- Observe the micrometer scale closely and point to the gauge line past the decimal to determine the fourth digit for precision.
-
Determine the position of the gauge line:
- Notice that the gauge line falls between two numbers on the scale (for example, between 6 and 7), indicating the measurement falls between these two values for the fourth decimal place.
-
Compare alignment of the scale numbers:
- Examine which number on the vernier scale aligns best with the main scale. In this example, the number 5 lines up perfectly, while the number 4 does not.
-
Confirm the correct alignment for the most accurate reading:
- Double-check that the number 5 is the one that lines up best, confirming the correct value for the fourth decimal place.
Adjust the micrometer efficiently
- Spin the thimble for rapid adjustment:
- If you need to move from a small measurement to a much larger one, avoid turning the thimble slowly for a long time.
- Instead, hold the micrometer and spin the thimble quickly with one hand to move to the larger measurement efficiently. This technique saves time compared to slow, incremental turning.
Verification and summary
- Always identify the sleeve and thimble before taking a reading, and confirm the zero alignment before measuring.
- Read the sleeve first for the base measurement (in 0.025-inch increments), then add the thimble value (in thousandths) for a three-decimal reading.
- For four-decimal precision, use the auxiliary (vernier) scale and add only the value from the line that aligns perfectly with the gauge line.
- When in doubt between two close numbers on the thimble, always use the lower number for consistent accuracy.
- Hold the micrometer with the frame in your palm and your ring finger on the thimble, and turn the thimble until the ratchet slips to ensure correct, repeatable measuring pressure on the workpiece.
- Keep your eye level with the scales to avoid parallax error, and reposition for a direct line of sight whenever alignment is unclear.
What's next
For more information on precision measuring tools, refer to additional instructional resources on reading calipers to continue building your measurement skills.
Generation details: cost, quality tiers
Docsie billed 6,000 credits ($4.20) to analyze this 12-minute video at standard quality. The rewrite, template fill and Word/PDF exports were included. The same video at each quality tier:
| Quality | Frames sampled | Credits | Approx. cost |
|---|---|---|---|
| Draft | every 16-30 s | 3,000 | $2.10 |
| Standard (this guide) | every 8-15 s | 6,000 | $4.20 |
| Detailed | every 4-7 s | 12,000 | $8.40 |
| Ultra | every 1-3 s | 24,000 | $16.80 |
Credits priced at $0.70 per 1,000; plans include a monthly allowance. Enterprise customers on on-premise or bring-your-own-model deployments run this on their own inference and pay no per-video credits.
Generated by Docsie Video-to-Docs on 2026-09-09 from a 11-minute video. Screenshots are frames from the source video and belong to their creator, Travers Tool Co, whose original is embedded above. If you own this video and want the guide removed or credited differently, contact us and we will act within one business day.