
How to MIG Weld
This SOP provides a structured procedure for setting up MIG welding equipment and developing proper welding technique. It covers machine setup, grounding, material preparation, and the three key technique variables — stick out (distance), gun angle, and movement — that determine weld quality. Following this procedure will help you build the muscle memory needed for consistent, high-quality MIG welds.
Video: How to MIG Weld for Beginners: MIG Welding Basics by TimWelds (2020). All credit for the demonstration goes to the creator; watch the original on YouTube. The written guide below was generated from this video by Docsie. Creator? Request a change or removal.
Purpose
This SOP provides a structured procedure for setting up MIG welding equipment and developing proper welding technique. It covers machine setup, grounding, material preparation, and the three key technique variables — stick out (distance), gun angle, and movement — that determine weld quality. Following this procedure will help you build the muscle memory needed for consistent, high-quality MIG welds.
Scope
This procedure applies to anyone performing MIG welding, from beginners setting up their first machine to welders looking to refine technique through structured practice. It covers welding setup, dry-run practice, angle control, travel speed, weaving techniques, and identification of common weld defects.
Required equipment and materials
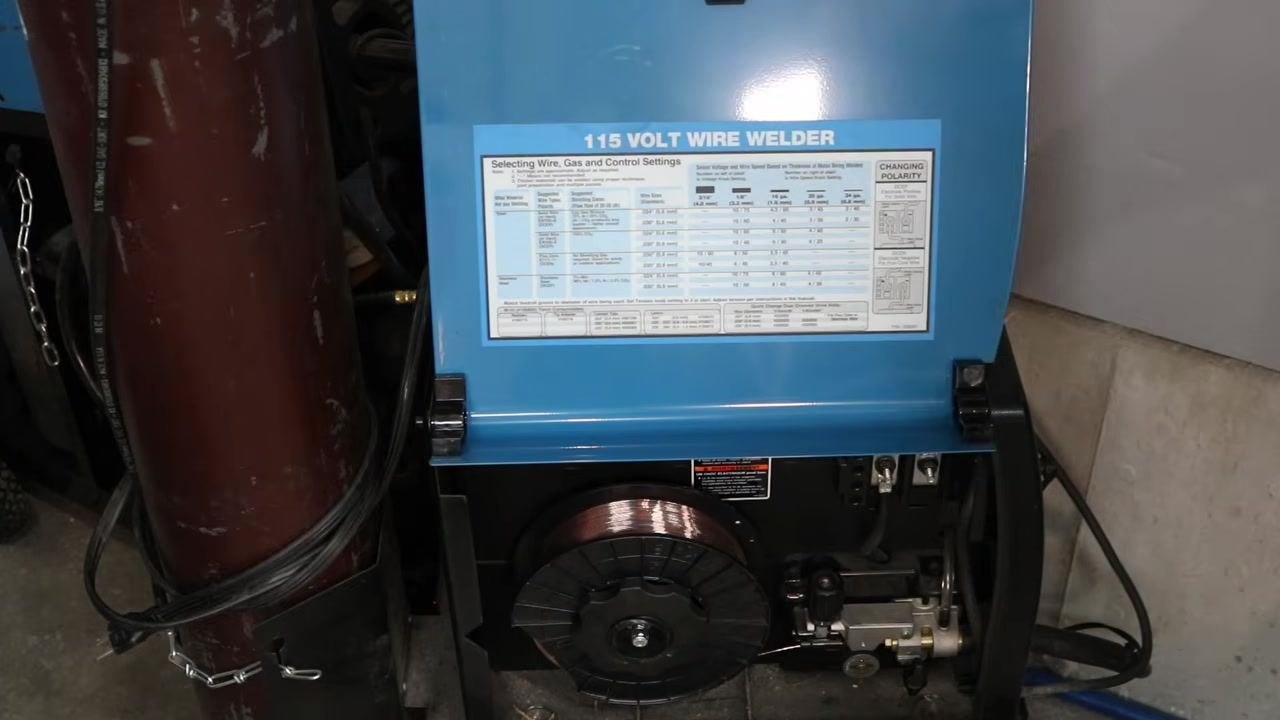
- MIG welder (e.g., 115 Volt Wire Welder) with a settings chart
- Solid wire for MIG welding
- Shielding gas: 75% argon / 25% CO2 blend, or straight CO2 (aluminum cylinders, such as those used for soda fountains, are a cost-effective option for straight CO2)
- Ground (work clamp)
- Welding table with a solid ground connection
- Clean base material
- Practice plates for dry runs and technique comparison
- Safety equipment: fire extinguishers and properly stored gas cylinders in the welding area
Procedure
Step 1: Understand the three key focus areas
Focus on only three main aspects of your welding technique to achieve good results: stick out (distance), gun angle, and movement. Break down each aspect and concentrate on one at a time for effective learning.
Step 2: Prepare your welding setup
Use solid wire for MIG welding. Set your shielding gas to a blend of 75% argon and 25% CO2, or alternatively use straight CO2 — aluminum cylinders (such as those used for soda fountains) can be a cost-effective option. The argon/CO2 blend is slightly better but not essential for beginners.
Step 3: Ensure proper grounding
Attach your ground (work clamp) directly to your material, or ensure a solid connection through the welding table. Safety note: Improper grounding can negatively affect MIG welding performance more than it does with stick or TIG welding.
Step 4: Clean your material
Make sure the material you are welding is clean to ensure a quality weld.
Step 5: Set your machine according to material and wire
Adjust your welder settings based on the thickness of your material and the diameter of your wire, using the settings chart on your machine for guidance. Do not overthink the settings — set them according to the chart and focus on improving your technique first. Fine-tune the settings only after you have mastered the basic technique. For more detailed information on settings, refer to the dedicated video on the creator's channel.
Step 6: Set the correct stick out (distance)
Monitor your distance from the workpiece, also known as "stick out" — how far the welding wire extends from the contact tip. Maintain a stick out of approximately 3/8 inch to 1/2 inch for most MIG welding applications.
Step 7: Maintain consistent stick out while welding
As you weld along your joint, keep the stick out consistent. Use your free hand to steady the MIG gun when possible: prop your hand vertically on the work surface and rest the MIG gun or your welding hand on it to stabilize movement. This technique can be adapted for various welding positions and geometries, including overhead or inside corner joints.
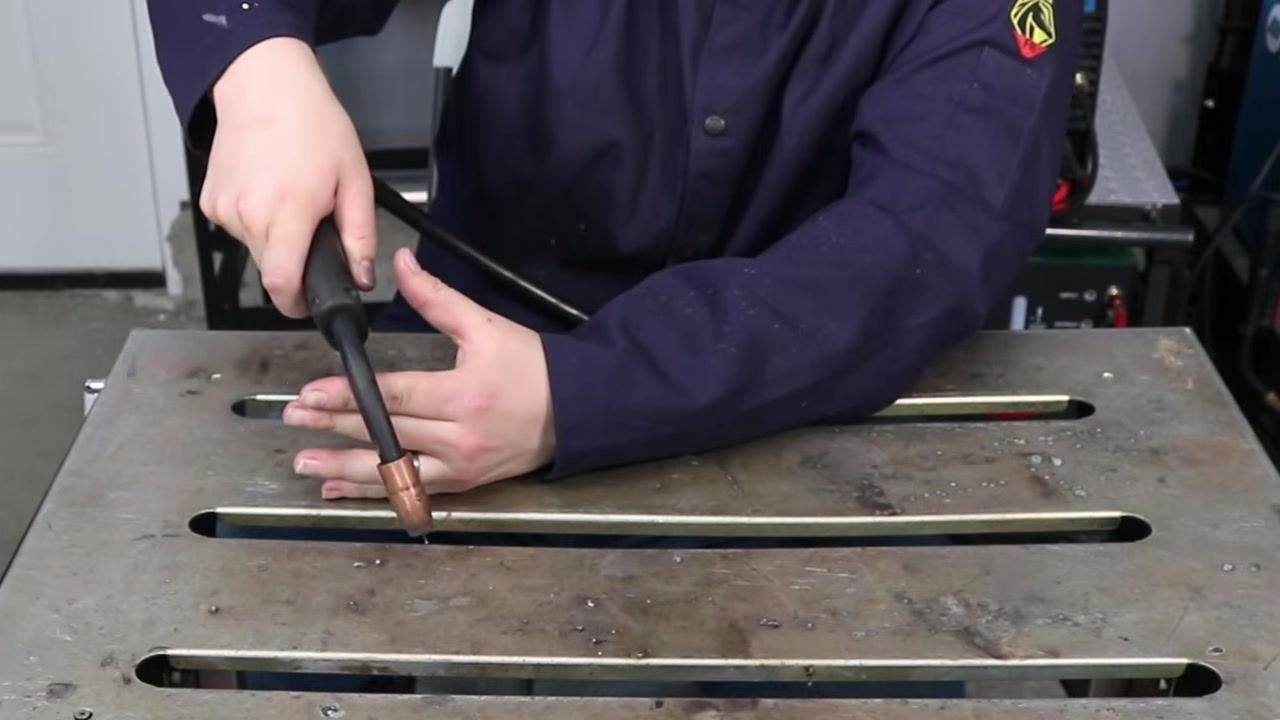
Note: In some situations, such as welding upside down or in tight spaces, you may not be able to use both hands for support. Adjust your grip and technique as needed to maintain control and stick out.
Step 8: Recognize the effects of incorrect stick out
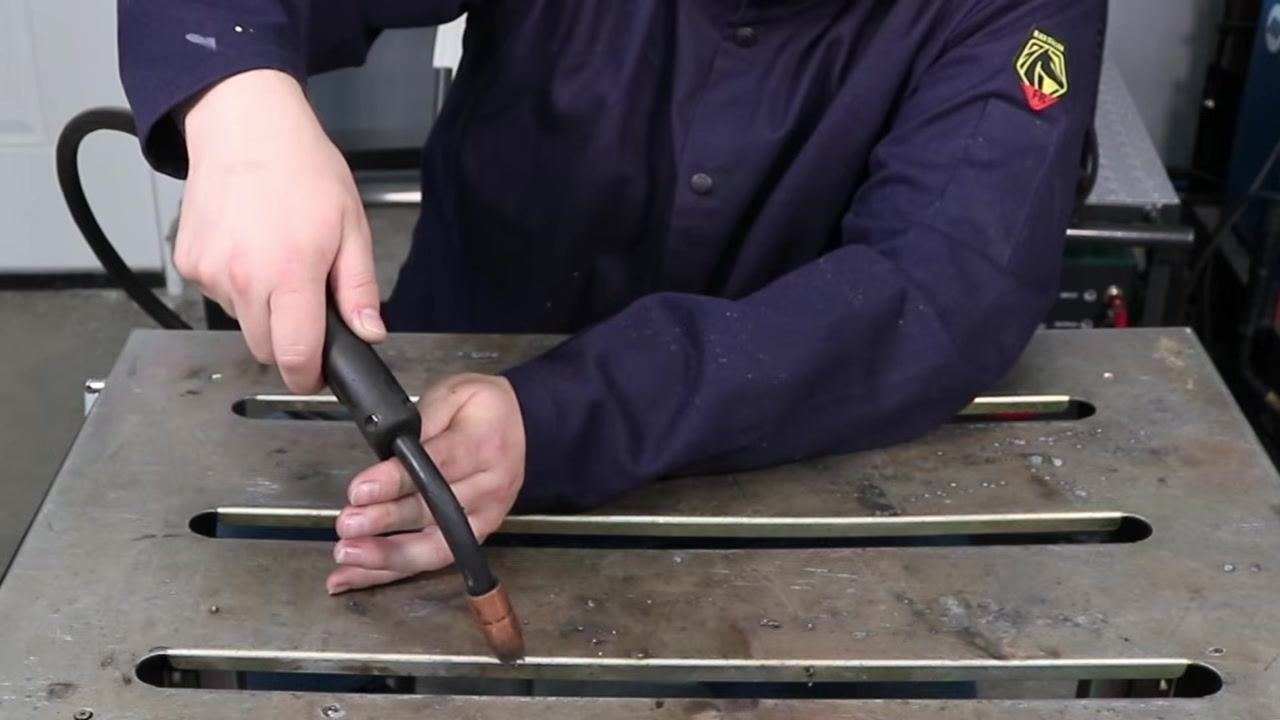
If the MIG gun is too far from the workpiece, the weld will not run smoothly, the wire acts as a resistor and reduces voltage at the arc, and reduced shielding gas coverage increases the risk of porosity. If the gun is too close, the wire may burn back into the contact tip, welding itself to the tip and causing a mess. Safety/quality note: Always aim for a stick out of approximately 3/8 inch to 1/2 inch.
Step 9: Practice stick out with dry runs
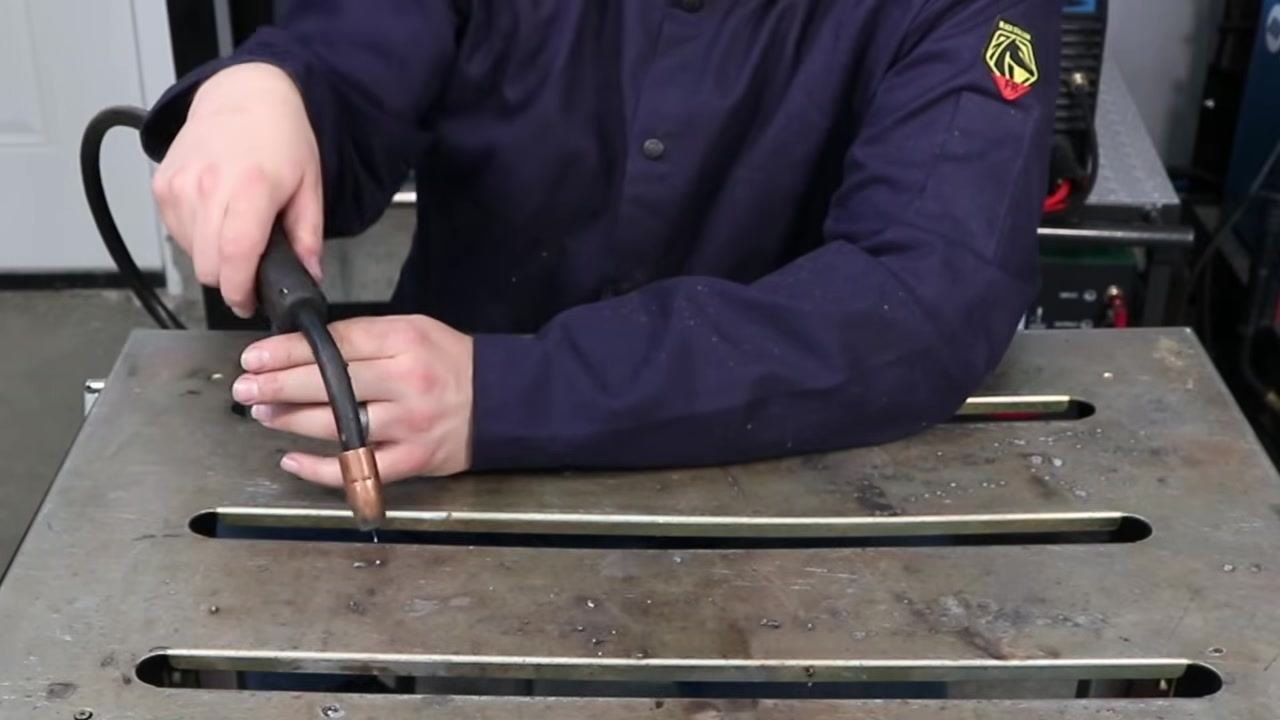
Before starting to weld, perform dry runs along your intended weld path without pulling the trigger. Focus on holding the correct distance consistently as you move along the joint. Only begin welding once you are confident you can maintain the proper stick out throughout the weld.
Step 10: Begin welding and monitor stick out
After practicing with dry runs, start welding and pay close attention to maintaining the correct stick out. Make adjustments as needed to keep your weld quality high.
Step 11: Identify and set the work angle
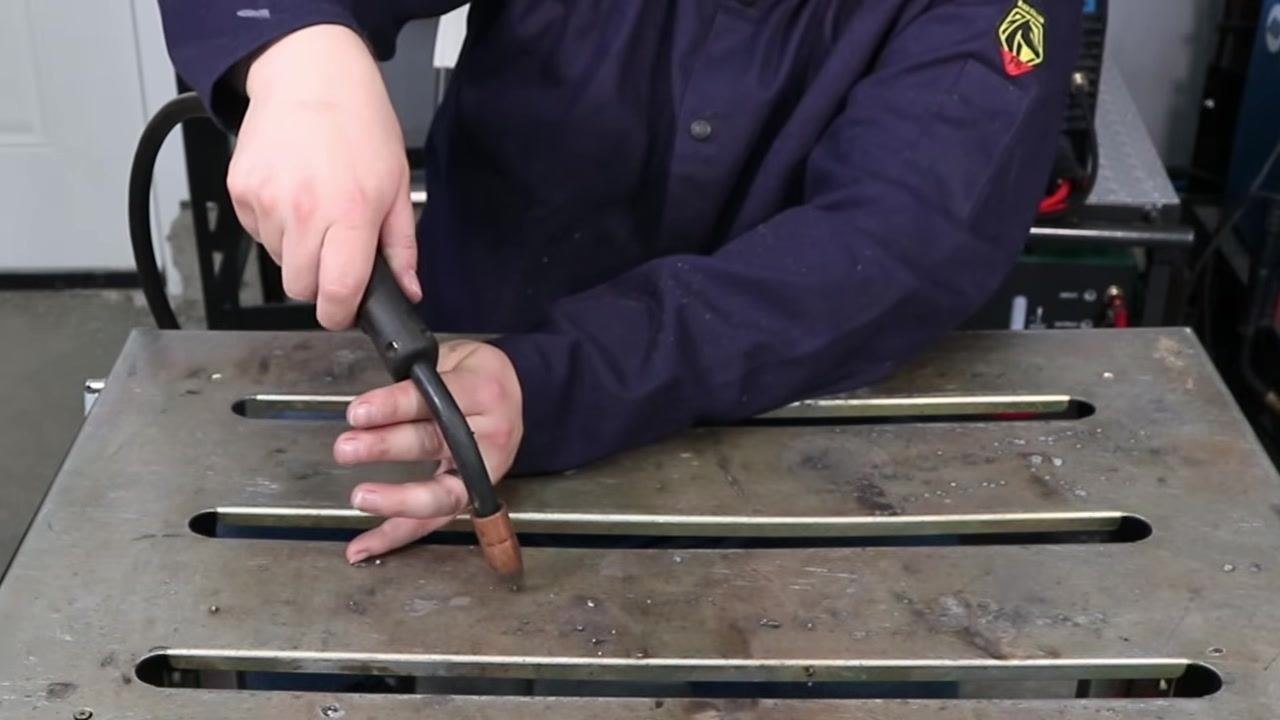
The work angle is the angle of the MIG gun relative to the workpiece, perpendicular to the direction of travel. For a butt joint (two plates side by side), hold the MIG gun straight up and down, perpendicular to the plate. For a T-joint (one plate vertical to another), set the gun at approximately a 45-degree angle to the joint, adjusting slightly as needed while staying close to 45 degrees. Maintain this angle consistently as you weld.
Step 12: Set the travel angle
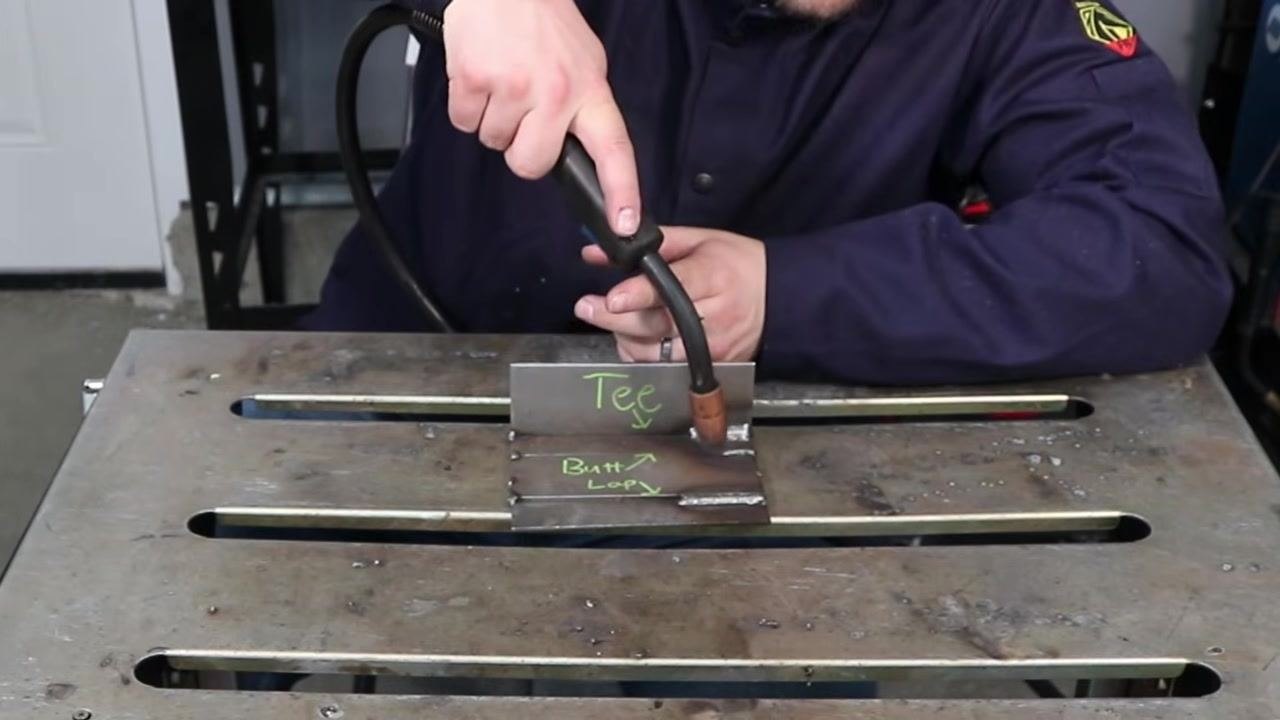
The travel angle is the forward or backward tilt of the MIG gun in the direction of welding. Aim for a travel angle between 10 degrees pushing (gun tilted away from the weld pool) or 10 degrees dragging (gun tilted toward the weld pool). Dragging generally provides more penetration, while pushing is recommended for aluminum to avoid soot. As a beginner, choose whichever technique feels most comfortable.
Step 13: Practice both angles with dry runs
Before welding, perform dry runs along the joint without pulling the trigger. Focus on keeping both the work angle and travel angle steady throughout the movement. Avoid rocking or changing the angle as you move — many beginners unintentionally end up parallel to the plate by the end of the weld. Repeat dry runs until you can confidently maintain both angles from start to finish.
Step 14: Verify angle consistency across the entire joint
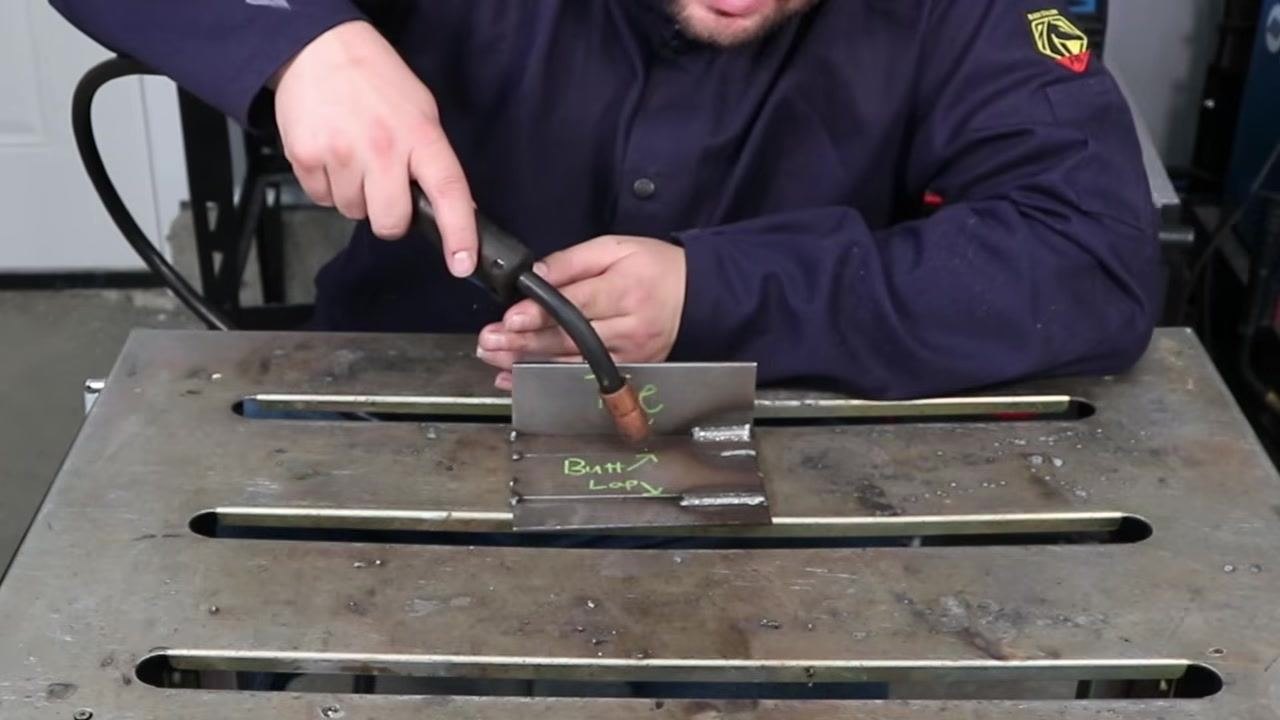
Ensure you are able to maintain the correct angles all the way across the joint, not just at the start. Continue practicing dry runs until you feel comfortable and consistent.
Step 15: Practice dry runs on the workbench
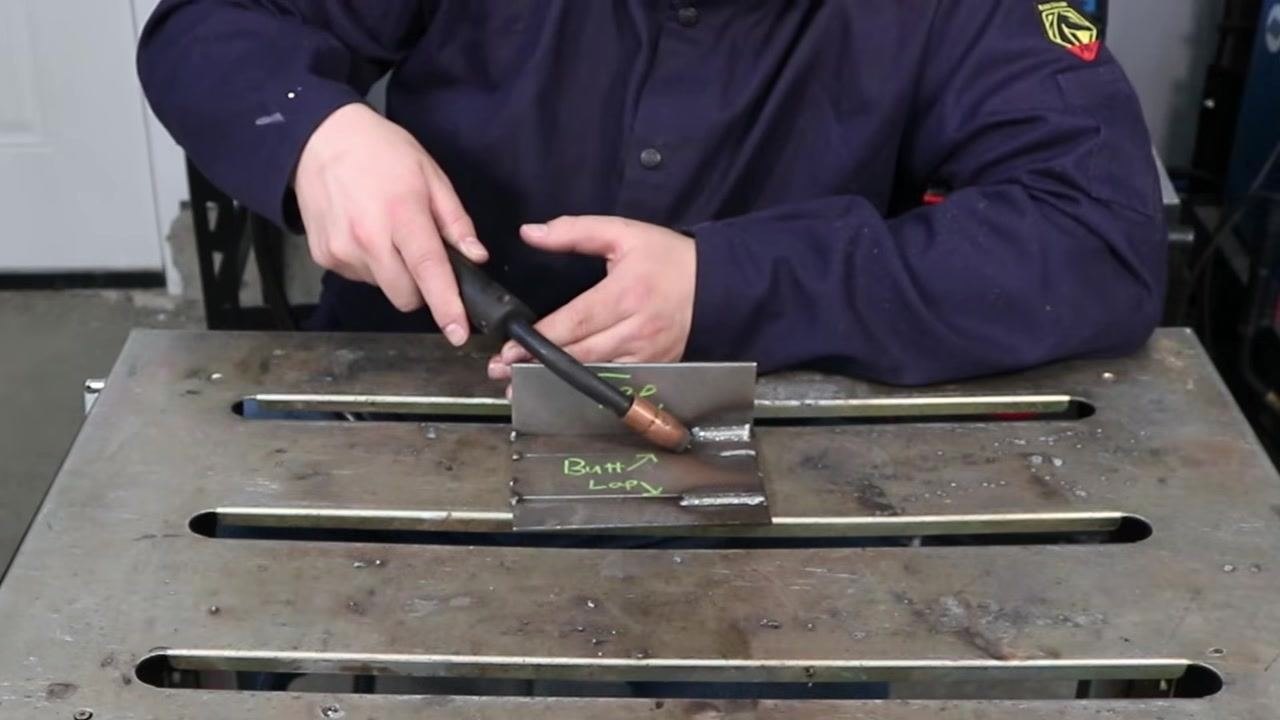
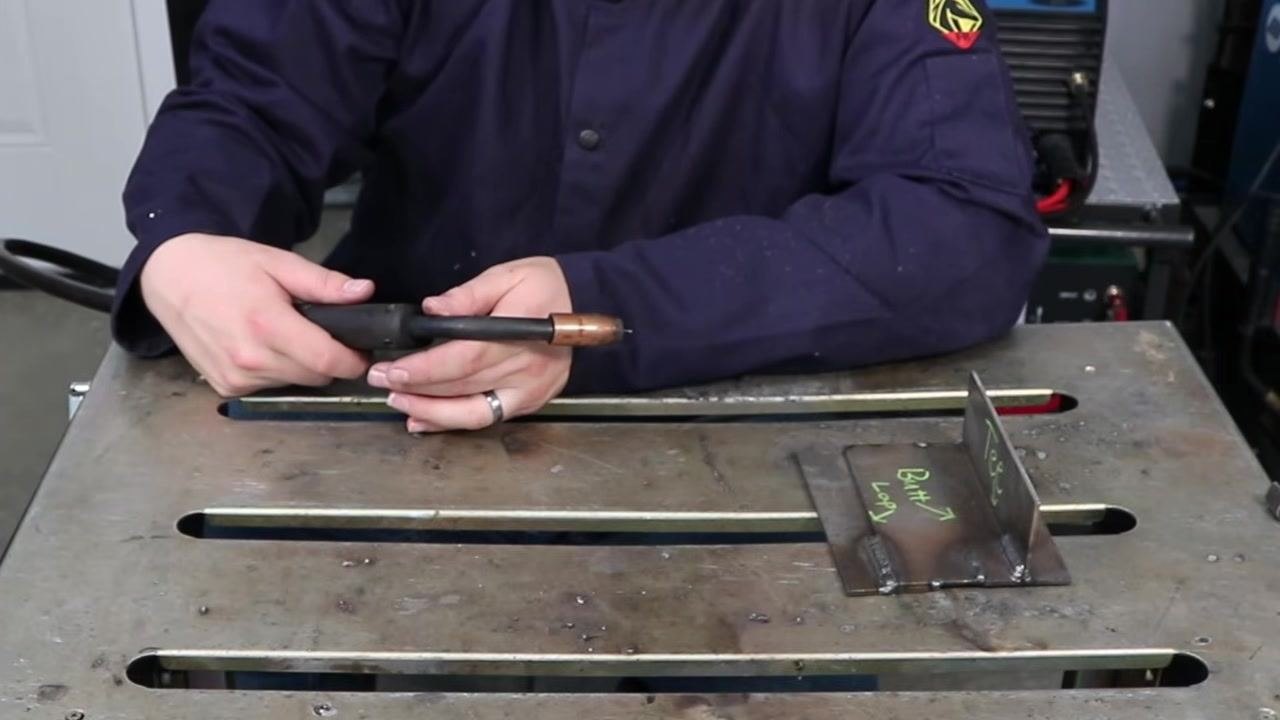
Hold the MIG welding gun in your hand and position it over the workpiece without pulling the trigger. Perform dry runs by moving the gun along the intended weld path to practice motion and angles. Repeat this process to build muscle memory and ensure smooth, controlled movements. Reference the labeled metal pieces on the workbench: "Tee" (vertical plate) and "Butt/Loop" (horizontal plate).
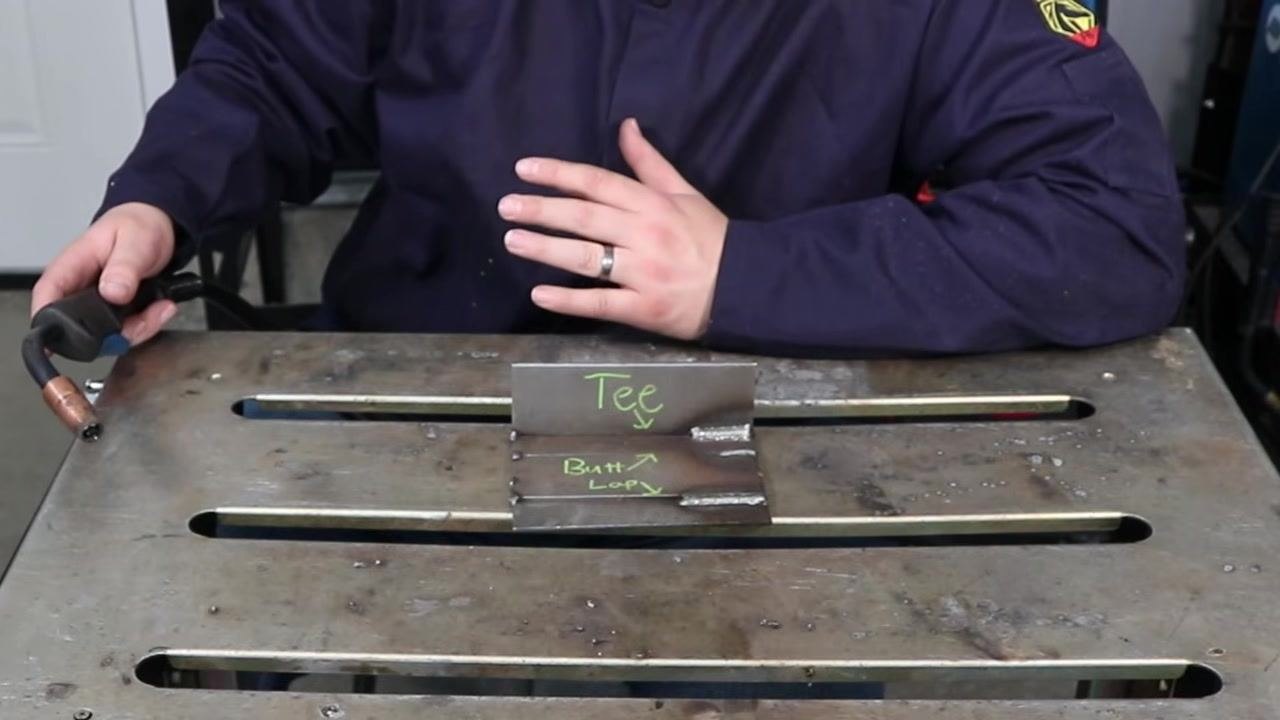
Step 16: Watch for excessive gun angles
Safety/quality note: Be cautious with your welding gun angles — excessive angles can cause excessive spatter and create a messy weld.
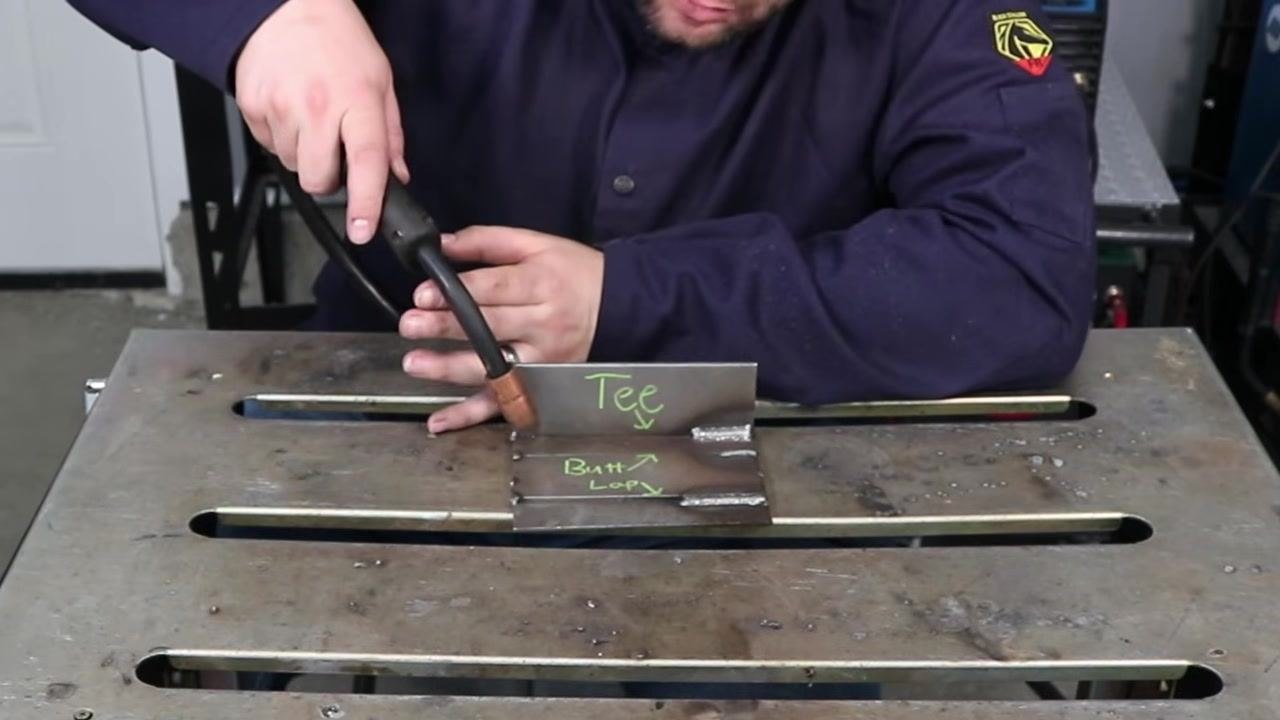
Step 17: Apply extra care to angle when welding out of position
When welding out of position, such as vertical or overhead, maintaining the correct gun angle becomes even more critical. Incorrect angles can lead to poor weld quality and increased difficulty.
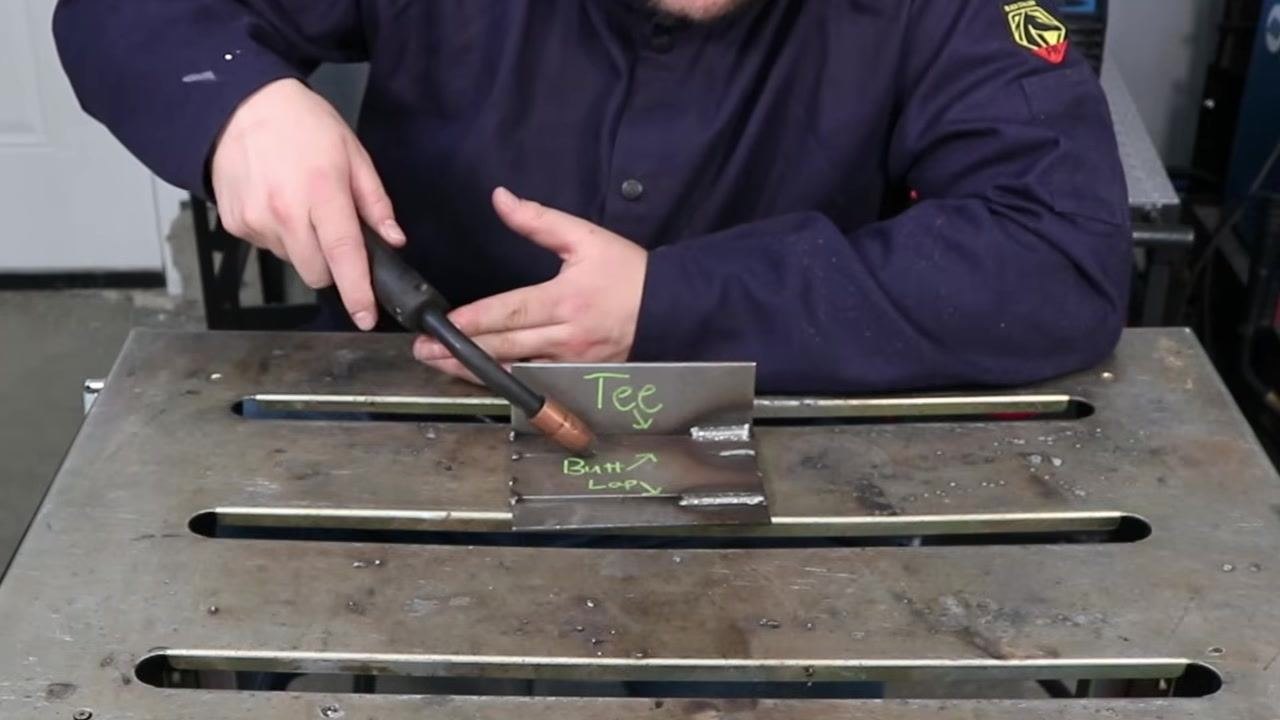
Step 18: Adjust gun position for vertical and overhead welding
For vertical or overhead welds, tilt the MIG gun upward slightly to maintain proper control of the weld pool. Pick up and reposition the workpiece as needed to simulate different welding positions.
Step 19: Focus on travel speed and motion pattern
Movement consists of two aspects: travel speed (how fast you move the gun along the joint) and the motion pattern you use. Hold the MIG gun steadily and prepare to practice different movement techniques.
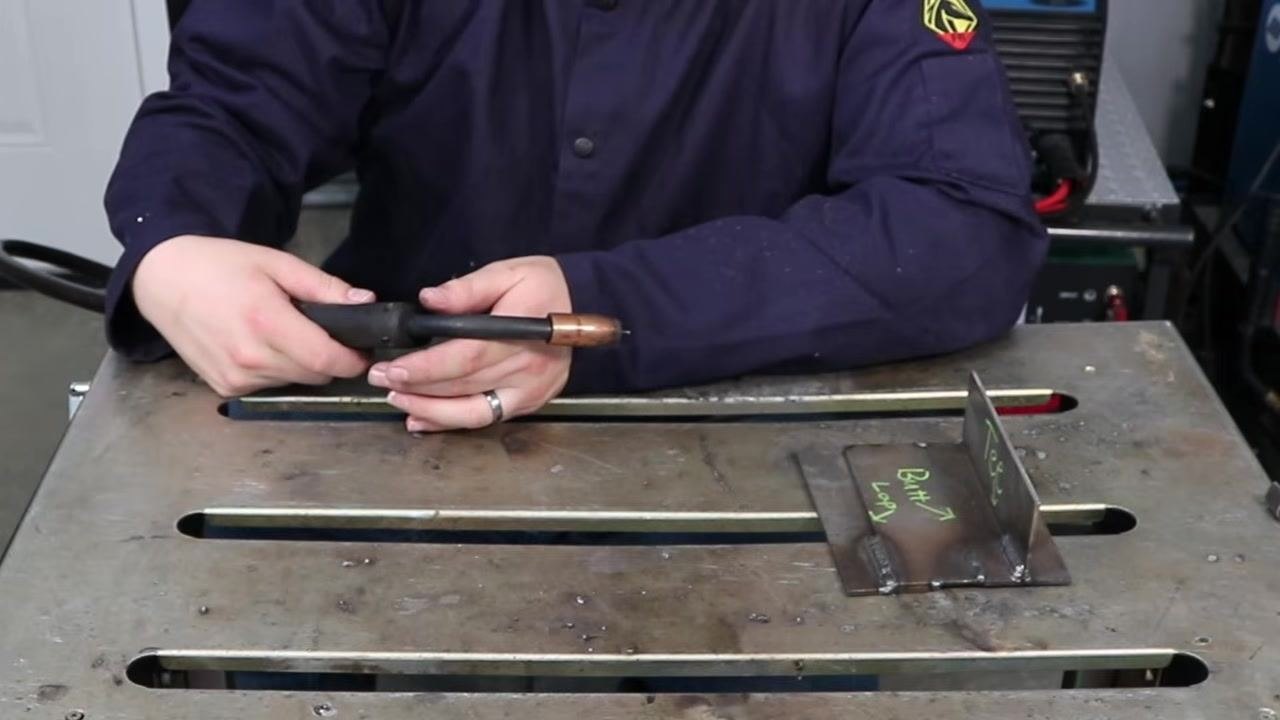
Step 20: Monitor your travel speed
Quality note: If you move too slowly, the weld bead will become too wide and may burn through the material. Observe the weld pool closely to maintain a consistent width and avoid excessive penetration.
Step 21: Experiment with weaving techniques
Try different weaving motions: back-and-forth movement, small curly cues, or a curved weave. Touch the front end of the weld puddle for best results, but avoid excessive side-to-side movement.
Step 22: Stay centered on the joint
Keep the welding arc centered on the joint, especially when joining materials of different thicknesses. Avoid touching the sides excessively — focus on a steady, central path for even heat distribution.

Step 23: Explore weaving options for weld beads
Hold the MIG welding gun securely and practice weaving techniques. Weaving gives you flexibility in bead shape and coverage, but avoid excessive or erratic movement.
Step 24: Maintain control during weaving
Begin weaving, but keep your movements controlled and deliberate. Quality note: Do not get carried away with wide or inconsistent weaves, as this can negatively affect weld quality.
Step 25: Review and compare weld beads
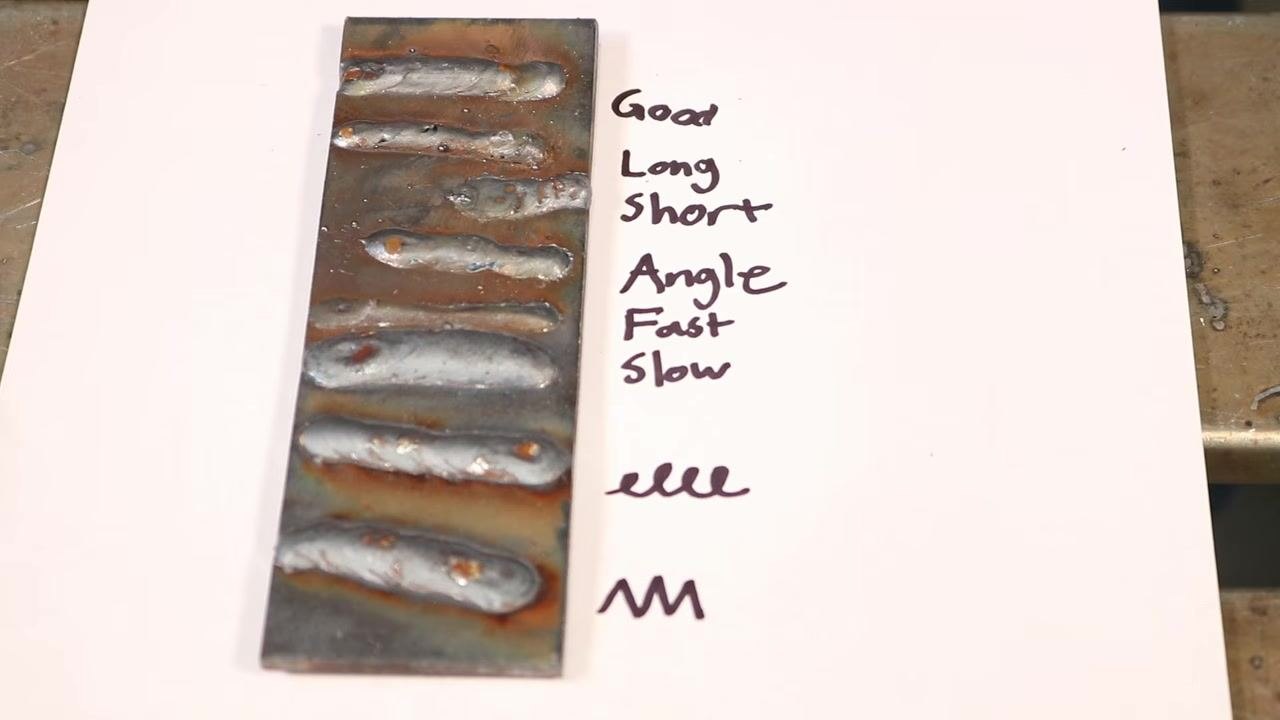
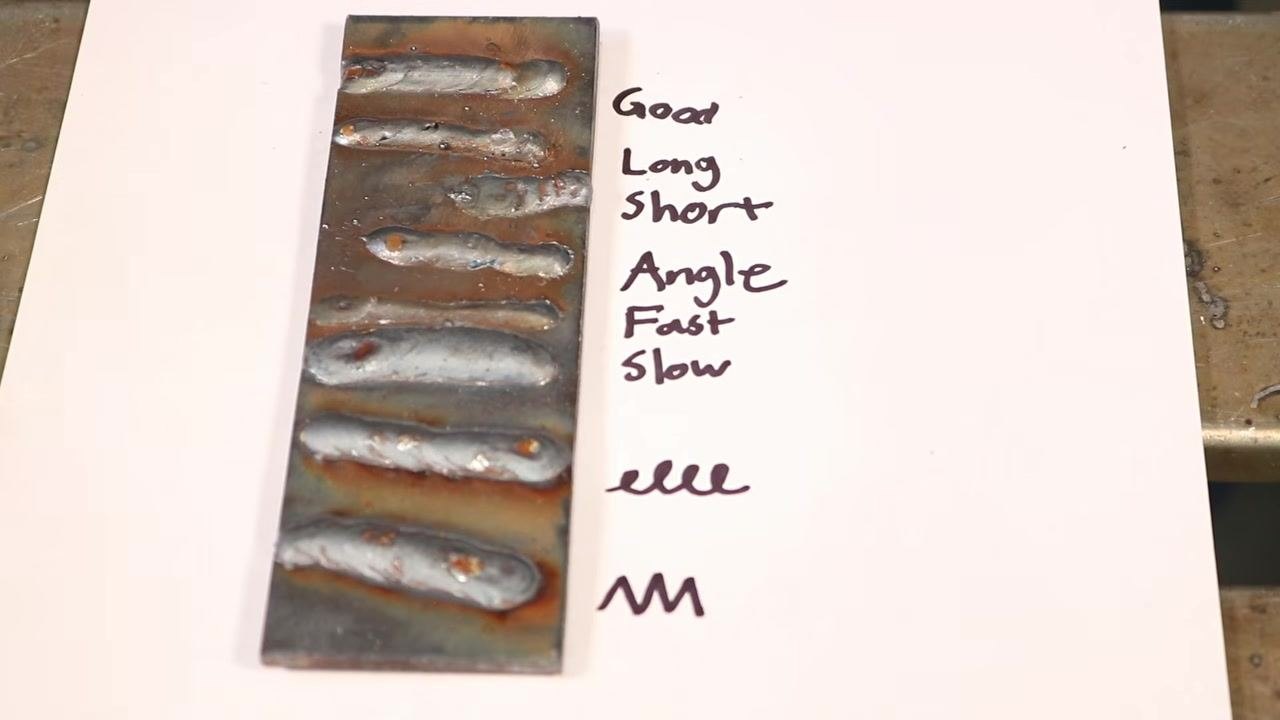
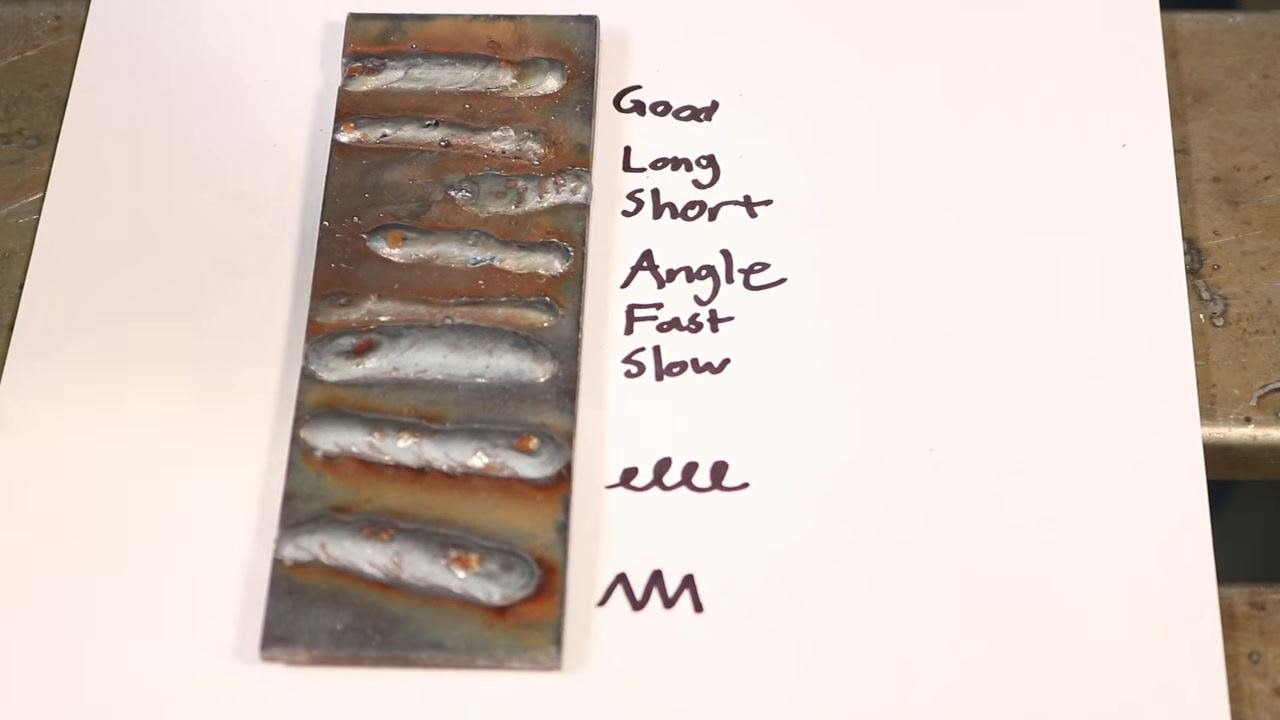
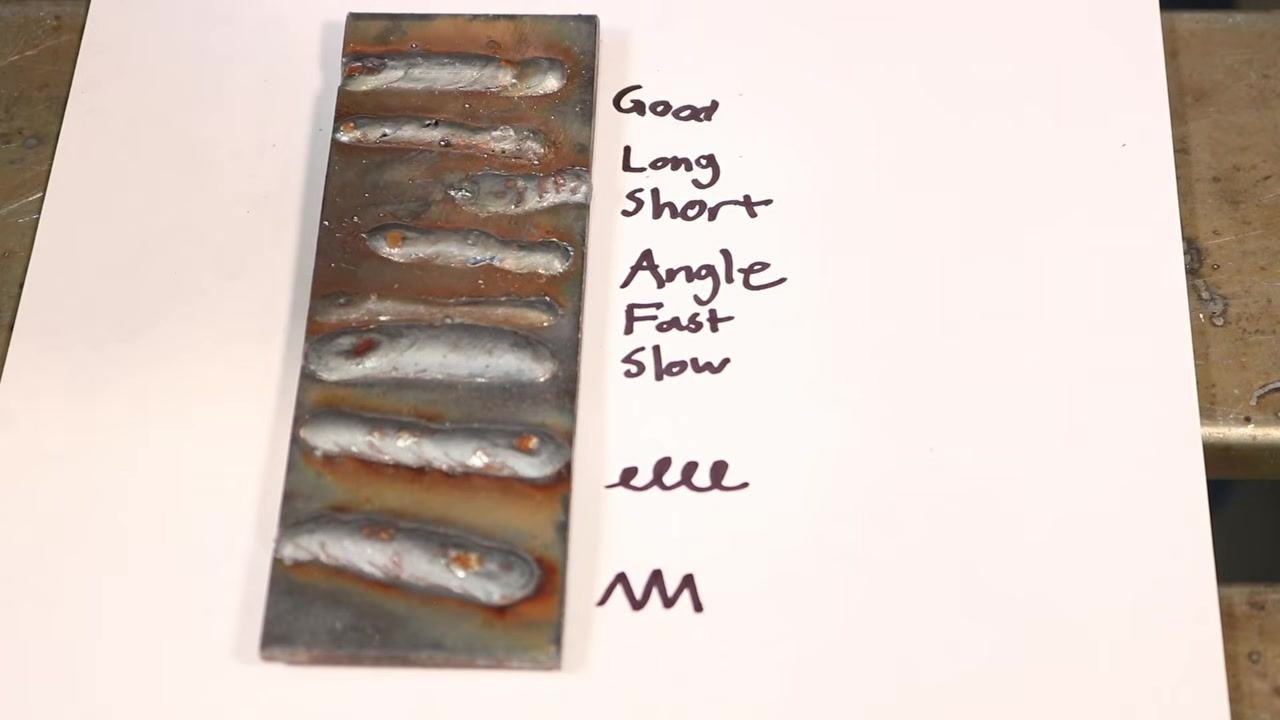
Examine a sample plate with multiple weld beads, each labeled according to the technique or parameter used:
- Good — example of a proper weld bead
- Long — weld with a long arc length
- Short — weld with a short arc length
- Angle — weld performed with an incorrect gun angle
- Fast — weld with excessive travel speed
- Slow — weld with slow travel speed
- E-pattern — weaving in an "e" pattern
- M-pattern — weaving in an "M" pattern
Use this comparison to understand how each variable affects the final weld appearance and quality.
Step 26: Identify weld defects — porosity
Notice welds with visible porosity (small holes or a sponge-like appearance), which indicate poor weld quality. Excessive arc length can cause porosity, resulting in a weak, non-solid weld. Use the labeled plate to visually identify these defects.
Step 27: Understand the effects of arc length and spatter
Increasing arc length not only causes porosity but also increases spatter and makes the weld harder to control. Refer to the labeled plate to see the impact of improper arc length and technique.
Step 28: Avoid burn-through on thin material
Safety/quality note: Be cautious when welding thin materials — moving too slowly or using excessive heat can burn through the workpiece. Use the sample plate to observe the results of improper speed or technique.
Step 29: Practice and tune your technique at the bench
Before starting your actual project, spend time at the workbench practicing and tuning your welding technique. Adjust your settings and motions based on the results you observe on your practice pieces. This accelerates learning and helps you achieve better results on your final work.
Step 30: Master one welding variable at a time
Focus on running a weld bead while paying attention to only one variable at a time. Start by mastering the correct distance between the MIG gun and the workpiece, then concentrate on maintaining the proper gun angle once comfortable. Practice each variable separately to build muscle memory and consistency. Safety note: Work in a well-equipped welding area with safety equipment (fire extinguishers, gas cylinders, welding machines) readily accessible.
Verification and summary
Confirm the following before considering your setup and technique complete:
- Machine is set correctly according to material thickness and wire diameter, per the settings chart
- Ground connection is solid and direct
- Material is clean prior to welding
- Stick out is maintained consistently at approximately 3/8 inch to 1/2 inch
- Work angle and travel angle are held steady across the full length of the joint
- Travel speed produces a consistent bead width without burn-through
- Weld beads are compared against sample plates to confirm absence of porosity, excessive spatter, or angle-related defects
Repeat the process, focusing on one aspect of your technique during each practice session. With consistent practice, isolating and mastering each critical variable — stick out, angle, and movement — will produce noticeable improvement in your welding skills in a short period.
What's next
Continue practicing dry runs and live welds in a safe, well-equipped environment, focusing on one variable at a time. For more detailed information on machine settings, refer to the dedicated video on the creator's channel. To stay updated on further welding tips and tutorials, consider subscribing to the channel or resource for ongoing support.
Generation details: cost, quality tiers
Docsie billed 4,500 credits ($3.15) to analyze this 9-minute video at standard quality. The rewrite, template fill and Word/PDF exports were included. The same video at each quality tier:
| Quality | Frames sampled | Credits | Approx. cost |
|---|---|---|---|
| Draft | every 16-30 s | 2,250 | $1.57 |
| Standard (this guide) | every 8-15 s | 4,500 | $3.15 |
| Detailed | every 4-7 s | 9,000 | $6.30 |
| Ultra | every 1-3 s | 18,000 | $12.60 |
Credits priced at $0.70 per 1,000; plans include a monthly allowance. Enterprise customers on on-premise or bring-your-own-model deployments run this on their own inference and pay no per-video credits.
Generated by Docsie Video-to-Docs on 2026-09-08 from a 8-minute video. Screenshots are frames from the source video and belong to their creator, TimWelds, whose original is embedded above. If you own this video and want the guide removed or credited differently, contact us and we will act within one business day.