
How to Safety Wire a Bolt
This standard operating procedure explains how to safety wire a bolt on a propeller assembly using 0.041" (41,000) steel safety wire. Following these steps ensures the bolts remain securely fastened and resist loosening during operation.
Video: How To Safety Wire Airplane Propeller Bolts by Glenn Brasch (2015). All credit for the demonstration goes to the creator; watch the original on YouTube. The written guide below was generated from this video by Docsie. Creator? Request a change or removal.
This standard operating procedure explains how to safety wire a bolt on a propeller assembly using 0.041" (41,000) steel safety wire. Following these steps ensures the bolts remain securely fastened and resist loosening during operation.
Purpose
The purpose of this procedure is to provide a consistent, repeatable method for safety wiring propeller bolts, preventing them from loosening due to vibration or operational stress.
Scope
This procedure applies to any propeller assembly with bolts that include holes for threading safety wire. It covers the full process from preparation through final inspection.
Required equipment
- 0.041" (41,000) steel safety wire
- Safety wire pliers/cutters
- The propeller assembly with accessible bolts
- A well-lit, organized hangar or workshop
Step-by-step procedure
Prepare the work area and materials
Ensure you are working in a well-lit, organized hangar or workshop before starting. Gather all required materials: 0.041" steel safety wire, safety wire pliers/cutters, and the propeller assembly with accessible bolts.
Identify the bolts to be safety wired
Inspect the propeller hub and locate the bolts that require safety wiring. Confirm that each bolt has a hole for threading the safety wire through it.
Measure the required length of safety wire
Hold the spool of 0.041" steel safety wire near the bolts and estimate the length needed by wrapping the wire around the bolts as it will be installed. Allow extra length for twisting and securing the ends.
Cut the safety wire
Use safety wire cutters to cut the measured length of wire from the spool, then let the remaining spool drop aside to keep your work area clear.
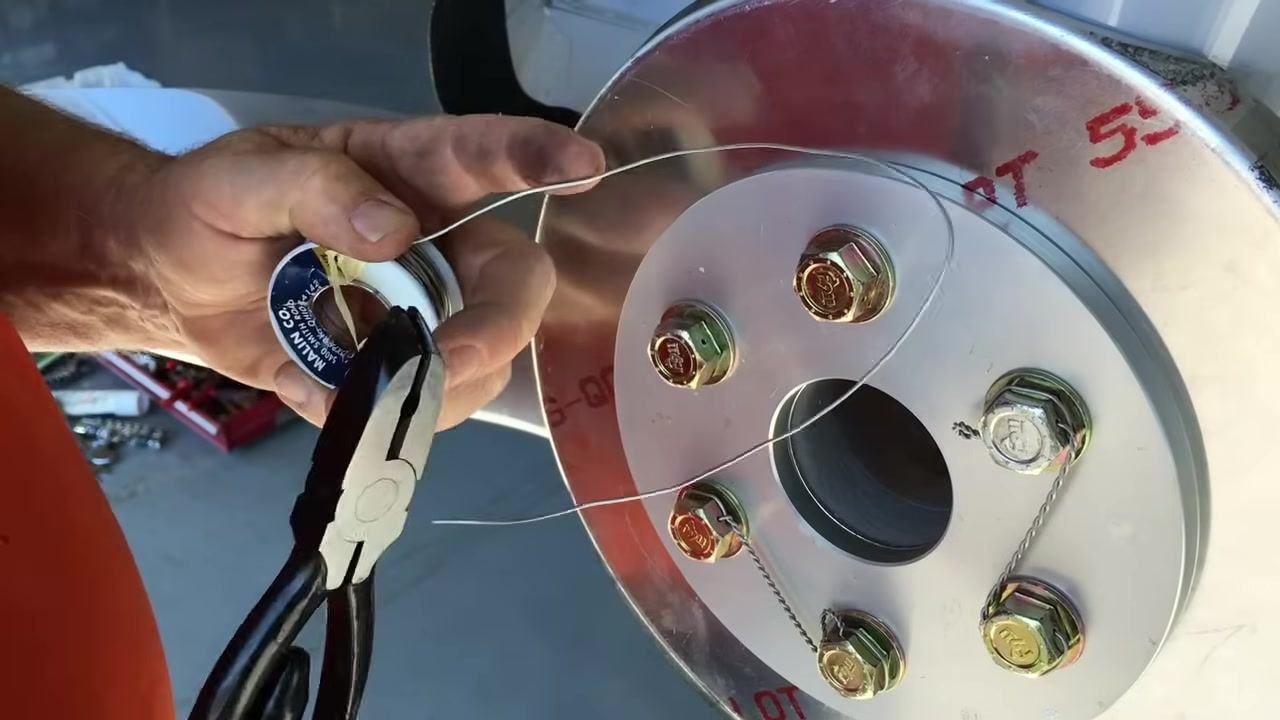
Plan the safety wire routing
Determine the direction each bolt must be turned to tighten, and plan to route the wire so that any force on it will tend to tighten rather than loosen the bolts. For each pair of bolts, visualize the path the wire will take, making sure it passes through the bolt holes and forms a secure clamp.
Thread the safety wire through the first bolt
Insert one end of the safety wire through the hole in the first bolt. Leave a short tag end of about 1 inch on one side for twisting later.
Route the wire to the next bolt
Bring the long end of the wire around to the next bolt, following your planned path. Ensure you have enough wire remaining to complete the loop and make the necessary twists.
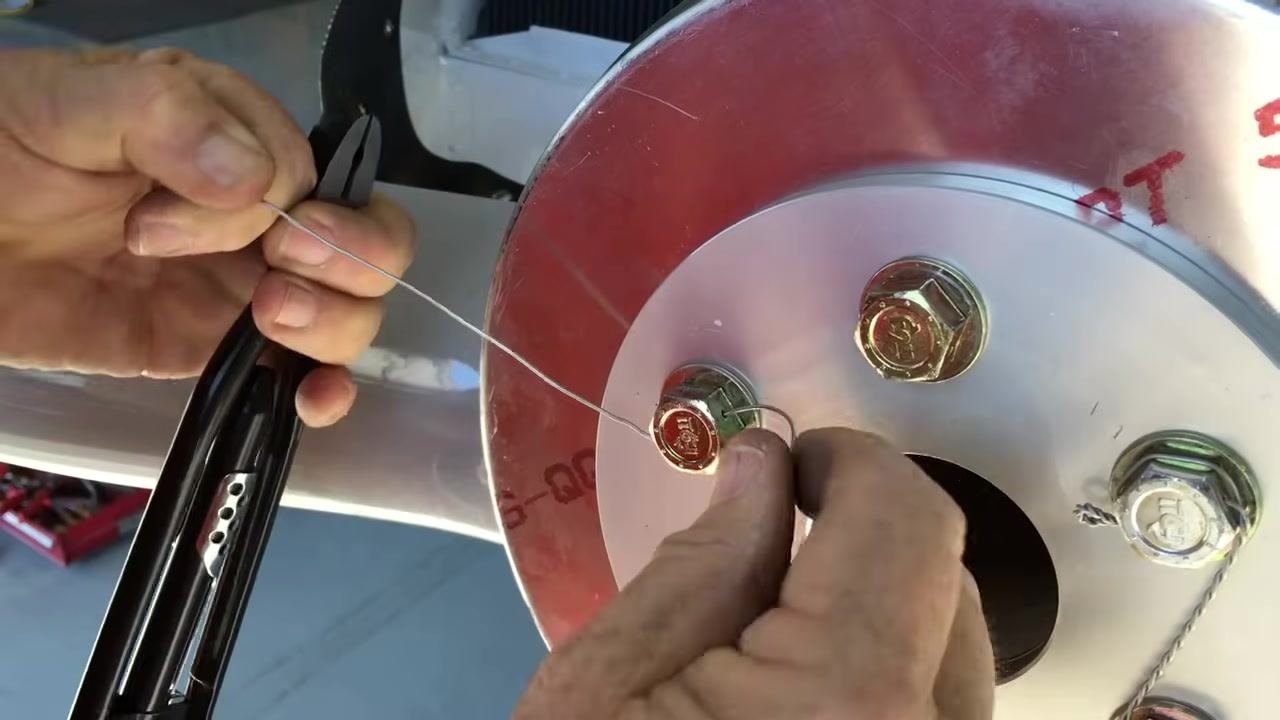
Adjust for proper length
If you do not have enough wire to complete the loop, pull more wire through the first bolt or cut a new length as needed. Confirm that both ends of the wire are accessible and long enough for twisting.
Secure and tighten the wire
Fold the tag end of the wire underneath the main length, then pull both ends tight to remove slack and ensure a snug fit around the bolts. Prepare to twist the wire to lock it in place.
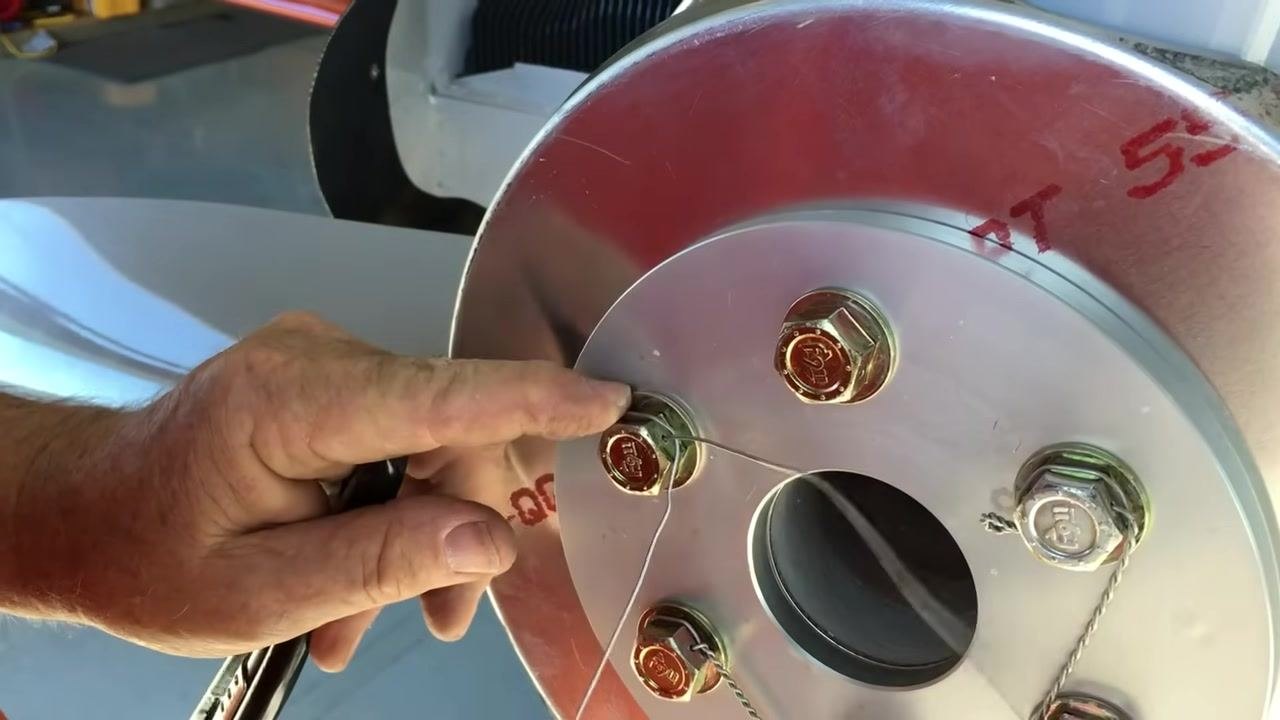
Position the safety wire for twisting
Identify the entry hole on the next bolt where the wire will be threaded, and bring the wire up to the bolt head following the planned routing path. Hold the wire firmly in place with your fingers and prepare your safety wire pliers for twisting.
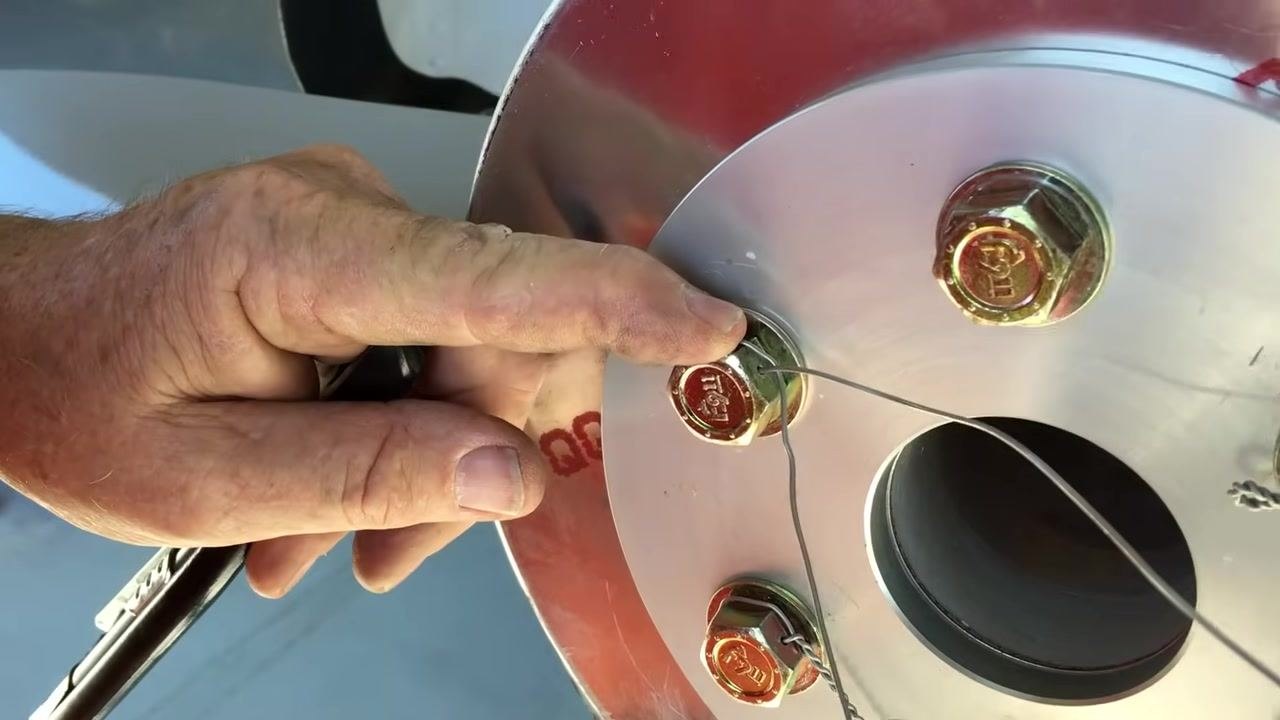
Apply safety wire pliers and pull tight
Place the jaws of the safety wire pliers on the wire at the point where twisting should begin, and lock the pliers securely onto the wire. Pull the wire with the pliers to remove any slack, ensuring the wire is tight between the bolts. This step is critical for a secure installation.
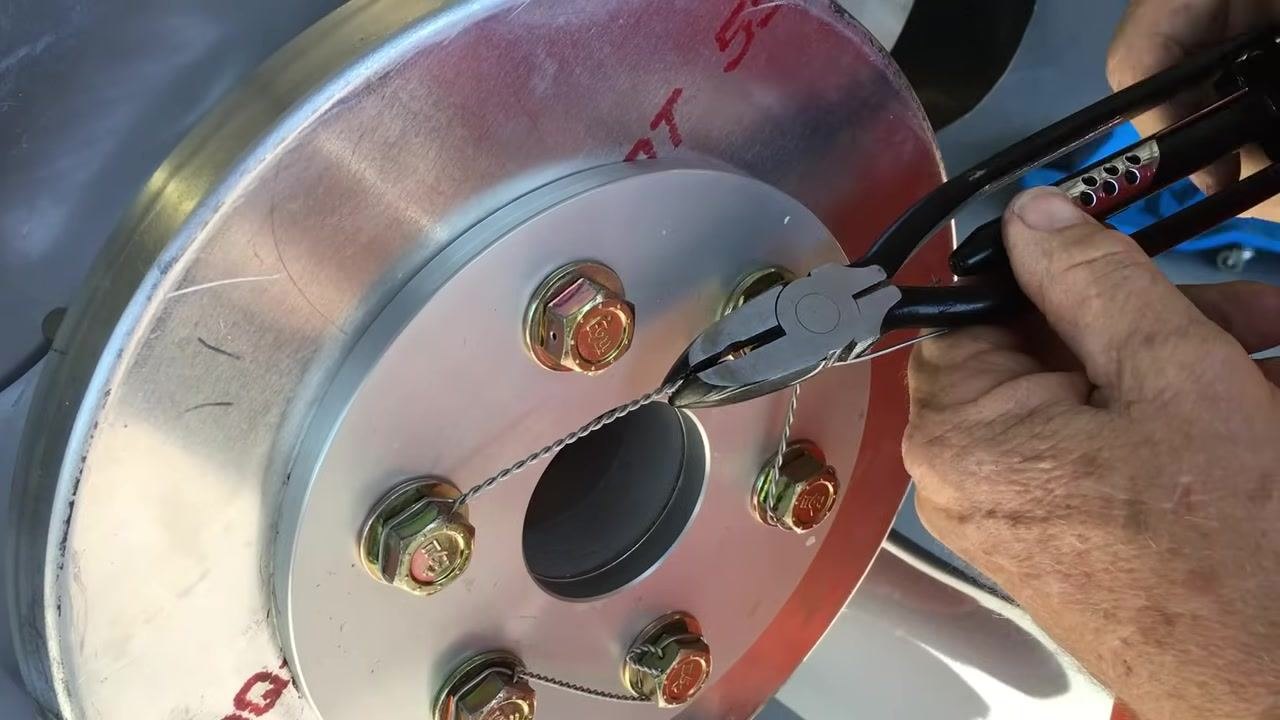
Twist the safety wire
Begin twisting the wire using the pliers, aiming for approximately seven turns per inch for optimal security and appearance. Check that the tag end is the correct length and positioned properly, and continue twisting until the wire is evenly and tightly coiled.
Reposition and prepare for the next bolt
Move to the opposite side of the propeller hub if needed for better access. Hold both ends of the twisted wire so the twists remain tight and uniform, then prepare to thread the wire through the next bolt head.
Thread the wire through the next bolt
Insert the twisted wire through the hole in the next bolt head, ensuring it passes cleanly through without kinks or bends. Hold the wire steady as you prepare to tighten it.
Pull the wire tight with pliers
Use the safety wire pliers to grip the wire after it has been threaded through the bolt, and pull it firmly to ensure it is tight and secure. Confirm there is no slack in the wire between the bolts.
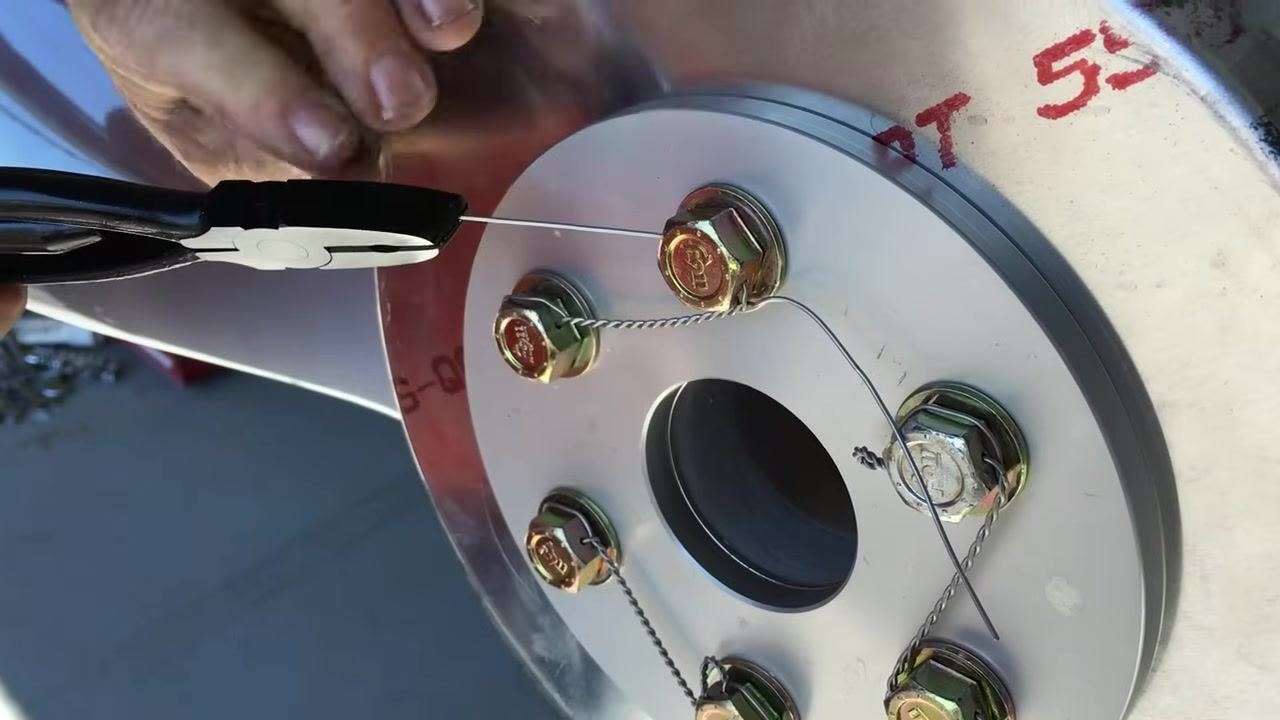
Inspect the tightness of the wire
Visually check that the wire is tight and properly routed, and ensure it is snug against the bolt heads with no visible slack.
Secure the tag end and final tightening
Bring the tag end of the wire around the bolt as needed, and pull it tight using the pliers to ensure a secure fit. Prepare to twist the tag end in the opposite direction if required, to prevent it from pulling off the bolt.
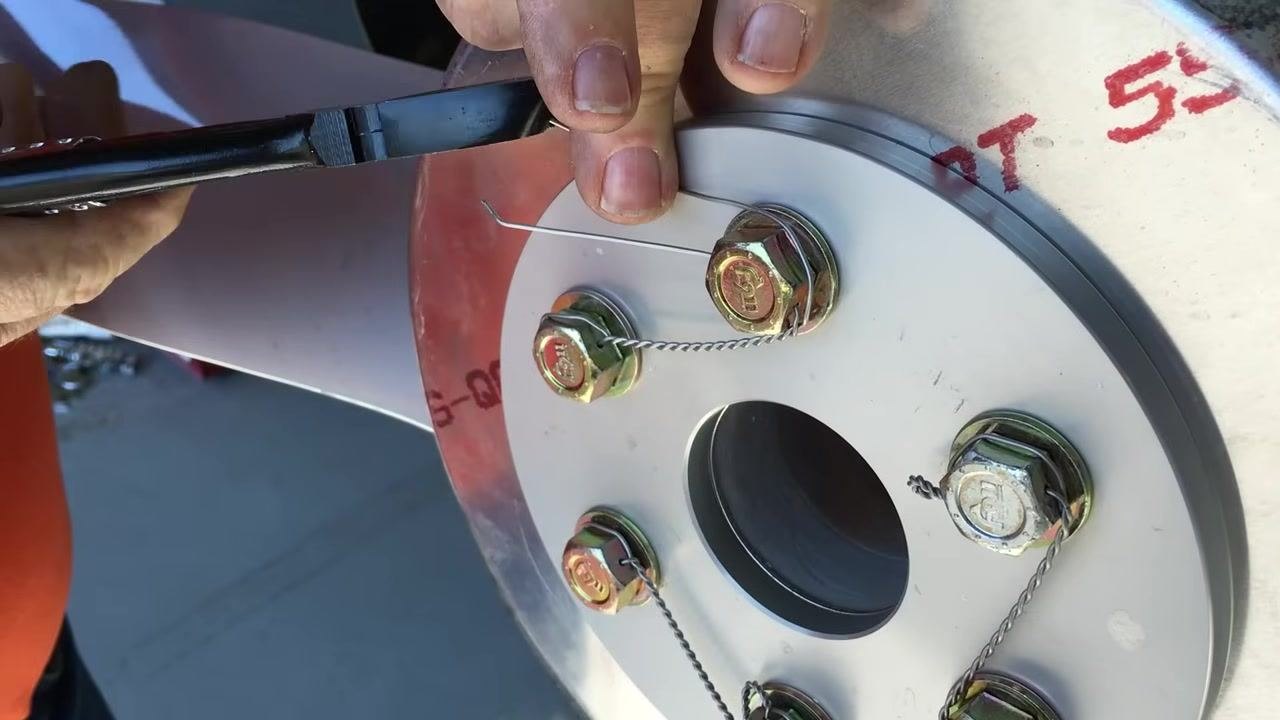
Check the completed section
Inspect the completed section of safety wire for proper routing, tightness, and correct number of twists. Ensure the wire is securely fastened and the tag end is properly positioned.
Safety note: Always twist the final tag end in the opposite direction if necessary to prevent it from pulling off the bolt. Double-check all connections for security and compliance with safety wiring standards. Repeat these steps for each remaining pair of bolts.
Twist the tag end (pigtail) in the opposite direction
Align yourself so you are in a direct line with the bolt hole, then hand-twist the tag end (pigtail) of the safety wire in the opposite direction of the main twists. Ensure the pigtail is tightly twisted and positioned close to the bolt head. It is acceptable to use more than seven turns for the pigtail to ensure security.
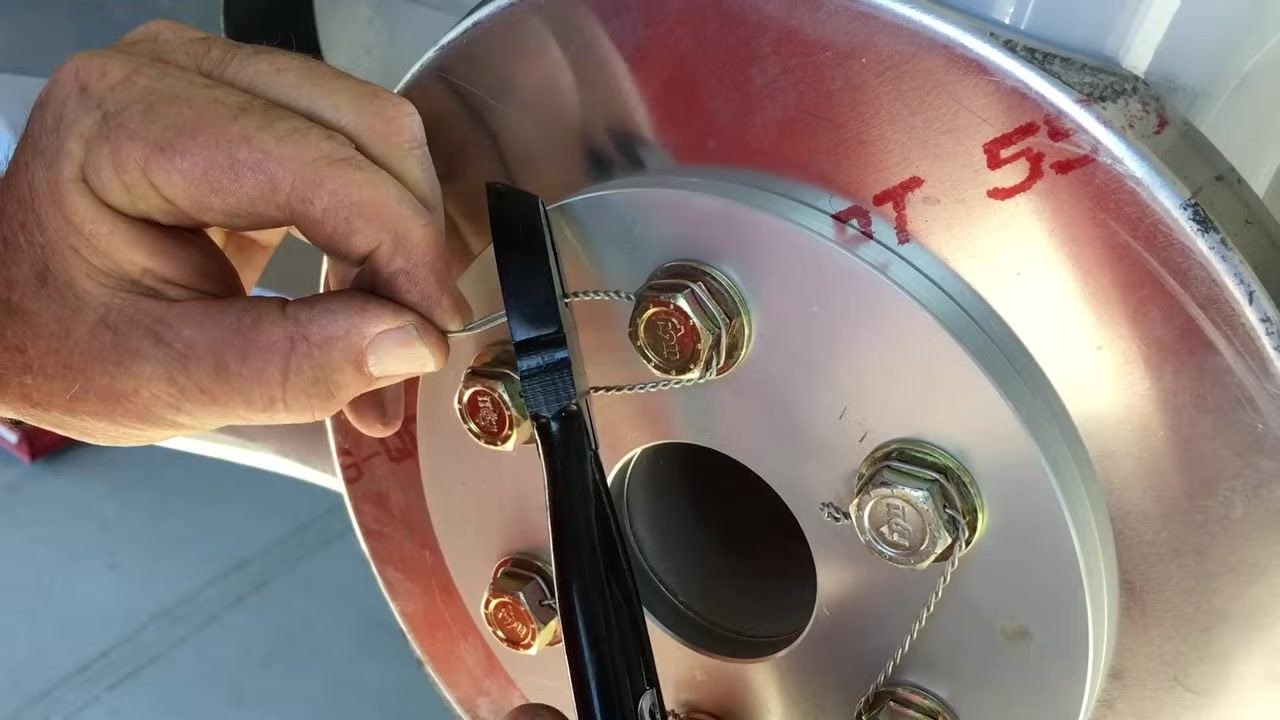
Cut the excess wire
Use wire cutters or the cutting feature on your safety wire pliers to trim the pigtail close to the bolt head, making the cut as flush as possible to avoid leaving sharp or protruding ends.
Tuck and secure the pigtail
Bend the freshly cut pigtail back around the bolt head. This step is important to prevent the pigtail from snagging fingers or clothing during future handling. Ensure the pigtail is tucked securely and does not protrude, and visually inspect the finished wire for any sharp ends or loose sections.
Perform a final inspection
Confirm that all bolts are securely safety-wired, with the wire tight and properly routed. Check that the tag ends are twisted, cut, and tucked neatly, and ensure the installation meets safety wiring standards with no loose or sharp wire ends.
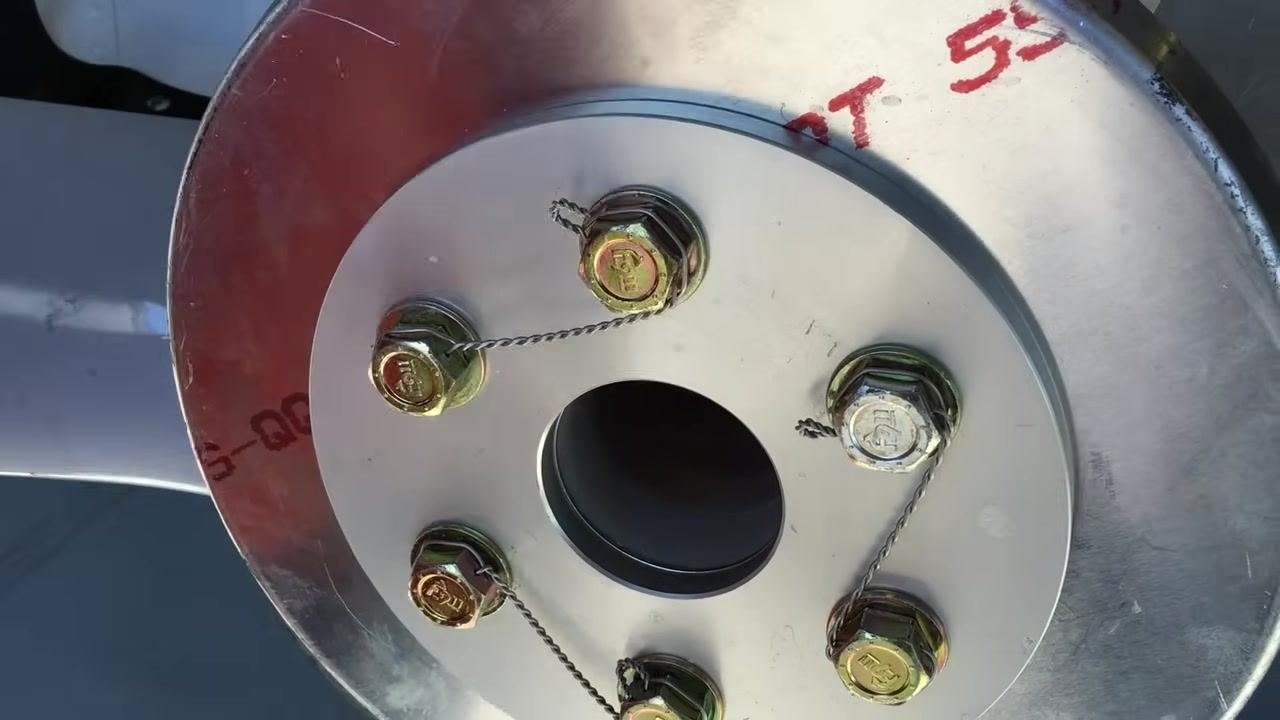
Confirm completion
The safety wiring process is now complete.
Safety notes and verification
- Always twist the final tag end in the opposite direction to prevent it from pulling off the bolt.
- Double-check all connections for security and compliance with safety wiring standards.
- Repeat the process for any additional bolts as required.
- Properly dispose of any excess wire trimmings to maintain a safe work area.
Generation details: cost, quality tiers
Docsie billed 2,500 credits ($1.75) to analyze this 5-minute video at standard quality. The rewrite, template fill and Word/PDF exports were included. The same video at each quality tier:
| Quality | Frames sampled | Credits | Approx. cost |
|---|---|---|---|
| Draft | every 16-30 s | 1,250 | $0.88 |
| Standard (this guide) | every 8-15 s | 2,500 | $1.75 |
| Detailed | every 4-7 s | 5,000 | $3.50 |
| Ultra | every 1-3 s | 10,000 | $7.00 |
Credits priced at $0.70 per 1,000; plans include a monthly allowance. Enterprise customers on on-premise or bring-your-own-model deployments run this on their own inference and pay no per-video credits.
Generated by Docsie Video-to-Docs on 2026-09-08 from a 4-minute video. Screenshots are frames from the source video and belong to their creator, Glenn Brasch, whose original is embedded above. If you own this video and want the guide removed or credited differently, contact us and we will act within one business day.