
How to Buck Rivets
This procedure explains how to buck rivets correctly, covering rivet selection, tool setup, the bucking technique itself, and how to inspect your work for quality. Following these steps ensures you use the correct rivet size, apply proper bucking technique, and can identify both correct and incorrect results before moving on to production work.
Video: Bucking Rivets by Schneider Tech Digest (2023). All credit for the demonstration goes to the creator; watch the original on YouTube. The written guide below was generated from this video by Docsie. Creator? Request a change or removal.
This procedure explains how to buck rivets correctly, covering rivet selection, tool setup, the bucking technique itself, and how to inspect your work for quality. Following these steps ensures you use the correct rivet size, apply proper bucking technique, and can identify both correct and incorrect results before moving on to production work.
Purpose
This SOP demonstrates how to buck rivets properly, why selecting the correct rivet size matters, and what a correctly bucked rivet should look like compared to an improperly bucked one.
Scope
This procedure applies to any operator preparing to buck rivets on a workpiece, including rivet selection, air hammer setup, the bucking operation, and post-bucking inspection.
Required equipment and PPE
- Selection of rivets in multiple sizes (e.g., 14X5/8, 14X3/4, and 14X7/8 full braz rivet hard)
- Air hammer with rivet head bit(s) matching your rivet sizes
- Bucking bar
- Vise and workbench
- Safety glasses
- Gloves
- Work shirt
Gather rivets and tools
Gather all necessary rivets and tools before starting. Ensure you have a selection of rivet sizes available, and prepare your work area for easy access to rivets and tools.
Identify rivet sizes
Examine bins or containers labeled with rivet specifications before selecting the rivets you need. For example, bins may be labeled "14X5/8 FULL BRAZ RIVET HARD," "14X3/4 FULL BRAZ RIVET HARD," and "14X7/8 FULL BRAZ RIVET HARD," each containing 500 rivets.
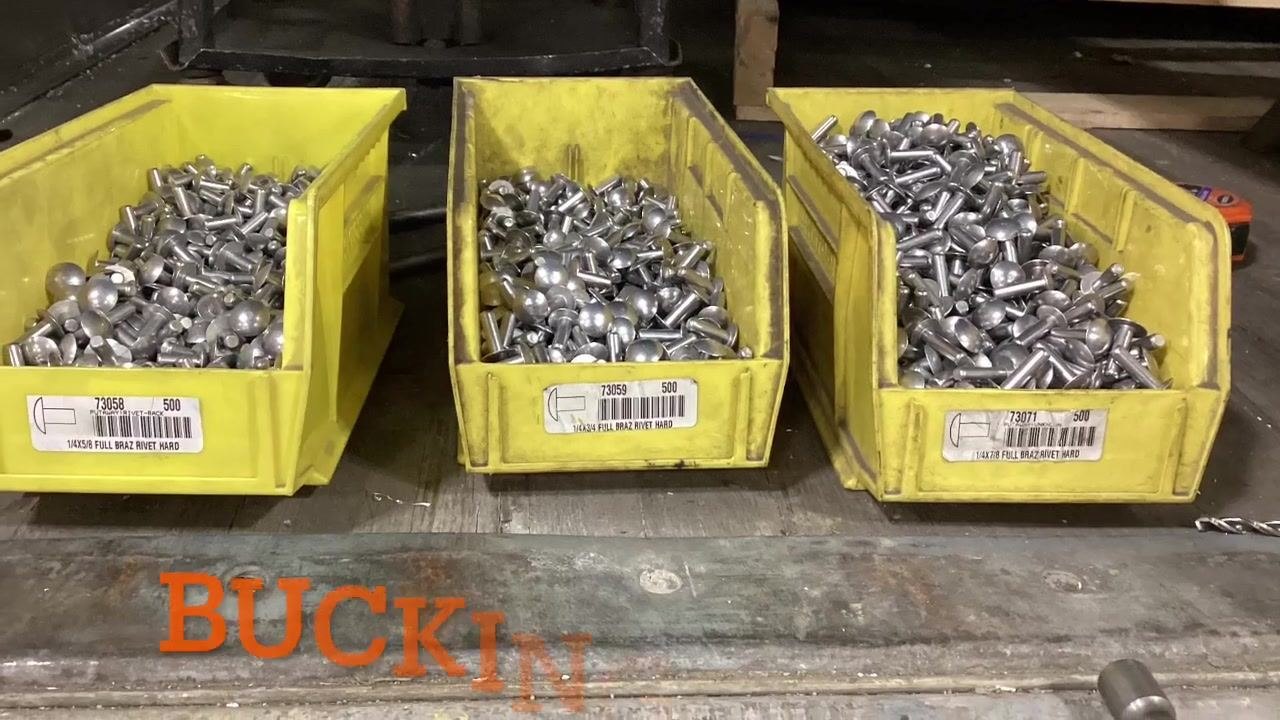
Set up your workspace
Set up your workspace and prepare the smallest rivet for bucking. Wear all required safety equipment, including safety glasses and gloves, and position the workpiece securely before proceeding.
Confirm readiness
Before bucking the first (smallest) rivet, announce your readiness and confirm with your partner if you are working as a team.
Begin the bucking process
Hold the rivet in place using appropriate tools, and use an air hammer or bucking bar as required to buck the rivet.

Inspect the bucked rivet
Observe the appearance of the rivet head on the panel. Compare multiple rivets side by side to see differences in bucking results.

Repeat for additional rivets
Confirm readiness before each bucking operation, then buck the next rivet and use the same inspection process afterward.
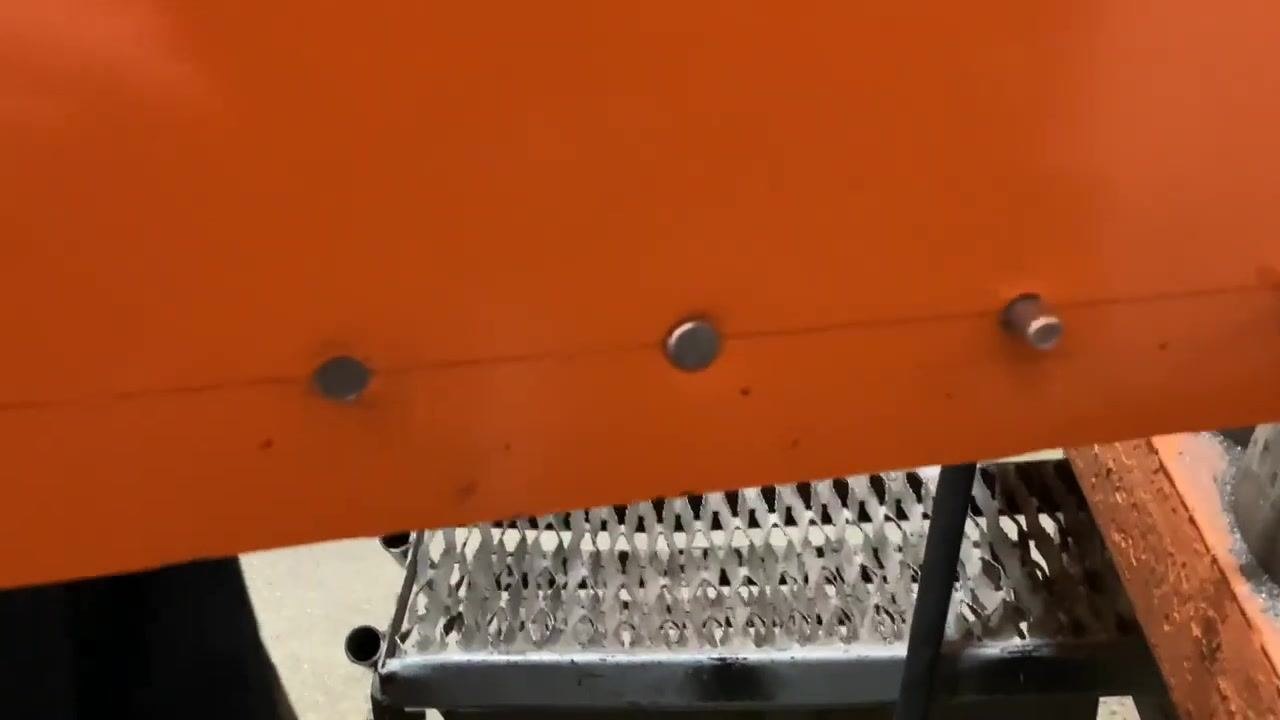
Identify improper bucking — rivet too far inside the panel
If a rivet sits way inside the panel, it is not correctly bucked and does not meet requirements.
Identify improper bucking — rivet too close to the panel
If a rivet is too close to the panel, it is also incorrect. Point to the rivet head to highlight the issue.
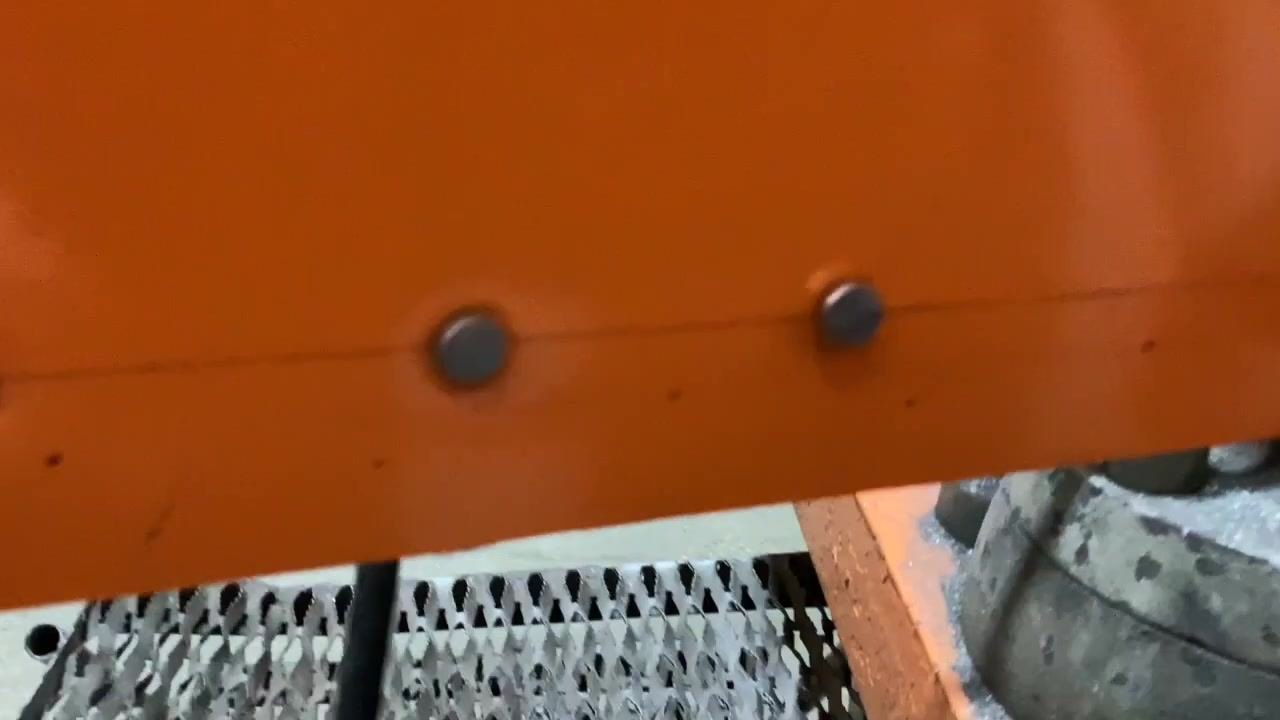
Identify improper bucking — rivet too long
If a rivet is way too long, it is not suitable for the application and must be corrected.
Safety note: Only a properly sized and correctly bucked rivet provides the correct result for the panel. Do not proceed with production work using rivets that show any of the defects above.
Review bucking tools
Show the air hammer with the rivet head bit attached, and display different rivet head shapes and sizes for comparison before selecting the correct one for the job.
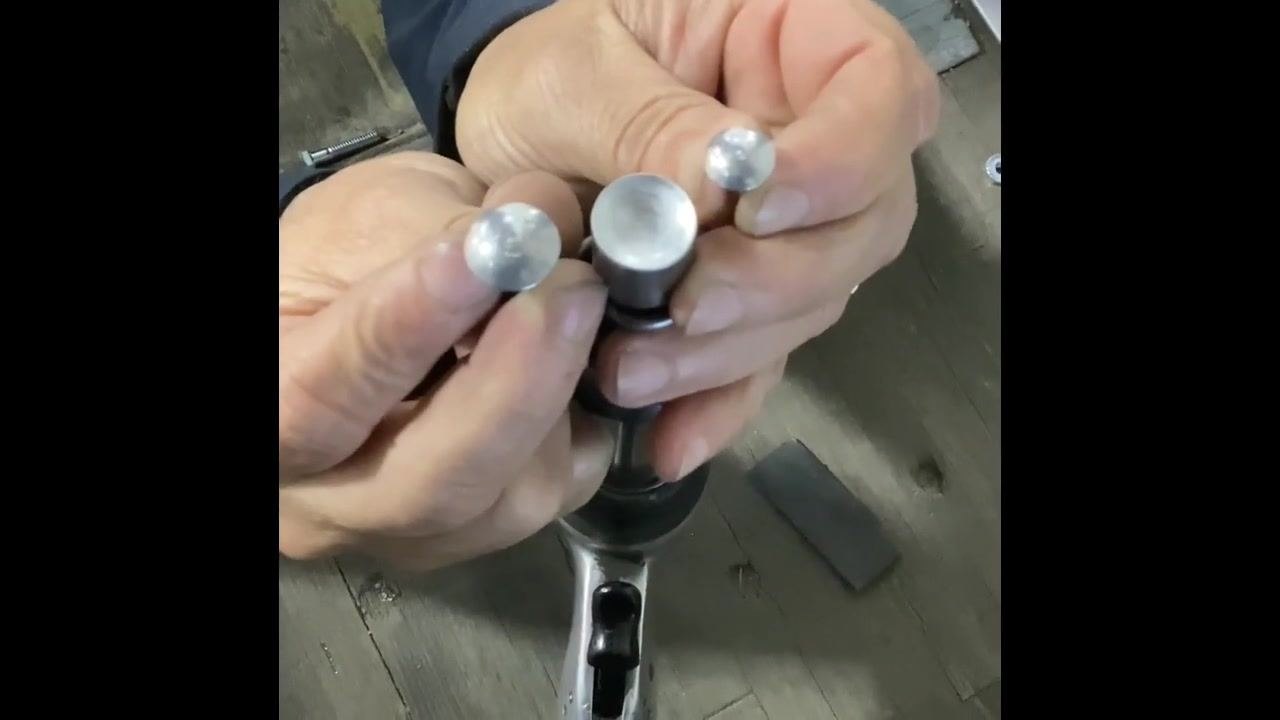
Compare rivet sizes before bucking
Hold two rivets side by side to visually compare their sizes. Identify the correct rivet size for your application — in this comparison, the smaller rivet (right) is not suitable, while the larger rivet (left) is the correct choice.
Select the correct bit size
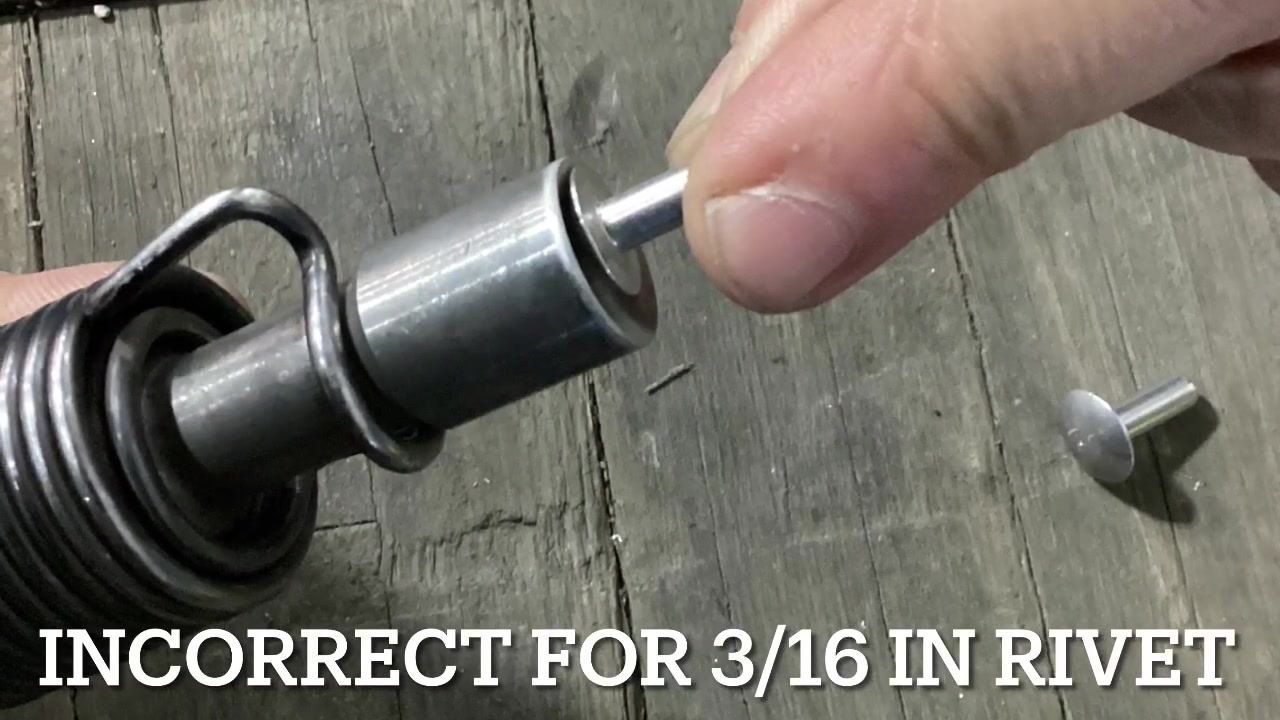
Ensure the bit in your air hammer matches the size of the rivet you are using. Double-check the fit before proceeding to avoid improper bucking.
Center the bit on the rivet head
Position the air hammer so the bit is perfectly centered on the rivet head. Avoid using a bit that is too small for the rivet.
Safety note: Using an undersized bit, as shown in the example labeled "INCORRECT FOR 3/16 IN RIVET," results in a mismatched bit and rivet size and leads to improper bucking.
Apply even, steady pressure
Hold the air hammer firmly and apply consistent pressure to ensure a clean, uniform rivet head. Proper technique results in a smooth, shiny rivet appearance.
Verification: Inspect the finished rivet
Examine the rivet head for a clean, shiny finish without tool marks. A properly bucked rivet has a uniform appearance with no visible indentations or scratches.
Verification: Identify signs of improper bucking
Look for marks or scratches on the rivet head, which indicate the bit jumped or was not held steady. If you see these marks, review your technique and ensure the bit is centered and pressure is applied evenly.
Safety note: If you are unsure about your results or have questions about proper rivet bucking, contact your training team for guidance before continuing.
Summary
By following this procedure, you will select the correct rivet size, buck rivets using proper technique, and correctly identify both good and defective bucking results. Always use the appropriate tools and safety equipment, match your bit size to your rivet, maintain steady pressure throughout the bucking operation, and inspect every rivet for a clean, uniform finish. If any result is in doubt, consult your training resources or team before proceeding.
Generation details: cost, quality tiers
Docsie billed 2,000 credits ($1.40) to analyze this 4-minute video at standard quality. The rewrite, template fill and Word/PDF exports were included. The same video at each quality tier:
| Quality | Frames sampled | Credits | Approx. cost |
|---|---|---|---|
| Draft | every 16-30 s | 1,000 | $0.70 |
| Standard (this guide) | every 8-15 s | 2,000 | $1.40 |
| Detailed | every 4-7 s | 4,000 | $2.80 |
| Ultra | every 1-3 s | 8,000 | $5.60 |
Credits priced at $0.70 per 1,000; plans include a monthly allowance. Enterprise customers on on-premise or bring-your-own-model deployments run this on their own inference and pay no per-video credits.
Generated by Docsie Video-to-Docs on 2026-09-14 from a 3-minute video. Screenshots are frames from the source video and belong to their creator, Schneider Tech Digest , whose original is embedded above. If you own this video and want the guide removed or credited differently, contact us and we will act within one business day.