
How to Use Sick Time in Workday
This guide walks you through how to use sick time in Workday, from opening the request form to confirming your submission. It also covers how to check the status of a pending request and how to cancel a time off entry if your plans change.
Video: How to Request or Cancel Time Off in Workday | ZaranTech by Workday Learner Community (2024). All credit for the demonstration goes to the creator; watch the original on YouTube. The written guide below was generated from this video by Docsie. Creator? Request a change or removal.
This guide walks you through how to use sick time in Workday, from opening the request form to confirming your submission. It also covers how to check the status of a pending request and how to cancel a time off entry if your plans change.
Prerequisites
- Access to your Workday account and dashboard.
- Awareness of your available sick time balance before submitting a request.
Requesting sick time off in Workday
Navigate to the Workday home page
Open Workday and confirm you are on the main dashboard. The dashboard displays sections such as "Hi There," "Awaiting Your Action," "Announcements," "Important Dates," and "Your Top Apps." Check the date shown in the top right corner to confirm you are viewing current information.
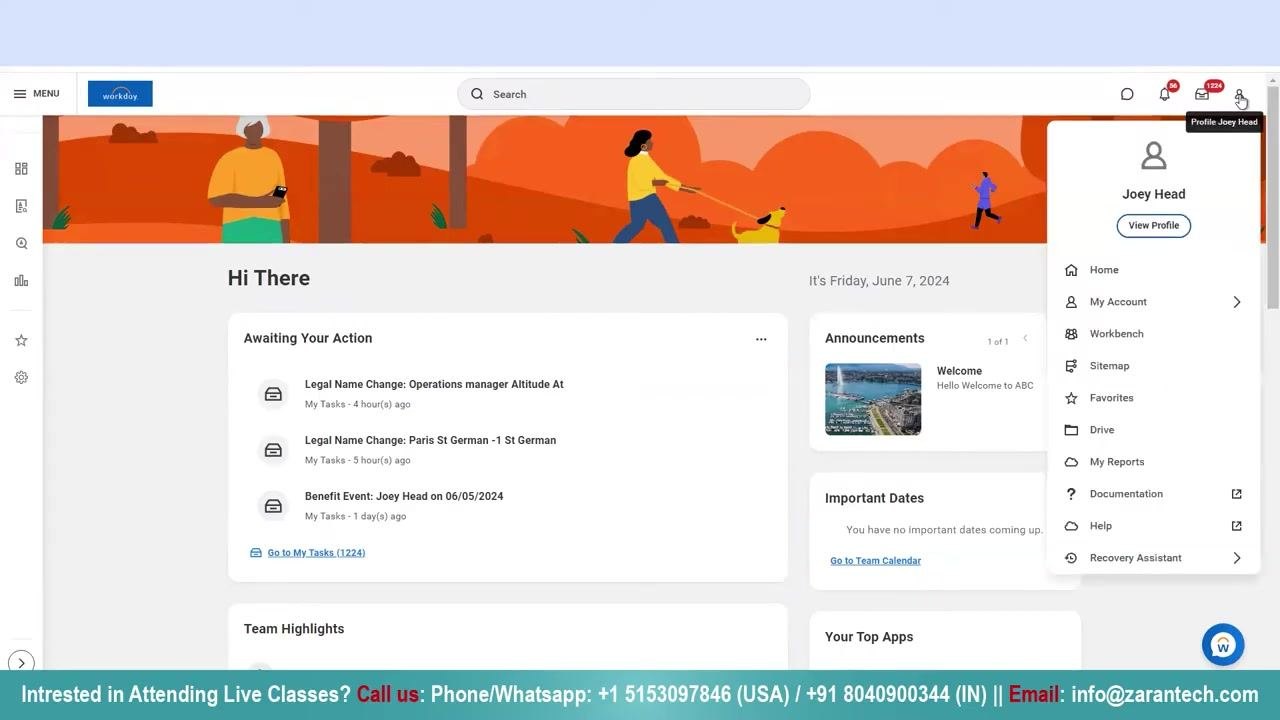
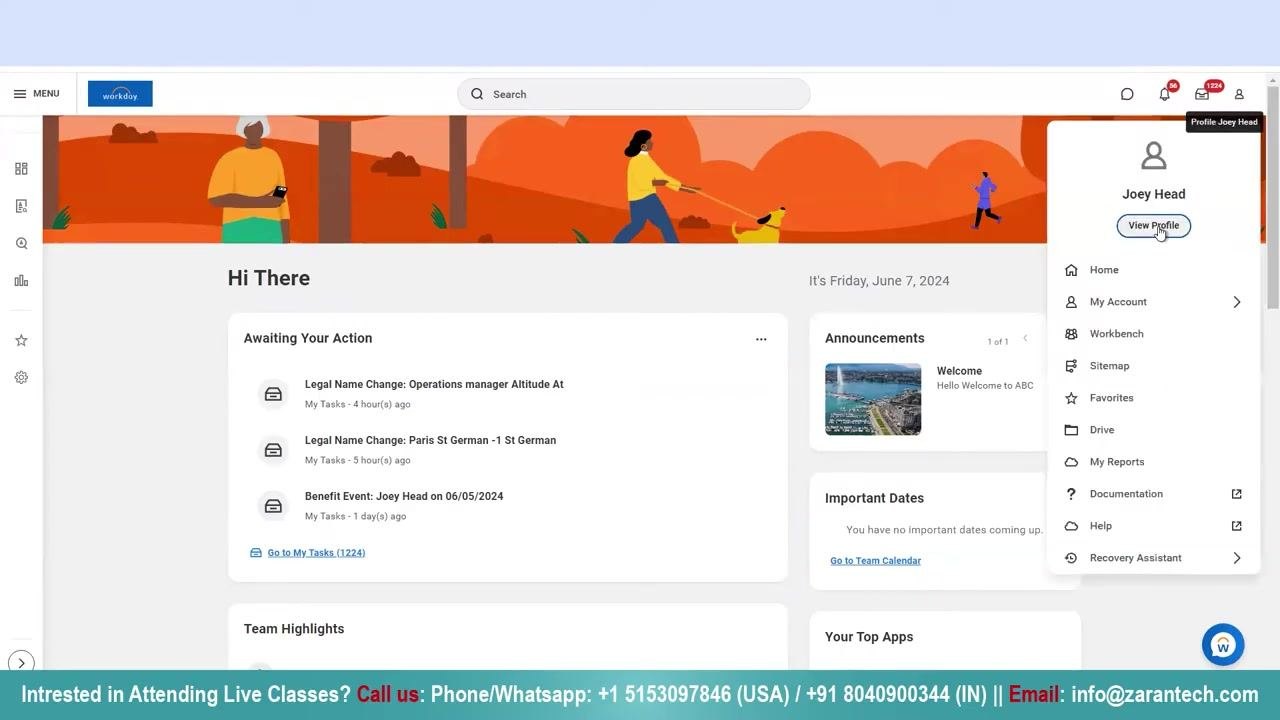
Access your profile
Click your profile icon or name in the upper right corner. From the dropdown menu, select View Profile.
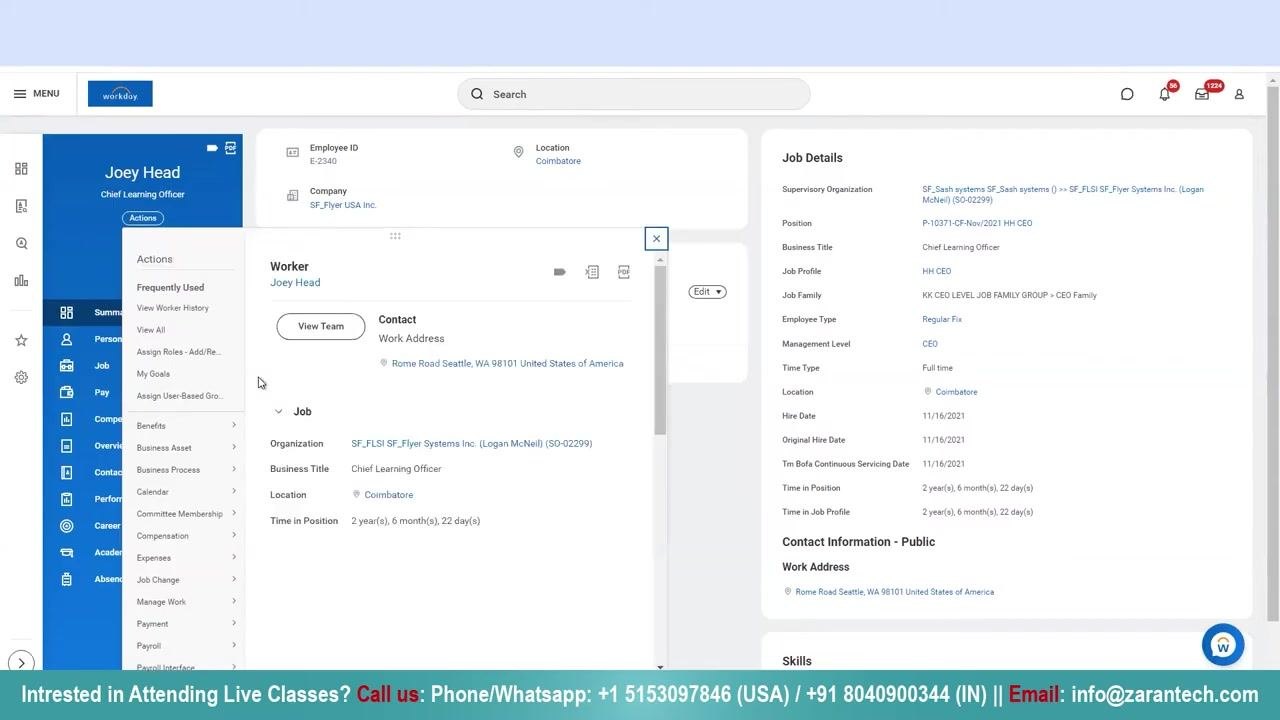
Open the Actions menu
On your profile page, locate the left sidebar and click the Actions button to open the actions menu. Scroll down until you find the Time and Leave section.
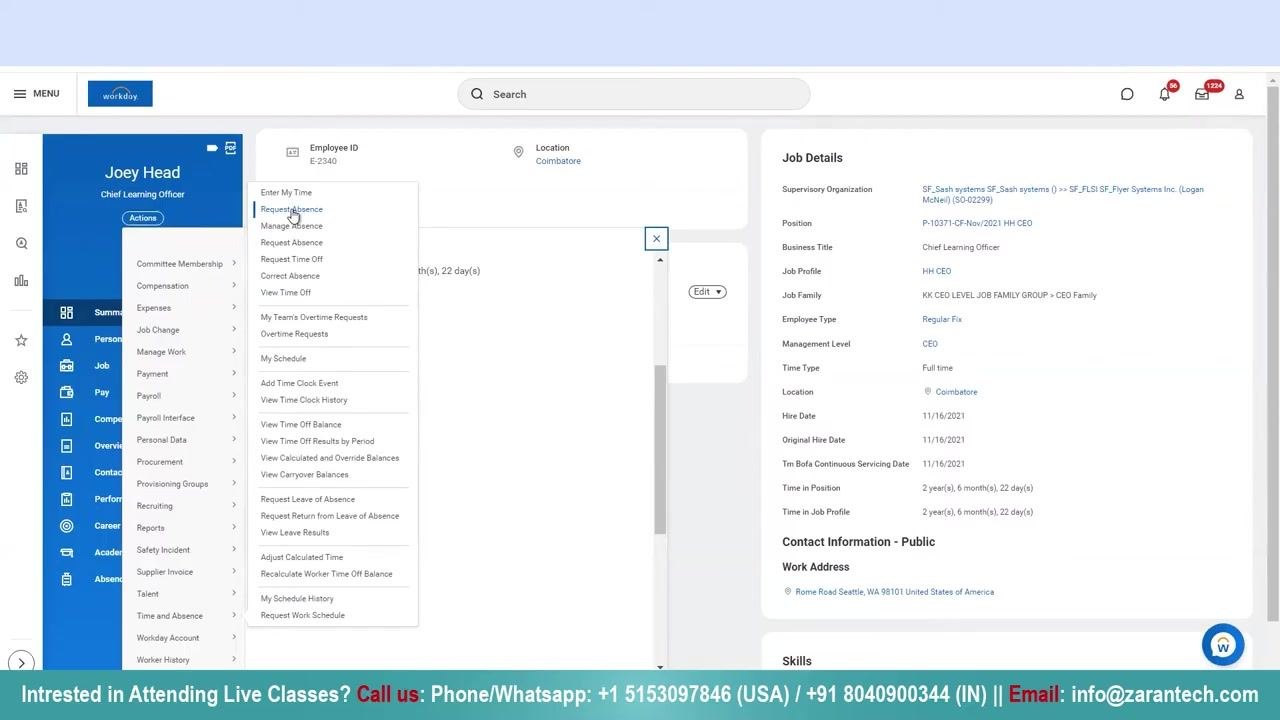
Select Request Absence or Request Time Off
Under Time and Leave in the Actions menu, hover over or click to expand the available options. Select Request Absence or Request Time Off from the dropdown list.
View the Request Time Off calendar
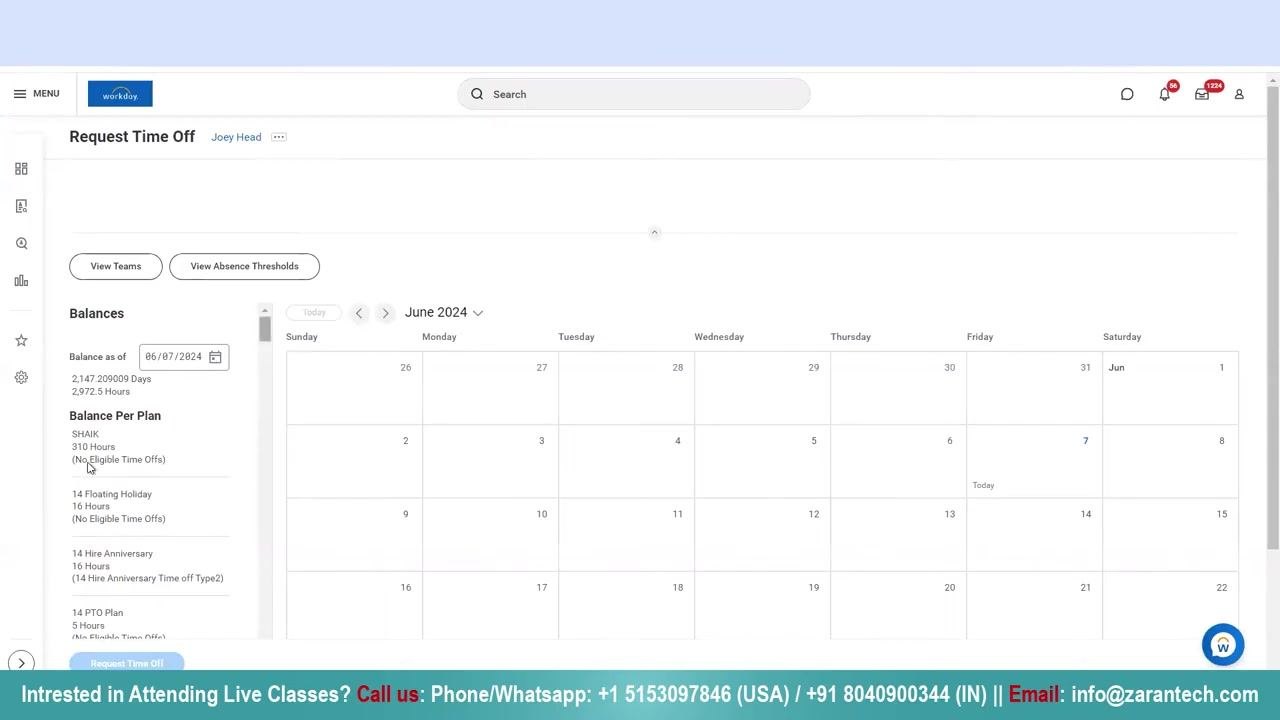
The Request Time Off page opens with a calendar for the current month. You will see View Teams and View Absence Thresholds buttons at the top. Allow the page a moment to fully load.
Review your available balances
On the left side of the Request Time Off page, find the Balances section. This "Balance Per Plan" list shows all available time off types and their current balances, such as Floating Holiday, Hire Anniversary, and PTO Plan hours. If you want to use sick time in Workday, check the Sick Time Off Plan balance here to confirm you have hours available before proceeding.
Select the date for your time off
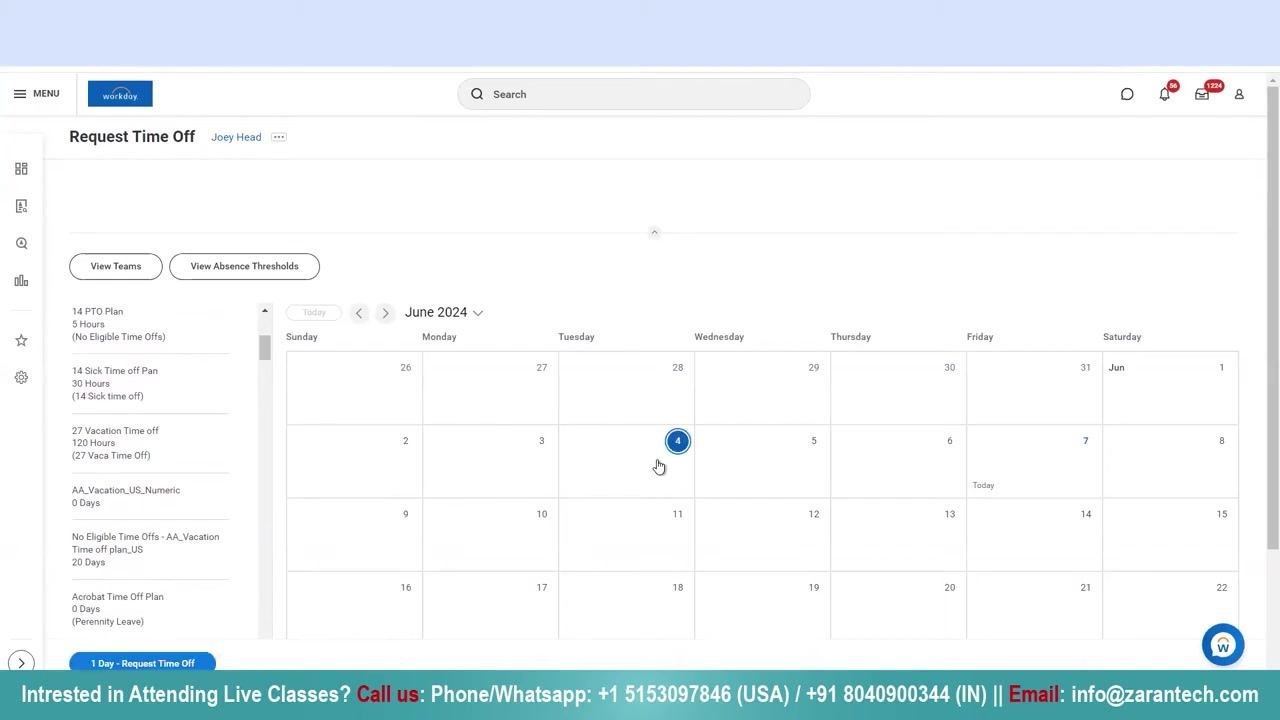
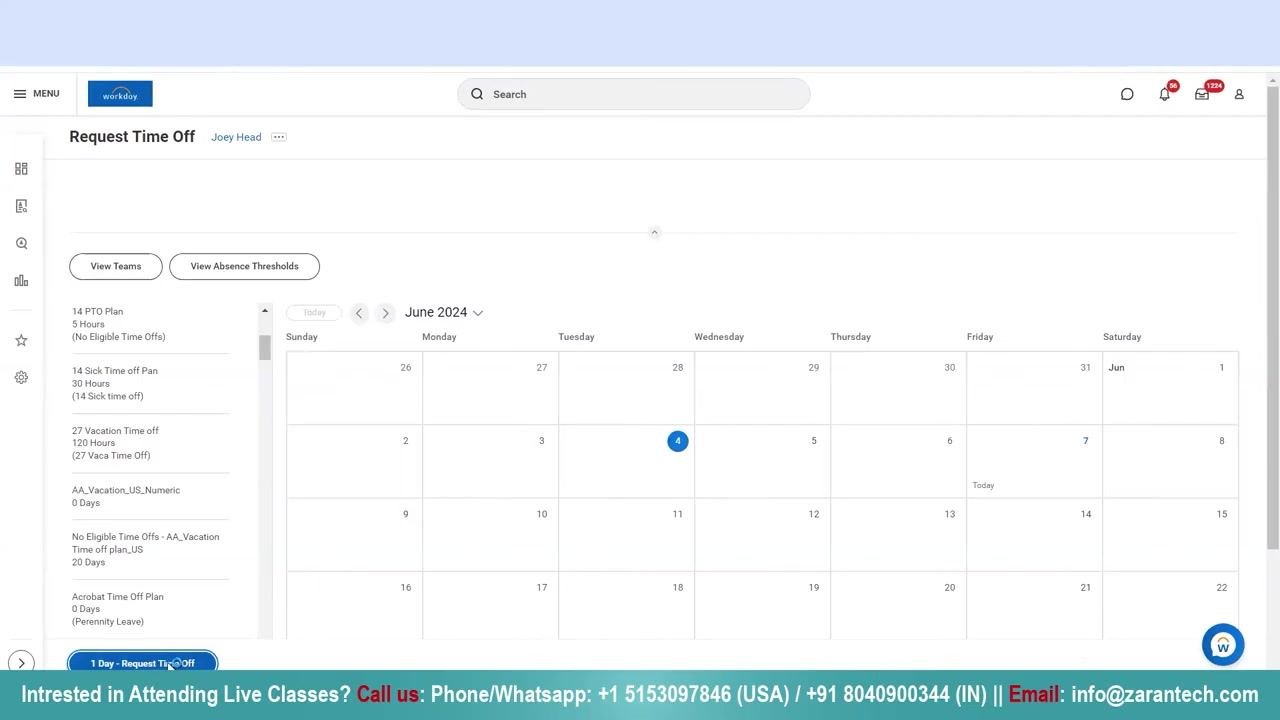
On the calendar, click the specific date you want to request off. A blue highlight appears on the selected date to confirm your choice.
Wait for the Request Time Off pop-up
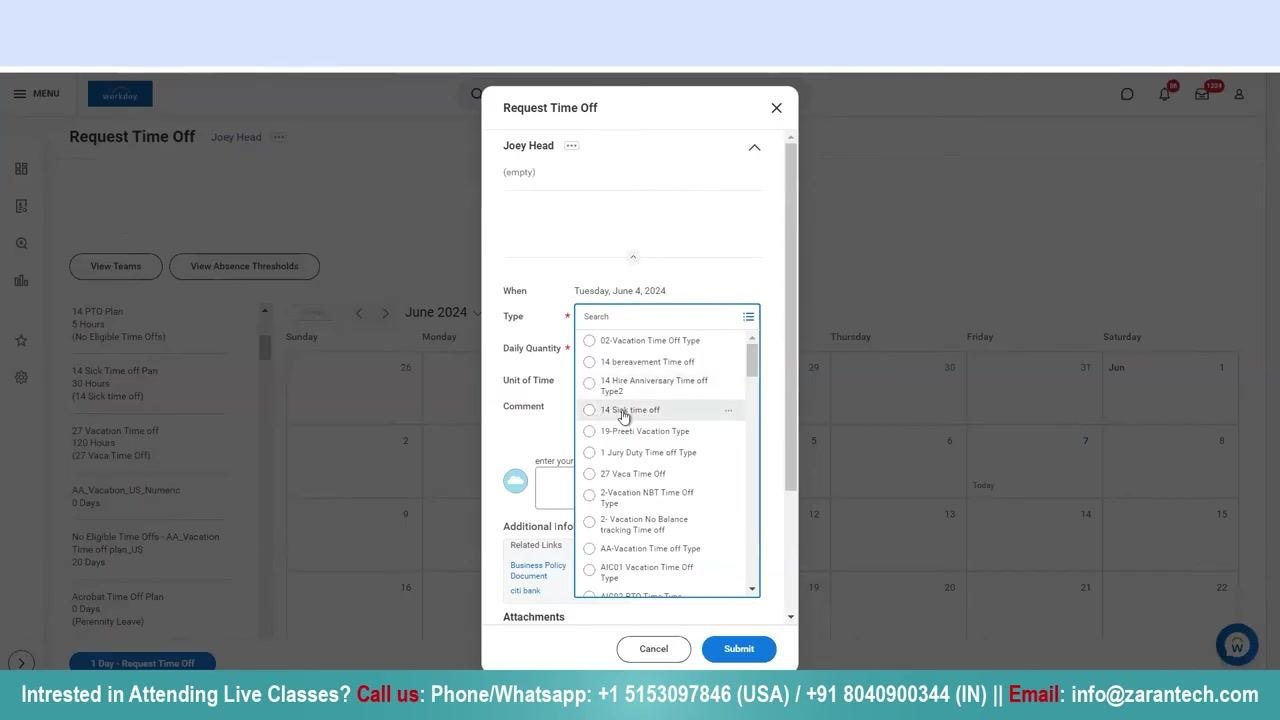
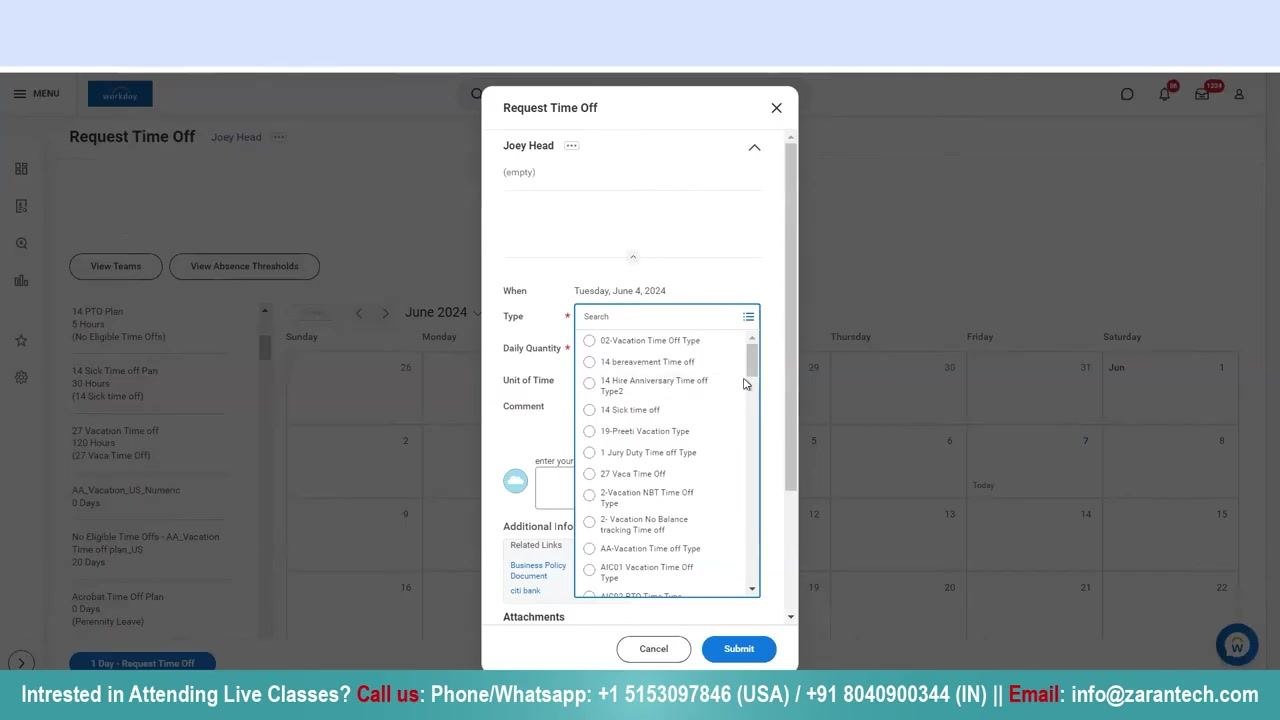
After selecting a date, wait for the Request Time Off pop-up window to load. If the system responds slowly, allow a few moments for the window to appear. The pop-up includes fields for "When," "Type," "Daily Quantity," "Unit of Time," "Comment," and "Attachments."
Choose the sick time off type
In the "Type" dropdown, scroll through the available options and select 14 Sick time off to request sick leave.
Enter the daily quantity
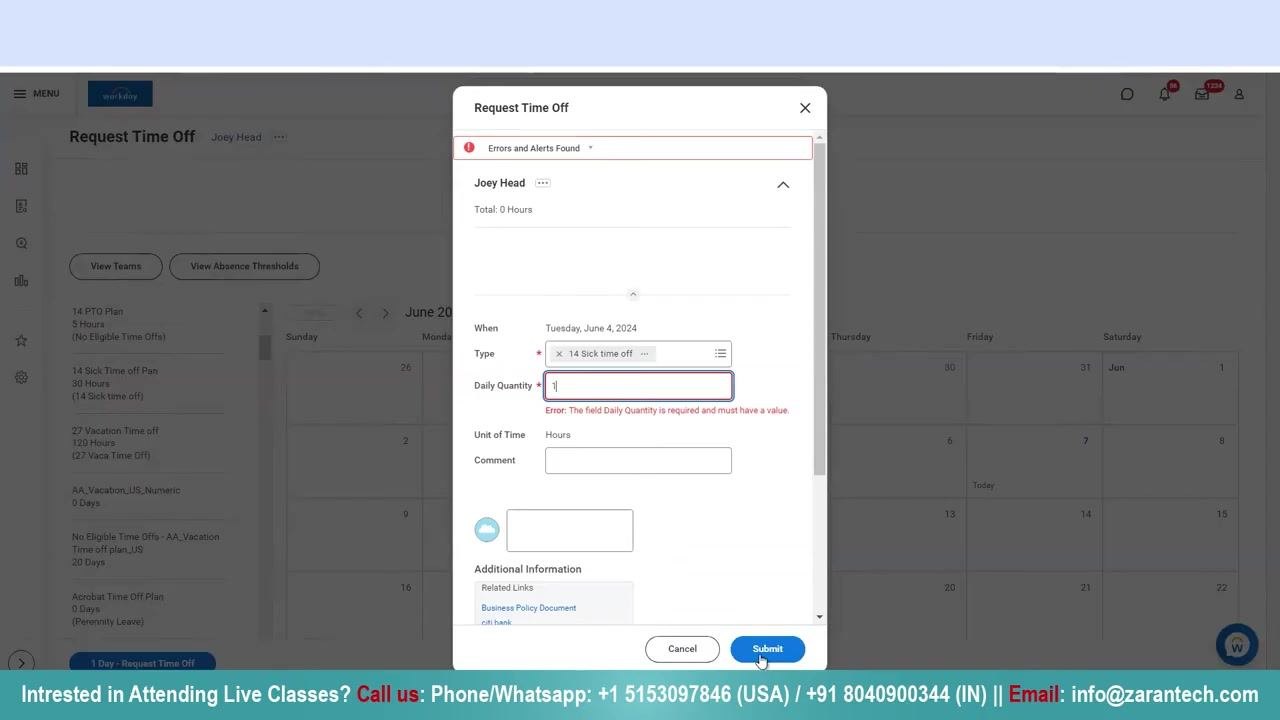
In the "Daily Quantity" field, enter 1 to request one day off. If you try to submit without entering a value, an error message appears: "Error: The field Daily Quantity is required and must have a value."
Submit the time off request
Once all required fields are filled in, click Submit at the bottom of the pop-up window and wait for the system to process your request.
Confirm your submission
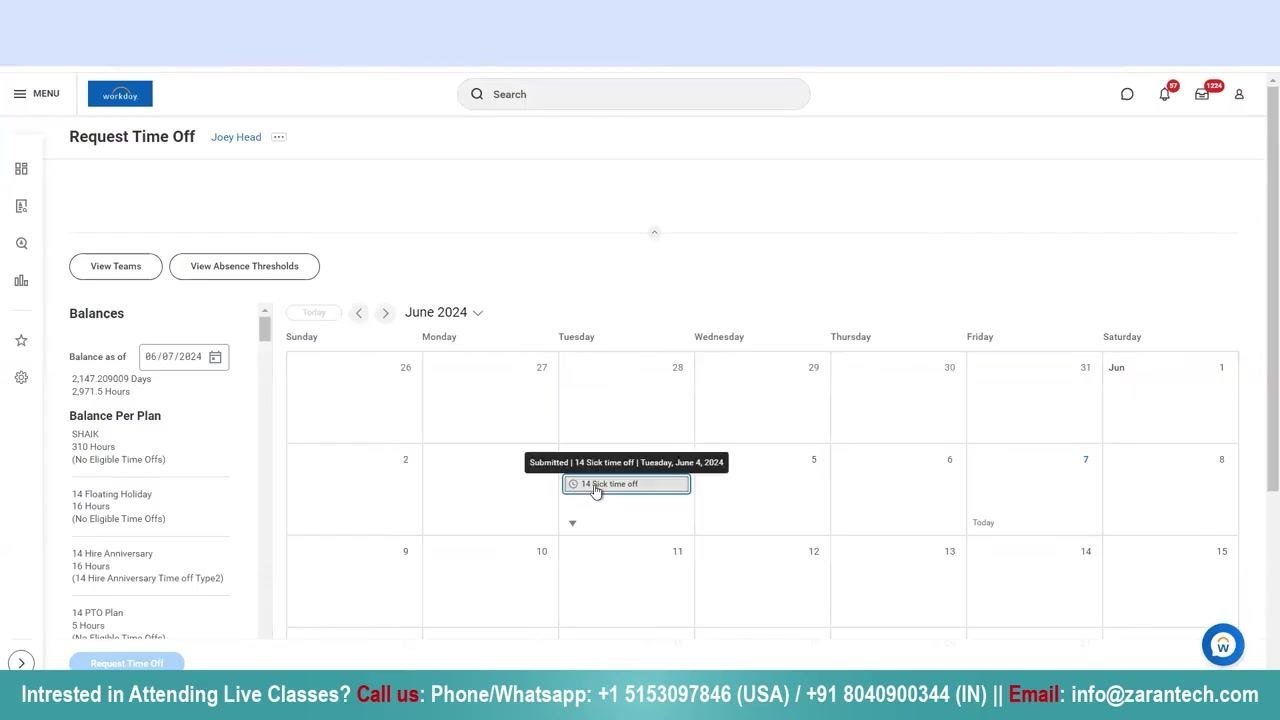
After submitting, a confirmation message appears at the top of the screen: "Your request has been submitted." Your sick time off entry now appears on the calendar for the selected date.
Checking the status of your request
Check the status of your submitted request
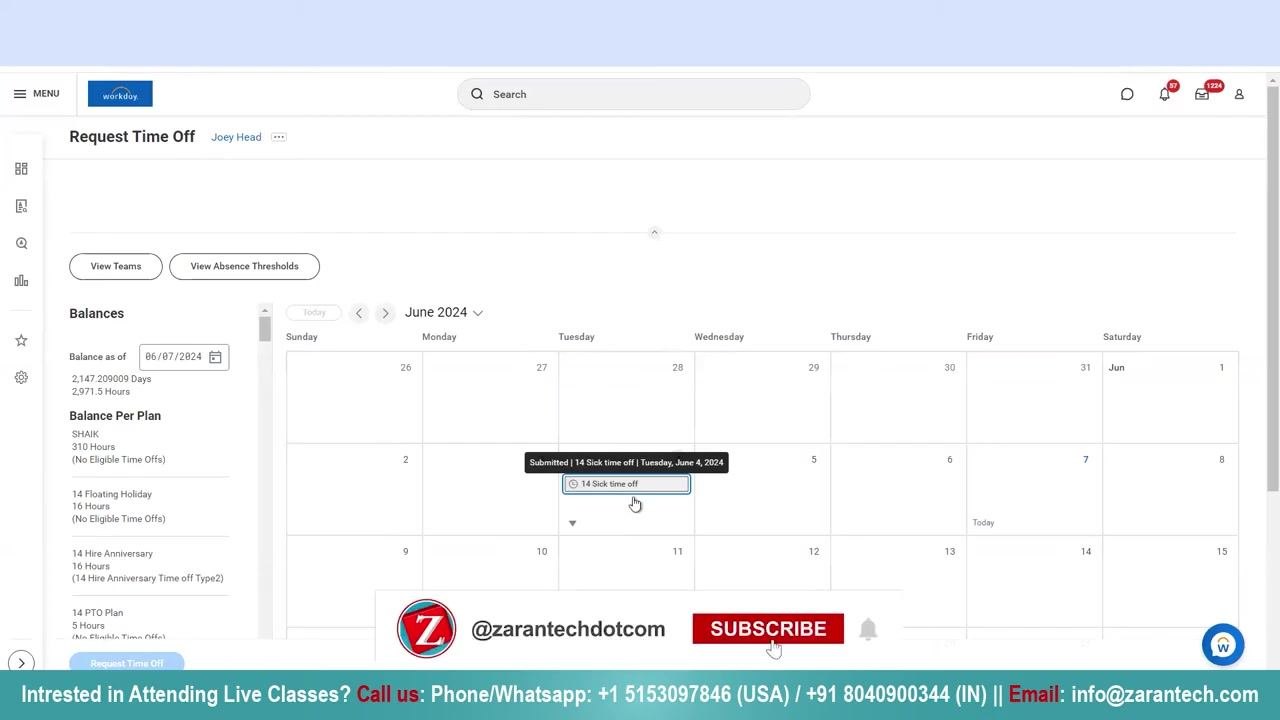
View the calendar in the Request Time Off section and locate your requested date. Hover over the date to see its status, which displays as "Submitted | 14 Sick time off" with the corresponding date until your manager approves it. The confirmation message "Your request has been submitted" also appears at the top of the screen.
Wait for manager approval
Your request is sent to your manager for approval. Once approved, the calendar status updates to "Approved" for the selected date. Until then, the status remains "Submitted."
Cancelling a submitted time off request
Initiate the cancellation process
If you no longer need the requested time off, locate the submitted entry on the calendar and click on it. A dropdown or options menu appears for the selected request.
Open the Cancel Business Process window
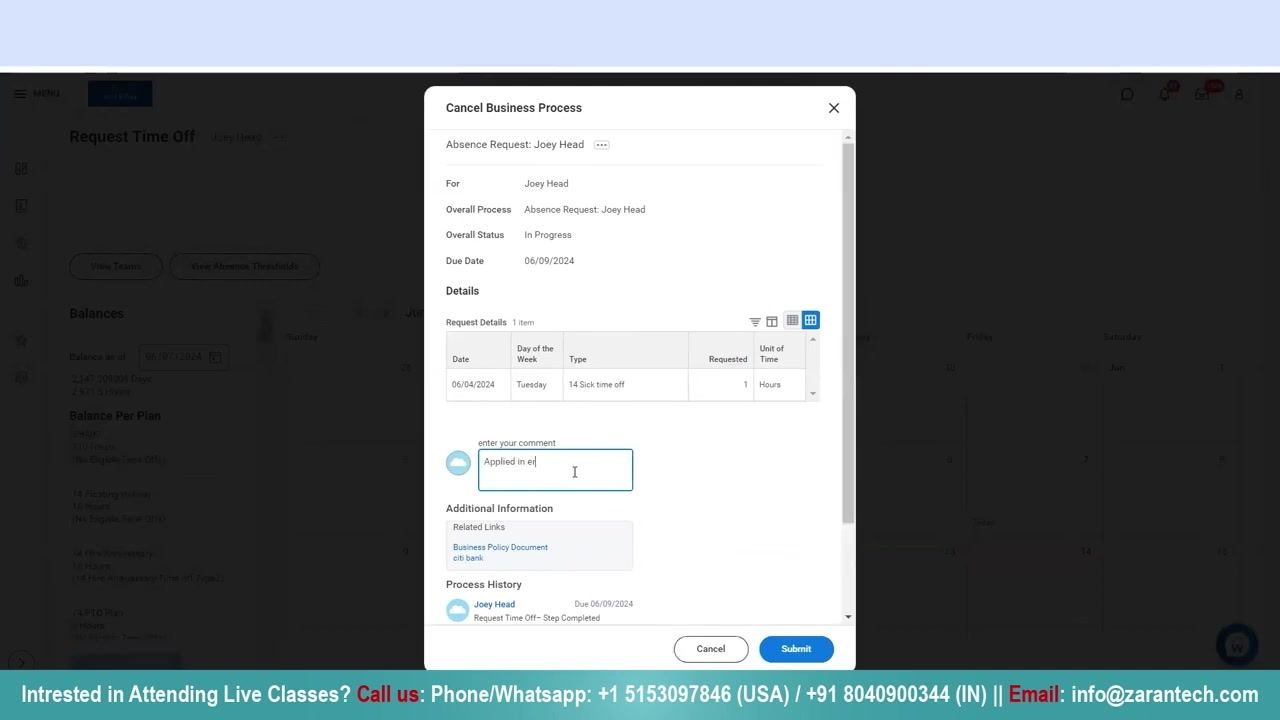
Select the option to cancel the request. The Cancel Business Process window opens, showing the date, type, and quantity of the time off requested. In the "enter your comment" field, provide a reason for the cancellation, such as "Applied in error."
Submit the cancellation
After entering your comment, click Submit at the bottom right of the window to confirm the cancellation.
Verify the cancellation
A confirmation message, "Event Canceled," appears at the top of the screen once the cancellation is submitted. The cancelled entry no longer appears on your calendar for that date.
Additional support
If you need further assistance, the following contact options are available:
- Phone/WhatsApp (USA): +1 5153097846
- Phone/WhatsApp (IN): +91 8040900344
- Email: info@zarantech.com
- 24/7 chat support

What's next
Now that you know how to use sick time in Workday, you can monitor the approval status of any request and cancel it if your plans change. Always include a clear reason when cancelling a request to keep your records accurate.
Generation details: cost, quality tiers
Docsie billed 2,500 credits ($1.75) to analyze this 5-minute video at standard quality. The rewrite, template fill and Word/PDF exports were included. The same video at each quality tier:
| Quality | Frames sampled | Credits | Approx. cost |
|---|---|---|---|
| Draft | every 16-30 s | 1,250 | $0.88 |
| Standard (this guide) | every 8-15 s | 2,500 | $1.75 |
| Detailed | every 4-7 s | 5,000 | $3.50 |
| Ultra | every 1-3 s | 10,000 | $7.00 |
Credits priced at $0.70 per 1,000; plans include a monthly allowance. Enterprise customers on on-premise or bring-your-own-model deployments run this on their own inference and pay no per-video credits.
Generated by Docsie Video-to-Docs on 2026-09-08 from a 4-minute video. Screenshots are frames from the source video and belong to their creator, Workday Learner Community, whose original is embedded above. If you own this video and want the guide removed or credited differently, contact us and we will act within one business day.