
How to Create a Site in SharePoint Online
This guide walks you through creating both a Team Site and a Communication Site in SharePoint using Office 365. You'll learn how to configure site details, set privacy options, add members, and choose a design layout for each site type.
Video: How to Create a Site in SharePoint Online - Beginner Tutorial by Collaboration Coach (2017). All credit for the demonstration goes to the creator; watch the original on YouTube. The written guide below was generated from this video by Docsie. Creator? Request a change or removal.
This guide walks you through creating both a Team Site and a Communication Site in SharePoint using Office 365. You'll learn how to configure site details, set privacy options, add members, and choose a design layout for each site type.
Prerequisites
- Access to your organization's SharePoint homepage
- An Office 365 account with permissions to create sites
- Names or email addresses of any users you want to add as owners or members
Creating a team site
Follow these steps to create a new Team Site connected to an Office 365 group.
-
Open your web browser and navigate to your SharePoint homepage.
-
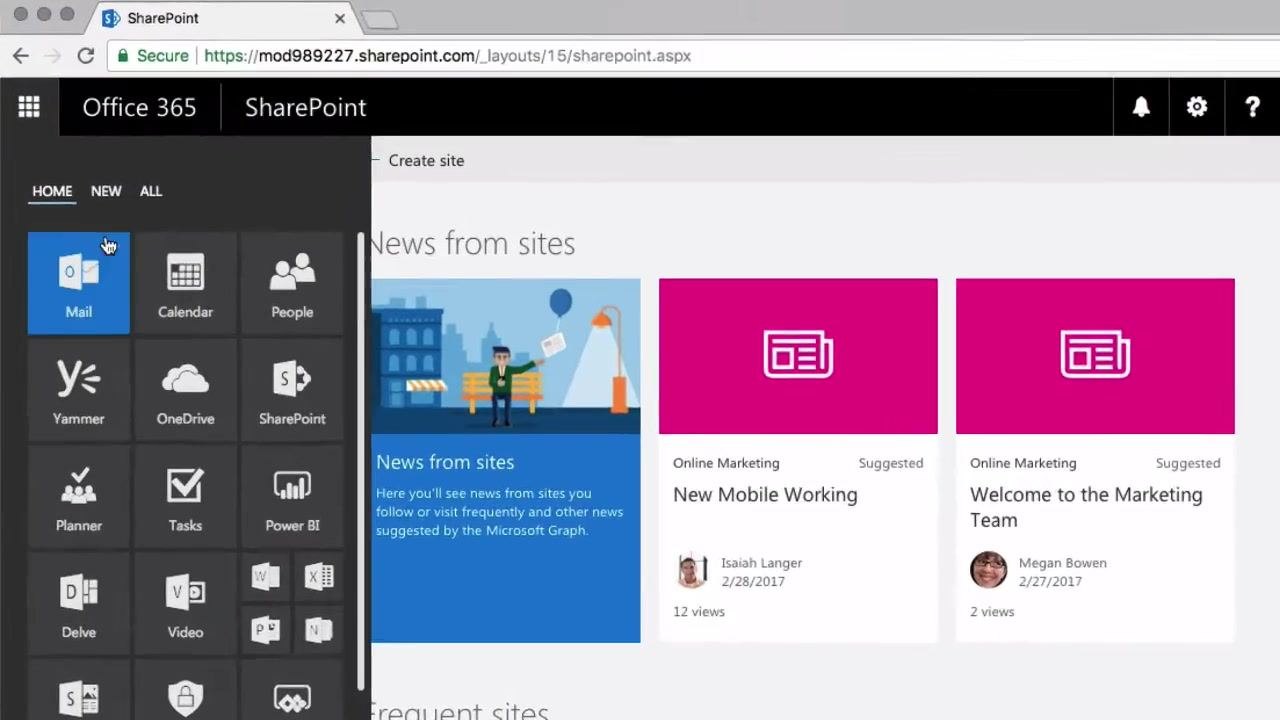
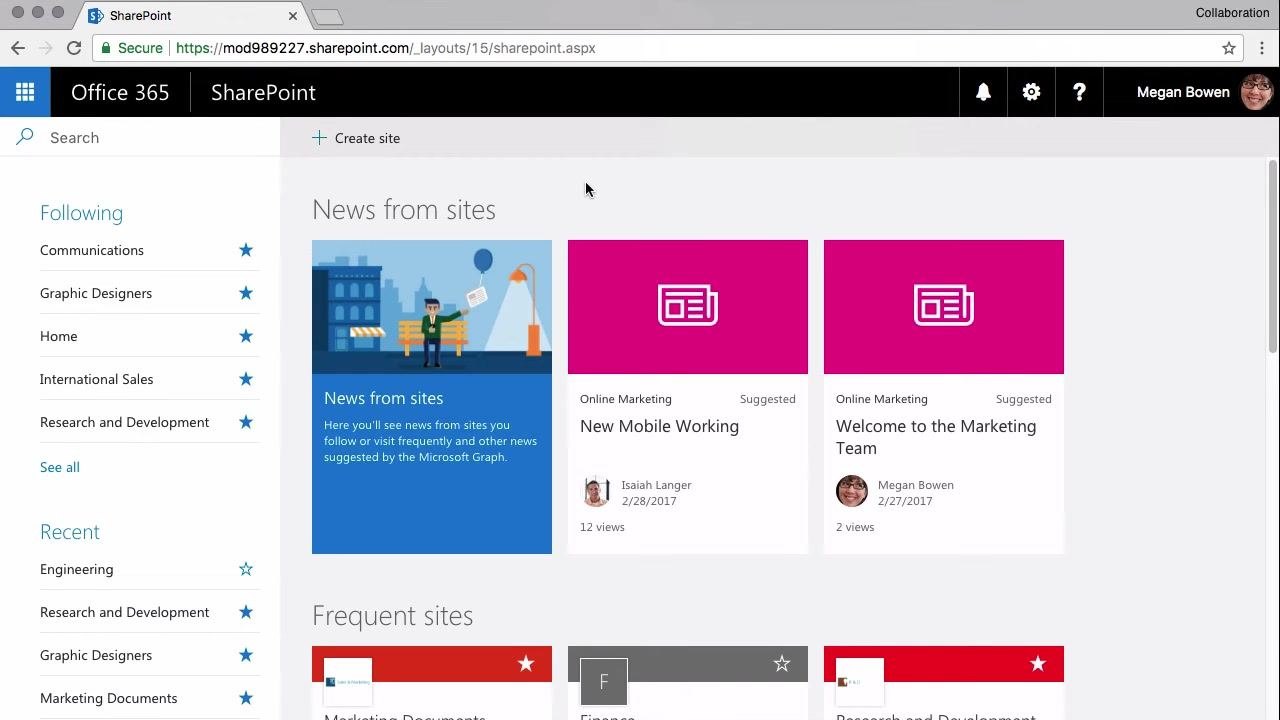
Click the App Launcher (grid icon) in the top left corner of the screen.
-
Select the SharePoint tile from the list of available apps.
-
On the SharePoint homepage, click the Create site button.
-
Choose the type of site you want to create. Two options are available:
- Team site: For team communication, document sharing, and collaboration. Connected to an Office 365 group.
- Communication site: For publishing dynamic content to inform and engage people across your organization.
-
Click Team site to proceed.
-
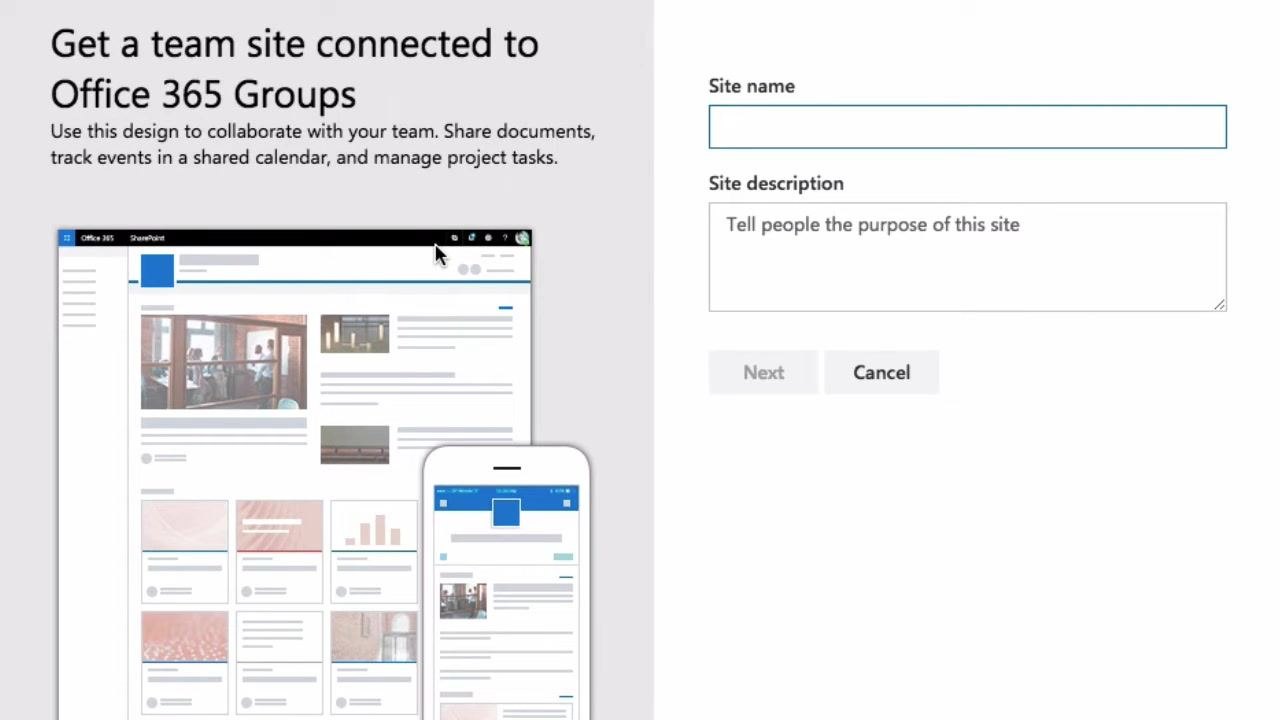
Enter the required information for your new team site:
- Site name: Enter a name for your team site (for example,
My Team). - Site description: Enter a brief description (for example,
a site for my team). - The Group email address and Site Address are generated automatically based on your site name. For example, the group email address becomes
MyTeamand the site address becomeshttps://mod989227.sharepoint.com/sites/MyTeam.
- Site name: Enter a name for your team site (for example,
- Scroll down to Privacy settings and choose between:
- Public: Anyone in your organization can access the site without authorization.
- Private: Only members you specify can access the site; others must request access and be approved by an owner.
For a private team site, select Private - only members can access this site.
-
Click Next to continue.
-
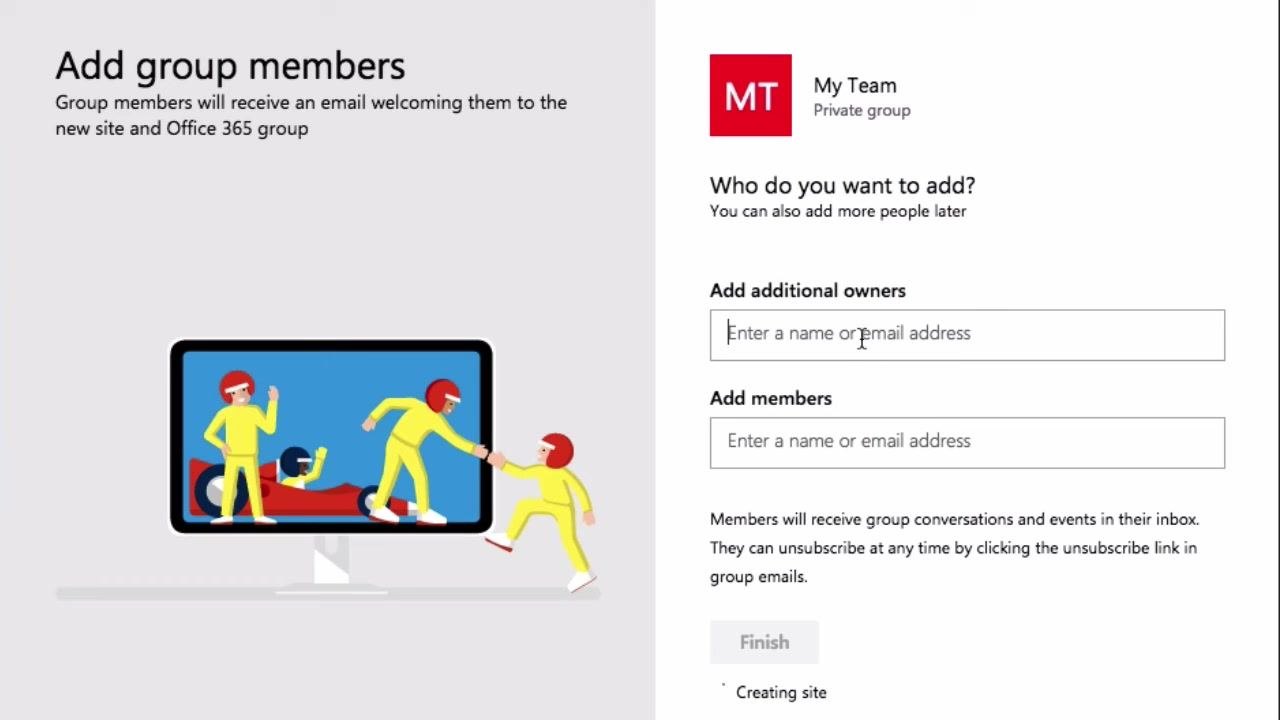
Add group members:
- Add additional owners: Enter names or email addresses of users you want to assign as additional owners (for example,
Alex Wilber). - Add members: Enter names or email addresses of users you want to add as members.
You can add as many owners and members as needed.
- Add additional owners: Enter names or email addresses of users you want to assign as additional owners (for example,
-
Click Finish to create the site and add the specified users.
After completing these steps, you will have a private team site with assigned owners and members, and the appropriate privacy settings for your organization.
Creating a communication site
Once your Team Site is set up, you can create a Communication Site to publish content across your organization.
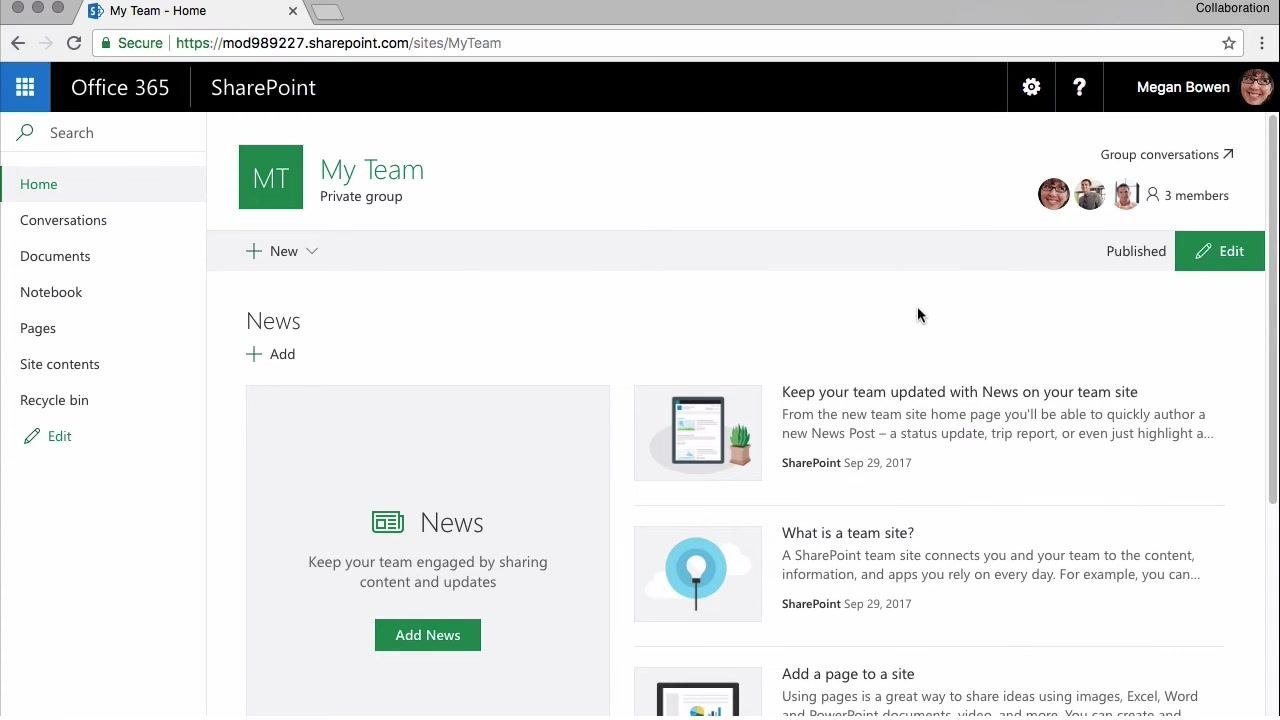
- After creating your Team Site, you're taken to the new site's homepage. Note the following:
- Default News and Activity entries appear in the main area.
- The left-hand navigation includes standard libraries and lists: Home, Conversations, Documents, Notebook, Pages, Site contents, and Recycle bin.
You can customize these entries as needed.
-
Return to the SharePoint homepage and click the Create site button at the top of the page.
-
In the "Create a site" dialog, select Communication site.
-
Choose a design for your Communication Site from three options:
- Topic: Use this design if you have a lot of information to share, such as news, events, and other content.
- Showcase: Use this design to showcase a product, team, or event using photos or images.
- Blank: Start with a blank layout and customize it as needed.
As you select each design, a sample preview appears below to show what the site will look like.
-
For this example, select Showcase as the design.
-
Enter the required information for your new Communication Site:
- Site name: Enter a name for your site (for example,
New Product). - Site Address: Generated automatically based on your site name (for example,
https://mod989227.sharepoint.com/sites/NewProduct). - Site description: Enter a brief description of the site's purpose.
- Site name: Enter a name for your site (for example,
-
Click Finish to create the Communication Site.
-
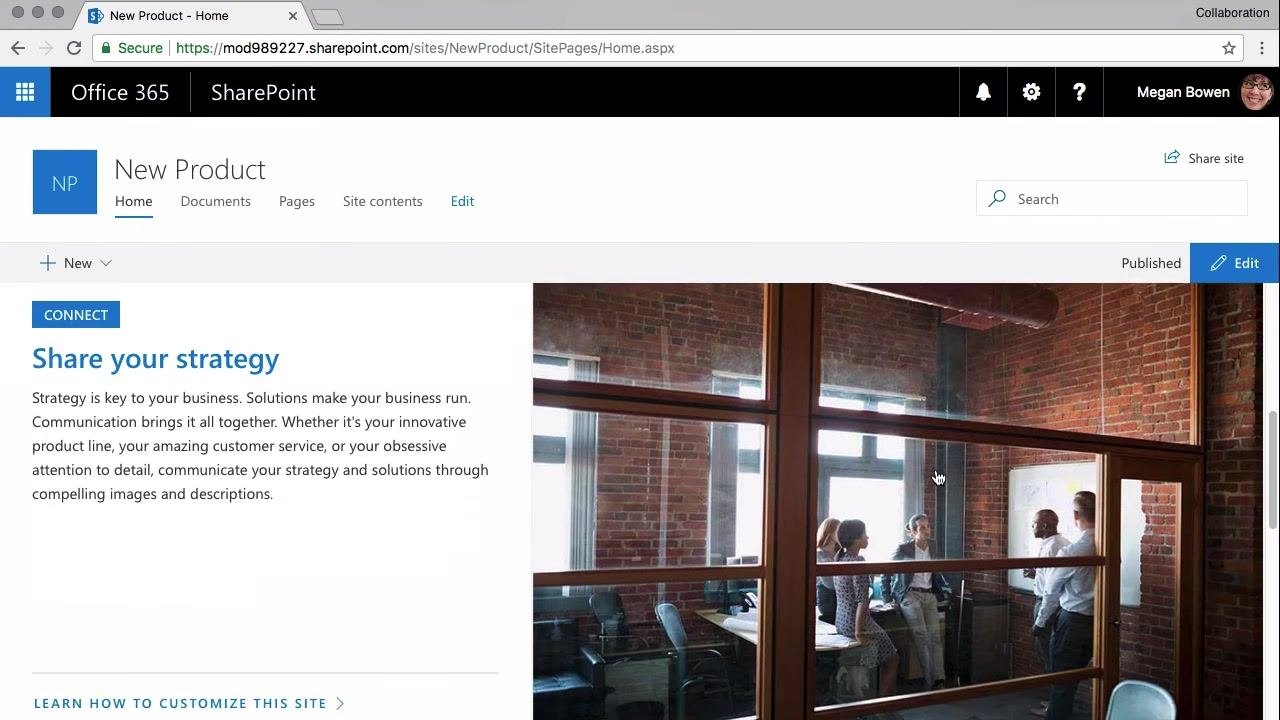
Once the site is created, you're taken to the new Communication Site homepage. Notice that the visual layout differs from the Team Site: it includes large images, text sections, and a prominent area to share your strategy or key messages.
-
Scroll down to view the Image gallery at the bottom of the homepage, which displays a grid of images and makes the site highly visual and engaging.
After completing these steps, you'll have a Communication Site with your chosen design, site details, and a visual layout suited to sharing content across your organization.
What's next
To stay updated on future SharePoint and collaboration tutorials:
- Click the Subscribe button on the video platform (such as YouTube) if you haven't already.
- Enable notifications, usually by clicking the bell icon, to receive alerts when new videos are posted.
New tutorials are posted every week, so subscribing ensures you receive the latest tips, guides, and updates on SharePoint and other collaboration tools as soon as they're available.
Generation details: cost, quality tiers
Docsie billed 2,000 credits ($1.40) to analyze this 4-minute video at standard quality. The rewrite, template fill and Word/PDF exports were included. The same video at each quality tier:
| Quality | Frames sampled | Credits | Approx. cost |
|---|---|---|---|
| Draft | every 16-30 s | 1,000 | $0.70 |
| Standard (this guide) | every 8-15 s | 2,000 | $1.40 |
| Detailed | every 4-7 s | 4,000 | $2.80 |
| Ultra | every 1-3 s | 8,000 | $5.60 |
Credits priced at $0.70 per 1,000; plans include a monthly allowance. Enterprise customers on on-premise or bring-your-own-model deployments run this on their own inference and pay no per-video credits.
Generated by Docsie Video-to-Docs on 2026-09-08 from a 3-minute video. Screenshots are frames from the source video and belong to their creator, Collaboration Coach, whose original is embedded above. If you own this video and want the guide removed or credited differently, contact us and we will act within one business day.