
How to Create a Form in SharePoint
This guide walks you through how to create a form in SharePoint using the built-in Microsoft Forms web part. You'll learn how to add a fillable form to any SharePoint site page, add questions to it, and confirm it's ready to collect responses from your users.
Video: 🧾 A complete guide to creating fillable forms in SharePoint Online 🧾 by Business Tech Planet (2022). All credit for the demonstration goes to the creator; watch the original on YouTube. The written guide below was generated from this video by Docsie. Creator? Request a change or removal.
This guide walks you through how to create a form in SharePoint using the built-in Microsoft Forms web part. You'll learn how to add a fillable form to any SharePoint site page, add questions to it, and confirm it's ready to collect responses from your users.
Prerequisites
- An active Office 365 account with access to SharePoint.
- Edit permissions on the SharePoint site where you want to add the form.
Open Office 365 and access SharePoint
Make sure you are logged into your Office 365 account. Click the app launcher (grid icon) in the top left corner, then select SharePoint from the list of available apps.
Navigate to your SharePoint site
In SharePoint, go to the site where you want to add the fillable form.
Enter edit mode
Click the Edit button at the top right of your SharePoint site page to start making changes to the layout.
Choose where to add the form
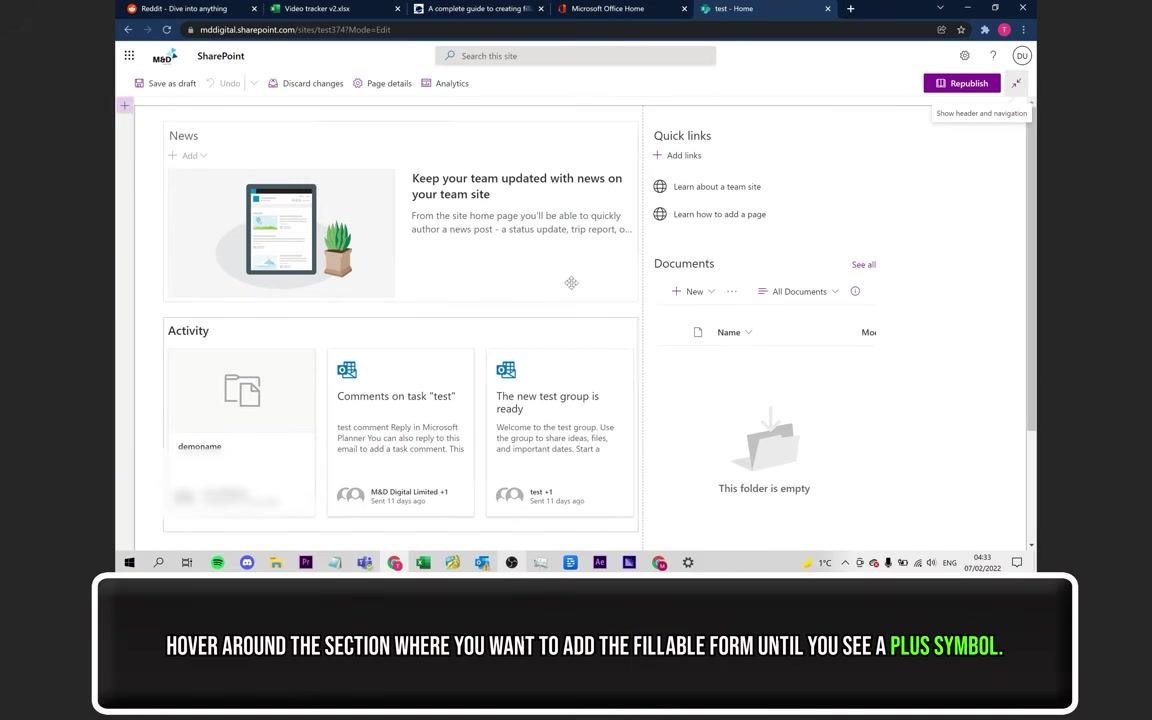
Hover your mouse over the section of the page where you want to insert the fillable form. Wait until a plus (+) symbol appears, which indicates you can add a new web part at that location.
Add the Microsoft Forms web part
Click the plus (+) symbol to open the web part selection window, then locate and select Microsoft Forms from the list.
Create a new form
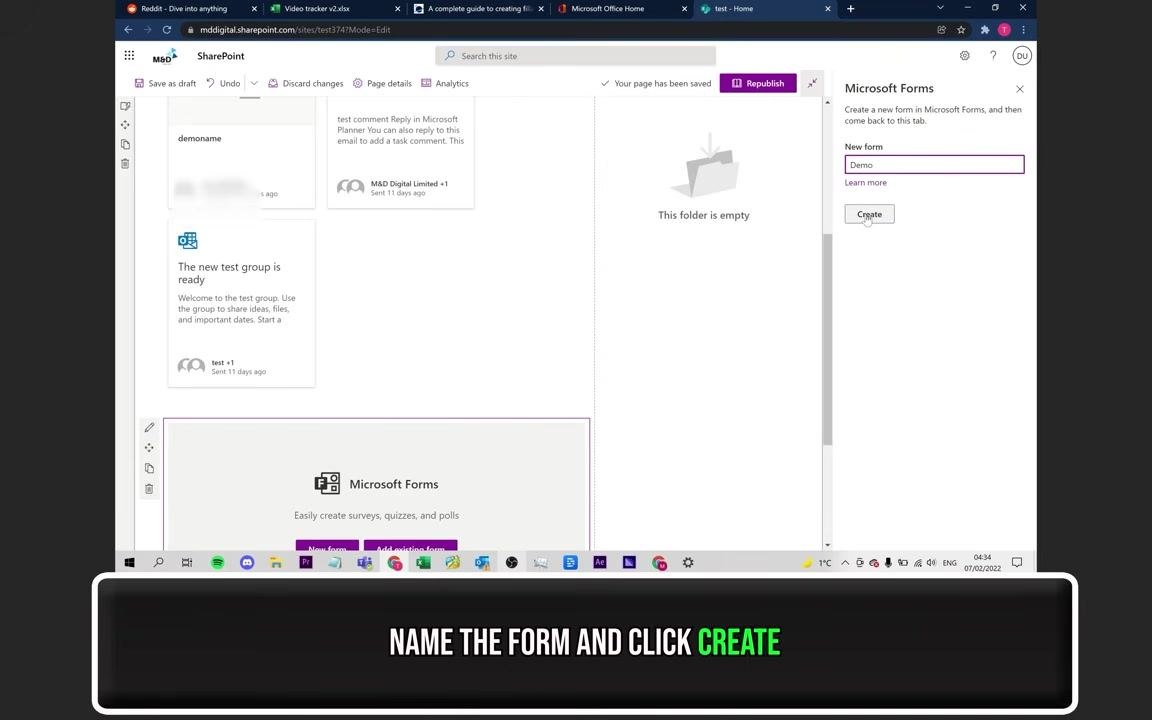
In the Microsoft Forms pane on the right, click New Form. Enter a name for your form in the "Name your form" field (for example, "Demo"), then click Create to generate the new form.
Add questions to your form
Click Add New to insert a new question or element into your form. For this example, select the Text option to add a text input field, then enter the desired question or prompt (for example, "Social Media"). Continue clicking Add New to add more elements as needed.
Customize and finalize your form
Adjust the form elements and settings as needed—for example, toggle the "Long answer" or "Required" options. Experiment with different question types and settings until the form meets your requirements.
Save and refresh your SharePoint site
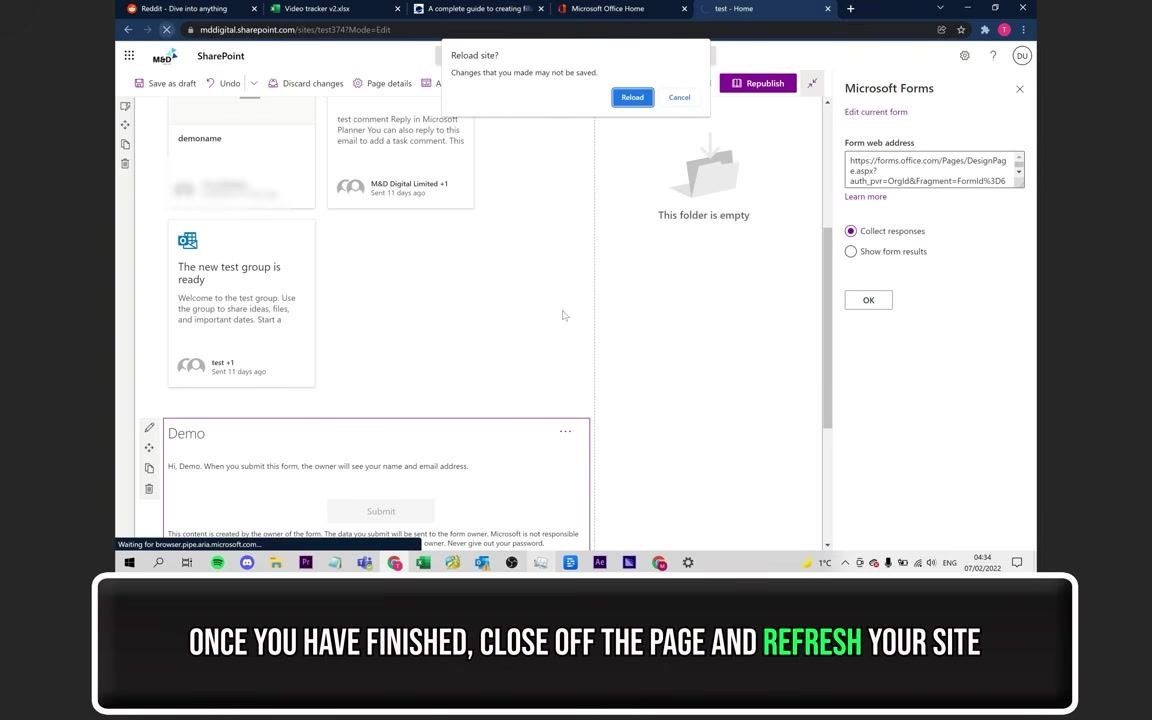
Once you have finished creating and customizing your form, close the Microsoft Forms editing page. Return to your SharePoint site and refresh the page to confirm the form is embedded and visible.
Confirm your form is live
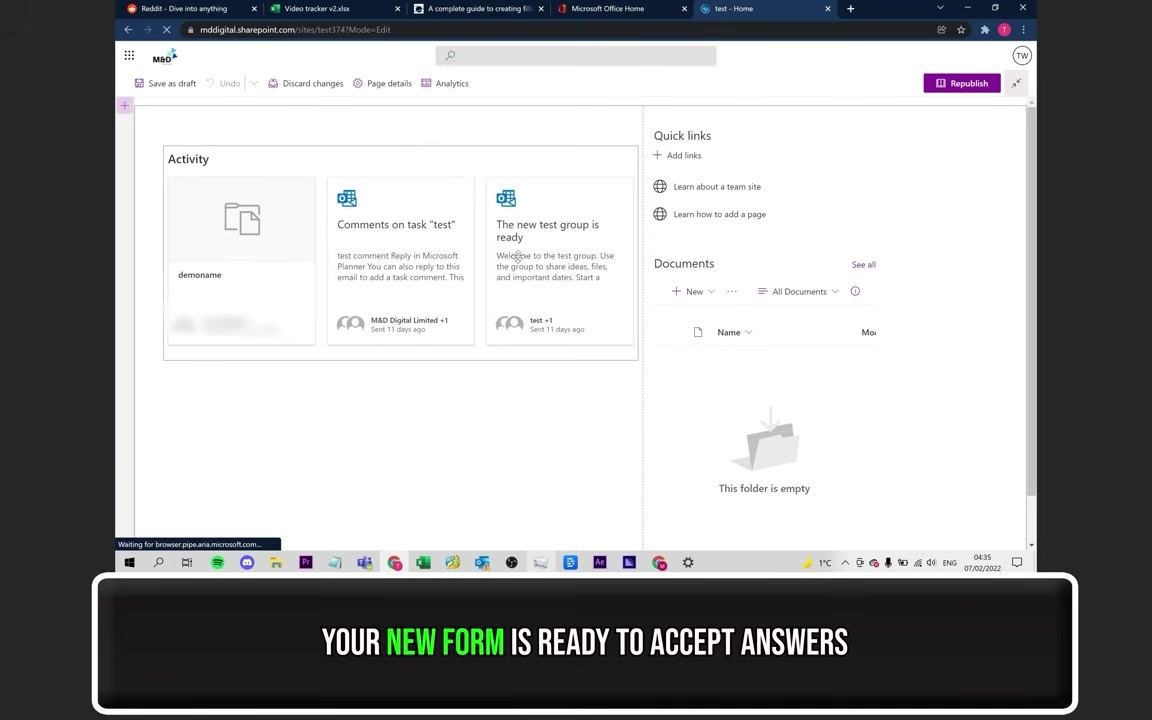
Check that your new fillable form is embedded on your SharePoint site and ready to accept responses from users. Look for a confirmation message or visual cue indicating the form is active.
Summary
By following these steps, you have successfully created and embedded a fillable form on your SharePoint site using Microsoft Forms. Your form is now live and ready to collect responses from users.
Generation details: cost, quality tiers
Docsie billed 1,500 credits ($1.05) to analyze this 3-minute video at standard quality. The rewrite, template fill and Word/PDF exports were included. The same video at each quality tier:
| Quality | Frames sampled | Credits | Approx. cost |
|---|---|---|---|
| Draft | every 16-30 s | 750 | $0.52 |
| Standard (this guide) | every 8-15 s | 1,500 | $1.05 |
| Detailed | every 4-7 s | 3,000 | $2.10 |
| Ultra | every 1-3 s | 6,000 | $4.20 |
Credits priced at $0.70 per 1,000; plans include a monthly allowance. Enterprise customers on on-premise or bring-your-own-model deployments run this on their own inference and pay no per-video credits.
Generated by Docsie Video-to-Docs on 2026-09-08 from a 2-minute video. Screenshots are frames from the source video and belong to their creator, Business Tech Planet, whose original is embedded above. If you own this video and want the guide removed or credited differently, contact us and we will act within one business day.