
How to Export a ServiceNow Report to Excel
If you need to analyze or share ServiceNow data outside the platform, you can export any list—such as incidents, tasks, or other records—directly to an Excel file. This guide walks you through how to export a ServiceNow report to Excel, from locating the list to reviewing the downloaded spreadsheet.
Video: How To Export Data From ServiceNow To Excel by Lui Iacobellis (2021). All credit for the demonstration goes to the creator; watch the original on YouTube. The written guide below was generated from this video by Docsie. Creator? Request a change or removal.
If you need to analyze or share ServiceNow data outside the platform, you can export any list—such as incidents, tasks, or other records—directly to an Excel file. This guide walks you through how to export a ServiceNow report to Excel, from locating the list to reviewing the downloaded spreadsheet.
Prerequisites
- Access to a ServiceNow instance with permission to view the list or report you want to export.
- A web browser with downloads enabled.
Navigate to the desired list
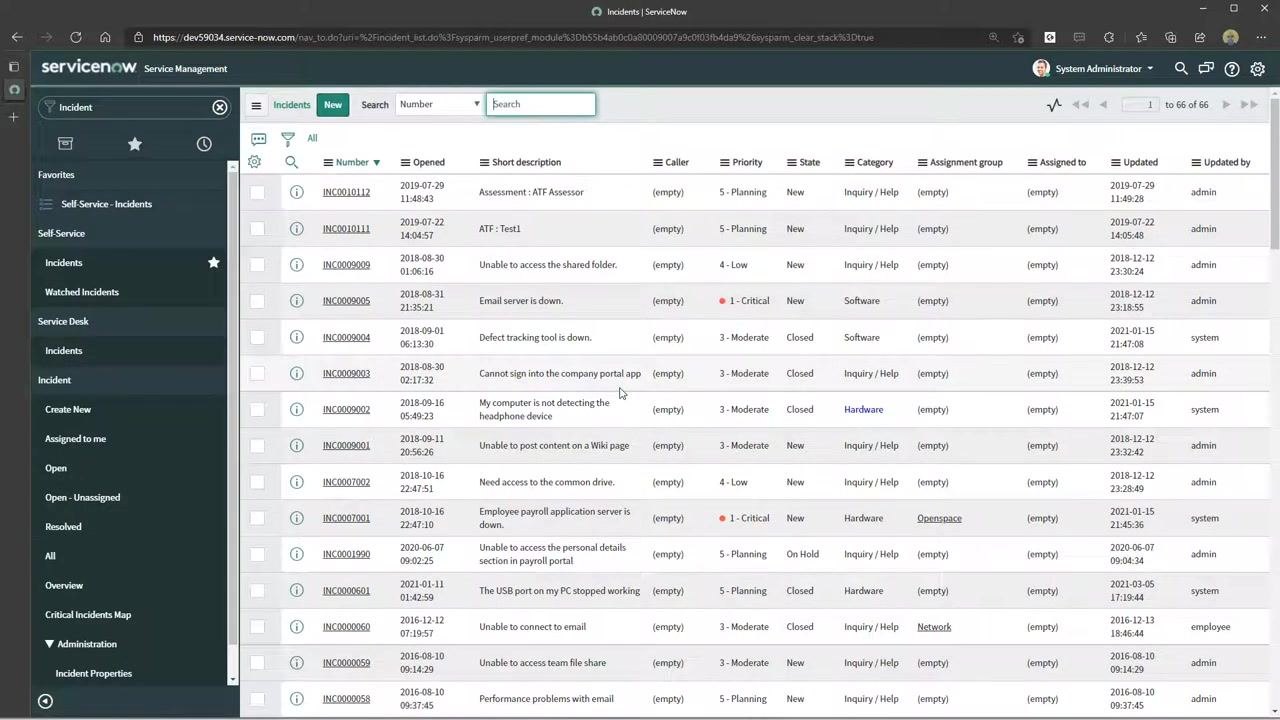
Open your ServiceNow instance and use the search bar in the left navigation pane to find the list you want to export. For example, type Incident to locate incident records, then click the relevant list under its section (such as Incidents under Self-Service).
Open the list view
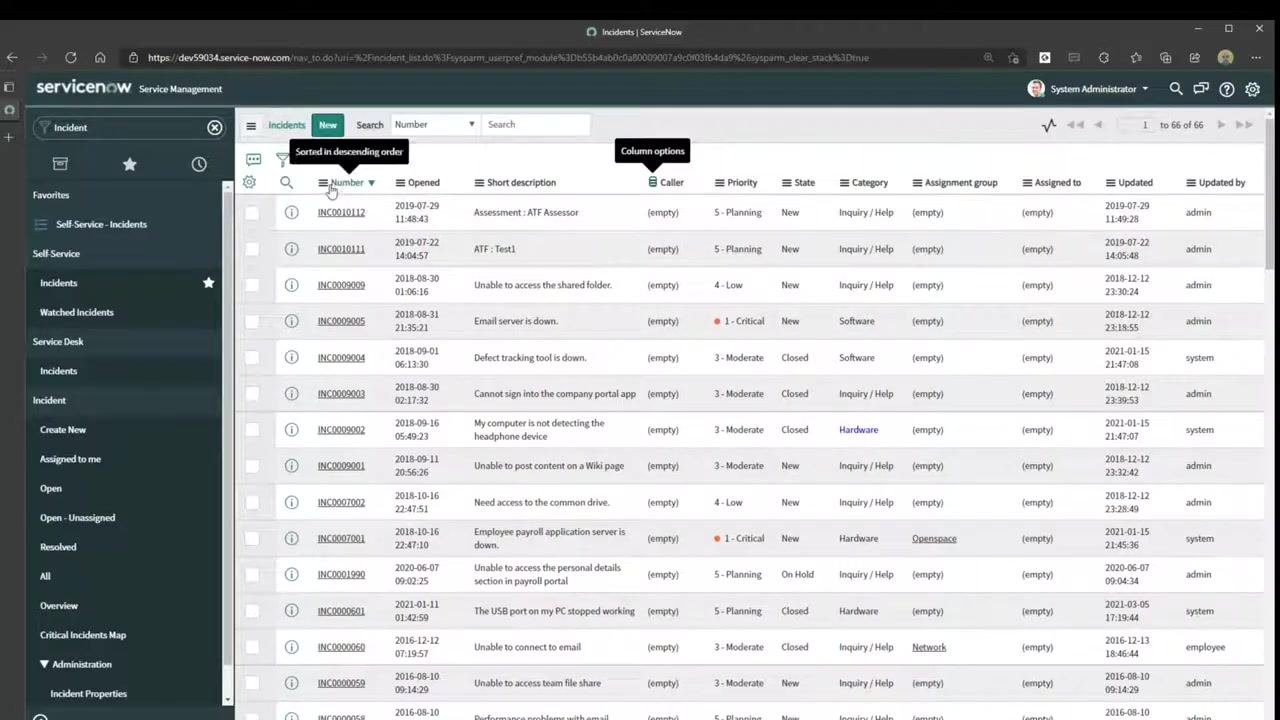
Confirm you are viewing the full list of records you intend to export, such as all incidents. The list view displays columns like Number, Opened, Short Description, Caller, Priority, State, Category, Assignment Group, Assigned To, Updated, and Updated By.
Access the export menu
Click on any column header in the list view, such as Number, to open its dropdown menu. Scroll down to find the Export option, then hover over it to reveal the available export formats. Select Excel (.xlsx) to export the report to Excel.
Download the exported file
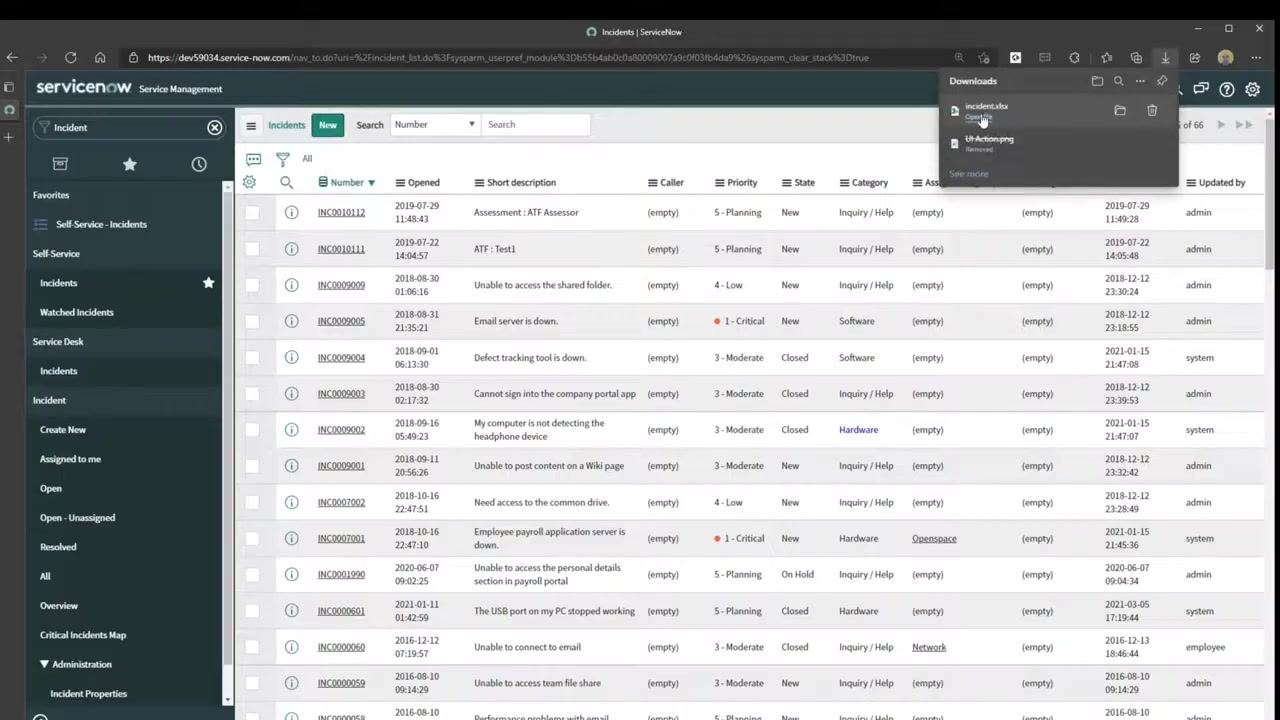
Once you select Excel (.xlsx), ServiceNow begins the export process, and a download notification appears in your browser. Click the downloaded file (for example, incident.xlsx) to open it.
Review the exported data
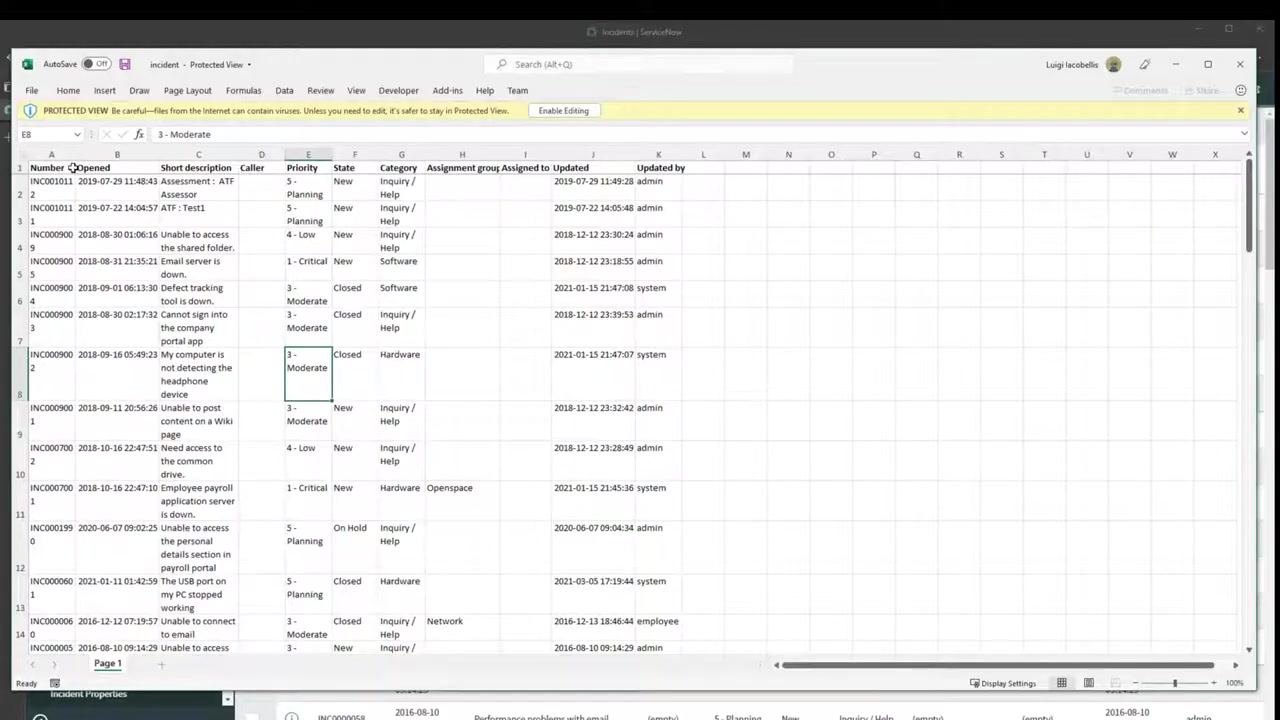
Open the Excel file to check that all column headers and data from your ServiceNow list appear correctly. The exported file includes every column that was visible in the ServiceNow list view at the time of export.
Best practices for exporting from ServiceNow
Make sure all needed columns are visible before exporting. Only the columns currently shown in your list view are included in the export. If you need additional fields, customize your list layout to add or remove columns before you export.
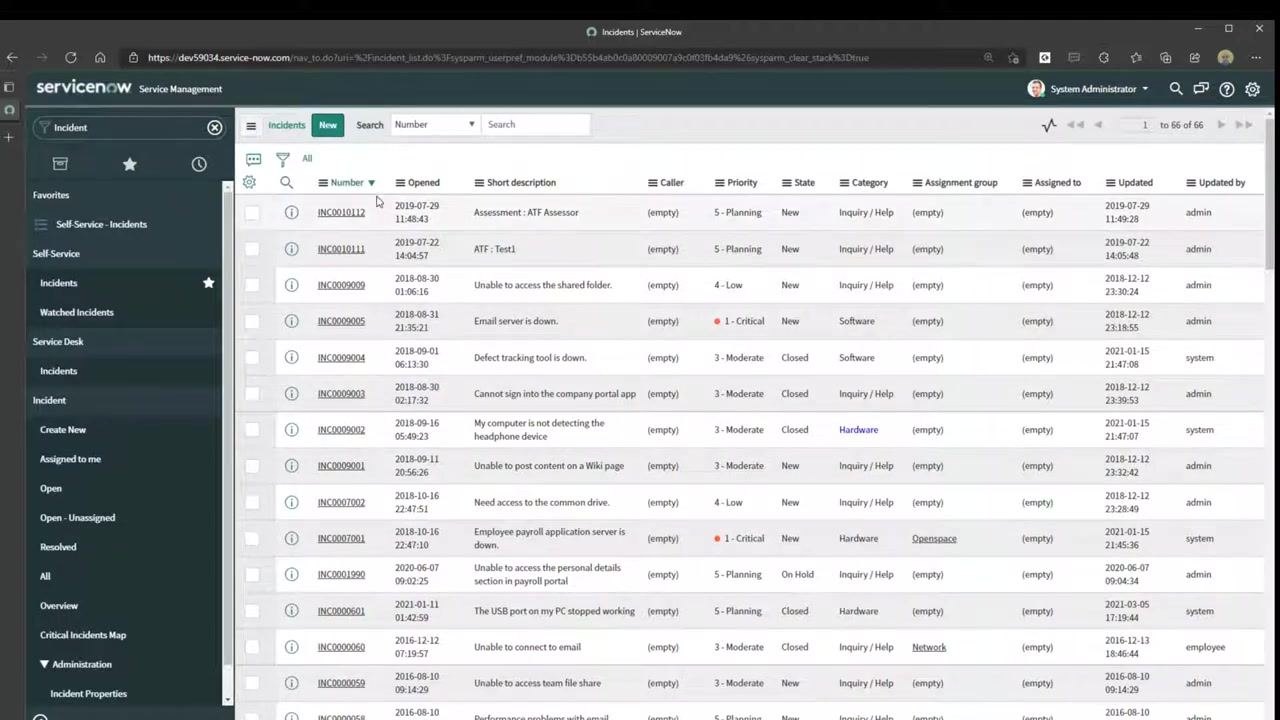
Start the export from any column header. You can click the dropdown arrow on any column—such as Caller or Number—to open the column options menu. The export option is available from any column, not only the first one.
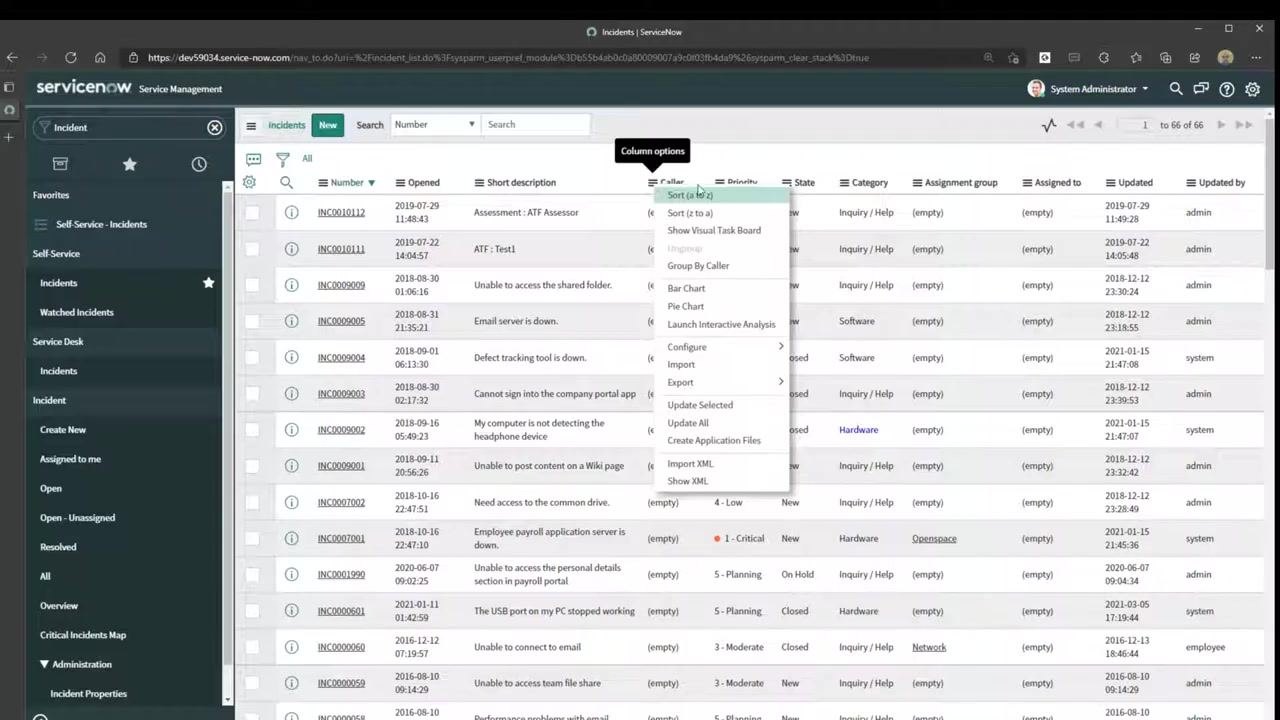
Choose the format that fits your needs. In the column options menu, hover over Export to see the available formats, including Excel (.xlsx), CSV, XML, JSON, and PDF. For most spreadsheet needs, select Excel (.xlsx).
Summary
- Confirm your list view includes every column you need before exporting.
- The export function is accessible from any column header in the list.
- ServiceNow supports multiple export formats, including Excel, CSV, XML, JSON, and PDF, so you can choose the one that fits your reporting needs.
- Always open and review the downloaded file to verify the data matches what was displayed in ServiceNow.
By following these steps, you can reliably export any ServiceNow report to Excel for further analysis or reporting.
Generation details: cost, quality tiers
Docsie billed 1,500 credits ($1.05) to analyze this 3-minute video at standard quality. The rewrite, template fill and Word/PDF exports were included. The same video at each quality tier:
| Quality | Frames sampled | Credits | Approx. cost |
|---|---|---|---|
| Draft | every 16-30 s | 750 | $0.52 |
| Standard (this guide) | every 8-15 s | 1,500 | $1.05 |
| Detailed | every 4-7 s | 3,000 | $2.10 |
| Ultra | every 1-3 s | 6,000 | $4.20 |
Credits priced at $0.70 per 1,000; plans include a monthly allowance. Enterprise customers on on-premise or bring-your-own-model deployments run this on their own inference and pay no per-video credits.
Generated by Docsie Video-to-Docs on 2026-09-08 from a 2-minute video. Screenshots are frames from the source video and belong to their creator, Lui Iacobellis, whose original is embedded above. If you own this video and want the guide removed or credited differently, contact us and we will act within one business day.