
How to Create a Storage Location in SAP
When you manage incoming or outgoing inventory in SAP, you need a way to track exactly where materials are stored within a plant. This guide explains how to create a storage location in SAP, assign it a unique identifier, and attach a specific address and responsible contact to it using the SAP Customizing Implementation Guide (IMG).
Video: 006 Creating a Storage Location in SAP MM by Skills Host (2017). All credit for the demonstration goes to the creator; watch the original on YouTube. The written guide below was generated from this video by Docsie. Creator? Request a change or removal.
When you manage incoming or outgoing inventory in SAP, you need a way to track exactly where materials are stored within a plant. This guide explains how to create a storage location in SAP, assign it a unique identifier, and attach a specific address and responsible contact to it using the SAP Customizing Implementation Guide (IMG).
Background: shipments, plants, and storage locations
Before creating a storage location, it helps to understand how SAP organizes inventory at a higher level.
Shipment details. When you ship inventory, SAP prompts you to enter relevant shipment information, including:
- Wrapping material used
- Stuffing material used
- Weight of each product
- Total weight of the shipment
SAP also asks you to specify the plant where you want to store the material.
Plants. A plant represents your physical location or factory. Plants vary widely in size, from about 50,000 square feet to 10–15 acres or more. When prompted, you select the plant in which you want to store the incoming material.
Why storage locations matter. To manage inventory efficiently within a large plant, you divide the plant into multiple sections. Each section is called a storage location in SAP. Storage locations let you track exactly where products are stored and make retrieval and placement simpler. For each plant, you define storage locations with unique identifiers (for example, 001, 002, and so on). You can create hundreds or thousands of storage locations as needed, and assign each incoming product to a specific one for precise tracking.
Prerequisites
- Access to the SAP Customizing Implementation Guide (IMG)
- Your plant number (for example, RPLN)
- Authorization to maintain storage locations and storage location addresses
Navigate to Maintain Storage Location
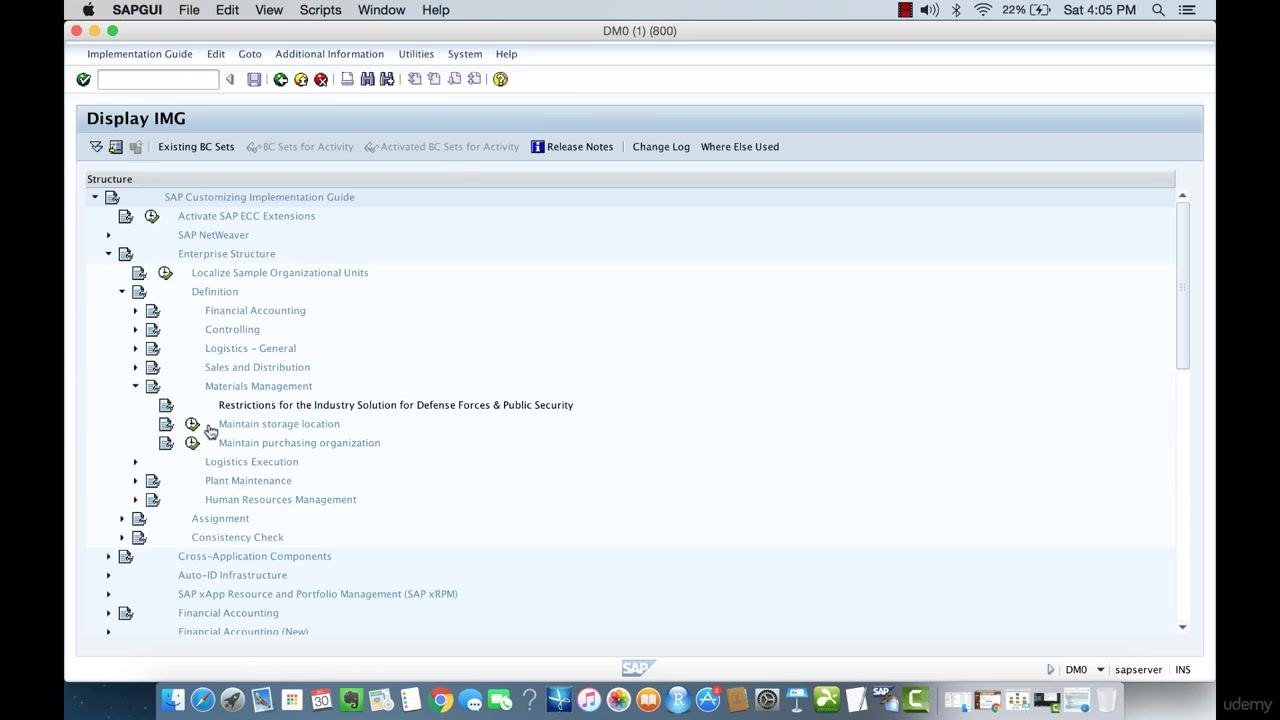
In the SAP IMG, expand the following path:
Enterprise Structure > Definition > Materials Management
Click Maintain storage location. This opens the screen where you manage storage locations for your selected plant.
Enter your plant number
On the "Change View 'Storage locations': Overview" screen, enter your plant number in the Plant field (for example, RPLN). This displays all existing storage locations for the selected plant. If no storage locations have been created yet, the list appears empty.
Create a new storage location
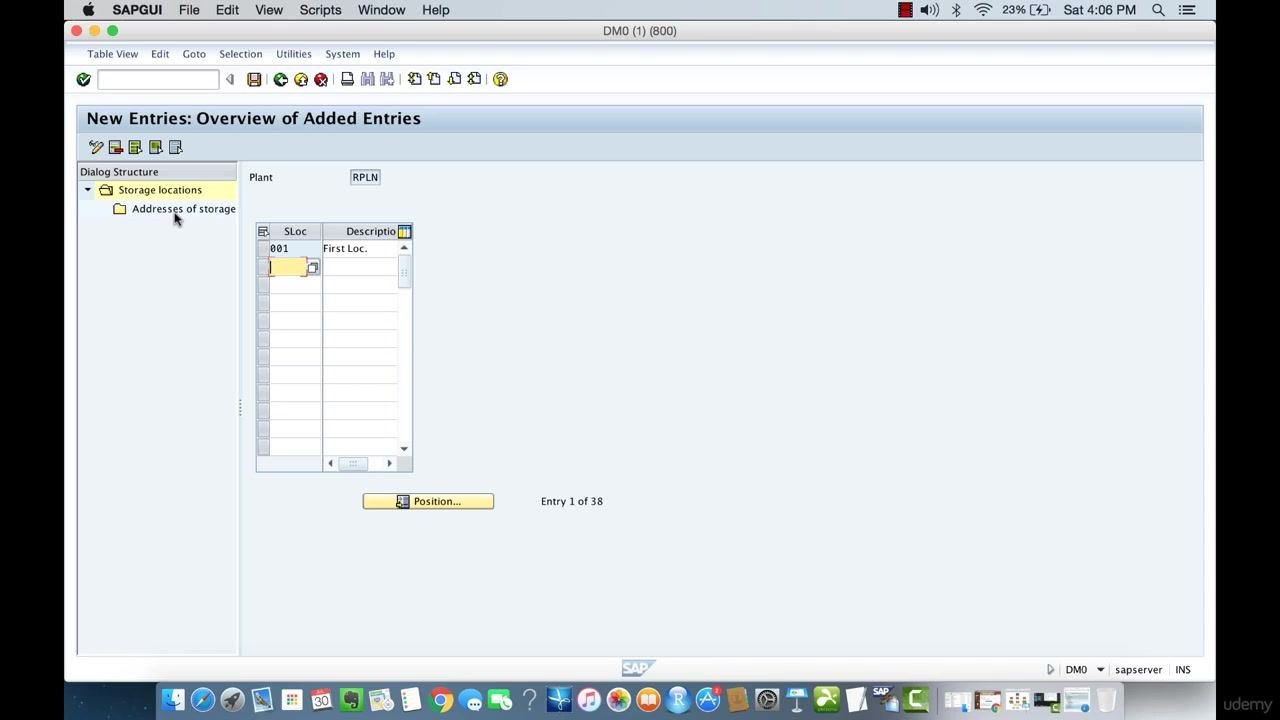
Click New Entries at the top of the screen. In the new row, enter:
- SLoc:
001 - Description:
First Loc.
Press Enter to confirm the entry.
Assign a specific address to the storage location
Select the newly created storage location (001). In the left navigation pane, double-click Addresses of storage locations to open the address assignment screen for that storage location.
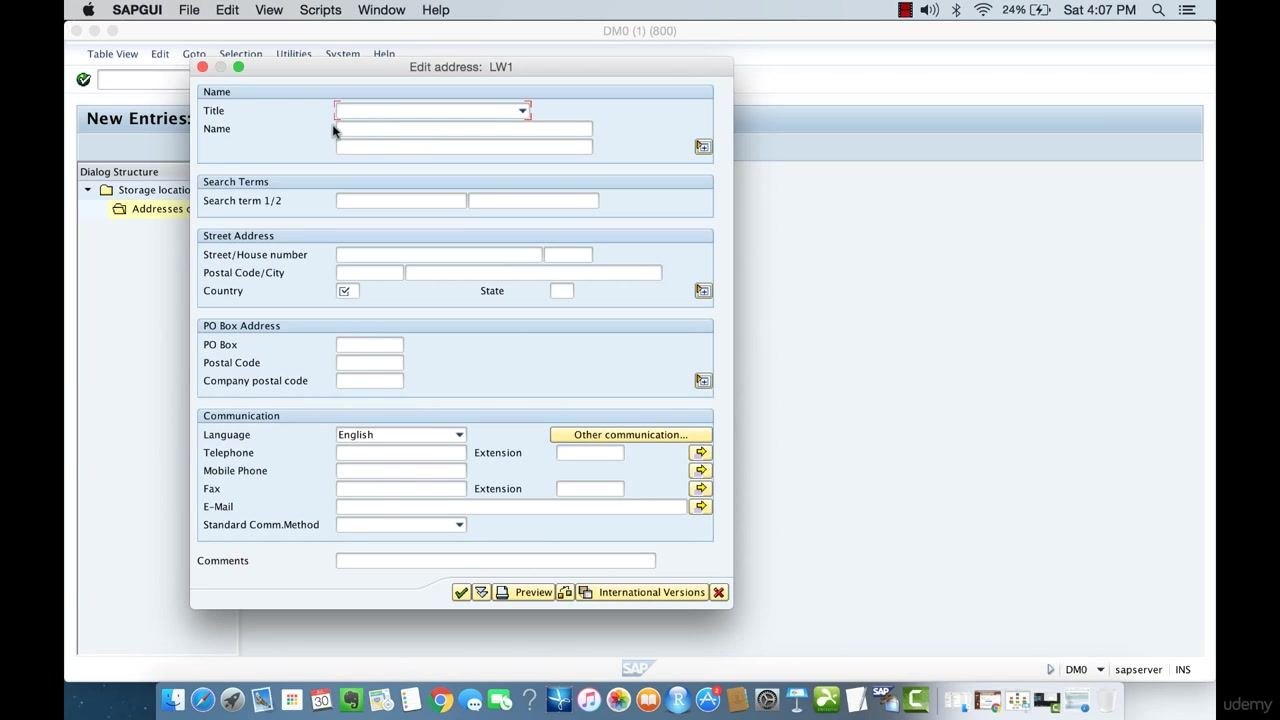
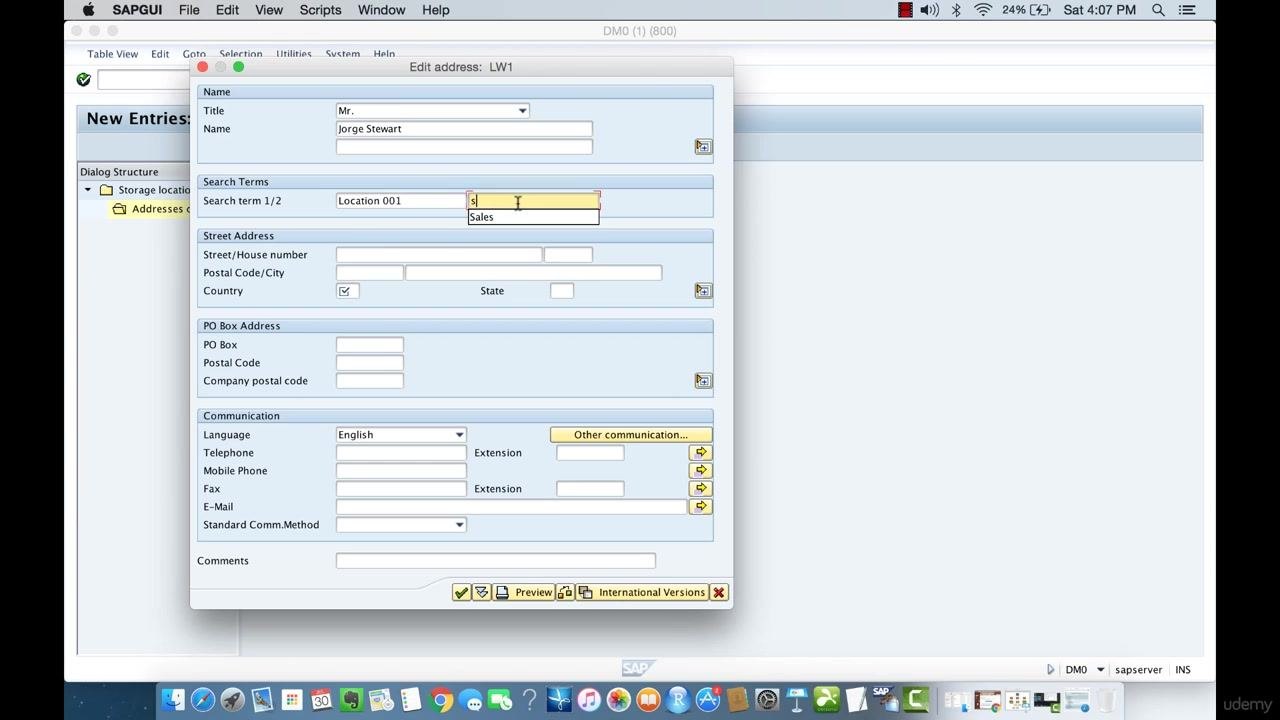
Click New Entries to add a new address entry, then enter LW1 in the No. field (representing "Left Wing 1" or a similar internal address code).
Complete the required address fields
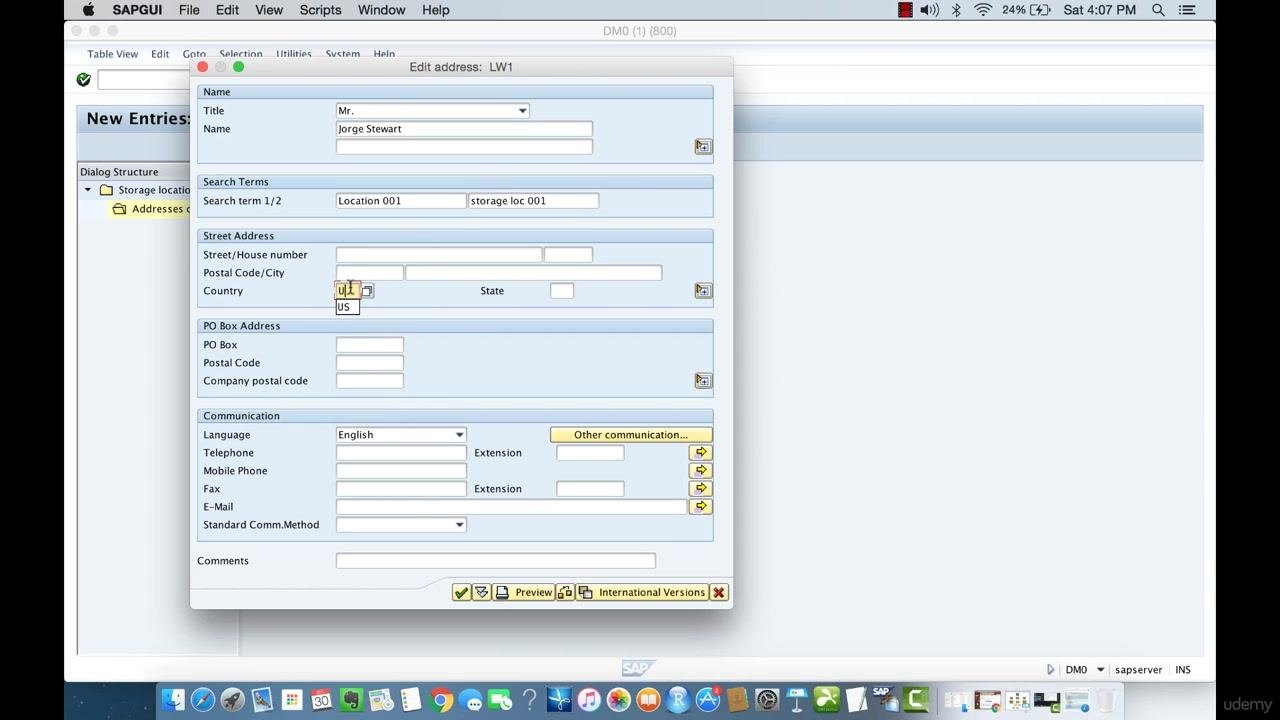
In the "Edit address: LW1" pop-up, fill in the following fields:
- Title:
Mr. - Name:
Jorge Stewart - Search term 1/2:
Location 001andstorage loc 001 - Country:
US
You do not need to complete any other fields unless your organization requires them.
Finalize the address entry
Click the Save icon (diskette) to confirm the address entry. If a warning appears, such as "The use of the last 10 characters in field SORT1 is restricted," review the message, then click New entry or the checkmark button to acknowledge it and proceed.
Verify the address assignment
After saving, you return to the "Overview of Added Entries" screen. Confirm that your new address (LW1) is listed for storage location 001 under plant RPLN. The status bar should display "Data was saved."
What's next
With your storage location created and its address assigned, you can repeat this process to define additional storage locations within the same plant, each with its own unique identifier and address. This allows you to track inventory precisely across every section of your plant.
Generation details: cost, quality tiers
Docsie billed 2,500 credits ($1.75) to analyze this 5-minute video at standard quality. The rewrite, template fill and Word/PDF exports were included. The same video at each quality tier:
| Quality | Frames sampled | Credits | Approx. cost |
|---|---|---|---|
| Draft | every 16-30 s | 1,250 | $0.88 |
| Standard (this guide) | every 8-15 s | 2,500 | $1.75 |
| Detailed | every 4-7 s | 5,000 | $3.50 |
| Ultra | every 1-3 s | 10,000 | $7.00 |
Credits priced at $0.70 per 1,000; plans include a monthly allowance. Enterprise customers on on-premise or bring-your-own-model deployments run this on their own inference and pay no per-video credits.
Generated by Docsie Video-to-Docs on 2026-10-14 from a 4-minute video. Screenshots are frames from the source video and belong to their creator, Skills Host, whose original is embedded above. If you own this video and want the guide removed or credited differently, contact us and we will act within one business day.