
How to Create a New Material Type in SAP
This guide explains how to create a new material type in SAP MM by copying an existing raw material type, and how to edit an existing material type afterward. You will use transaction codes OMS2 and OMH2 to access the material types overview and configure your custom material type.
Video: How to create material type in SAP MM by D-TaleD VaulT (2023). All credit for the demonstration goes to the creator; watch the original on YouTube. The written guide below was generated from this video by Docsie. Creator? Request a change or removal.
This guide explains how to create a new material type in SAP MM by copying an existing raw material type, and how to edit an existing material type afterward. You will use transaction codes OMS2 and OMH2 to access the material types overview and configure your custom material type.
Prerequisites
- Access to the SAP Easy Access screen with authorization to use transaction codes OMS2 and OMH2.
- Knowledge of the material type code and description you want to create (for example,
ZZR3).
Creating a new material type
Open the material types overview
Launch the SAP Easy Access screen. In the command field at the top, enter oms2 and press Enter. The SAP Menu and Favorites folders appear on the left side of the screen.
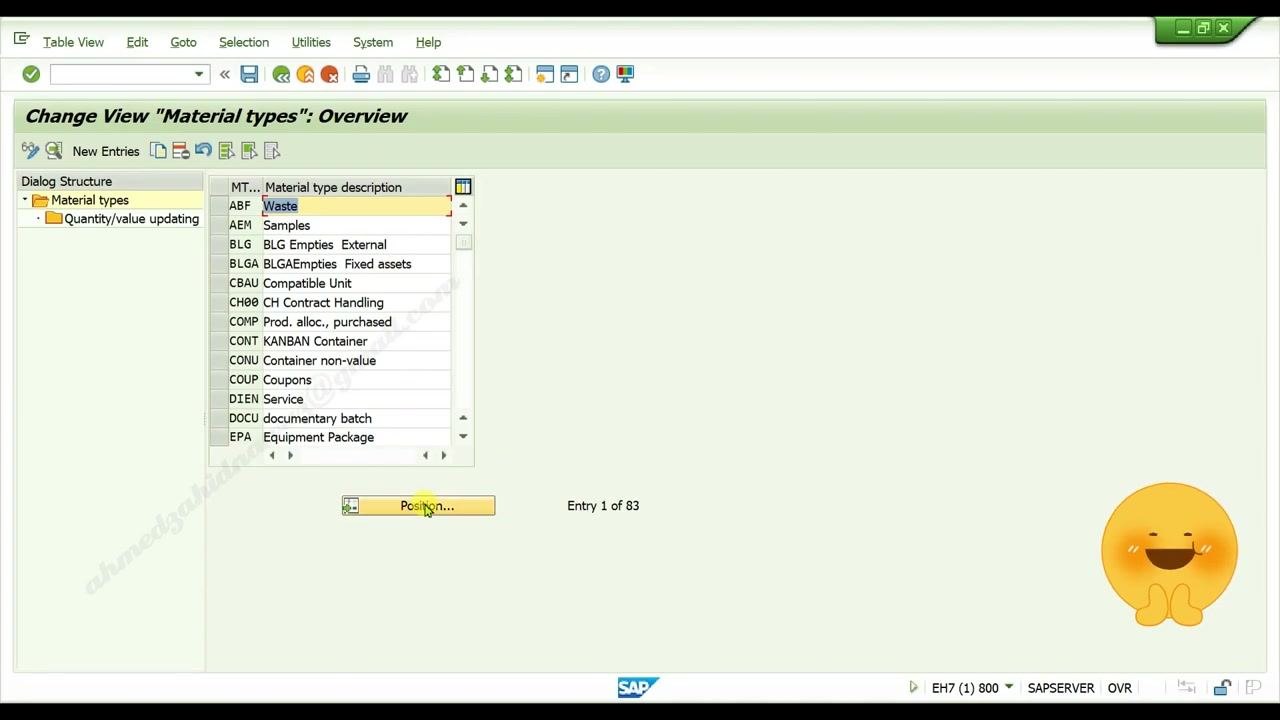
The Change View "Material types": Overview screen opens, displaying a list of existing material types and their descriptions. Click the Position... button if you want to quickly find a specific material type.
Select the raw material line
Scroll through the list and select the line where:
- MT is ROH
- Material type description is Raw material
This highlights the raw material type entry.
Copy the material type
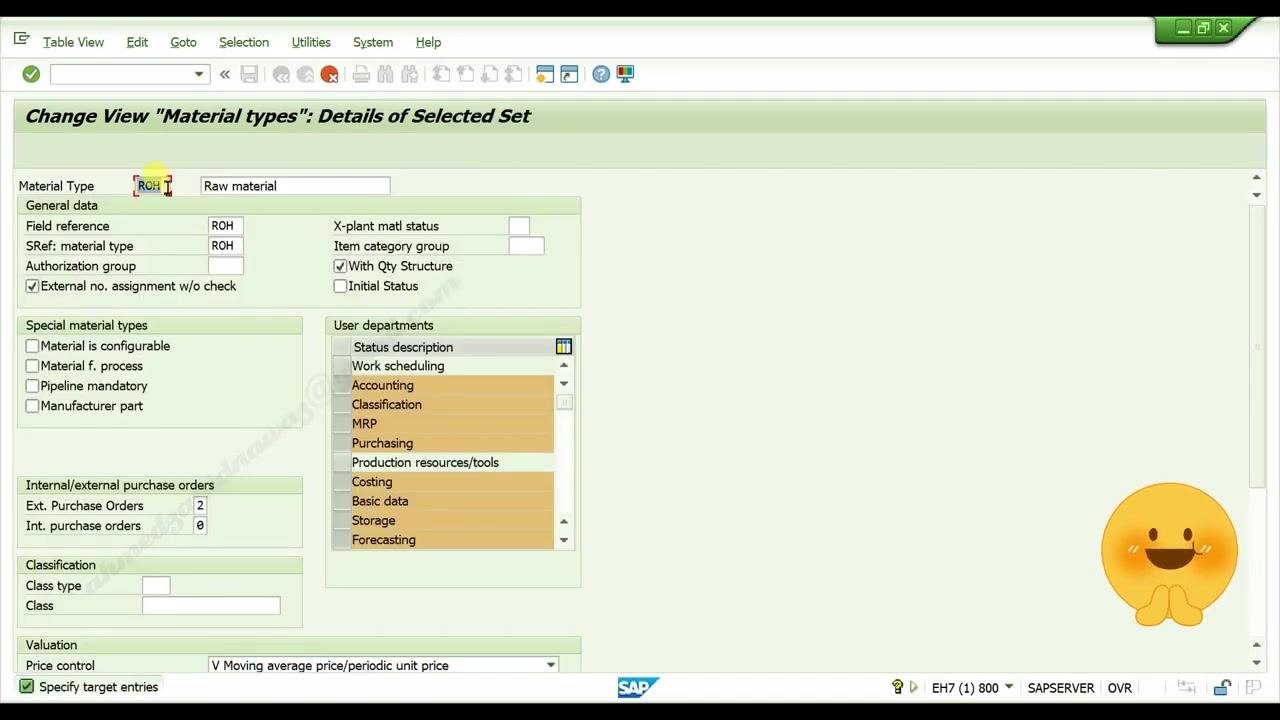
Click the Copy as icon to open the details screen for copying the material type.
Enter your own material type code
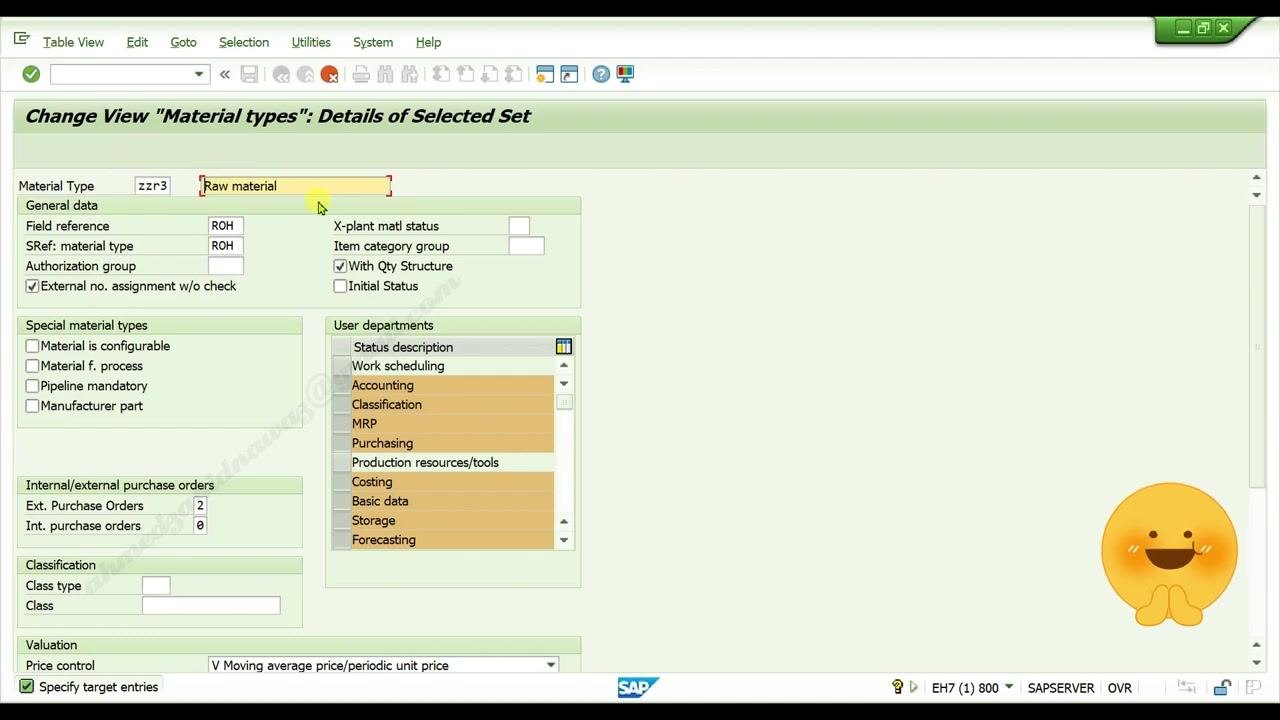
In the Material Type field, replace ROH with your own code, for example zzr3. The Raw material description remains unchanged for now.
Enter your own description
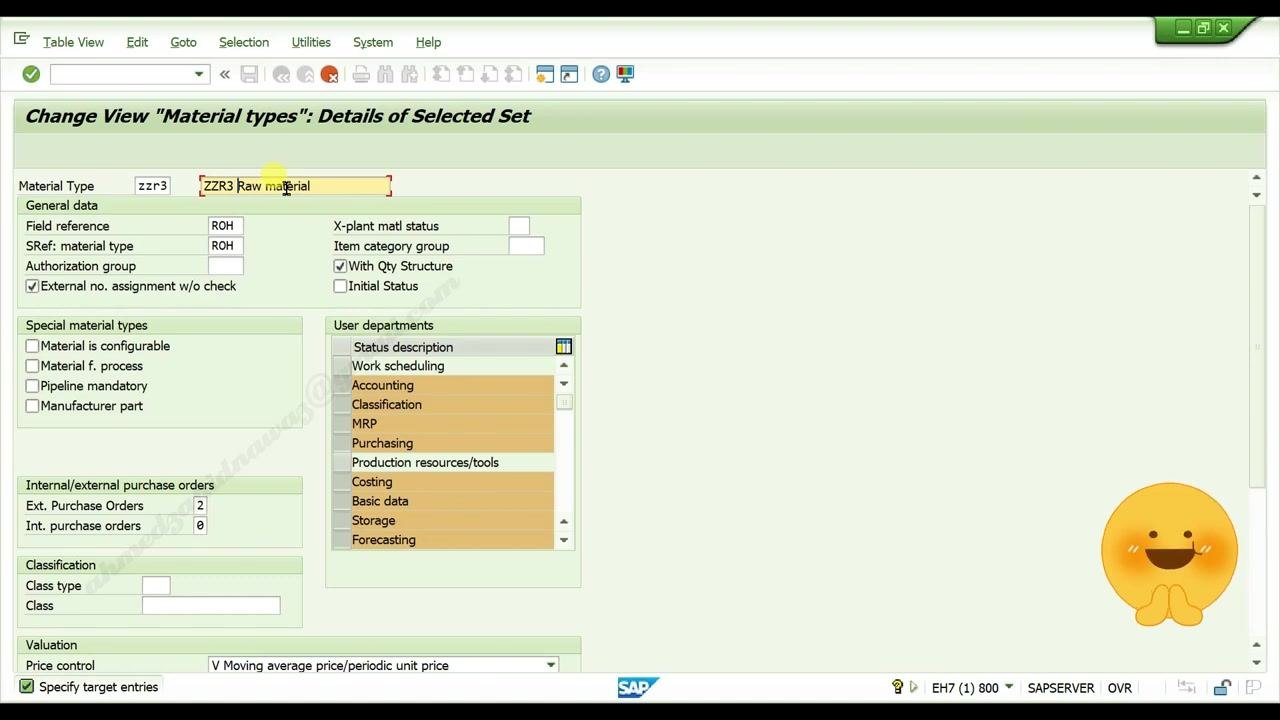
In the Material type description field, enter your custom description, for example ZZR3 Raw material.
Confirm your entries
Press Enter to confirm the new code and description. The fields update to reflect your entries.
Save the new material type
Click the Save button (disk icon) in the toolbar. If prompted, click Continue to confirm any warnings. A message appears at the bottom left of the screen confirming: "Data was saved."
Editing an existing material type
Open the material types overview
Launch the SAP Easy Access screen. In the command field at the top, enter omh2 and press Enter. The SAP Menu and Favorites folders appear on the left side of the screen.
The Change View "Material types": Overview screen opens, displaying the list of existing material types and descriptions, with the Position... button available below the list.
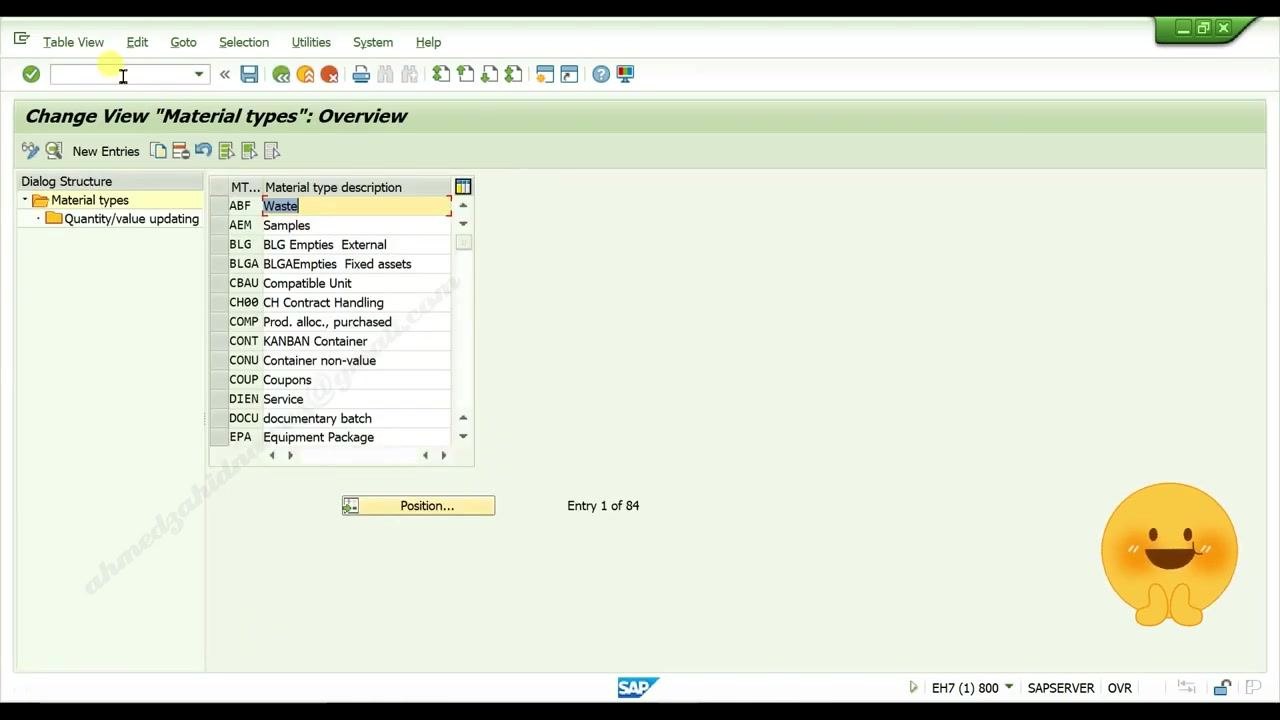
Find your material type
Click the Position... button. In the dialog that appears, enter the material type code you created earlier (for example, ZZR3), and press Enter to navigate directly to it in the list.
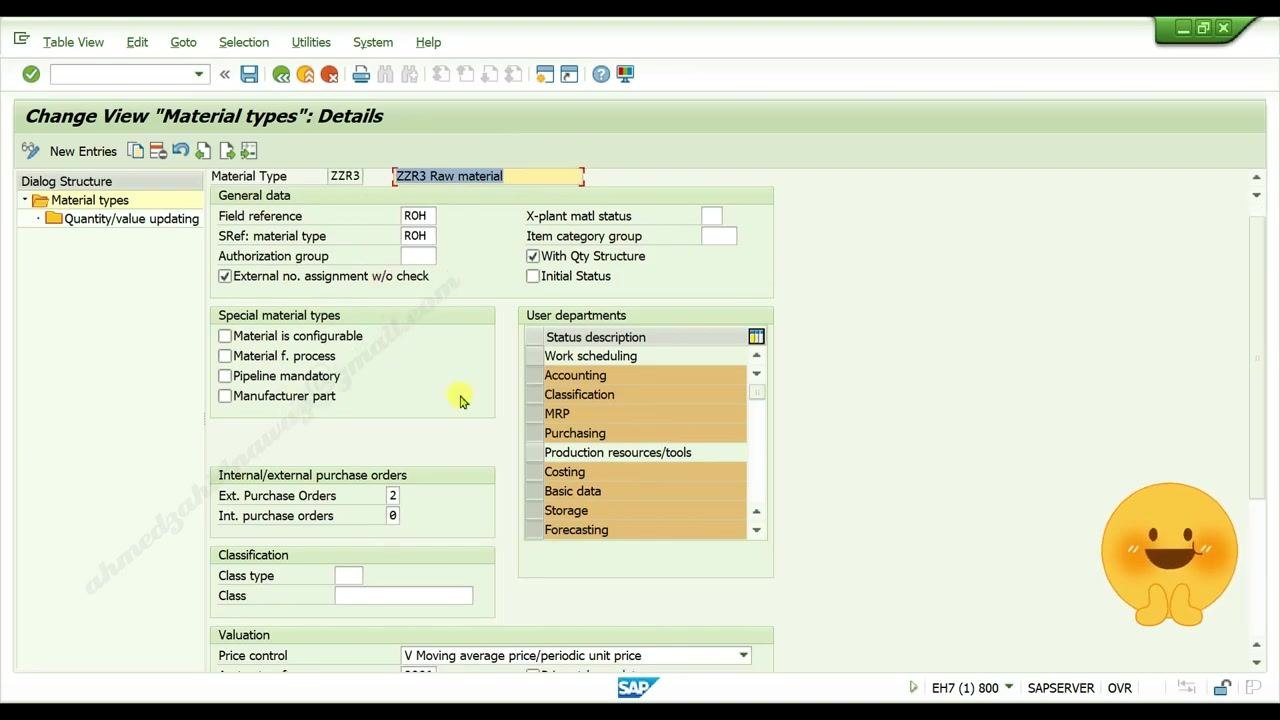
Select and open your material type
Locate your material type (for example, ZZR3) in the list, then double-click the entry to open its details.
Edit the material type details
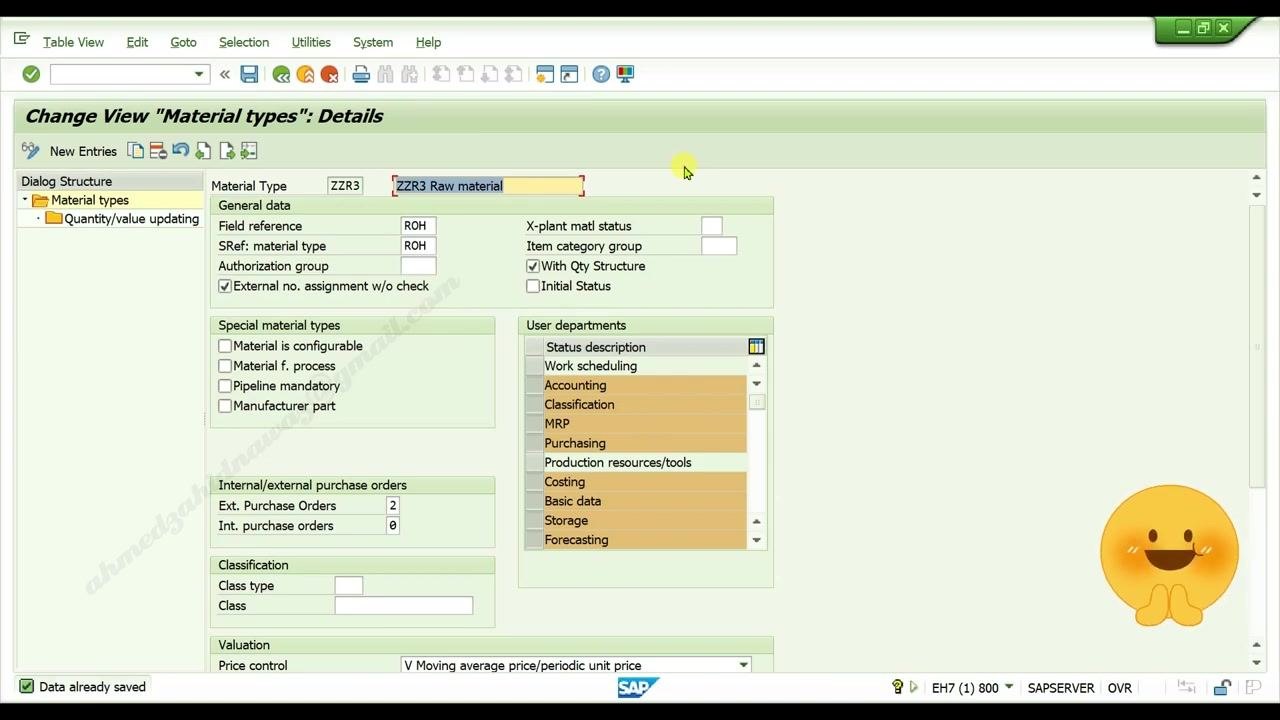
The Change View "Material types": Details screen opens. Here, you can edit any of the following fields as needed:
- Material Type (for example,
ZZR3) - Material type description (for example,
ZZR3 Raw material) - Field reference, SRef: material type, Authorization group
- Special material types (checkboxes for configurable, process, pipeline, manufacturer part)
- Internal/external purchase orders
- Classification (Class type, Class)
- Valuation (Price control, etc.)
- User departments (Work scheduling, Accounting, Classification, MRP, Purchasing, etc.)
Make the necessary changes to your material type details.
Save your changes
After editing, click the Save button (disk icon) in the toolbar. A confirmation message appears at the bottom left: "Data already saved."
Summary
By following these steps, you can create a new material type in SAP MM by copying an existing raw material type, and efficiently locate and edit the details of your custom material type whenever needed.
Generation details: cost, quality tiers
Docsie billed 1,500 credits ($1.05) to analyze this 3-minute video at standard quality. The rewrite, template fill and Word/PDF exports were included. The same video at each quality tier:
| Quality | Frames sampled | Credits | Approx. cost |
|---|---|---|---|
| Draft | every 16-30 s | 750 | $0.52 |
| Standard (this guide) | every 8-15 s | 1,500 | $1.05 |
| Detailed | every 4-7 s | 3,000 | $2.10 |
| Ultra | every 1-3 s | 6,000 | $4.20 |
Credits priced at $0.70 per 1,000; plans include a monthly allowance. Enterprise customers on on-premise or bring-your-own-model deployments run this on their own inference and pay no per-video credits.
Generated by Docsie Video-to-Docs on 2026-10-14 from a 2-minute video. Screenshots are frames from the source video and belong to their creator, D-TaleD VaulT, whose original is embedded above. If you own this video and want the guide removed or credited differently, contact us and we will act within one business day.