
How to Create a Material Number Range in SAP
Material number ranges in SAP MM determine how material numbers are assigned to specific material types. This guide walks you through locating, reviewing, editing, deleting, and creating number range intervals for material types using the SAP Implementation Guide (IMG).
Video: 010 Defining Number Ranges for Material Types in SAP MM by Skills Host (2017). All credit for the demonstration goes to the creator; watch the original on YouTube. The written guide below was generated from this video by Docsie. Creator? Request a change or removal.
Material number ranges in SAP MM determine how material numbers are assigned to specific material types. This guide walks you through locating, reviewing, editing, deleting, and creating number range intervals for material types using the SAP Implementation Guide (IMG).
Prerequisites
- Access to the SAP GUI with authorization to view and edit the Implementation Guide (IMG).
- Familiarity with the Material Master configuration area in SAP.
Access the number range definition in the IMG
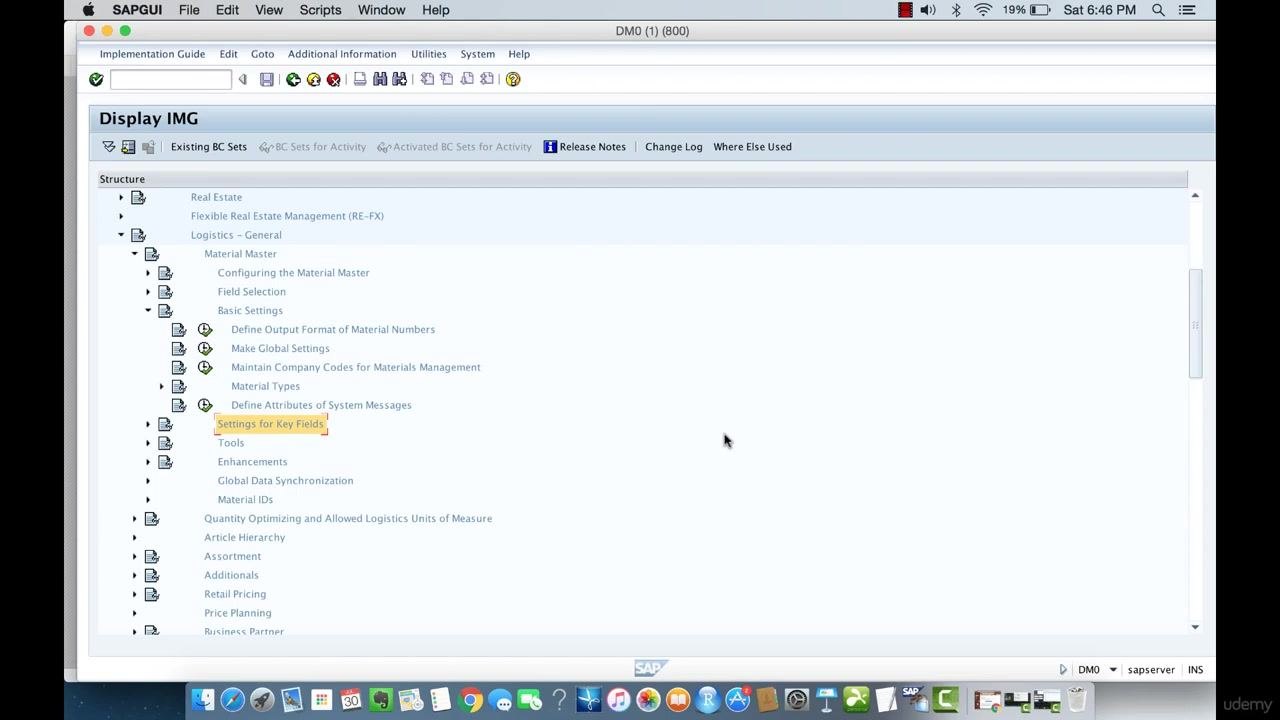
Open the SAP GUI and make sure you are on the Display IMG screen. In the navigation tree, expand Logistics – General, then Material Master, then Basic Settings, and locate the Material Types section. This is where you configure settings related to material types and their number ranges.
Open the number range configuration
Within the Material Types section, find and select Define Number Ranges for Each Material Type. This option lets you view and configure the intervals available for material numbers.
Review existing number range intervals
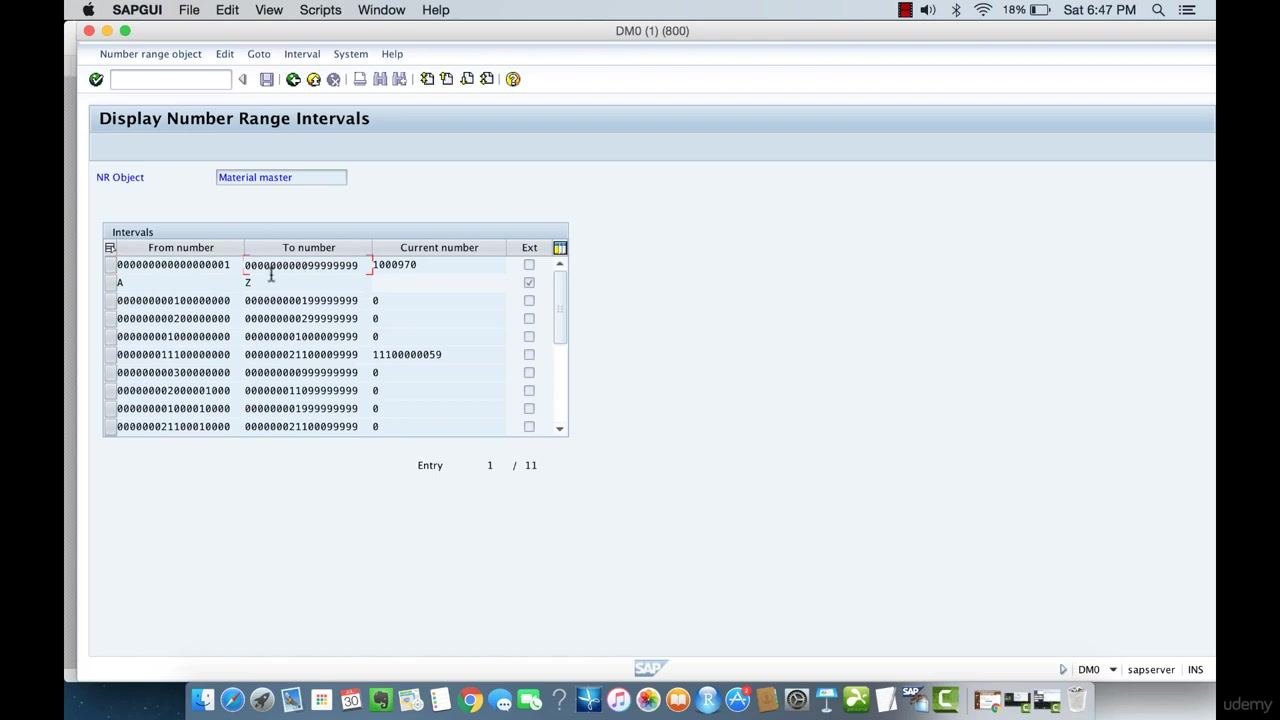
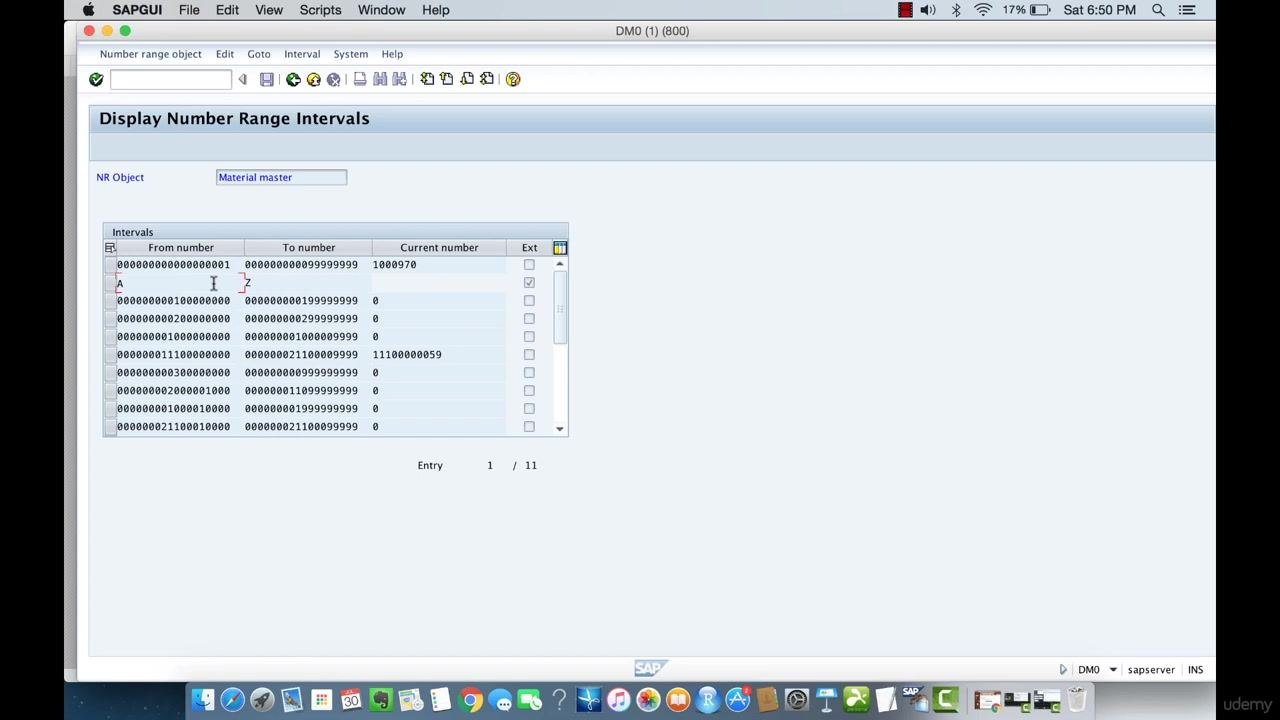
The Display Number Range Intervals screen appears, showing a table with the following columns:
- From number – the starting value of the range
- To number – the ending value of the range
- Current number – the last number used in the range
- Ext – indicates whether external number assignment is allowed
Example intervals include a numeric range from 000000000000000001 to 000000000099999999, and an alphabetic range from A to Z. The Current number column shows the latest assigned number within each range.
Interpret how number ranges link to material types
Any material number that falls within a defined interval is linked to the associated material type. For example, numbers between 000000000000000001 and 000000000099999999 belong to one material type, while numbers or letters between A and Z belong to another.
You can attach these number ranges to material types so that selecting a product ID from a given range automatically links it to the correct material type.
Navigate to number range groups
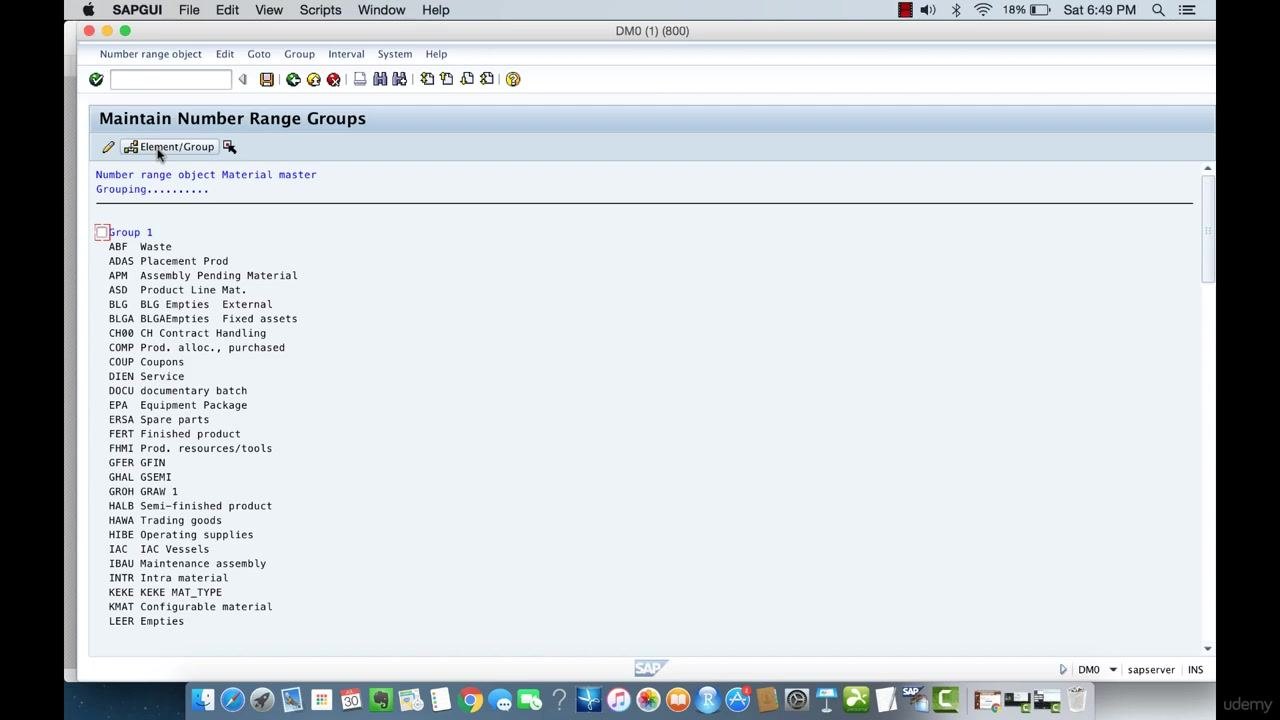
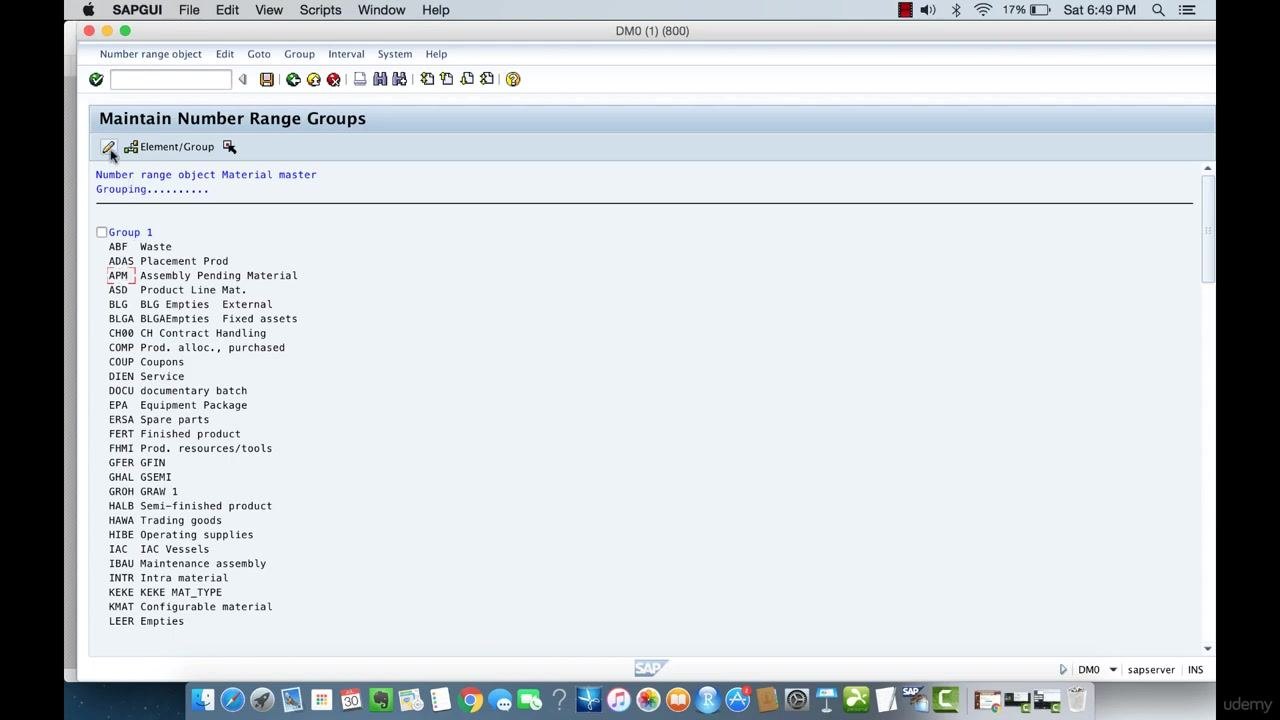
Return to the Maintain Number Range Groups screen. Here you see a list of groups and their associated material types, such as ABF Waste, ADAS Placement Prod, and APM Assembly Pending Material. Identify the group and material type you want to modify.
Edit a material type's interval range
Select the material type you want to change from the list, then click the Edit button (pencil icon) to open its editing interface. The system displays the current number range intervals associated with that material type.
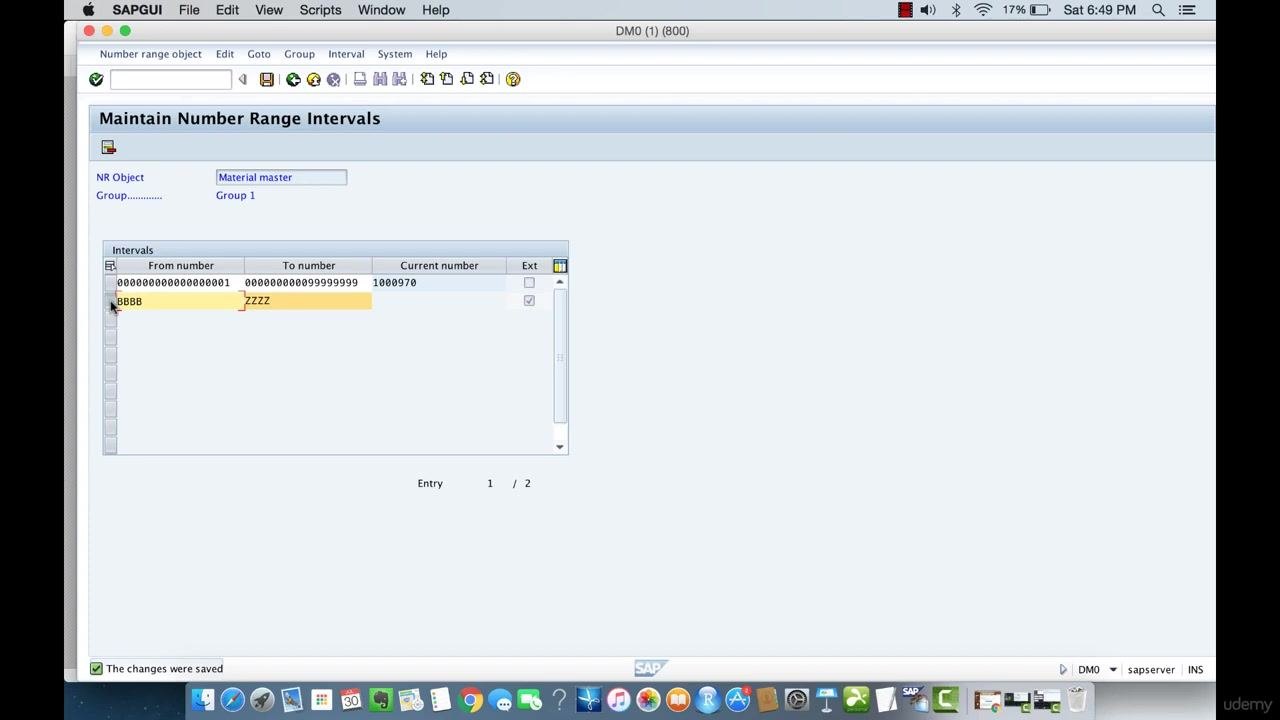
You can now update the interval range—for example, setting From number to B and To number to Z. Click the save icon to apply your changes; a confirmation message appears once the changes are saved.
Delete a number range interval
To remove an interval, select its row using the row selector on the left, then click the delete icon (trash can or minus sign) in the toolbar. The interval is removed from the list, and a confirmation message indicates the deletion was successful.
Create a new number range interval
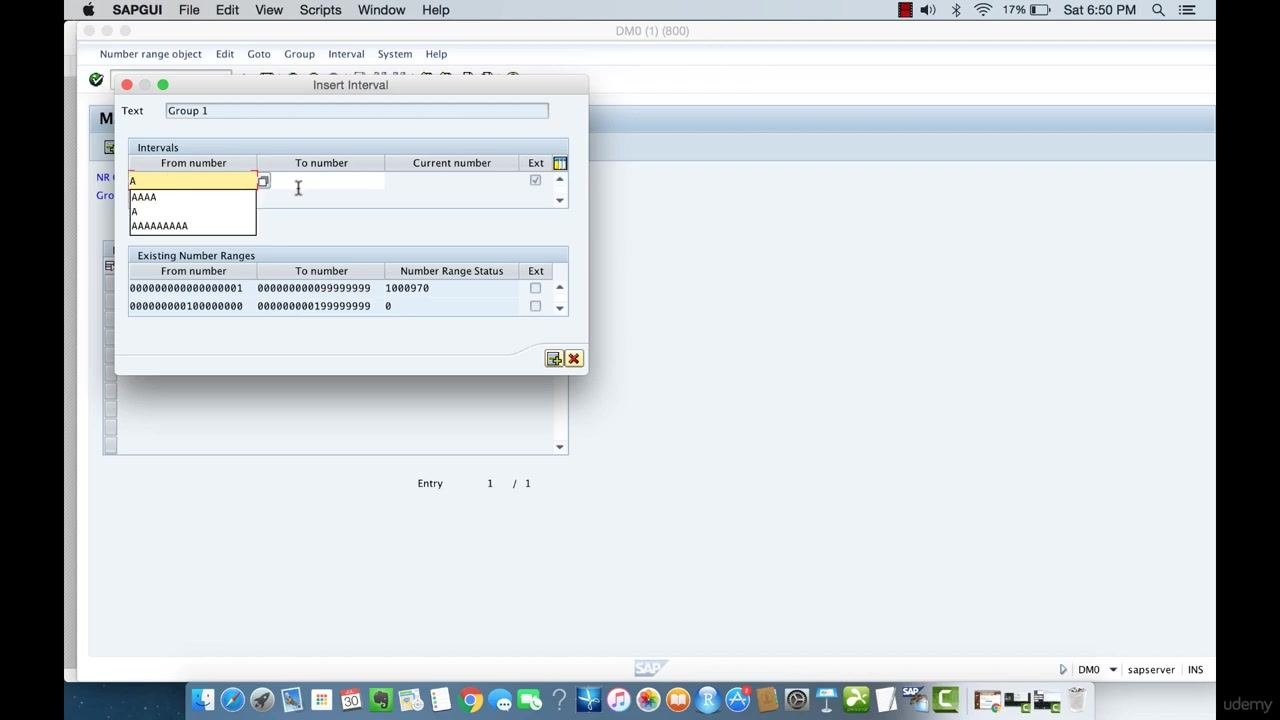
Click the Create or Insert Interval button, typically shown as a plus sign or "Insert" icon. In the Insert Interval dialog, enter the new From number and To number values—for example, A for the From number and Z for the To number. Click the save or confirm icon (green checkmark) to add the new interval, which then appears in the list for the selected group.
Save your changes and exit the editing screen
Click the save icon to ensure all changes are stored, then exit the interval editing interface to return to the main number range group overview.
Verify the updated number range intervals
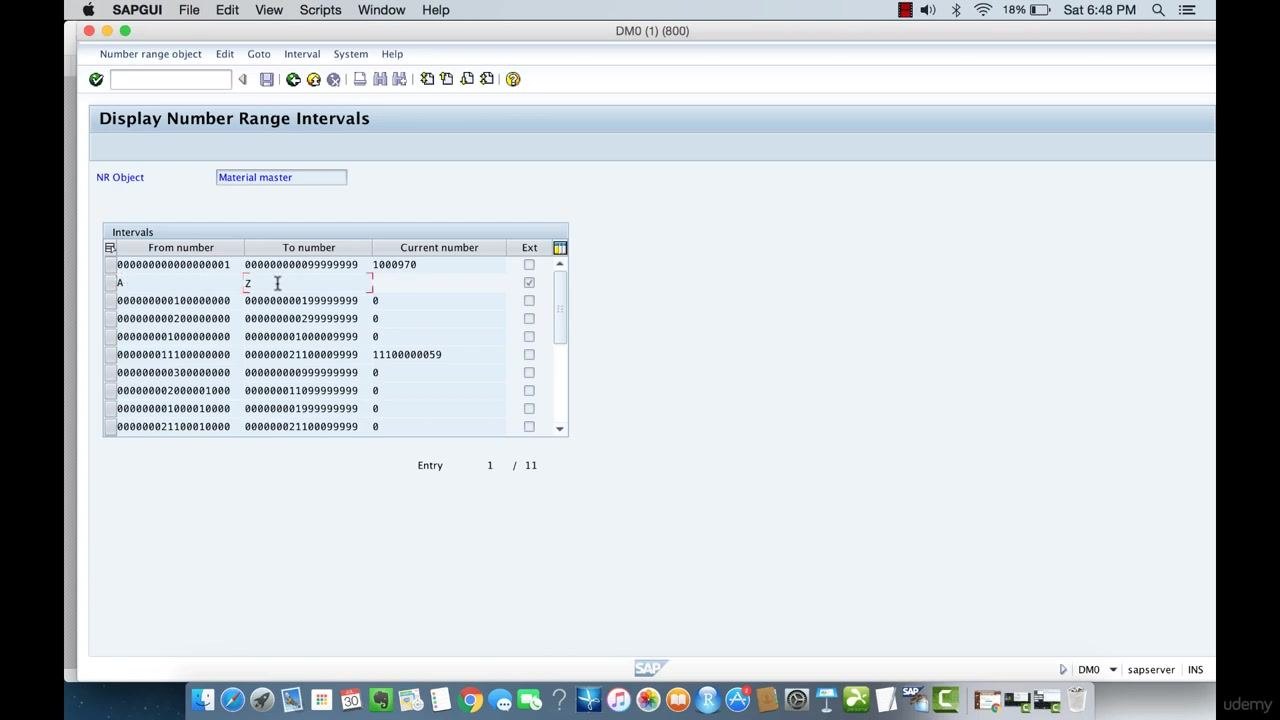
Navigate back to the Display Number Range Intervals screen to see a table listing all intervals for the selected NR Object (Material master). Confirm that your new or edited interval appears as expected—for example, verify that the interval from A to Z is listed. Check the Current number and Ext columns for each interval to confirm the configuration is correct.
Summary
You have now reviewed, edited, deleted, and created number range intervals for material types in SAP MM, and confirmed your changes in the Display Number Range Intervals screen. These intervals determine how material numbers map to material types, so verifying them ensures that new materials are assigned to the correct type automatically.
Generation details: cost, quality tiers
Docsie billed 2,000 credits ($1.40) to analyze this 4-minute video at standard quality. The rewrite, template fill and Word/PDF exports were included. The same video at each quality tier:
| Quality | Frames sampled | Credits | Approx. cost |
|---|---|---|---|
| Draft | every 16-30 s | 1,000 | $0.70 |
| Standard (this guide) | every 8-15 s | 2,000 | $1.40 |
| Detailed | every 4-7 s | 4,000 | $2.80 |
| Ultra | every 1-3 s | 8,000 | $5.60 |
Credits priced at $0.70 per 1,000; plans include a monthly allowance. Enterprise customers on on-premise or bring-your-own-model deployments run this on their own inference and pay no per-video credits.
Generated by Docsie Video-to-Docs on 2026-10-14 from a 3-minute video. Screenshots are frames from the source video and belong to their creator, Skills Host, whose original is embedded above. If you own this video and want the guide removed or credited differently, contact us and we will act within one business day.