
How to Create a Logical System in SAP
This guide walks you through how to create a logical system in SAP using transaction code BD54, and then assign that logical system to a specific client using transaction code SCC4. Following these steps ensures your logical system is correctly configured and linked to the target client.
Video: how to create logical system in SAP by techಹಳ್ಳಿ (2022). All credit for the demonstration goes to the creator; watch the original on YouTube. The written guide below was generated from this video by Docsie. Creator? Request a change or removal.
This guide walks you through how to create a logical system in SAP using transaction code BD54, and then assign that logical system to a specific client using transaction code SCC4. Following these steps ensures your logical system is correctly configured and linked to the target client.
Prerequisites
- Access to the SAP Logon application with valid system connection details.
- A user ID and password with sufficient authorization to create and modify logical systems (the SAP* user is restricted from making these changes).
- Knowledge of the system ID (SID) and client number for which you are creating the logical system.
Log in to the SAP system
Open the SAP Logon application and connect to your SAP system. Enter your client, user ID, and password as required to complete the login.
Access the SAP Easy Access screen
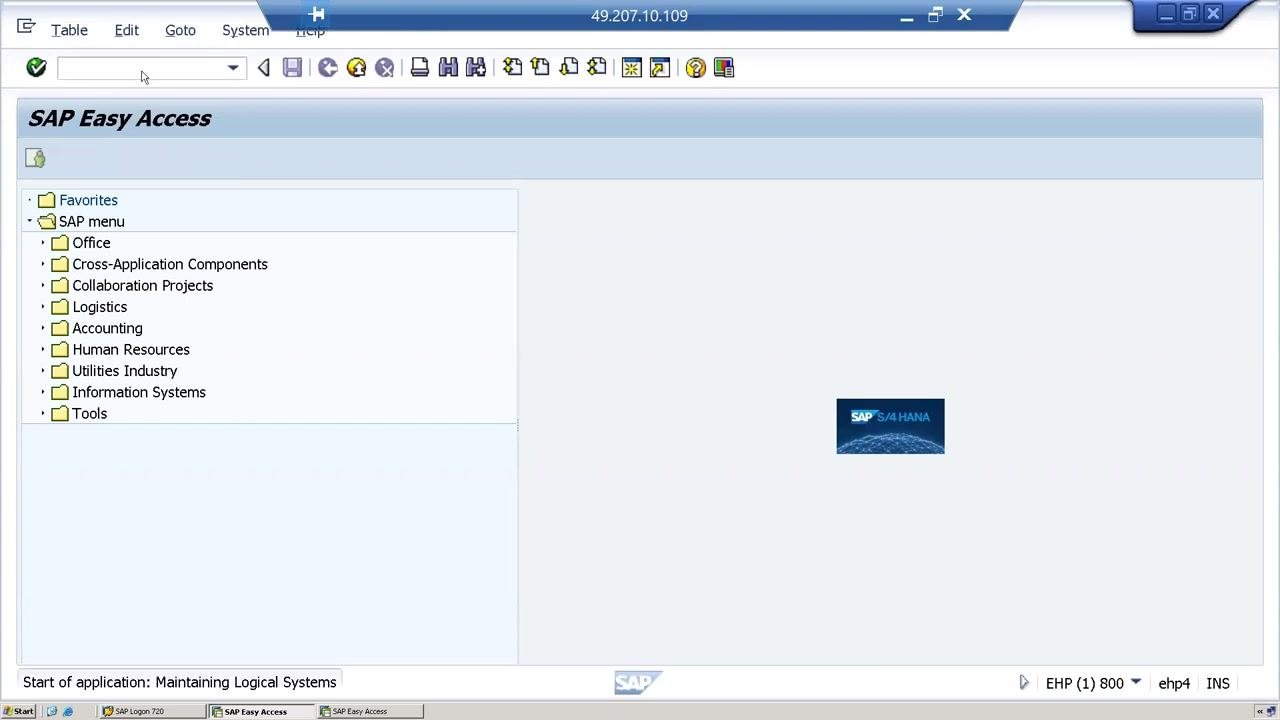
After logging in, confirm you are on the SAP Easy Access screen. The left panel displays the SAP menu, including folders such as Office, Logistics, Accounting, and Human Resources.
Enter the transaction code to maintain logical systems
In the command field at the top of the screen, type BD54 and press Enter. This transaction code is used to maintain logical systems in SAP.
Resolve user permission errors
If you are logged in with the SAP user, you will see the error message: "No changes for user SAP allowed. Choose 'Display object' or 'Cancel'." If this occurs, log out and log in again with a user ID that has the necessary permissions.
Log in with a different user
Return to the SAP Logon screen and enter the client, user ID, and password for a user with sufficient permissions to proceed.
Navigate to the logical systems overview
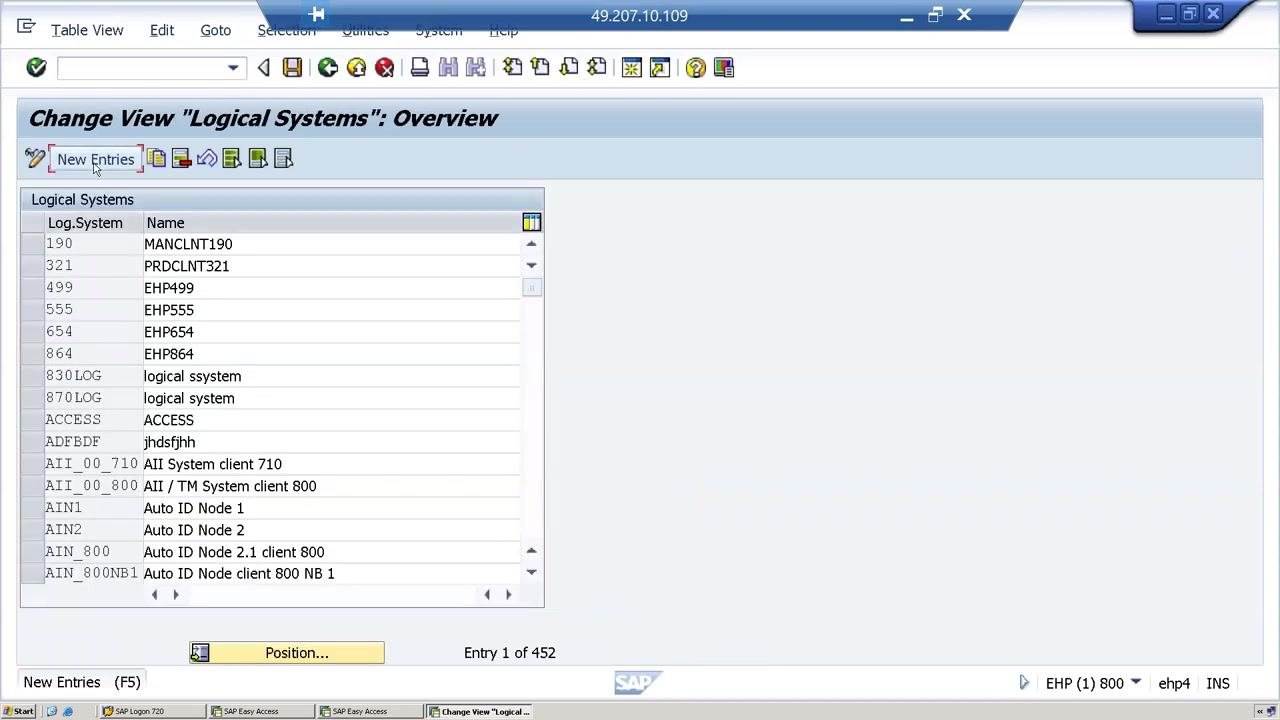
After successfully logging in, enter transaction code BD54 again. The Change View 'Logical Systems': Overview screen appears, listing existing logical systems. Click New Entries at the top left to add a new logical system.
Enter the details for the new logical system
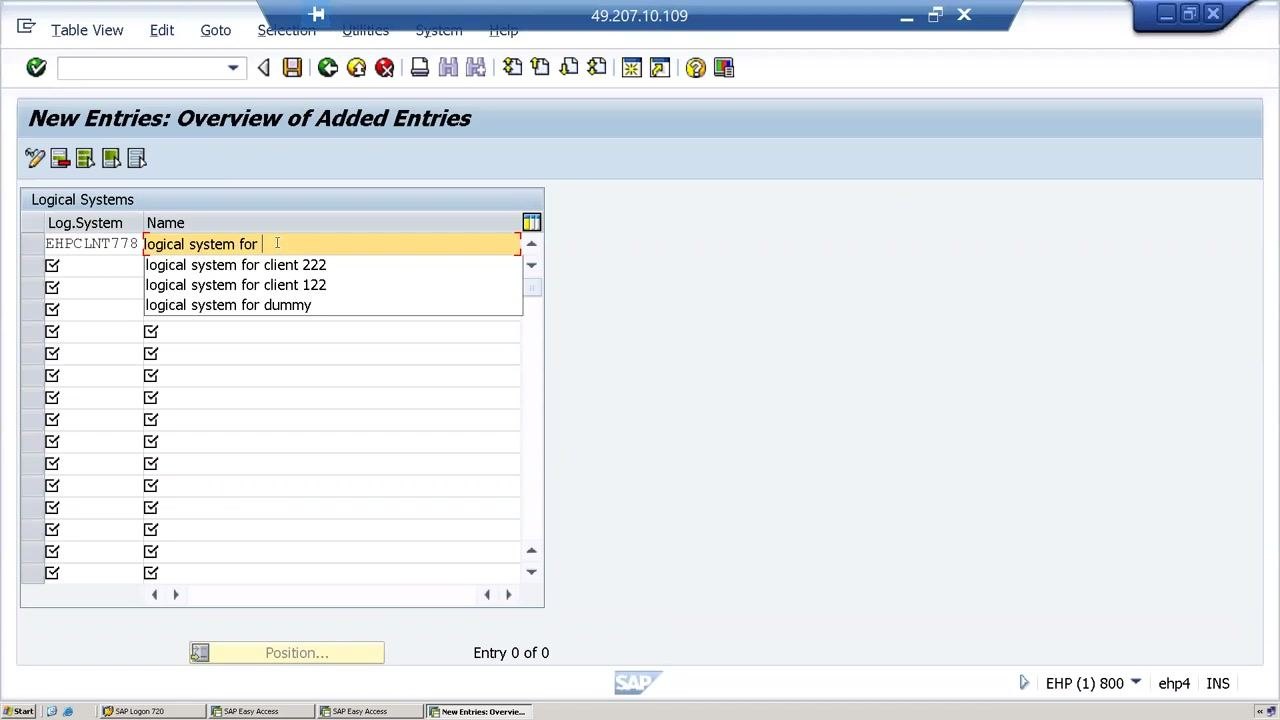
On the New Entries: Overview of Added Entries screen, enter the following details:
- Log.System: Enter the logical system name using the naming convention
[SID]CLNT[Client Number]. For example,EHPC1NT778represents system IDEHPand client778. - Name: Enter a description, such as "logical system for client 778."
Save the new logical system
Confirm that you have entered the logical system name (for example, EHPC1NT778) and description (for example, "logical system for client 778") on the New Entries: Overview of Added Entries screen. Click the Save icon (diskette) to save the entry. If prompted, proceed to create a Workbench request.
Create a Workbench request
In the Prompt for Workbench request dialog, enter a short description, such as "logical system for client 778," in the Short Description field. Confirm the owner, source client, and target system as displayed, then click the Save icon to continue.
Confirm the logical system was created
After saving, verify that your logical system appears in the overview list with the correct name and description. Look for a confirmation message, such as "Data was saved," at the bottom of the screen.
Navigate to client assignment
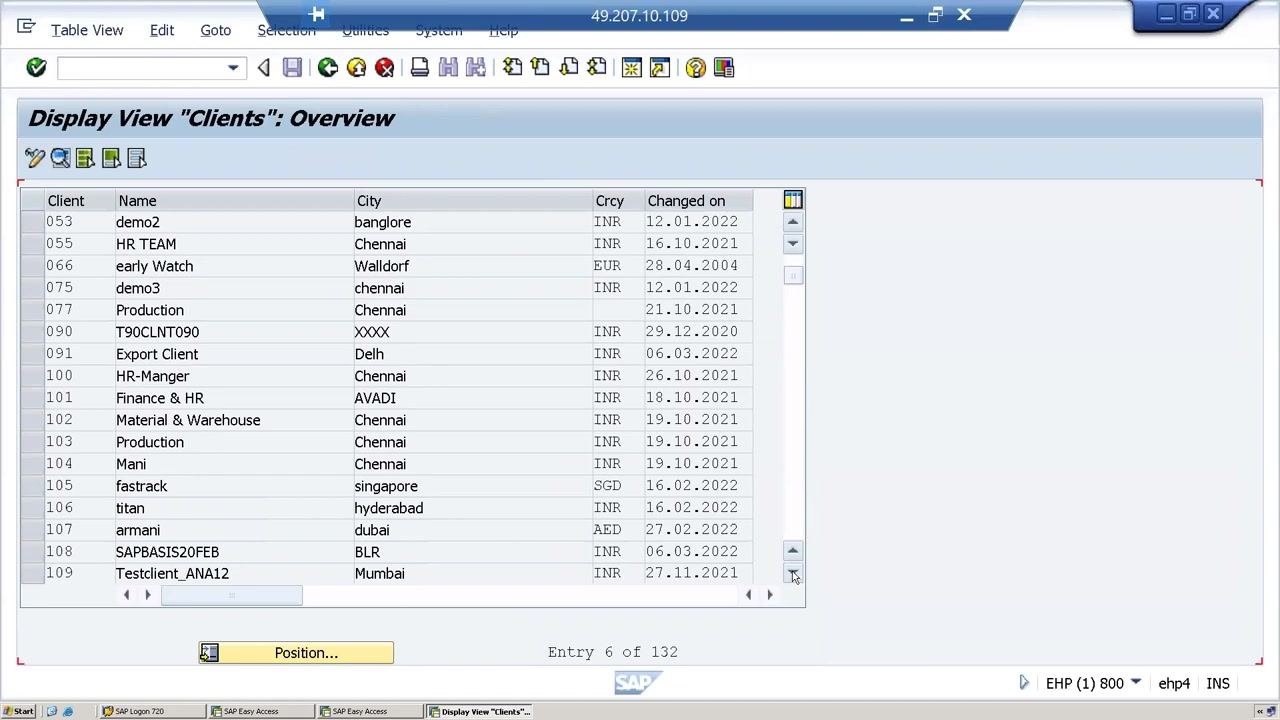
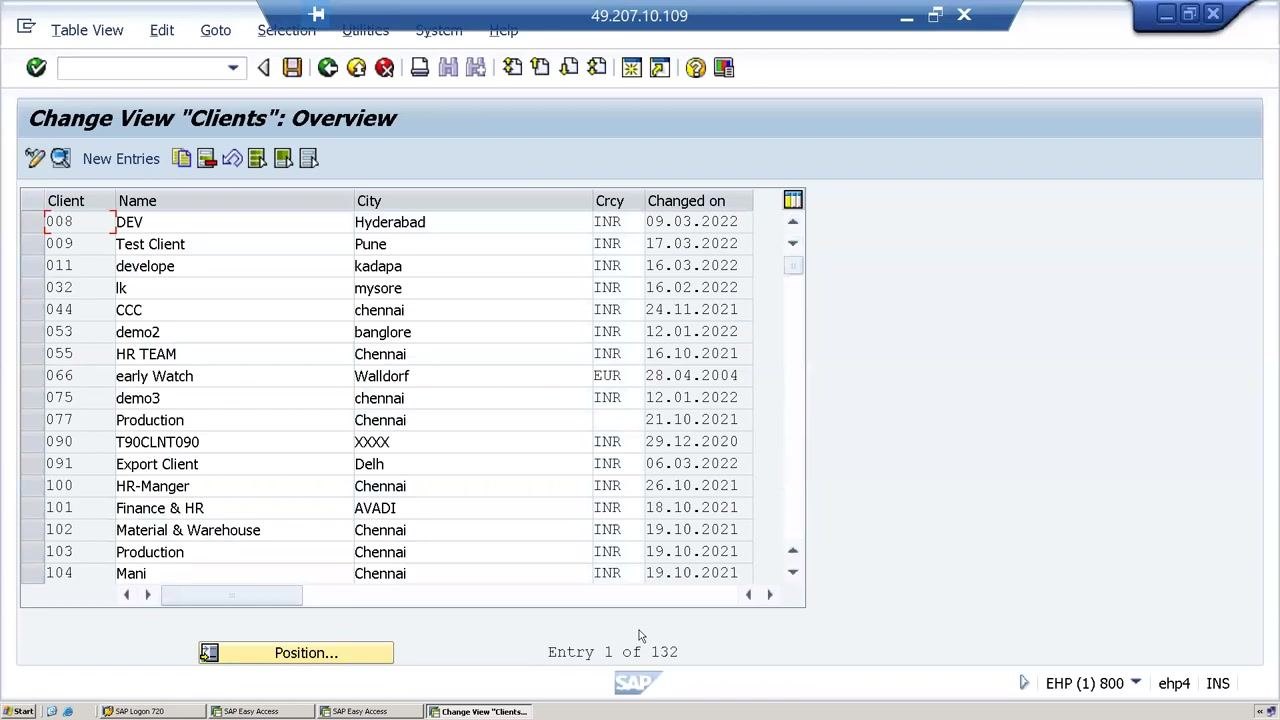
To assign the logical system to a specific client (for example, client 778), use transaction code SCC4 to open the Display View 'Clients': Overview screen. Scroll through the list to locate the target client.
Switch to change mode
If the client overview opens in display mode, switch to change mode to enable editing. Use the Change View 'Clients': Overview screen and scroll again to locate the target client (for example, 778).
Select the logical system for the client
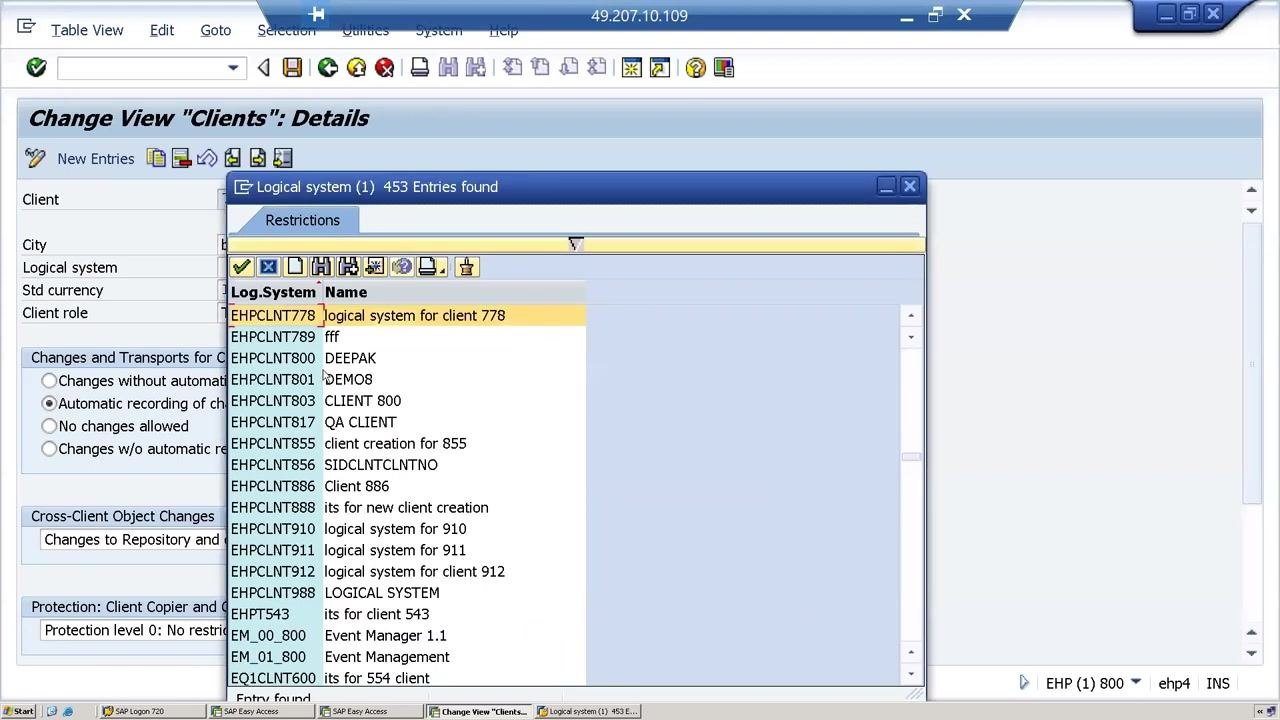
On the Change View 'Clients': Details screen, click the input field next to Logical system to open the list of available options. A pop-up window titled "Logical system (1) 453 Entries found" appears, displaying all available logical systems. Scroll through the list, locate the logical system you created (for example, EHPCLNT778 with the description "logical system for client 778"), and click to select it.
Confirm and save the assignment
After selecting the logical system, confirm that the Logical system field for the client (for example, client 778) is populated with the correct value (for example, EHPCLNT778). Review the other client details:
- Client:
778 - Name:
ICICI - City:
bangalore - Std currency:
INR - Client role:
Test - Last Changed By:
BASIS8 - Date:
13.04.2022
Under Changes and Transports for Client-Specific Objects, verify that the appropriate option is selected (for example, "Automatic recording of changes"). Under Cross-Client Object Changes, confirm the correct setting (for example, "Changes to Repository and cross-client Customizing allowed"). Under Protection: Client Copier and Comparison Tool, confirm the protection level (for example, "Protection level 0: No restriction").
Click the Save icon to finalize the assignment, and look for the confirmation message "Data was saved" at the bottom of the screen.
Summary
By completing these steps, you have successfully created a logical system in SAP and assigned it to a specific client. The logical system EHPC1NT778 is now configured and linked to client 778, with the assignment confirmed and saved in the system.
Generation details: cost, quality tiers
Docsie billed 2,000 credits ($1.40) to analyze this 4-minute video at standard quality. The rewrite, template fill and Word/PDF exports were included. The same video at each quality tier:
| Quality | Frames sampled | Credits | Approx. cost |
|---|---|---|---|
| Draft | every 16-30 s | 1,000 | $0.70 |
| Standard (this guide) | every 8-15 s | 2,000 | $1.40 |
| Detailed | every 4-7 s | 4,000 | $2.80 |
| Ultra | every 1-3 s | 8,000 | $5.60 |
Credits priced at $0.70 per 1,000; plans include a monthly allowance. Enterprise customers on on-premise or bring-your-own-model deployments run this on their own inference and pay no per-video credits.
Generated by Docsie Video-to-Docs on 2026-10-14 from a 3-minute video. Screenshots are frames from the source video and belong to their creator, techಹಳ್ಳಿ, whose original is embedded above. If you own this video and want the guide removed or credited differently, contact us and we will act within one business day.