
How to Configure a Pricing Procedure in SAP
Configuring a pricing procedure in SAP SD involves defining condition tables, access sequences, and condition types before assembling them into a procedure that the system uses to calculate prices on sales documents. This guide walks through the complete process in SAP SD, from building the pricing building blocks to validating the configuration with a sales order, delivery, and billing document.
Video: pricing procedure in sap sd | calculation schema in sap | condition technique #learn2win #sapsd #sap by LEARN2WIN SAP | SAP Training & Placement | S4HANA (2022). All credit for the demonstration goes to the creator; watch the original on YouTube. The written guide below was generated from this video by Docsie. Creator? Request a change or removal.
Configuring a pricing procedure in SAP SD involves defining condition tables, access sequences, and condition types before assembling them into a procedure that the system uses to calculate prices on sales documents. This guide walks through the complete process in SAP SD, from building the pricing building blocks to validating the configuration with a sales order, delivery, and billing document.
Prerequisites
Before you begin, make sure you have access to the following transaction codes in your SAP GUI:
- V/03 – Define condition table
- V/07 – Define access sequence
- V/06 – Define condition type
- VK11 – Create condition records
- VA01 – Create sales order
- VL01N – Create outbound delivery
- VF01 – Create billing document
Overview of the configuration steps
A complete pricing procedure setup in SAP SD follows these main stages:
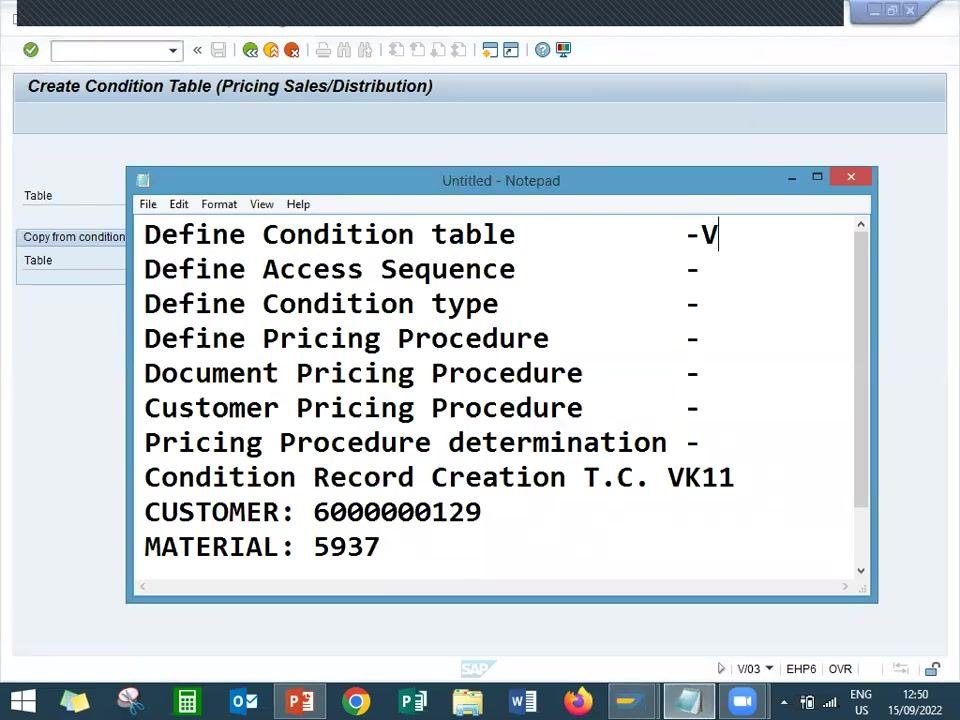
- Define Condition Table
- Define Access Sequence
- Define Condition Type
- Define Pricing Procedure
- Document Pricing Procedure
- Customer Pricing Procedure
- Pricing Procedure Determination
- Condition Record Creation (transaction code VK11)
Define the condition table
Open the condition table transaction
Use transaction code V/03 to begin defining a condition table.
Create the condition table
On the Create Condition Table (Pricing Sales/Distribution) screen:
- Enter a table number above 500 (for example, 625 or 626).
- Use the Page Up and Page Down keys to browse available table numbers.
- Make sure With validity period and With release status are checked.
On the Create Condition Table (Pricing Sales/Distribution): Field Overview screen, select the fields required for your condition table:
- Select Sales Organization from the field catalog and move it to the Selected Fields section.
- Select Distribution Channel and move it to the Selected Fields section.
- Select Customer and move it to the Selected Fields section.
- Select Material and move it to the Selected Fields section.
- Confirm the table number is set to 626.
- Confirm that both With validity period and With release status remain checked.
Generate the condition table
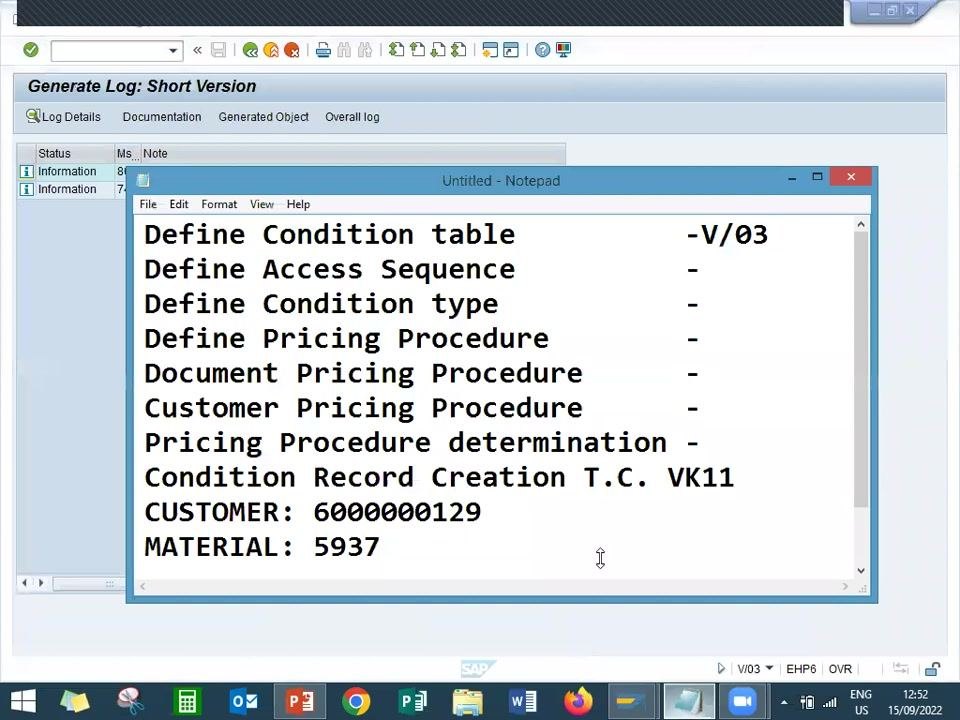
Click the Generate button (or press Shift+F4) to create the condition table and wait for the system to process it.
Review the generation log to confirm success. Look for messages such as "Table A626 has been saved" and "Reports and screens for table A626 marked for generation." Note that your condition table number is 626.
Define the access sequence
Open the access sequence configuration
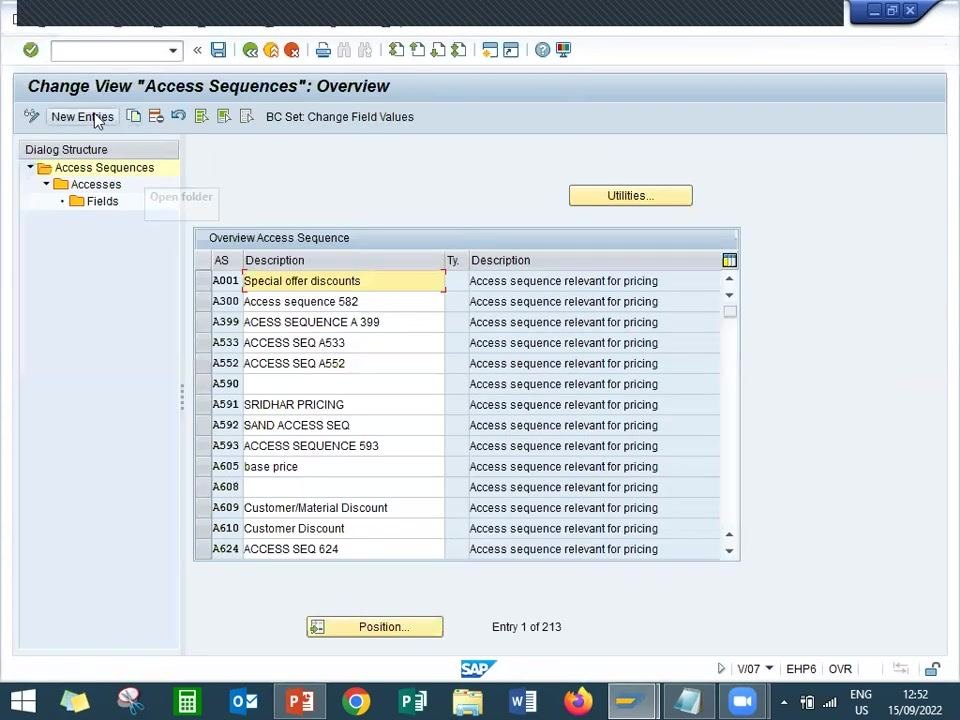
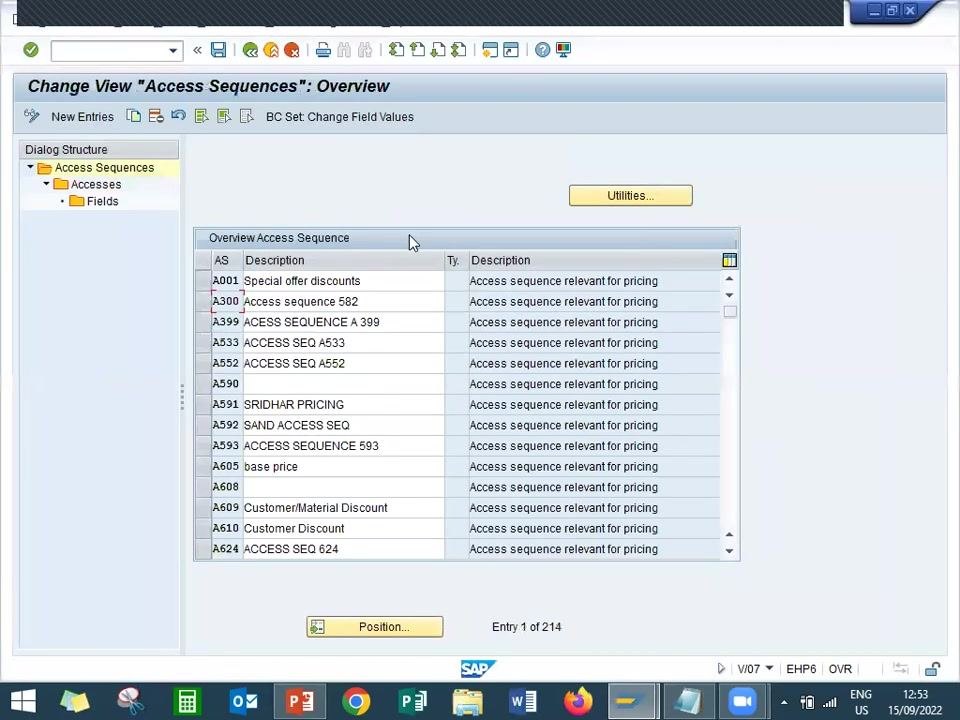
Return to the main configuration menu and navigate to the Access Sequence configuration section. Use transaction code V/07 to define a new access sequence, then click New Entries to create one.
Enter and finalize the access sequence
Enter the following details for the new access sequence:
- Access Sequence: A626
- Description: a relevant description, for example "Access sequence for table 626"
- Transaction Code: B-07
Confirm the entry in your tracking notes.
Confirm that access sequence A626 is created and associated with table 626:
- Press Enter when prompted to confirm your entries.
- Double-click the relevant line item to review the fields.
- Press Enter again to proceed.
- Save your changes to generate the access sequence.
- Press F3 to return to the previous menu.
Define the condition type
Open condition type definition
Go to the Condition Types definition section using transaction code V/06, then select the Conditions: Condition Types overview from the SAP menu.
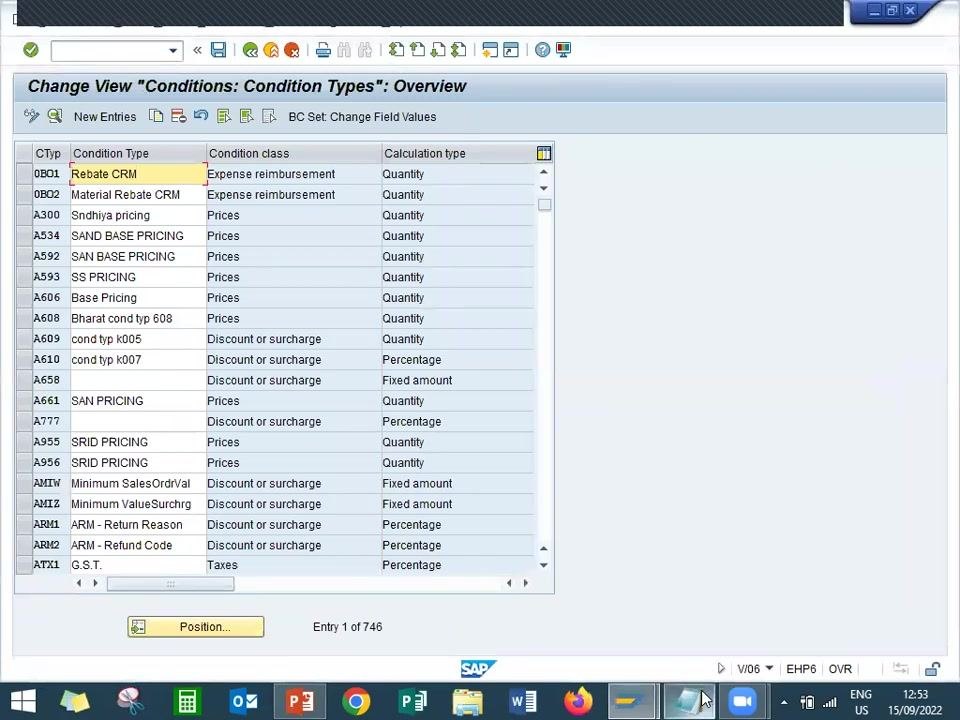
Copy the standard condition type PR00
Find PR00 (Base Pricing) in the list and select it as the template for your new condition type. Click Copy As (or press F6) to create a new condition type based on PR00.
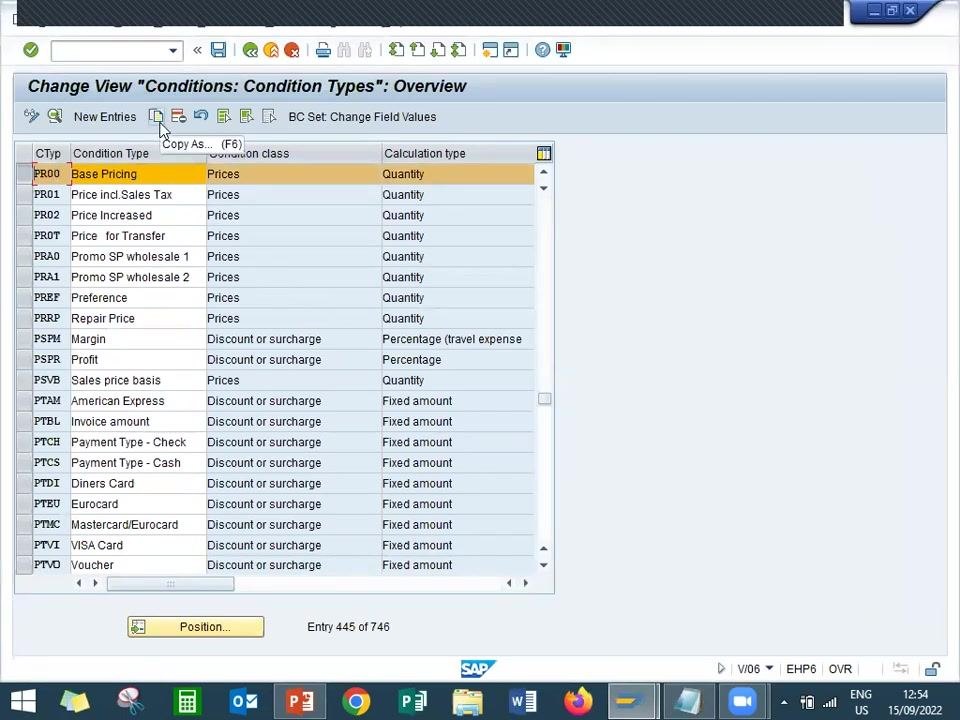
Create the new condition type Z626
In the copy dialog, enter:
- Condition Type: Z626
- Description: Base Pricing LEARN2W (or as required)
- Access Sequence: A626
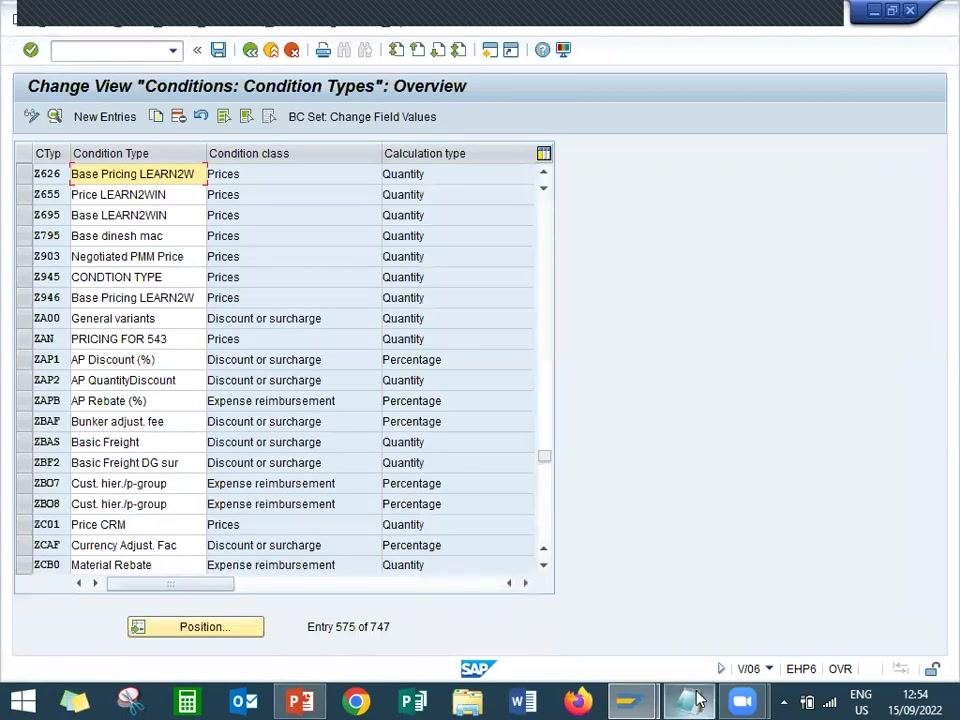
Confirm and save. Verify that Z626 now appears in the list of condition types with the correct description and access sequence.
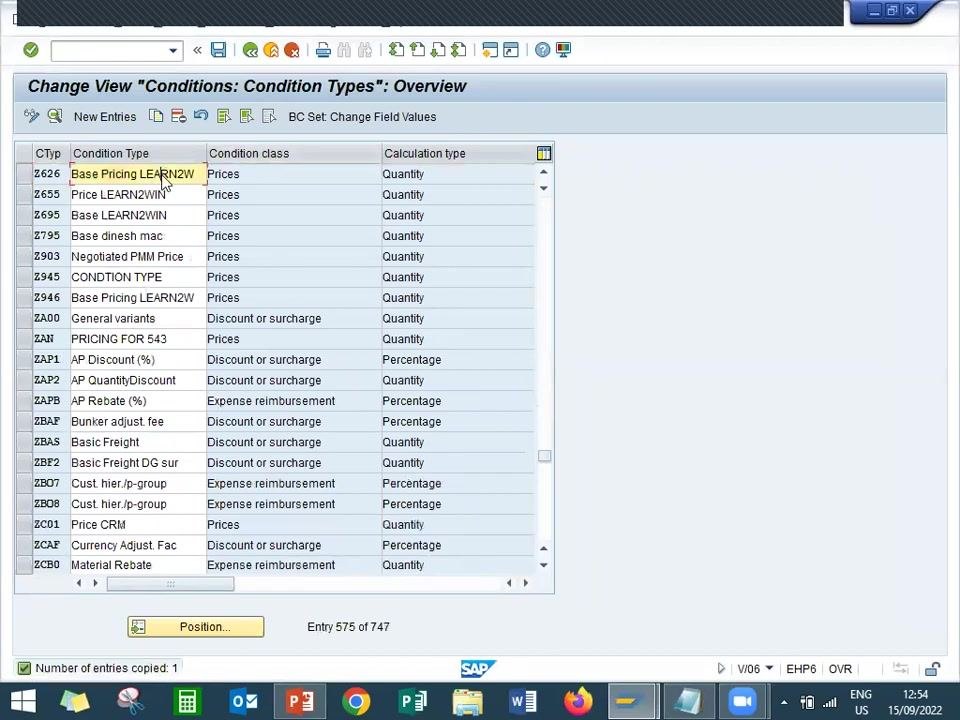
Verify the condition type configuration
On the Change View "Conditions: Condition Types": Details screen, confirm that the following fields are populated:
- Cond. type: Z626
- Description: Base Pricing LEARN2W
- Access seq.: A626
Double-check that access sequence A626 is correctly assigned to condition type Z626, and confirm that all previous steps are complete before proceeding to pricing procedure configuration.
Create and assign the pricing procedure
Open the procedures overview
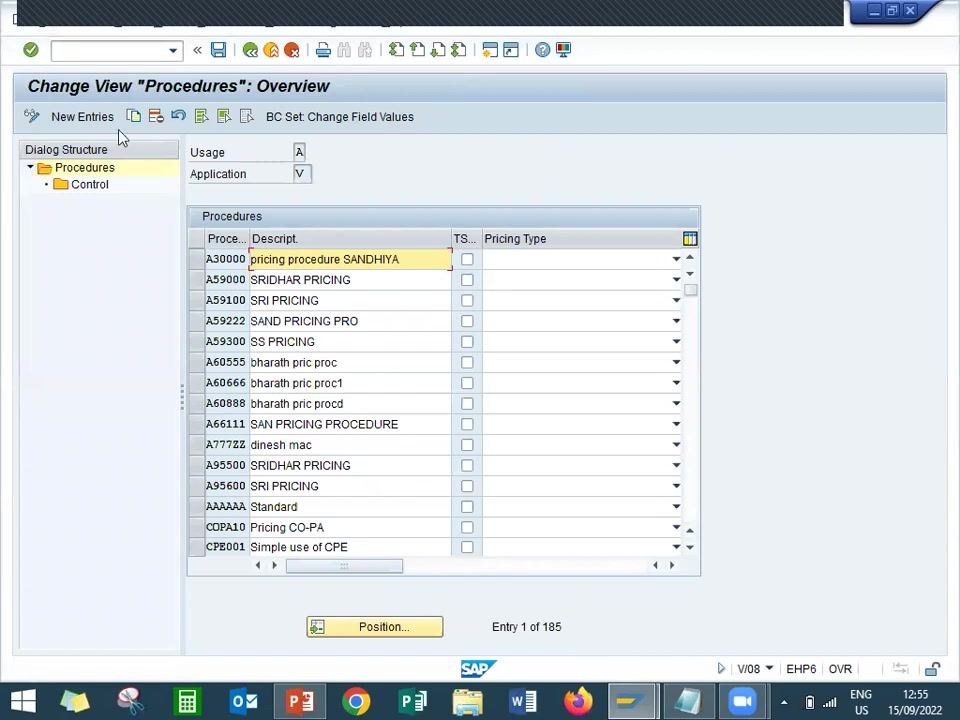
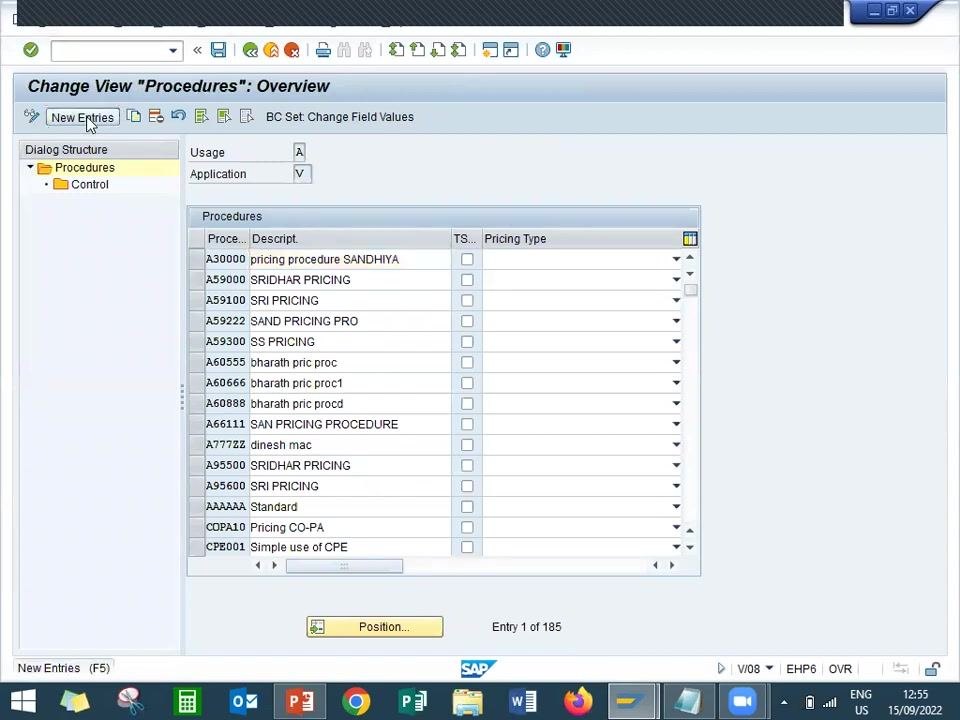
Navigate to the Change View 'Procedures': Overview screen. You will see a list of existing pricing procedures. Click New Entries at the top left to create a new pricing procedure.
Create a new pricing procedure
On the new entry screen, enter:
- Procedure: Z626ZZ
- Description: PRICING PROCEDURE LEARN2WIN
This sets up the new pricing procedure for further configuration.
Assign the condition type to the pricing procedure
On the New Entries: Overview of Added Entries screen, assign the condition type:
- Step: 1
- Counter: 0
- CType: Z626
- Description: Base Pricing LEARN2W
Additional columns such as From, To, Manual, Reqt, Subtotal, Requirement, Calculation Type, Base Type, and Account Key are available for further configuration.
Press Enter to validate the entries. The system updates the screen to confirm the assignment of Z626 Base Pricing LEARN2W. Ensure the Reqt field is set to 2 and the BasTy field is set to ERL.
Save the pricing procedure
Click the Save icon (or press Ctrl+S) and wait for the confirmation message indicating the entries were saved successfully.
Set up pricing procedure determination
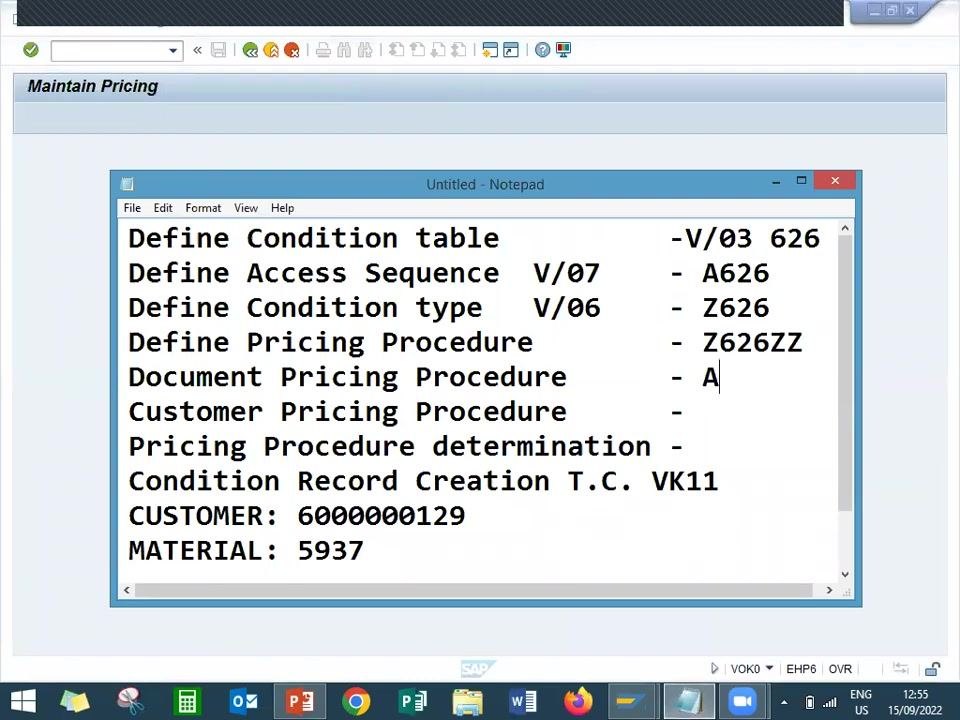
Use standard document and customer pricing procedures
Use the existing standard values rather than creating new entries:
- Document Pricing Procedure: A
- Customer Pricing Procedure: 1
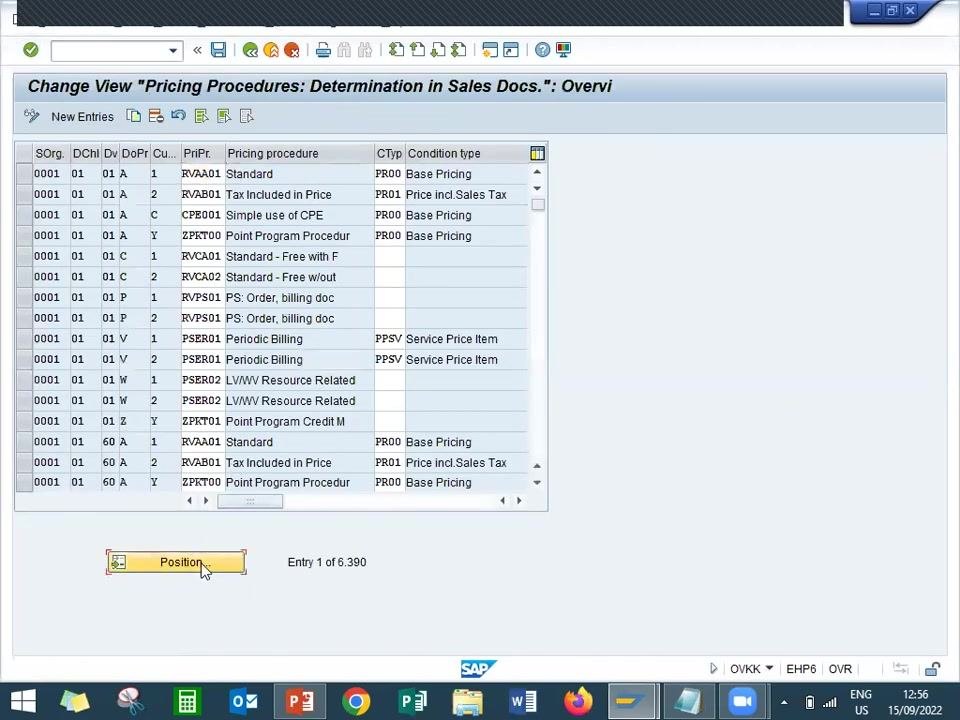
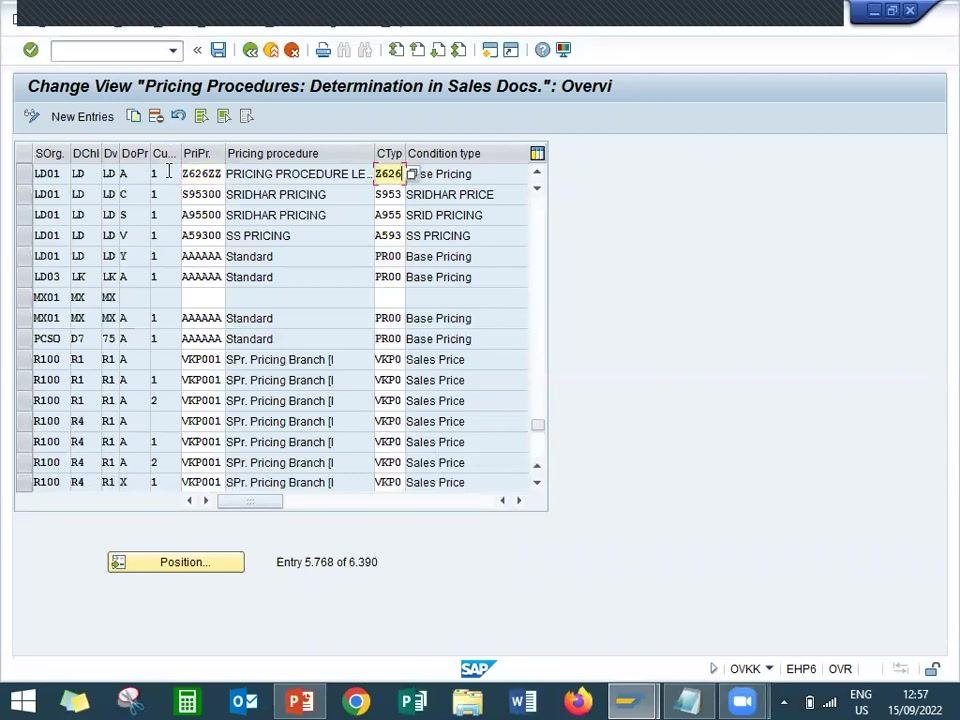
Navigate to the Change View 'Pricing Procedures: Determination in Sales Docs.': Overview screen. This screen lists all existing pricing procedure assignments by sales organization, distribution channel, division, document pricing procedure, and customer pricing procedure. Use the Position... button at the bottom to quickly locate specific entries.
Search for the new pricing procedure assignment
Use Position... or scroll to locate the entry for your new pricing procedure, and confirm it matches:
- Sales Organization: LD01
- Distribution Channel: LD
- Division: LD
- Document Pricing Procedure: A
- Customer Pricing Procedure: 1
- Pricing Procedure: Z626ZZ
- Condition Type: Z626
Create the condition record
Prepare for condition record creation
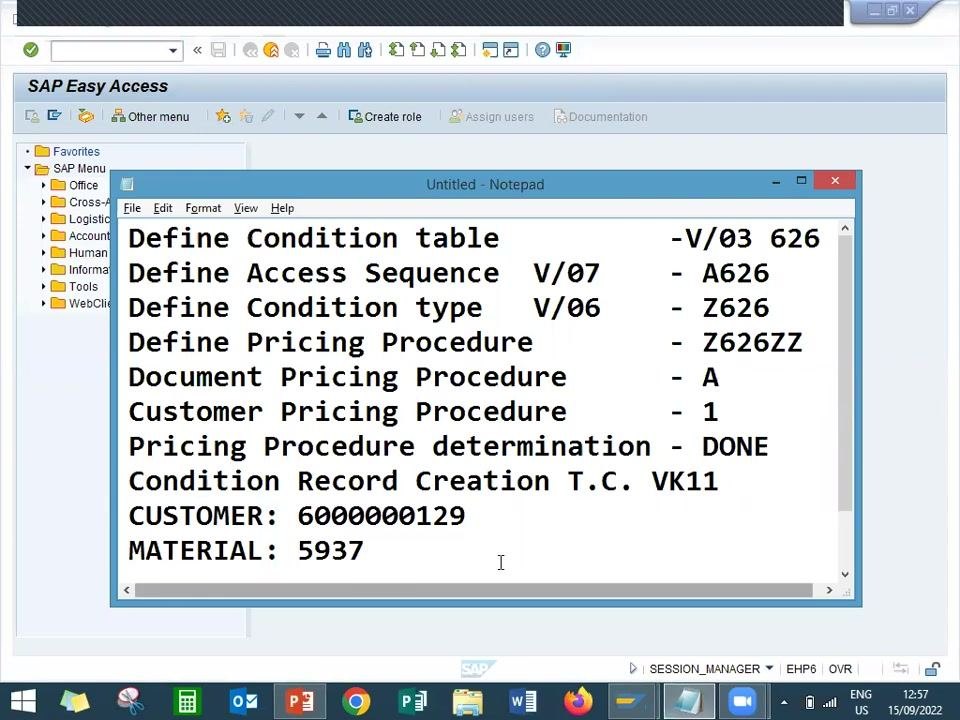
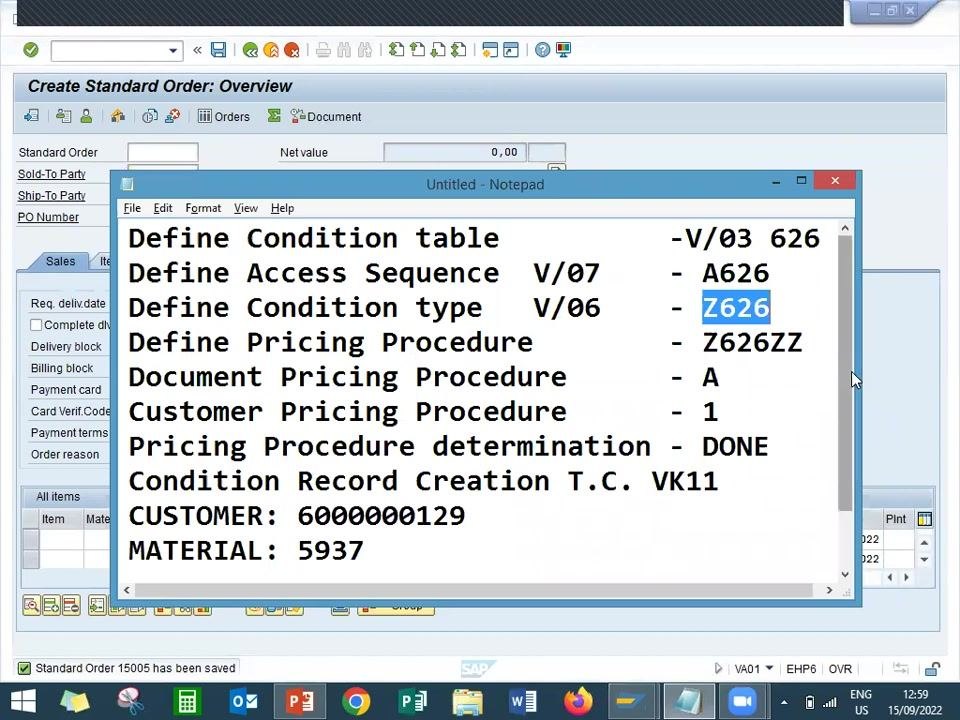
Note the values needed for the VK11 transaction:
- Condition Type: Z626
- Customer: 6000000129
- Material: 5937
Open the Create Condition Records screen
Navigate to the Create Condition Records screen. The screen displays tabs for Condition Information and Key Combination.
Enter condition record details
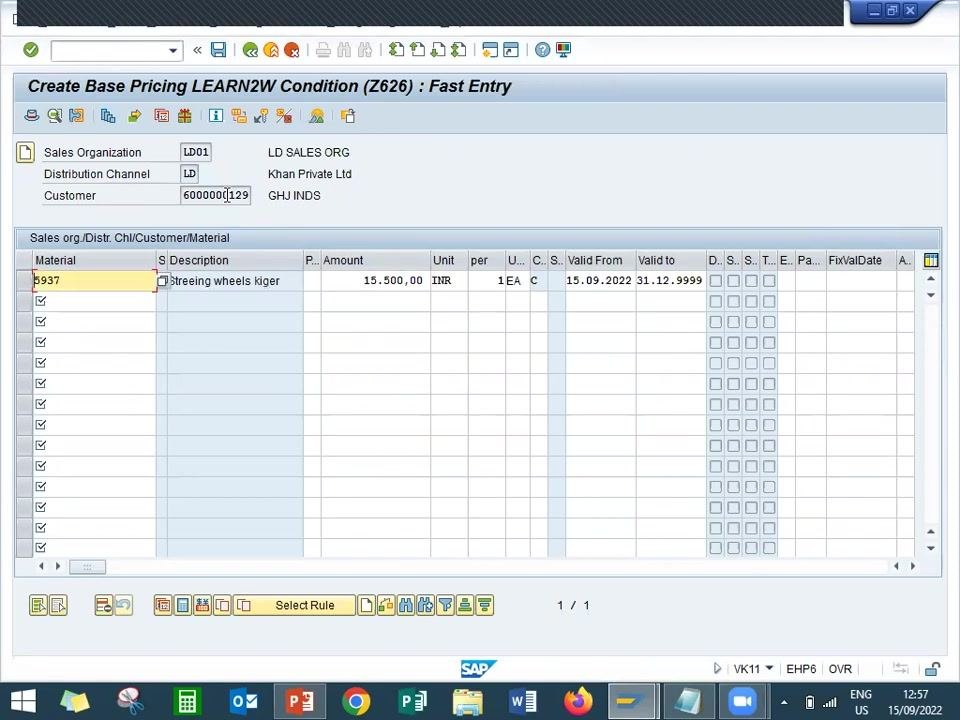
On the Create Base Pricing LEARN2W Condition (Z626): Fast Entry screen, enter:
- Sales Organization: LD01
- Distribution Channel: LD
- Customer: 6000000129 (GHJ INDS)
- Material: 5937
- Description: Streering wheels kiger
- Amount: 15,500.00 INR per 1 EA
- Validity: From 15.09.2022 to 31.12.9999
This screen sets the price at which the material will be sold to the customer.
Save the condition record
Click the save icon (diskette) to store the condition record. Confirm that the record is saved by checking for a confirmation message at the bottom of the screen; the entry fields will clear once the save is successful.
Validate the configuration with a sales order
Start sales order creation
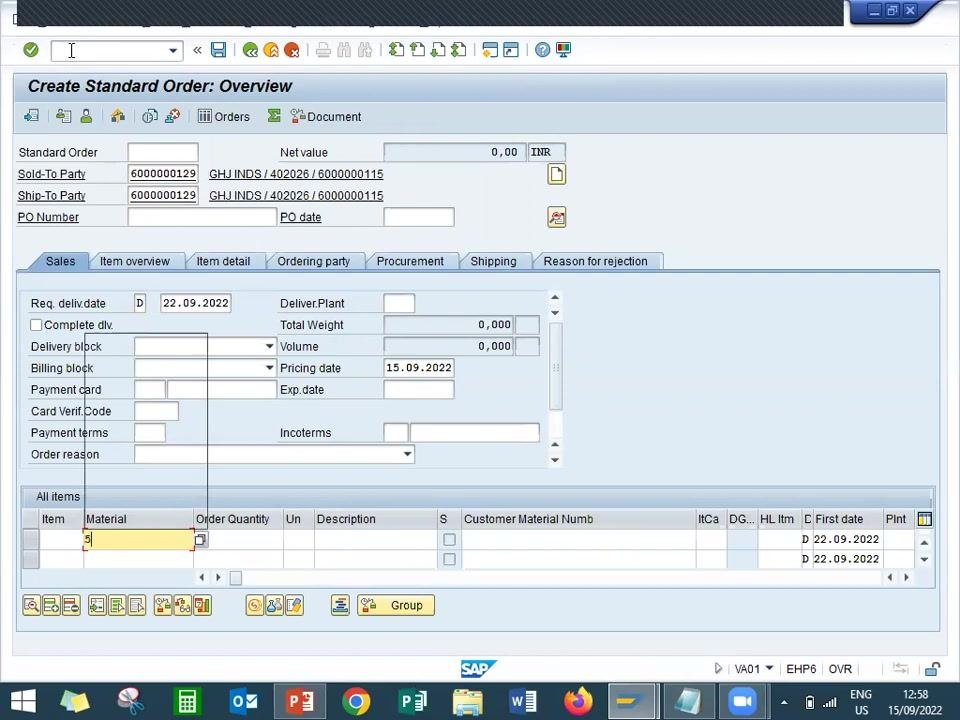
In the command field at the top, enter /nVA01 and press Enter to open the Create Standard Order: Overview screen.
Enter sales order header data
On the Create Standard Order: Overview screen, fill in:
- Sold-To Party: 6000000129 (GHJ INDS)
- Ship-To Party: 6000000129 (GHJ INDS)
- Pricing Date: 15.09.2022
- Required Delivery Date: 22.09.2022
In the All items section, begin entering the material number.
Enter material and order details
In the All items section, enter:
- Material: 5937
- Order Quantity: 1 EA
- Description: Streering wheels kiger
If configured correctly, the system automatically pulls in the price from the condition record.
Specify payment terms and incoterms
On the Sales tab, enter:
- Payment Terms: 0001 (select from the dropdown)
- Incoterms: CFR
Save the sales order
Click the save icon to create the sales order. Wait for the confirmation message at the bottom of the screen (for example, "Standard Order 15005 has been saved") and note the generated sales order number for reference.
Confirm pricing through goods receipt, delivery, and billing
Perform a goods receipt for the material
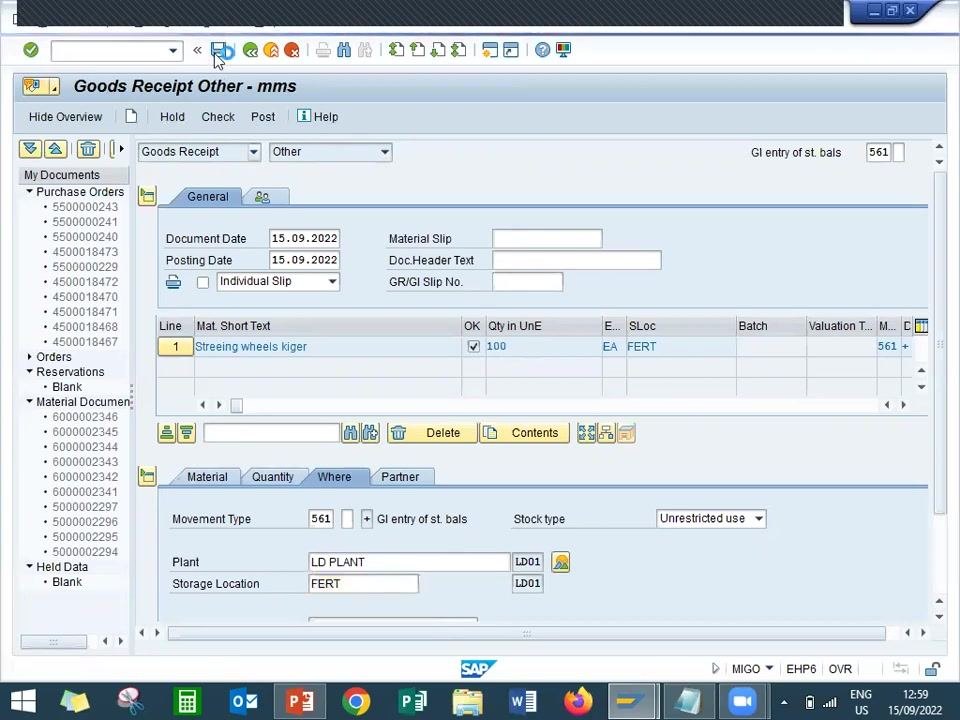
On the Goods Receipt Other - mms screen, General tab, enter:
- Document Date: 15.09.2022
- Posting Date: 15.09.2022
- Material Short Text: Streering wheels kiger
- Quantity: 100
- Unit: EA
- Storage Location: FERT
- Movement Type: 561 (GI entry of st. bals)
- Plant: LD PLANT
- Stock Type: Unrestricted use
- Plant Code: LD01
Save the goods receipt document.
Create the outbound delivery
On the Create Outbound Delivery with Order Reference screen, enter:
- Shipping Point: LD01
- Sales Order: 150005
- Material: 5937
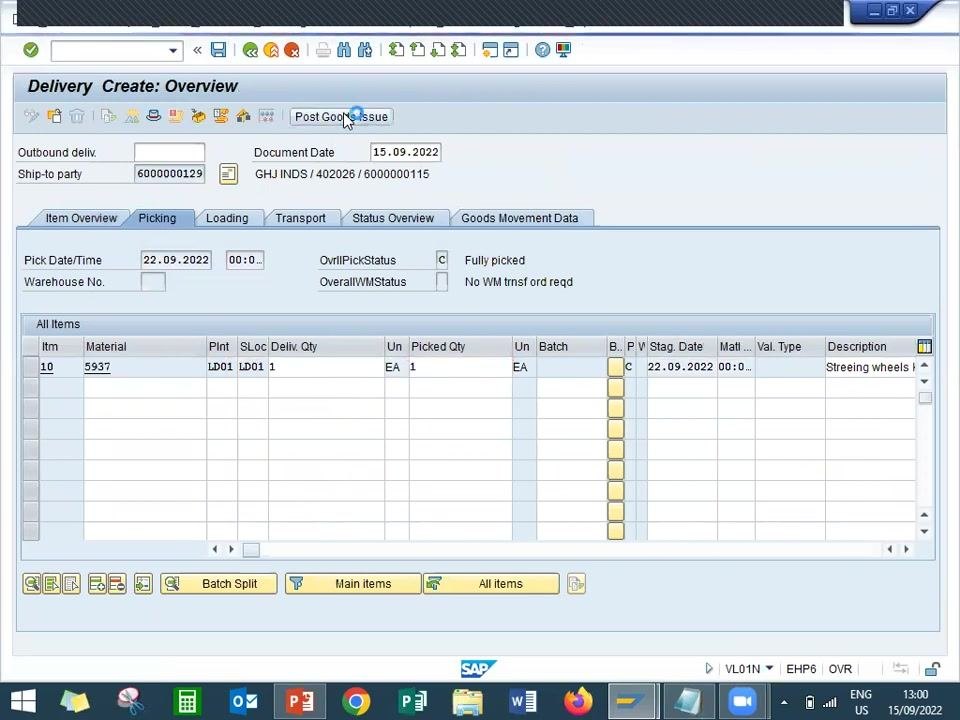
On the Delivery Create: Overview screen, verify:
- Ship-to party: 6000000129
- Document Date: 15.09.2022
- Pick Date/Time: 22.09.2022
- Material: 5937
- Plant: LD01
- Storage Location: LD01
- Delivery Quantity: 1 EA
- Picked Quantity: 1 EA
- Description: Streering wheels kiger
Make sure the item shows as "Fully picked" and that no WM transfer order is required.
Post goods issue
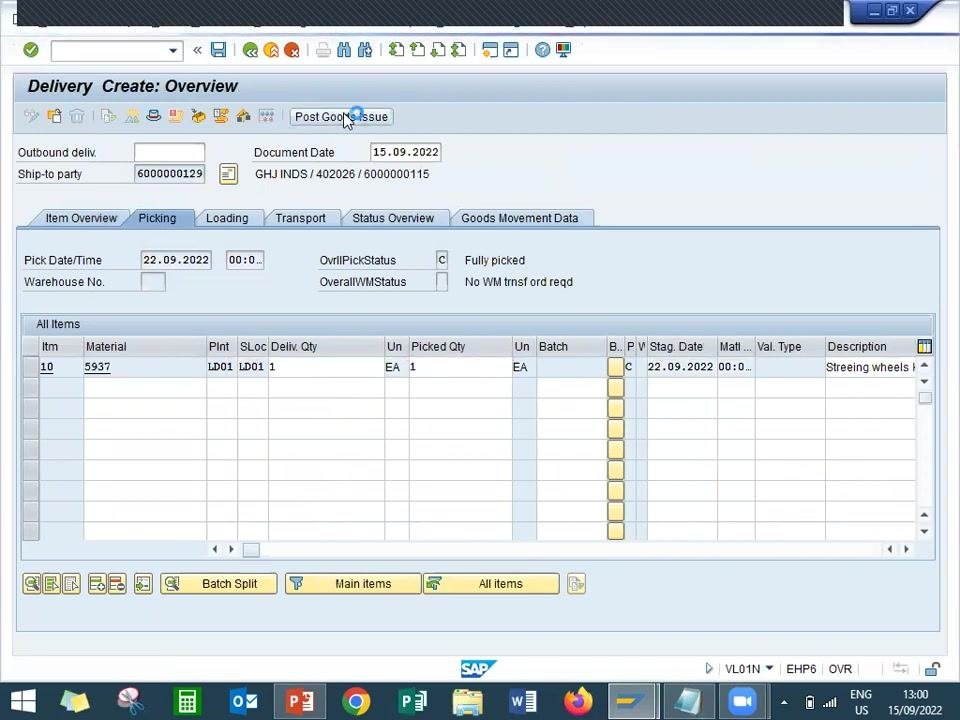
Click Post Goods Issue to complete the outbound delivery process, and confirm that the goods issue is posted successfully.
Create the billing document
Return to the SAP Easy Access menu and enter transaction code VF01 to create a billing document.
Review and confirm the billing document
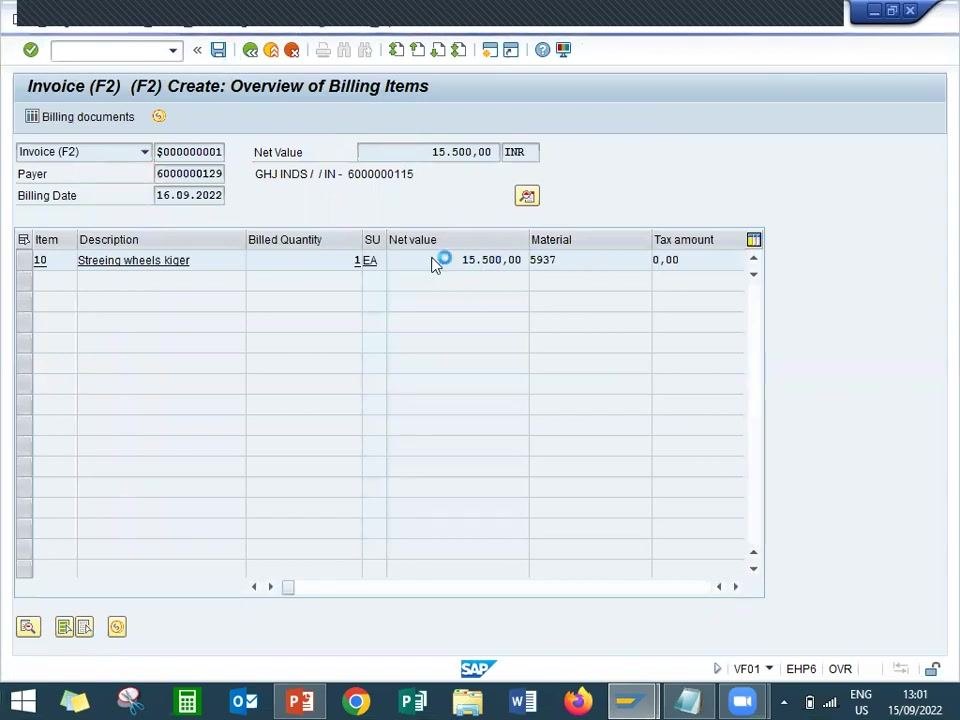
On the Invoice (F2) Create: Overview of Billing Items screen, review:
- Invoice: S000000001
- Payer: 6000000129
- Billing Date: 16.09.2022
- Description: Streering wheels kiger
- Billed Quantity: 1 EA
- Material: 5937
- Net Value: 15,500.00 INR
- Tax Amount: 0.00
Verify all details for accuracy before confirming the billing document.
Summary
By completing these steps, you have configured a pricing procedure in SAP SD — from the condition table, access sequence, and condition type through to the pricing procedure assignment and determination — and validated it end-to-end by creating a condition record, a sales order, a goods receipt, an outbound delivery, and a billing document. The net value on the invoice confirms that the new pricing procedure correctly determined the price for the sales transaction.
Generation details: cost, quality tiers
Docsie billed 6,000 credits ($4.20) to analyze this 12-minute video at standard quality. The rewrite, template fill and Word/PDF exports were included. The same video at each quality tier:
| Quality | Frames sampled | Credits | Approx. cost |
|---|---|---|---|
| Draft | every 16-30 s | 3,000 | $2.10 |
| Standard (this guide) | every 8-15 s | 6,000 | $4.20 |
| Detailed | every 4-7 s | 12,000 | $8.40 |
| Ultra | every 1-3 s | 24,000 | $16.80 |
Credits priced at $0.70 per 1,000; plans include a monthly allowance. Enterprise customers on on-premise or bring-your-own-model deployments run this on their own inference and pay no per-video credits.
Generated by Docsie Video-to-Docs on 2026-10-14 from a 11-minute video. Screenshots are frames from the source video and belong to their creator, LEARN2WIN SAP | SAP Training & Placement | S4HANA, whose original is embedded above. If you own this video and want the guide removed or credited differently, contact us and we will act within one business day.