
How to Use Salesforce in Salesforce
Salesforce provides cloud-based tools and services to manage sales processes and marketing efforts. It helps businesses keep track of contacts, leads, and accounts in a centralized database, storing customer details, communication history, and ongoing opportunities. This guide walks you through how to use Salesforce to add accounts, manage contacts and opportunities, schedule meetings, handle customer service cases, and access performance insights.
Video: Salesforce CRM Demo Walkthrough For Beginners | Step By Step Tutorial 2026 by Thrive Media (2024). All credit for the demonstration goes to the creator; watch the original on YouTube. The written guide below was generated from this video by Docsie. Creator? Request a change or removal.
Salesforce provides cloud-based tools and services to manage sales processes and marketing efforts. It helps businesses keep track of contacts, leads, and accounts in a centralized database, storing customer details, communication history, and ongoing opportunities. This guide walks you through how to use Salesforce to add accounts, manage contacts and opportunities, schedule meetings, handle customer service cases, and access performance insights.
Prerequisites
- An active Salesforce account (trial or full account)
- Access to the Salesforce homepage with navigation permissions for Accounts, Contacts, Sales, Outreach, Service, and Calendar sections
Access the Salesforce homepage
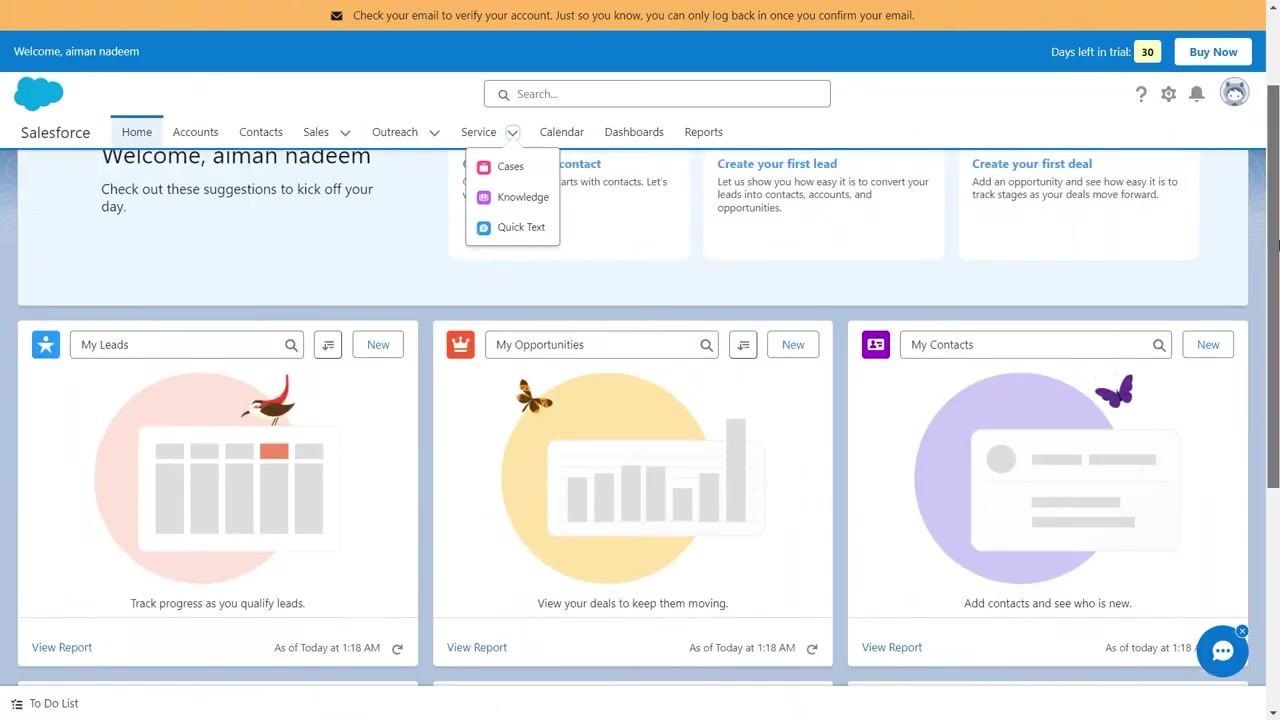
Log in to your Salesforce account. On the homepage, you will see a welcome message, a navigation bar (Home, Accounts, Contacts, Sales, Outreach, Service, Calendar, Dashboards, Reports), and quick-start suggestions such as "Create your first contact," "Create your first lead," and "Create your first deal."
The dashboard displays widgets for My Leads, My Opportunities, and My Contacts. A notification bar at the top may prompt you to verify your email, and if you are using a trial account, you will see the days left in your trial along with a Buy Now button. Use the search bar at the top to quickly find records or features.
Add a new account
Click Accounts in the top navigation bar, then click the New button in the top right corner of the Accounts page.
Fill in the required information for the new account:
- Account Name: Enter the name (e.g., "project 1")
- Website: Enter the website (e.g., "weddingcraft")
- Type: Select the type from the dropdown (e.g., "Partner")
- Description: Optionally, add a description
- Parent Account: Optionally, search and select a parent account
- Account Owner: Auto-filled with your user name
- Phone: Enter a contact phone number
- Billing Address and Shipping Address: Enter as needed
Once all details are entered, click Save to create the account.
View and manage the new account
After saving, you are redirected to the account details page, where a confirmation message appears (e.g., "Account 'project 1' was created"). The account details are displayed on the left, including name, website, type, and owner.
Use the top buttons to:
- New Event: Schedule a meeting or event
- Log a Call: Record a phone call
- New Task: Assign a new task
The right panel allows you to add contacts, opportunities, cases, and files related to this account. You can add multiple customer accounts or leads to follow up with.
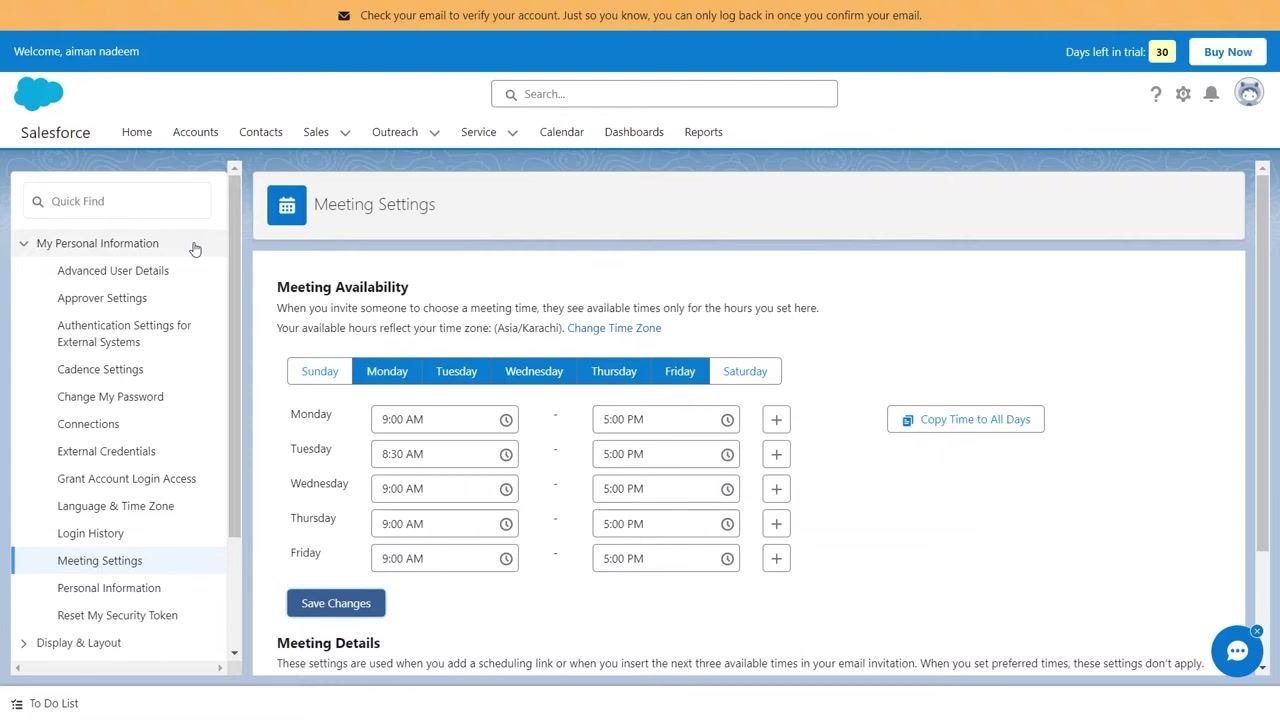
Set up meeting availability
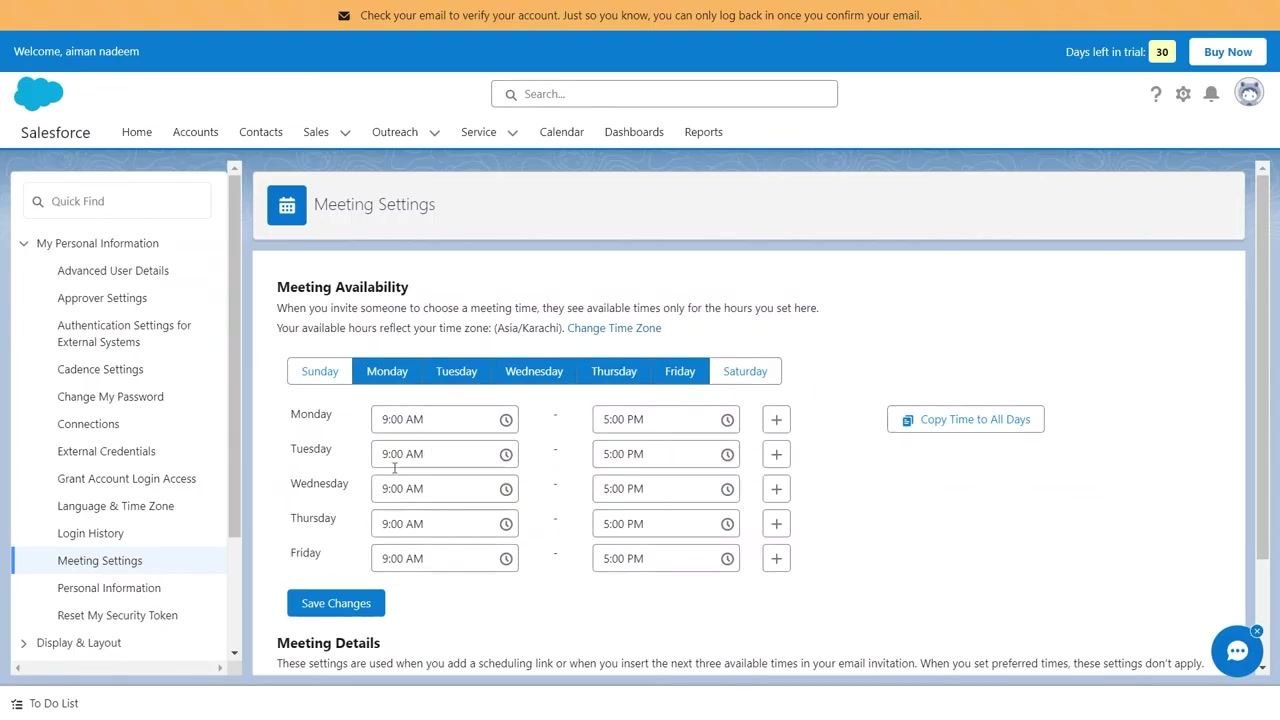
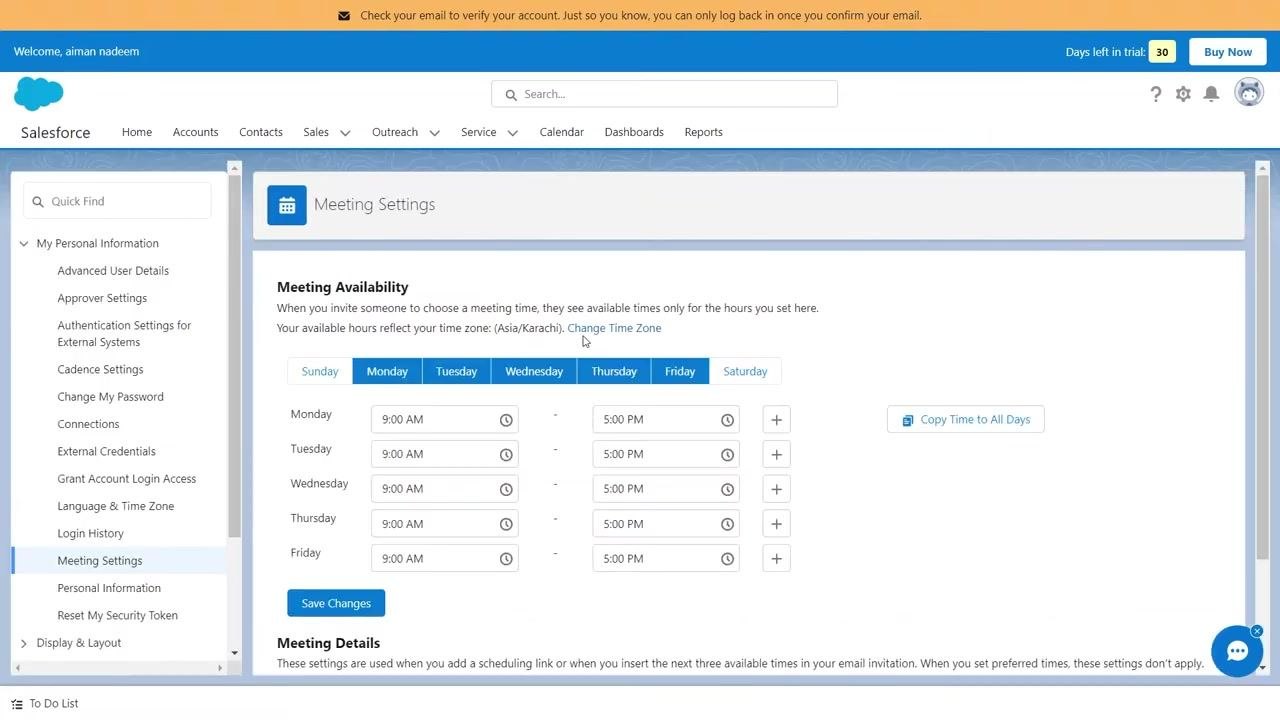
Go to Meeting Settings from the left sidebar under My Personal Information. In the Meeting Availability section, set your available hours for each day of the week — for example, Monday to Friday from 9:00 AM to 5:00 PM, or Tuesday from 8:30 AM to 5:00 PM for a specific adjustment.
Use the Copy Time to All Days button to quickly apply the same hours to all days, then click Save Changes to update your meeting availability.
Once meeting details are entered, Salesforce lets you send invitations to attendees, including email notifications with meeting details and calendar invites. Salesforce can integrate with popular email and calendar applications for seamless scheduling, and it synchronizes meeting details across integrated platforms so all team members and clients see up-to-date meeting information.
Create and manage contacts
Click Contacts in the top navigation bar, then click the New button or the Add a Contact button in the center of the screen.
Fill in the required contact details:
- Contact Name: Enter the full name (e.g., "Ms. joe welem")
- Account Name: Link the contact to an existing account (e.g., "project 1")
- Title: Enter the contact's title (e.g., "trendy")
- Description: Optionally, add a description
- Reports To: Assign a member of your organization who will follow up with this contact
- Contact Owner: Auto-filled with your user name
- Phone, Email, Mailing Address: Enter as needed
Click Save to create the contact.
View and manage contact details
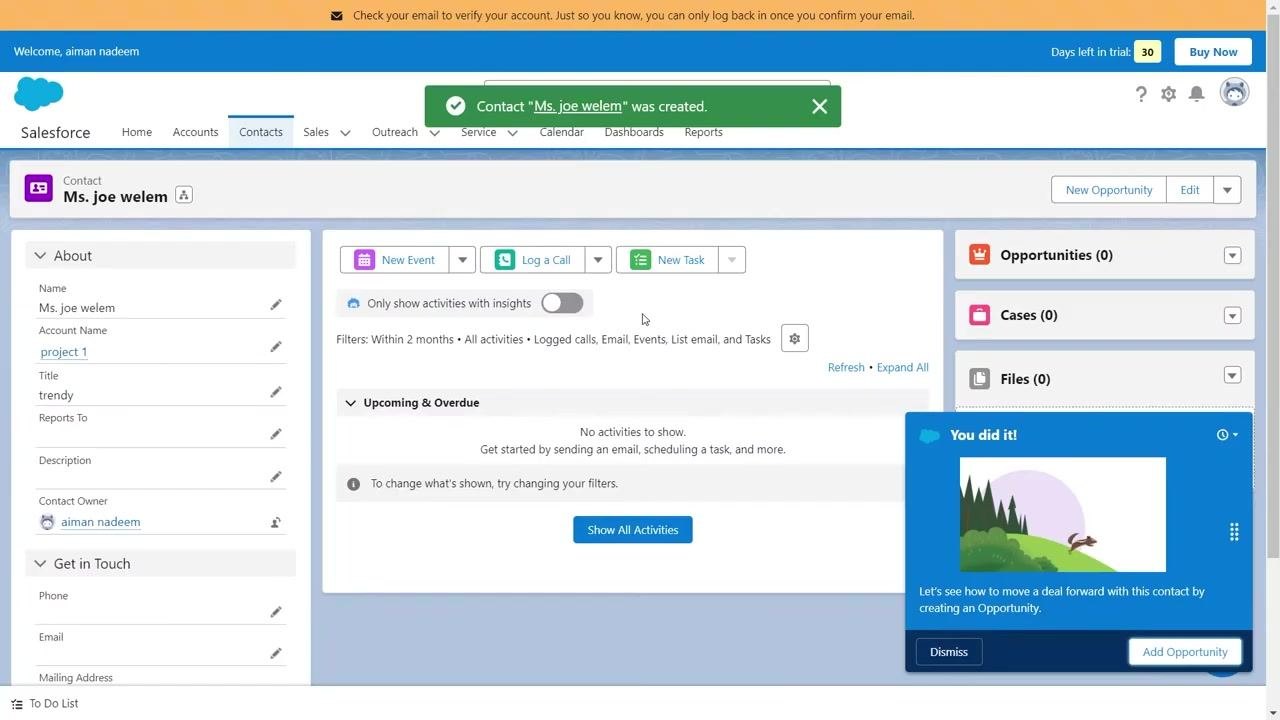
After saving, you are redirected to the contact details page, and a confirmation message appears (e.g., "Contact 'Ms. joe welem' was created"). The left panel displays contact information: name, account, title, reports to, description, and owner.
Use the top buttons to:
- New Event: Schedule a meeting or event for the contact
- Log a Call: Record a phone call with the contact
- New Task: Assign a new task related to the contact
Click Show All Activities to view all meetings, calls, or tasks scheduled for this contact. The right panel allows you to add opportunities, cases, and files related to the contact, and to upload documents, pictures, videos, or other files by clicking Upload Files or dragging files into the Files section.
Create a sales opportunity
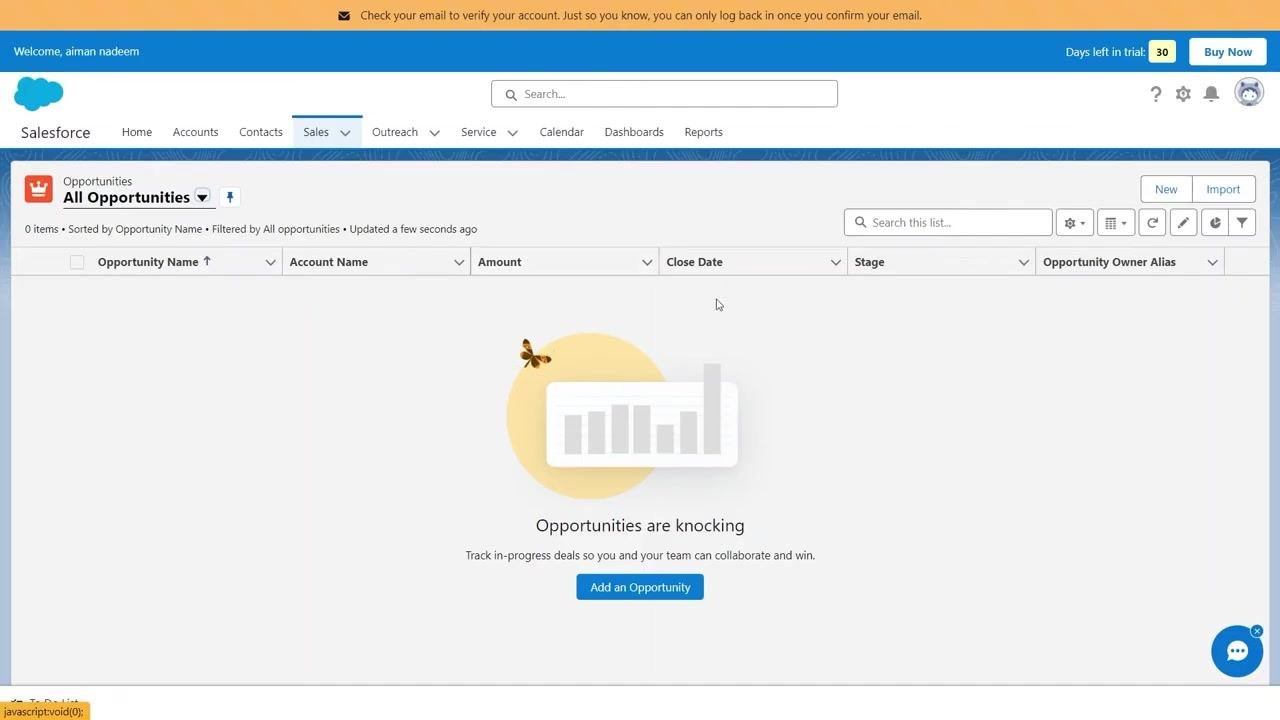
Click Sales in the top navigation bar and select Opportunities from the dropdown. On the Opportunities page, click Add an Opportunity.
Fill in the necessary details for the new opportunity:
- Opportunity Name: Enter a descriptive name
- Account Name: Link the opportunity to an existing account
- Amount: Enter the expected value of the opportunity
- Close Date: Set the expected or target closing date
- Stage: Select the current stage in the sales process
- Probability (%): Enter the likelihood of closing the deal
- Forecast Category: Select the appropriate forecast category
- Next Step: Optionally, describe the next action to take
- Description: Optionally, add more details
- Opportunity Owner: Auto-filled with your user name
Click Save to create the opportunity.
Update opportunity stages and add team members
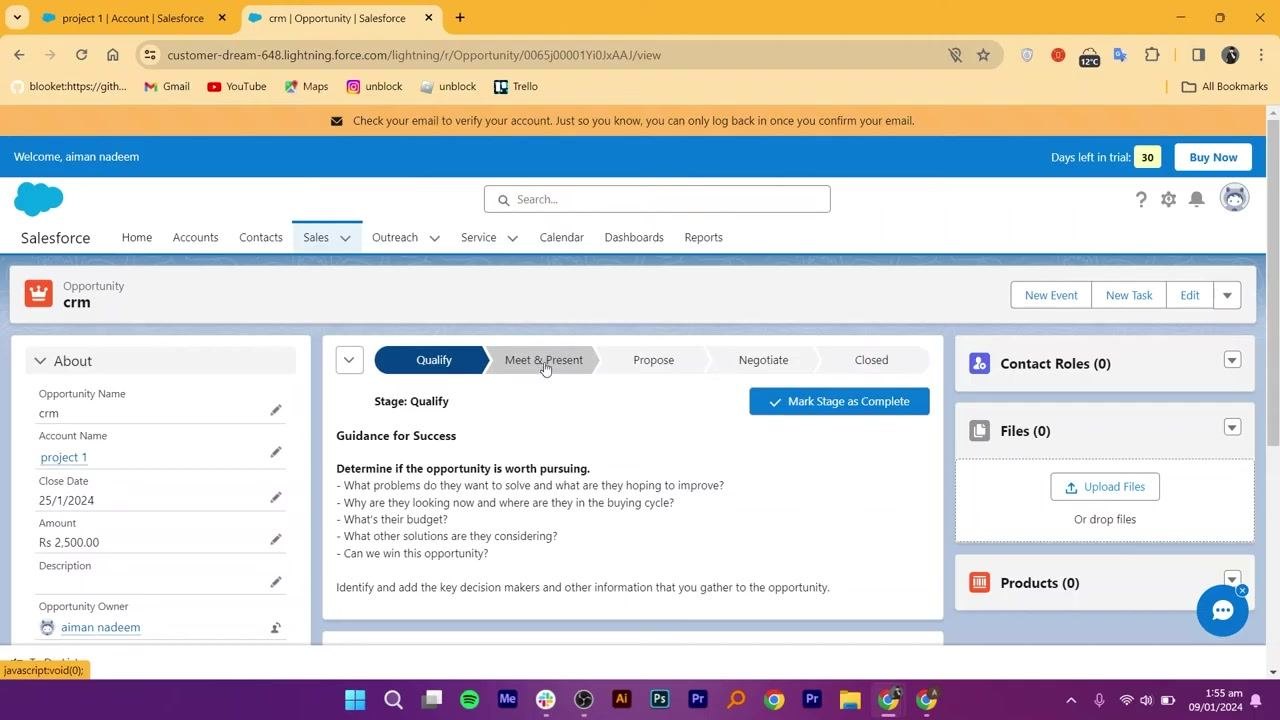
After creating an opportunity, review its details on the summary page. Update the Stage as the opportunity progresses through the sales pipeline (for example, from "Qualify" to "Meet & Present," "Propose," "Negotiate," or "Closed").
Add team members involved in the opportunity by assigning them as Contact Roles, which can include sales representatives, managers, or other stakeholders. Use the Mark Stage as Complete button to advance the opportunity to the next stage.
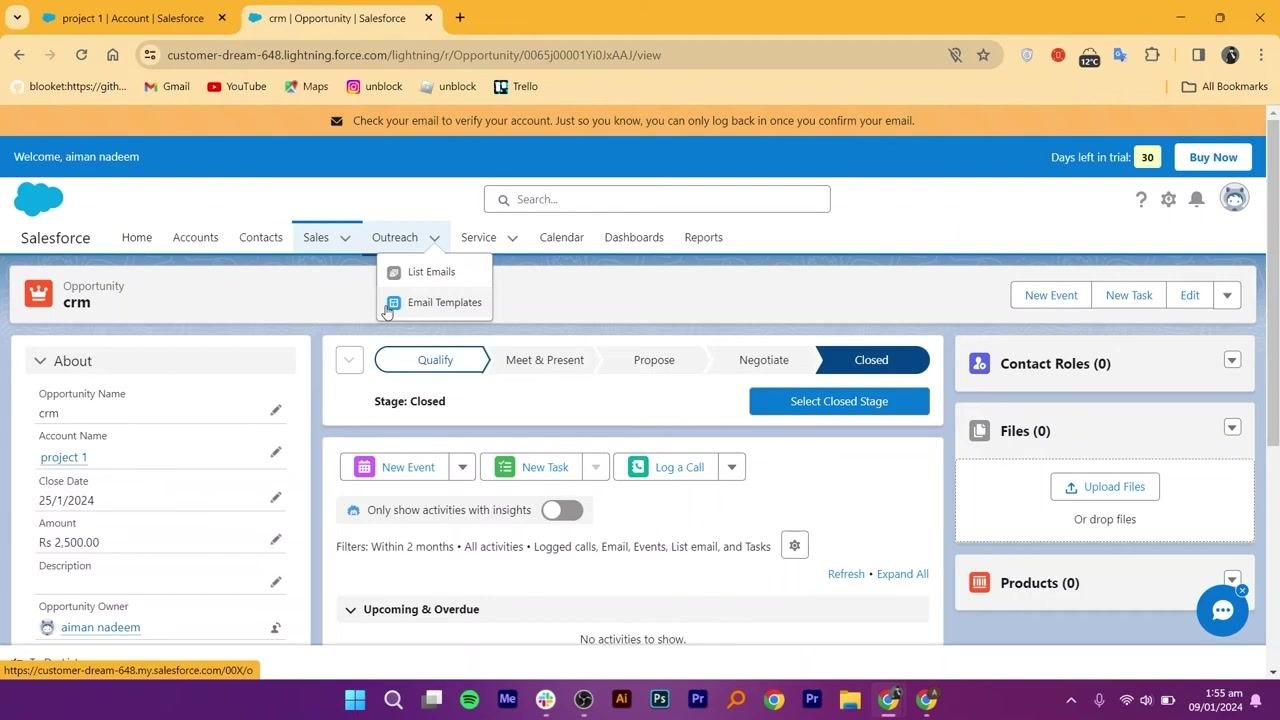
Create an email marketing template
Navigate to the Outreach tab in the top navigation bar and select Email Templates from the dropdown menu. Click New Email Template to create a new template.
Fill out the form with the required template details, such as template name, subject, and message content, then scroll down to add the message body. Click Save to finalize and store your new email template.
Attach files to campaigns or templates
On the email template or campaign page, locate the Files section. Click Upload Files or drag and drop files into the designated area to attach documents, images, or other relevant files. Use the Related tab to view and manage all files linked to the template or campaign.
Create a customer service case
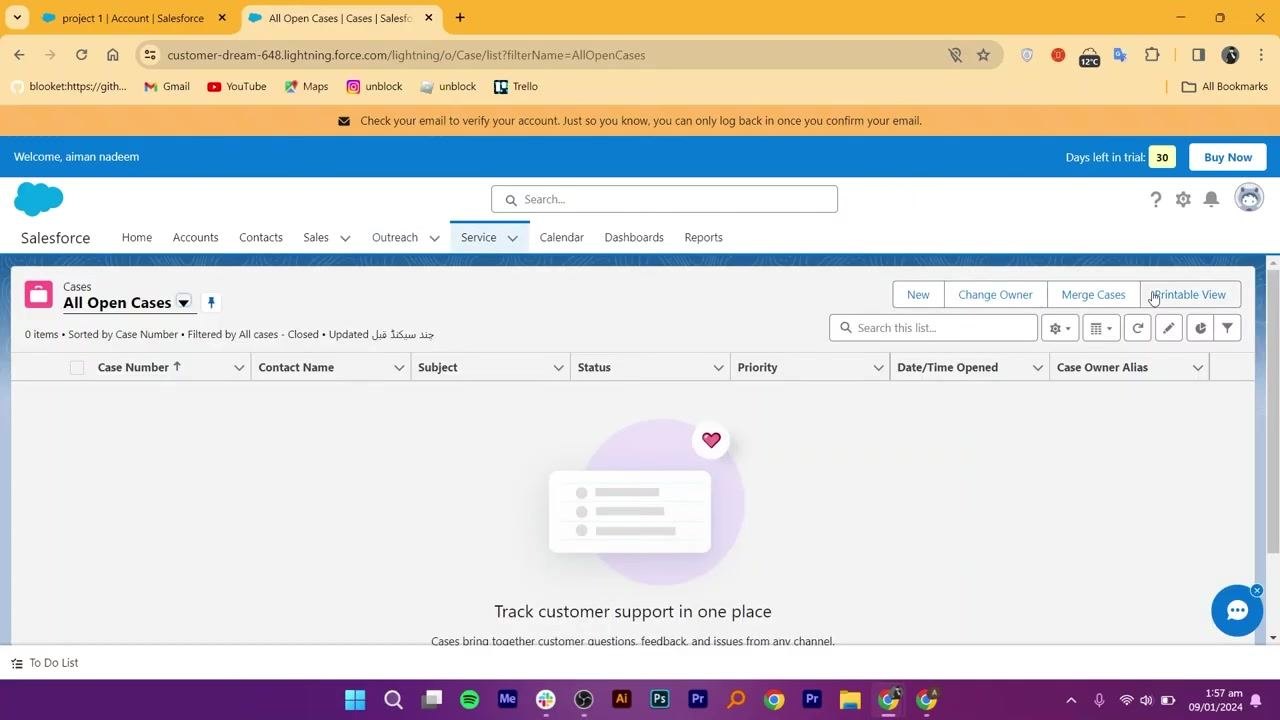
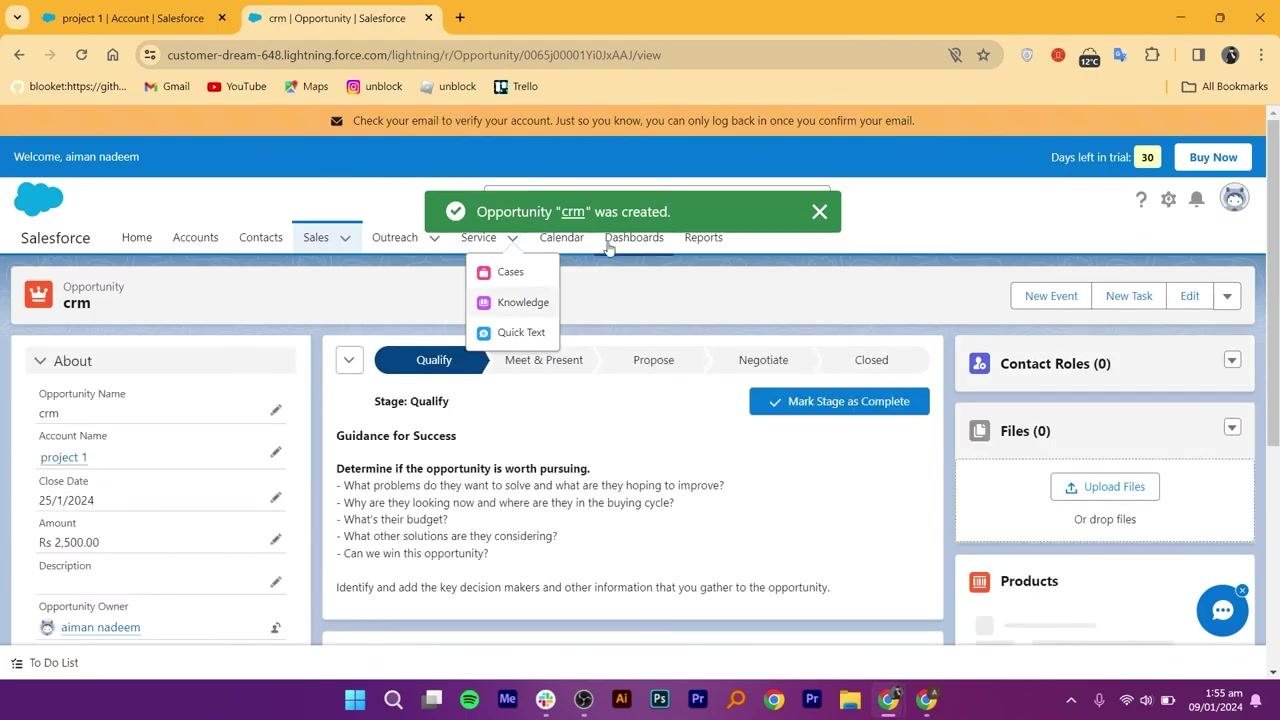
Go to the Service tab in the top navigation bar and select Cases from the dropdown menu. On the Cases page, click New.
Fill in the case details:
- Status: Select the current status (e.g., "Working")
- Case Origin: Choose the source of the case (e.g., phone, email, web)
- Priority: Set the priority level (e.g., "Medium")
- Case Owner: Auto-filled with your user name
- Contact Name: Search and select the relevant contact
- Account Name: Search and select the associated account
- Subject: Enter a brief subject for the case
- Description: Provide a detailed description of the issue or inquiry
Optionally, check the box to send a notification email to the contact, then click Save to create the case.
Schedule an event in the calendar
Access the Calendar section from the top navigation bar and click New Event.
Fill in the event details:
- Subject: Enter the event subject (e.g., "Meeting")
- Start Date and Time: Set the start (e.g., 9 Jan. 2024, 1:30 AM)
- End Date and Time: Set the end (e.g., 9 Jan. 2024, 2:30 AM)
- Attendees: Add people to the attendee section as needed
Click Save to add the event to your Salesforce calendar.
Confirm and track meeting activity
After scheduling and saving a meeting, Salesforce automatically logs it as an activity in the associated records (such as contacts, accounts, or opportunities), giving you a comprehensive view of all interactions related to a specific customer or deal.
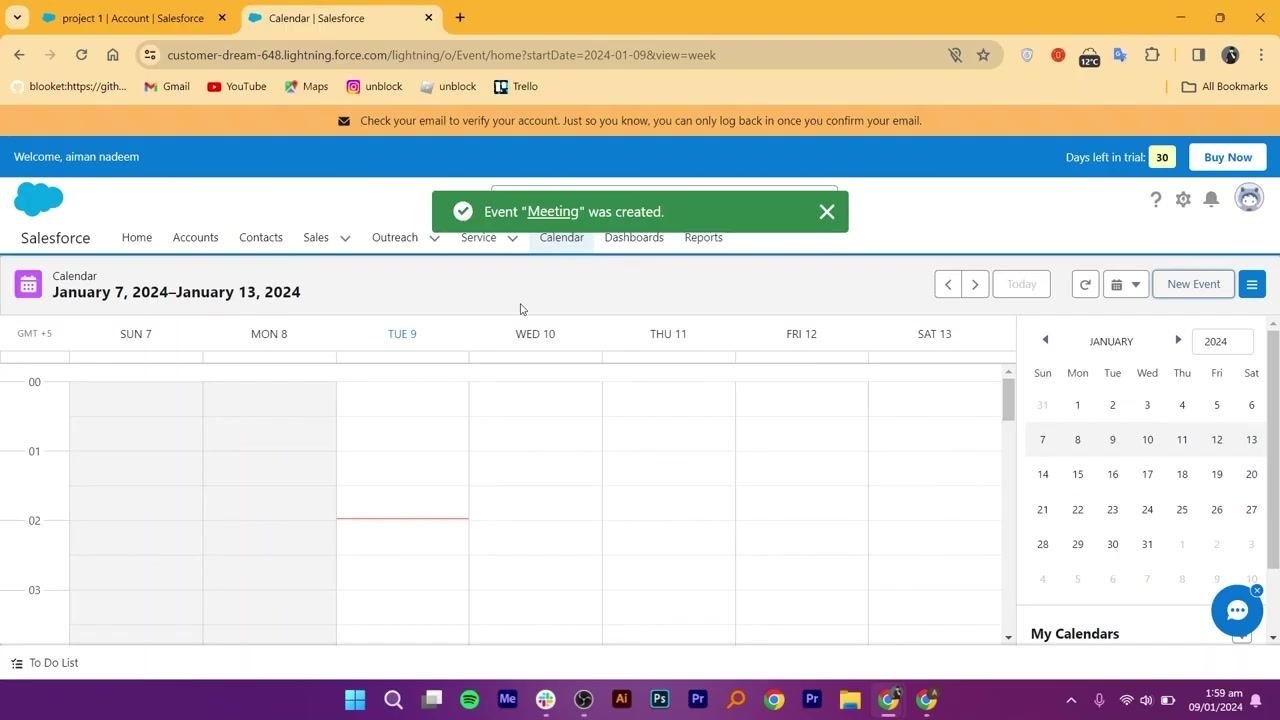
Confirm that the event was created by checking for the green notification banner stating: Event "Meeting" was created.
Log follow-up actions and outcomes
After the meeting concludes, log any follow-up actions directly in Salesforce. Update the relevant records (contact, account, or opportunity) with notes, next steps, or outcomes discussed during the meeting. Use the activity timeline or related lists within each record to add tasks, calls, or additional meetings as needed.
Document any outcomes or decisions made during the meeting in the appropriate record, and assign follow-up tasks to yourself or other team members to ensure accountability and progress. Use the calendar and activity tracking features to monitor upcoming actions and deadlines.
Review dashboards for insights
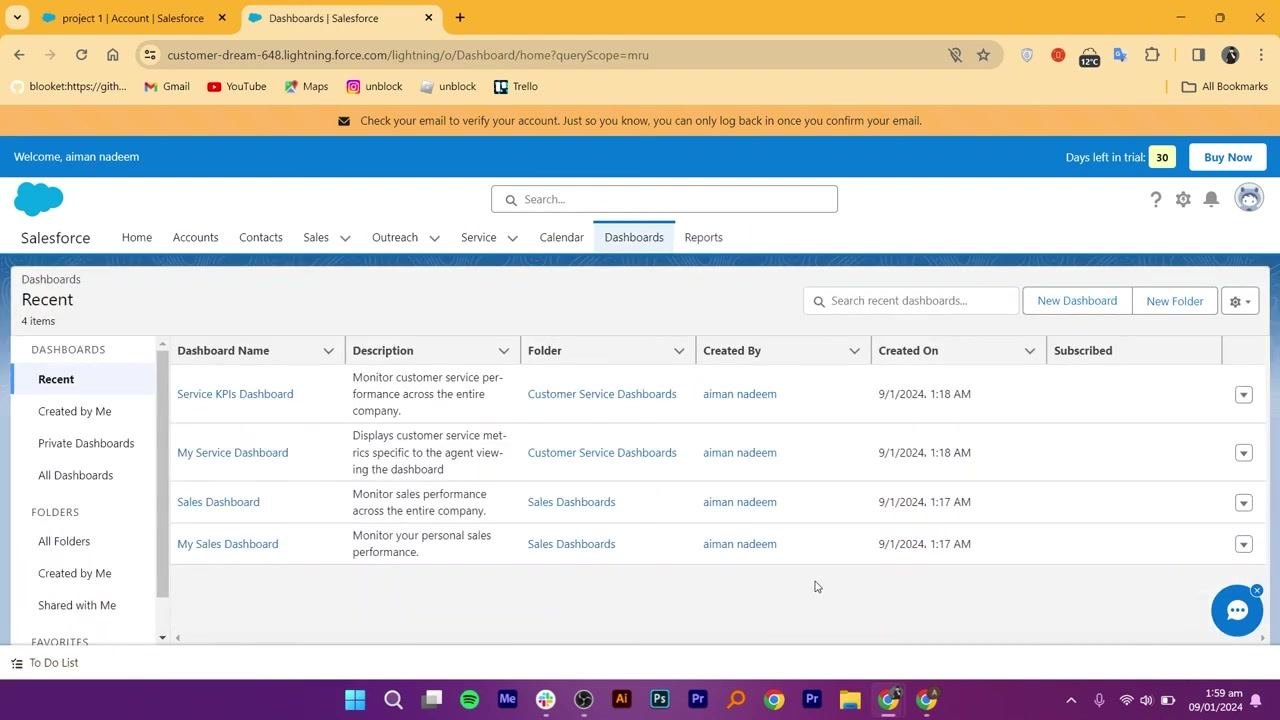
Navigate to the Dashboards tab in the top navigation bar to access visual summaries of your sales, marketing, and customer service activities. Review dashboards such as:
- Service KPIs Dashboard: Monitor customer service performance across the company
- My Service Dashboard: View customer service metrics specific to your role
- Sales Dashboard: Track overall sales performance
- My Sales Dashboard: Monitor your personal sales metrics
Use these dashboards to make data-driven decisions and identify trends or areas for improvement.
Return to the home page
Click the Home tab to return to the main dashboard. Review personalized suggestions such as Create your first contact, Create your first lead, and Create your first deal. Use the quick access panels for My Leads, My Opportunities, and My Contacts to efficiently manage your daily workflow.
Summary
Now you know how to use Salesforce to manage customer relationships from start to finish: adding and tracking accounts, creating and managing contacts, moving opportunities through the sales pipeline, running email marketing campaigns, handling customer service cases, and scheduling meetings. By logging activities and reviewing dashboards regularly, you ensure that follow-up actions are documented and your team benefits from actionable insights, maximizing efficiency, transparency, and collaboration across your sales, marketing, and customer service operations.
Generation details: cost, quality tiers
Docsie billed 3,000 credits ($2.10) to analyze this 6-minute video at standard quality. The rewrite, template fill and Word/PDF exports were included. The same video at each quality tier:
| Quality | Frames sampled | Credits | Approx. cost |
|---|---|---|---|
| Draft | every 16-30 s | 1,500 | $1.05 |
| Standard (this guide) | every 8-15 s | 3,000 | $2.10 |
| Detailed | every 4-7 s | 6,000 | $4.20 |
| Ultra | every 1-3 s | 12,000 | $8.40 |
Credits priced at $0.70 per 1,000; plans include a monthly allowance. Enterprise customers on on-premise or bring-your-own-model deployments run this on their own inference and pay no per-video credits.
Generated by Docsie Video-to-Docs on 2026-09-10 from a 5-minute video. Screenshots are frames from the source video and belong to their creator, Thrive Media, whose original is embedded above. If you own this video and want the guide removed or credited differently, contact us and we will act within one business day.