
How to Create a Custom Object in Salesforce
This guide walks you through creating a new custom object in Salesforce Lightning, from accessing the Setup menu to filling out the object details and resolving common validation errors.
Video: HOW TO CREATE A NEW CUSTOM OBJECT IN SALESFORCE (2022) by Salesforce Emily (2020). All credit for the demonstration goes to the creator; watch the original on YouTube. The written guide below was generated from this video by Docsie. Creator? Request a change or removal.
This guide walks you through creating a new custom object in Salesforce Lightning, from accessing the Setup menu to filling out the object details and resolving common validation errors.
Prerequisites
- Access to a Salesforce Lightning environment with login credentials.
- Permissions sufficient to access Setup and the Object Manager.
Steps
Navigate to the Salesforce home page
Open your web browser and log in to your Salesforce Lightning environment. Ensure you are on the Sales app, visible in the top left of the screen. The main dashboard displays Quarterly Performance, Today's Events, Today's Tasks, and an Assistant panel.
Locate the gear icon (⚙️) in the upper right corner of the screen and click it to open the settings dropdown menu. In the dropdown, select Setup (Setup for current app).
Access the Setup home page
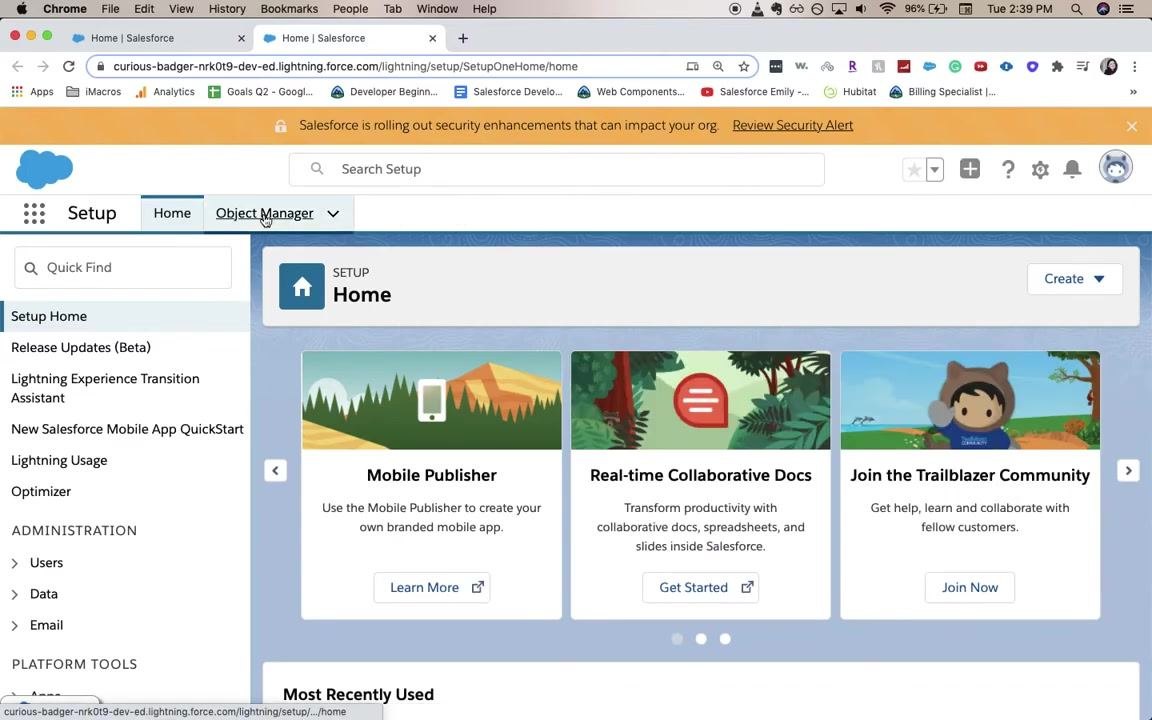
The screen transitions to the Setup Home page. A notification bar at the top may display security alerts. The left sidebar contains navigation options such as Setup Home, Release Updates (Beta), Lightning Experience Transition Assistant, and others.
The main panel displays Setup Home with a Create button on the right.
Open the Object Manager
In the Setup navigation bar, click Object Manager, located next to Home. The Home tab remains visible, and the main panel updates to show featured setup options such as Mobile Publisher, Real-time Collaborative Docs, and Join the Trailblazer Community. The left sidebar remains unchanged.
Start creating a new custom object
In the Object Manager view, you see a list of existing objects with columns for Label, API Name, and Description. Click the Create dropdown button on the right side of the screen, then select Custom Object from the dropdown.
Open the New Custom Object wizard
The screen updates to New Custom Object under the Object Manager. The main panel is initially blank while the wizard loads.
Enter custom object information
The New Custom Object form appears. A yellow banner at the top states: "Permissions for this object are disabled for all profiles by default. You can enable object permissions in permission sets or by editing custom profiles."
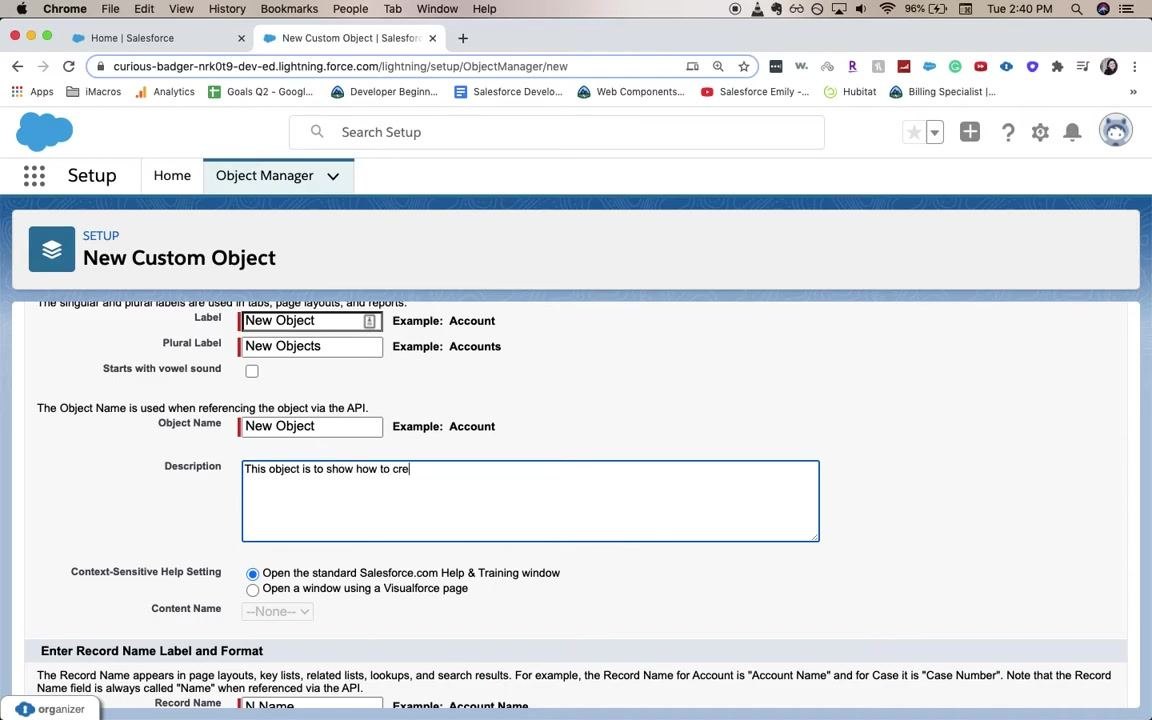
Under Custom Object Information, fill in the following fields:
- Label: Enter
New Object - Plural Label: Enter
New Objects - Object Name: Enter
New Object
The Description field is visible but not yet filled in at this point.
Complete the object description
In the Description field, enter: This object is to show how to create a new custom object.
At this point, the form contains:
- Label:
New Object - Plural Label:
New Objects - Object Name:
New Object - Description:
This object is to show how to create a new custom object
The Context-Sensitive Help Setting is set to "Open the standard Salesforce.com Help & Training window."
You have now completed the initial steps to create a new custom object in Salesforce Lightning. Continue with the steps below to configure additional settings and save your new object.
Review the form and enter record name details
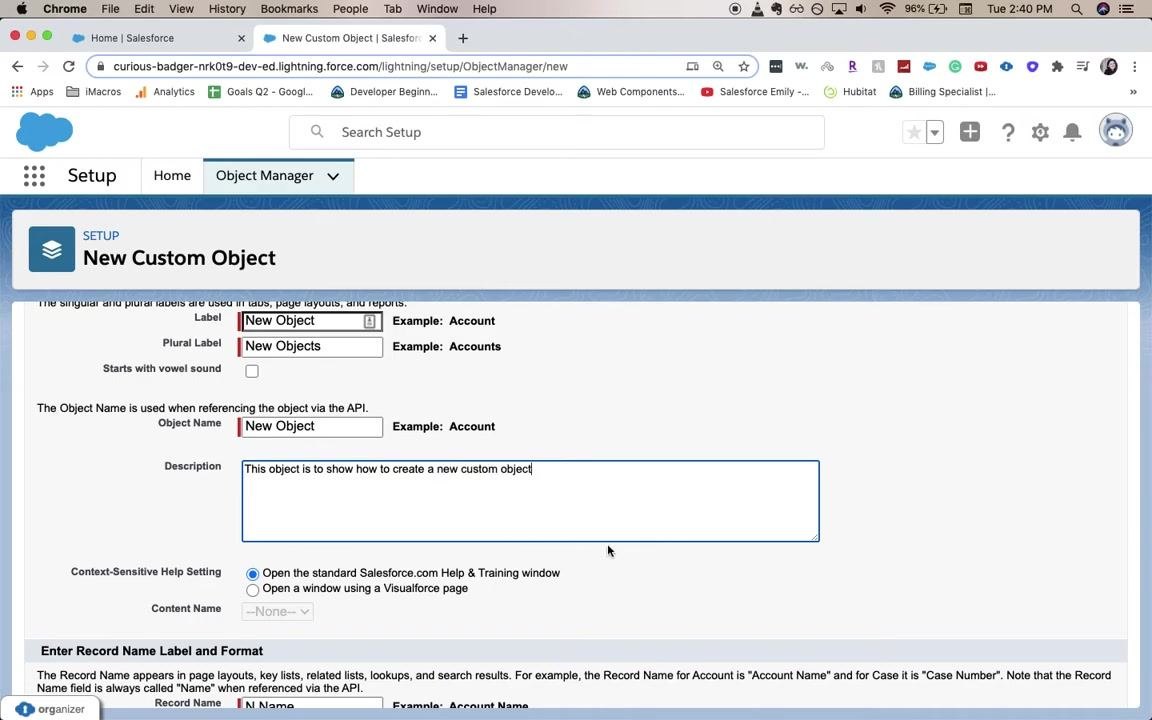
The New Custom Object form displays the following filled-in fields:
- Object Name:
New Object - Description:
This object is to show how to create a new custom object
Under Enter Record Name Label and Format, the following values are set:
- Record Name:
Name - Data Type:
Text
The environment is the Salesforce Lightning Setup interface, with the Object Manager tab active. No errors are shown at this point, and the form is ready for further input.
Attempt to save the object and address validation errors
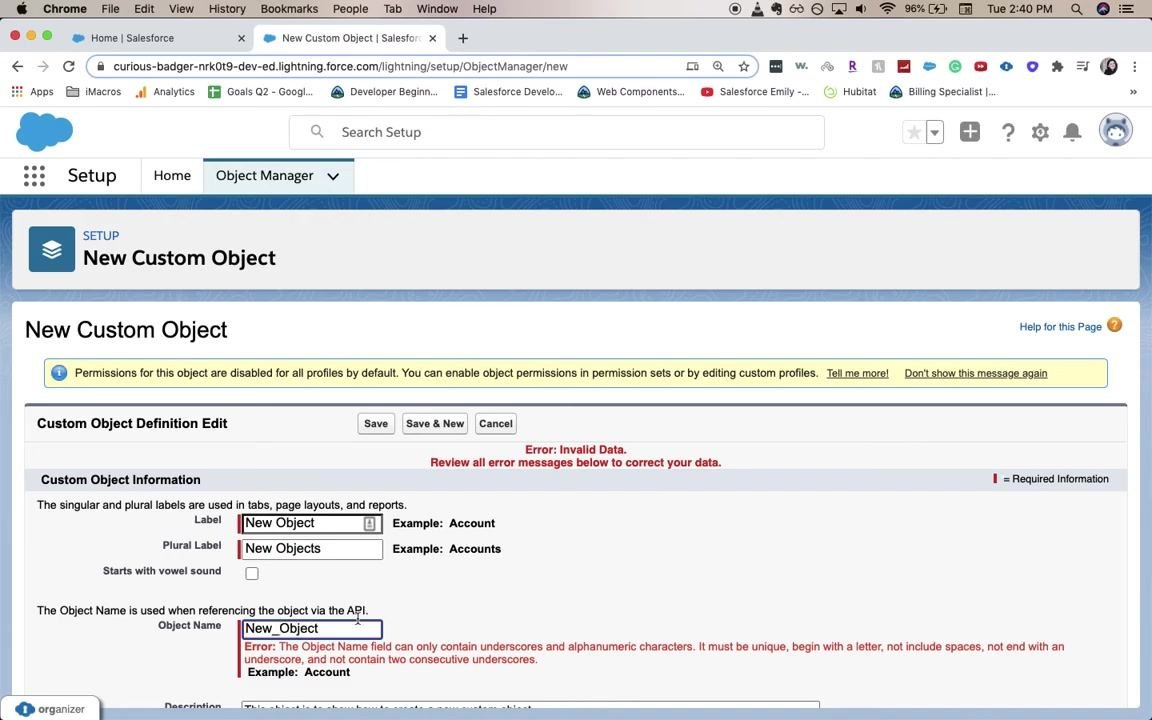
When you attempt to save the custom object, a yellow banner reappears: "Permissions for this object are disabled for all profiles by default. You can enable object permissions in permission sets or by editing custom profiles."
A red error message also appears: "Error: Invalid Data. Review all error messages below to correct your data." The Object Name field at this point contains New_Object, and an additional error message under Object Name states: "Error: The Object Name field can only contain underscores and alphanumeric characters. It must be unique, begin with a letter, not include spaces, not end with an underscore, and not contain two consecutive underscores."
The cursor is positioned in the Object Name field, indicating that a correction is needed. The Save, Save & New, and Cancel buttons are visible at the top of the form.
Attempt to save again after the error
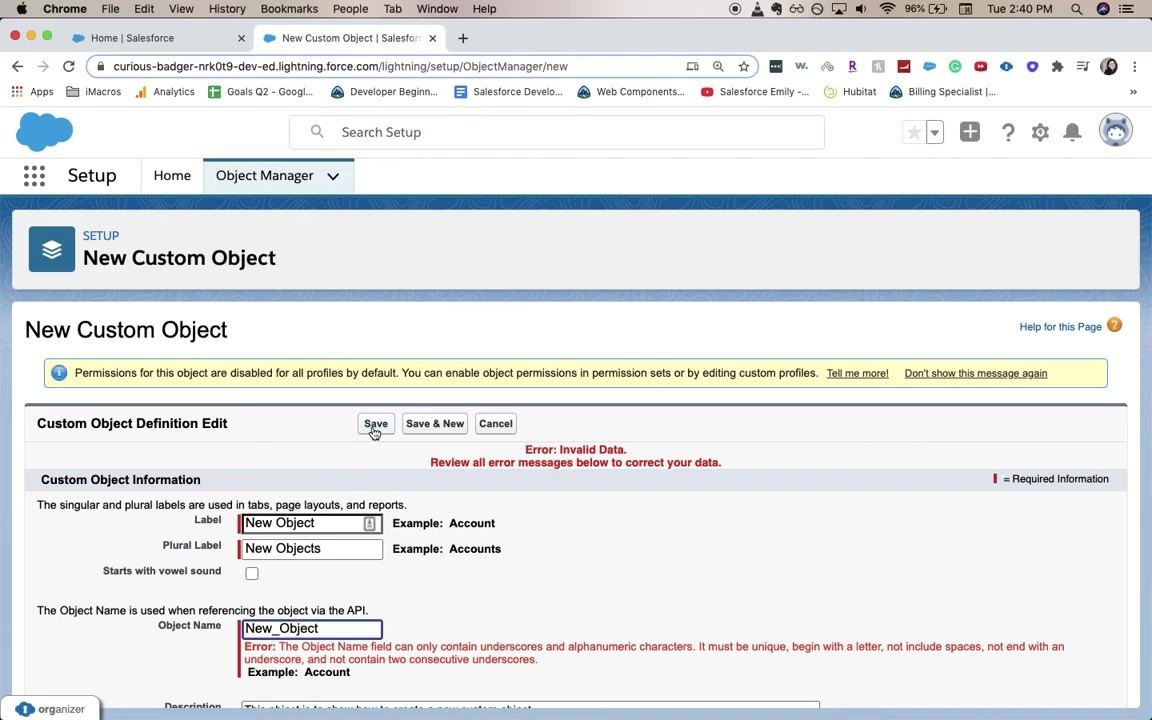
If you click Save again without correcting the Object Name field, the error persists. The field still contains the invalid value New_Object, and the same error messages remain visible, indicating the issue has not yet been resolved.
What's next
- Correct the Object Name field to meet Salesforce requirements: use only letters, numbers, and underscores; begin with a letter; avoid spaces; do not end with an underscore; and do not use consecutive underscores.
- Once the error is resolved, click Save to successfully create the custom object.
Generation details: cost, quality tiers
Docsie billed 1,500 credits ($1.05) to analyze this 3-minute video at standard quality. The rewrite, template fill and Word/PDF exports were included. The same video at each quality tier:
| Quality | Frames sampled | Credits | Approx. cost |
|---|---|---|---|
| Draft | every 16-30 s | 750 | $0.52 |
| Standard (this guide) | every 8-15 s | 1,500 | $1.05 |
| Detailed | every 4-7 s | 3,000 | $2.10 |
| Ultra | every 1-3 s | 6,000 | $4.20 |
Credits priced at $0.70 per 1,000; plans include a monthly allowance. Enterprise customers on on-premise or bring-your-own-model deployments run this on their own inference and pay no per-video credits.
Generated by Docsie Video-to-Docs on 2026-09-08 from a 2-minute video. Screenshots are frames from the source video and belong to their creator, Salesforce Emily, whose original is embedded above. If you own this video and want the guide removed or credited differently, contact us and we will act within one business day.